Secure a Web App Using Keycloak
Enable SSO and Granular Access Control For A Header-Based Web App with Keycloak
Preview
In this tutorial, we will use the Datawiza Access Proxy (DAP) to enable SSO and granular access control for a header-based web App. The IdP we will use is Keycloak. We will use DAP's side deployment mode, which means DAP and this app are running on the same server.
- We will use a built-in web application as the header-based web App.
- The DAP will run on
localhost:9772, which means the traffic to the app will reach DAP (running on port 9772) first and then be proxied to the web application. - We will provide the docker images for the DAP.
Part I: Keycloak Configuration
You will first need to start a Keycloak server. After registering an OIDC client on the server, obtain the following 4 values:
- Keycloak Server
- Realm Name
- Client ID
- Client Secret
These values will later be used to set up Datawiza Access Proxy in Datawiza Cloud Management Console. Please follow IdP Configuration Guide: Keycloak instructions on how to get those keys/values.
Part II: Create Application on Datawiza Cloud Management Console (DCMC)
You need to create an application and generate a keypair of (PROVISIONING_KEY, PROVISIONING_SECRET) for this app on the DCMC.
Please follow Step2 : Datawiza Cloud Management Console to configure.
The Keycloak IdP configuration should be as follows: 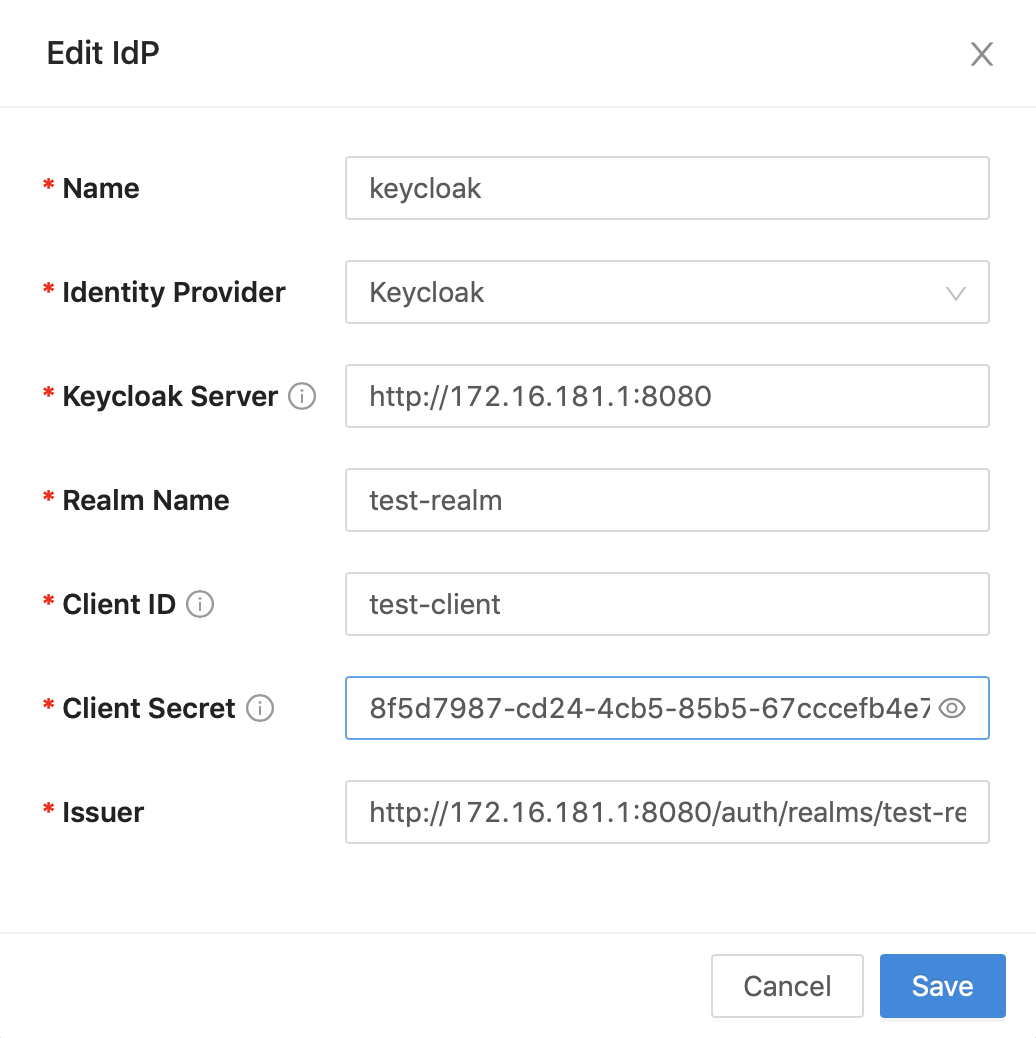
Part III: Run DAP
You can use either Docker or Kubernetes to run DAP. The following is an example docker-compose.yml file. You may need to login to our container registry to download the images of DAP and the header-based app. See Step3 : Configure DAP and SSO Integration for more details or Deploy DAP with Kubernetes for Kubernetes-specific instructions.
version: '3'

services:
  datawiza-access-proxy:
    image: registry.gitlab.com/datawiza/access-proxy
    container_name: datawiza-access-proxy
    restart: always
    ports:
      - "9772:9772"
    environment:
      PROVISIONING_KEY: #############################
      PROVISIONING_SECRET: #############################
After executing docker-compose -f docker-compose.yml up, the header-based app should have SSO enabled with Keycloak. Open a browser and type in http://localhost:9772/. You should see the Keycloak login page as follows. 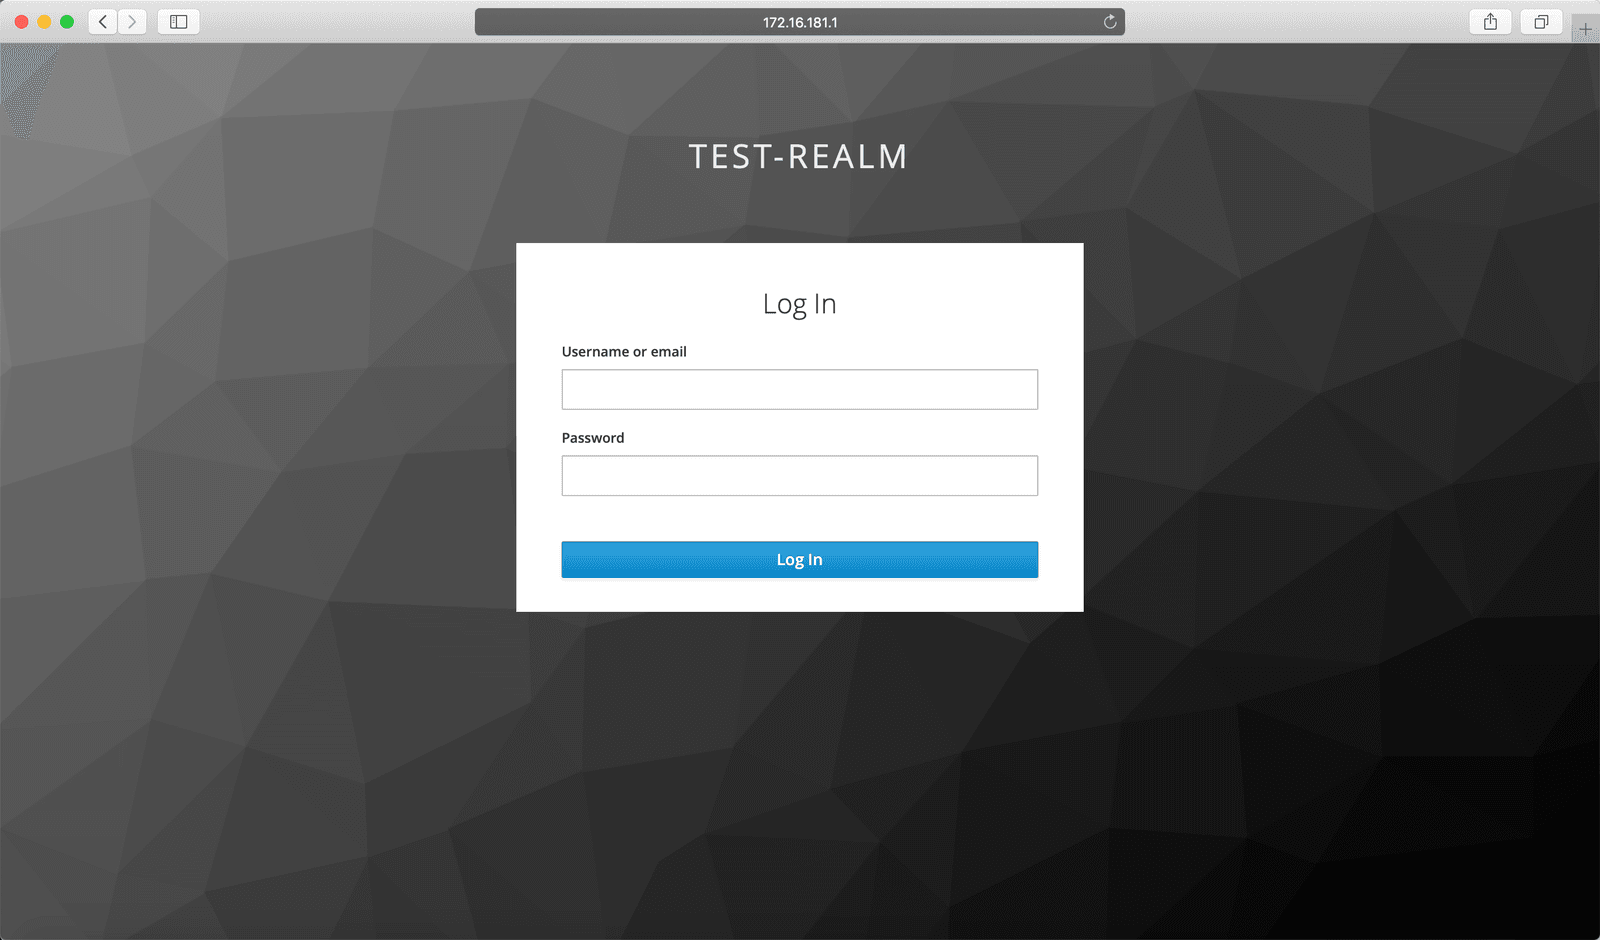
Part IV: Pass User Attributes to the Header-Based App
DAP gets user attributes from IdP and can pass the user attributes to the application via header or cookie.
Please follow the instructions of Step4 : Pass User Attributes to pass the user attributes to the header-based app, which is expecting:
- firstname
- lastname
- groups
After successfully configuring the user attributes, you should see the green check sign for each of the user attributes as follows. 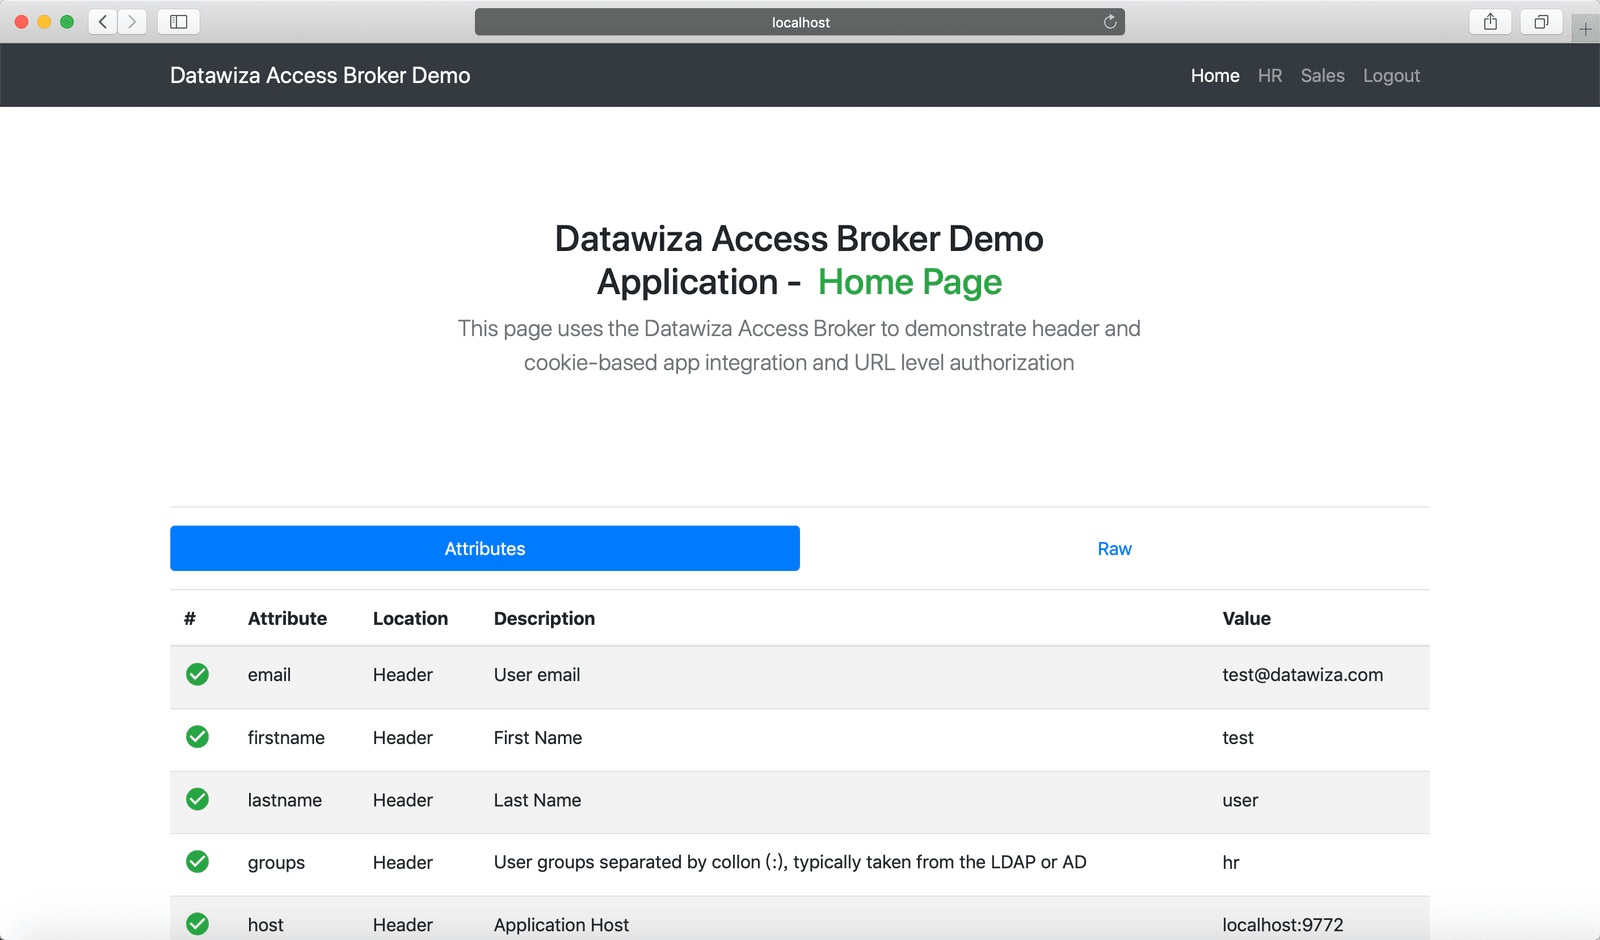 Notice, the user attributes will not be shown if you didn't add Client Roles
 view-users to user.
Part V: Achieve Granular Access Control
You can configure access control to an application based on user's attributes (e.g., groups, department) and other metadata of a request (e.g., URL, IP, http method, access time).
Please reference Step5 : Achieve Granular Access Control for detailed instructions on how to set up access rules. You can practice the rule configuration using the following example.
A Rule Example
Create a user in Keycloak, put it in
hrgroup, and then assign this person to your client on Keycloak.Create the following two rules:
hr pathcan only be accessed byhr group.sales pathcan only be accessed bysales group.
- Verify that the user you created can only access
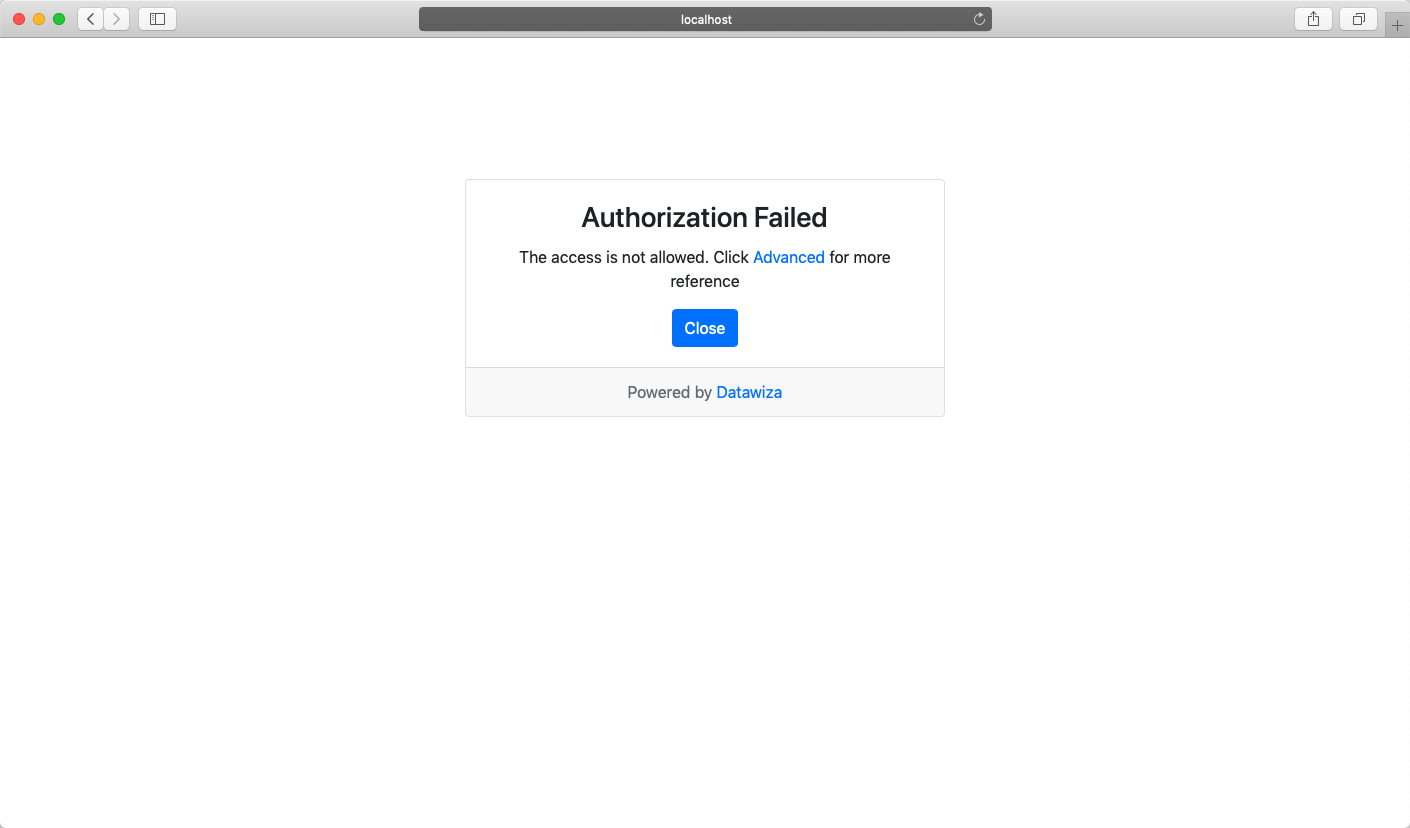
hrpage in the header-based app, but cannot accesssalespage. Trying to access the header-based application onlocalhost:9772in your browser, you should get something similar to the following screenshots.http://localhost:9772/hr:
http://localhost:9772/sales: