Deploy Datawiza Access Proxy with a Web App using Kubernetes
Deploy the Datawiza Access Proxy (DAP) with a Header-Based Web App using Azure Kubernetes Service (AKS) and enable SSO and Granular Access Control
Preview
In this tutorial, we will use Azure Kubernetes Service (AKS) to deploy the Datawiza Access Proxy (DAP) alongside our Header-Based App. After deploying the DAP, we will see how to enable SSO policies and granular access control. The IdP used in this example is Microsoft Entra ID (Azure Active Directory), though you could easily substitute this process with another IdP, such as Okta.
Part I: Microsoft Entra ID Configuration
You will need to register an OIDC application in the Microsoft Entra ID management portal and obtain the following 3 values for this application:
- Tenant ID
- Application (client) ID
- Client Secret
These values will later be used to set up our Application in the Datawiza Cloud Management Console (DCMC). Please follow IdP Configuration Guide: Microsoft Entra ID on how to obtain those keys/values.
Note: When configuring your application, you will have to skip Step 7 since we have not yet set up our Kuberntes cluster and do not have an External IP for our Redirect URL. We'll come back to this step later.
Part II: Create Application on Datawiza Cloud Management Console (DCMC)
We need to create a new deployment on the DCMC, which will contain our application. We'll generate a PROVISIONING_KEY and PROVISIONING_SECRET which will be needed when configuring AKS. This is in order for the DAP to get the latest configurations and policies from the DCMC.
Sign Into DCMC
- Login to the DCMC.
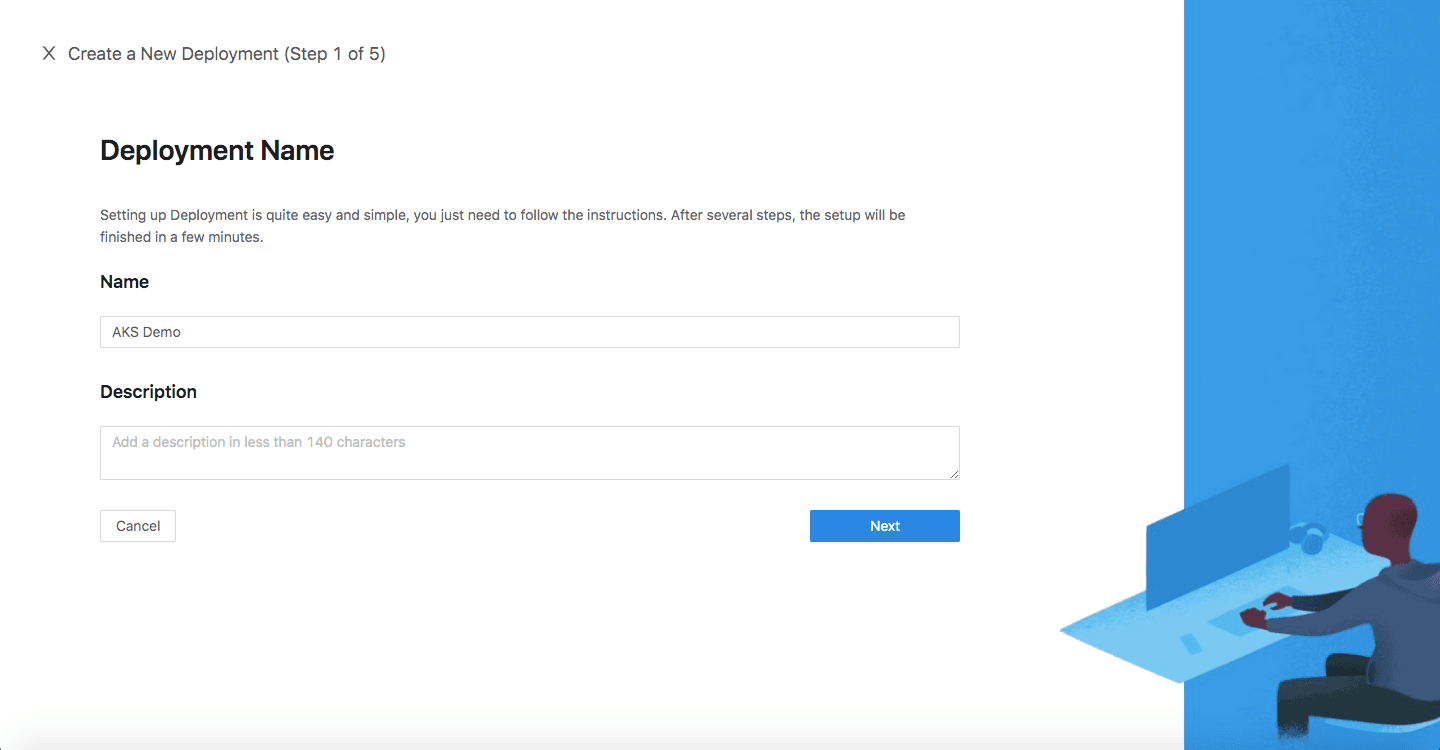
Create New Deployment
- Click the orange button
Getting started. Specify aNameand aDescription. ClickSave.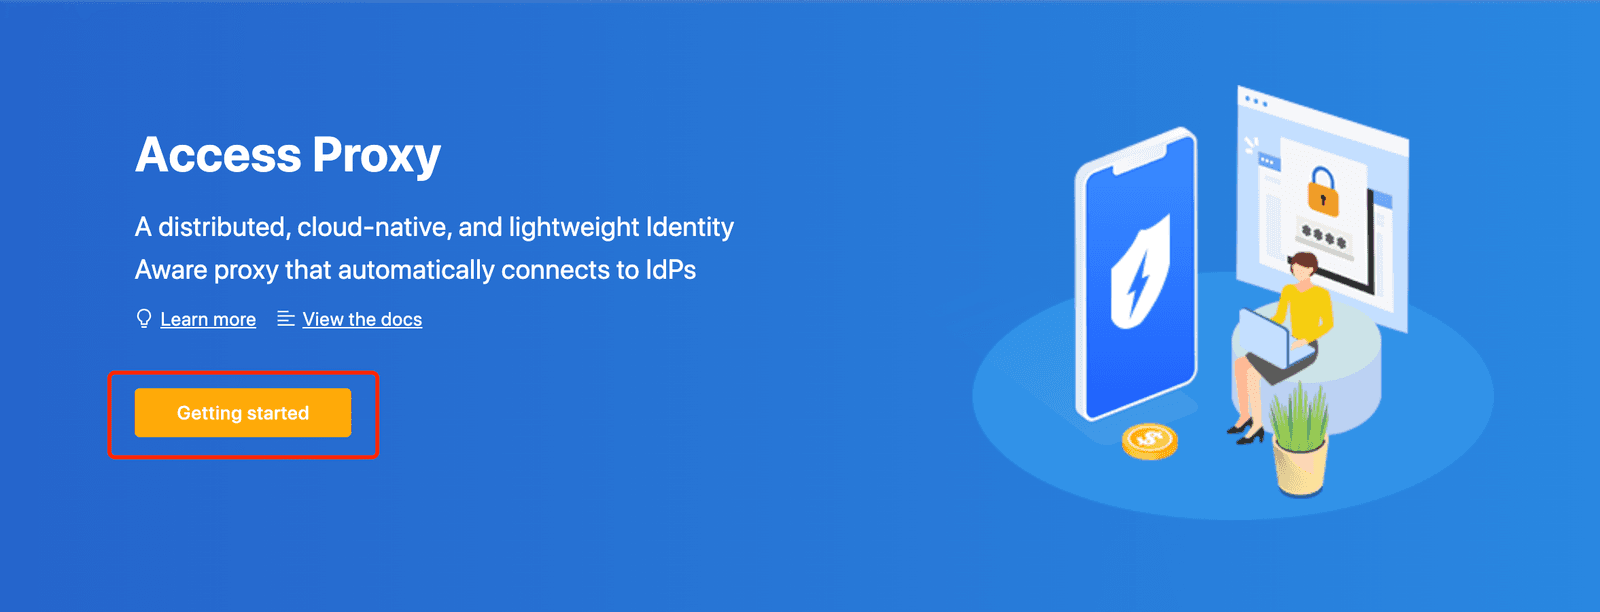
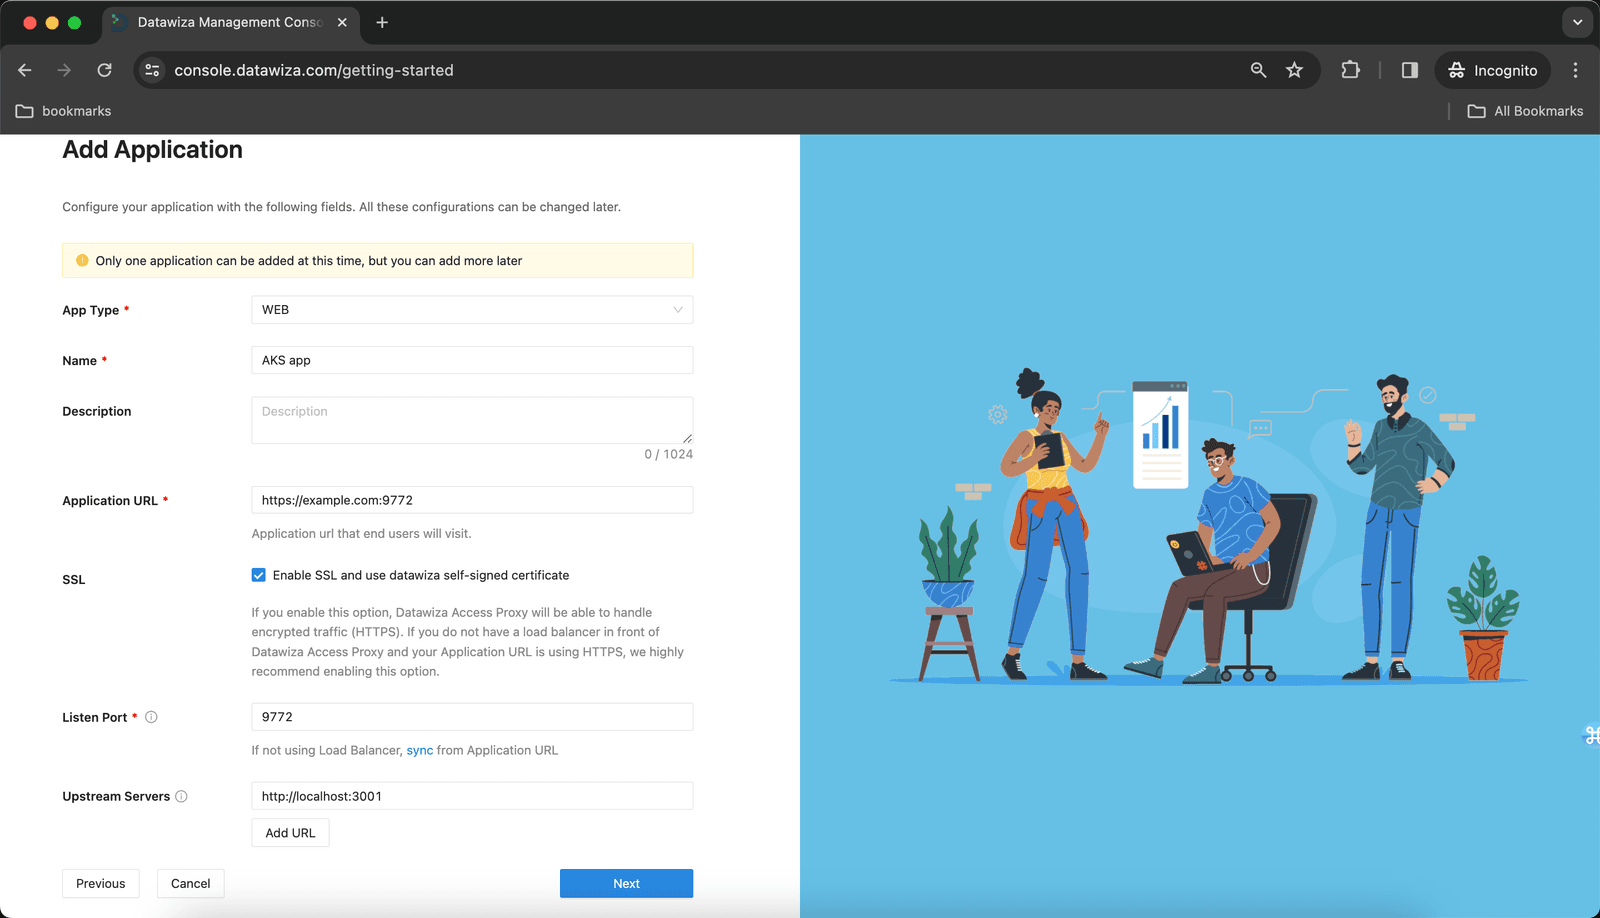
Create and Configure our Application
Configure our application with the following fields:
Name:AKS appApplication URL:https://example.com:9772- Note: Since we haven't set up our Kubernetes cluster yet, we don't know what our
External IPwill be. We'll leave this field with a default value and update it later.
- Note: Since we haven't set up our Kubernetes cluster yet, we don't know what our
Listen Port:9772Upstream Servers:- If deploying using standalone mode, we can make use of
kubednsby givinghttp://header-based-app:3001or by giving theClusterIPof our Header-Based app. - If deploying using sidecar mode, we can use
http://localhost:3001since both containers are sitting within the same pod.- See
Deployment Modesin Part III: Deploying the DAP using AKS for more information on the difference between standalone and sidecar mode.
- See
- If deploying using standalone mode, we can make use of
- Click
Next.
In this example, we are deploying the DAP in sidecar mode.
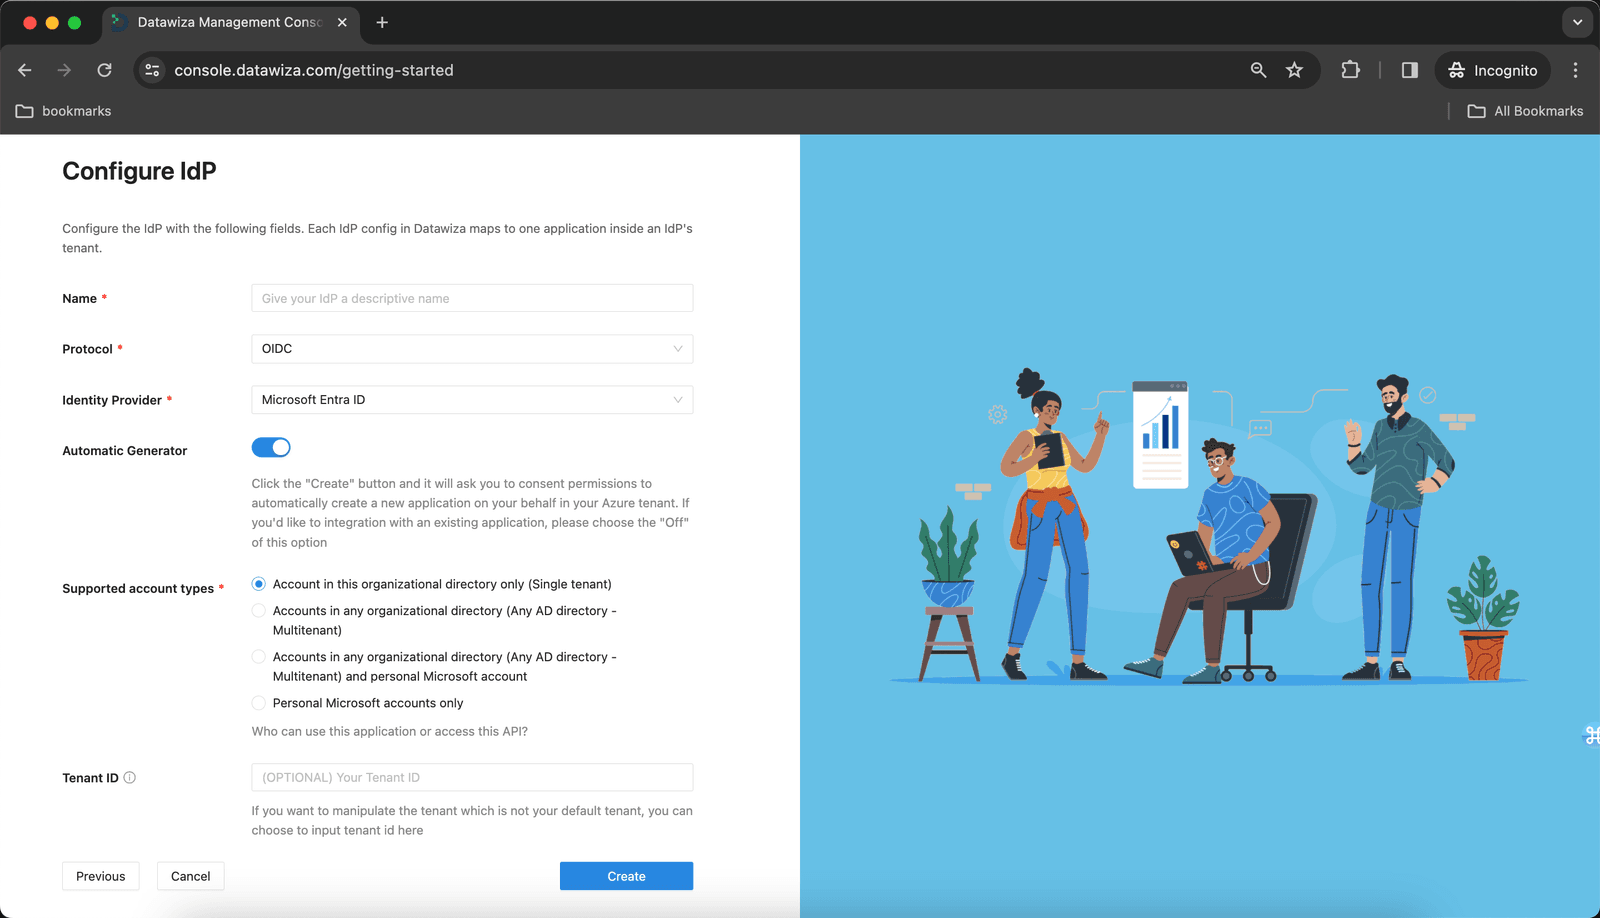
IdP Configuration
- Choose
Microsoft Entra IDfrom the drop down menu.
Populate the fields of the form with the keys/values obtained from IdP Configuration Guide: Microsoft Entra ID.
Alternatively, you can use One Click Integration to configure the Microsoft Entra ID.
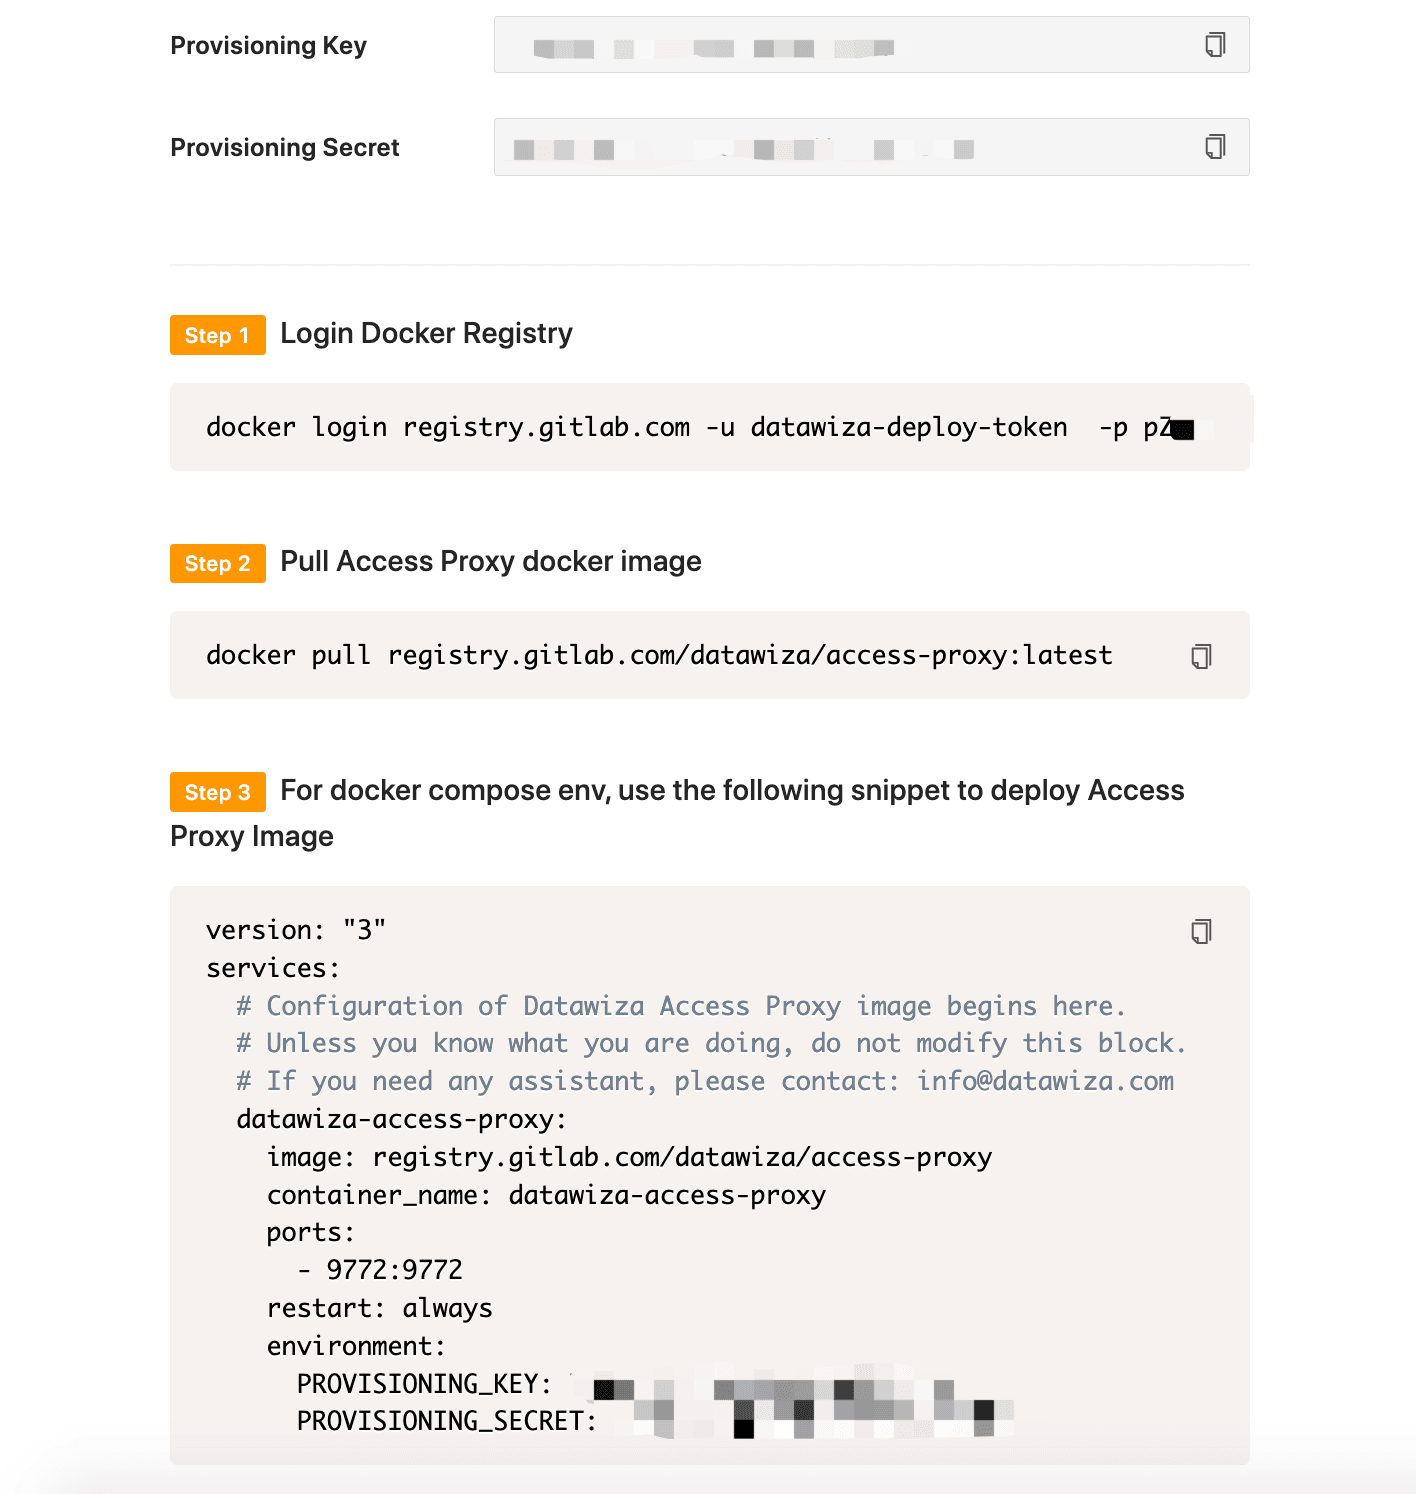
Note Down Provisioning Keys
Note down your PROVISIONING_KEY and PROVISIONING_SECRET. We will need these values later in our Kubernetes deployment.yaml file.
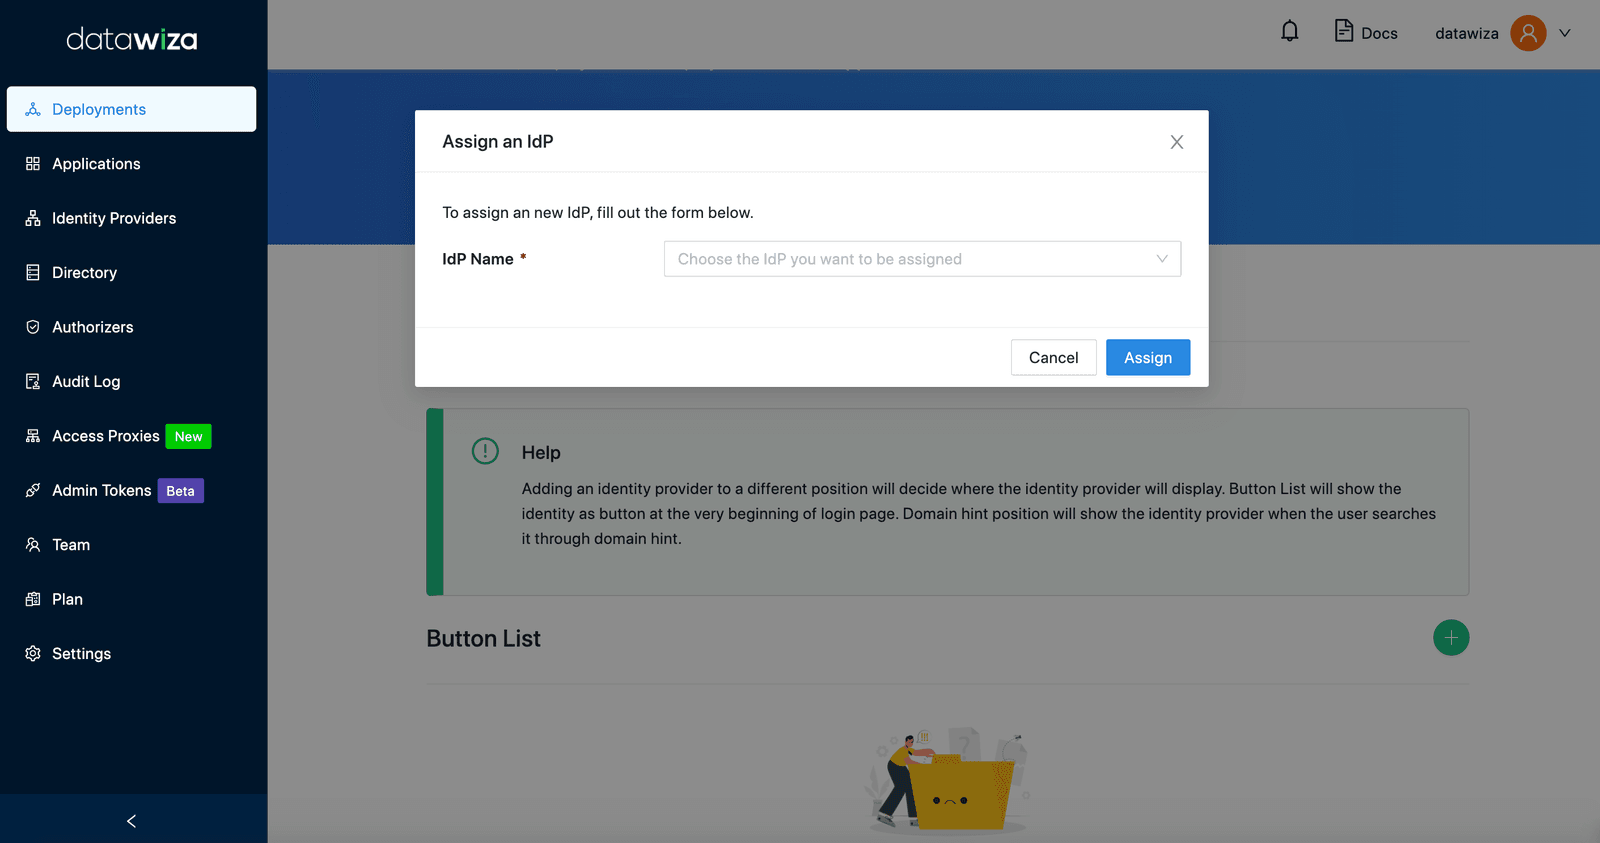
Assigning IdPs to our Applications
- Select the
IdP Configurationtab. Make sure that you can see your application (AKS App) and that the Identity Provider isMicrosoft Entra ID. If not, go ahead anAssignthe IdP you just created to your application.
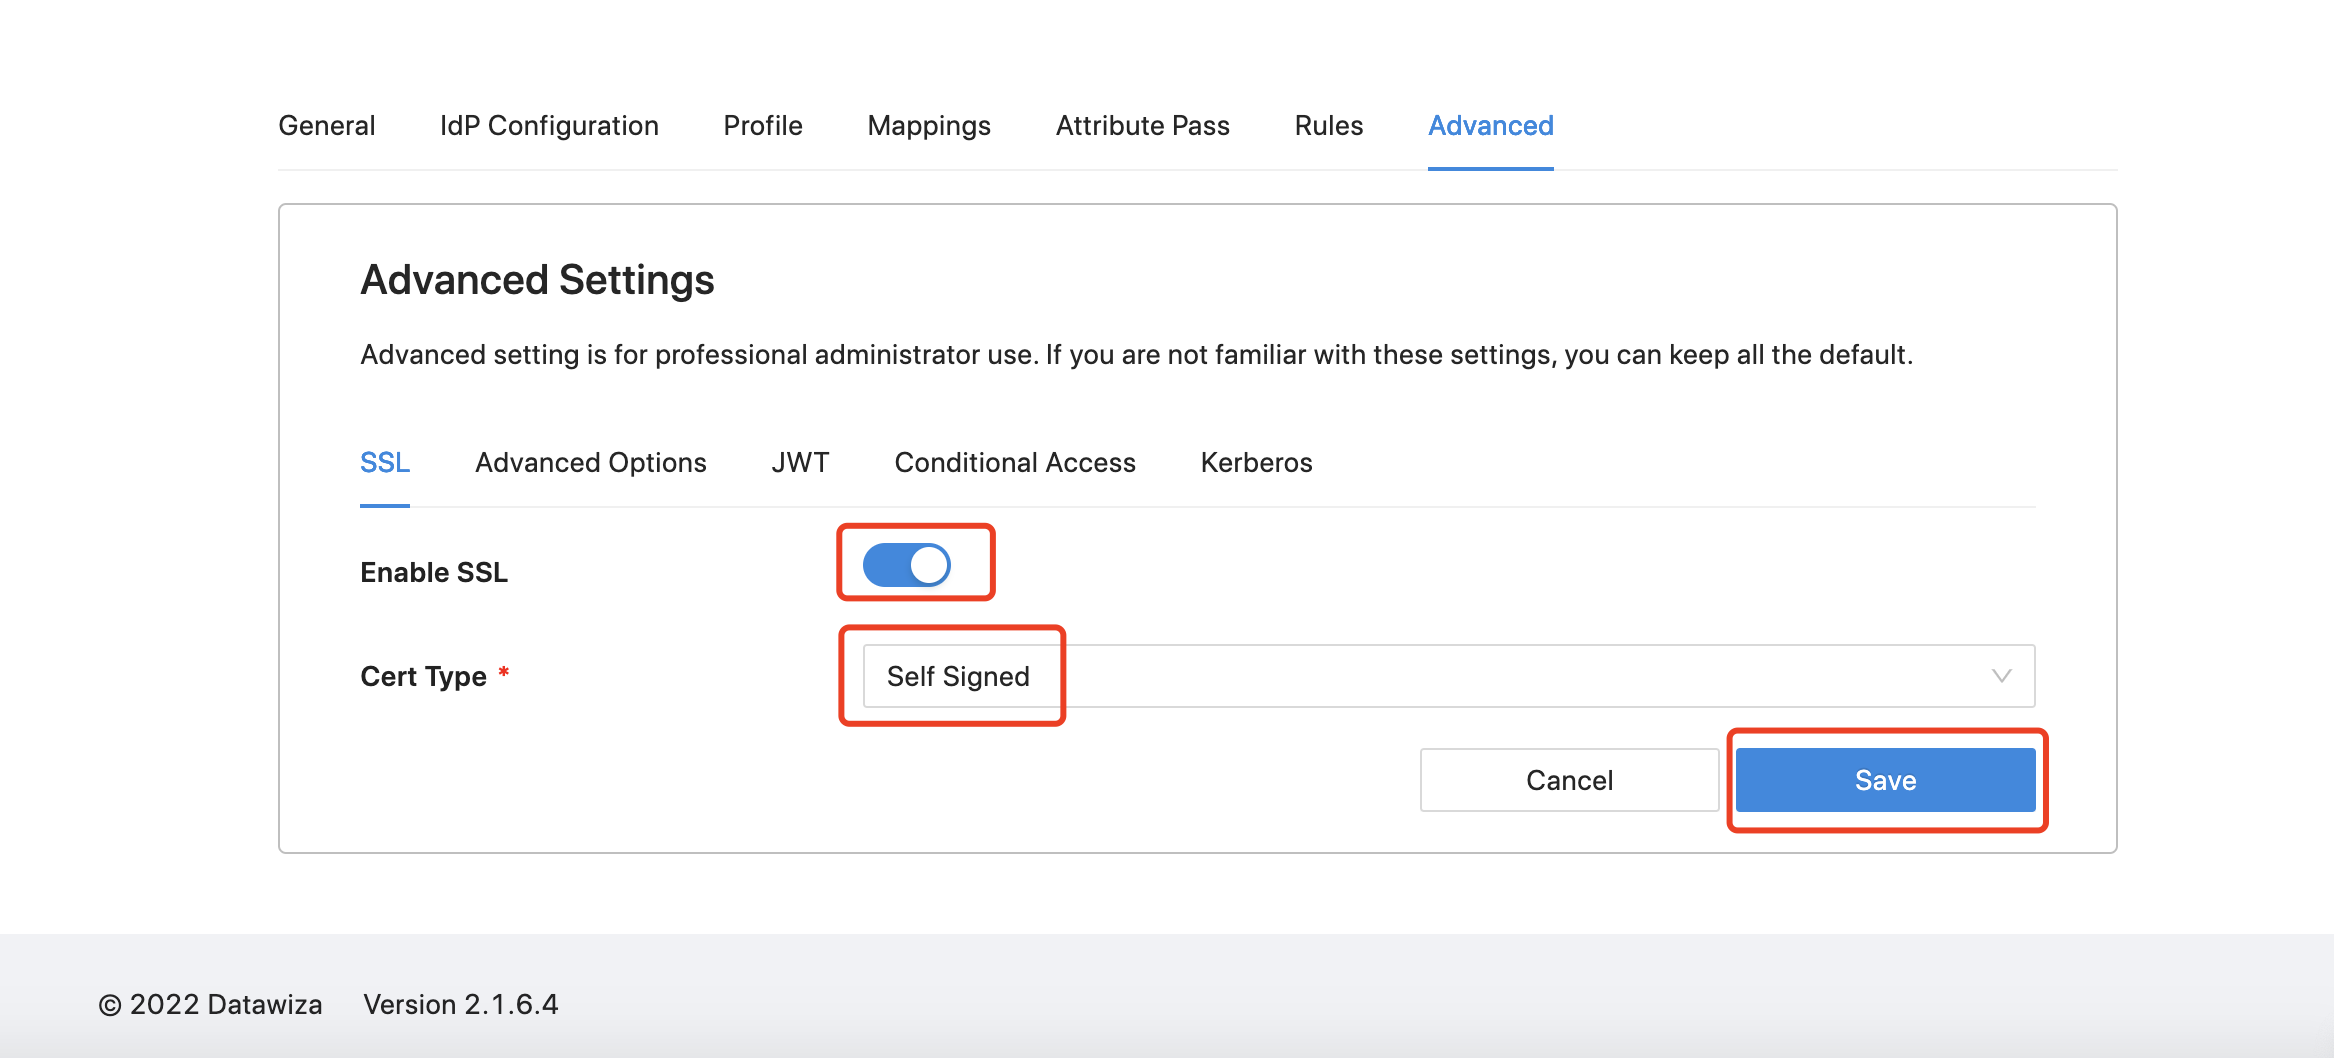
Enabling SSL
- Select the
Advancedtab from the menu. SelectSSLtab and clickEdit. Enable theSSLoption and selectSelf-Signedfor theCert Type. Make sure toSaveyour changes.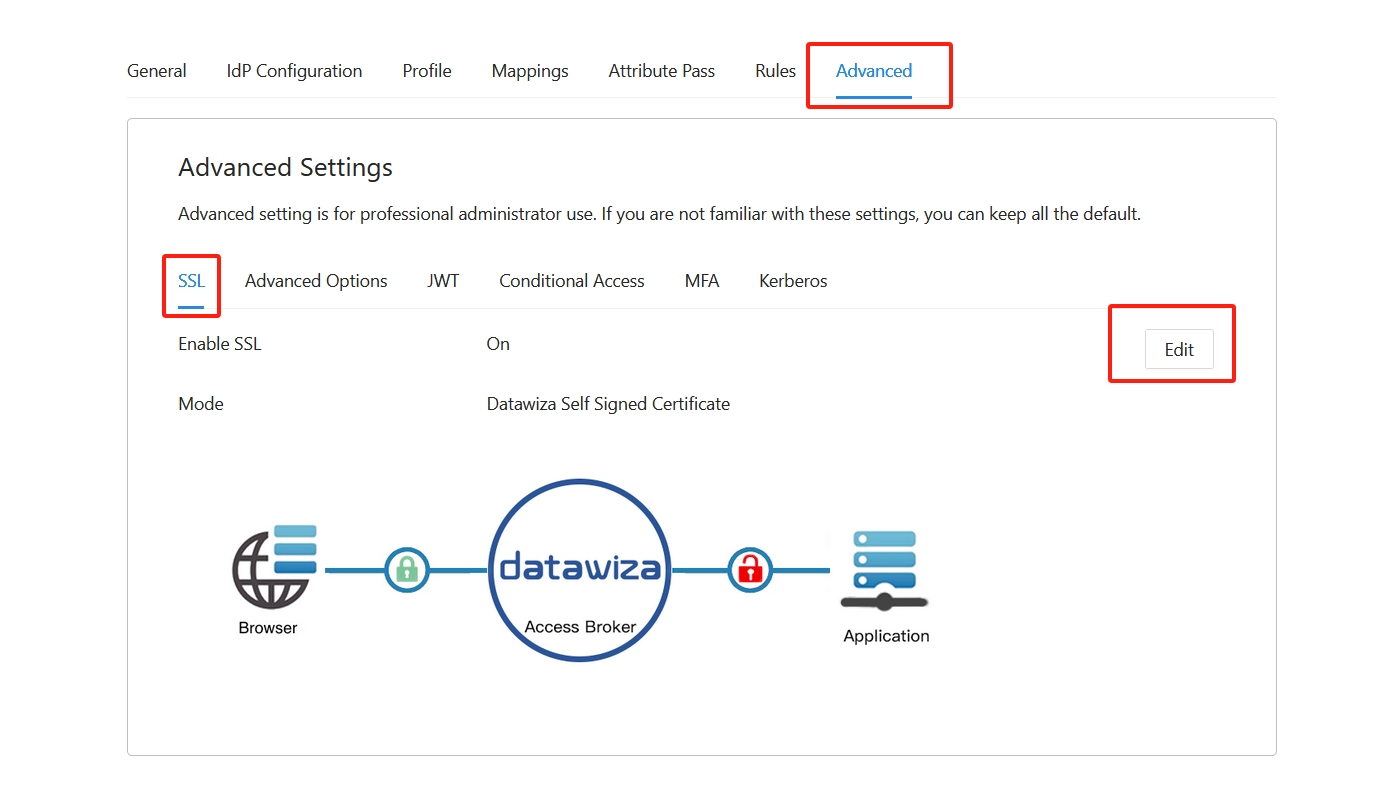
Part III: Deploying the DAP using AKS
Deployment Modes
The DAP offers two deployment options--standalone mode and sidecar mode. Sidecar mode is when the DAP and our application are running in the same pod. Standalone mode is when the DAP is deployed in a different pod than where the application resides. We will go through both deployment options in this section.
Before we get started, make sure you have created a Kubernetes Service and added a Kubernetes Cluster. The sample cluster used here, aks-test, has 3 nodes. We will use the Azure Cloud Shell to interact with our cluster and to run kubectl.
Standalone Mode
In standalone mode, the DAP and the Header-Based app are each containers inside their own pod. Since they are in the same cluster (aks-test) but are in different pods, the DAP will proxy the incoming traffic to the Header-Based app via its Cluster IP.
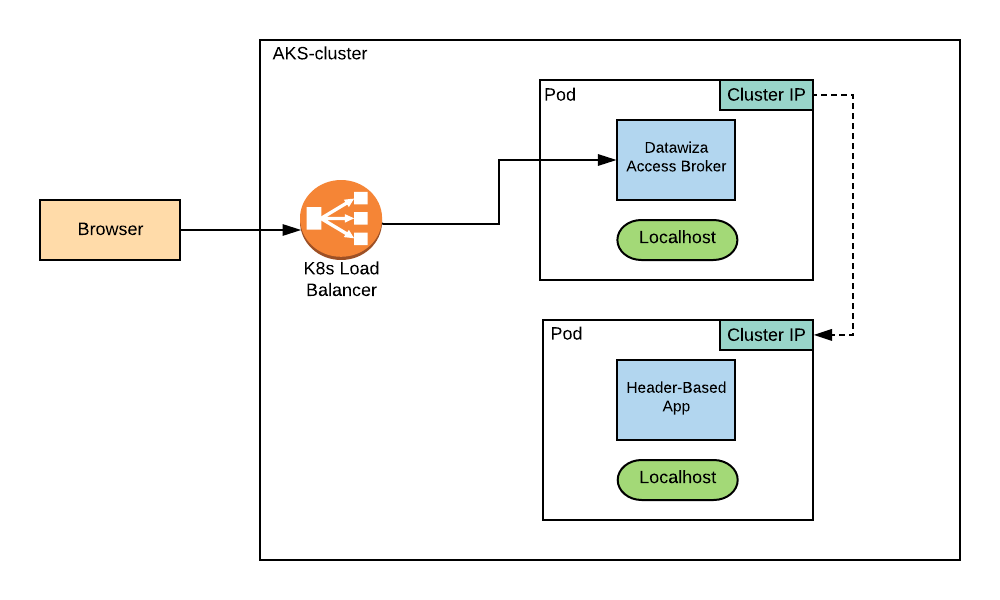
The following is an example deployment.yaml file. The DAP is given type: LoadBalancer in the spec section of its Service file in order for it to have an External IP.
apiVersion: apps/v1
kind: Deployment
metadata:
  name: datawiza-access-proxy
spec:
  replicas: 1
  selector:
    matchLabels:
      app: datawiza-access-proxy
  template:
    metadata:
      labels:
        app: datawiza-access-proxy
    spec:
      containers:
      - name: datawiza-access-proxy
        image: registry.gitlab.com/datawiza/access-proxy
        imagePullPolicy: Always
        ports:
        - containerPort: 9772
        env:
        - name: PROVISIONING_KEY
          value: ##########################
        - name: PROVISIONING_SECRET
          value: ##########################
      imagePullSecrets:
      - name: cred
---
apiVersion: v1
kind: Service
metadata:
  name: datawiza-access-proxy
spec:
  type: LoadBalancer
  ports:
  - port: 9772
  selector:
    app: datawiza-access-proxy
---
apiVersion: apps/v1
kind: Deployment
metadata:
  name: header-based-app
spec:
  replicas: 1
  selector:
    matchLabels:
      app: header-based-app
  template:
    metadata:
      labels:
        app: header-based-app
    spec:
      containers:
      - name: header-based-app
        image: registry.gitlab.com/datawiza/header-based-app
        imagePullPolicy: Always
        ports:
        - containerPort: 3001
      imagePullSecrets:
      - name: cred
---
apiVersion: v1
kind: Service
metadata:
  name: header-based-app
spec:
  ports:
  - port: 3001
  selector:
    app: header-based-app
Since the DAP and the Header-Based app are not public docker images, you will need to login to our container registry. This is represented by the cred field in our deployment.yaml file under imagePullSecrets.
# cred: credential for DAP and Header-Based app
kubectl create secret docker-registry cred --docker-server=registry.gitlab.com --docker-username=datawiza-deploy-token --docker-password=##########################
If you don't have the appropriate deploy tokens, please contact info@datawiza.com.
After creating your credentials, apply your deployment.yaml file using kubectl:
kubectl apply -f deployment.yaml
Run watch kubectl get pods and check that STATUS is Running for each pod. Make sure they are not ImagePullBackOff or ErrImagePull. Note that there should be two pods with one container in each, since we are running in standalone mode.

Run kubectl get svc to find the EXTERNAL-IP of the DAP.

Important Step!
Once we have our External IP, we have to go back to Microsoft Entra ID to fill in our Redirect URL field. Also, go back to the DCMC to populate the Application URL field within our application.
Redirect URLon Microsoft Entra ID:https://<EXTERNAL-IP>:9772/datawiza/authorization-code/callbackApplication URLon DCMC:https://<EXTERNAL-IP>:9772
When visiting the DCMC, you should also see that the Status of your Deployment is Online. If you select the + icon, you can make sure the Access Proxy that is connected matched the pod of your Access Proxy in your Kubernetes cluster.
Sidecar Mode
In sidecar mode, the DAP and the Header-Based app are each containers within the same pod. The DAP will proxy the incoming traffic to the Header-Based app via localhost in the same pod.
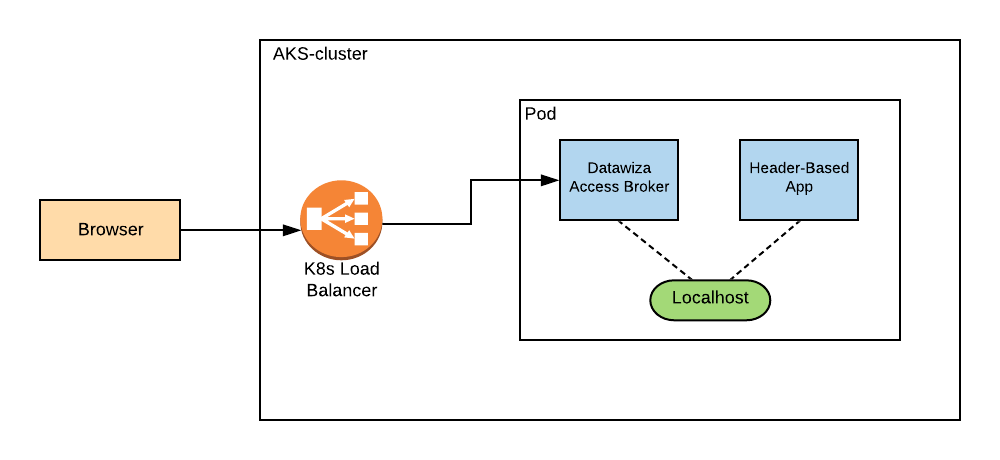
The following is an example deployment.yaml file. The DAP is given type: LoadBalancer in the spec section of its Service file in order for it to have an External IP.
apiVersion: apps/v1
kind: Deployment
metadata:
  name: datawiza-access-proxy
spec:
  replicas: 1
  selector:
    matchLabels:
      app: datawiza-access-proxy
  template:
    metadata:
      labels:
        app: datawiza-access-proxy
    spec:
      imagePullSecrets:
        - name: cred
      containers:
      - name: datawiza-access-proxy
        image: registry.gitlab.com/datawiza/access-proxy
        ports:
        - containerPort: 9772
        env:
        - name: PROVISIONING_KEY
          value: ##########################
        - name: PROVISIONING_SECRET
          value: ##########################
        imagePullPolicy: Always
      - name: header-based-app
        image: registry.gitlab.com/datawiza/header-based-app
        ports:
        - containerPort: 3001
        imagePullPolicy: Always
---
apiVersion: v1
kind: Service
metadata:
  name: datawiza-access-proxy
spec:
  type: LoadBalancer
  ports:
  - port: 9772
  selector:
    app: datawiza-access-proxy
Since the DAP and the Header-Based app are not public docker images, you will need to login to our container registry. There are two sets of credentials that need to be created (one for the DAP, another for the Header-Based app). These are represented by the regcred and newcred fields in our deployment.yaml file under imagePullSecrets.
# cred: credential for DAP and Header-Based app
kubectl create secret docker-registry cred --docker-server=registry.gitlab.com --docker-username=datawiza-deploy-token --docker-password=##########################
If you don't have the appropriate deploy tokens, please contact info@datawiza.com.
After creating your credentials, apply your deployment.yaml file using kubectl:
kubectl apply -f deployment.yaml
Run watch kubectl get pods and check that STATUS is Running for each pod. Make sure they are not ImagePullBackOff or ErrImagePull. Note that there should only be one pod with two containers, since we are in sidecar mode.

Run kubectl get svc to find the EXTERNAL-IP of the DAP.

Important Step!
Once we have our External IP, we have to go back to Microsoft Entra ID to fill in our Redirect URL field. Also, go back to the DCMC to populate the Application URL field within our application.
Redirect URLon Microsoft Entra ID:https://<EXTERNAL-IP>:9772/datawiza/authorization-code/callbackApplication URLon DCMC:https://<EXTERNAL-IP>:9772
When visiting the DCMC, you should also see that the Status of your Deployment is Online. If you select the + icon, you can make sure the Access Proxy that is connected to your Deployment matches the pod of your Access Proxy running in your Kubernetes cluster.
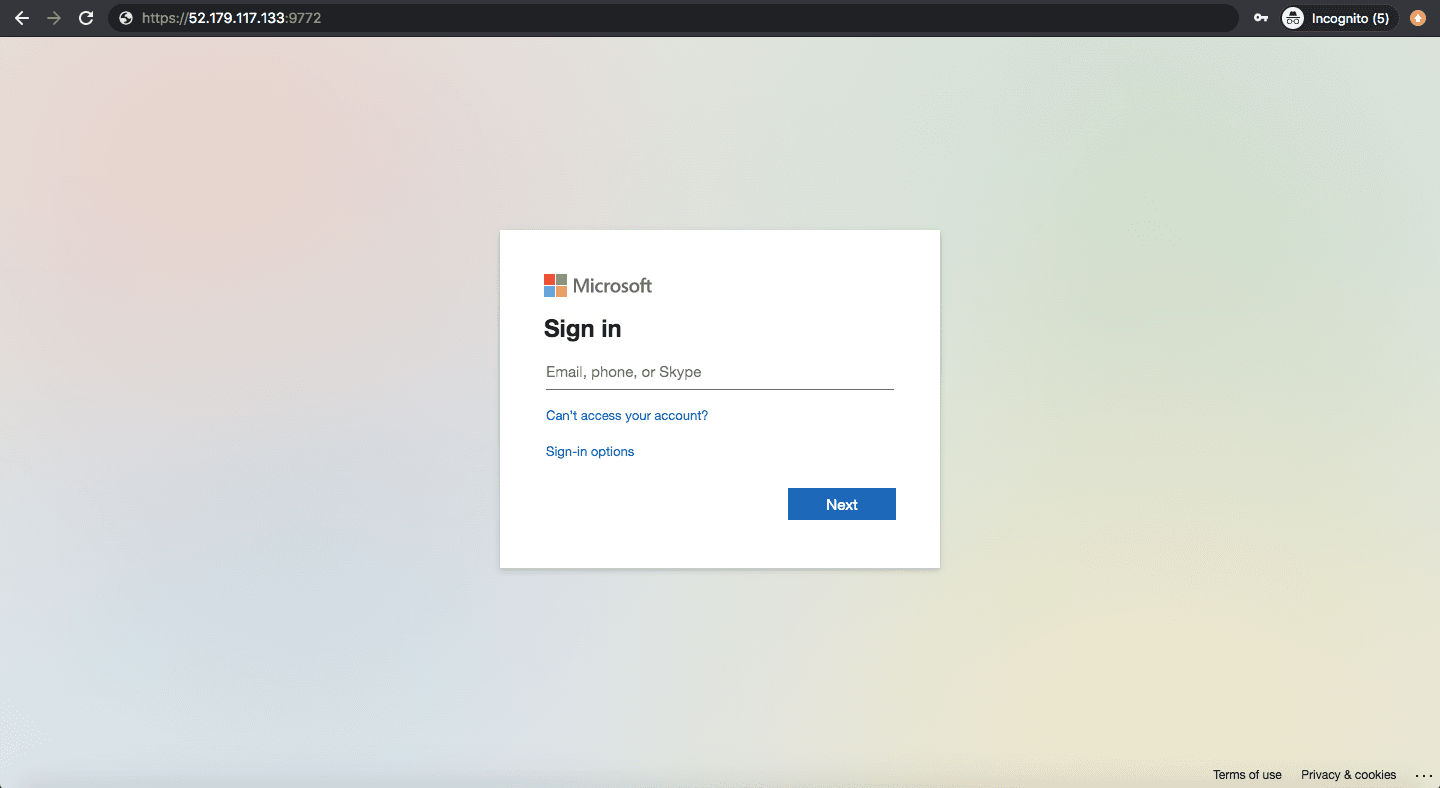
Visiting our External IP
When we now visit our External IP (in our sidecar example, https://52.179.117.133:9772), we will see a Warning: Potential Security Risk Ahead message. This is because we chose to use Self-Signed Certificates for our application. Once we accept the risks and continue, we should be prompted to sign in with Microsoft Entra ID. Our Header-Based app should have SSO enabled.
If you are seeing the Microsoft Entra ID login page but are unable to login (Microsoft keeps asking for your username and password repeatedly), ensure that you have created a user for your AD domain. Logging in with the root account will not work. Your username should be in the form of user@your_domain.onmicrosoft.com. Note that if you are already logged into Microsoft Entra ID in your browser, you may need to logout to see the login page.
Part IV: Granular Access Control and Further Steps
Please refer to Step4: Pass User Attributes and Step5: Achieve Granular Access Control to interact further with the additional features provided by the Datatwiza Access Proxy.
Summary
In summary, we have seen how to deploy the DAP in a Kubernetes environment and implement SSO policies using both the sidecar and standalone modes. We also have the ability to create multiple applications within our singular Deployment, and can assign each of our apps a different IdP if we so choose.