Enable B2B Single Sign-On (SSO) for a SaaS Application
Overview
B2B Single Sign-On (SSO) is a crucial feature for SaaS applications that serve enterprise clients. In this tutorial, we'll show you how to implement this functionality using the Datawiza Access Proxy (DAP) without requiring any coding or SDK integration. Throughout this tutorial, we'll use a hypothetical web application called "SaaSPortal" that caters to two enterprise customers: Acme Corporation, which employs Microsoft Entra ID (Azure AD) as its SSO platform, and Globex Corporation, which depends on Okta.
In this tutorial, we'll demonstrate how to use the DAP to enable SSO for SaaSPortal to serve both Acme Corporation and Globex Corporation. DAP is a container provided by Datawiza. To simplify the process, we'll employ the DAP's sidecar deployment mode, meaning the DAP and SaaSPortal will run on the same server. However, it's worth noting that DAP and SaaSPortal can also be configured to run on separate servers.
- The DAP will operate on
localhost:9772, ensuring that incoming traffic to the app first reaches the DAP (running on port 9772) before being proxied to the SaaSPortal application. - For debugging and testing purposes, a built-in web app runs inside the same DAP container. We'll use this built-in app as SaaSPortal. This app employs a header-based authentication mechanism to read user information via HTTP headers or JWT tokens.
Prerequisites
Before starting this tutorial, you need to have the following:
- A Datawiza account. If you don't have one, sign up here.
- A Docker environment. If you don't have it, follow the instructions to get it.
Part I: Microsoft Entra ID Configuration
Acme Corporation must register the application in the Azure Portal and obtain the following values for this application:
- Client ID
- Client Secret
- Tenant Id
These values will later be used to configure the DAP in the Datawiza Cloud Management Console (DCMC). To obtain these keys/values, please follow the instructions provided in the IdP Configuration Guide: Microsoft Entra ID.
Part II: Okta Configuration
Similar, Globex Corporation must register the application in the Okta Portal and obtain the following values for this application:
- Client ID
- Client Secret
- Okta Org
These values will later be used to configure the DAP in the Datawiza Cloud Management Console (DCMC). To obtain these keys/values, please follow the instructions provided in the IdP Configuration Guide: Okta.
Part III: Create Application on Datawiza Cloud Management Console (DCMC)
Sign in to the Datawiza Cloud Management Console.
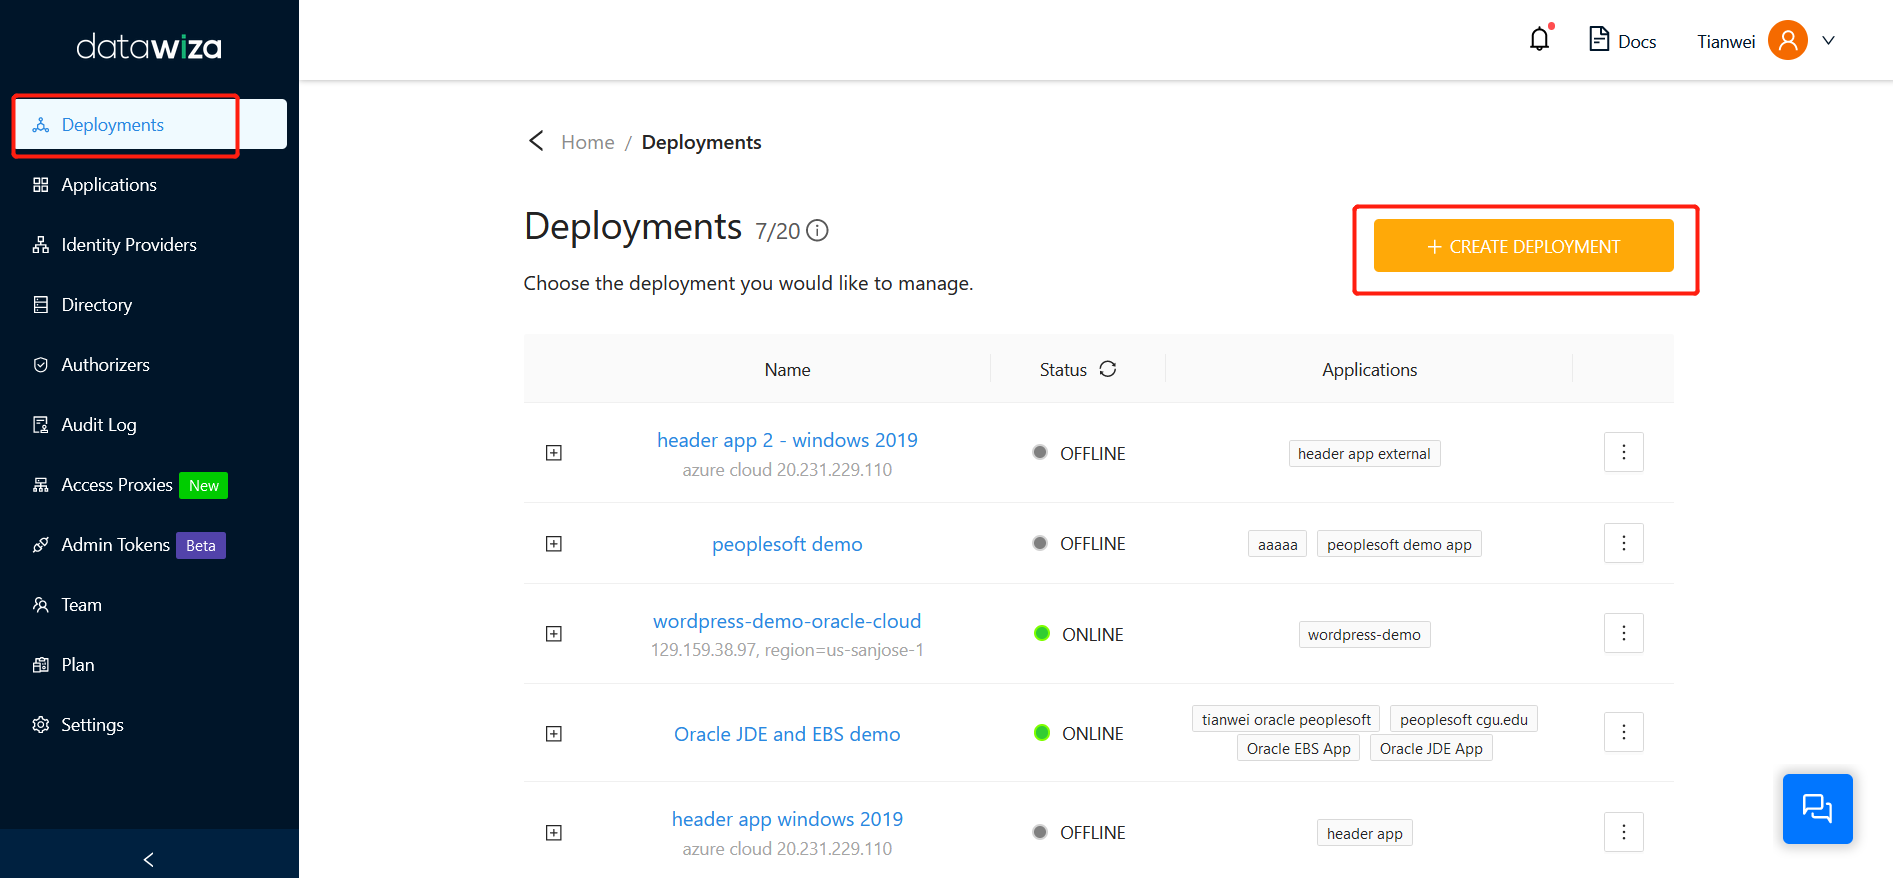
Navigate to the Deployments page on the left menu, and then click the Create Deployment button.
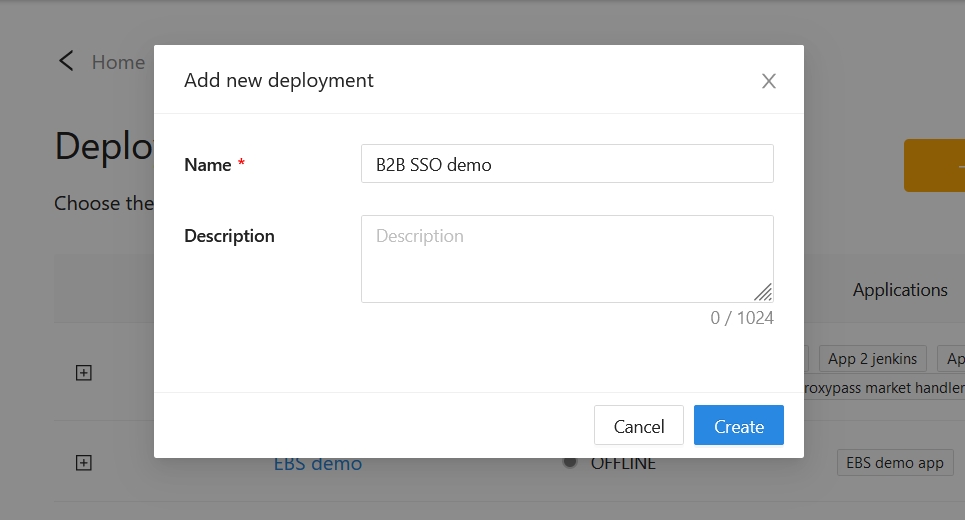
In the Name and Description fields, enter the relevant information.
Select Create.
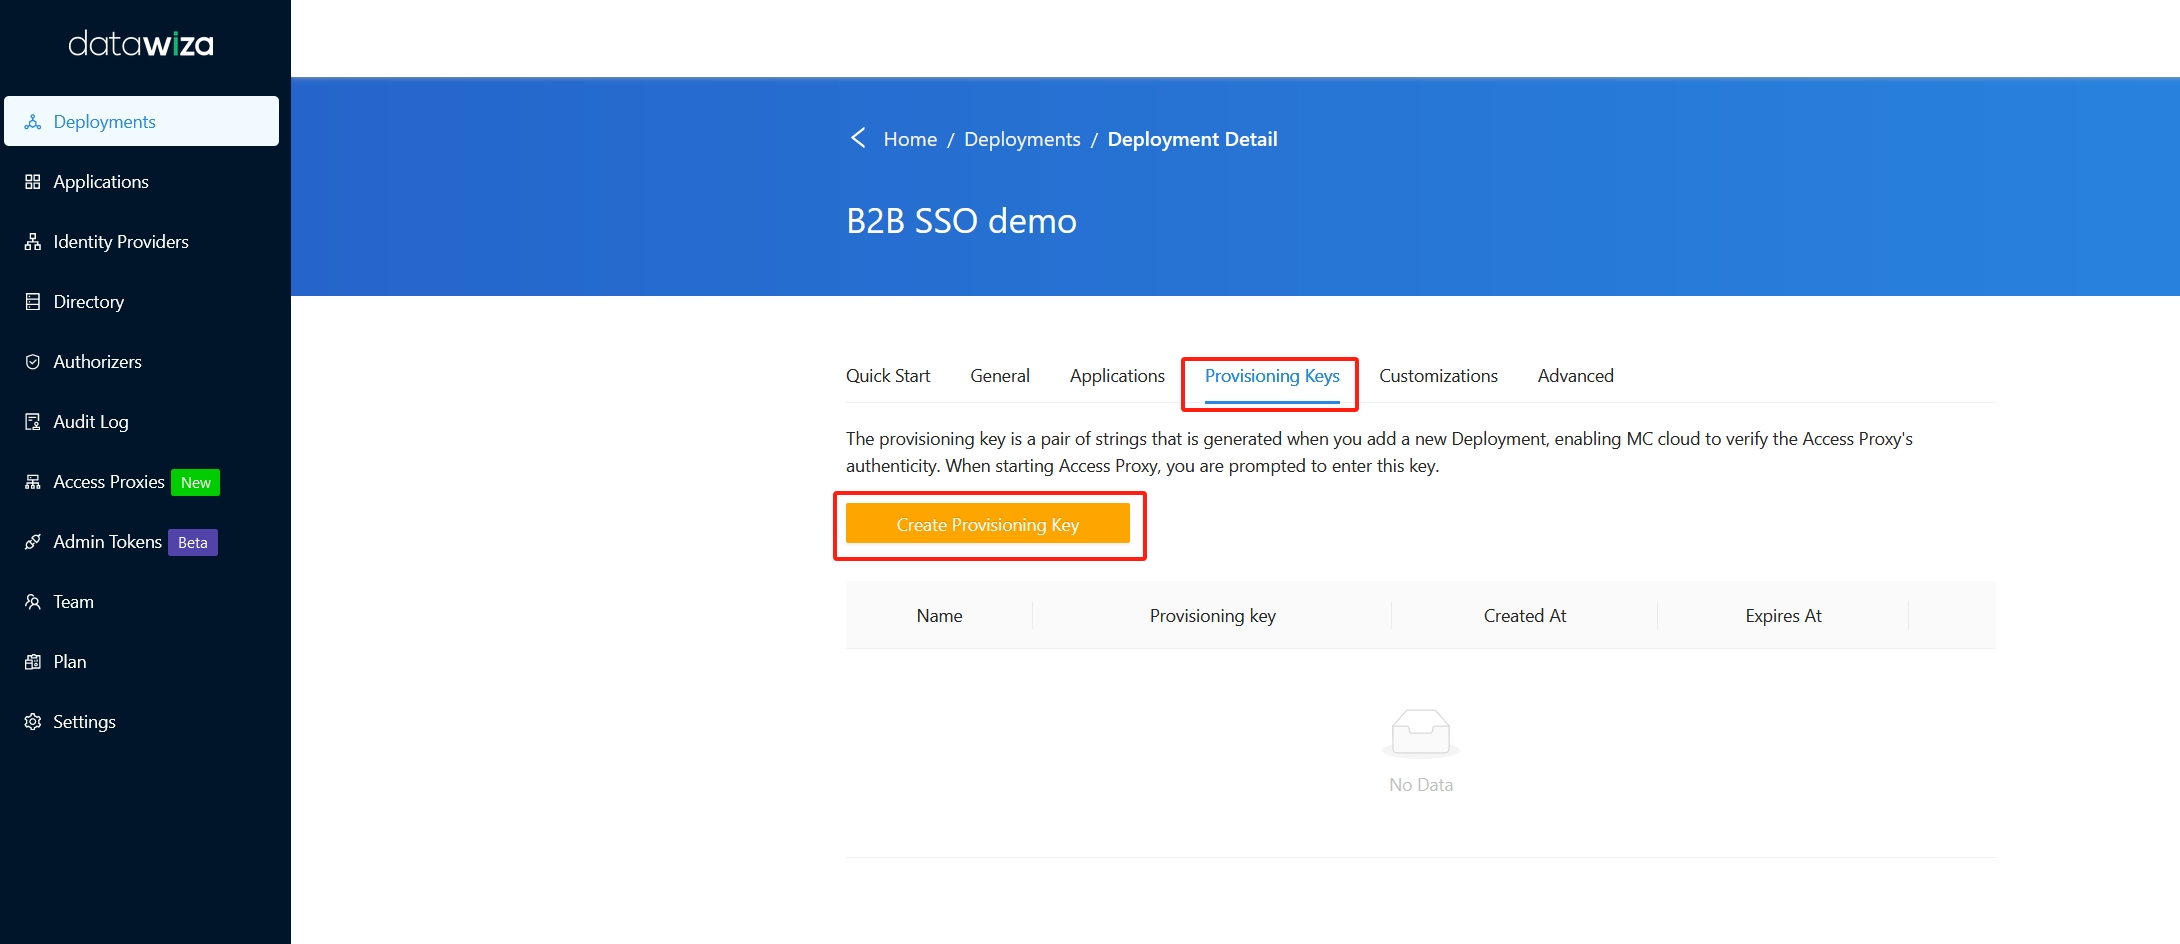
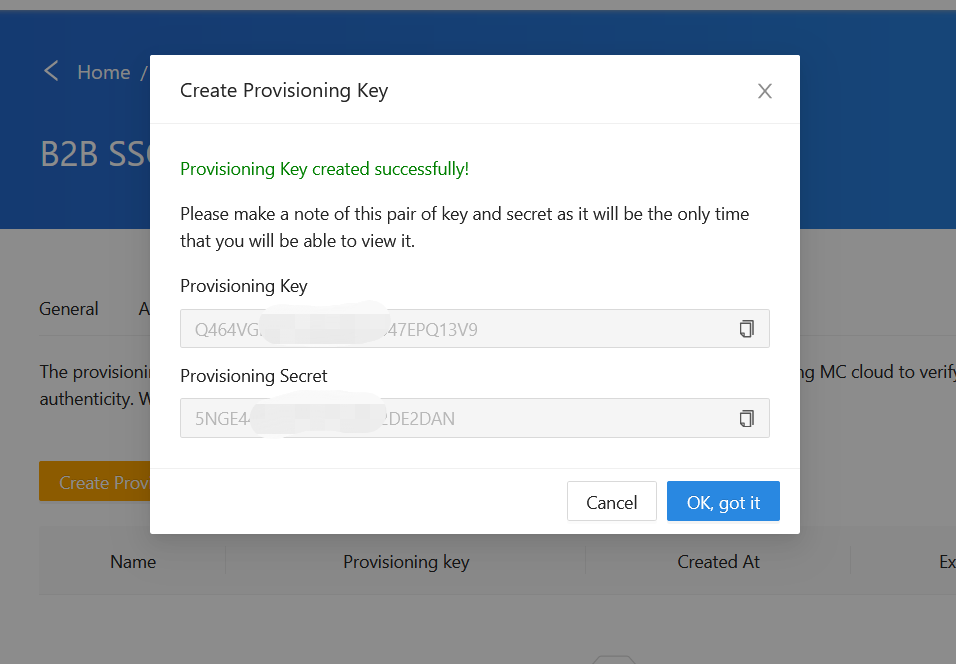
Navigate to the Provisioning Keys tab, and then click the Create Provisioning Key button.
In the Key Name and Expires fields, enter the relevant information.
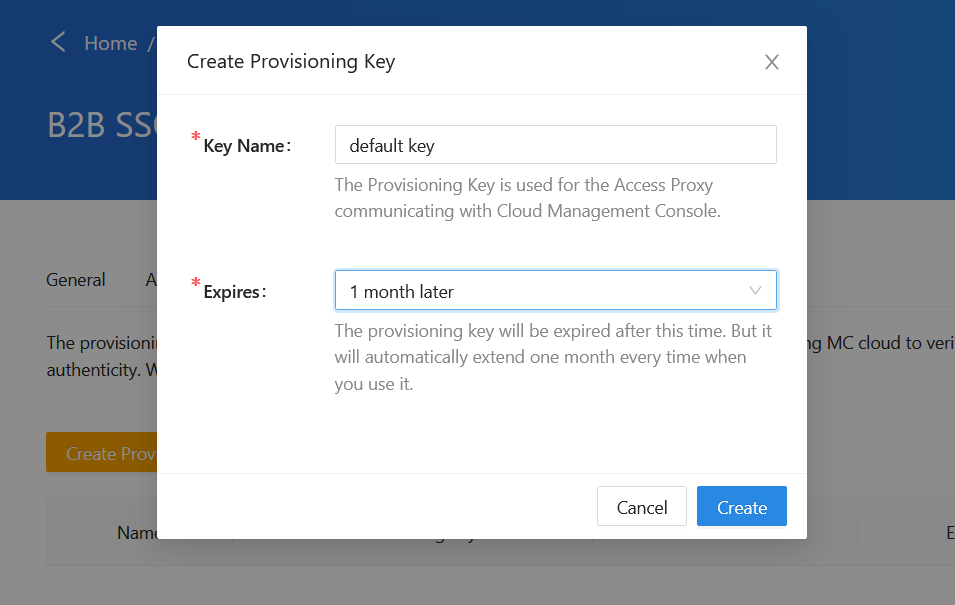
Make a note of the Provisioning Key and Secret , you will need to use this key pair later.
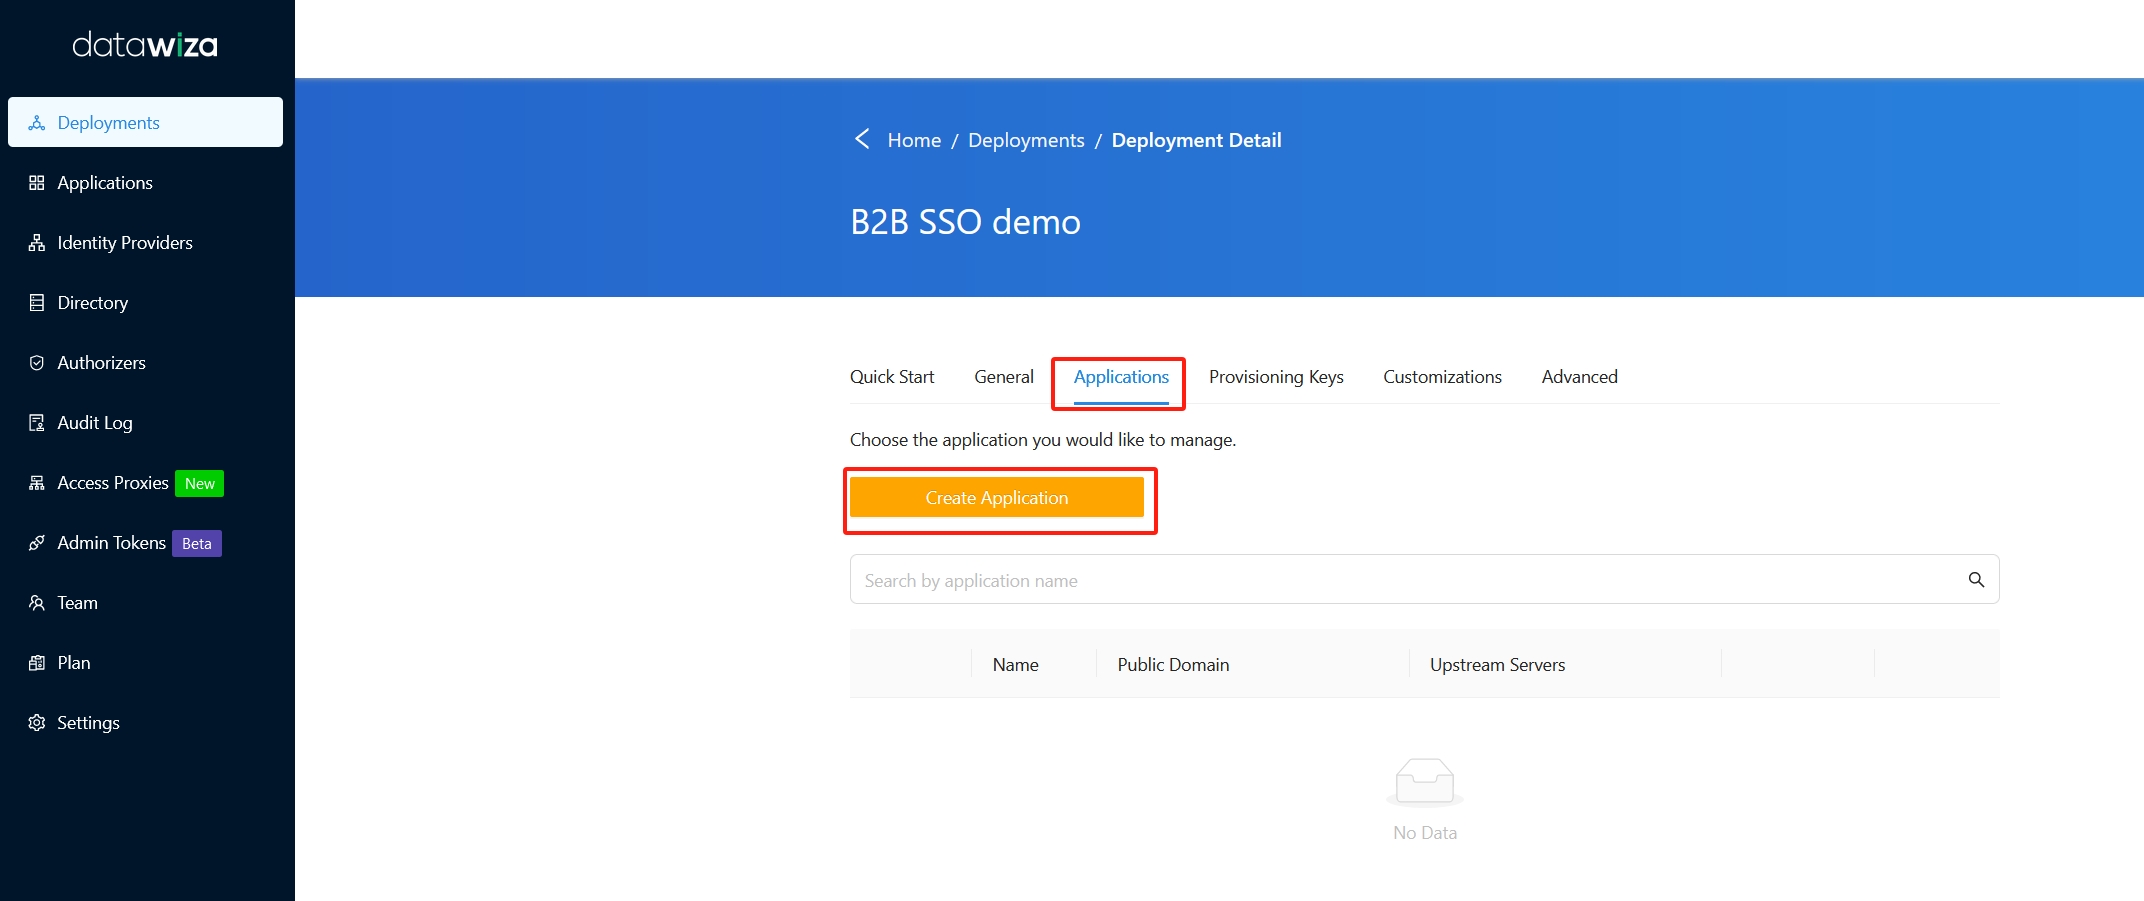
Navigate to Applications sub-tab, and then click the Create Application button.
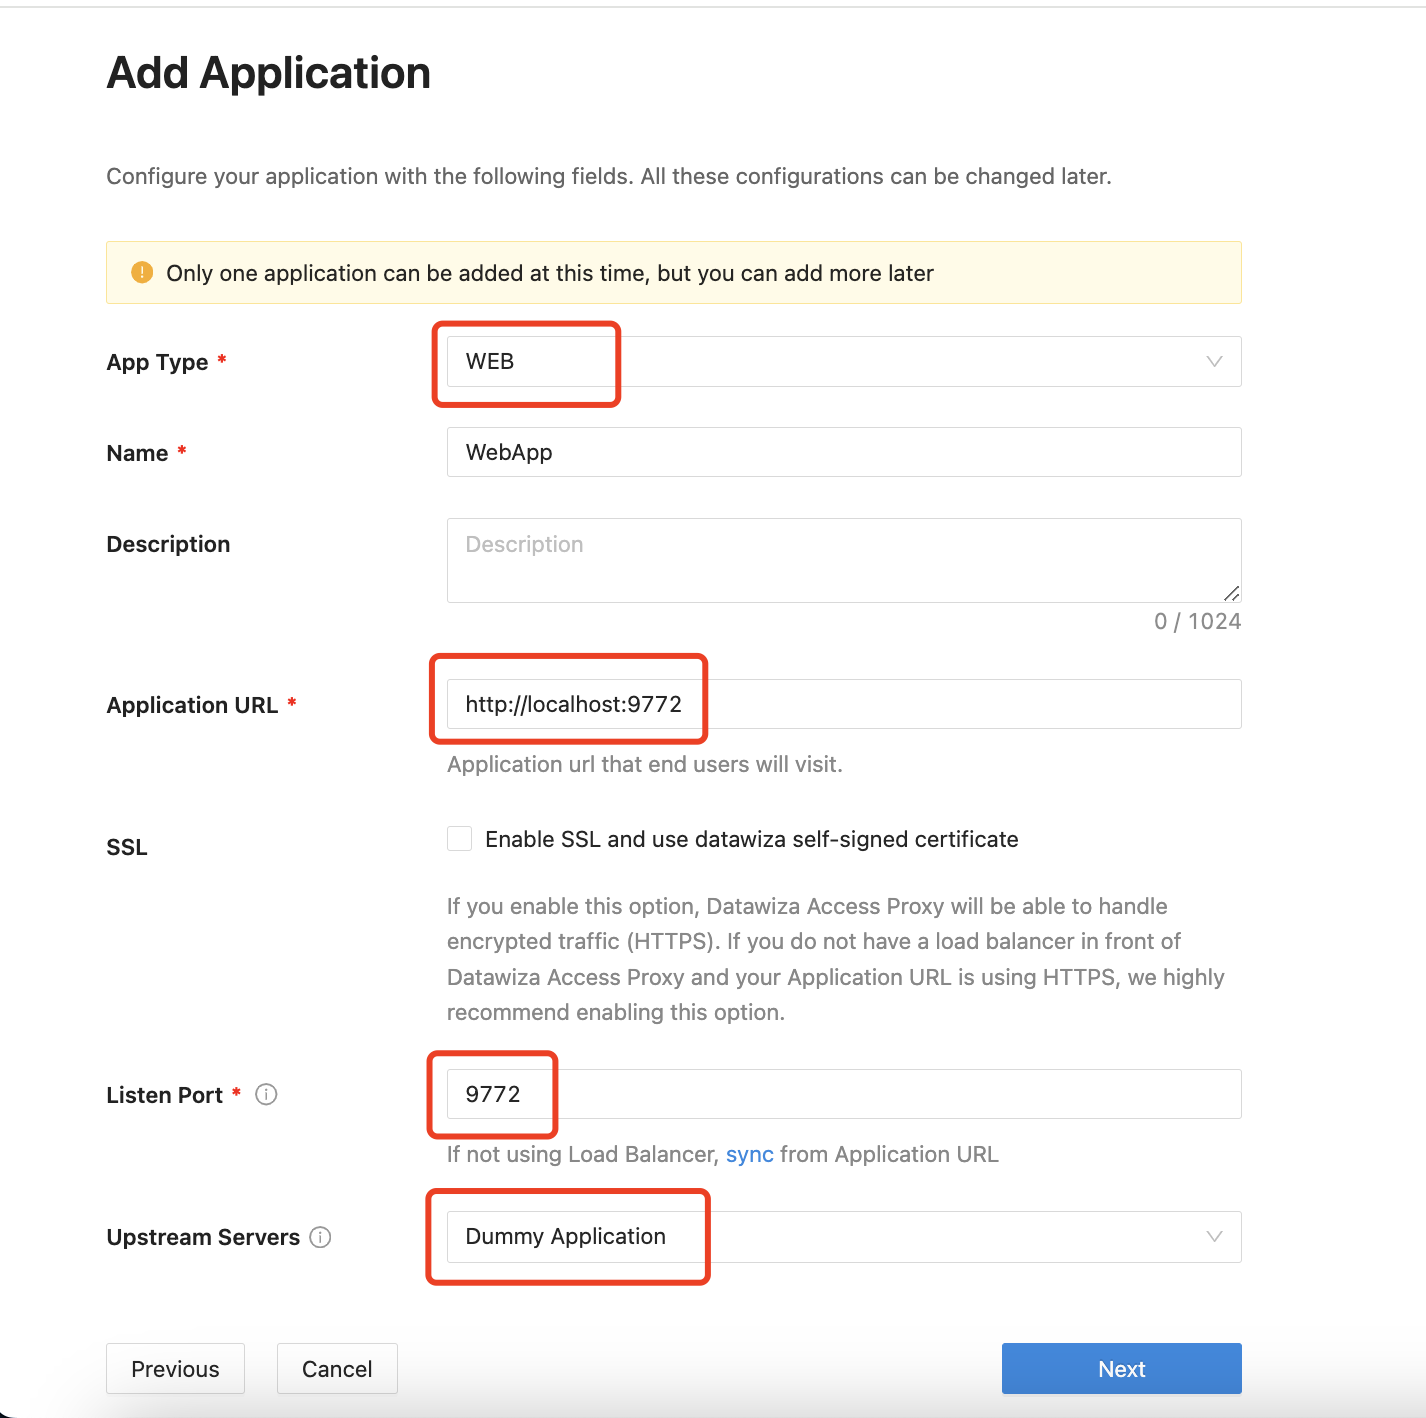
In the Add Application dialog box, use the following values:
Property Value App Type Web Name Enter a unique application name. For example, you can use the WebApp. Application URL Application URL that end users will visit. For example: https://webapp.example.com. For testing, you can use localhost DNS. Here we usehttp://localhost:9772.Listen Port The port that DAP listens on. Here we use the 9772.Upstream Servers The URL and port of your Web app. Here we use Dummy Application, which is a built-in web app that employs a header-based authentication mechanism to read user information via HTTP headers or JWT tokens.Select Create.
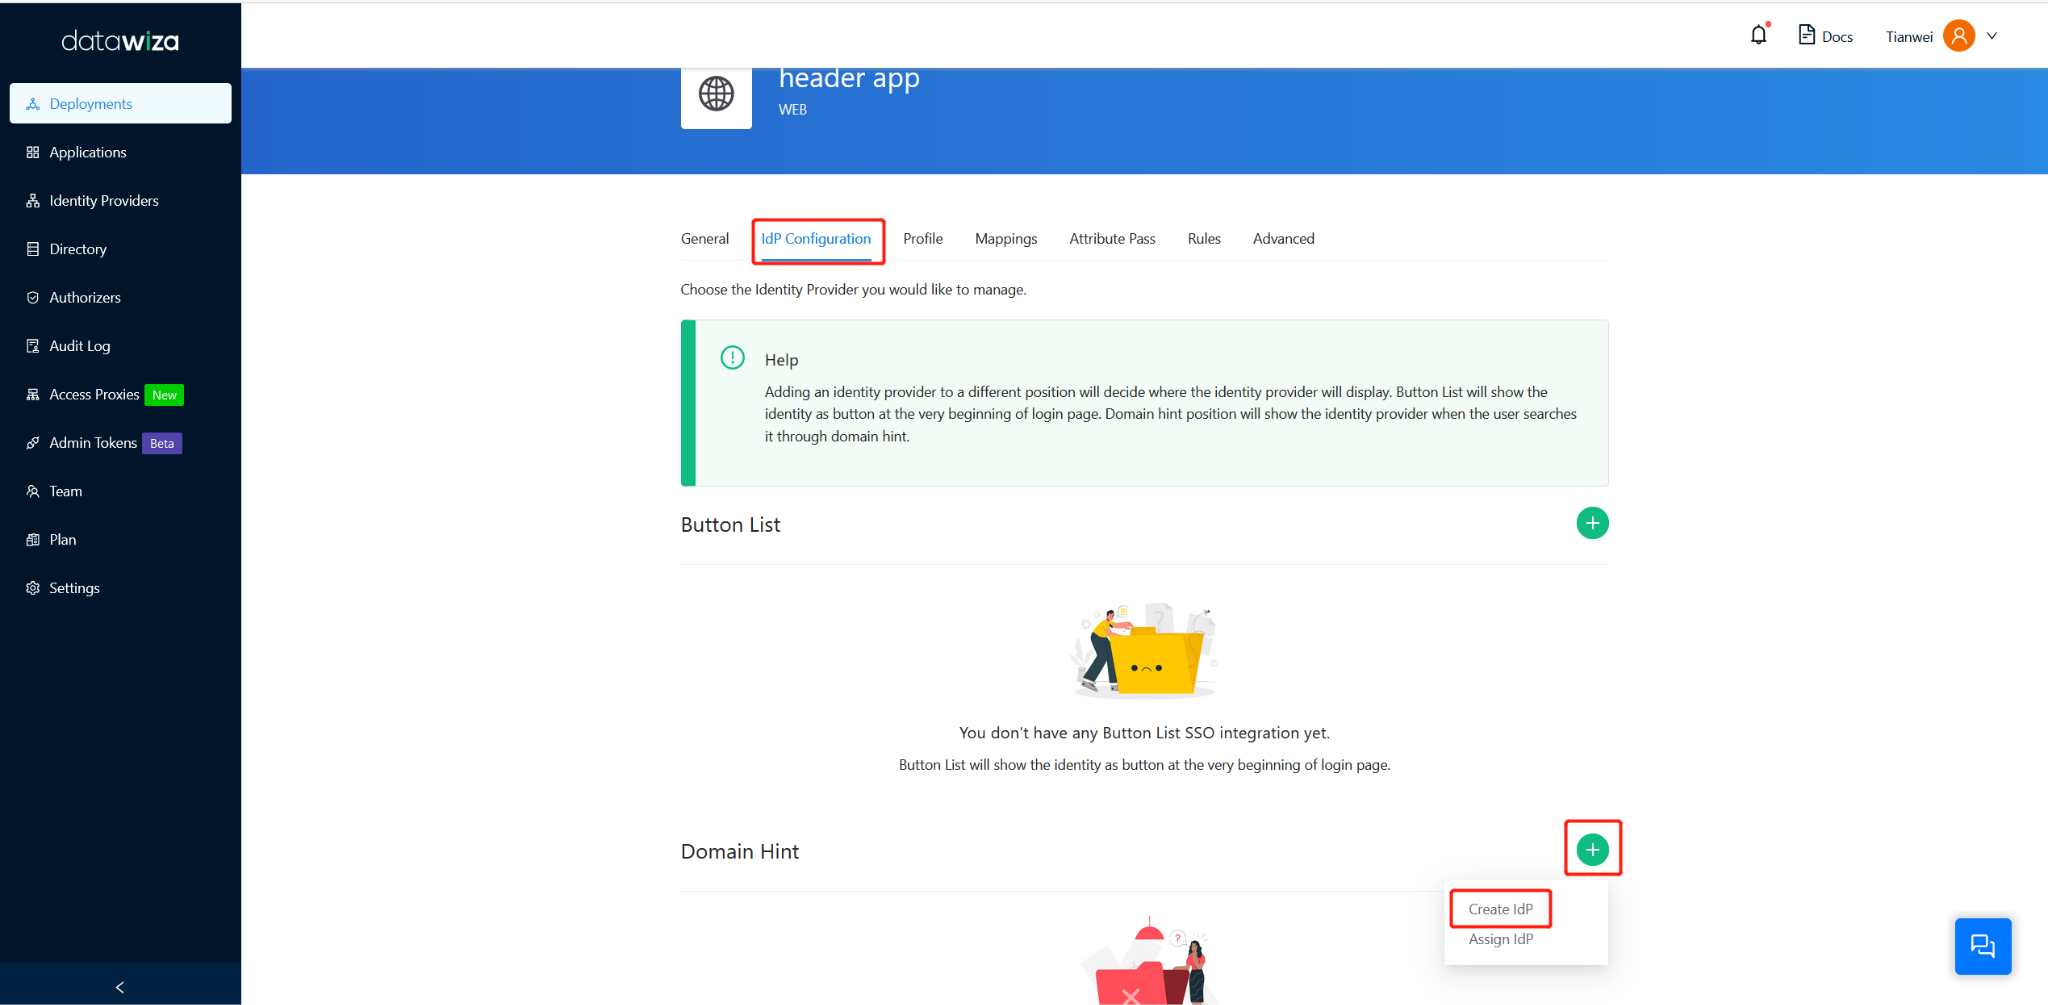
Switch to the IdP Configuration tab inside your application settings, Click the Create IdP button under Domain Hint.
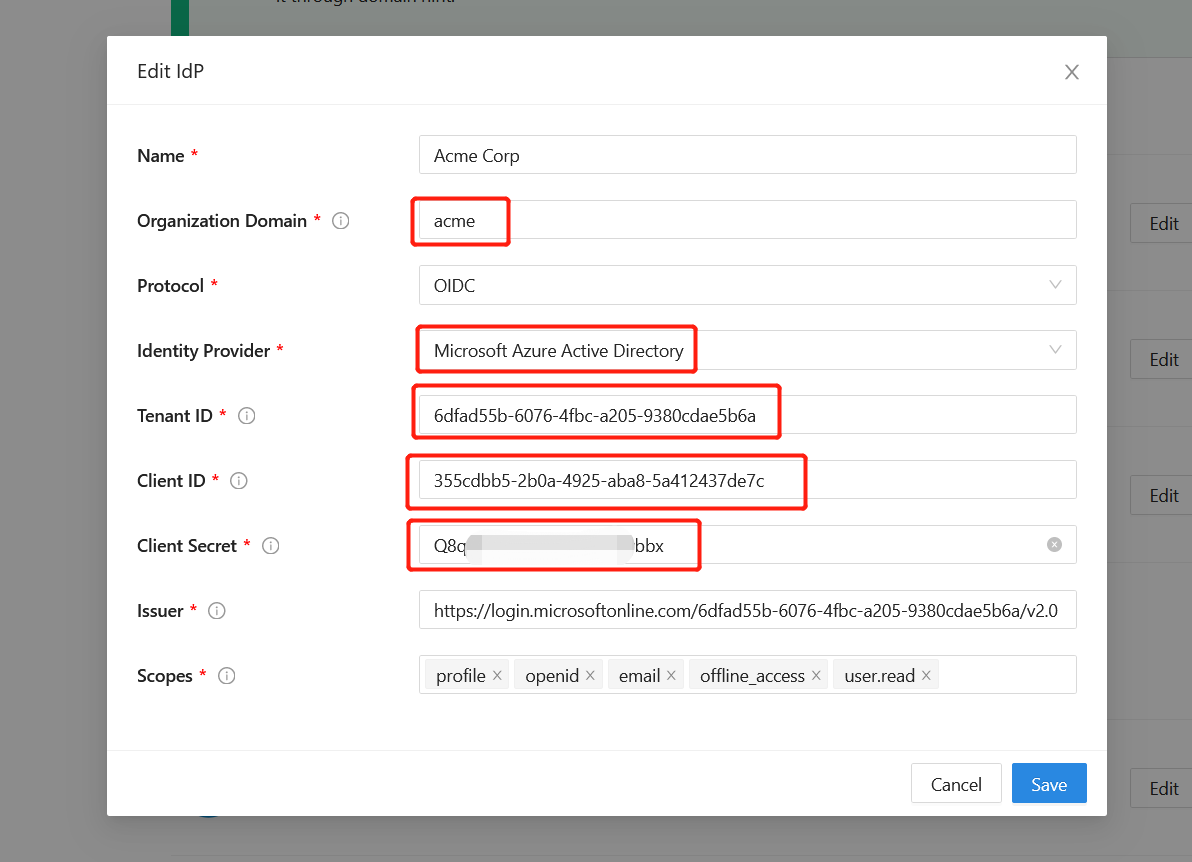
In the Add IdP dialog box, add an organization domain. Here we use acme. Select the Microsoft Entra ID as Identity Provider. Switch off Automatic Generator. Enter all the information from Part II. Then click the Save button.
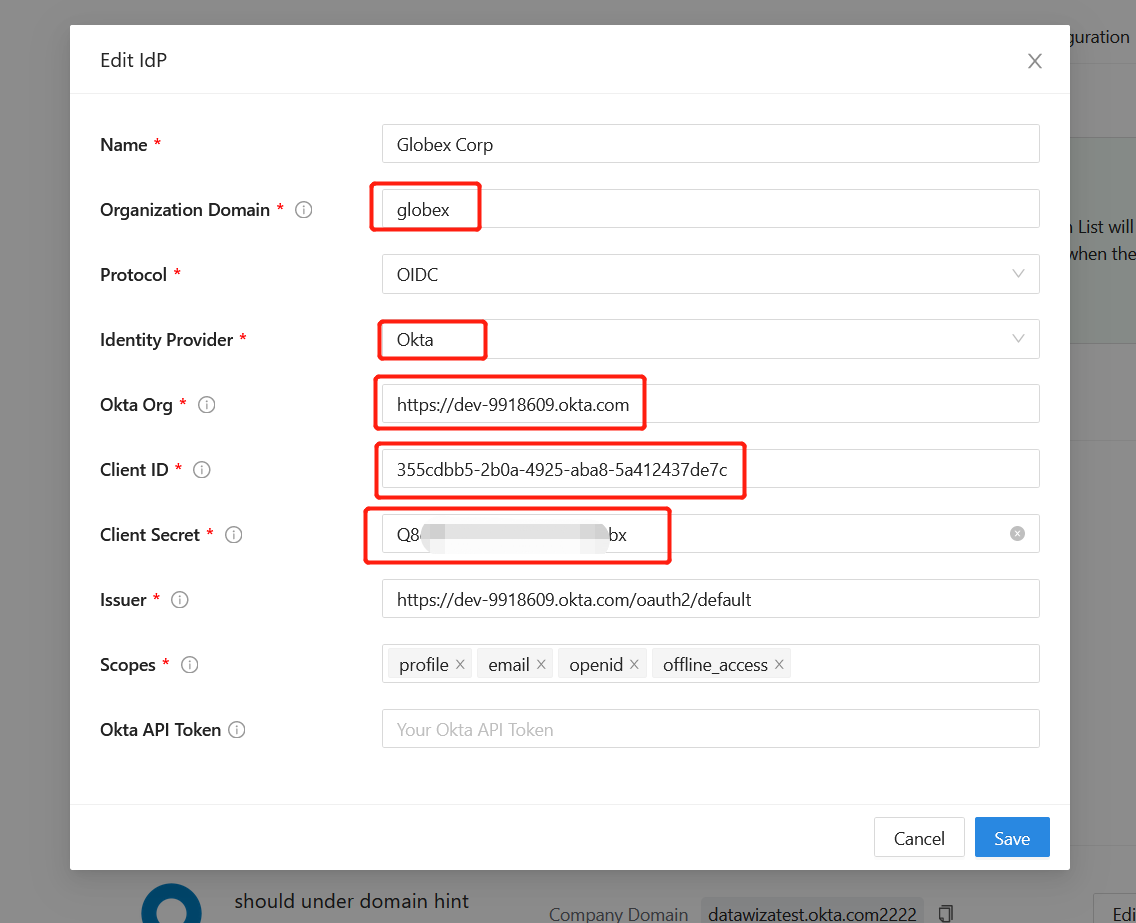
We can now repeat the previous steps to create an Okta IdP. Click the Create idp under the Domain hint. Put all the information from Part I. This time we use globex as an organization domain.
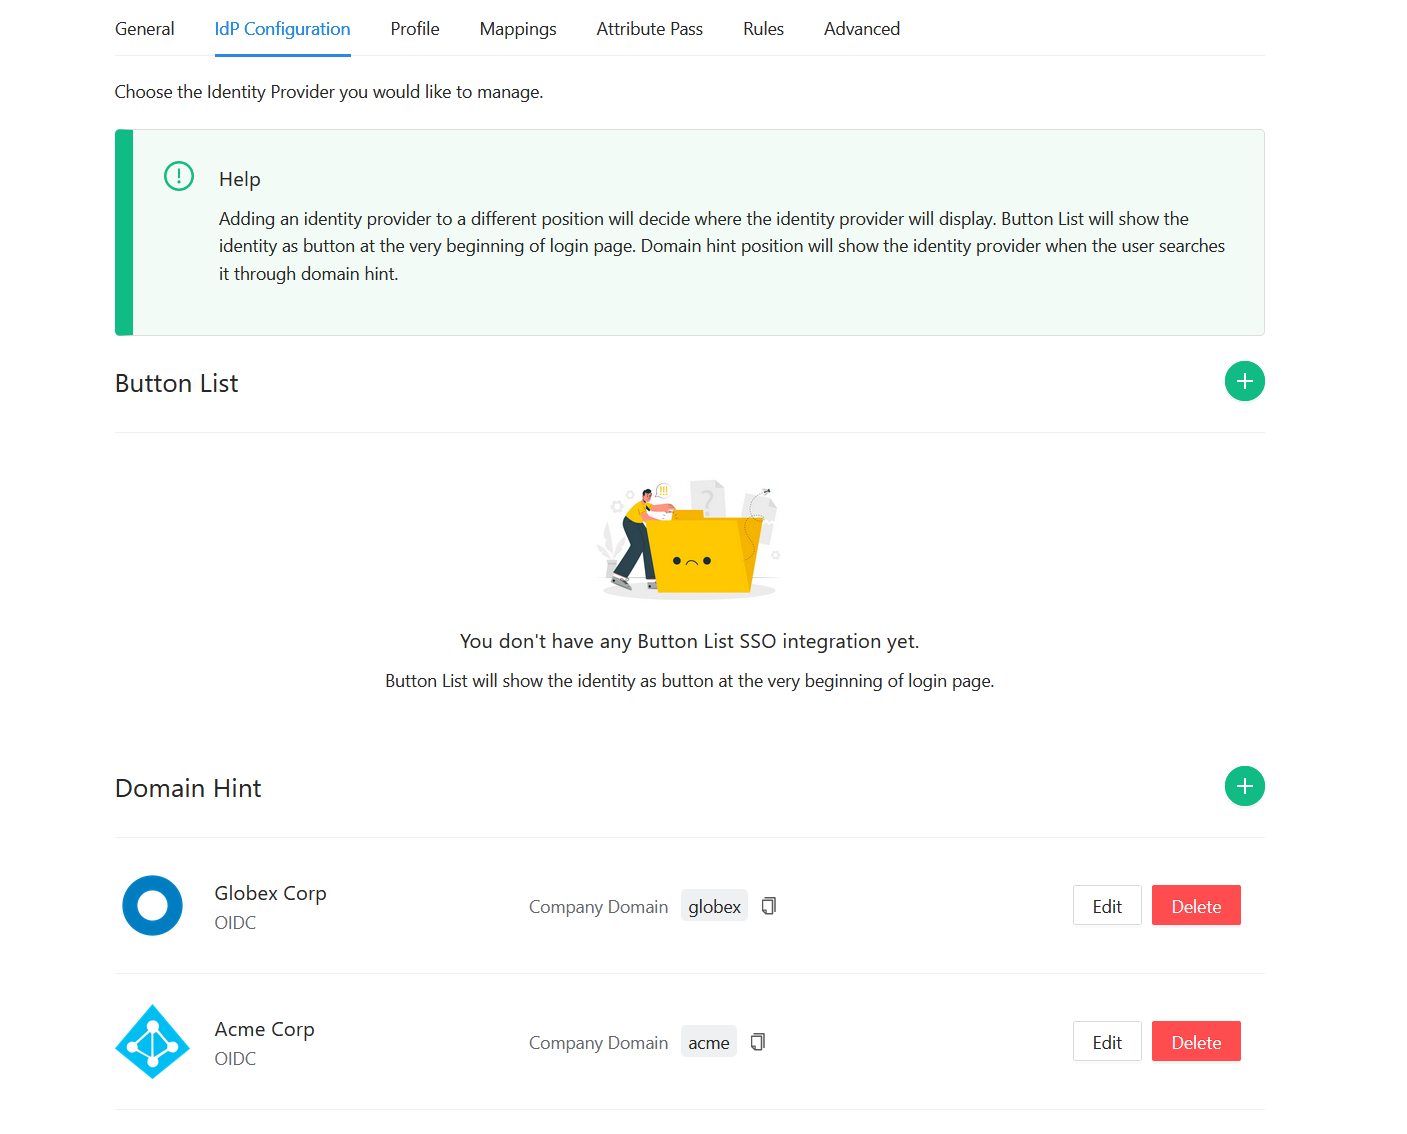
Your IdP configuration will now look like this.
Part IV: Run the DAP with the Sample Web Application
Return to the deployment you just created, and you'll find the steps to run DAP in the Quick Start tab. Refer to the following screenshot for guidance. 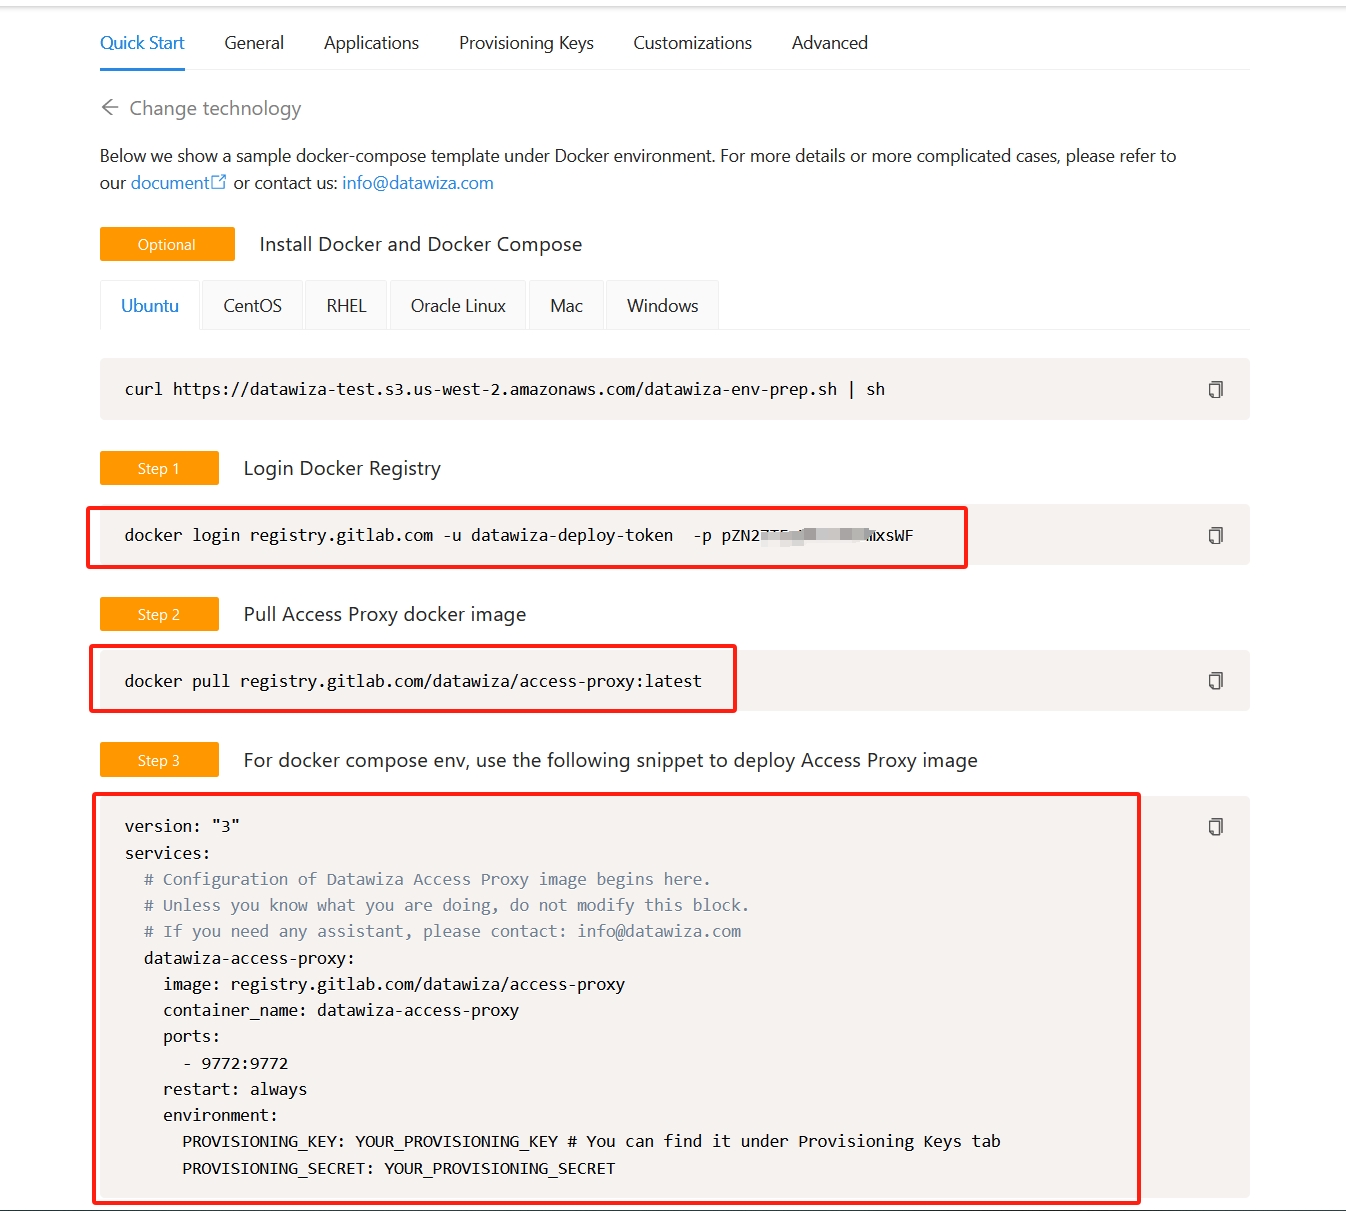
The following is an example docker-compose.yml file to run the DAP. Replace marked #### with the recorded Provisioning Key and Secret from the previous step.
version: '3'
services:
  datawiza-access-proxy:
    image: registry.gitlab.com/datawiza/access-proxy
    container_name: datawiza-access-proxy
    restart: always
    ports:
      - "9772:9772"
    environment:
      PROVISIONING_KEY: #############################
      PROVISIONING_SECRET: #############################
After executing docker-compose -f docker-compose.yml up -d in your terminal, the Datawiza Access Proxy and the SaaSPortal should be up and running.
Part V: Test the Application
Open a browser and type in http://localhost:9772. The login page of the SaaSPortal should be shown: 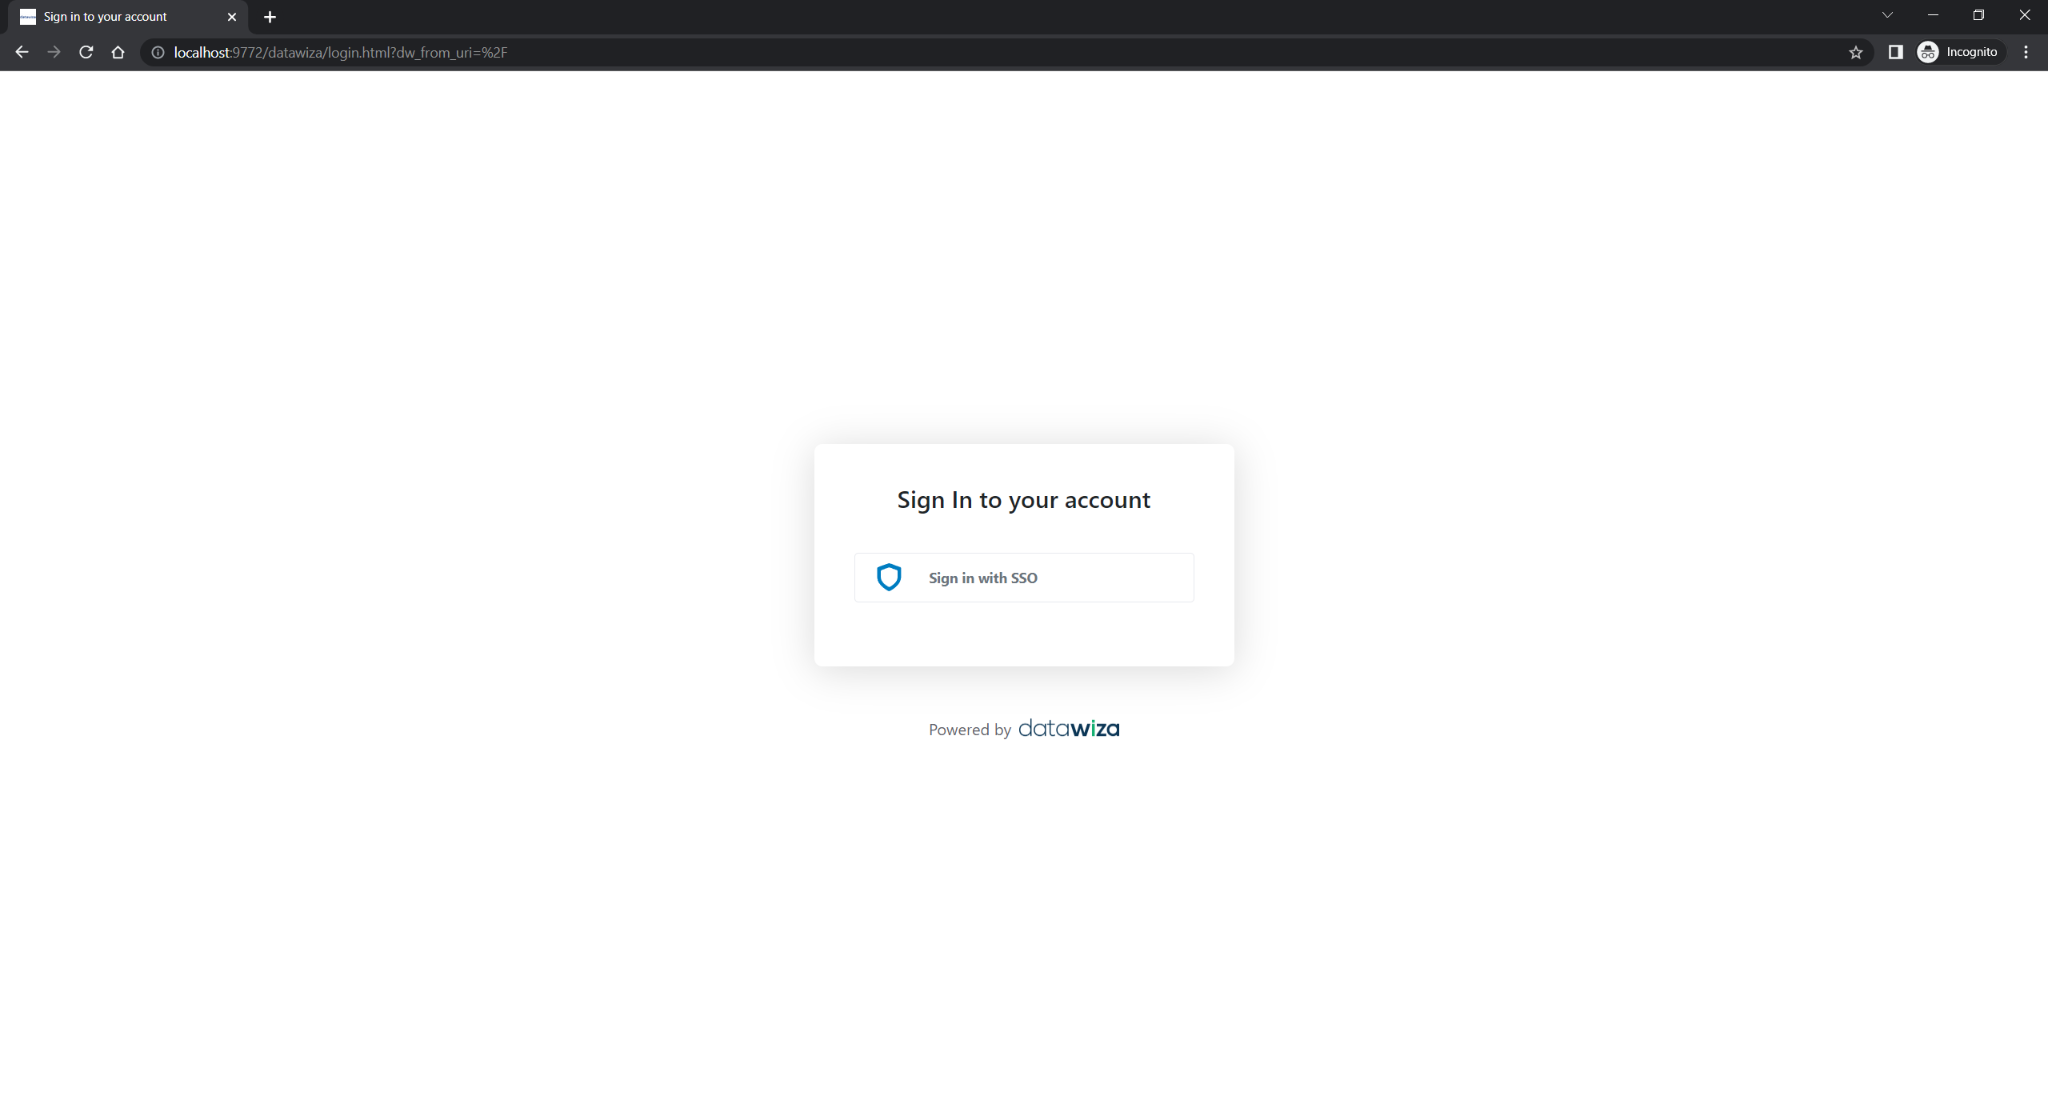
Click Sign in with SSO, and then input the organization domain acme. It will automatically redirect you to the Microsoft Entra ID to login. 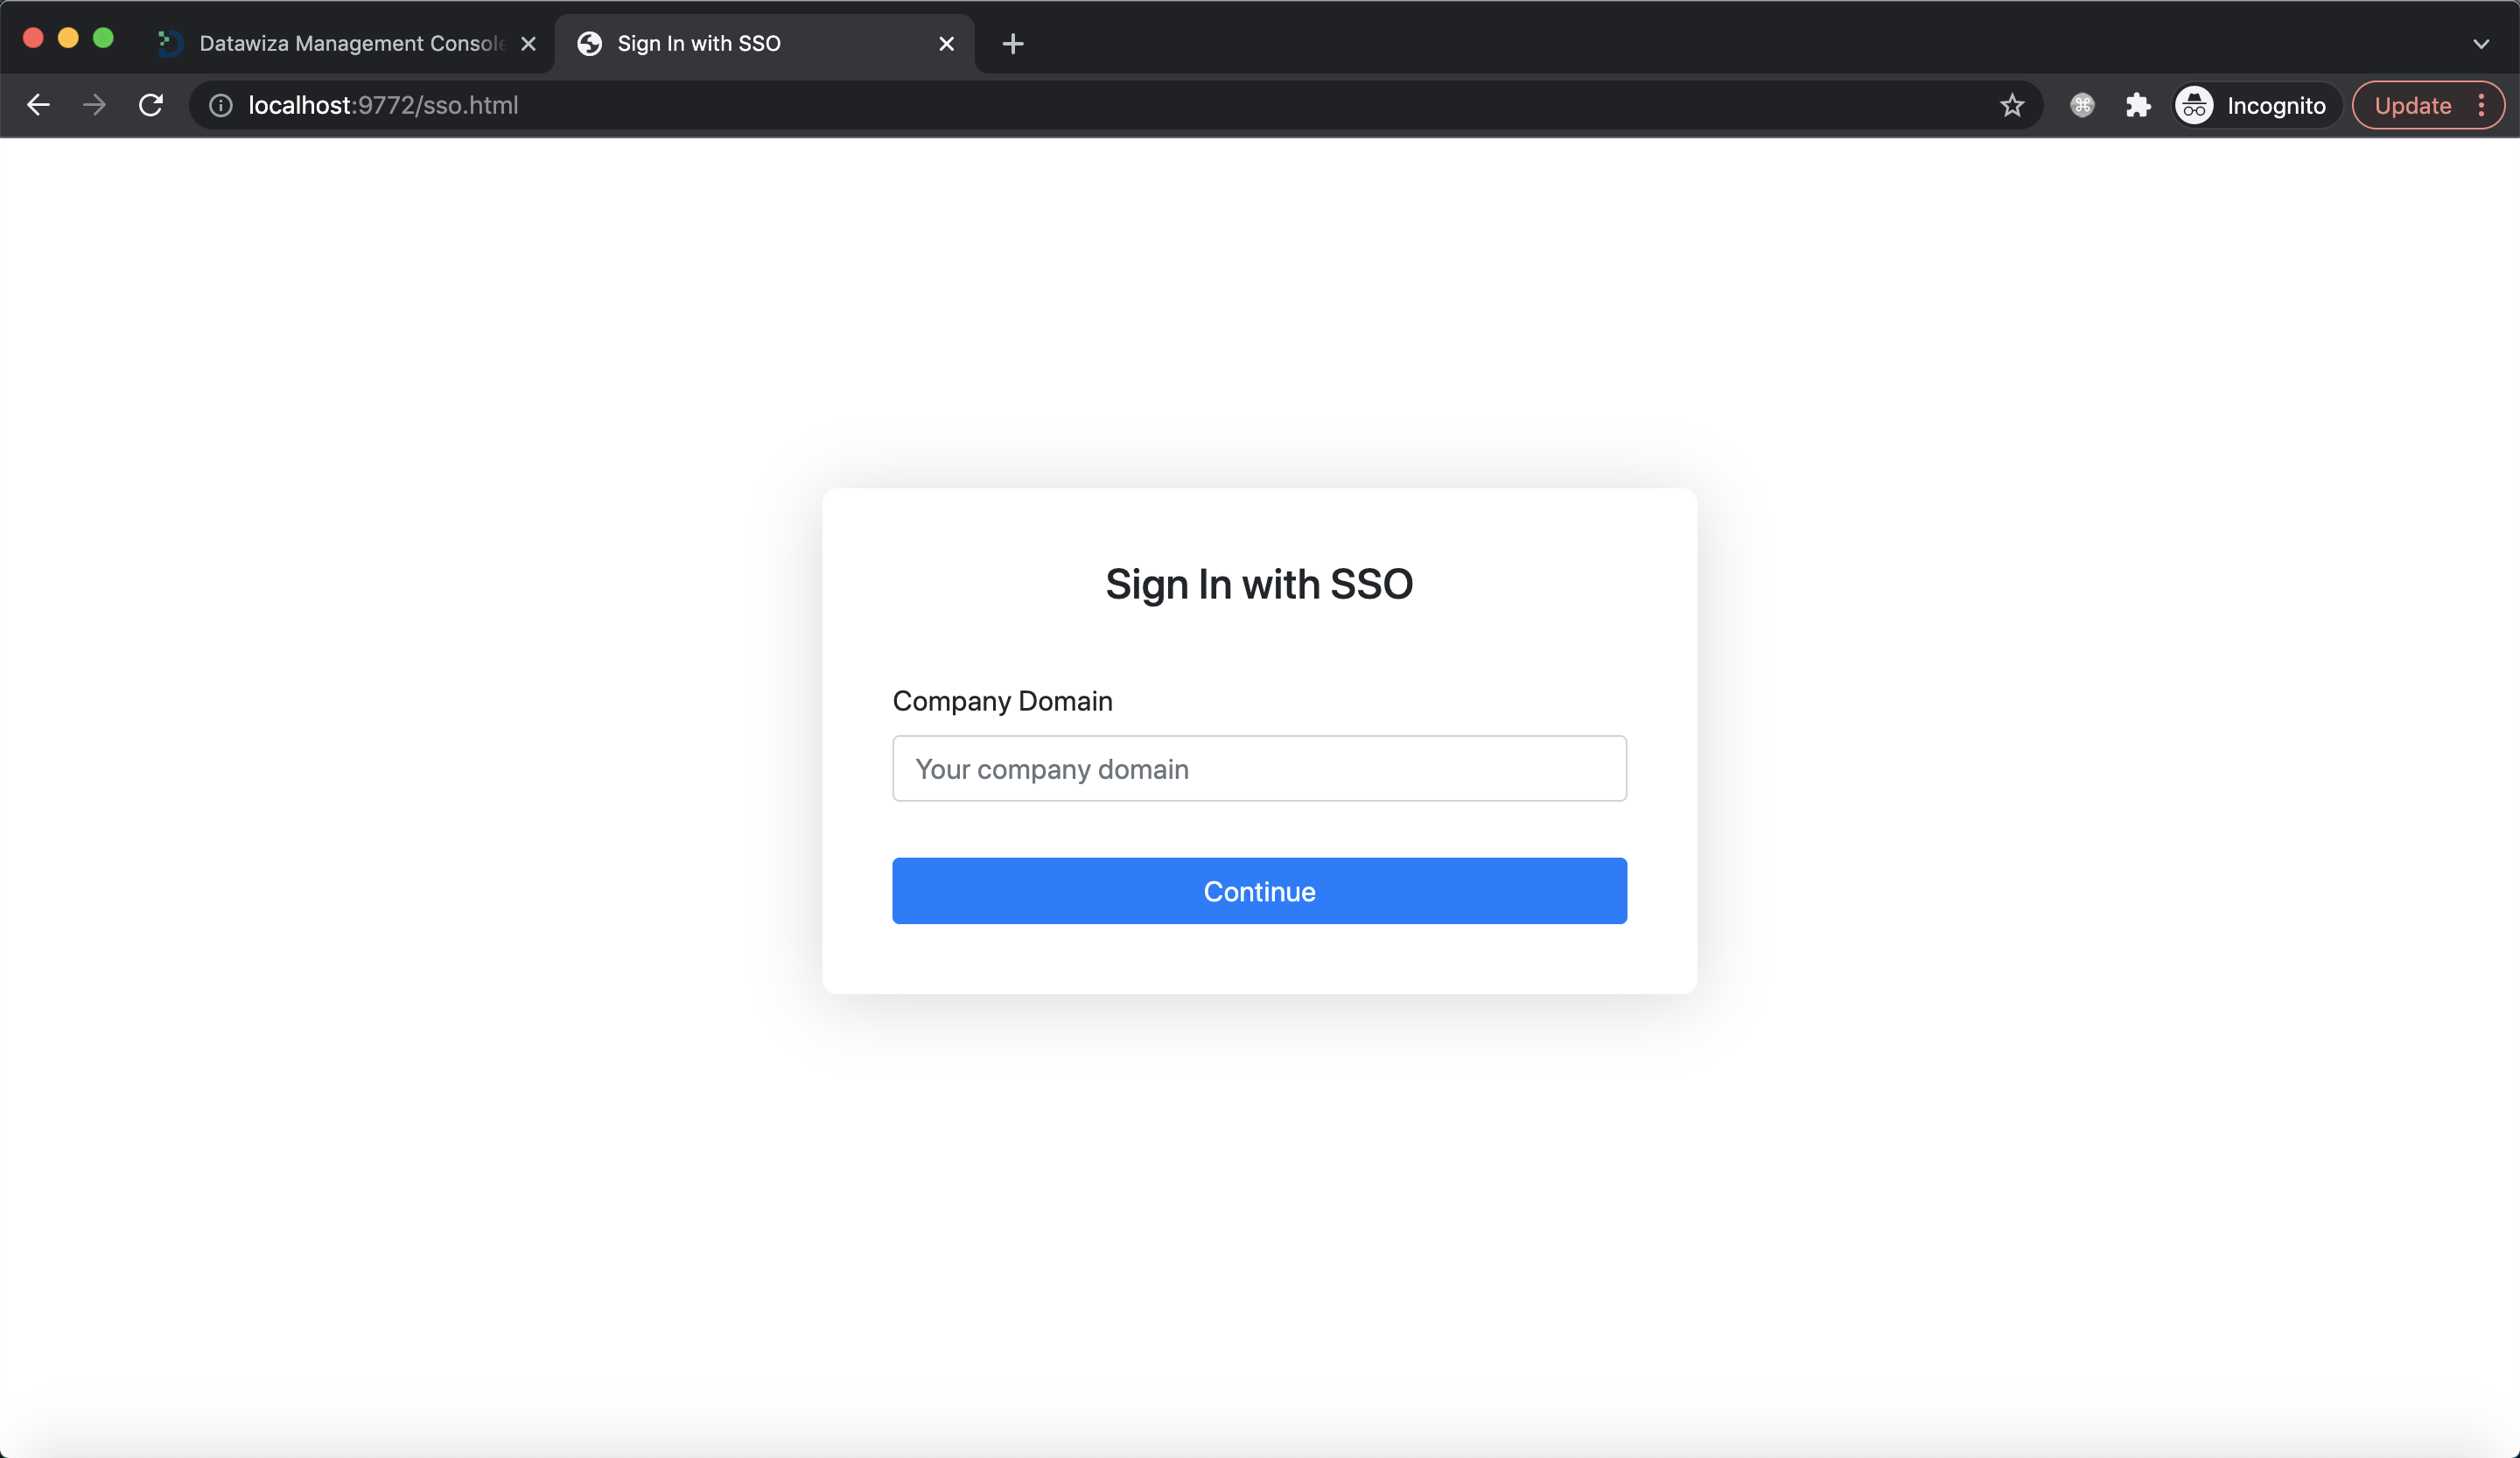
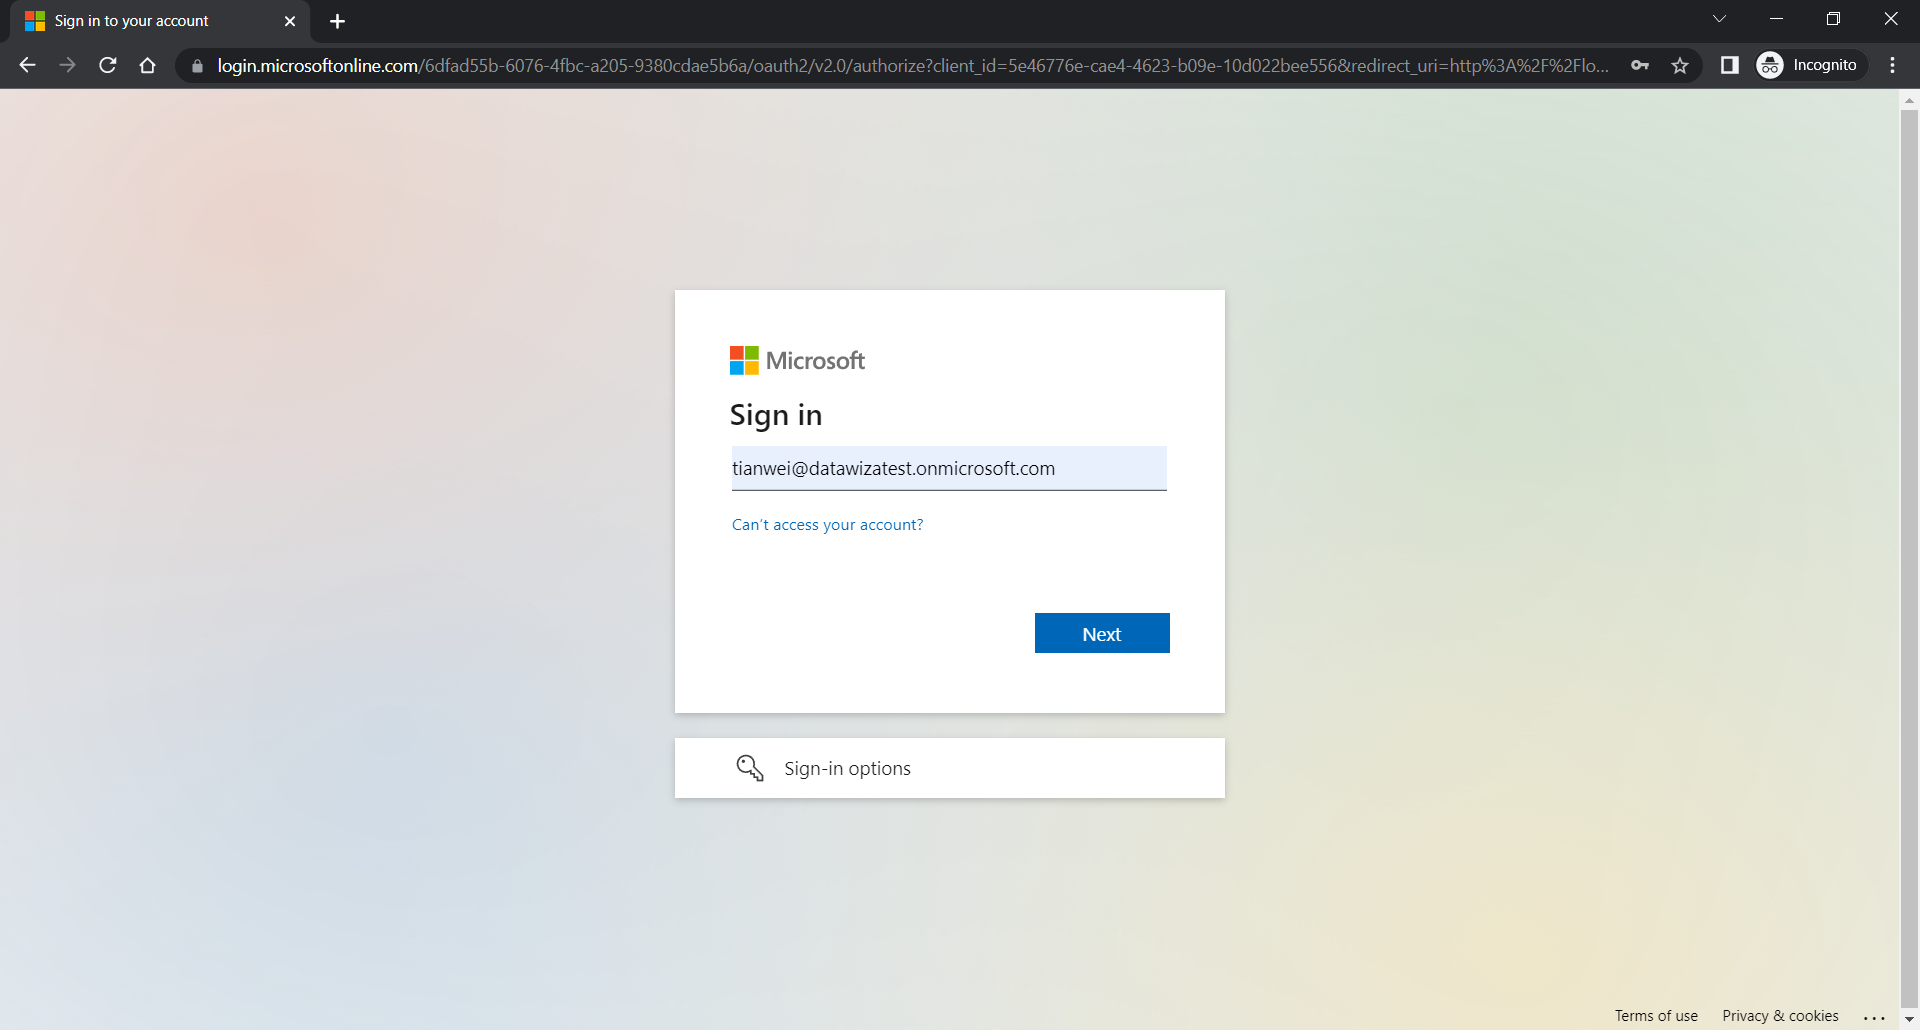
After entering the credentials, you should be able to login successfully and see the homepage of the SaaSPortal. 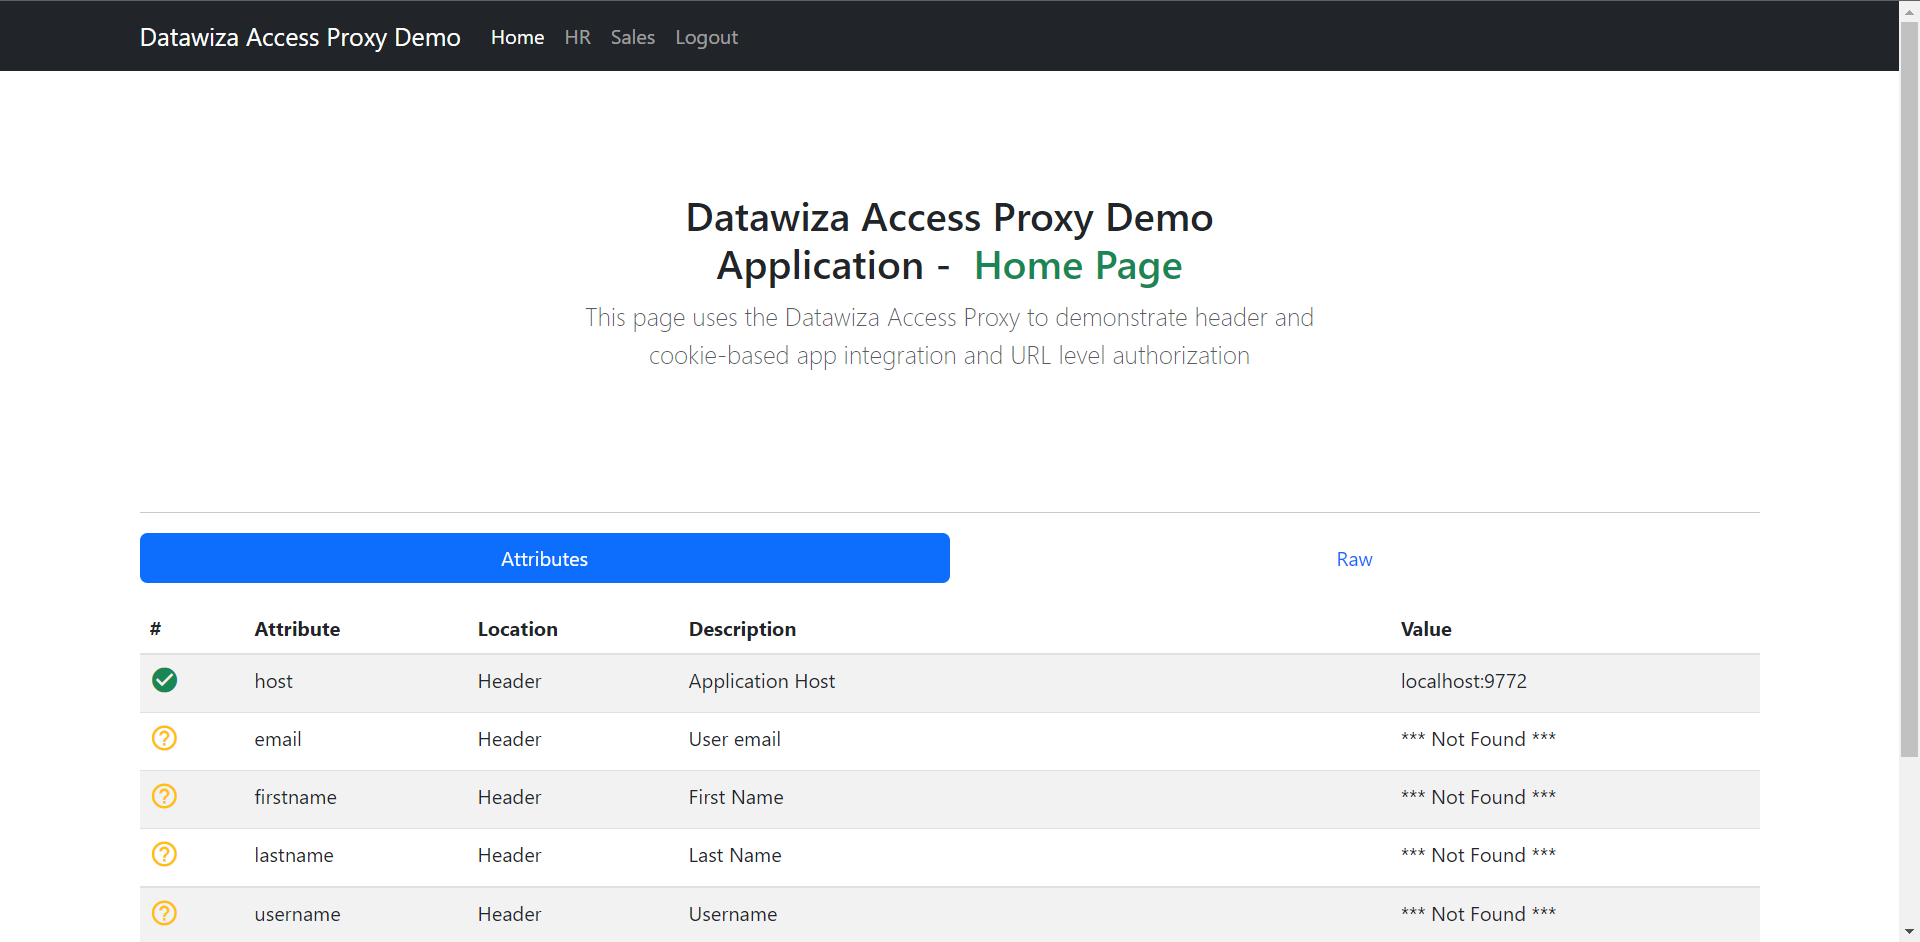
Now you can click the logout button and try to log in using OKTA. This time you input globex on the organization domain. After clicking the continue button, it will redirect you to Okta to login. 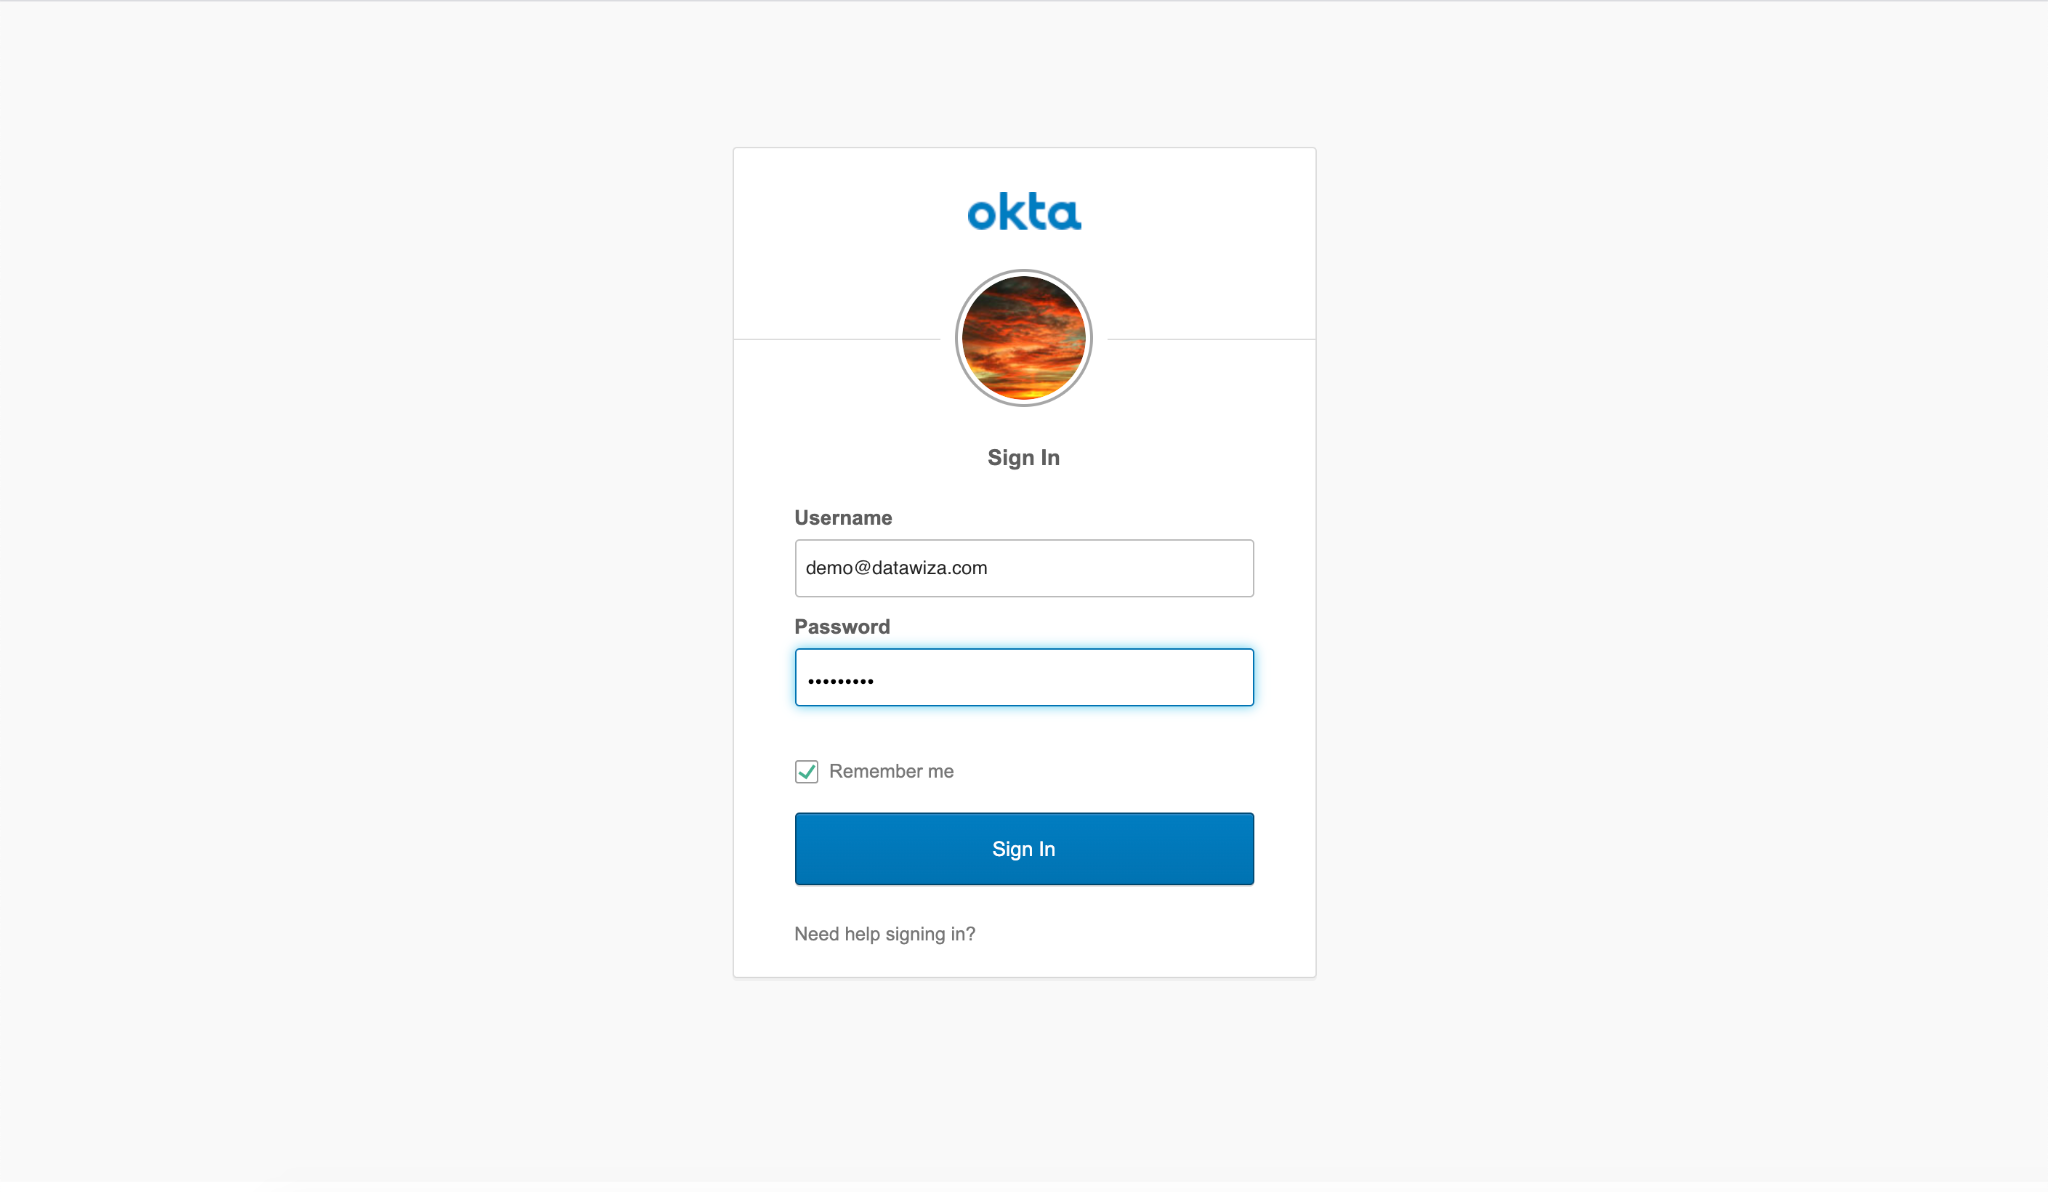
After entering the credentials, you should be able to login successfully and see the homepage of the SaaSPortal as well.
(Optional) Part VI: Pass User Attributes
The DAP gets user attributes from IdP and can pass the user attributes to the application via header or cookie.
Please follow the instructions of Pass User Attributes to pass the user attributes to the SaaSPortal, which is expecting:
- firstname
- lastname
If you want to get user's groups, you need to add groups in custom claim. You can refer to Add Claims in ID Token for Microsoft Entra ID and Create Claims in OKTA for more details.
After successfully configuring the user attributes and adding groups in Okta claim and the DCMC configuration, you should see the green check sign for each of the user attributes as follows. 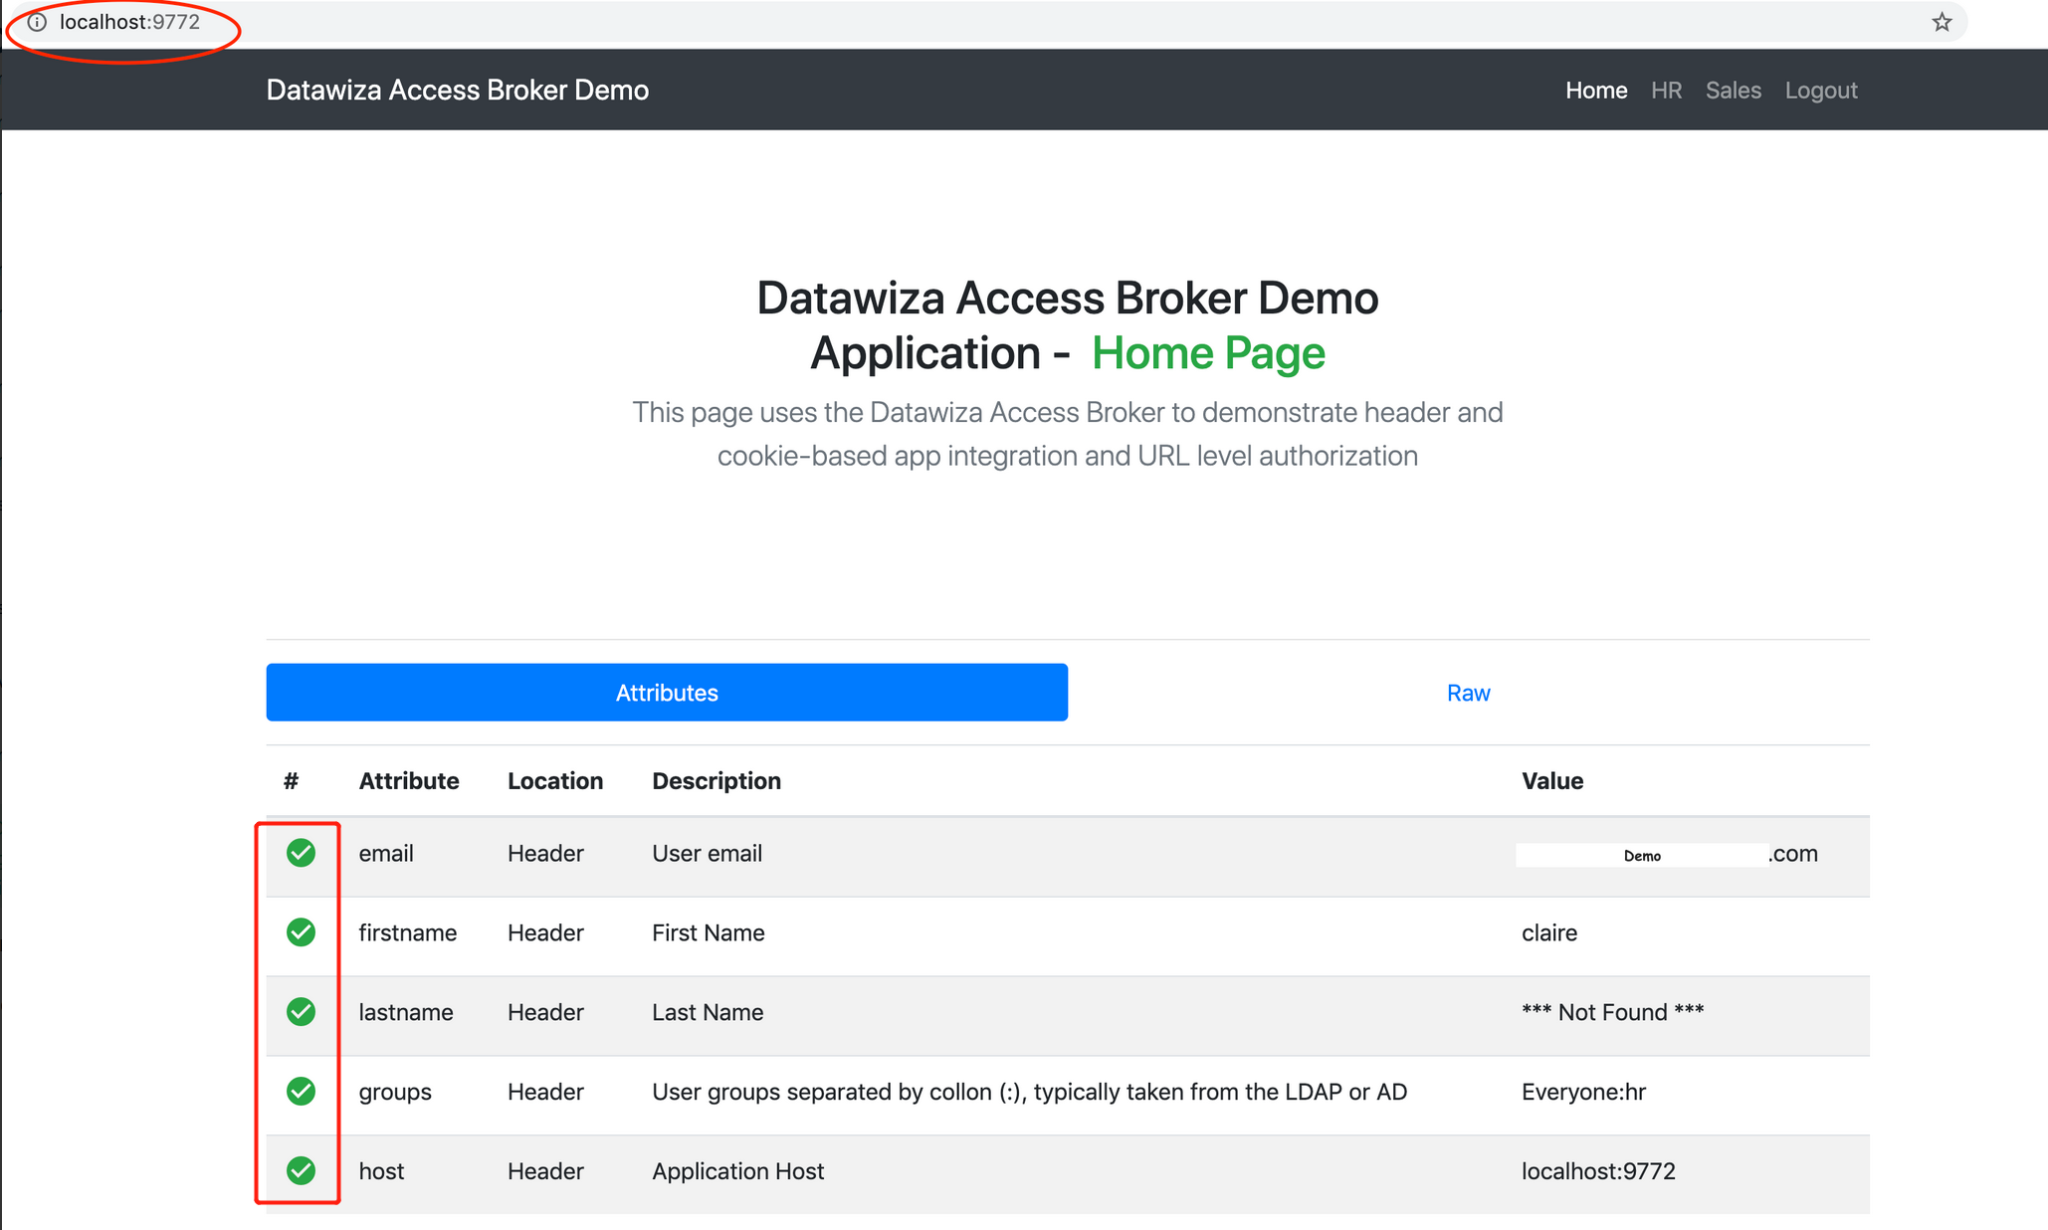
Conclusion
In this tutorial, you learned how to use Datawiza to configure B2B SSO logins for a SaaS app using OKTA and Microsoft Entra ID as the Identity Providers.
This is only a small example of what Datawiza can do. See Datawiza's online docs or official website for more information. Start a free trial today by signing up here!
