One Click Integration With Microsoft Entra ID (Azure AD)
Create the deployment with Microsoft Entra ID (Azure Active Directory (AD)) by One Click Integration
Preview
As we mentioned in Secure a Web App Using Microsoft Entra ID, we need to register an OIDC application in Azure management portal and get the tenant id, client id and client secret for this application. What's more, we offer a more convenient way to integrate Microsoft Entra ID with Datawiza Cloud Management Console (DCMC) which can create a new application on your behalf in your Azure tenant. In this tutorial, we will create a deployment with One Click Integration With Microsoft Entra ID.
Create Application on DCMC
- Get Started
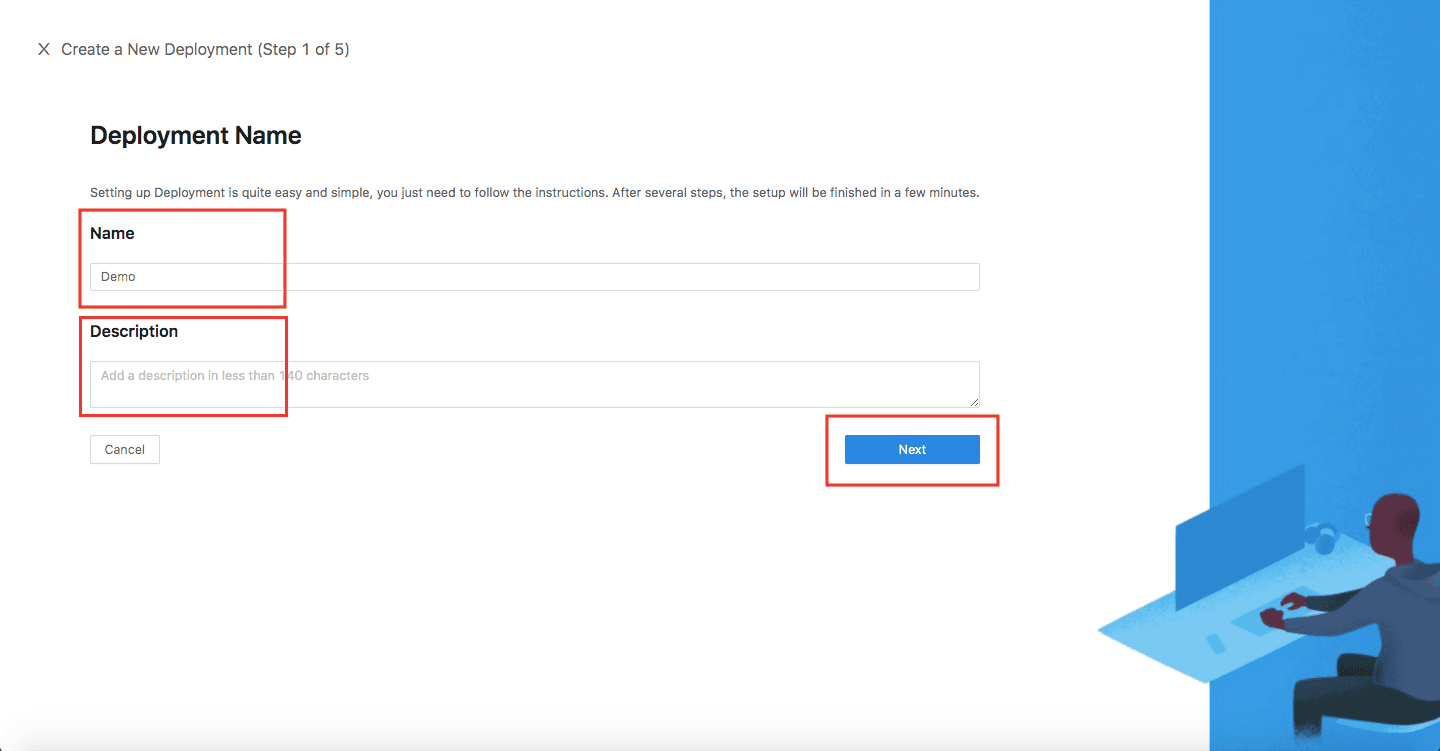
- Create Deployment
- Add Application Configure your application with the following values:
App Type:WebName:one-click-appApplication URL:http://localhost:9772Listen Port:9772Upstream Servers:Dummy Application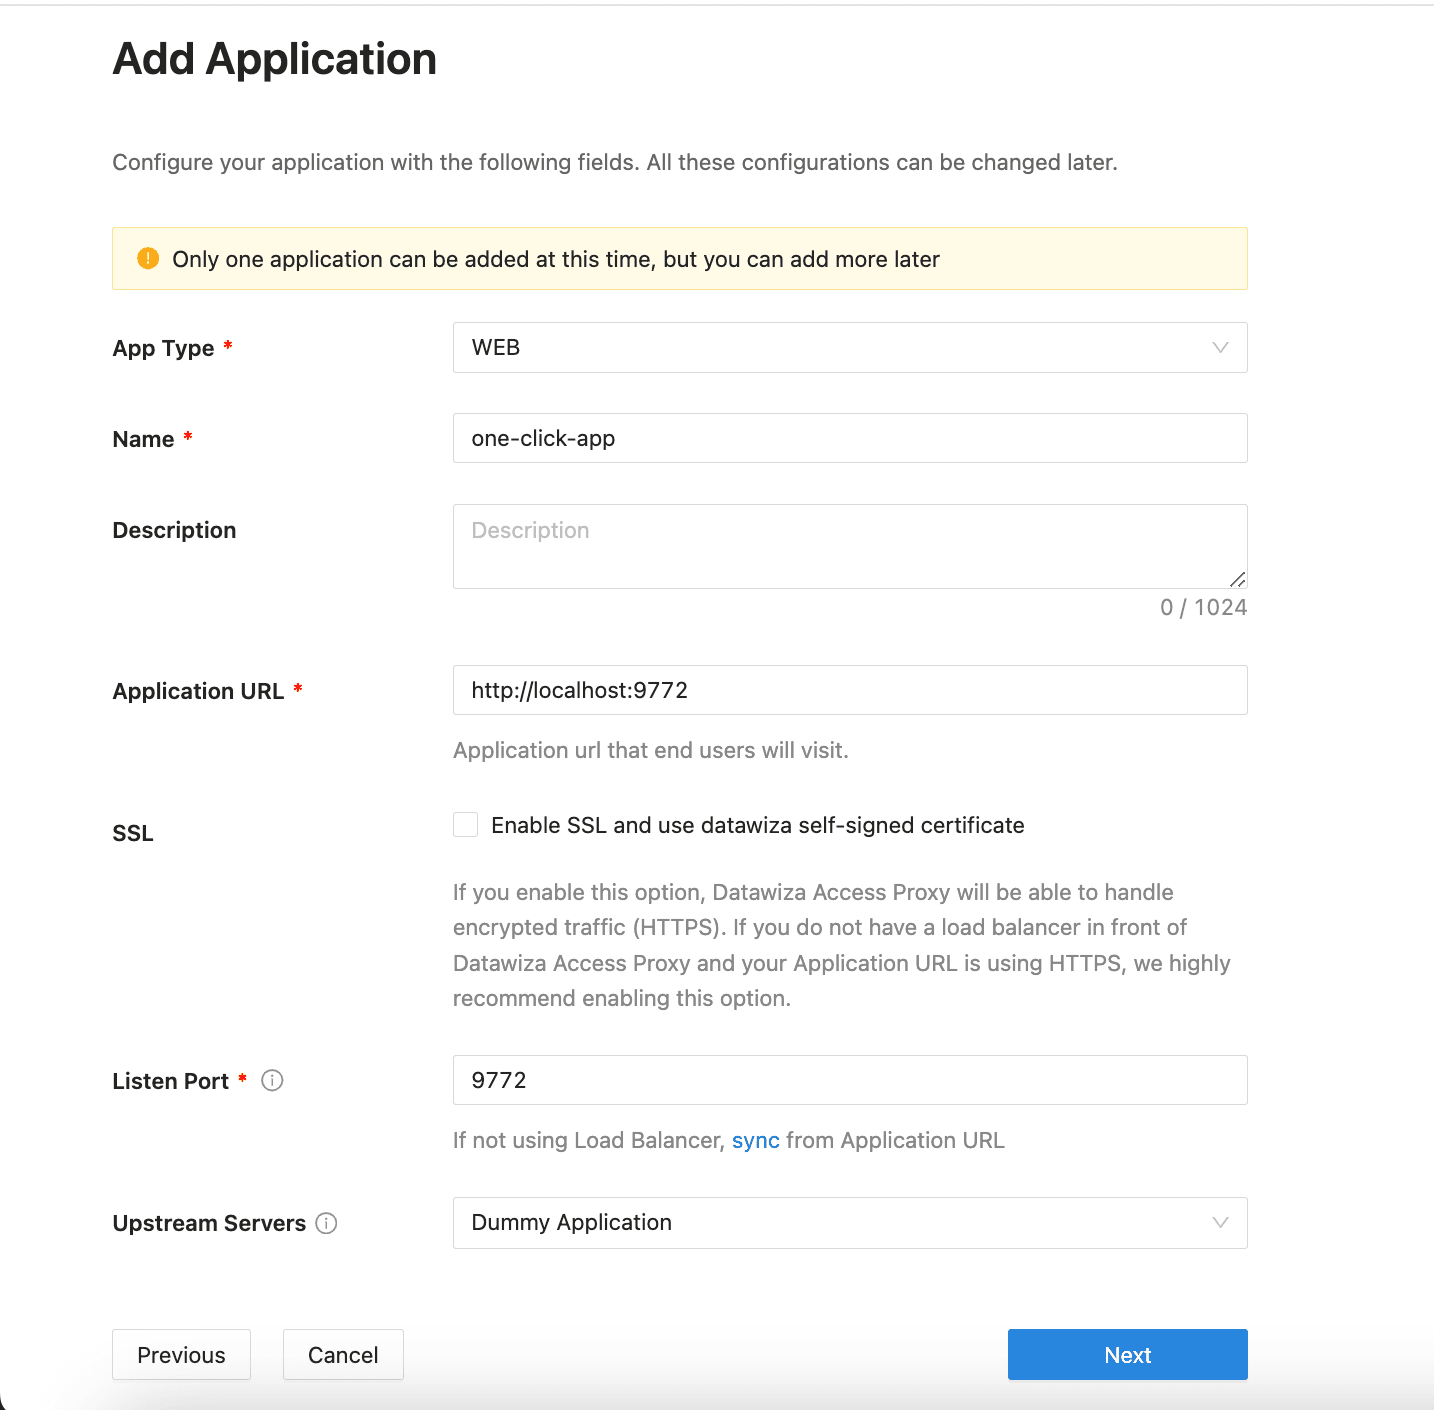
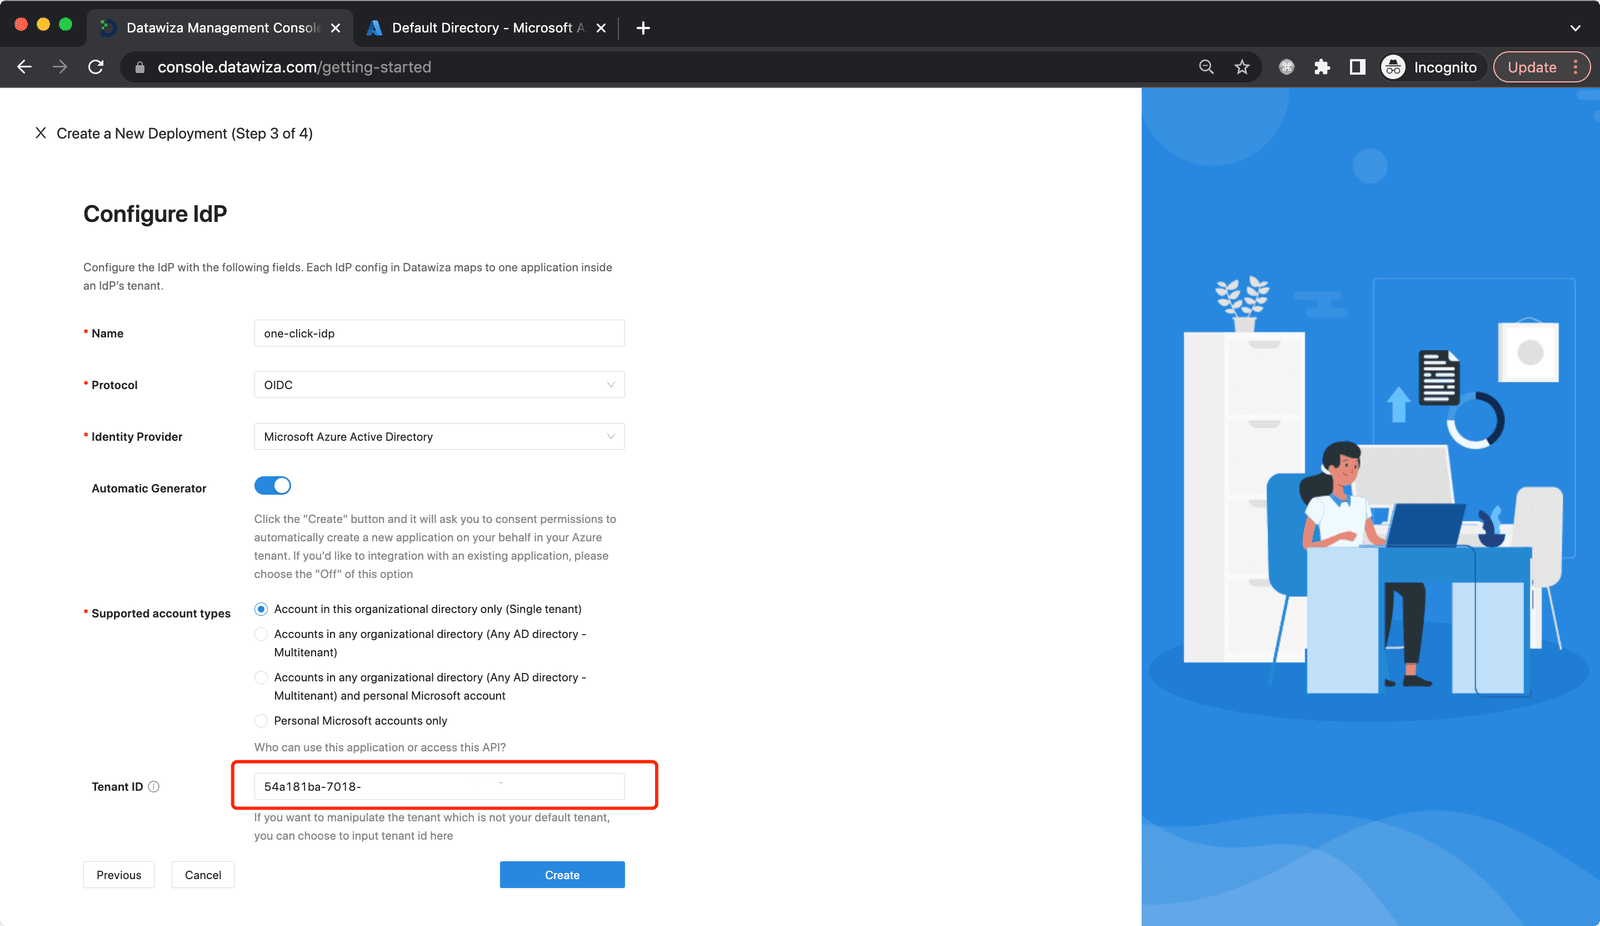
- Configure IdP Input the
Name. Select theOIDCas the Protocol andMicrosoft Entra IDas Identity Provider. Keep theAutomatic Generatoroption enable, selectSupported account typesbased on who can use this application, then click theCreate: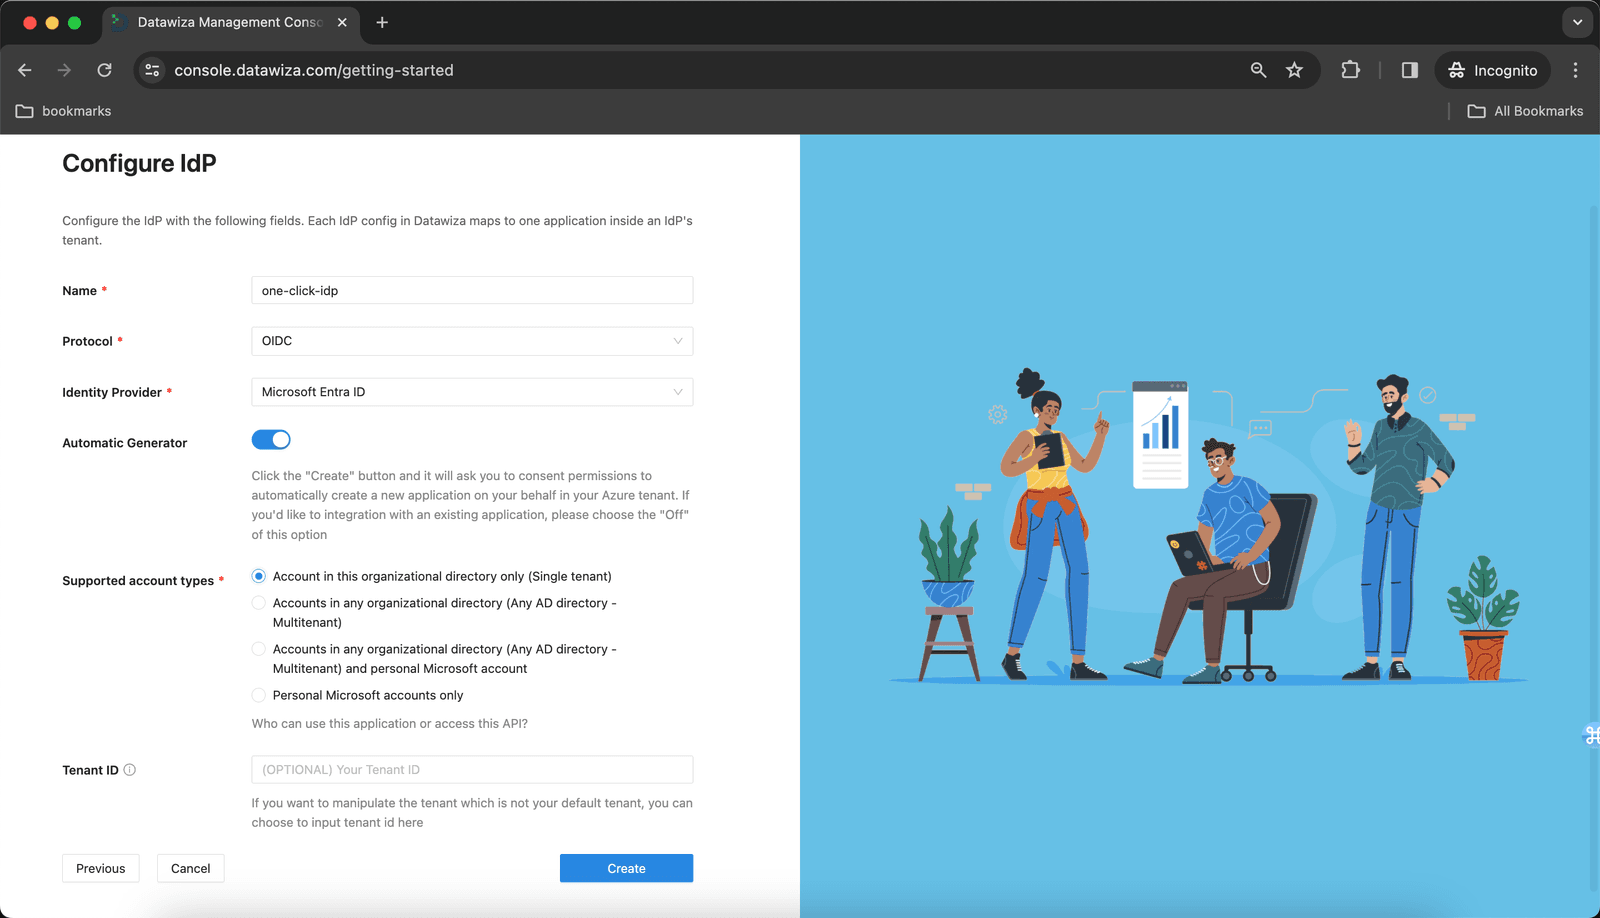
Note that the one-click function will create a new application on your behalf in your Azure tenant if you log in to the DCMC with an Azure account.
- If you log in to the DCMC with any other social account or email, you need to log in to Azure after click
Create. - Meanwhile, we provide the optional configuration called
Tenant ID. If you want to create the Microsoft Entra ID application in a specified tenant, you can enter the tenant ID here.
Accept the permissions:  Note that the consent needs admin privilege:
 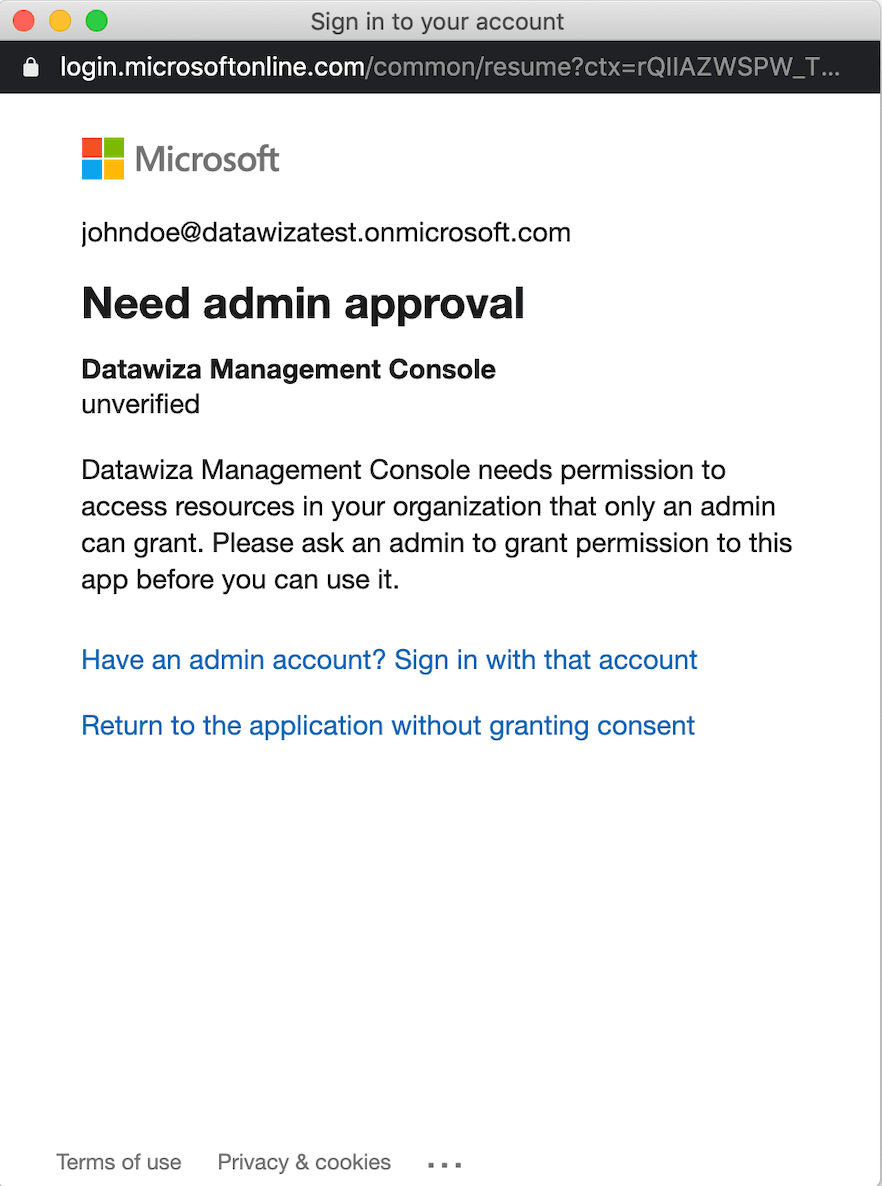 Then, the application will be created in Microsoft Entra ID management portal and needed IdP values will be generated automatically. You can click the
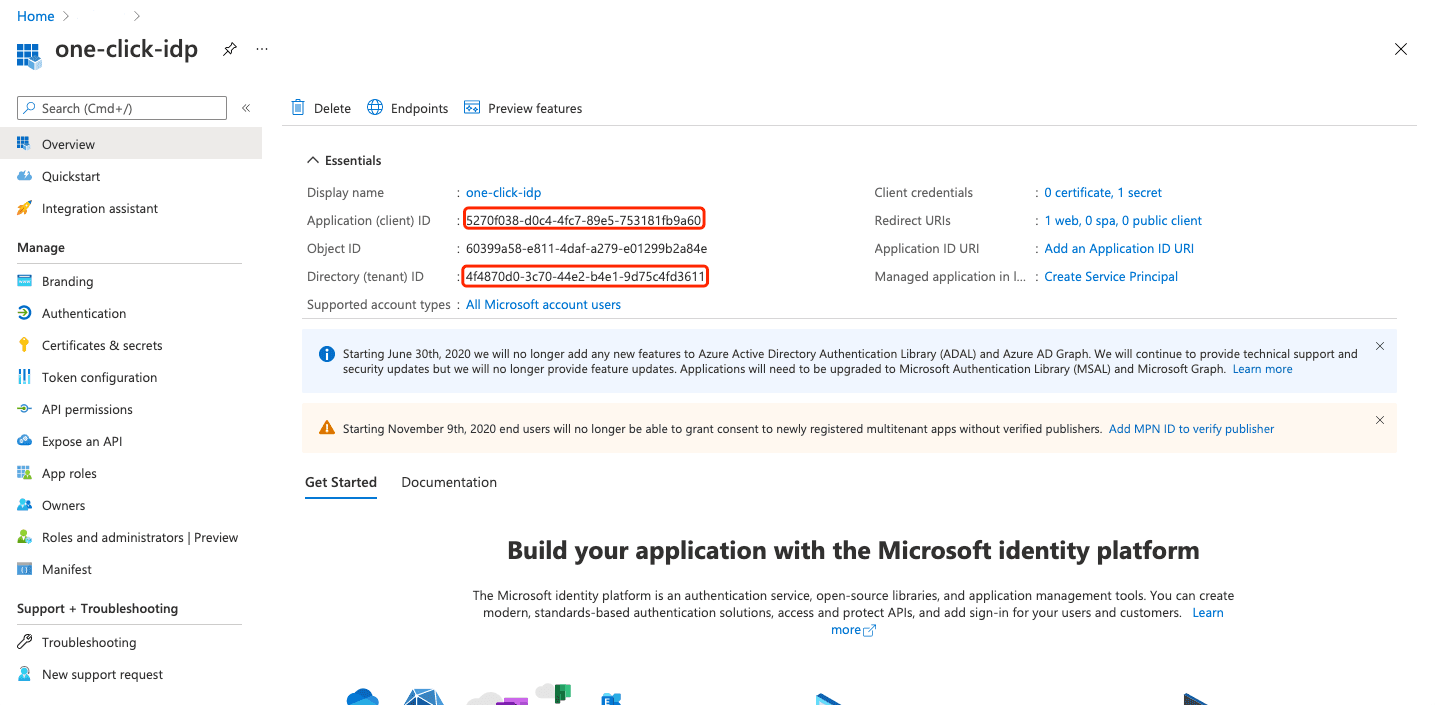
 Azure portal to check the application in Microsoft Entra ID management portal. 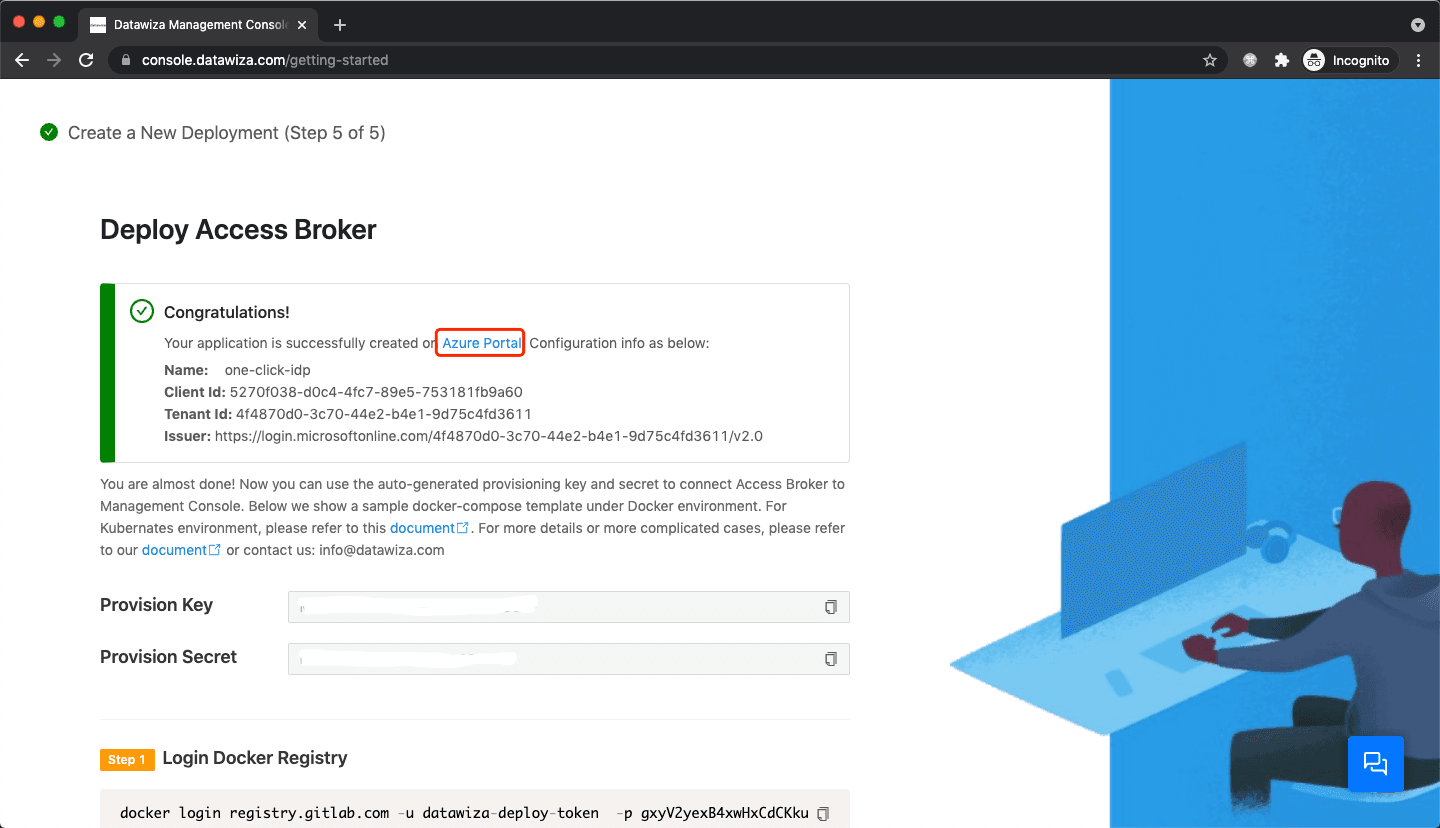
 NOTE: if you are using a Microsoft personal account, the message will be shown after clicking
 Create: 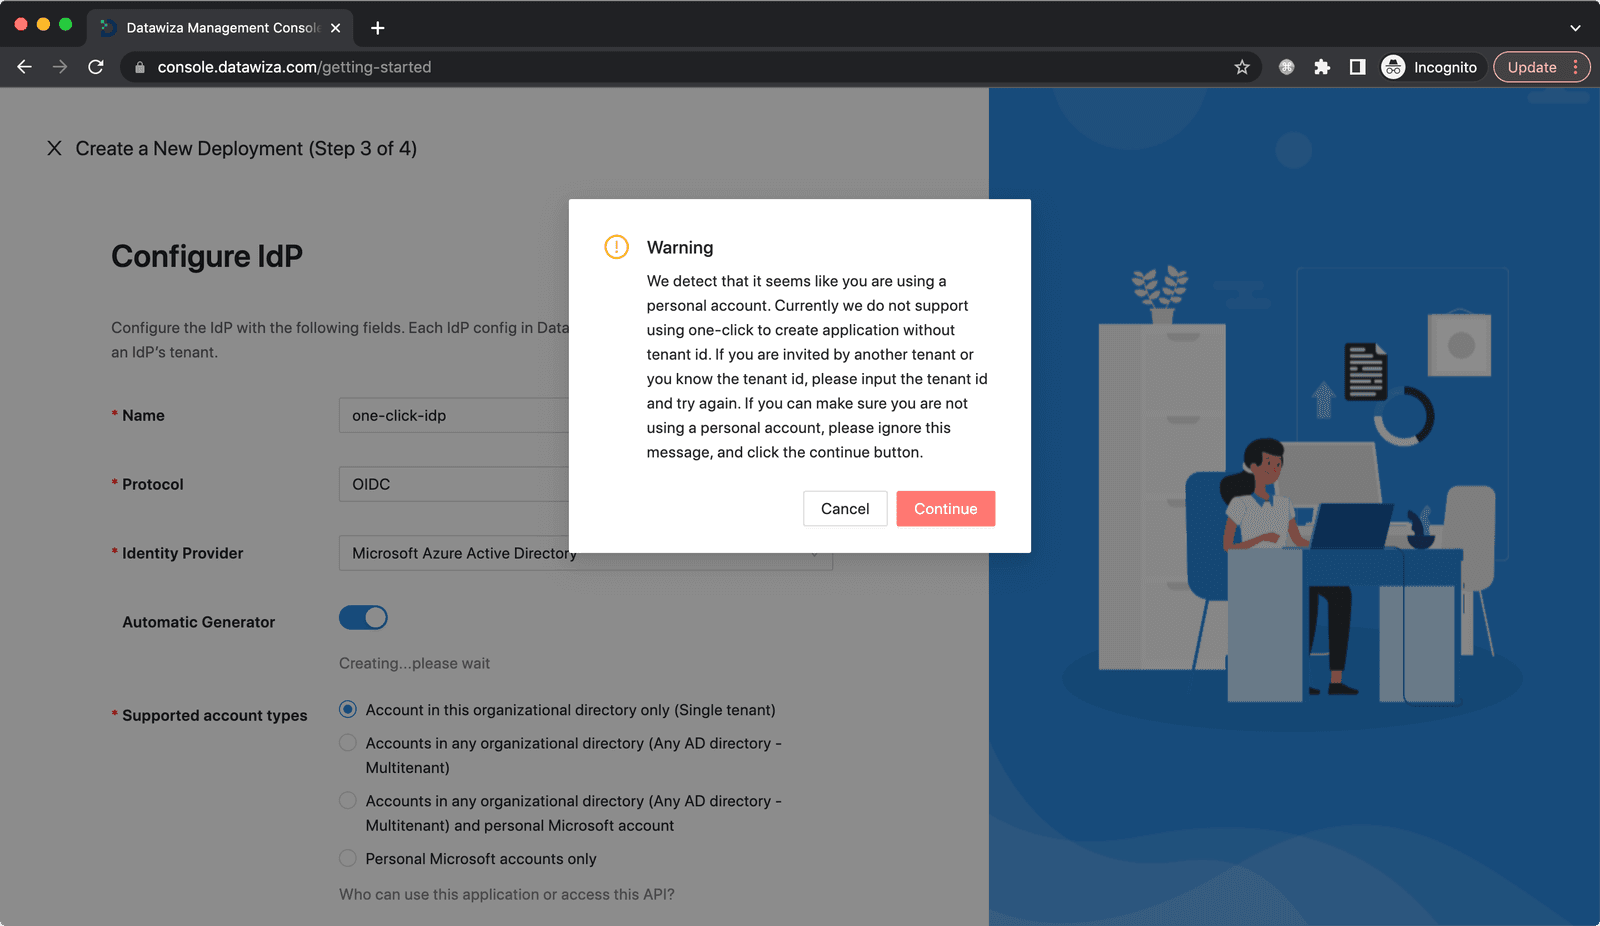 You can go to Azure portal of your personal account. Copy the
 Tenant ID and paste it in Configure IdP page. Then click Create: 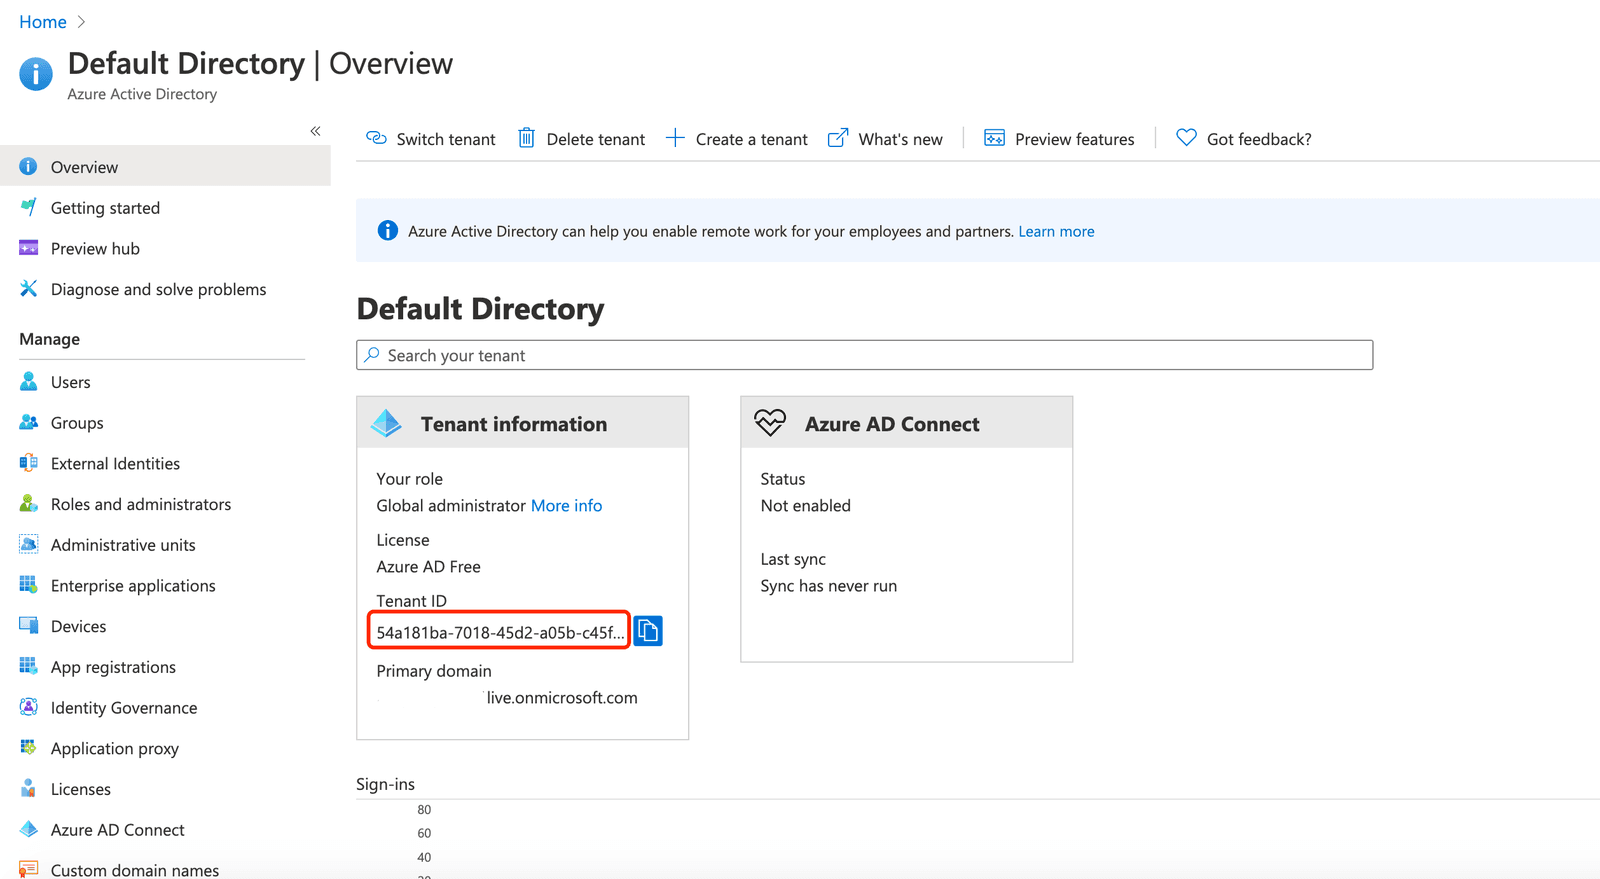
 Accept the permissions:
 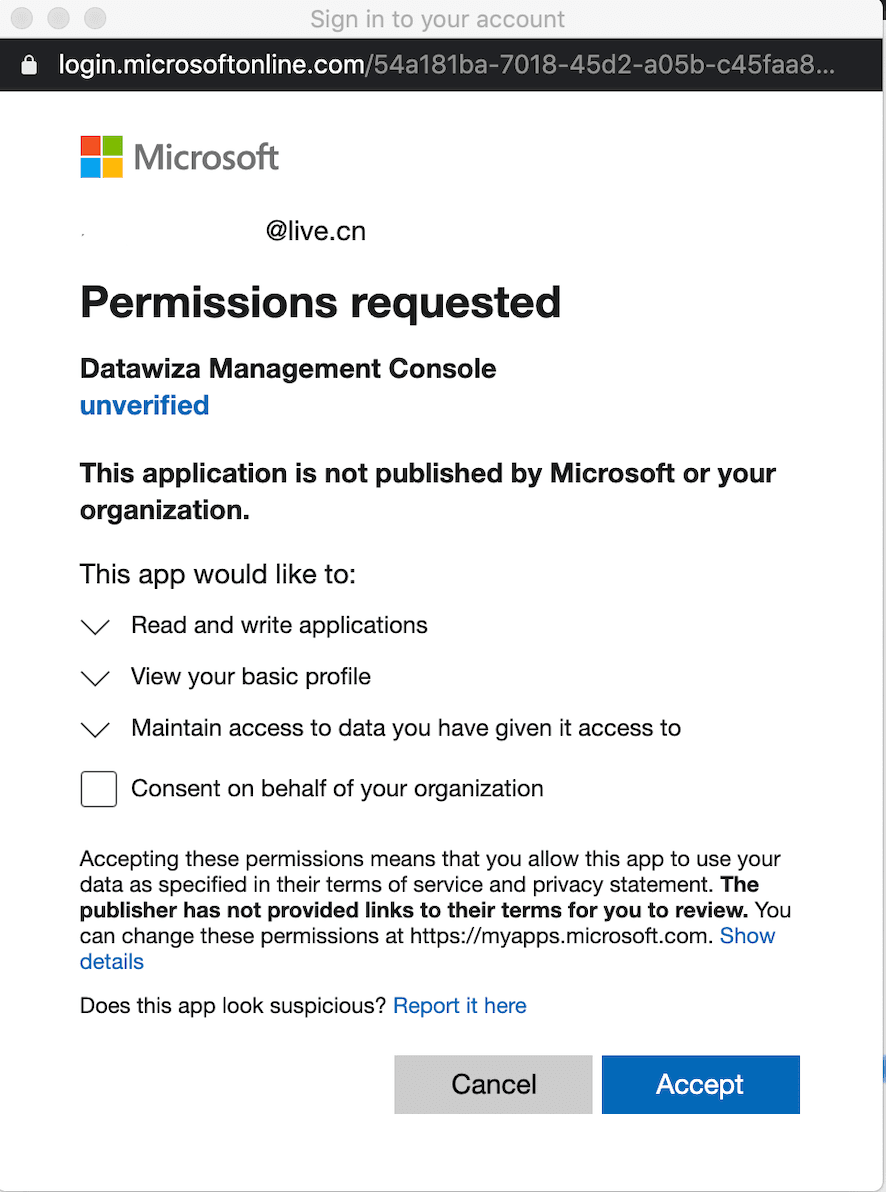 Then, the application will be created in Microsoft Entra ID management portal and needed IdP values will be generated automatically. You can click the
 Azure portal to check the application in Microsoft Entra ID management portal. 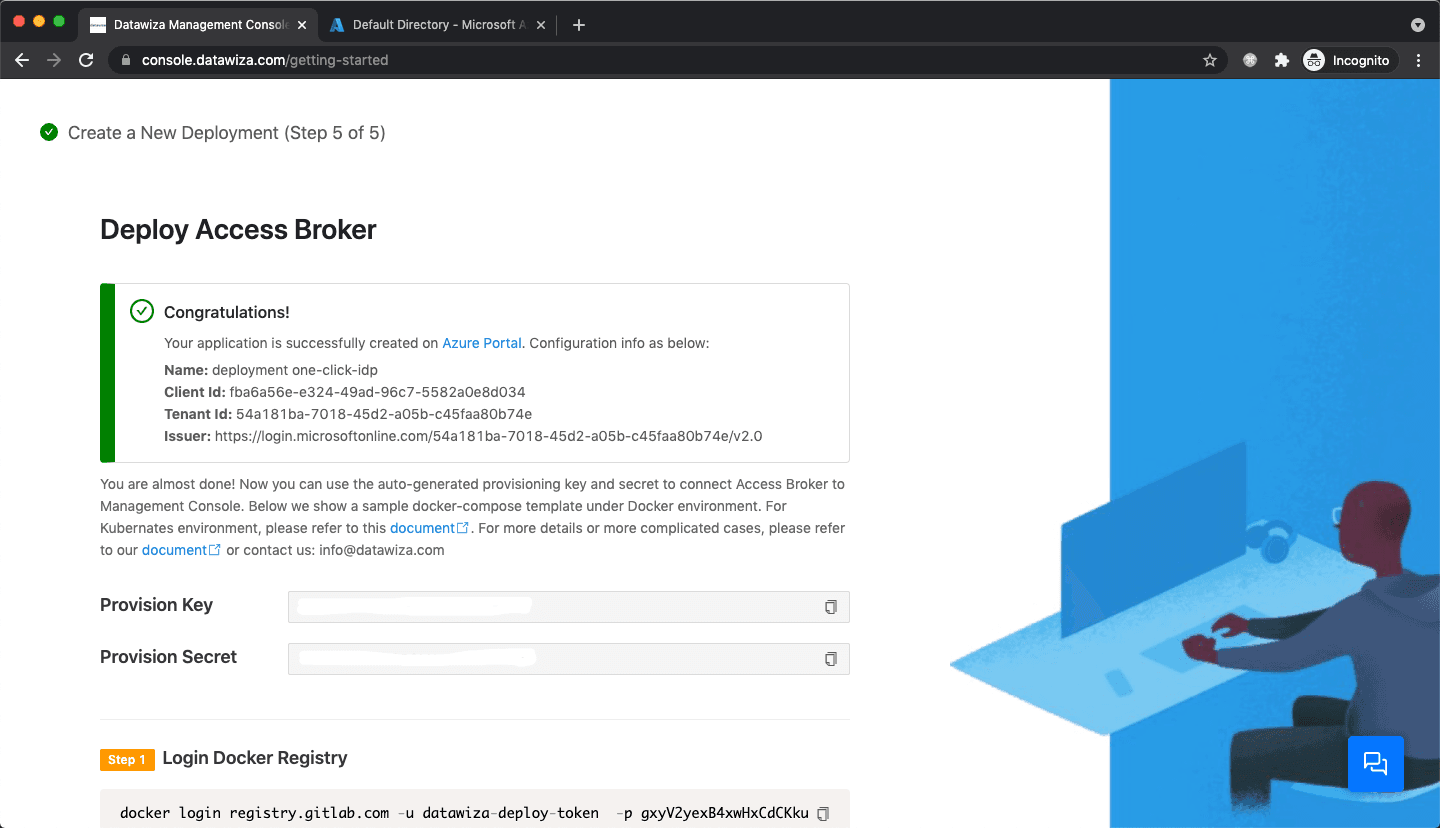
Note Down Provisioning Key and Secret Note down your
PROVISIONING_KEYandPROVISIONING_SECRET. We will need these values later when deploying the Datawiza Access Proxy (DAP).Deploy DAP With Your Application After you successfully complete the configuration on DCMC, you can refer to the Secure a Web App Using Microsoft Entra ID to deploy DAP With Your Application and for more configurations.