Keycloak
Keycloak Configuration
This session shows how to register a client on the Keycloak Server. When registering the client, we are getting the following four values that are needed for later configuration in Datawiza Cloud Management Console (DCMC):
- Keycloak Server The
Keycloak Serveris the Keycloak server address. Notice that we use theIP Addressinstead oflocalhostforKeycloak Serverwhile we start the Datawiza Access Proxy (DAP) with docker. For the author, it ishttp://172.16.181.1:8080. - Realm Name
- Client ID
- Client Secret
Prerequisite
We assume that you already have a Keycloak Server running on http://localhost:8080.
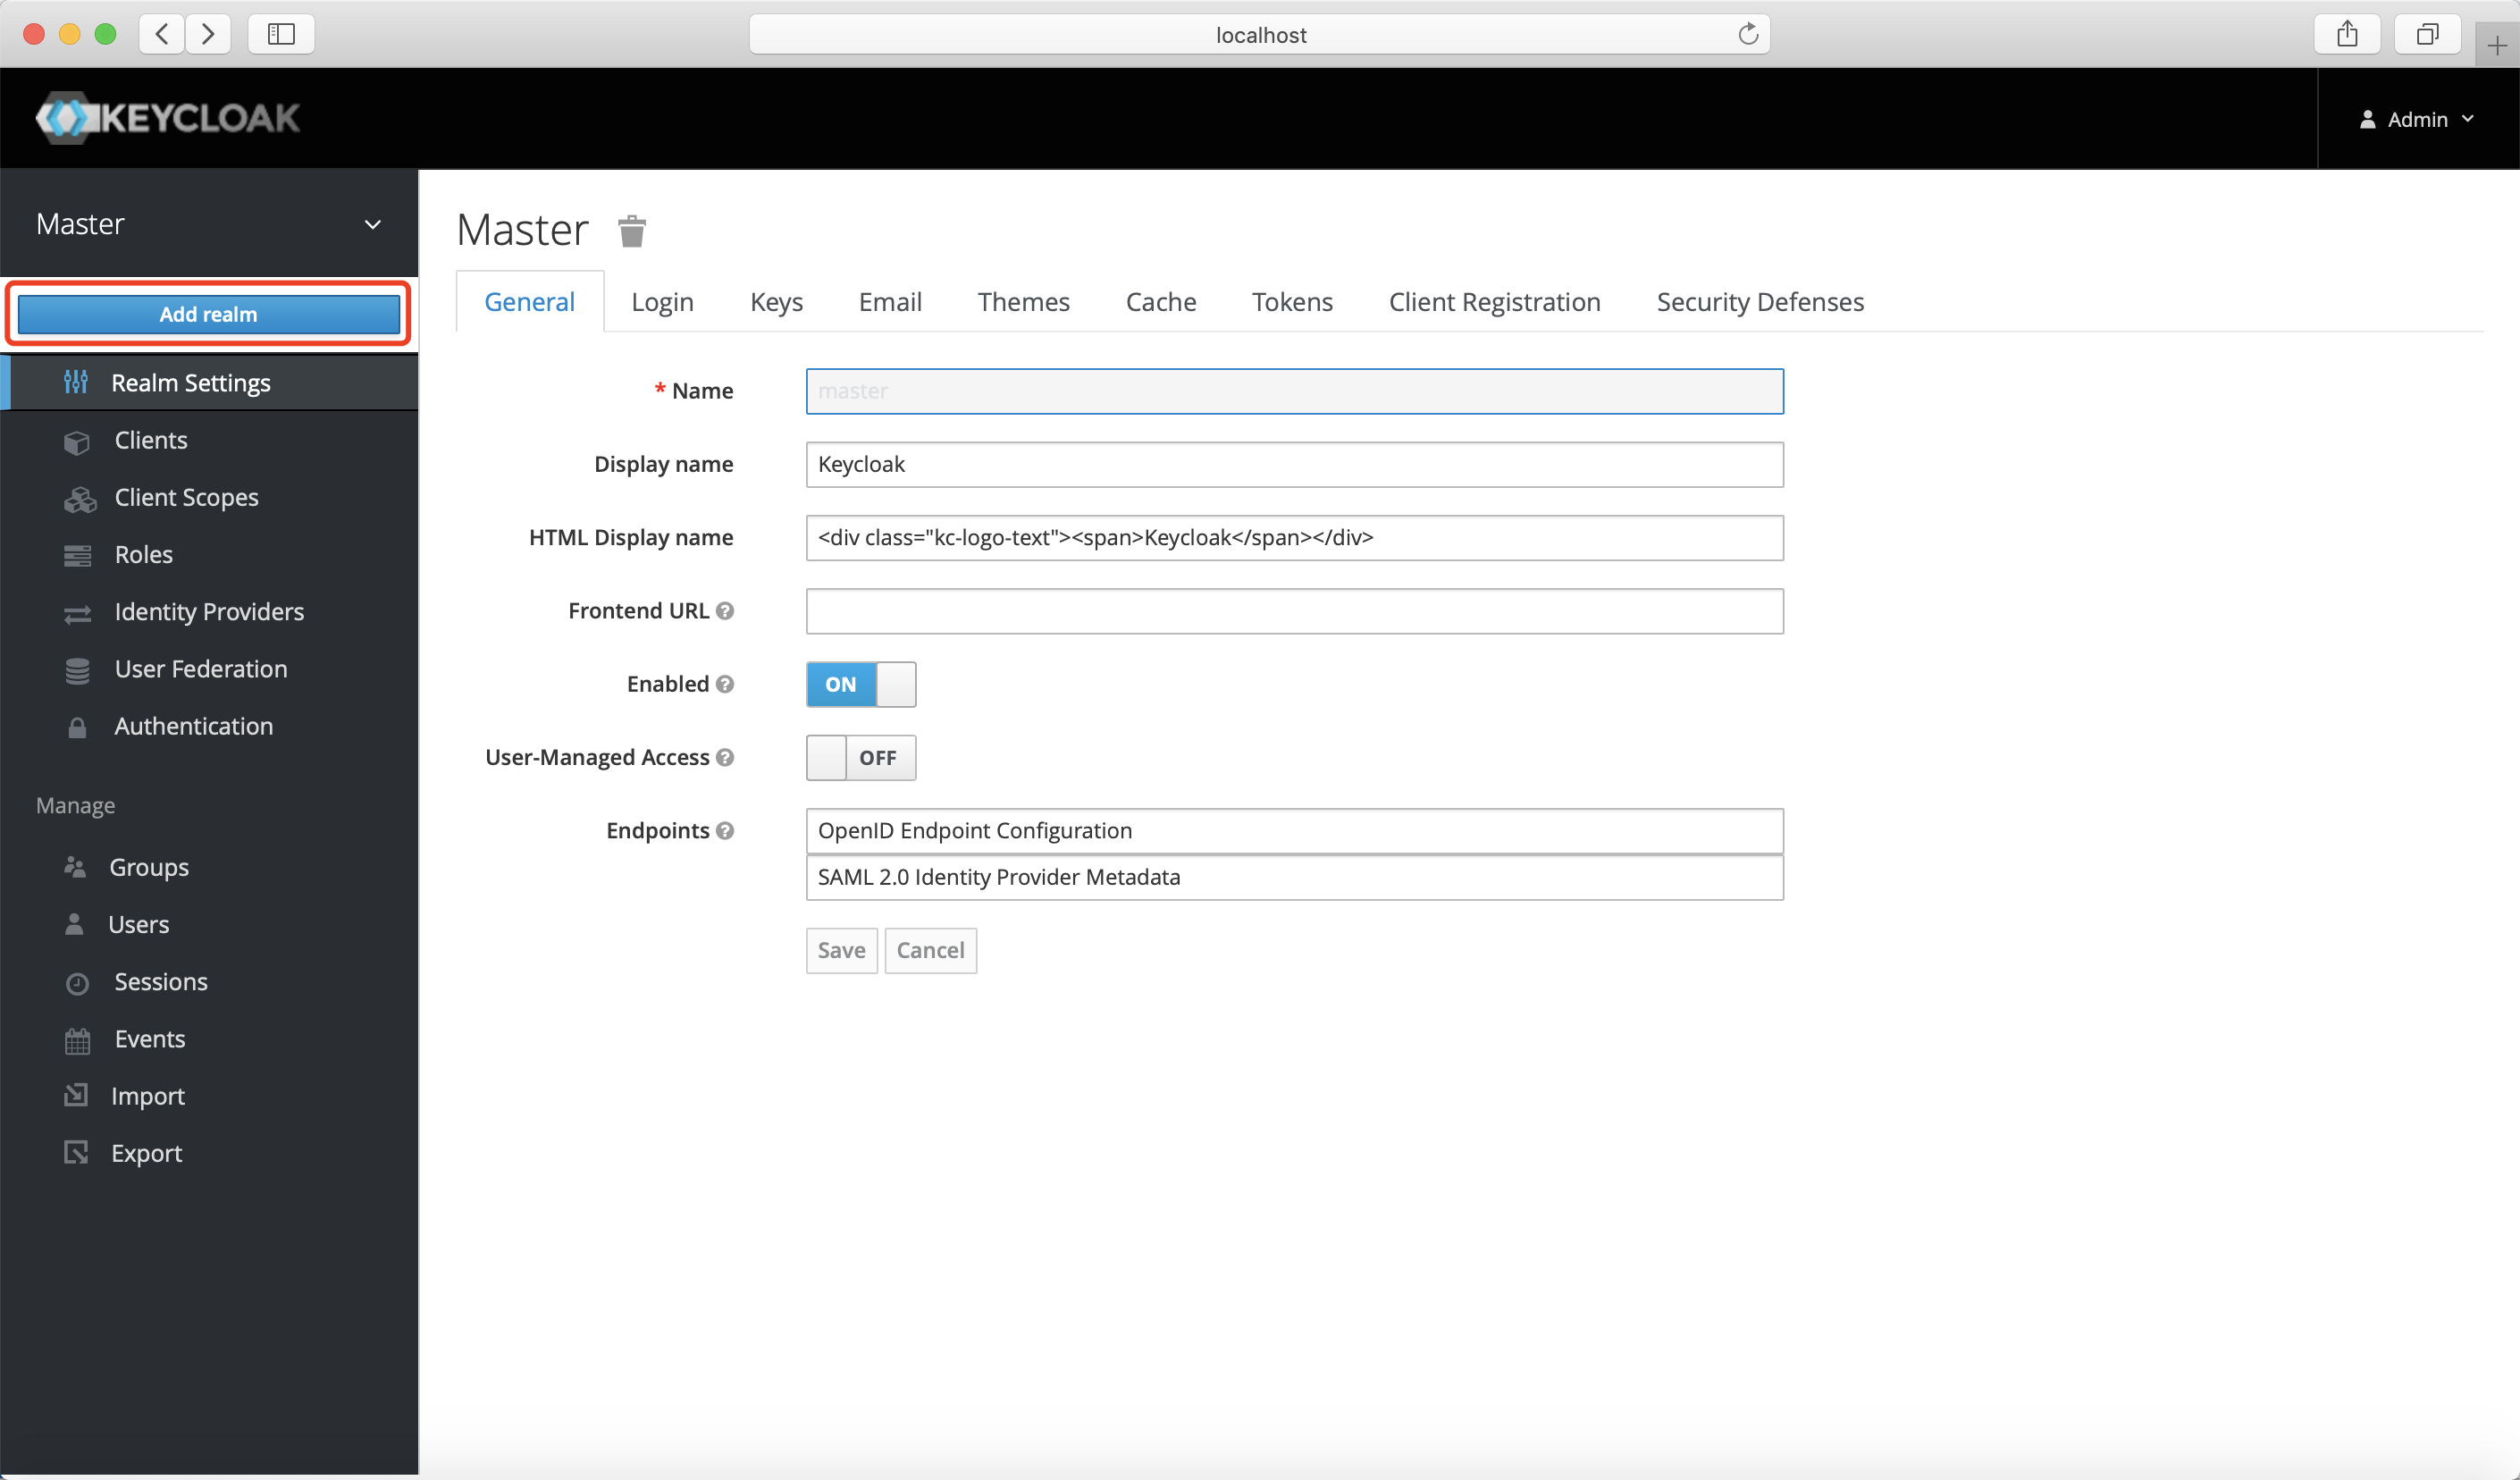
Add New realm
Create a new realm.
Enter the realm name, which is the
Realm Namewe need, and clickCreate.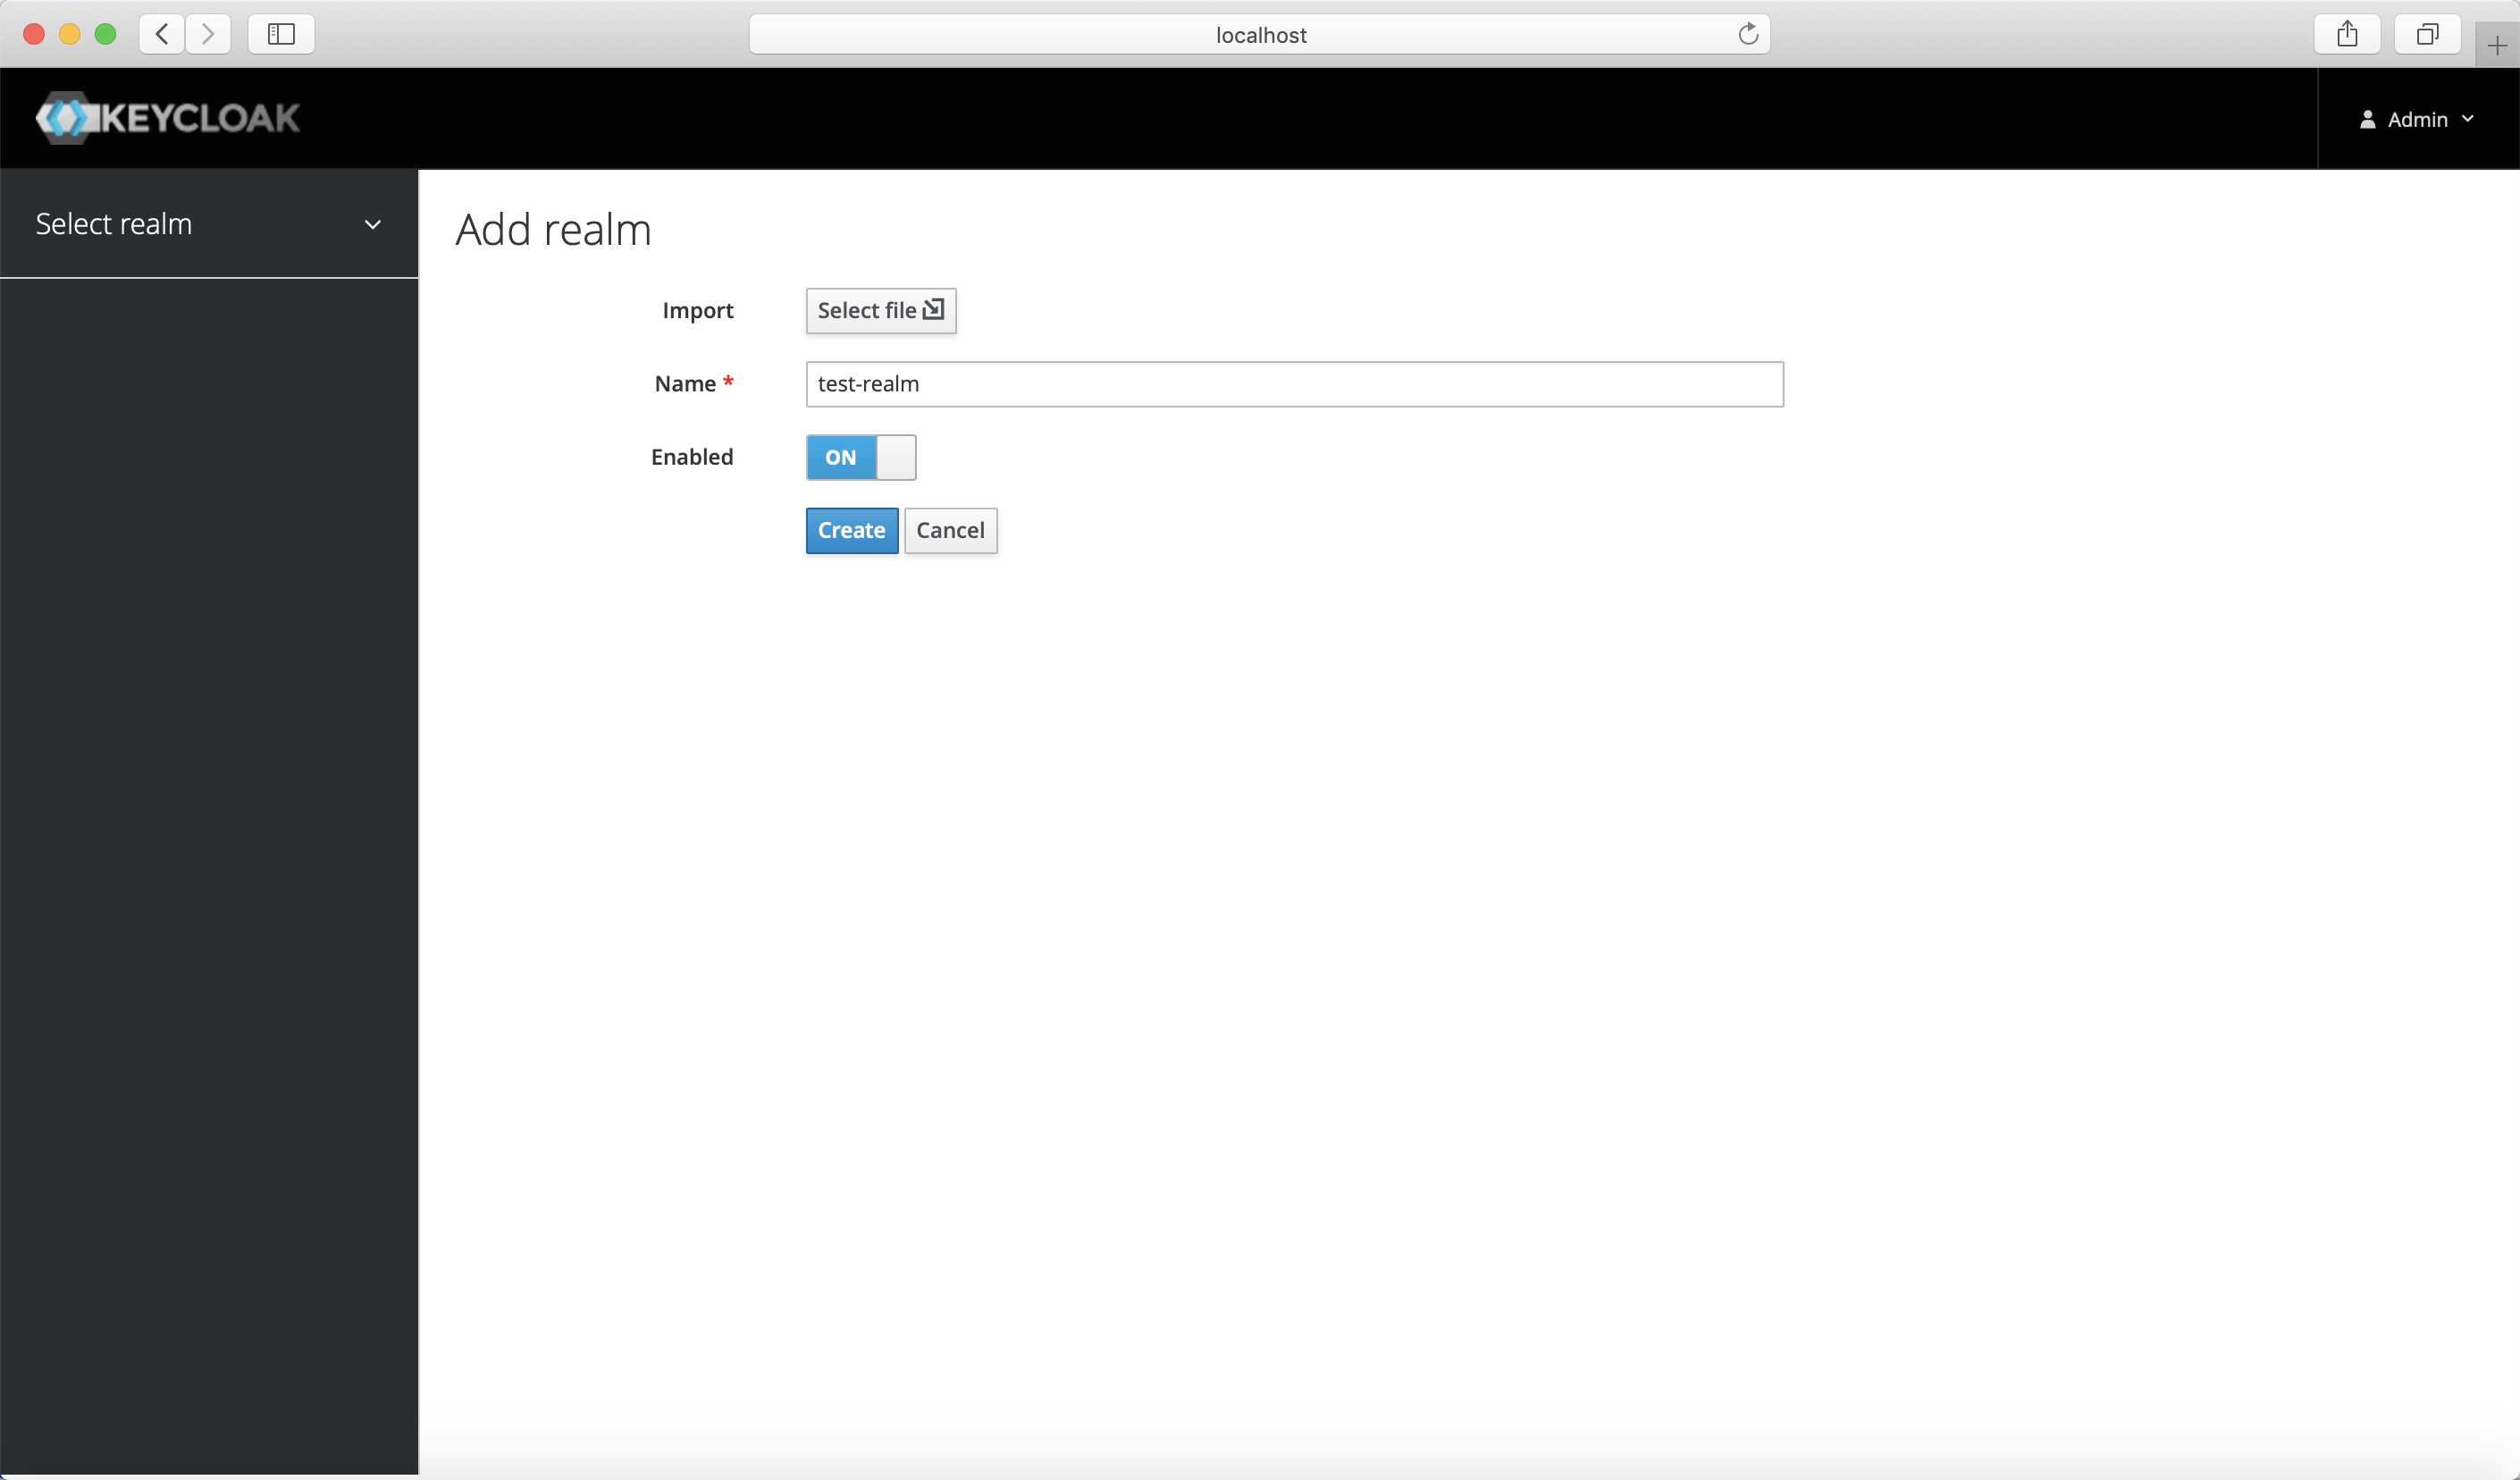
Create and Configure your Keycloak Client
Create a Client. Select
Clientstab and clickCreate: Enter the client name, which is the
 Client IDwe need, and clickSave.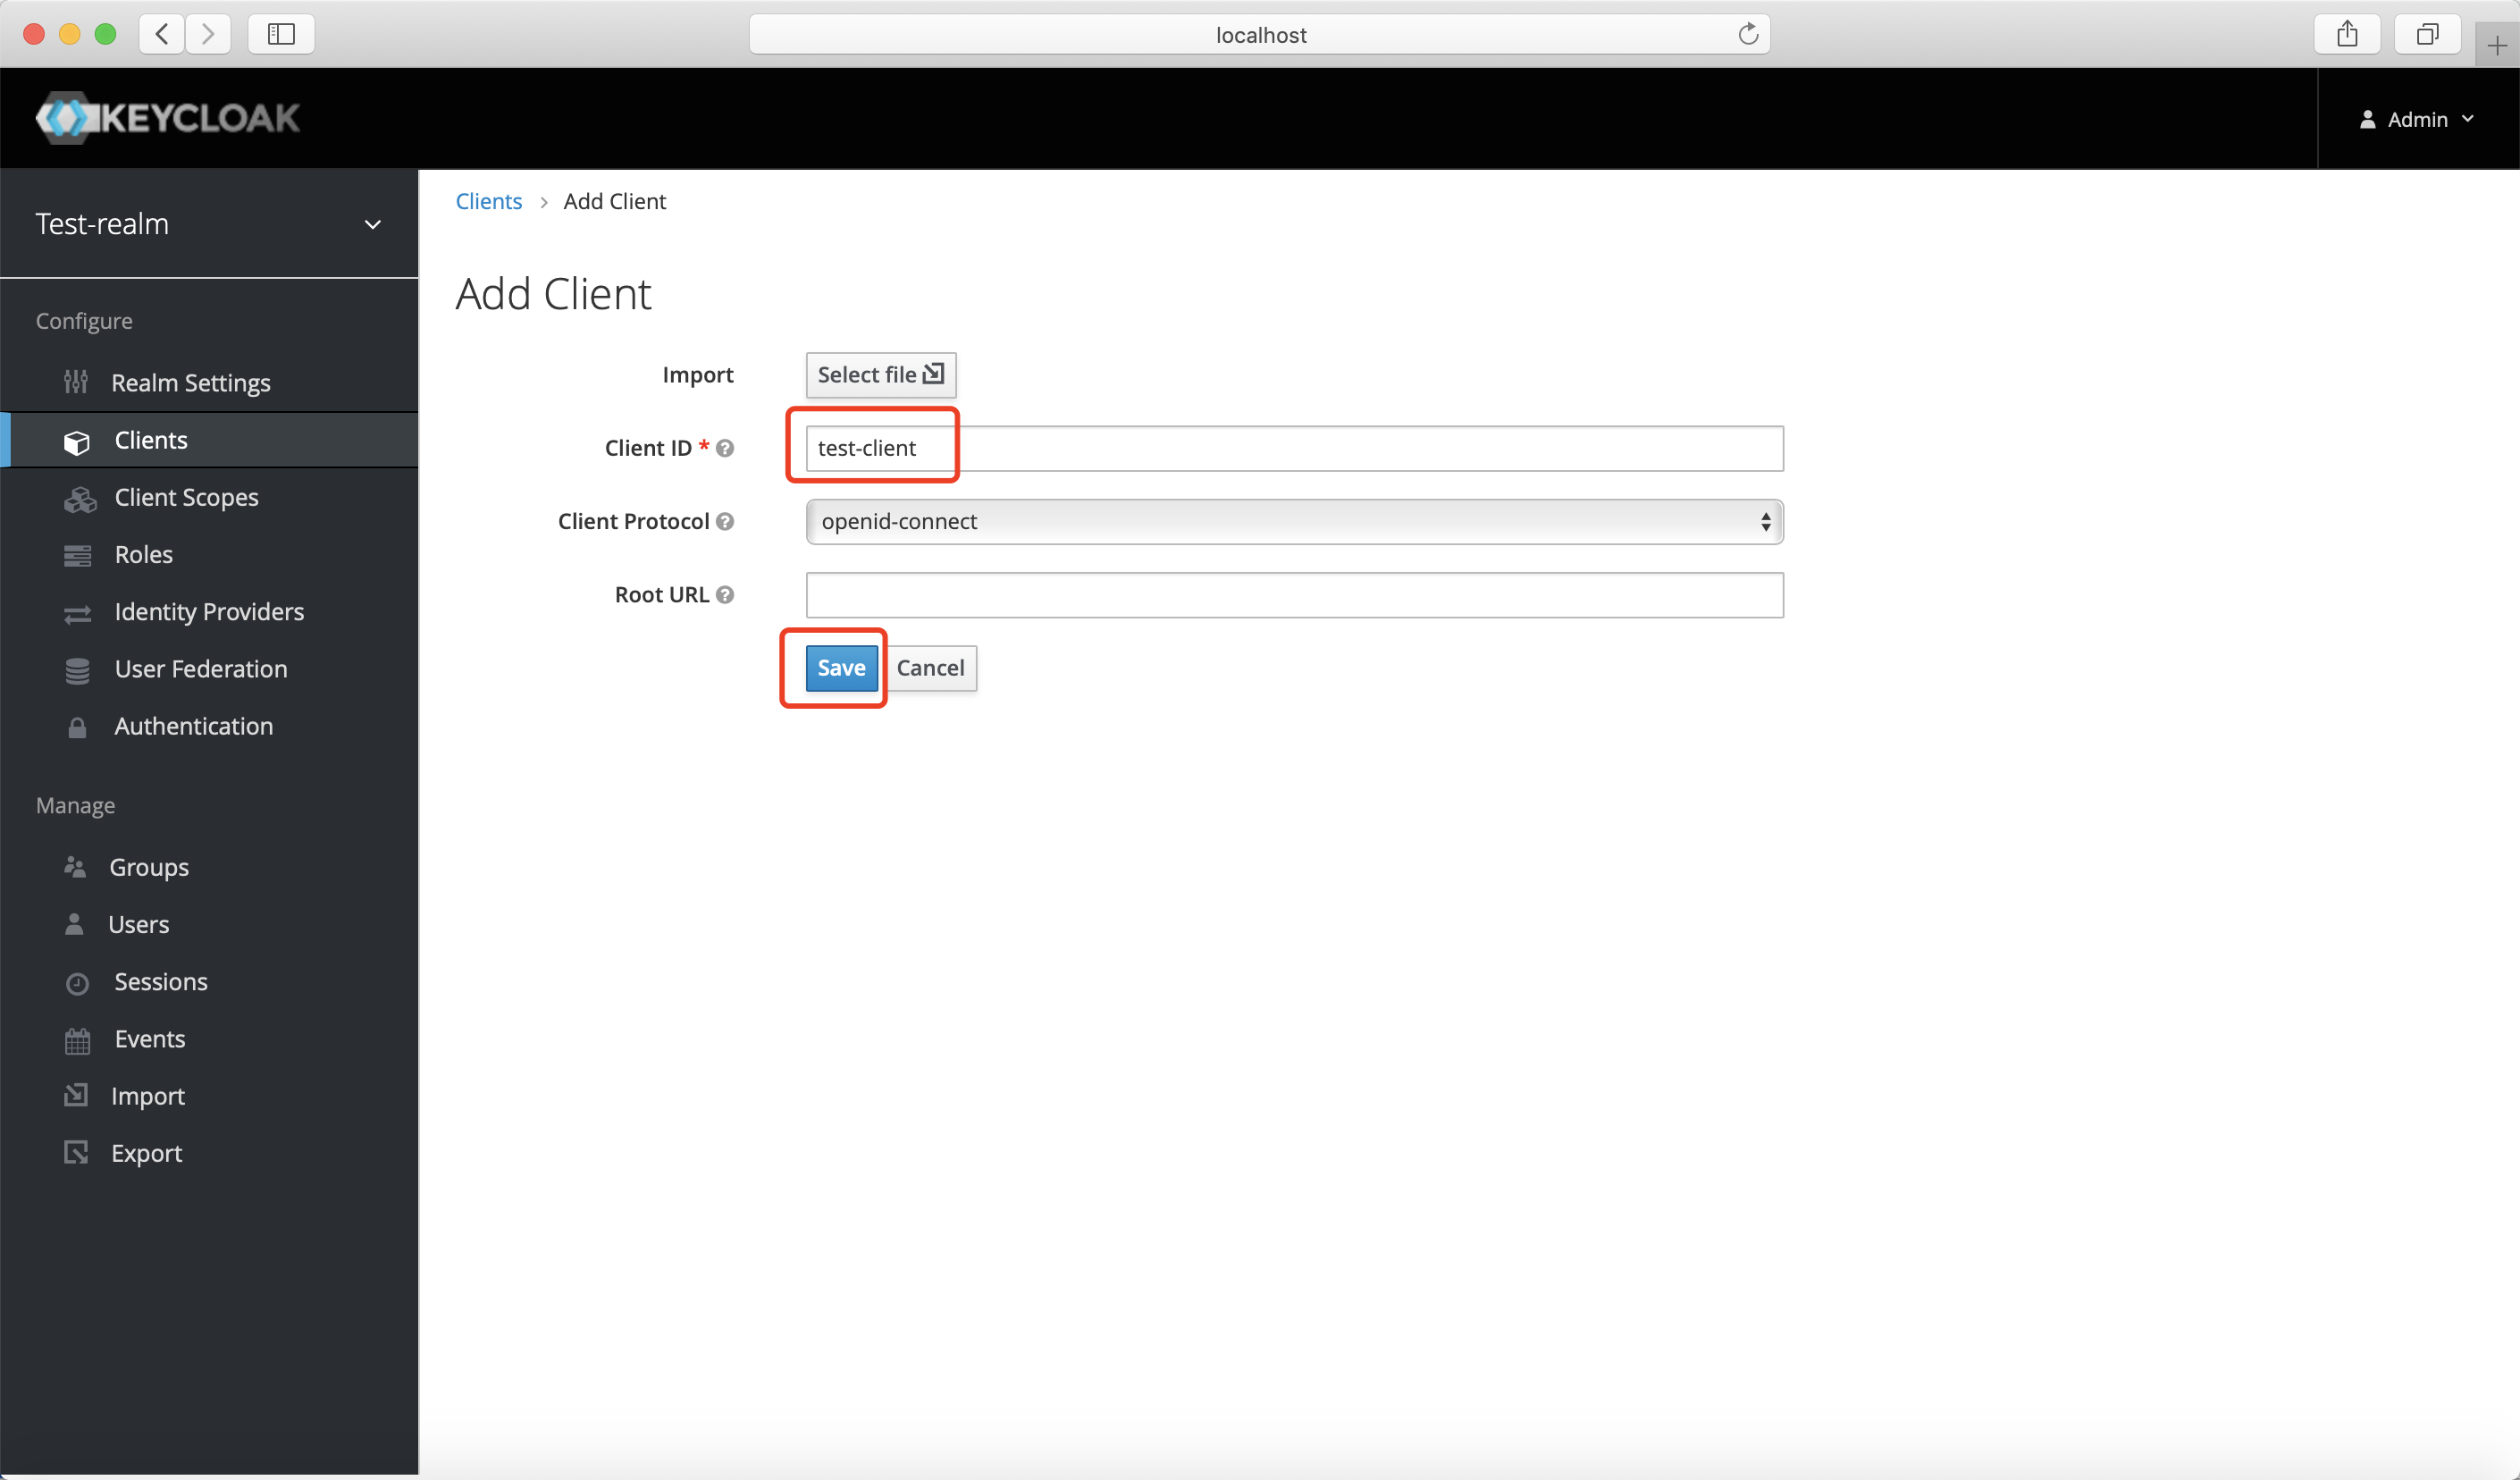
Configure the client. Select
confidentialinAccess Type: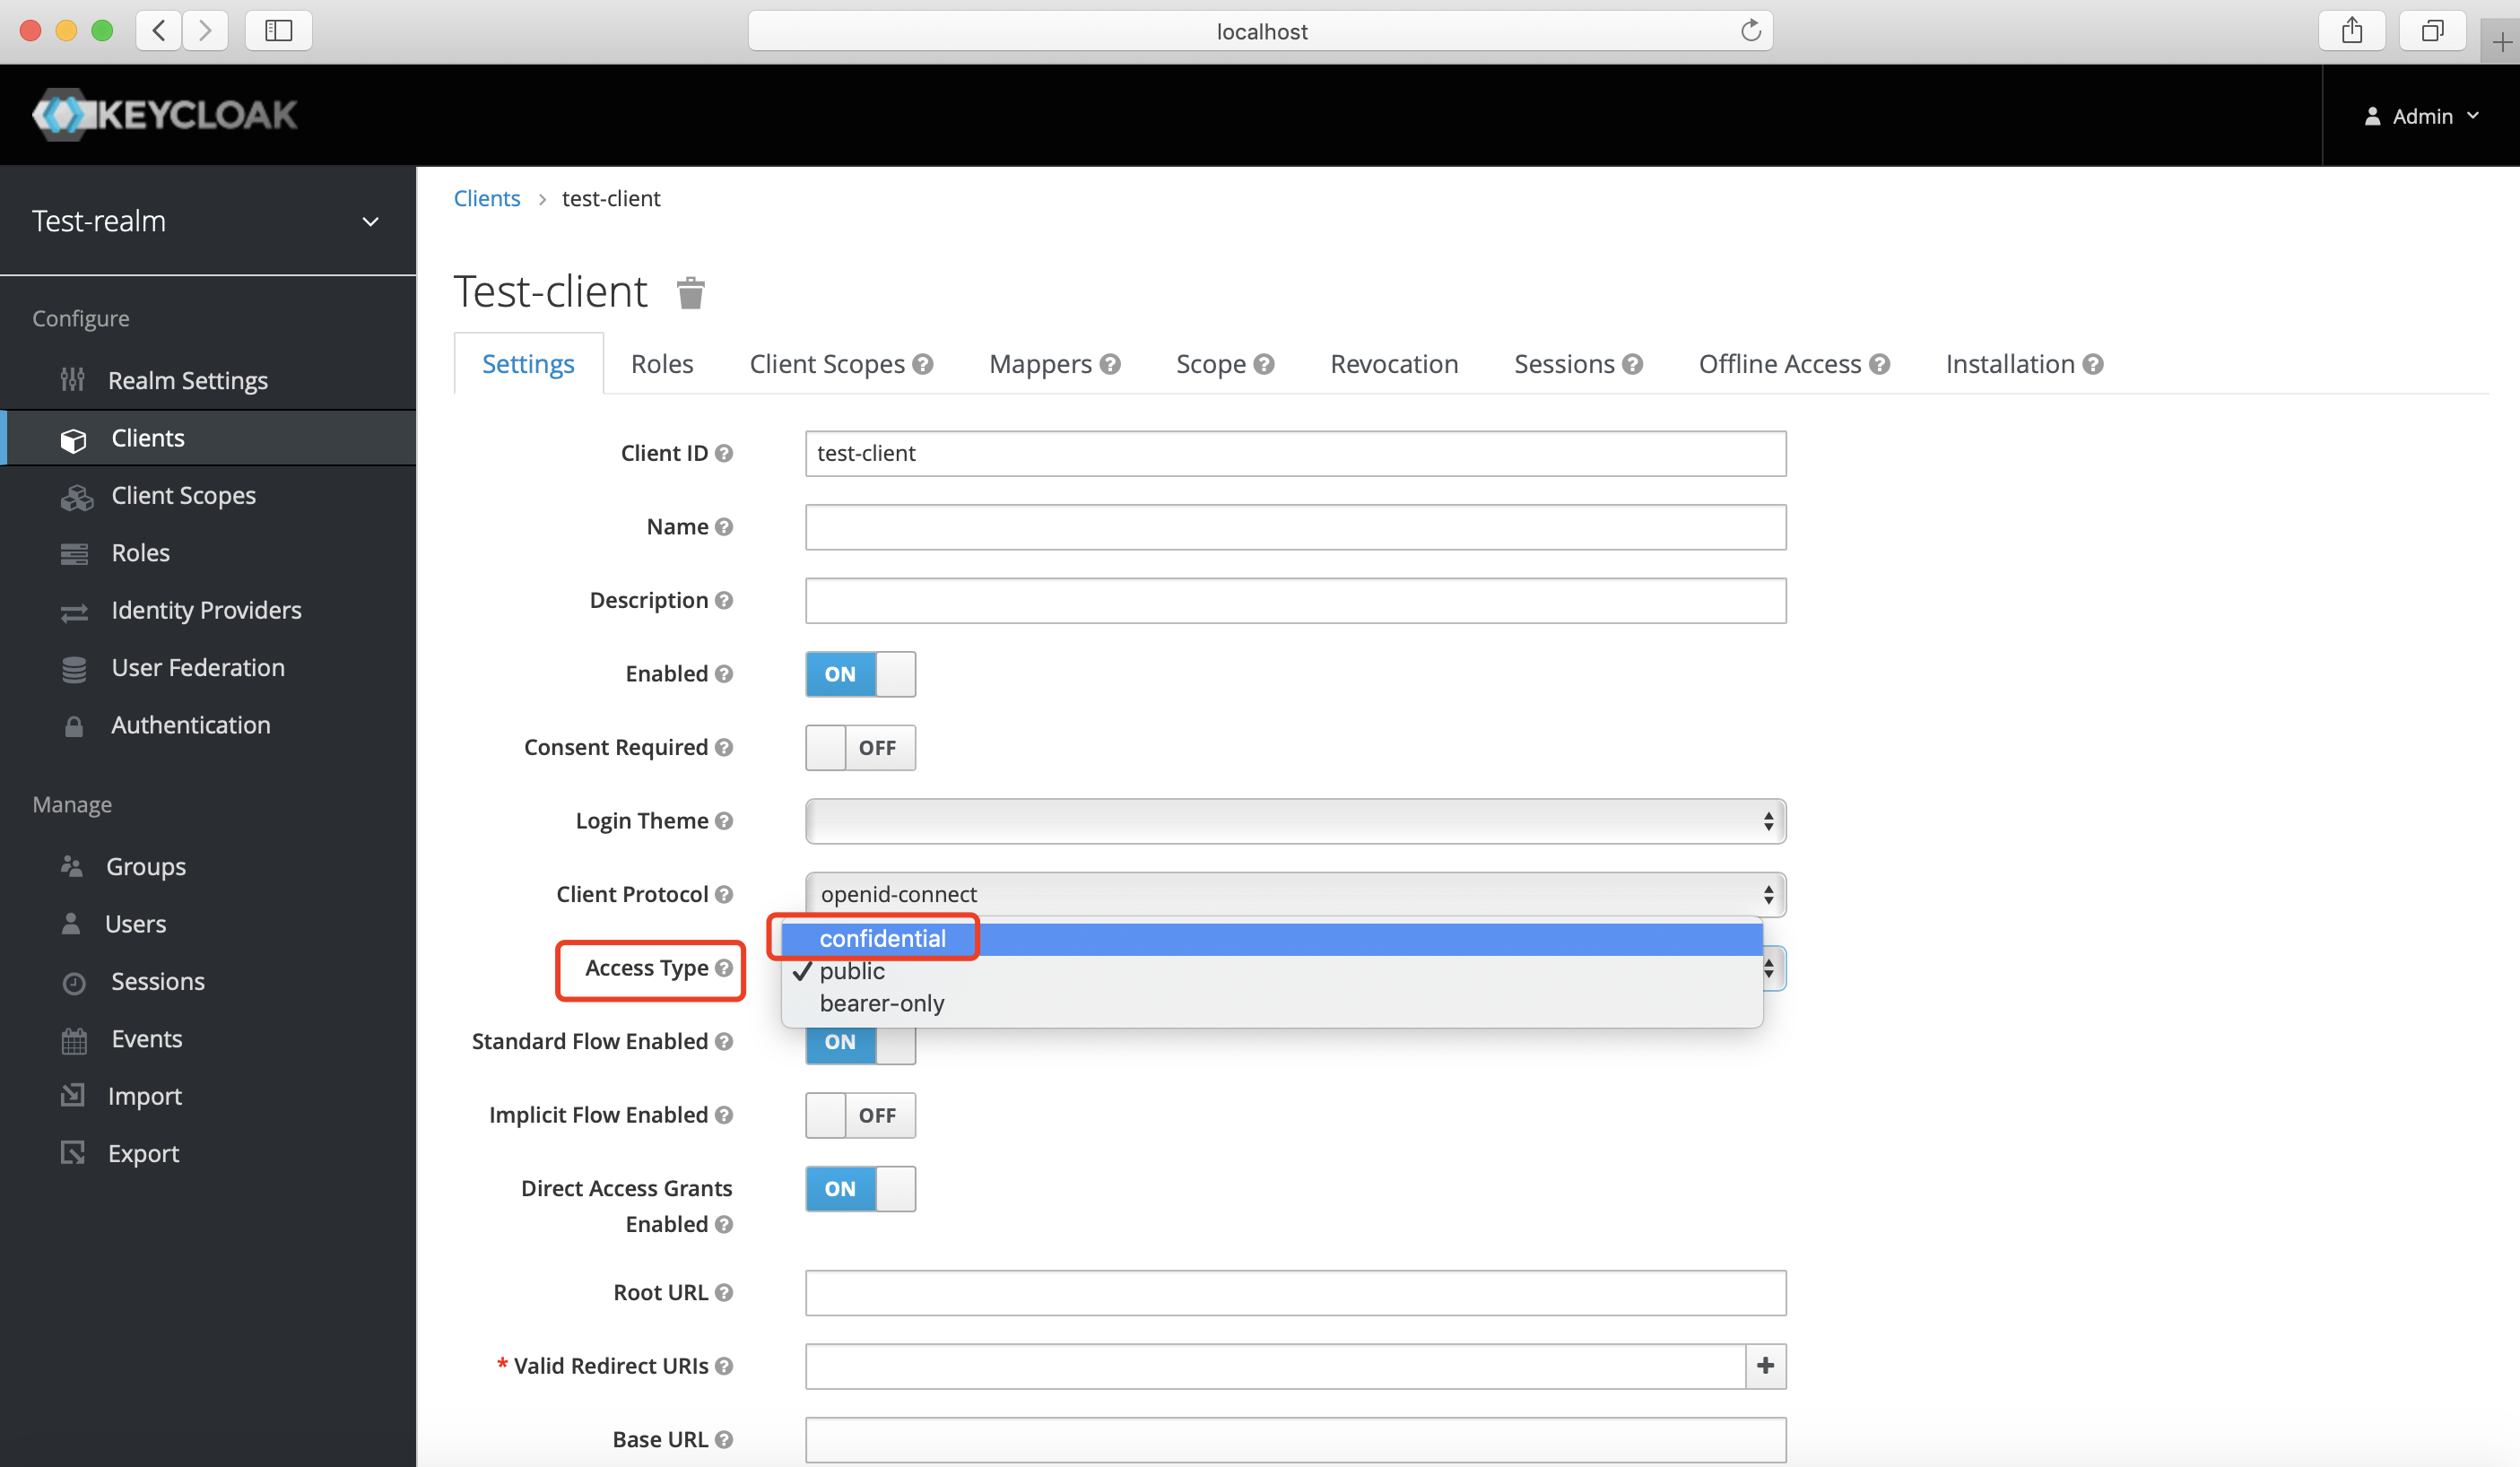 Open
Open Authorization EnabledandService Accounts Enabledshould be opened automatically: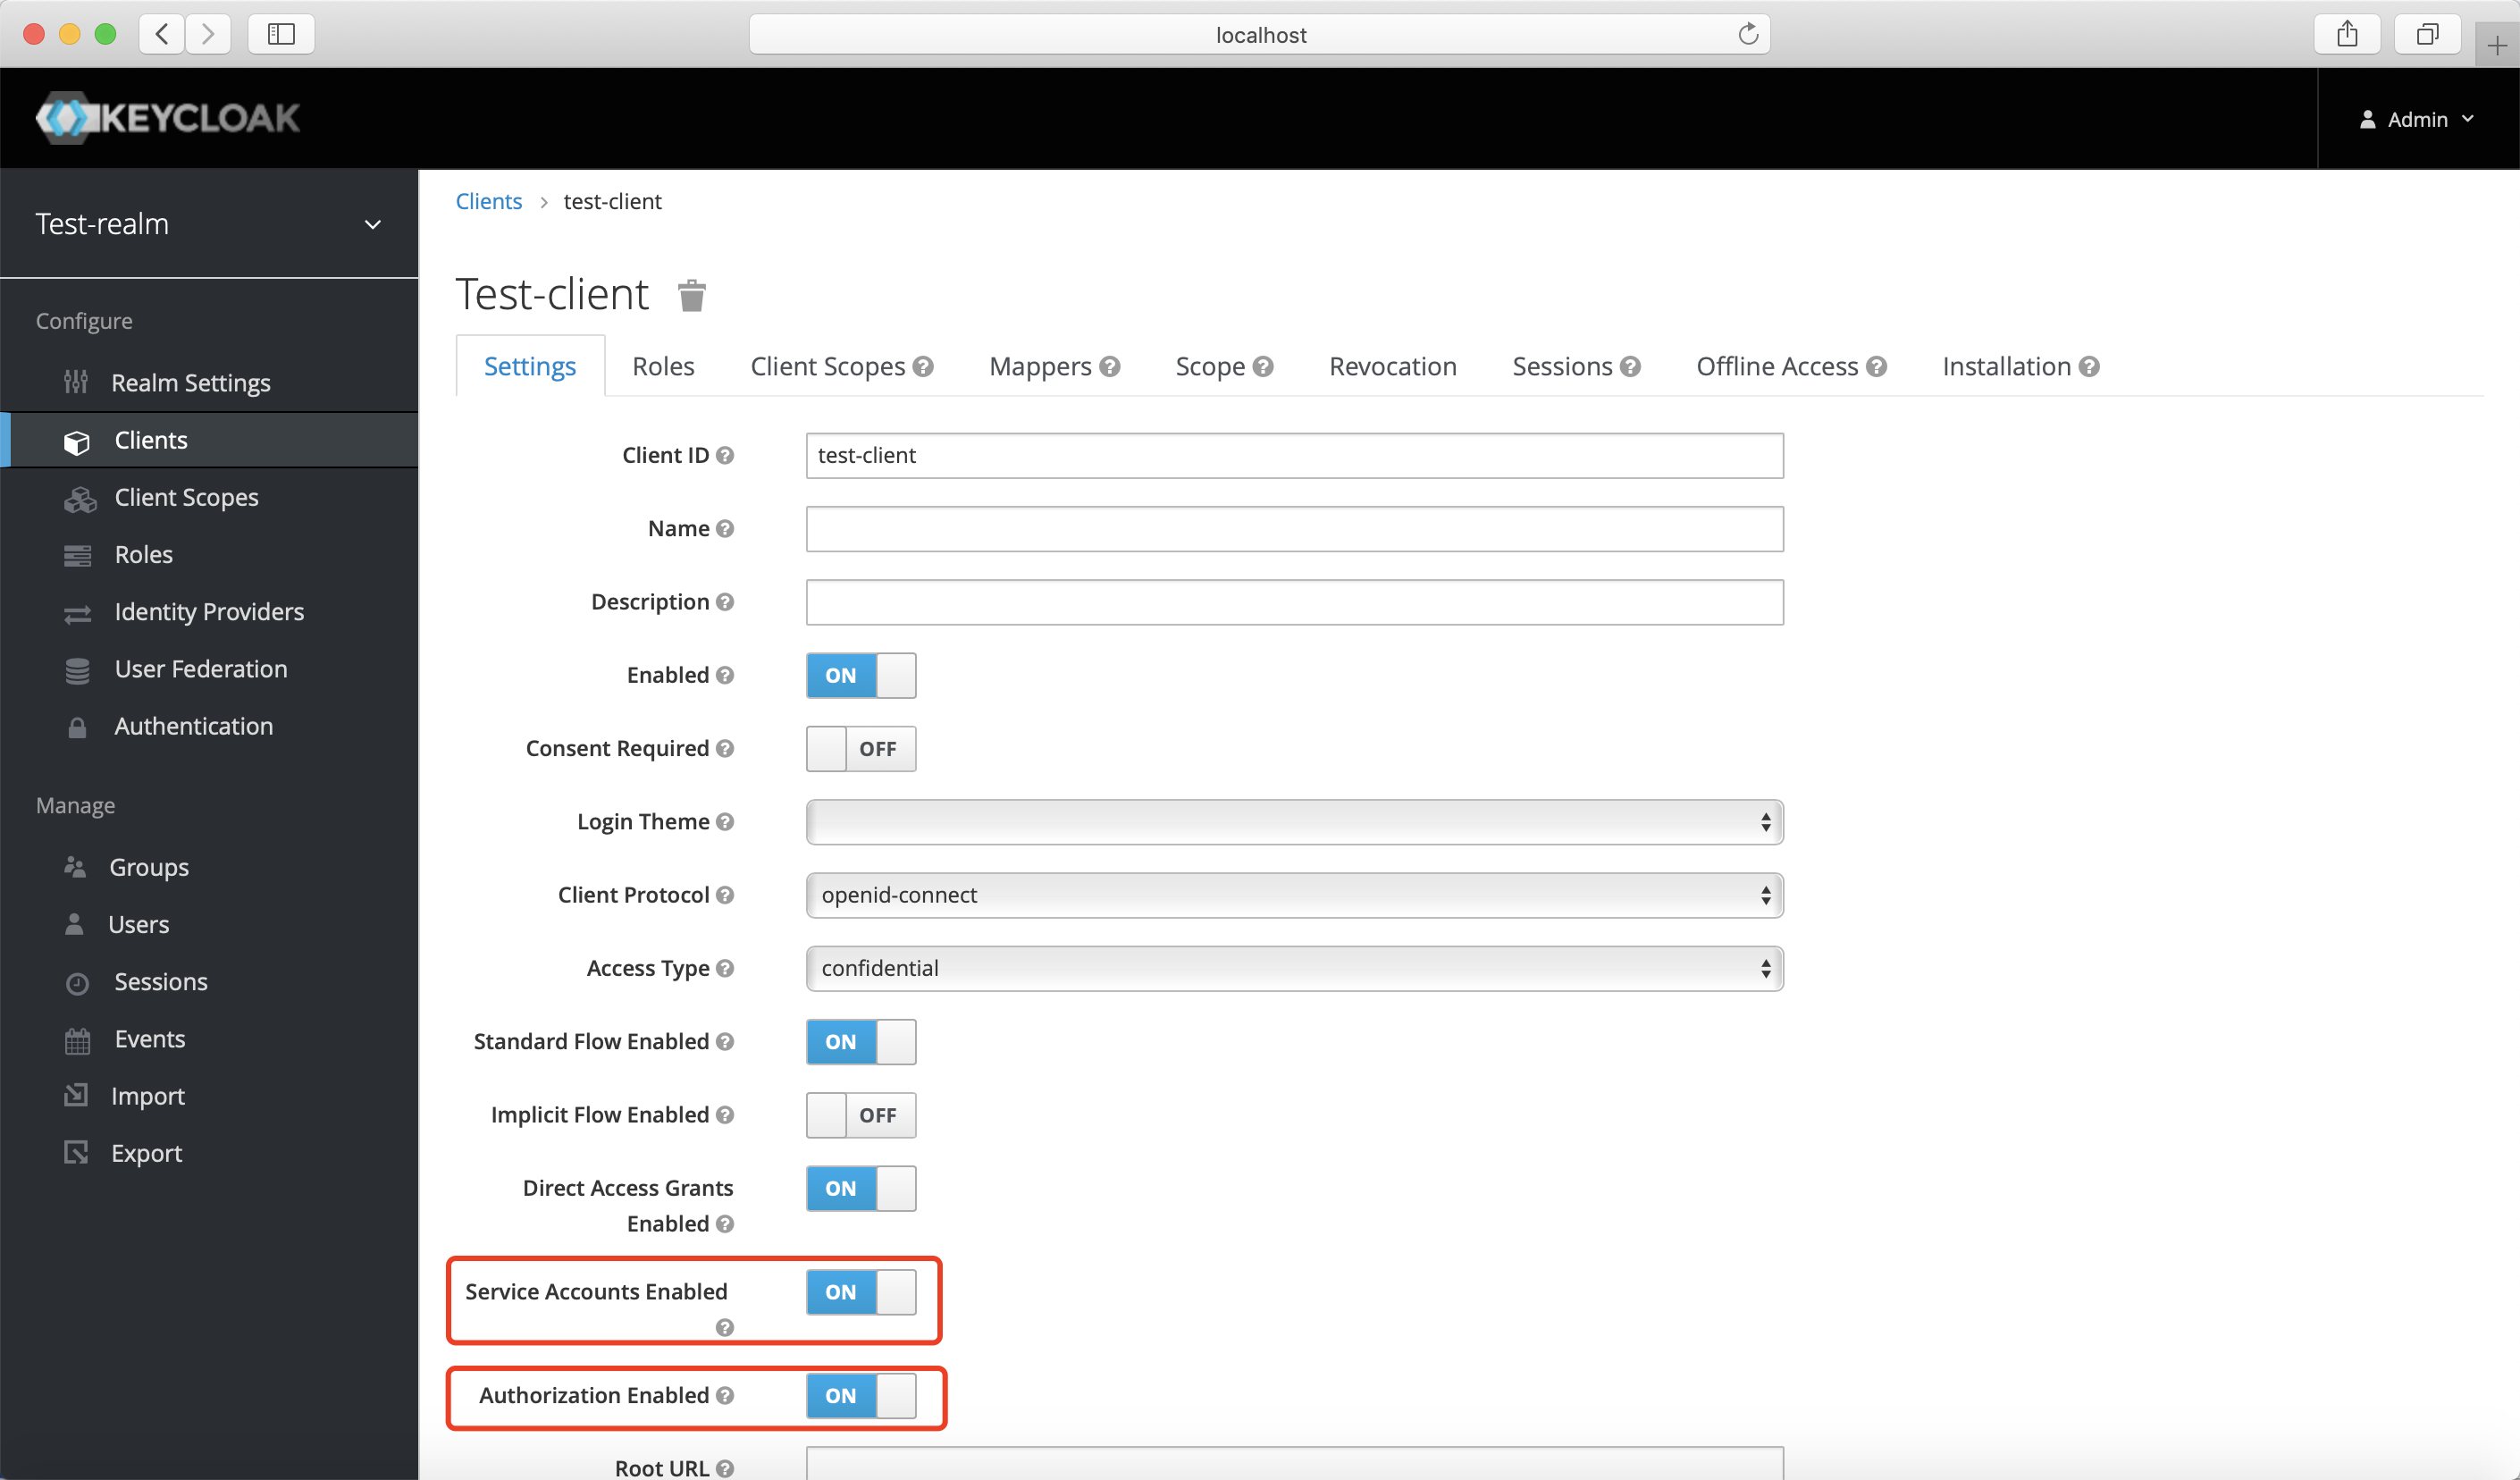 Enter the
 Valid Redirect URIs, which should be the address of DAP, e.g.,http://localhost:9772/*, then clickSave: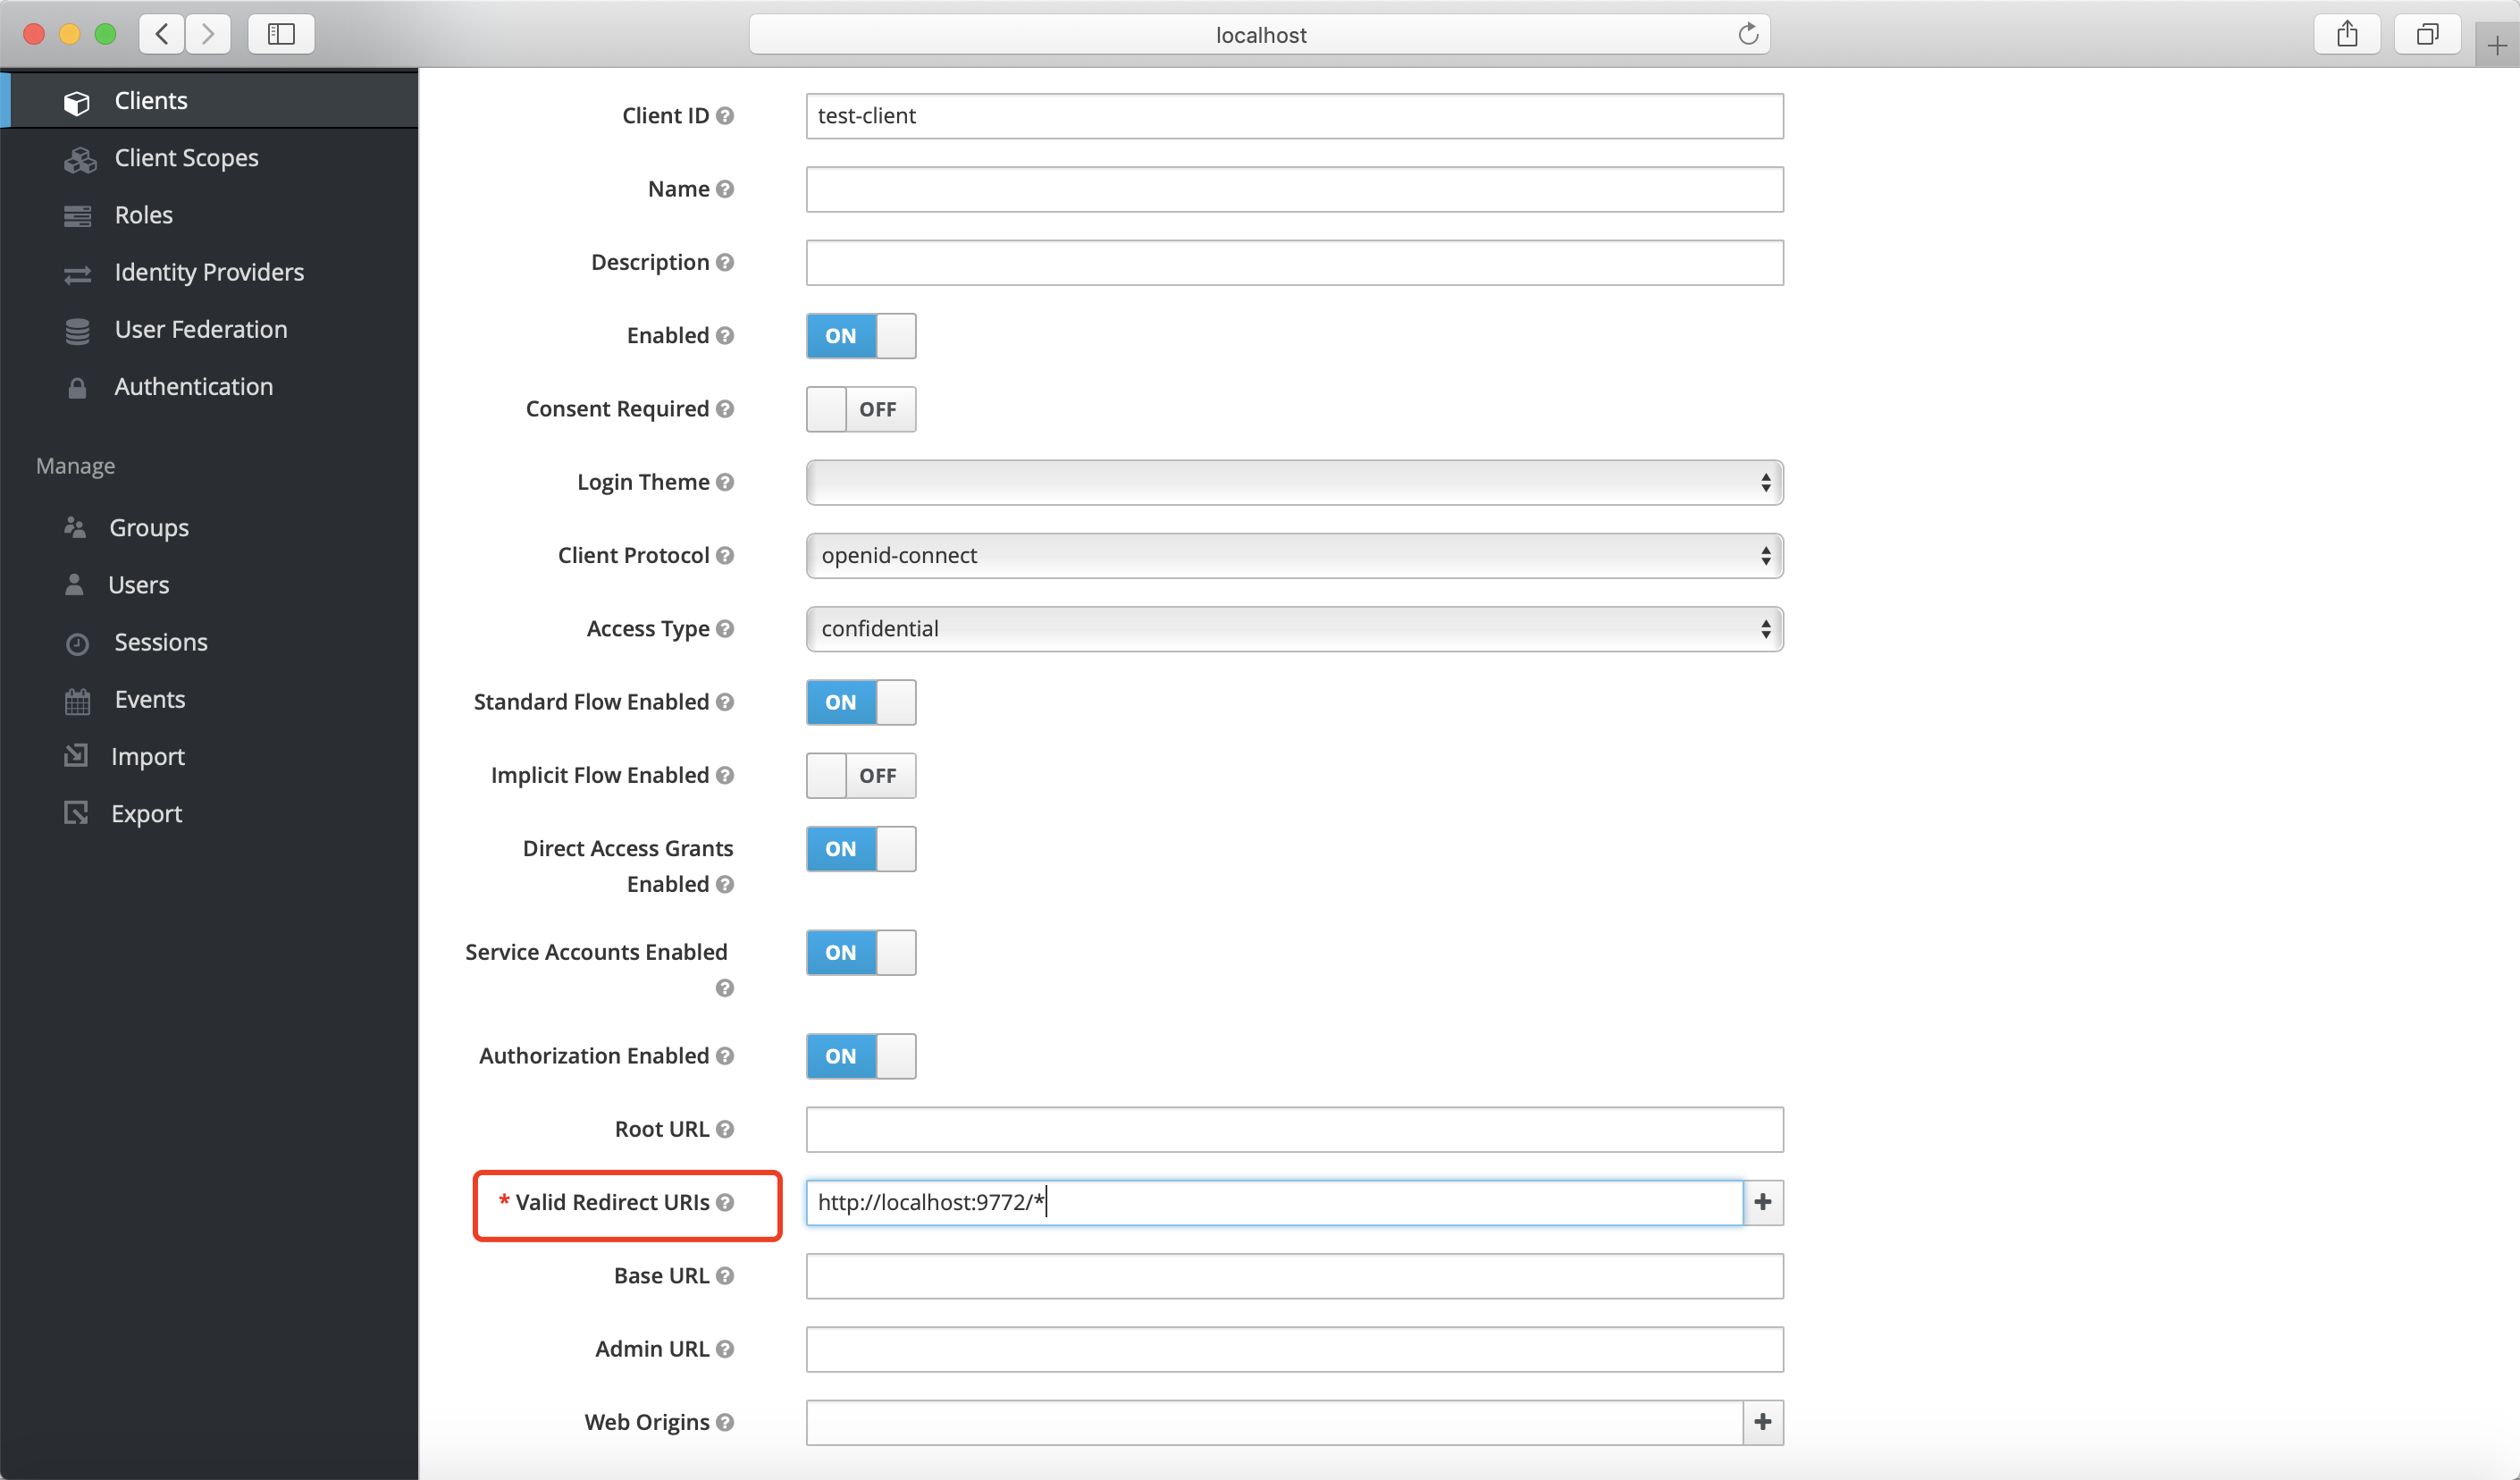 Now, the
 Credentialstab should be shown. Select it and make a copy ofSecretasClient Secret: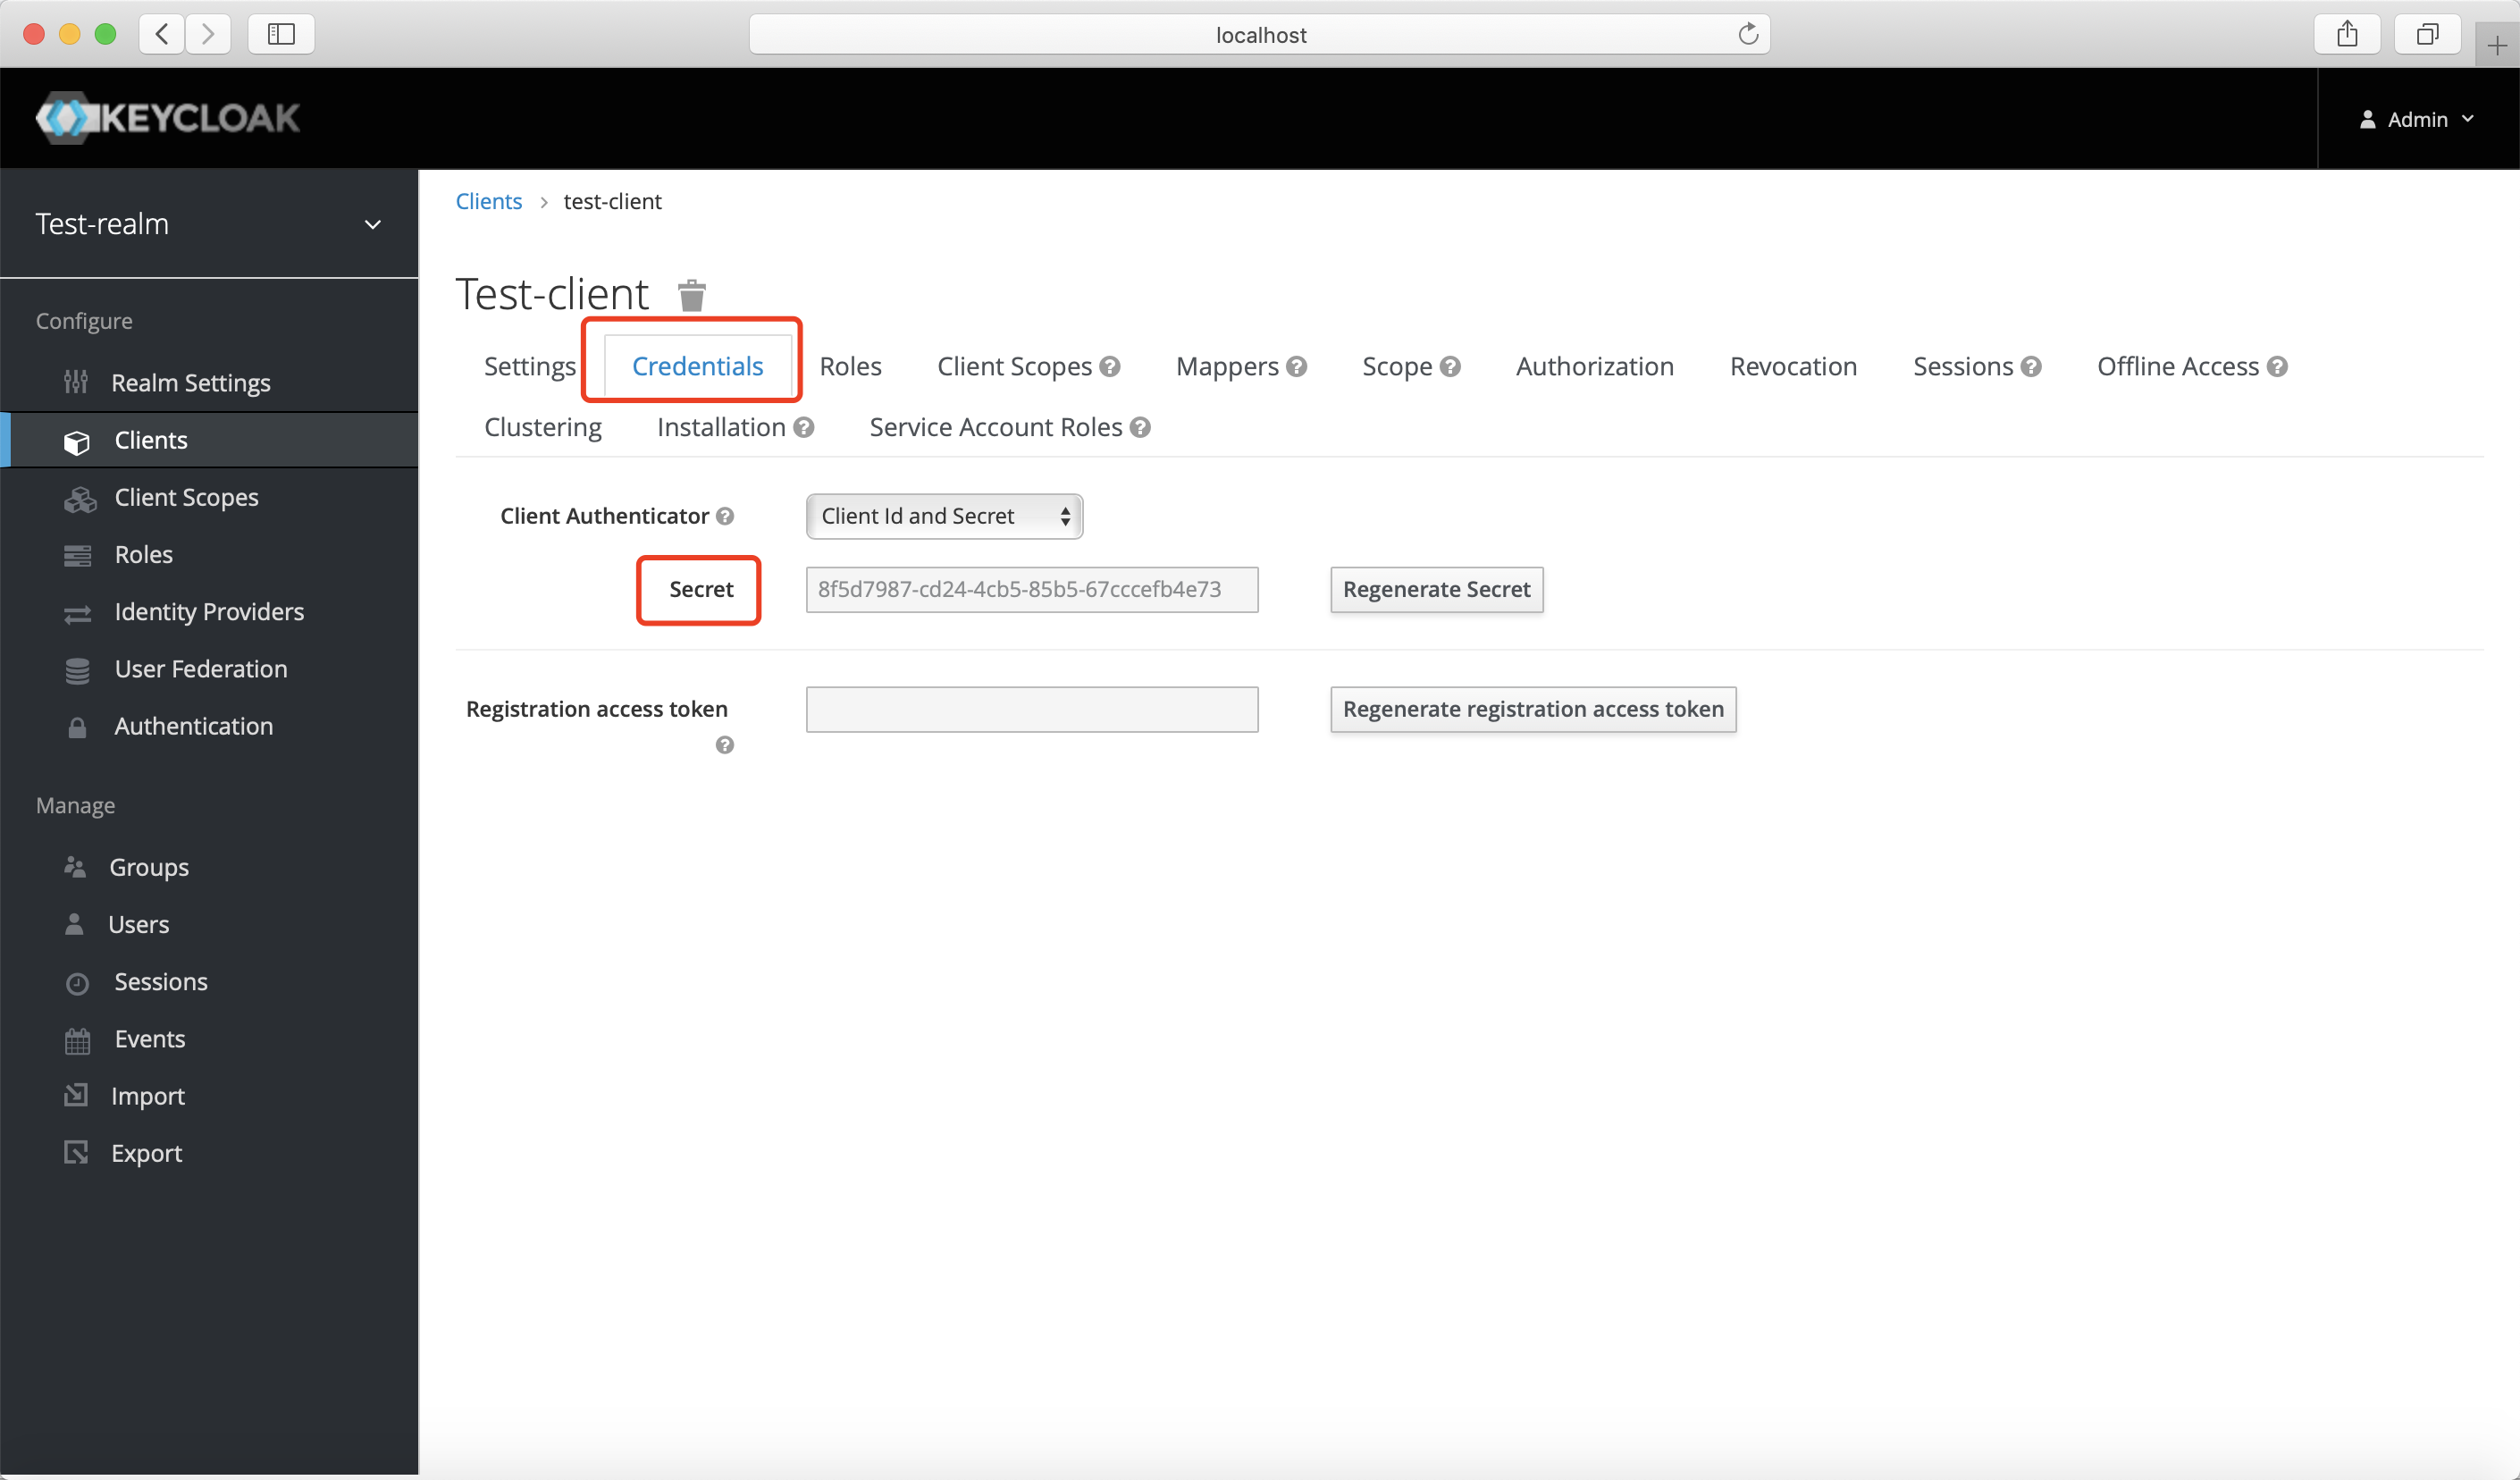
Create Groups and Users
Create groups. Choose
Groupsand clickNew: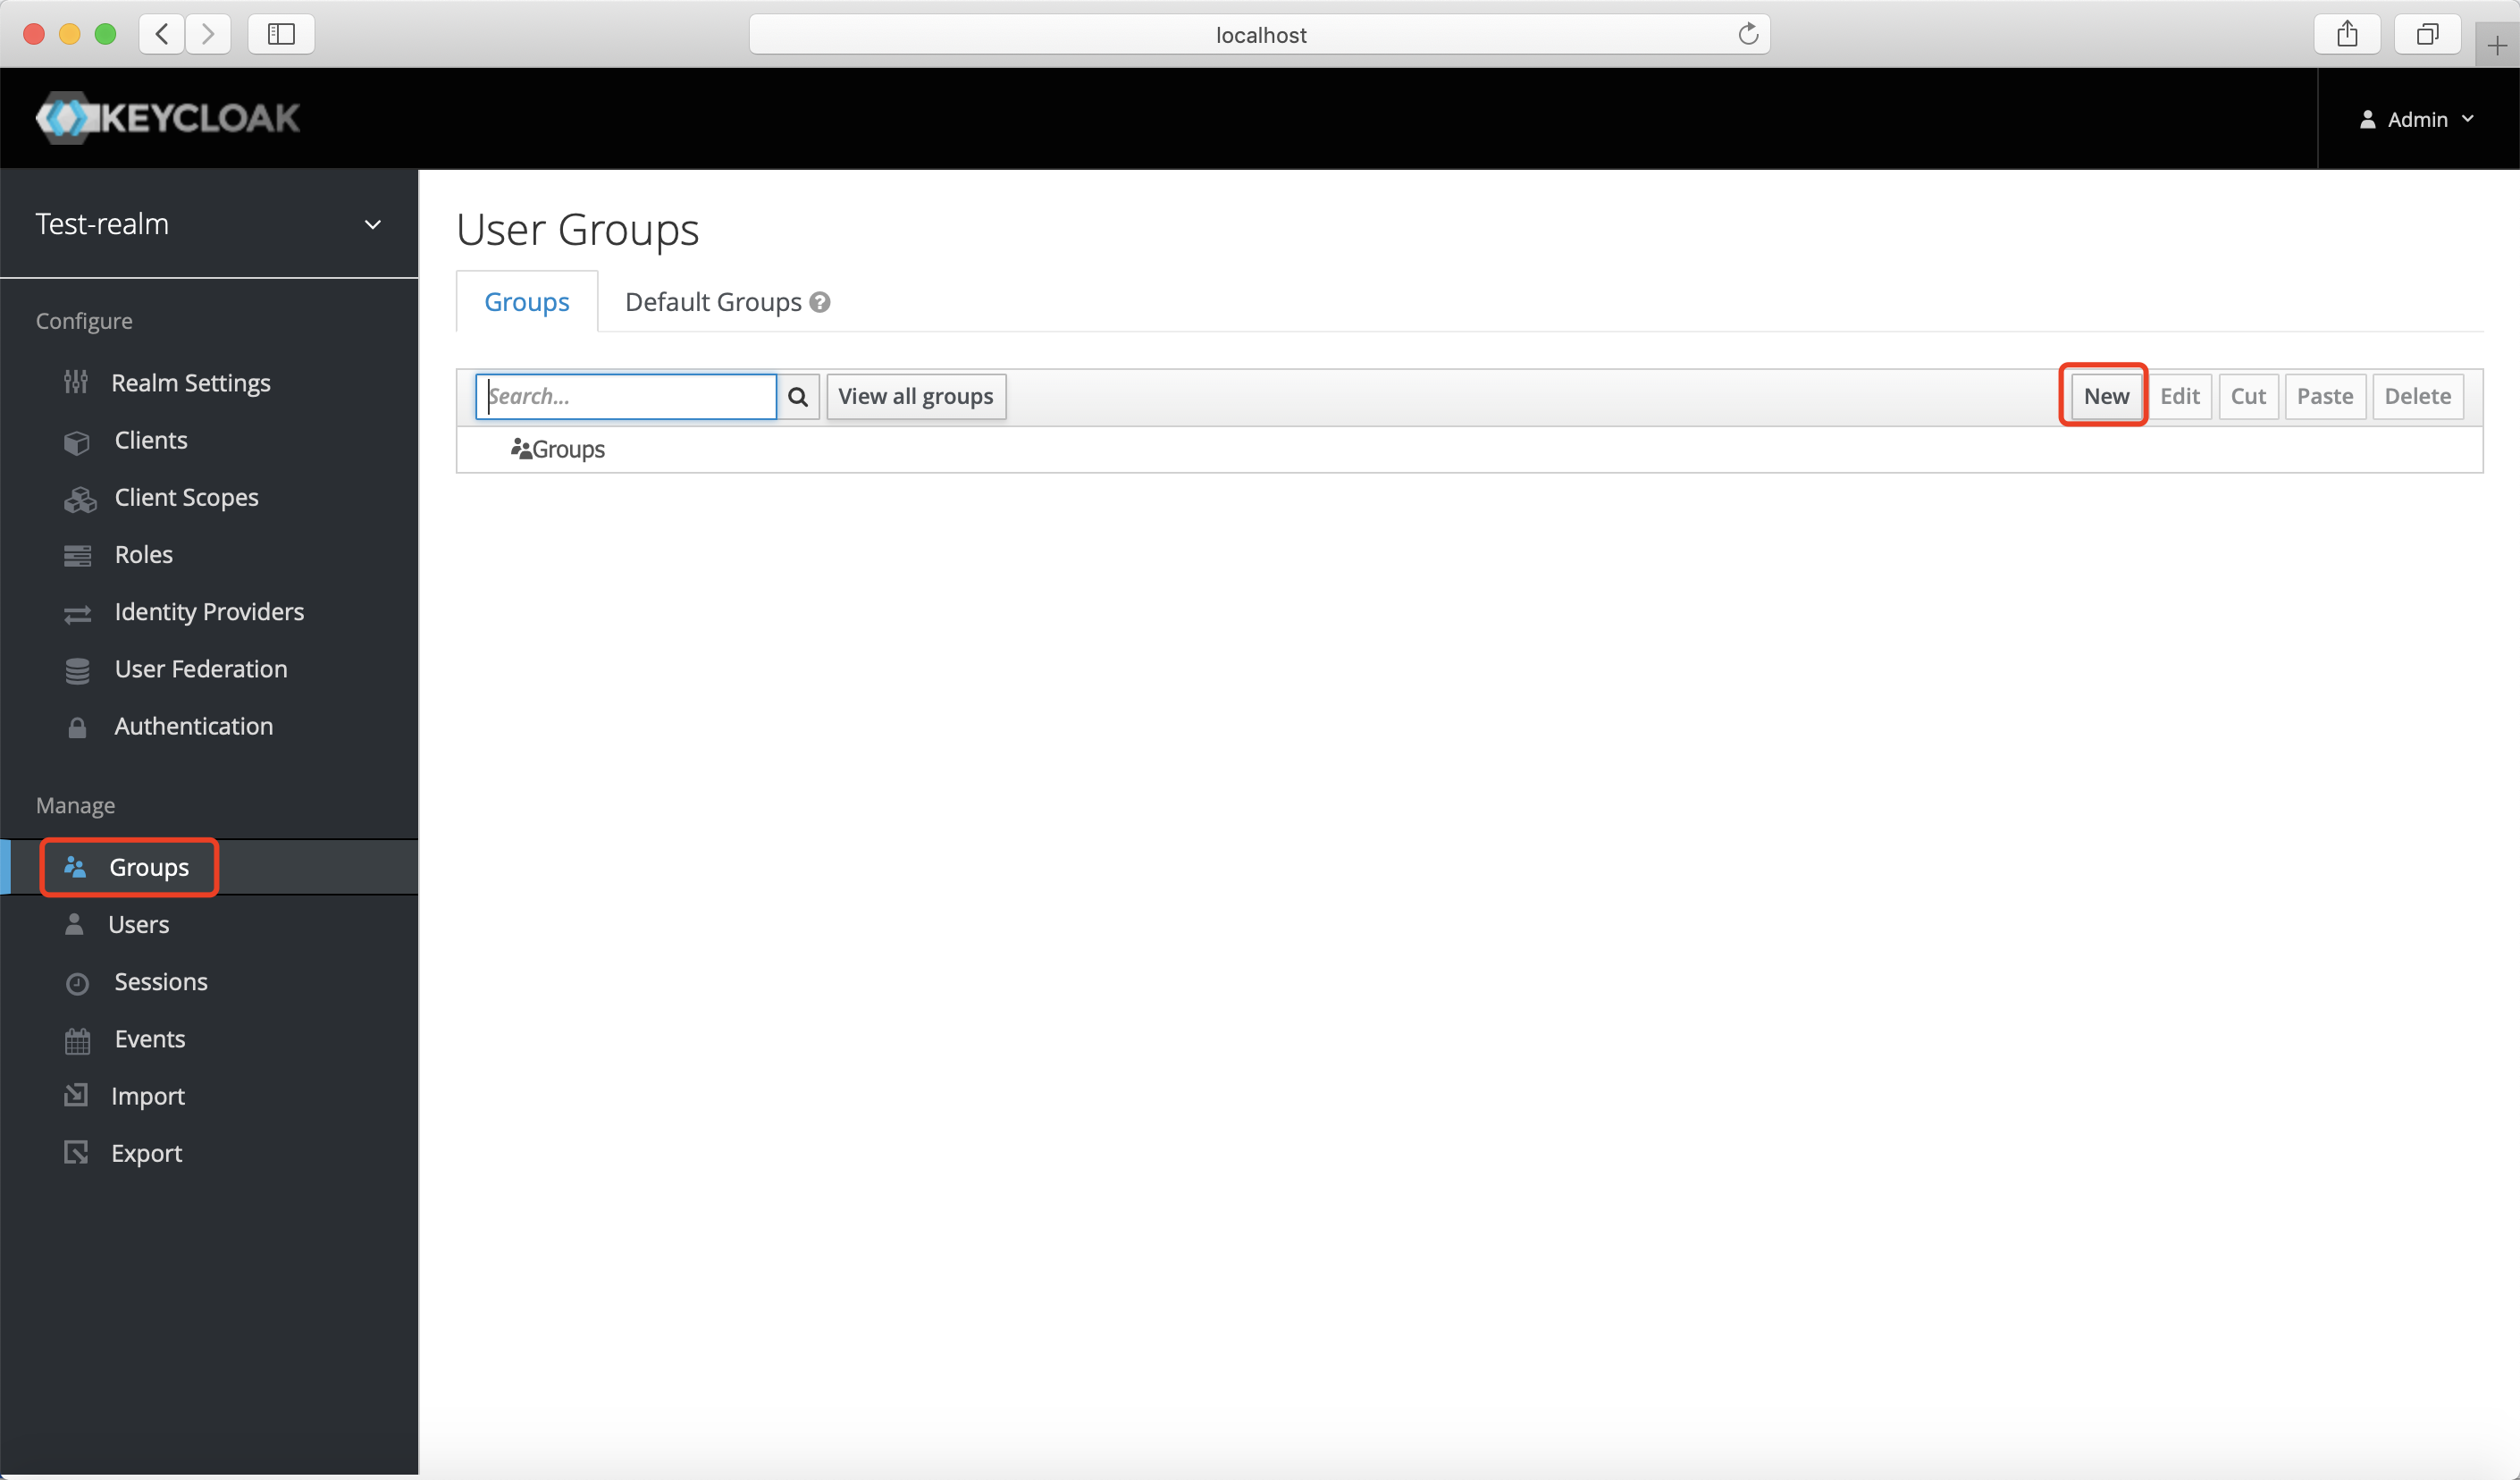 Enter the group name and click
 Save: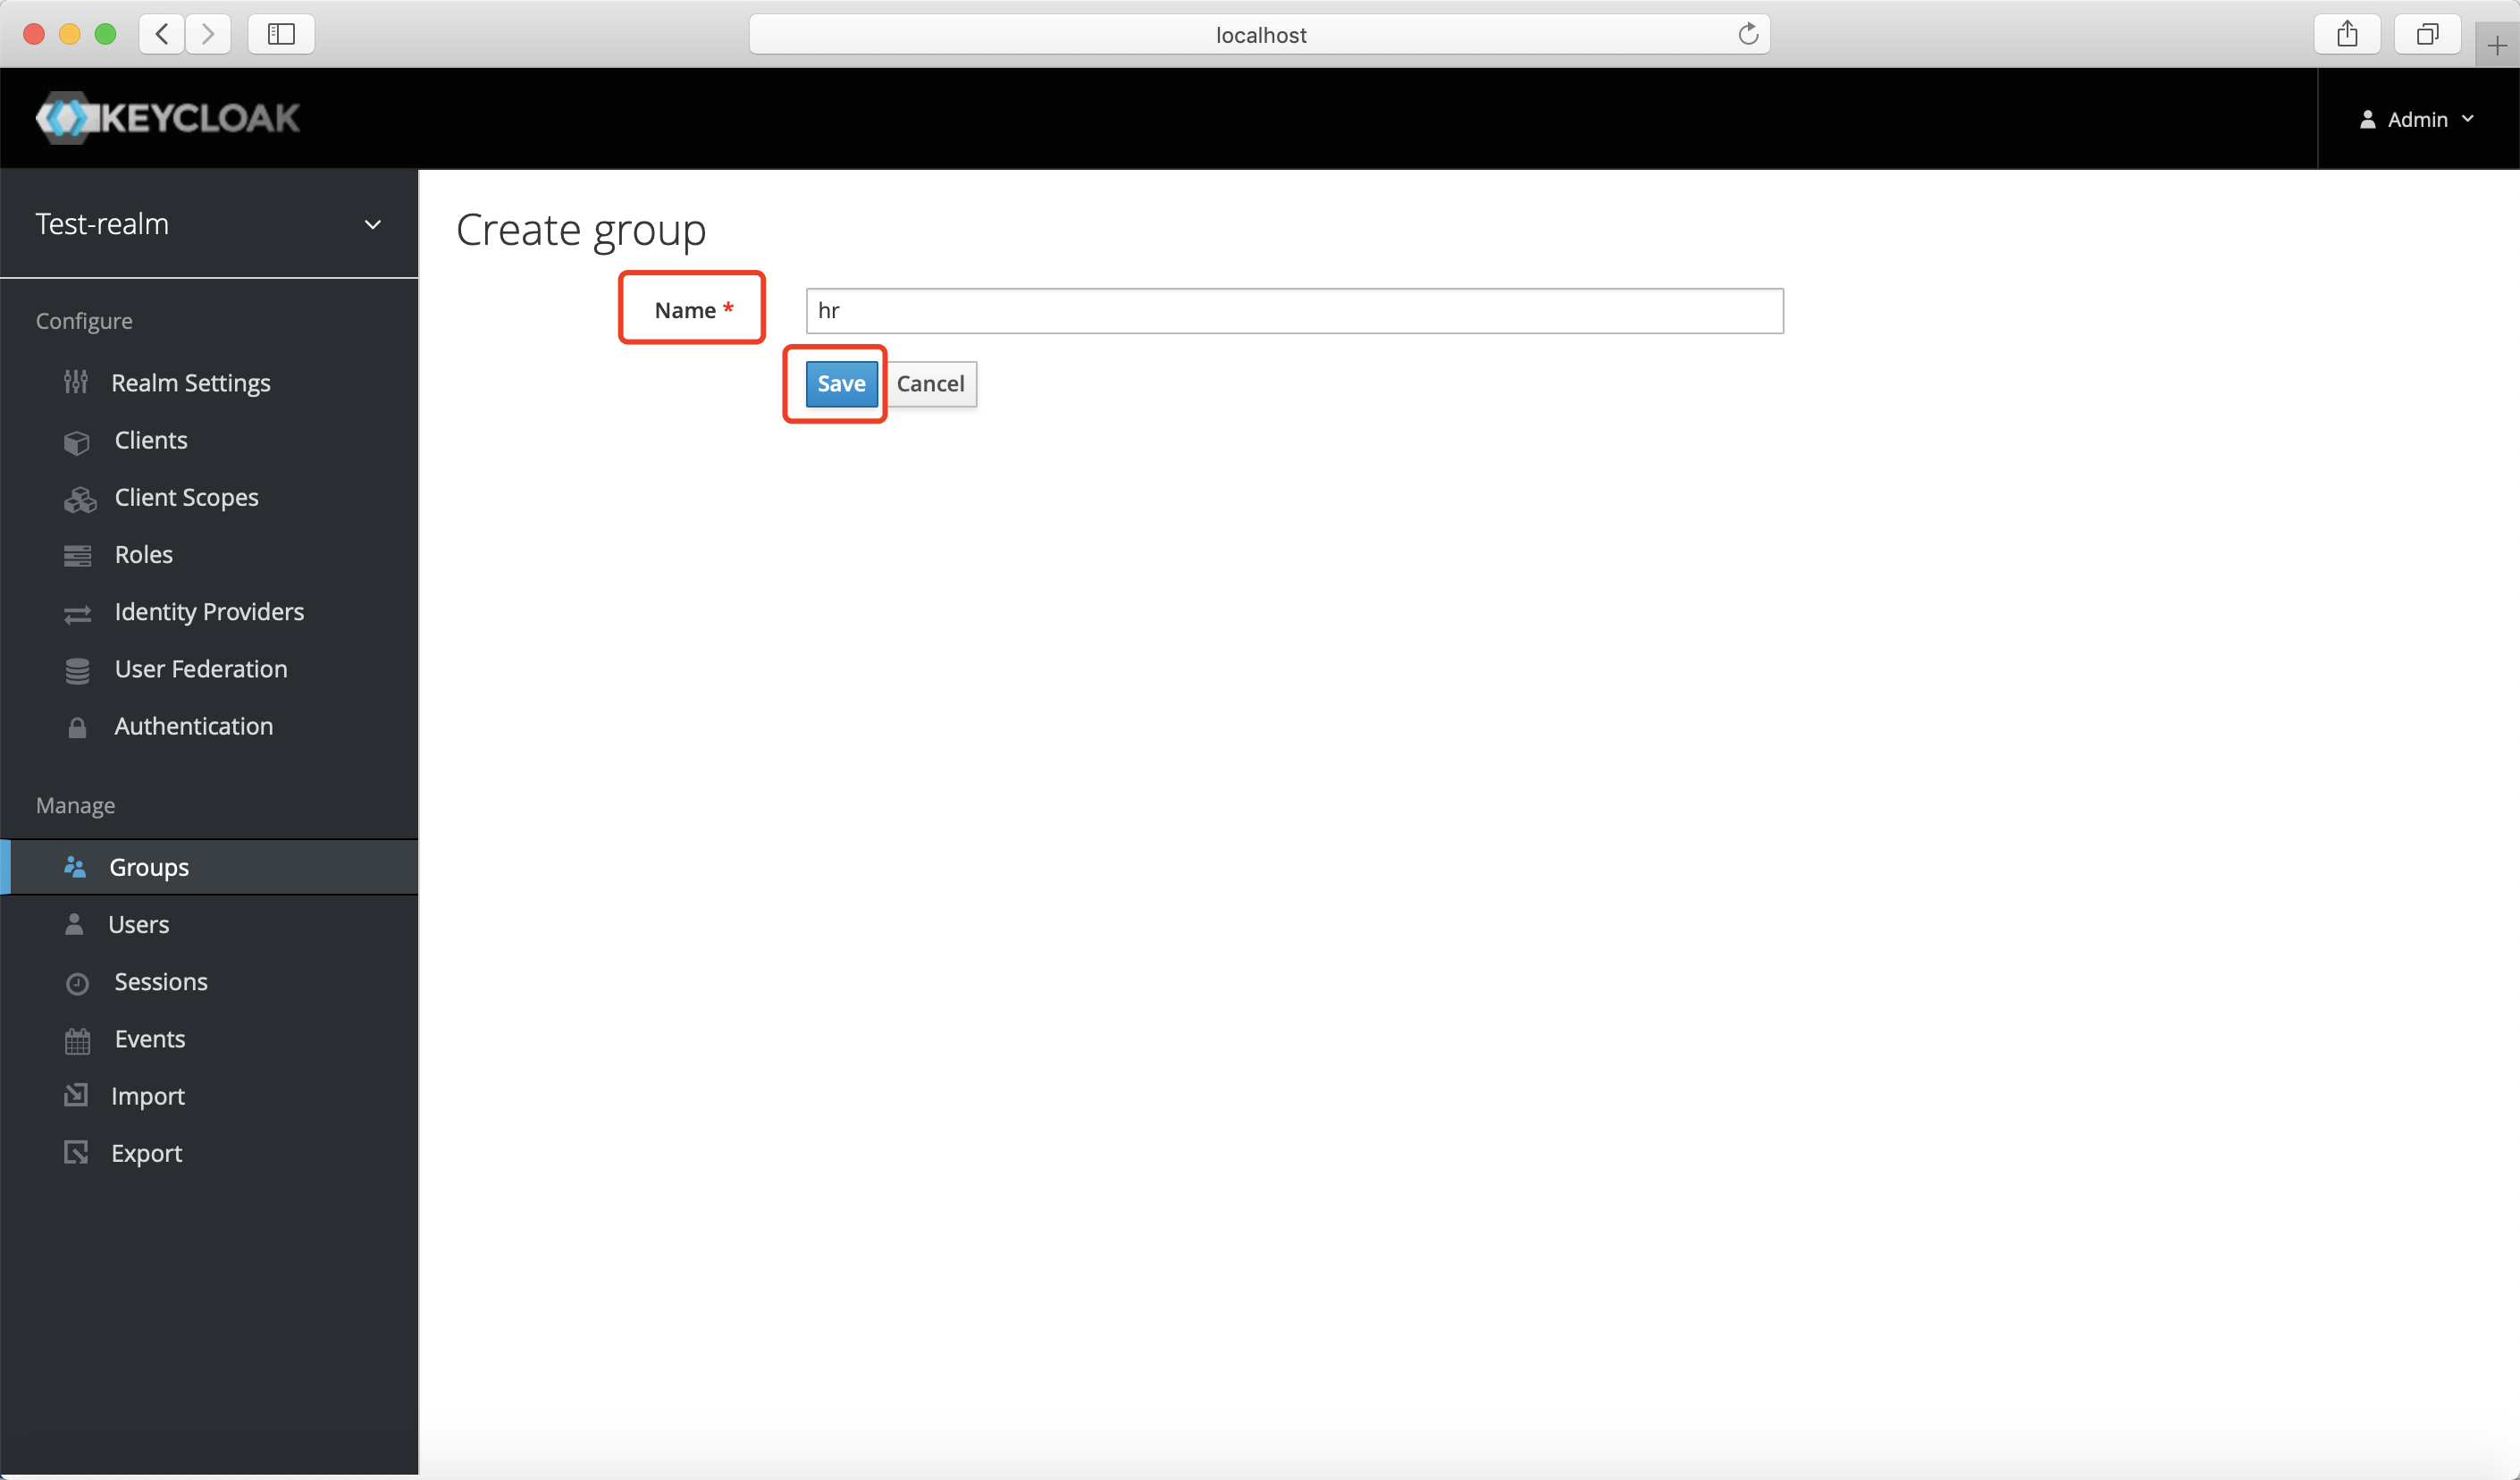
Create Users. Choose
Usersand clickAdd user: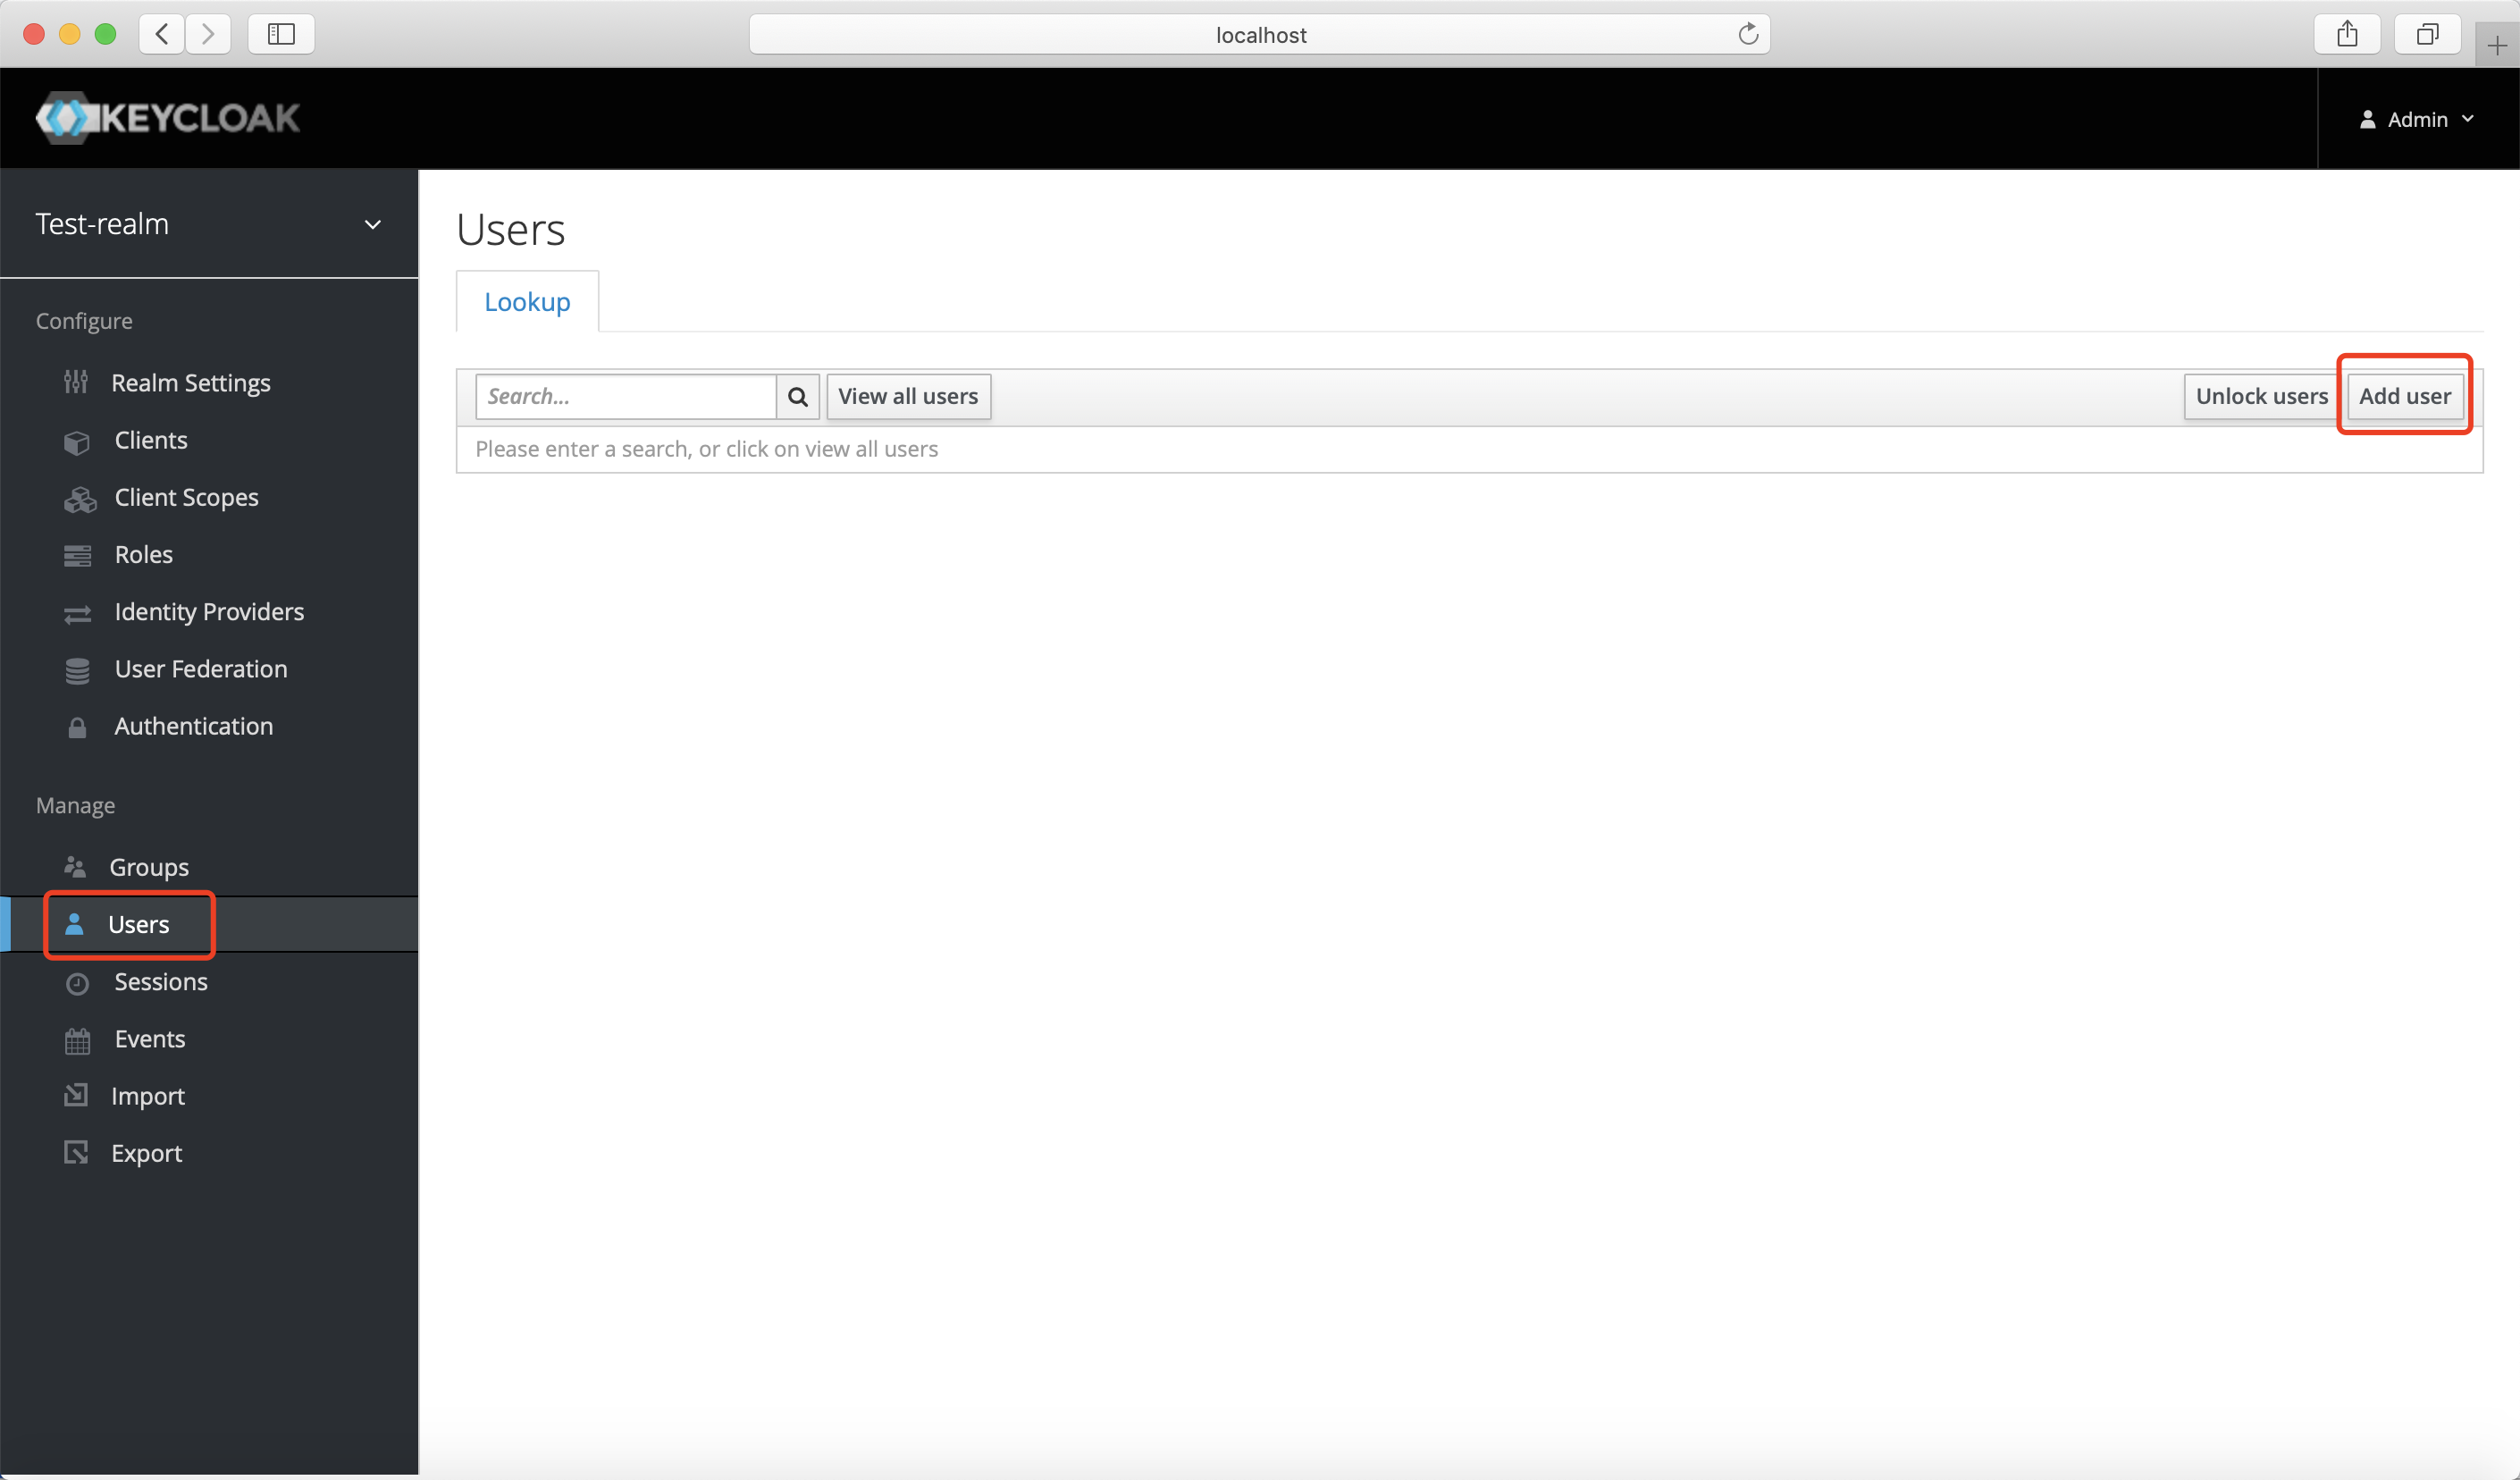 Enter the basic information and click
 Save: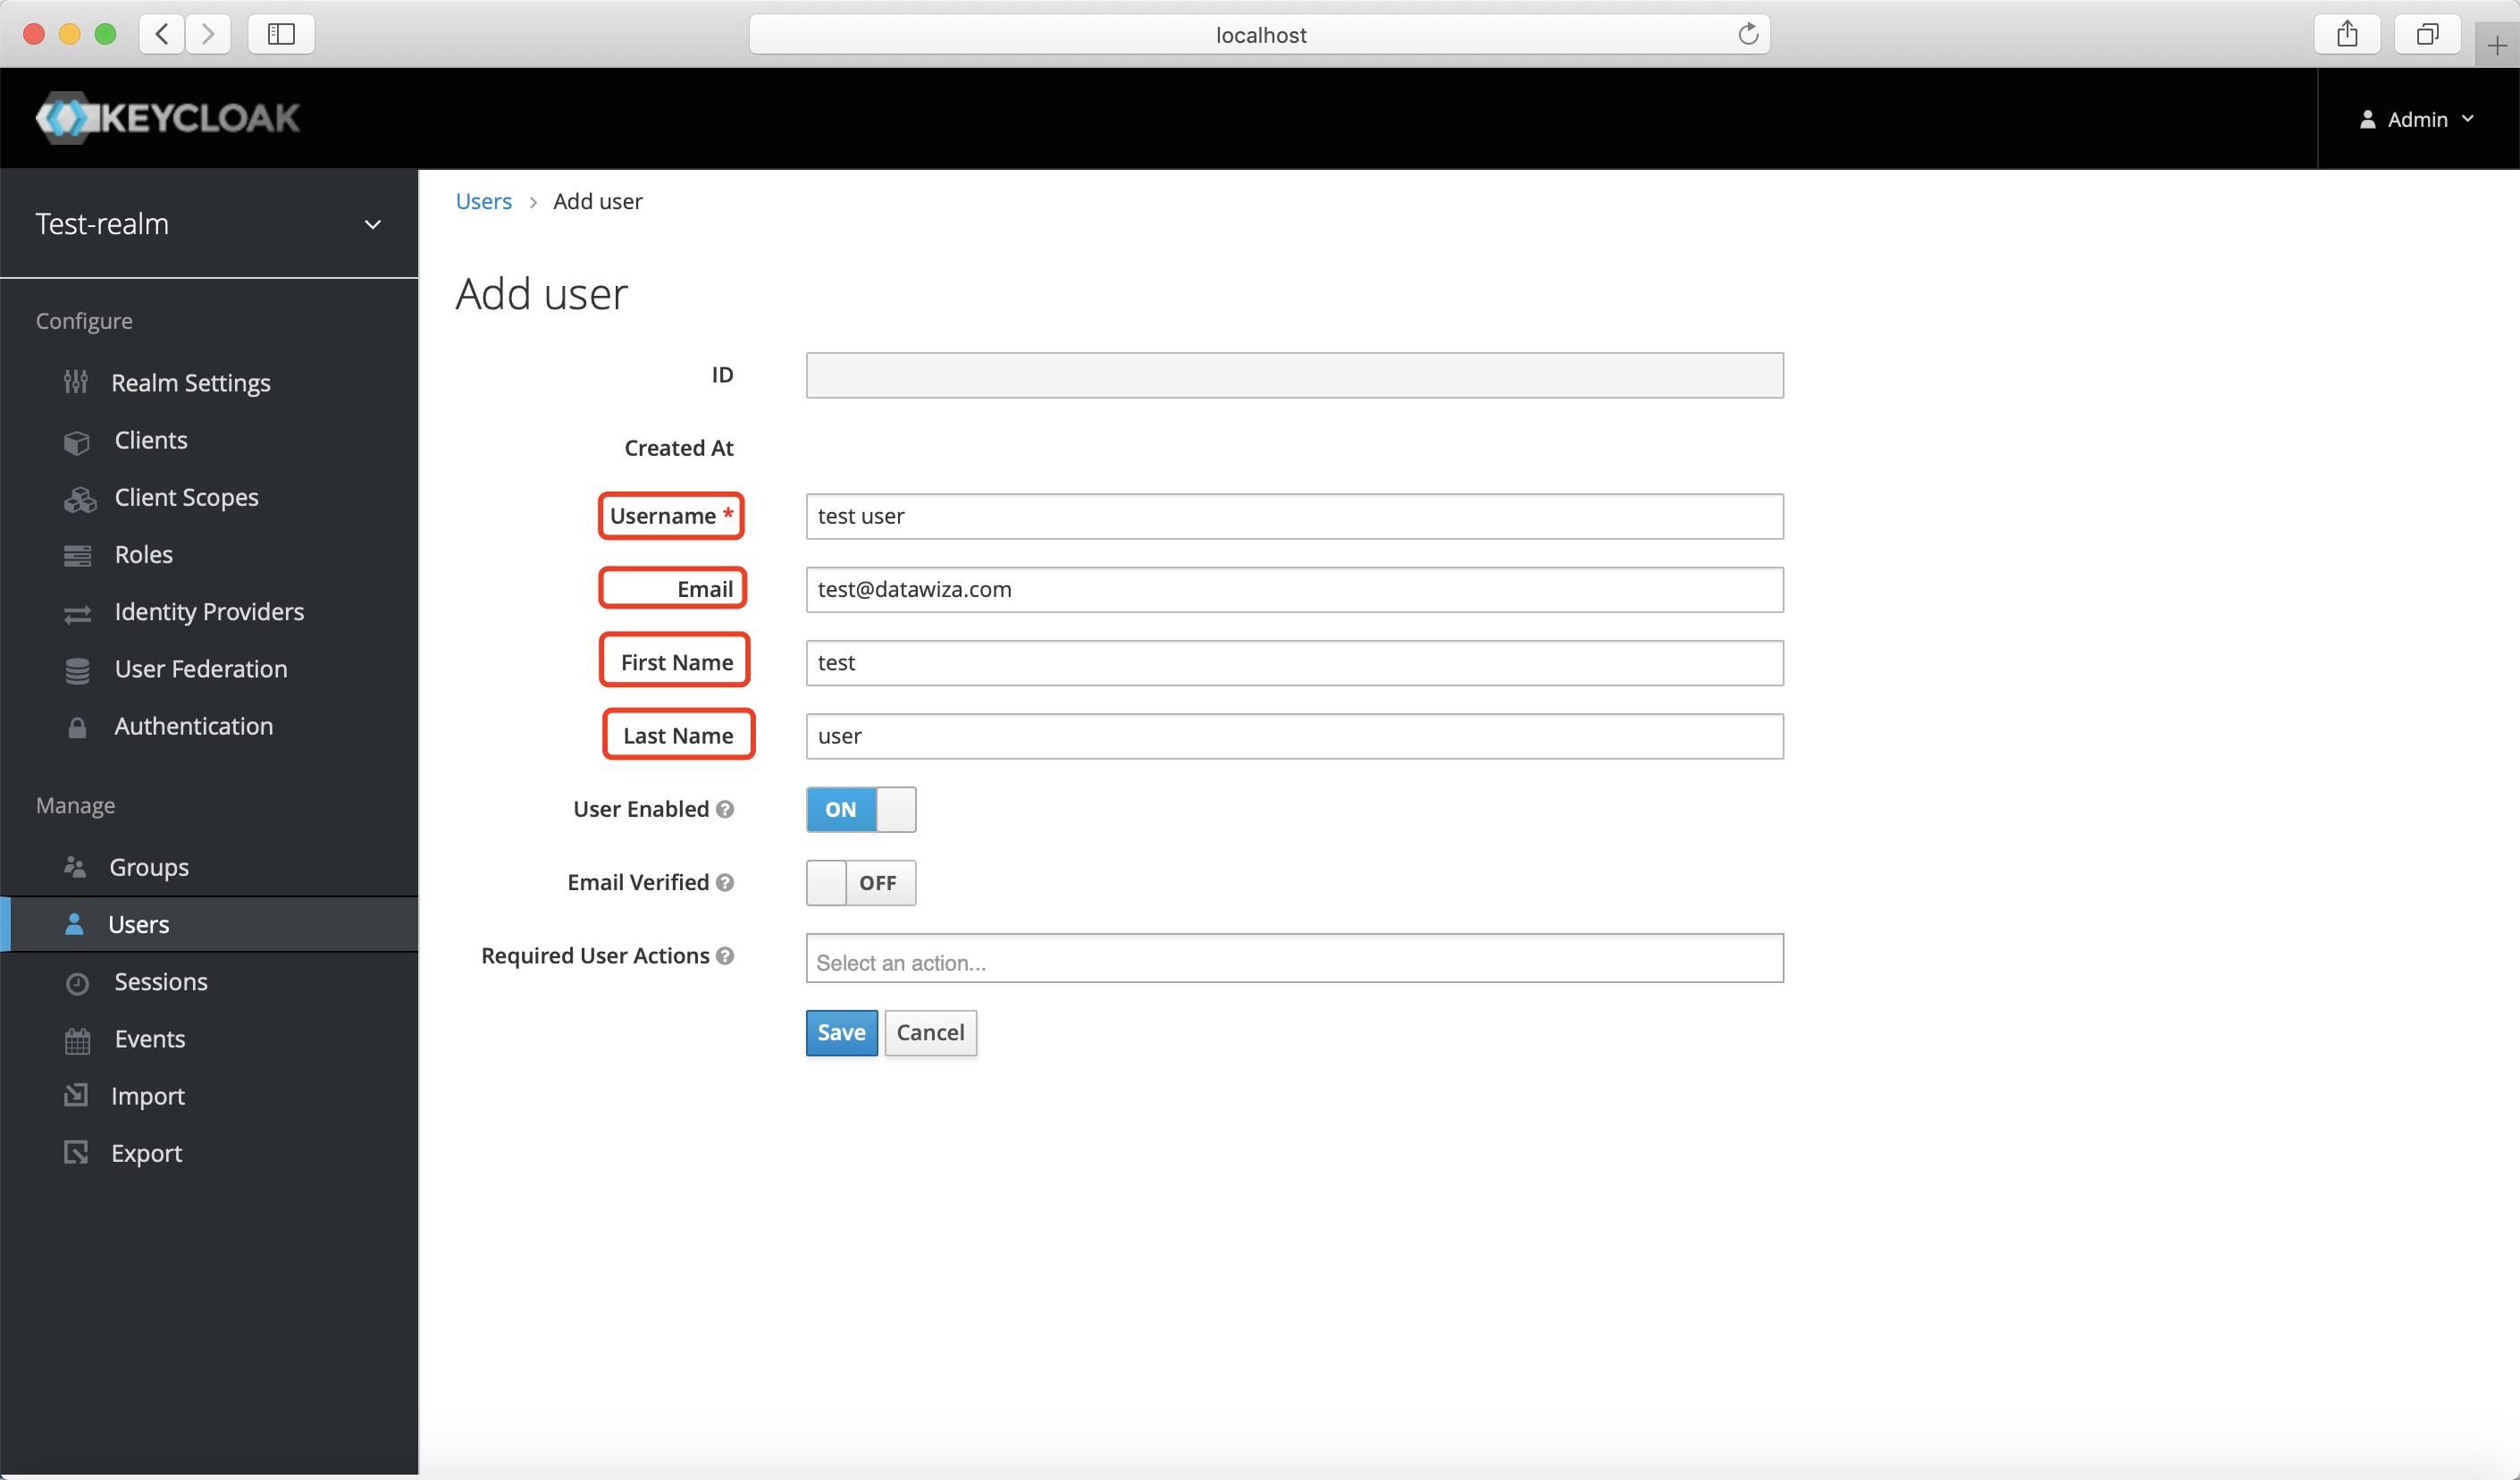 Select
 Credentialstab and enter the password, close theTemporaryfor test purpose. ClickSet Password: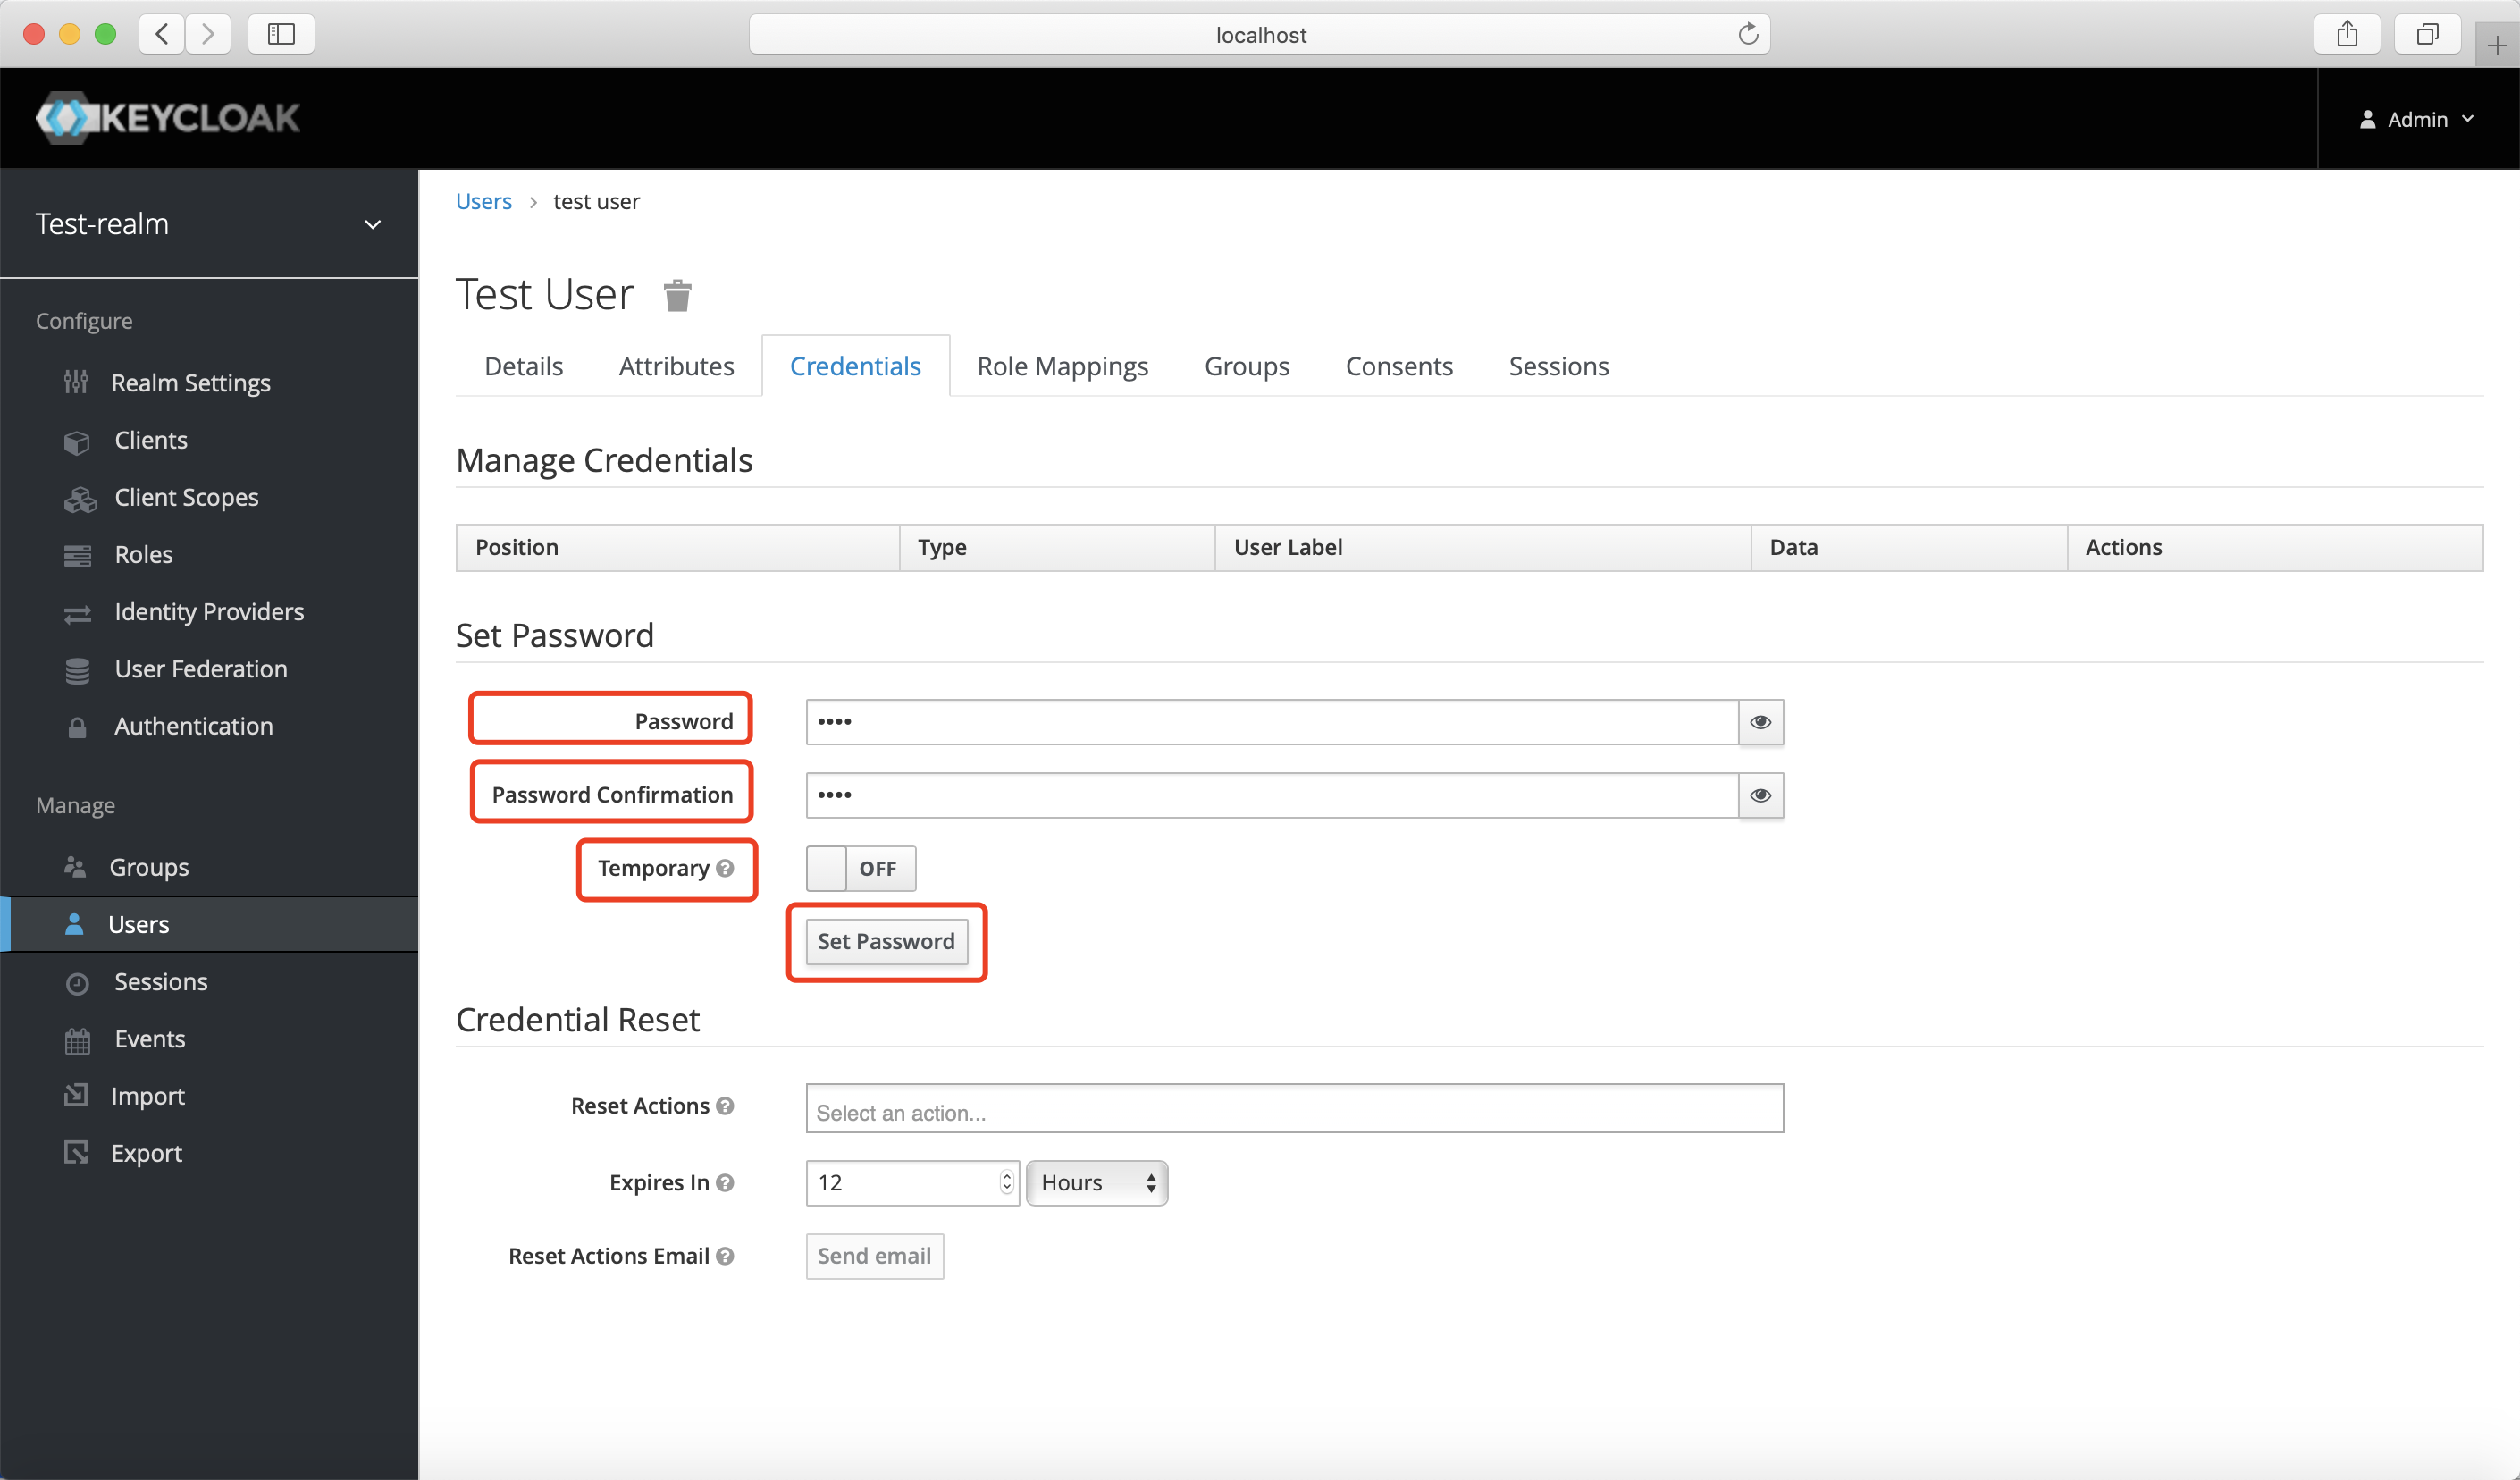
Add Client Roles to get user profile.(Optional). Select
Role Mappingsand chooserealm-managementinClient Roles: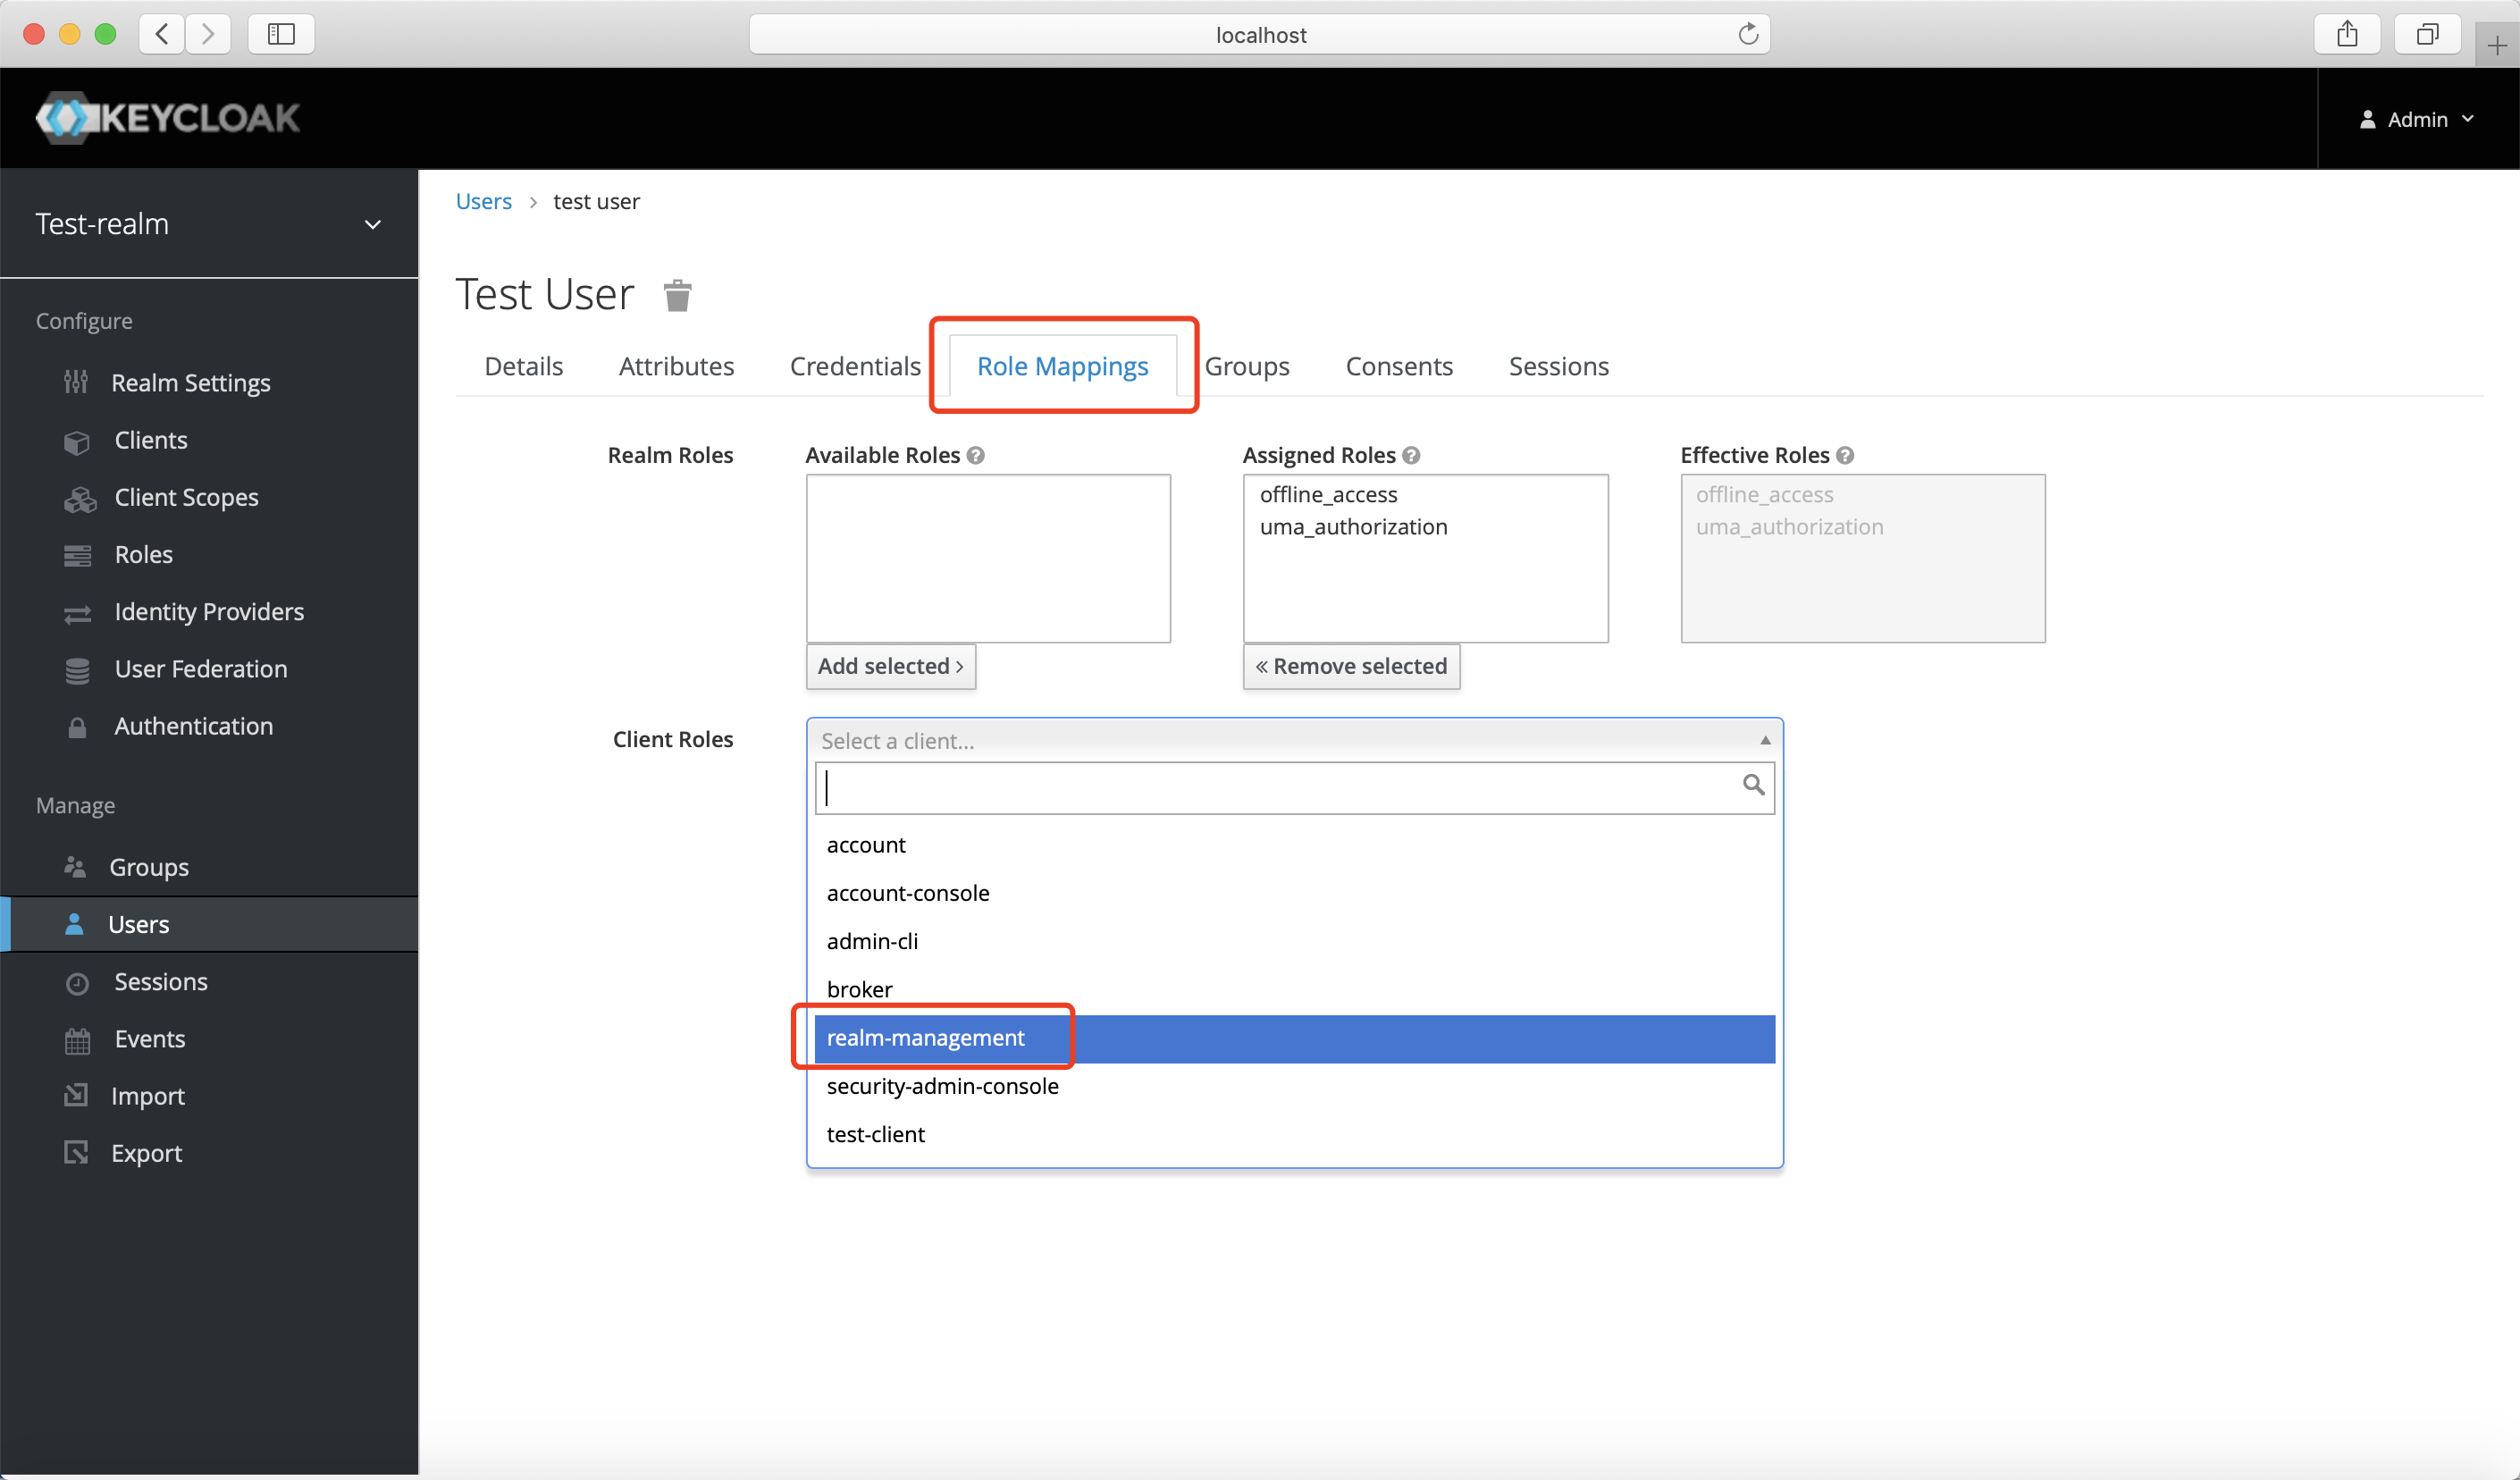 Add
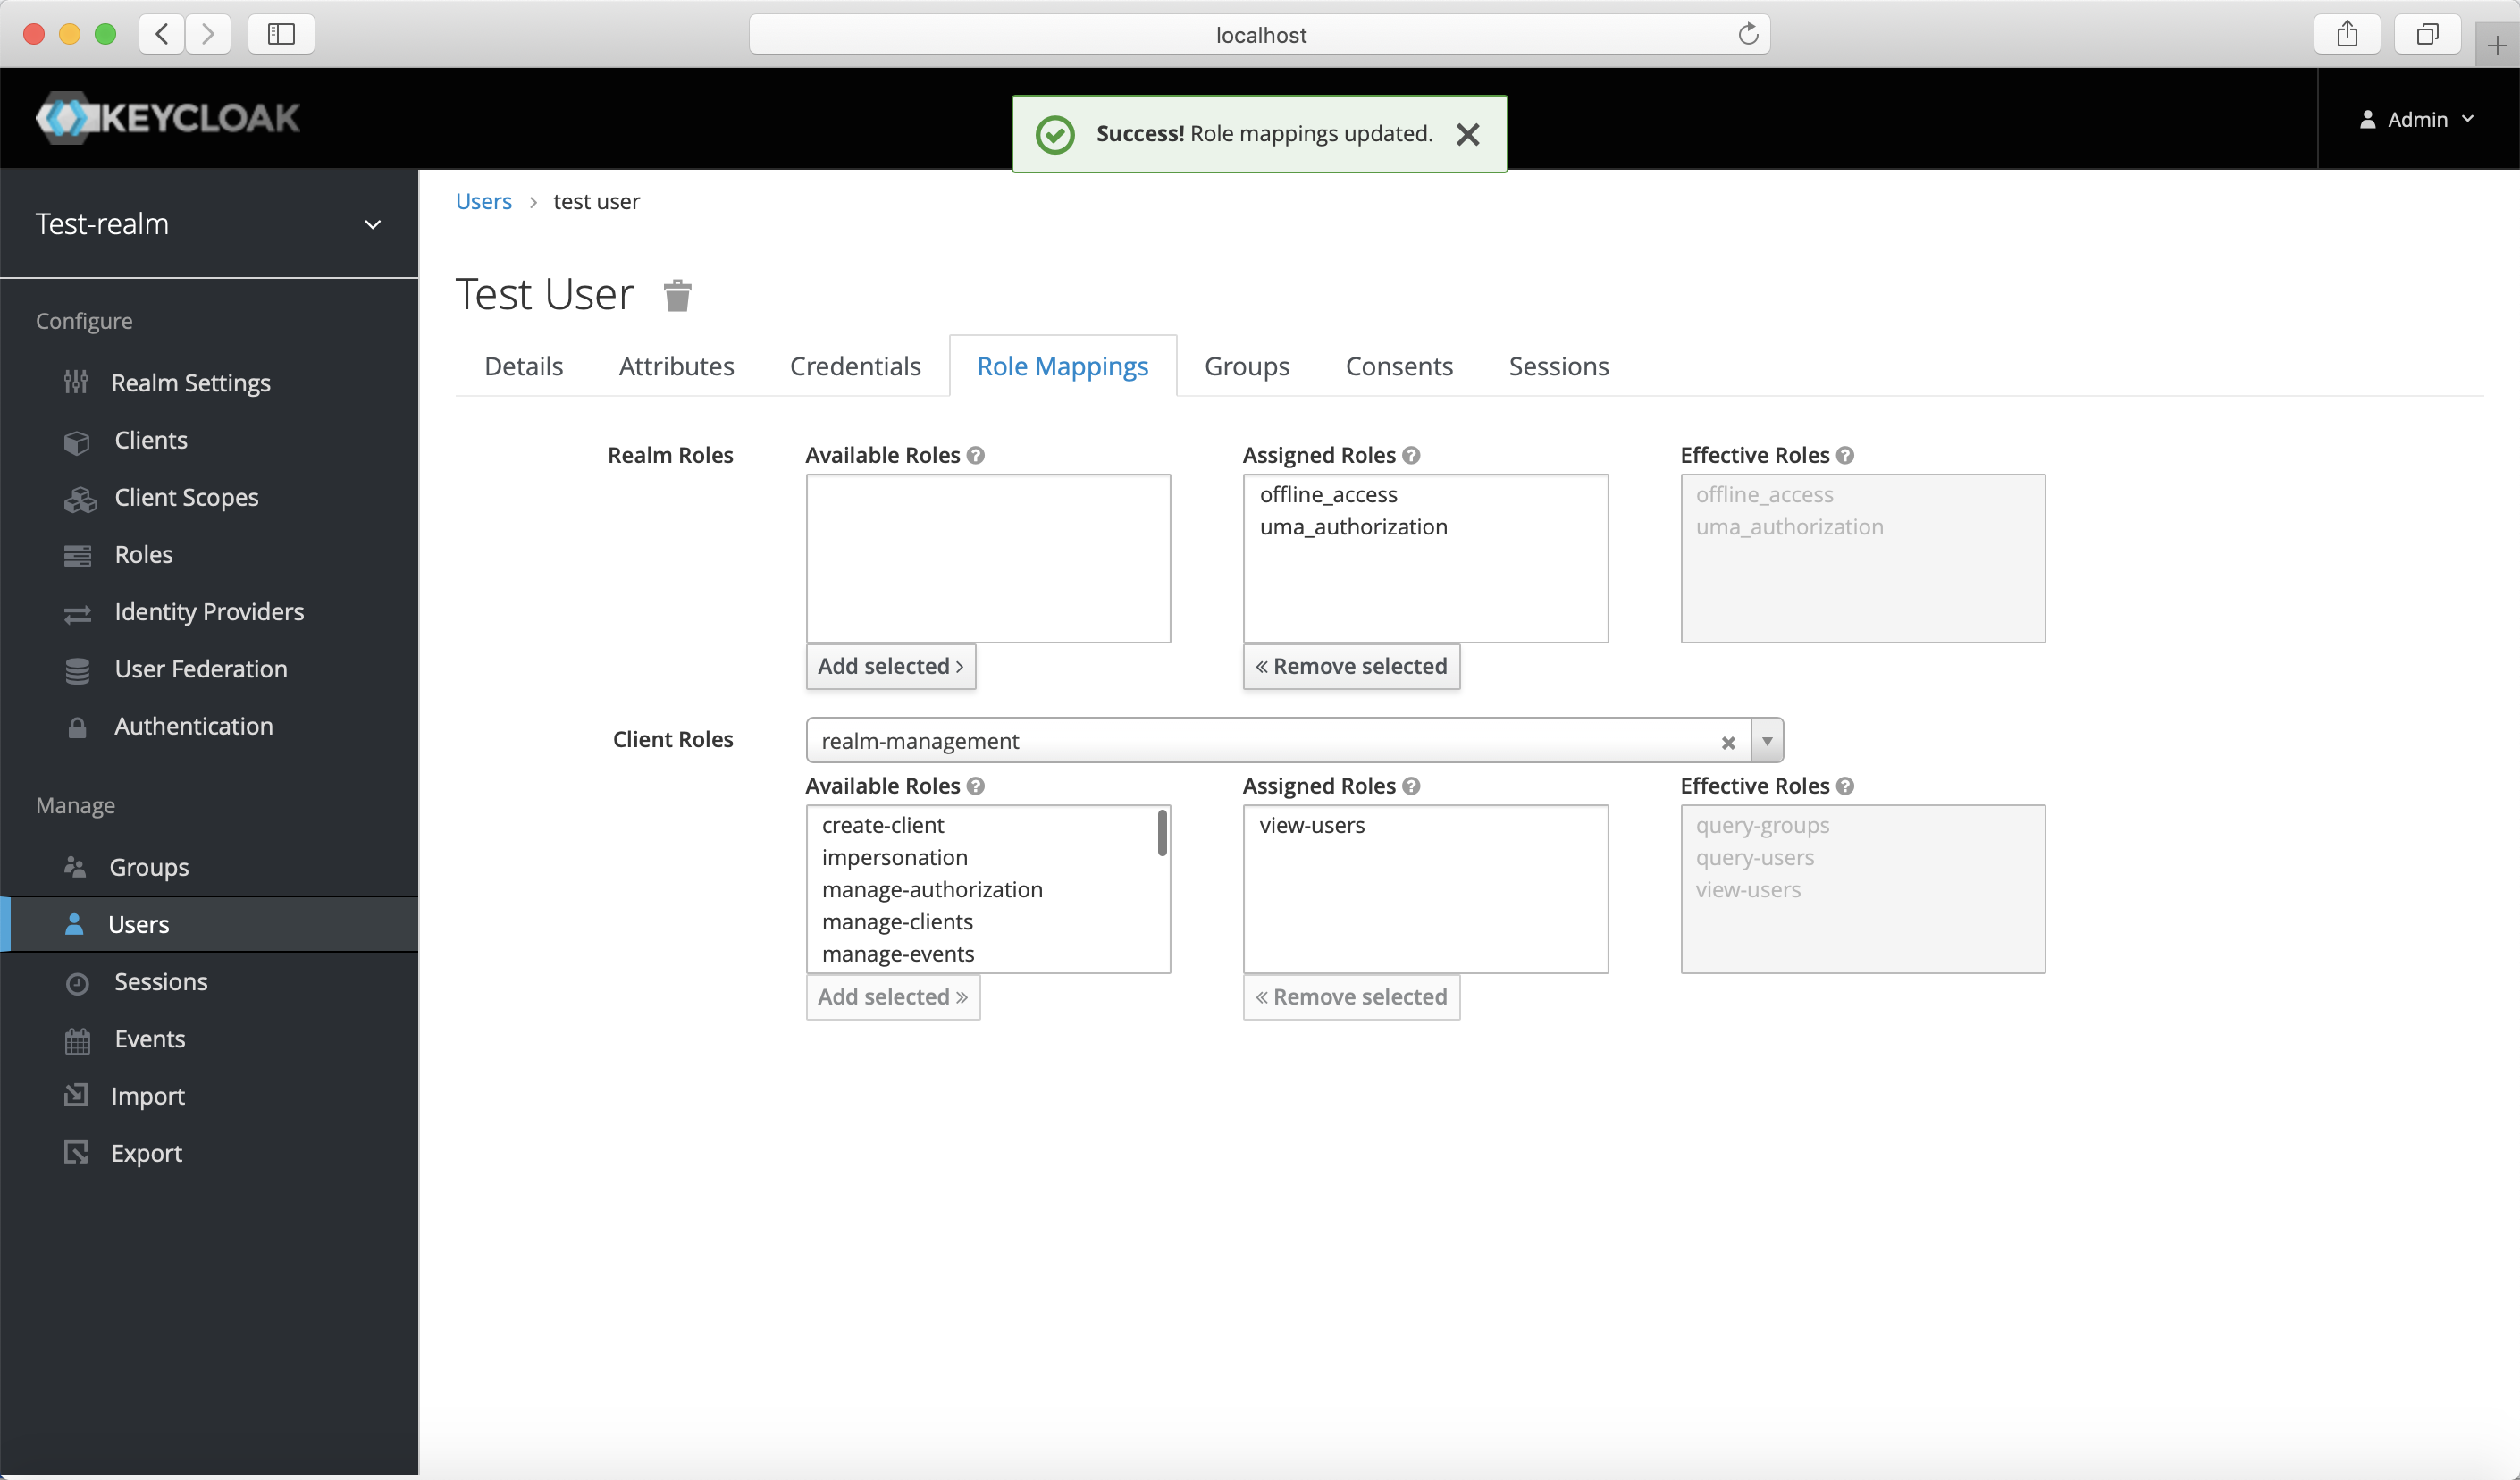
Add view-users: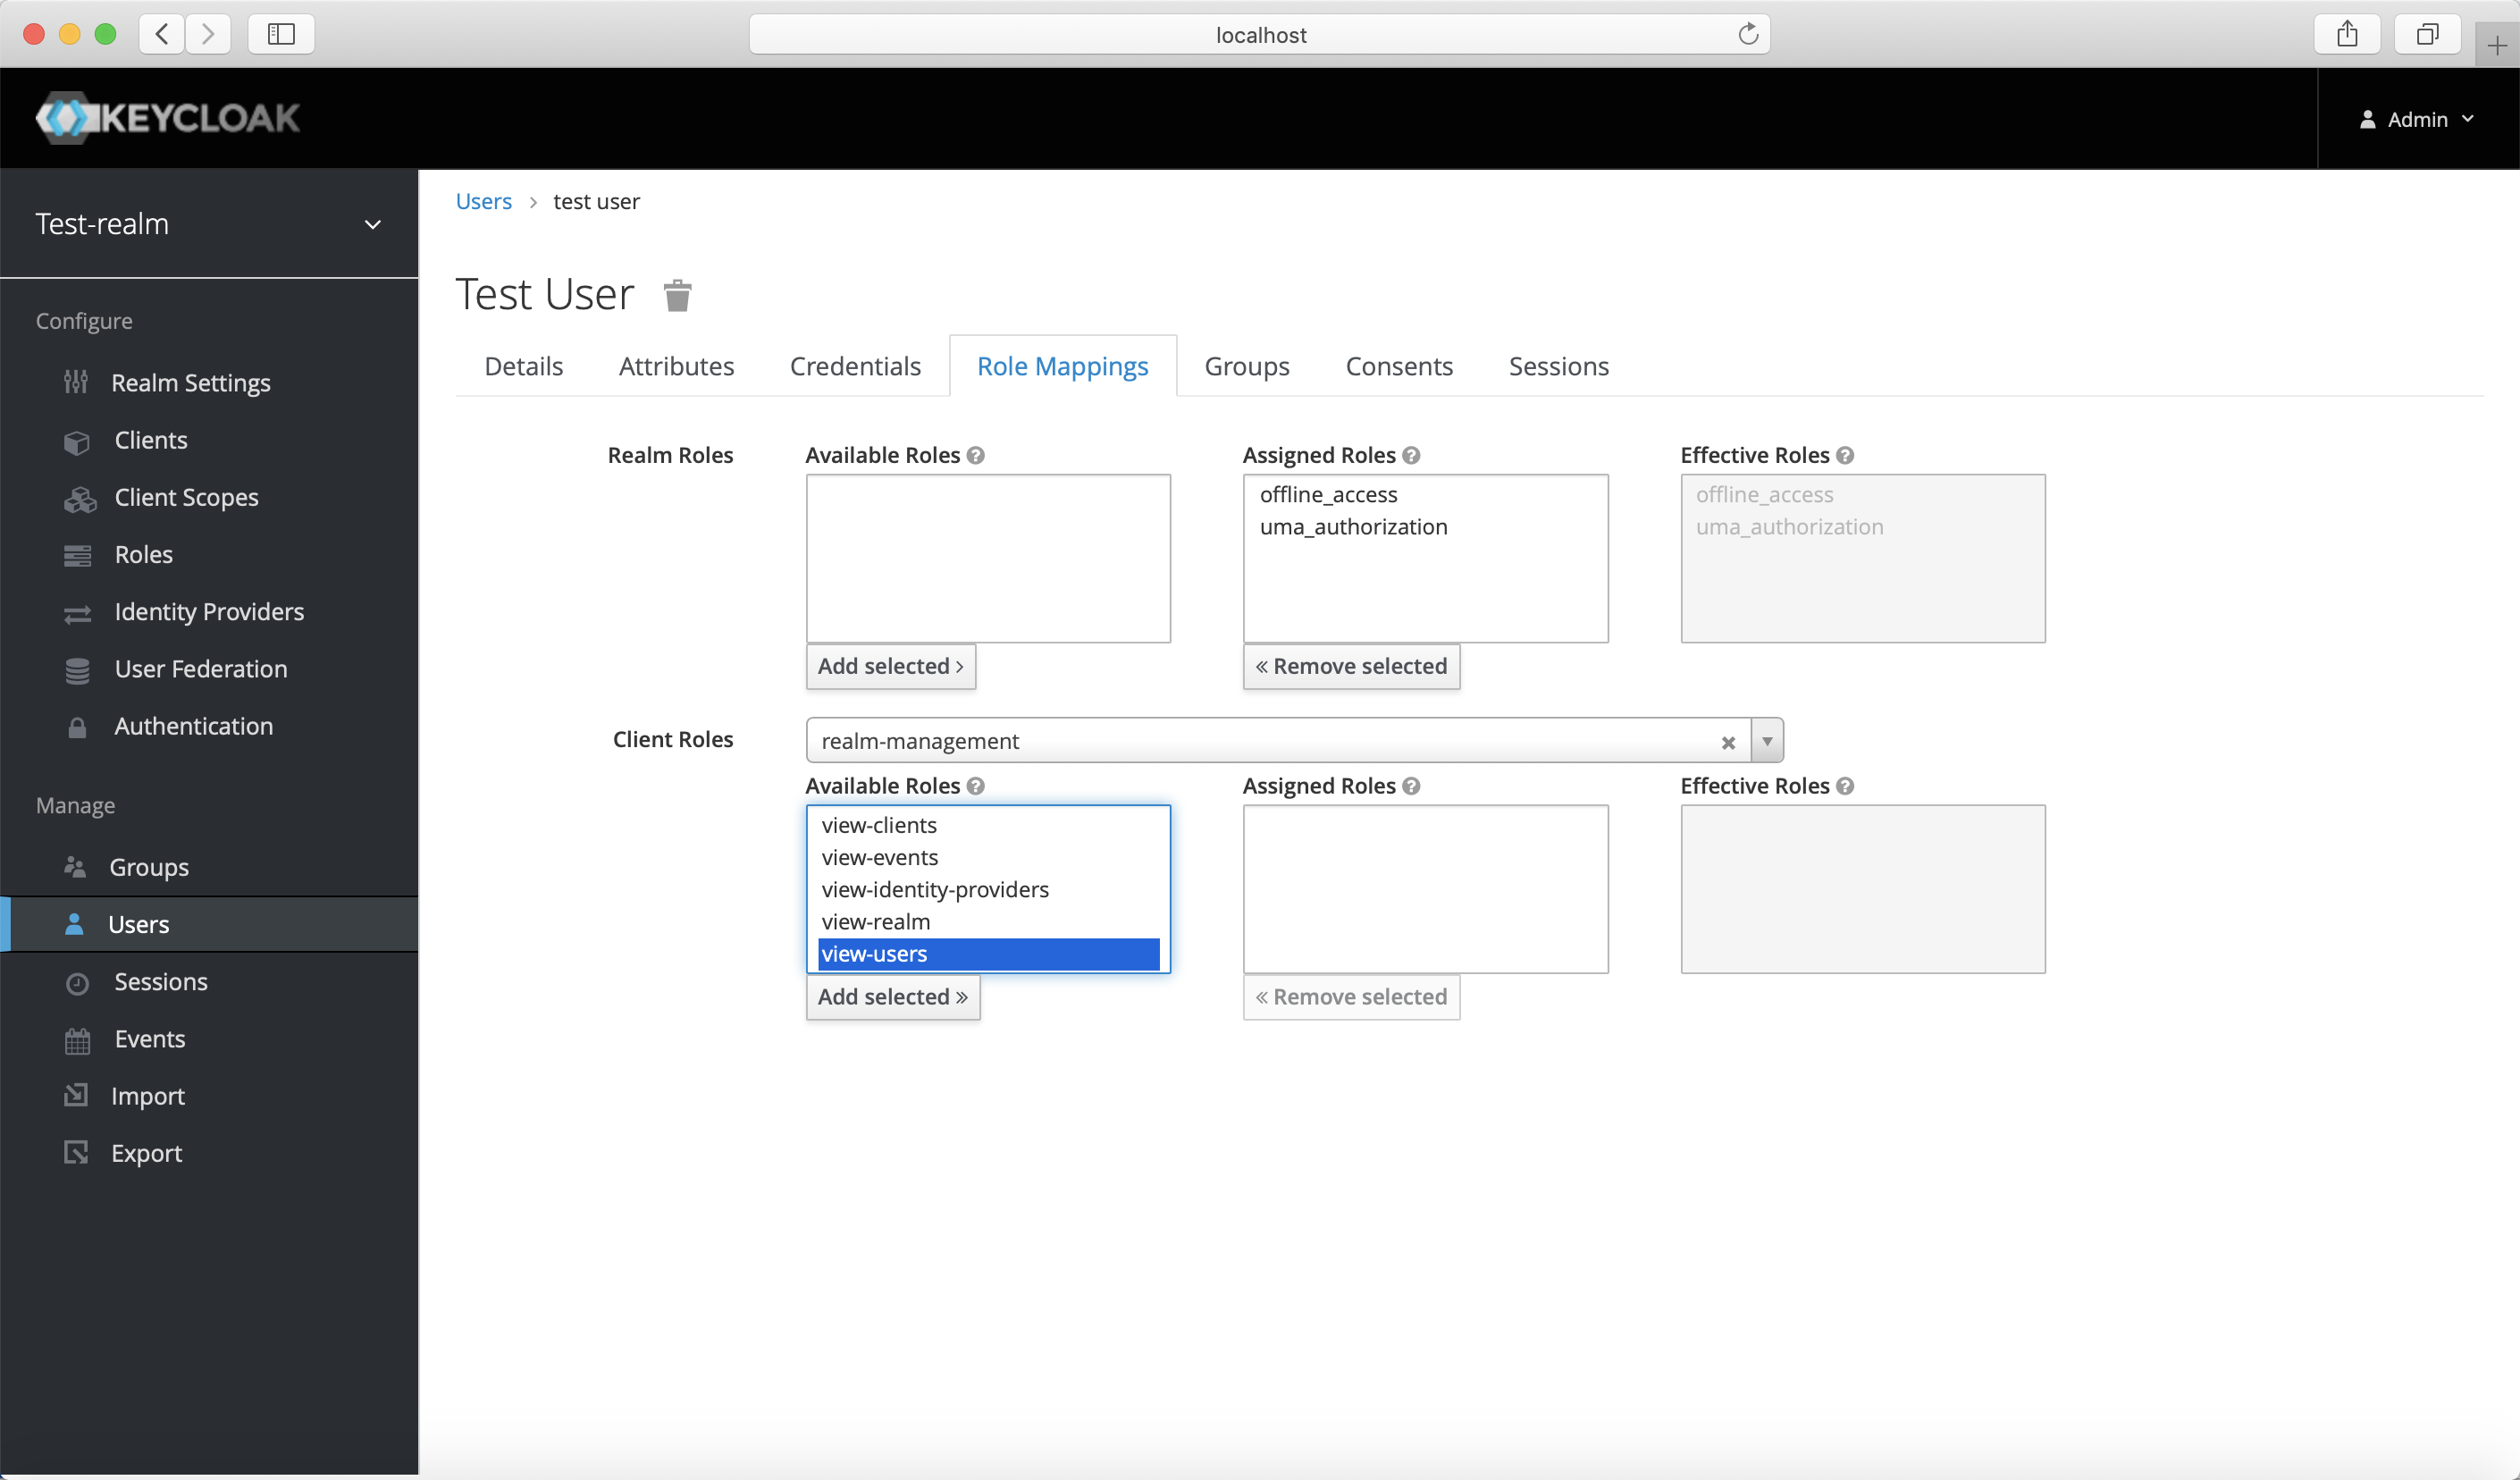
Assign user to group. Select
Groupstab, choose the group we created and clickJoin: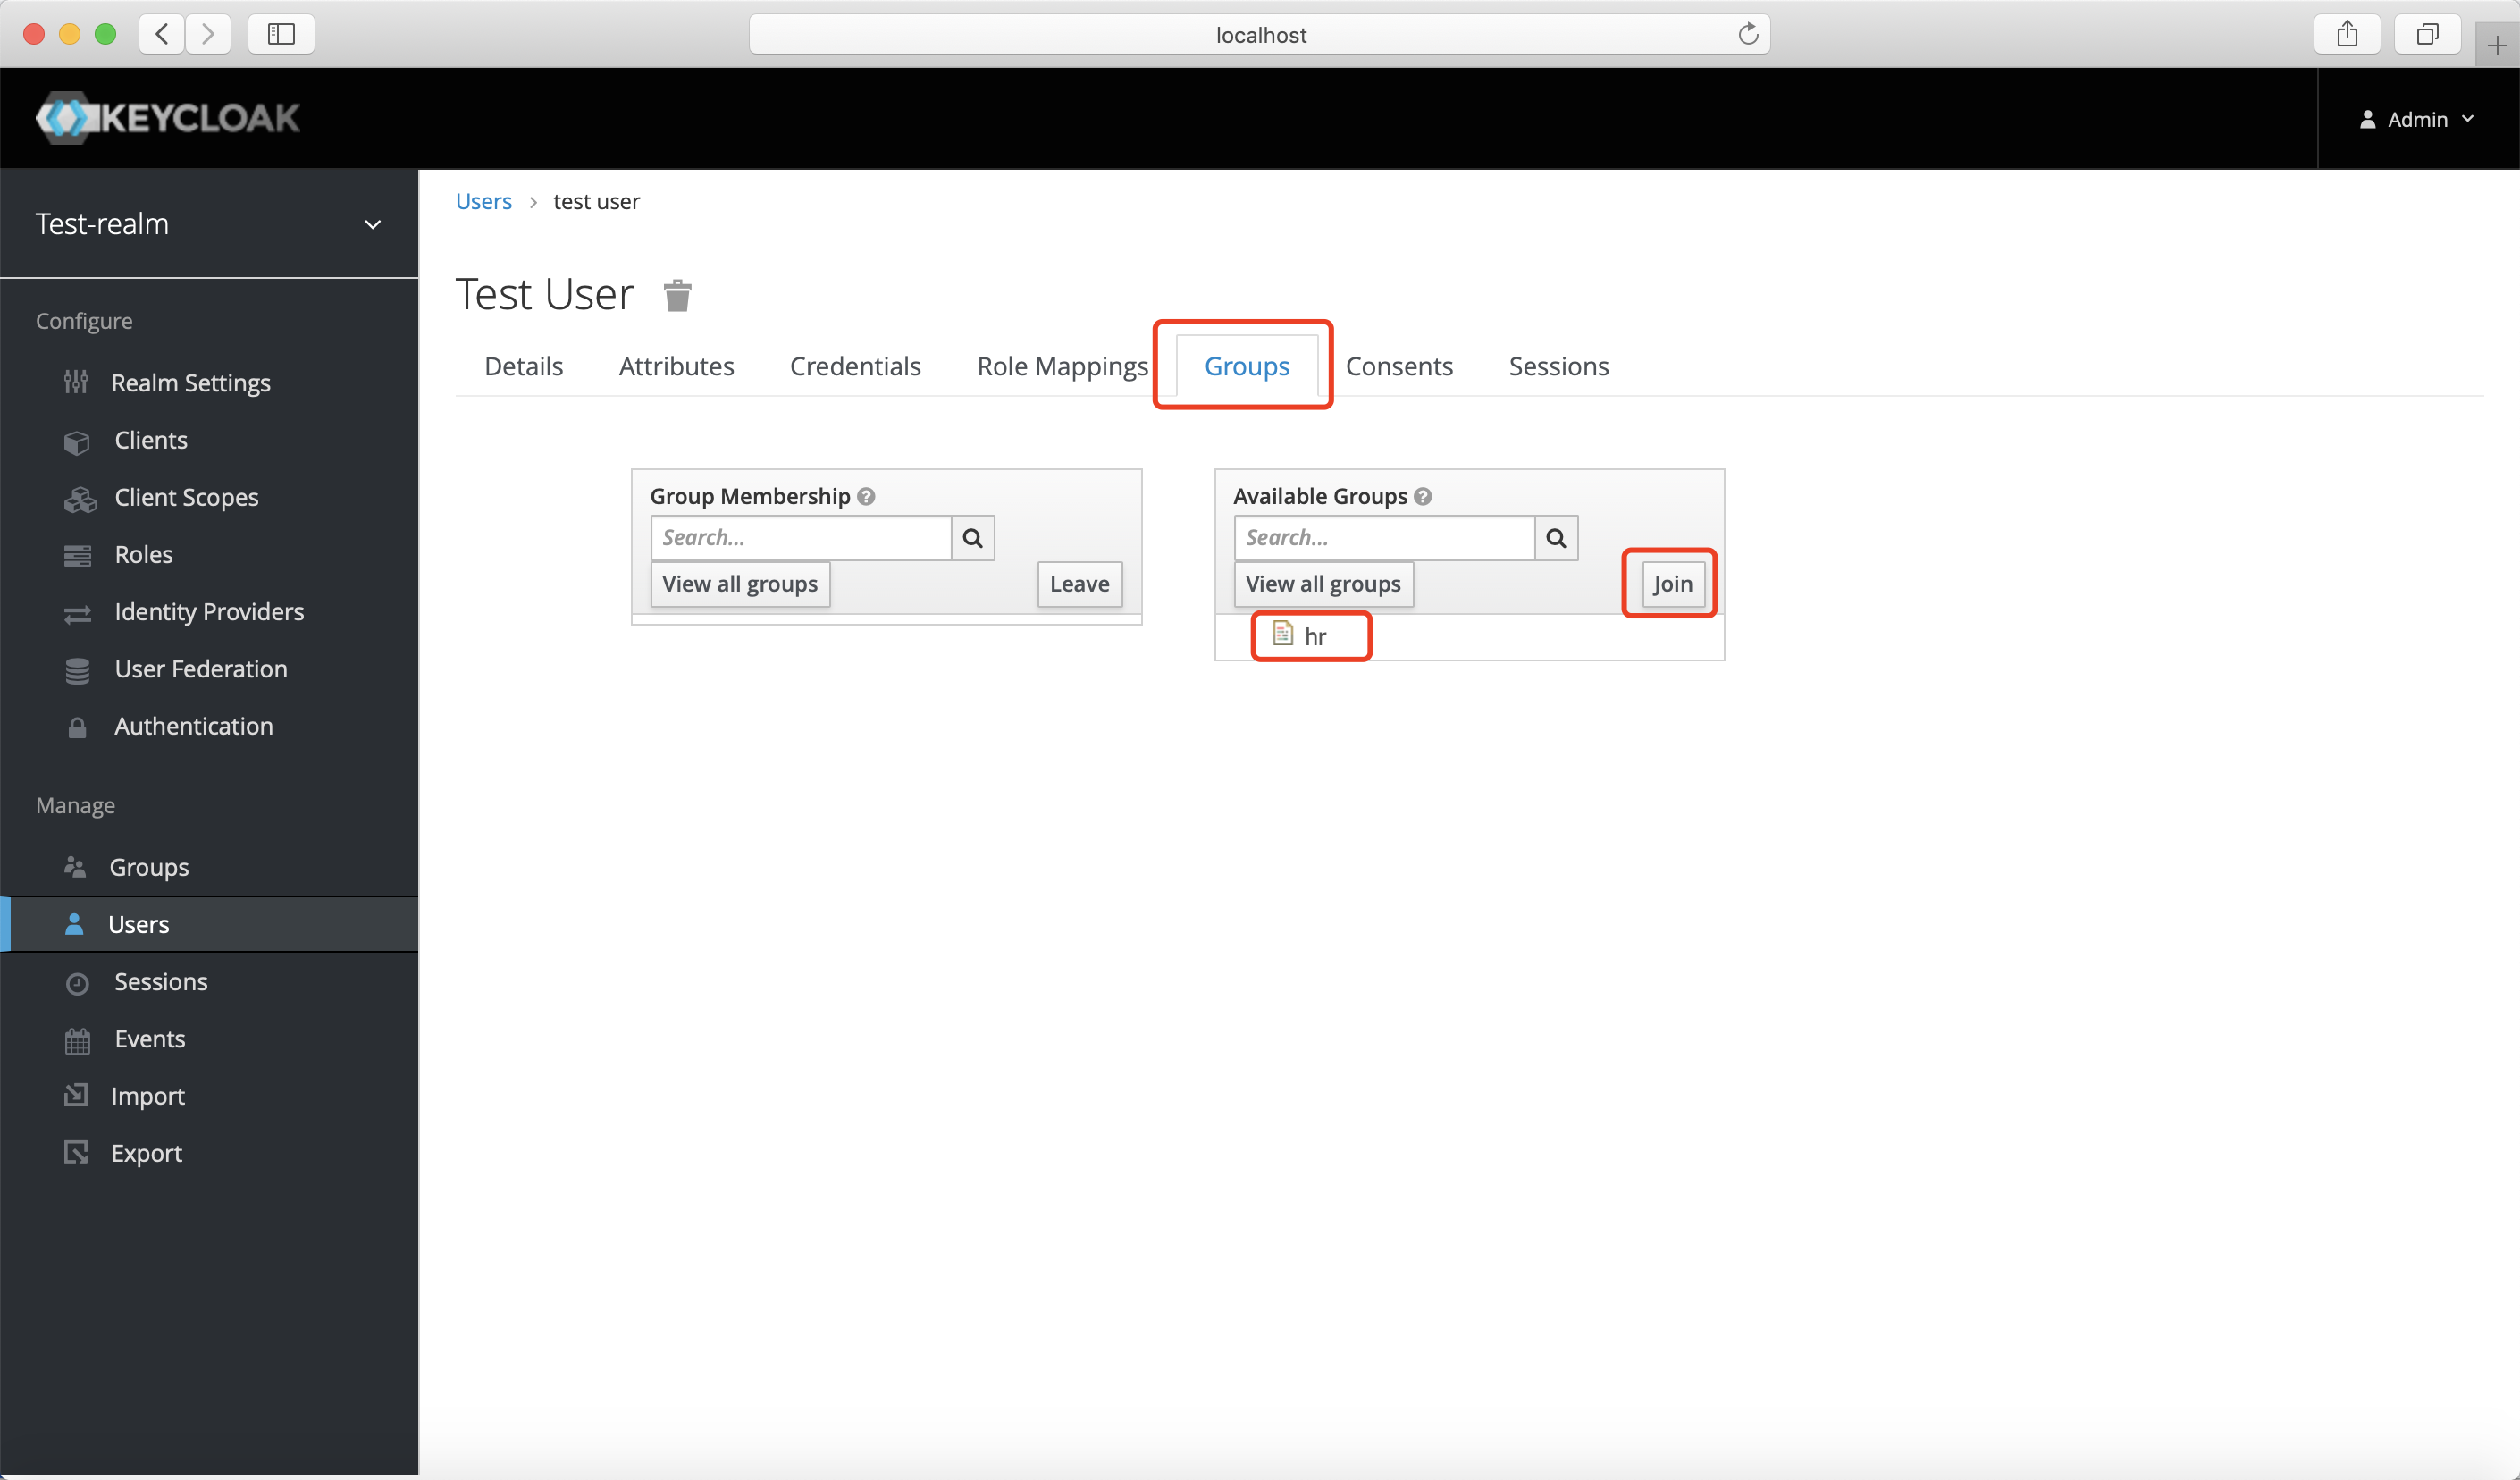
Summary
We have shown how to register a client on Keycloak. Please make sure to save the following four values for later setting in Datawiza Cloud Management Console.
- Keycloak Server
- Realm Name
- Client Id
- Client Secret