Enable Okta SSO and MFA to Oracle Hyperion via Datawiza
Overview
This tutorial shows how to enable Okta Single Sign-On (SSO) and Okta Multi-Factor Authentication (MFA) for an Oracle Hyperion application using Datawiza Access Proxy (DAP). Learn more about enabling SSO and MFA for Oracle Hyperion with Datawiza.
Benefits of integrating applications with Okta using DAP include:
- Proactive security with Zero Trust through Okta SSO.
- Easy authentication and authorization in Okta with no-code Datawiza. Use of web applications such as: Oracle JDE, Oracle E-Business Suite, Oracle Sibel, Oracle Peoplesoft, Oracle Hyperion, and home-grown apps.
- Use the Datawiza Cloud Management Console to manage access to applications in public clouds and on-premises.
Background
This document focuses on Oracle Hyperion application integration using HTTP authorization headers to manage access to protected content.
For legacy applications, due to the absence of modern protocol support, a direct integration with Okta SSO is difficult. Datawiza Access Proxy bridges the gap between the legacy application and the modern ID control plane, through protocol transitioning. DAP lowers integration overhead, saves engineering time, and improves application security.
Architecture
The solution has the following components:
- Okta : The Okta cloud-based identity and access management service, which helps users sign in and access external and internal resources.
- Datawiza Access Proxy (DAP): A lightweight container-based reverse-proxy that implements OpenID Connect (OIDC), OAuth, or Security Assertion Markup Language (SAML) for user sign-in flow. It transparently passes identity to applications through HTTP headers.
- Datawiza Cloud Management Console (DCMC): A centralized console to manage DAP. DCMC has UI and RESTful APIs for administrators to configure Datawiza Access Proxy and access control policies.
- Oracle Hyperion application : Legacy application going to be protected by Okta and DAP.
Prerequisites
Ensure the following prerequisites are met:
- An Okta subscription. If you don't have one, you can get an Okta free account.
- Install Docker and Docker Compose.
- An account with Okta and the Application administrator role.
- An Oracle Hyperion environment. Supported versions include: v11.2.8.0 or later.
- (Optional) An SSL web certificate to publish services over HTTPS. You can also use default Datawiza self-signed certs for testing.
Getting started with DAP
To integrate Oracle Hyperion with the Okta:
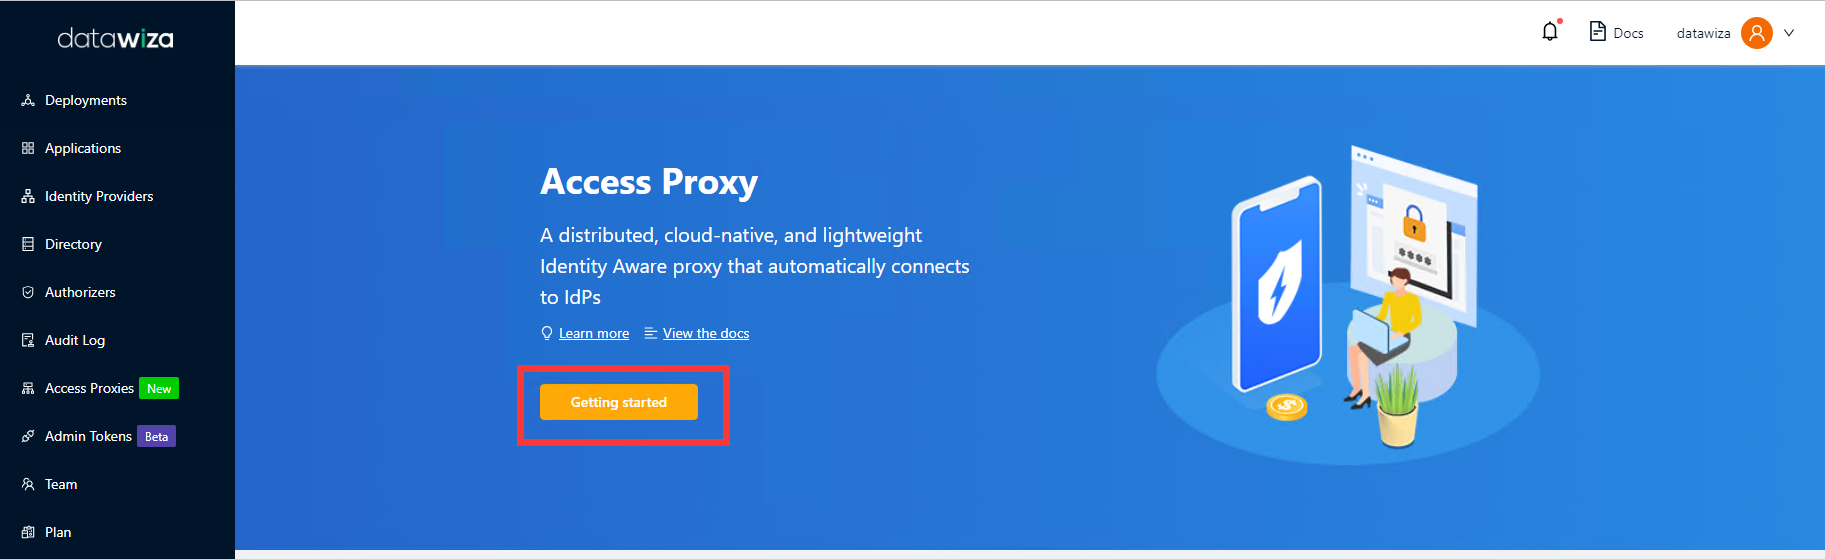
Sign in to Datawiza Cloud Management Console.
The Welcome page appears.
Select the orange Getting started button.
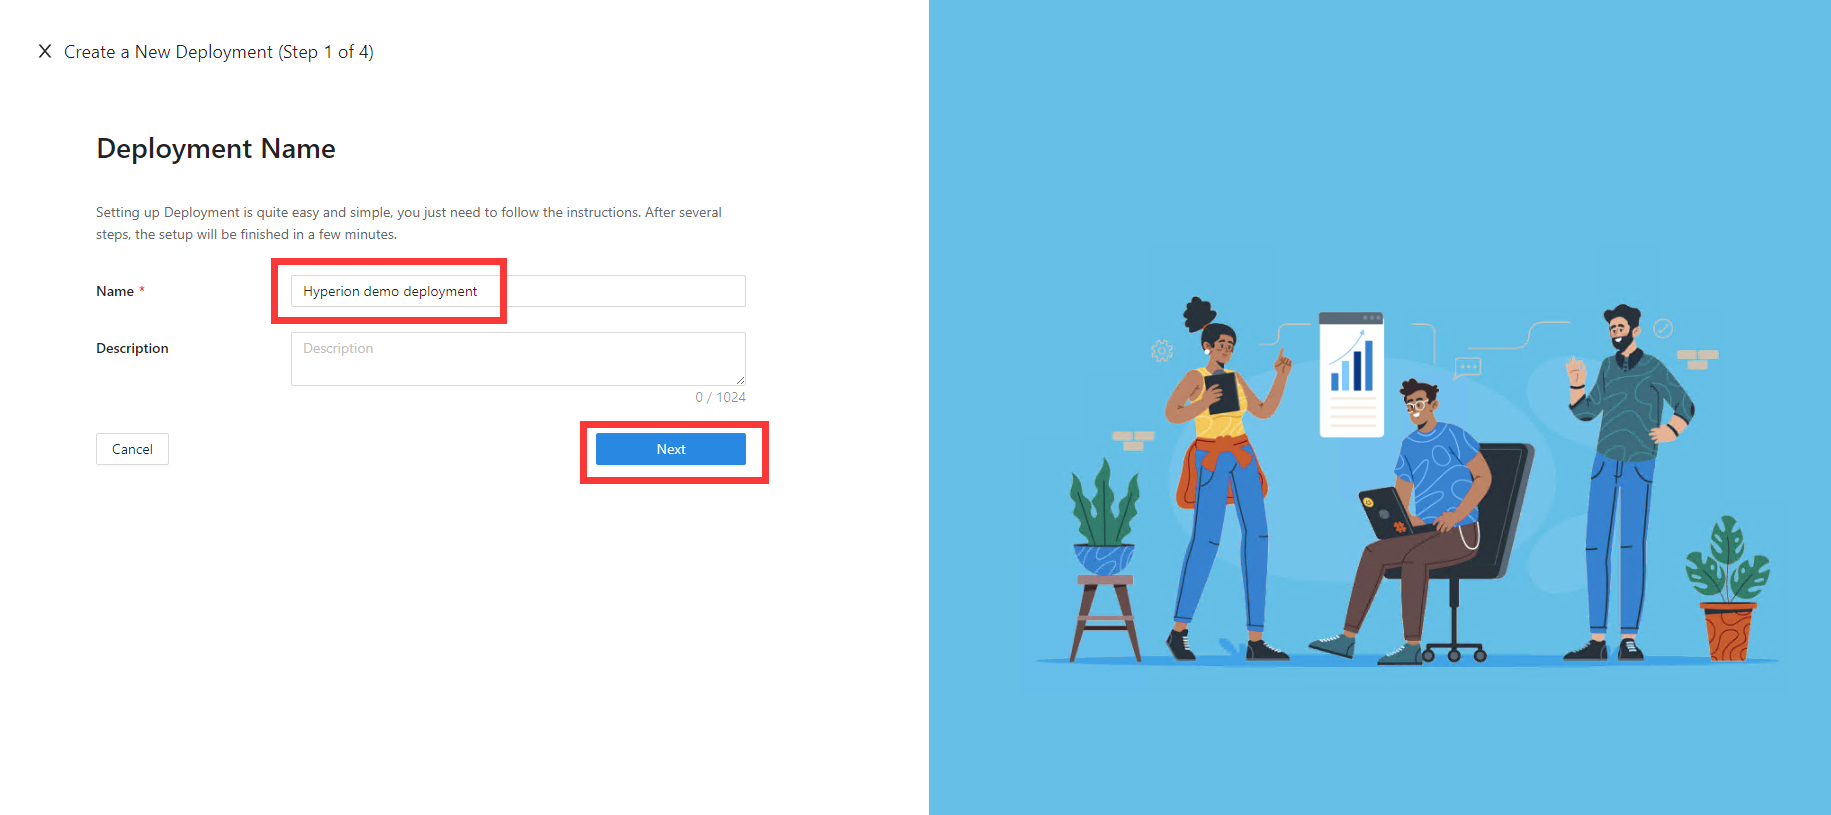
In the Name and Description fields, enter the relevant information.
Select Next.
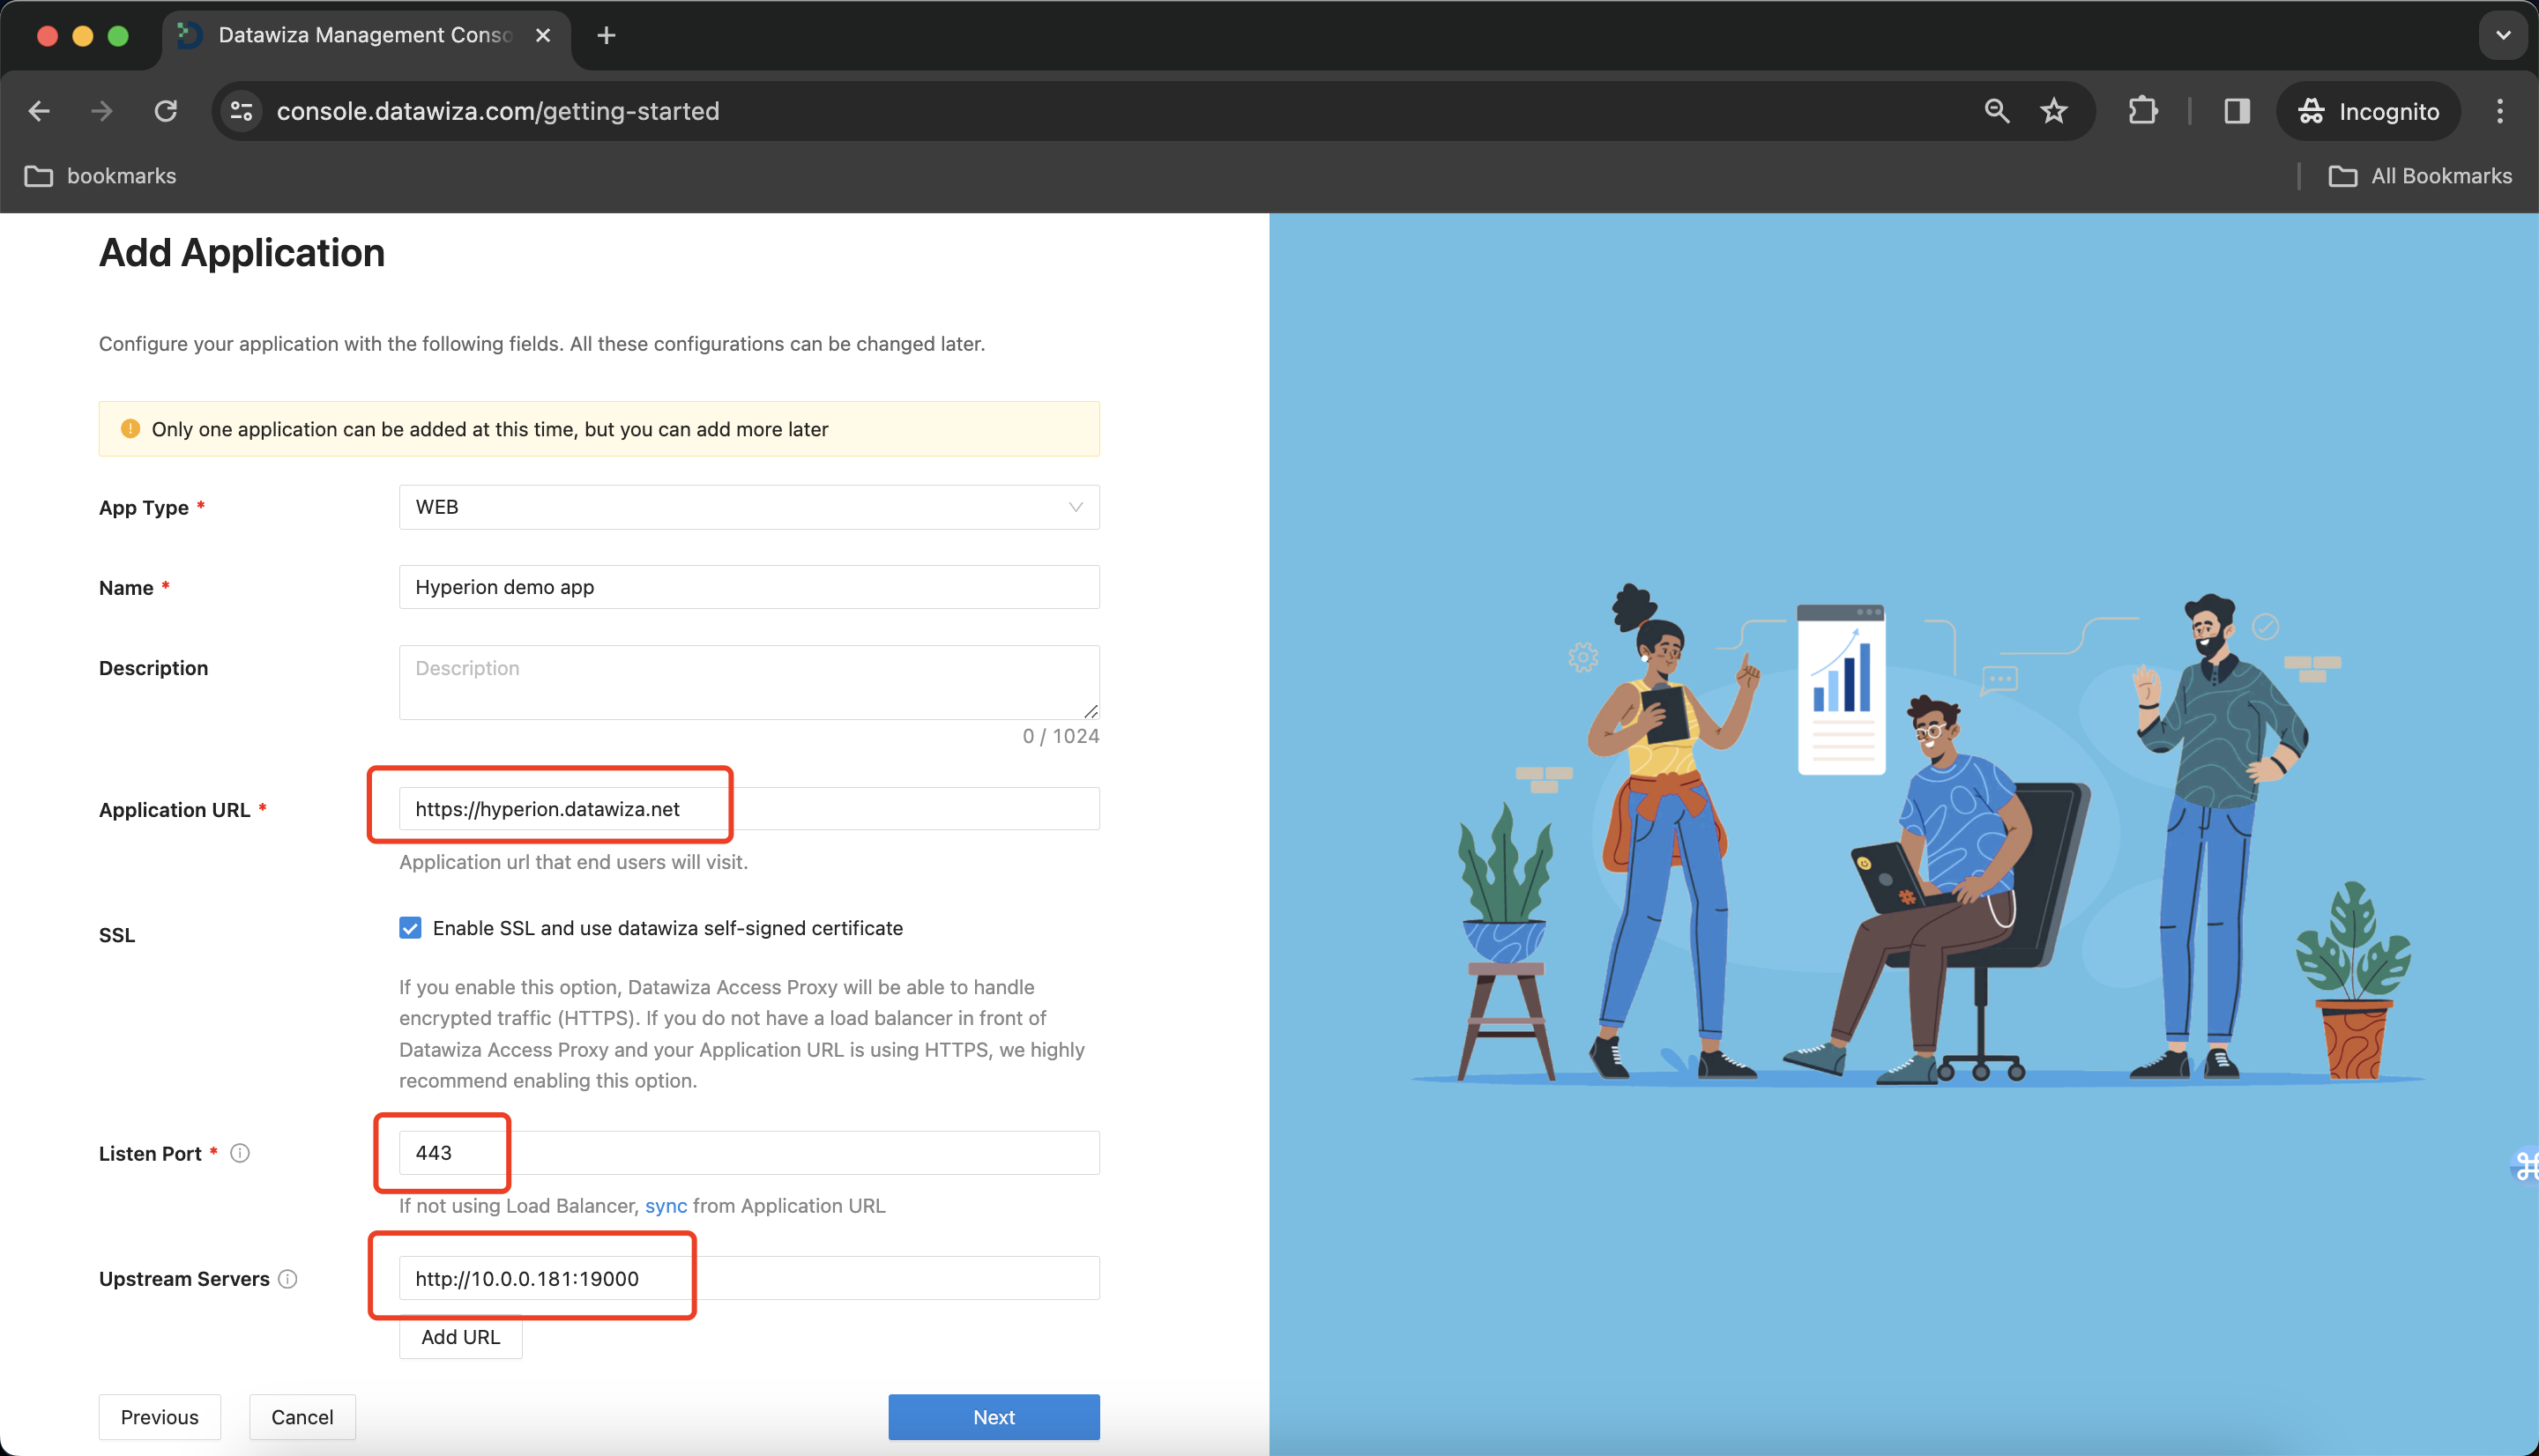
On the Add Application dialog, use the following values:
Property Value App Type Web Name Enter a unique application name. Application URL For example: https://hyperion-external.example.com. For testing, you can use localhost DNS. If you aren't deploying DAP behind a load balancer, use the Public Domain with the port.Listen Port The port that DAP listens on. Upstream Servers The Oracle Hyperion implementation URL and port to be protected. Select Next.
On the Configure IdP dialog, enter the relevant information.
Input the IdP name. Select
OIDCasProtocolandOktaasIdentity Provider. Populate the fields of the form with the keys/values obtained from IdP Configuration Guide: Okta.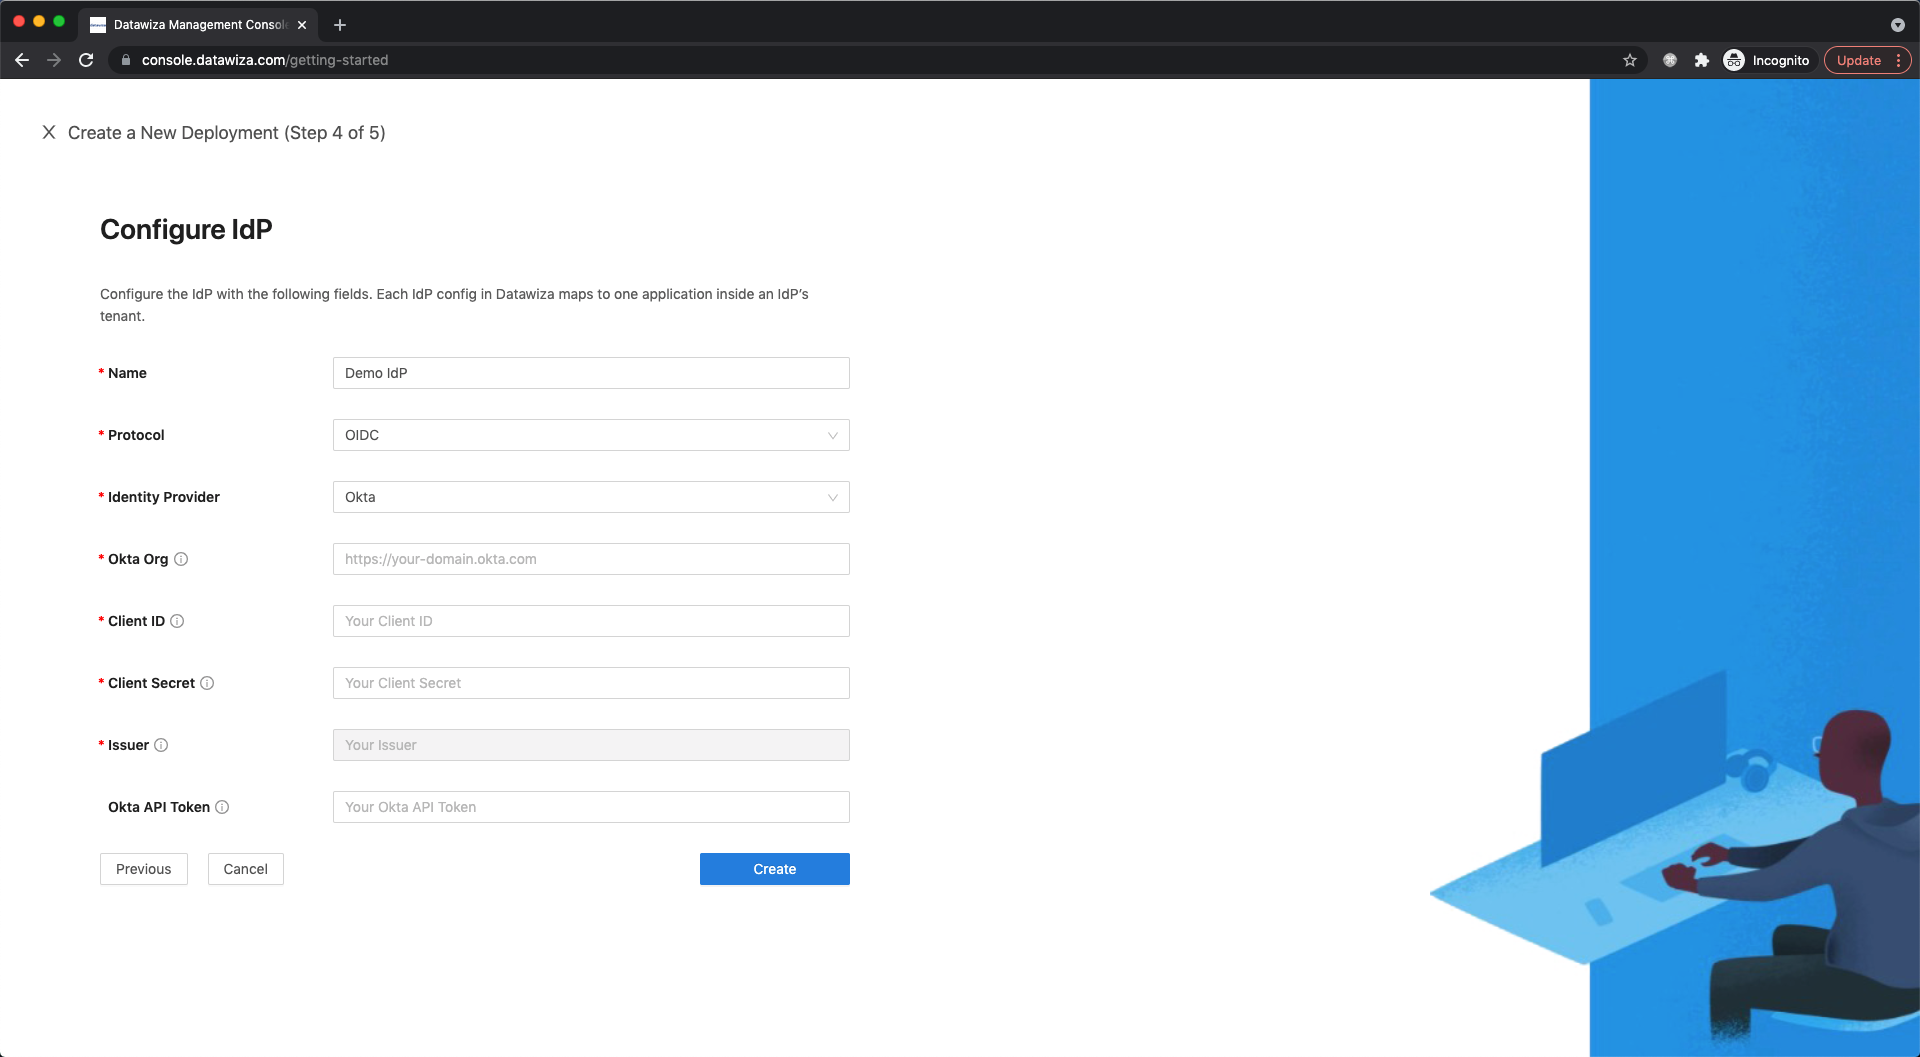
Select Create.
The DAP deployment page appears.
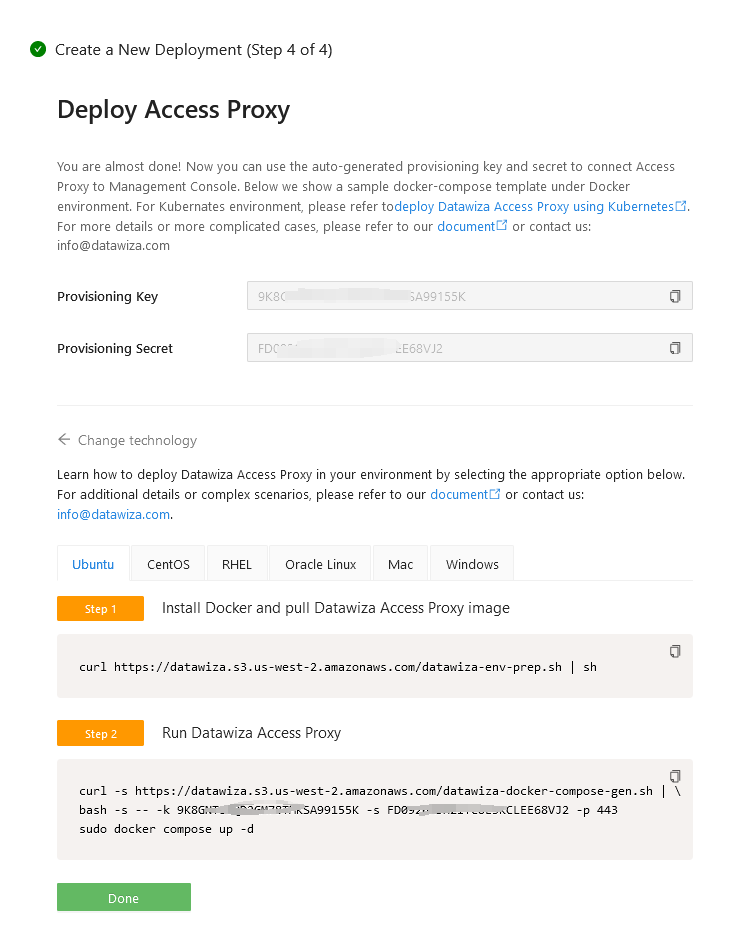
Install and run Datawiza Access Proxy
Once clicking on the Create button, the basic configuration on the management console is finished. You will see the final step of the guide, which presents you with a page showing the simple steps to deploy Datawiza Access Proxy (DAP) with your application. Note down the commands for your deployment. The first command will download Docker and Datawiza Access Proxy image, and the second command will create a Docker Compose file and run Datawiza Access Proxy. You can refer to Install and Run Datawiza Access Proxy by command for more information.
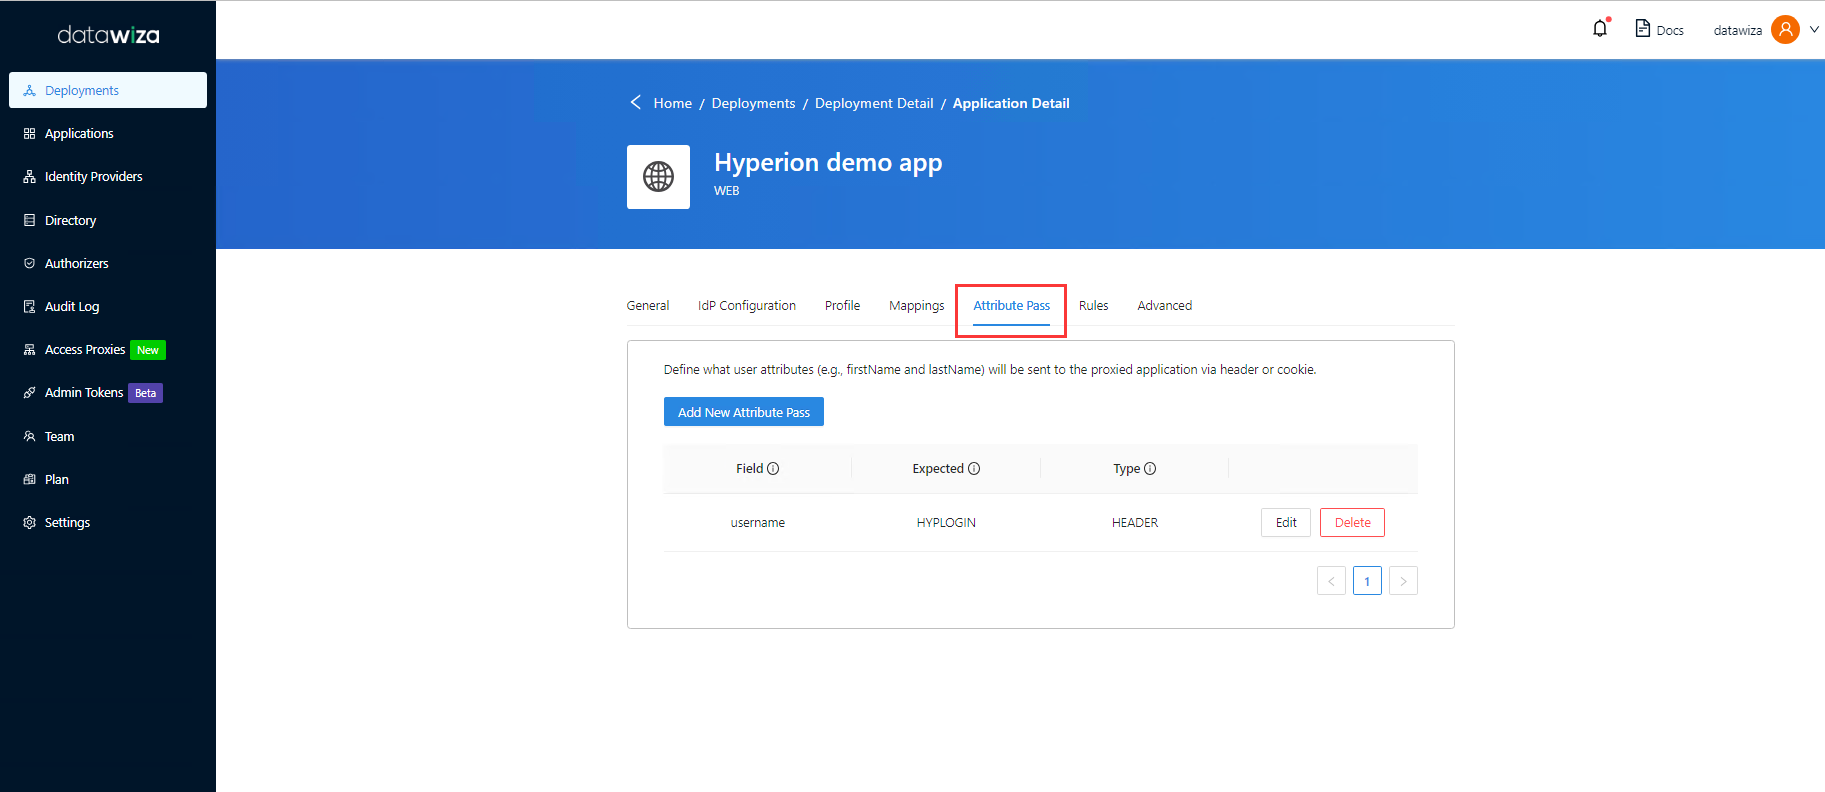
SSO and HTTP headers
The DAP gets user attributes from IdP and passes them to the upstream application via header or cookie.
For the Oracle Hyperion application to recognize the user correctly, there's another configuration step. Using a certain name, it instructs DAP to pass the values from the IdP to the application through the HTTP header.
Such configuration will be done in the Applications tab on the left panel and go to Attribute Pass sub-tab. For Oracle Hyperion, please refer to the screenshot below to configure the attribute pass:
| Property | Value |
|---|---|
| Field | Username |
| Expected | HYPLOGIN |
| Type | Header |
Info
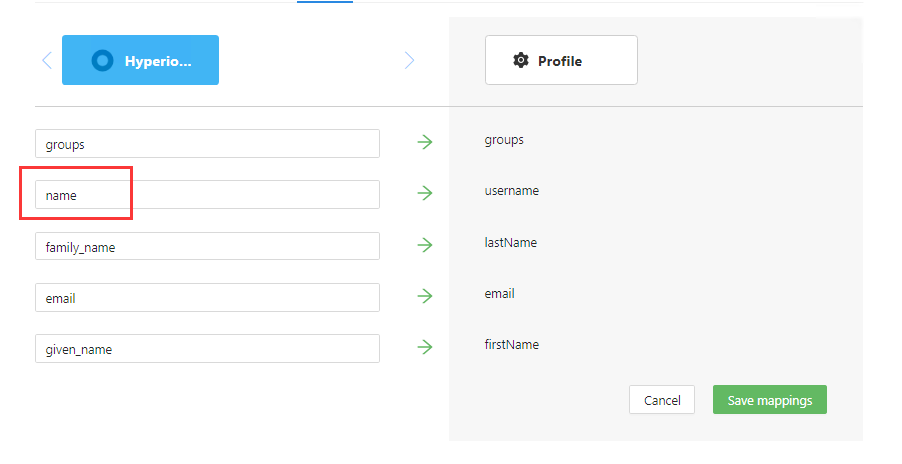
This configuration uses the Okta name as the sign in username used by Oracle Hyperion. Please make sure that the name is as same as the name in Hyperion user directories. To use another user identity, go to the Mappings tab.
SSL Configuration
Select the Advanced tab.
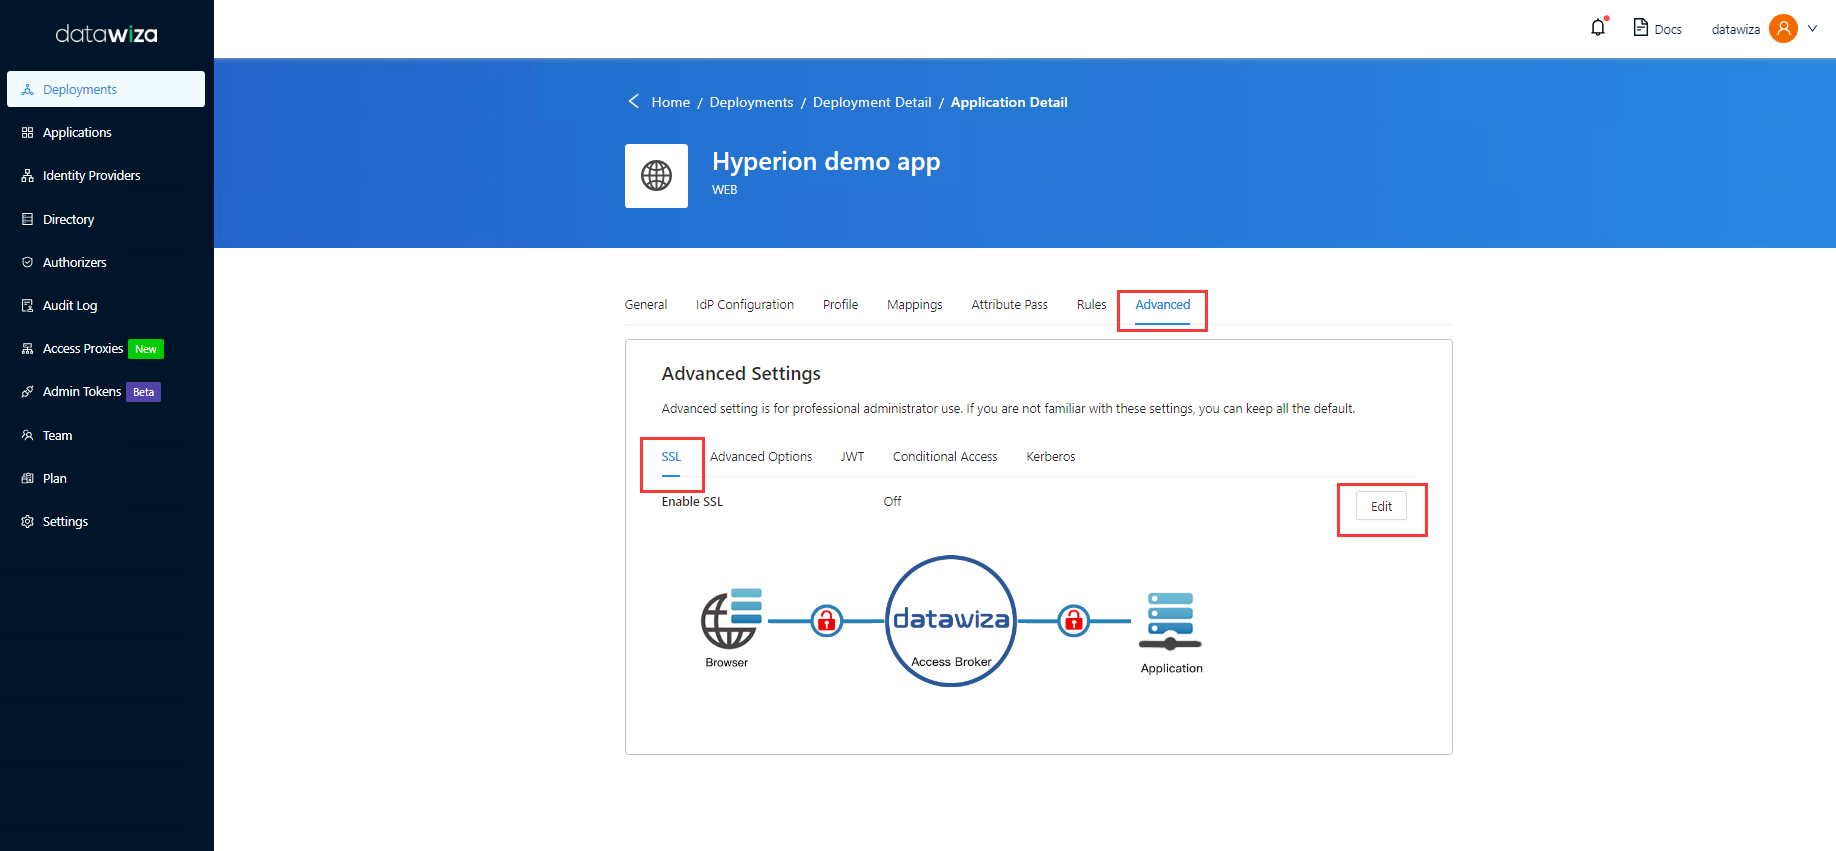
Select Enable SSL.
From the Cert Type dropdown, select a type.
For testing purposes, we'll be providing a self-signed certificate.
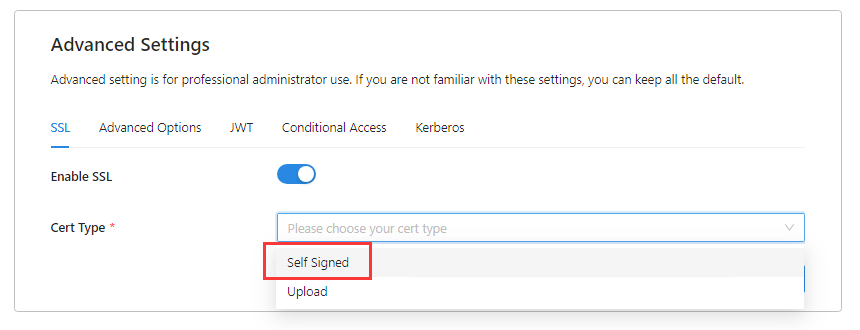
Info
You have the option to upload a certificate from a file.
Click Save.
Login and Logout Redirect URI
- Click Advanced Options.
- Input
/workspace/index.jspin both Login Redirect URI and Logout Redirect URI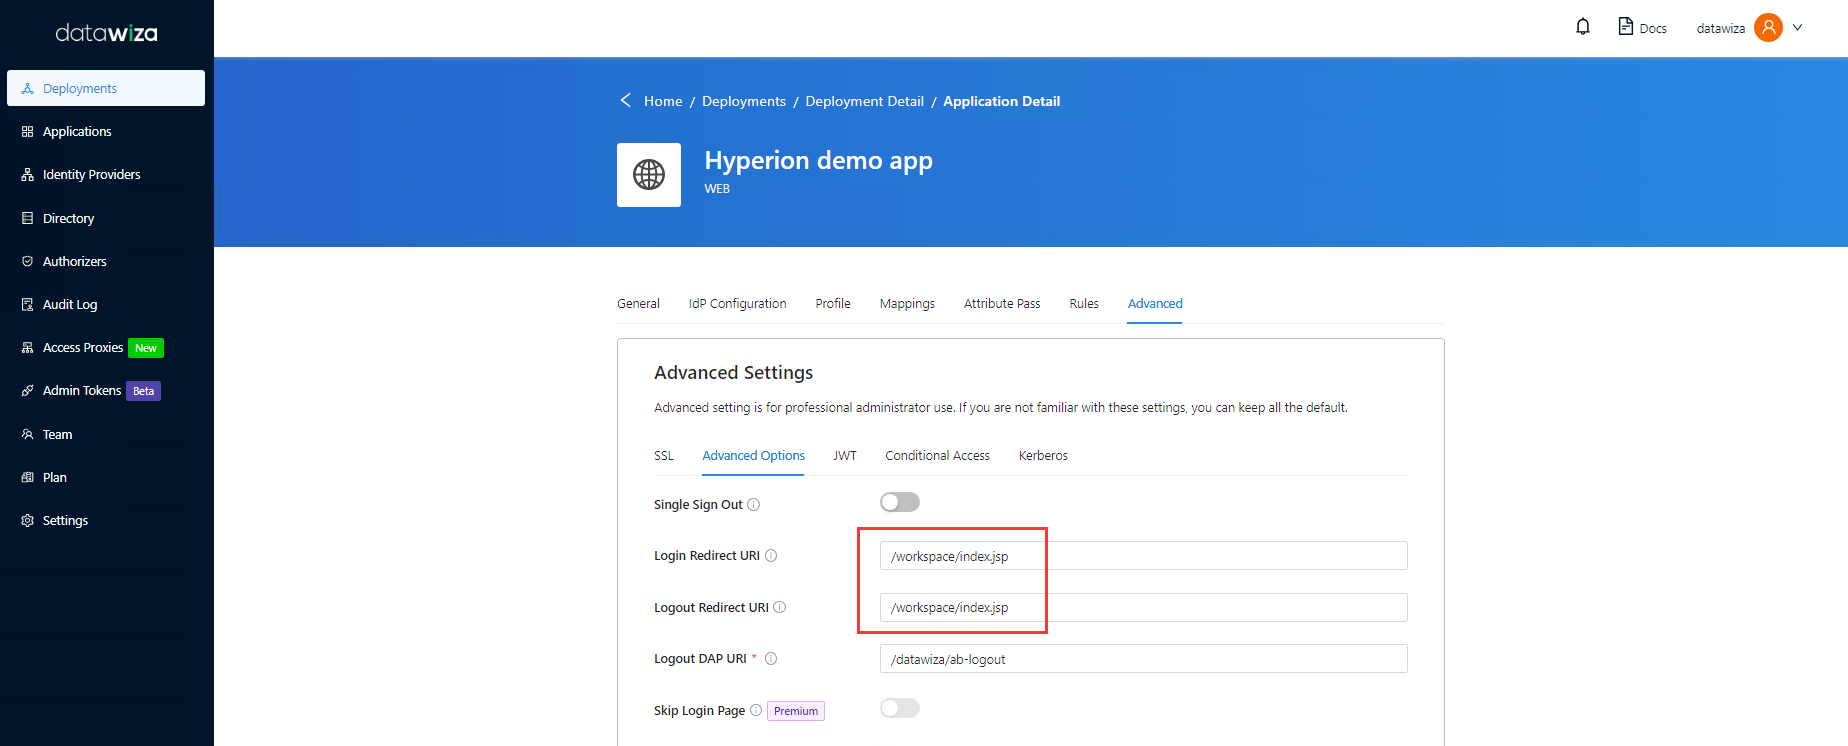
- Click Save.
(Optional) Enable Okta Multi-Factor Authentication
To provide an extra level of security for sign-ins, enforce multifactor authentication (MFA) for user sign-in. One way to achieve this is to Enable MFA on the Okta portal.
Enable SSO in the Oracle Hyperion Console
To enable SSO in the Oracle Hyperion environment:
- Log into to Hyperion Shared Service Console
http://{your-hyperion-fqdn}:19000/workspace/index.jspas a System Administrator.
Enable SSO
- Select Navigate, and then Shared Services Console.
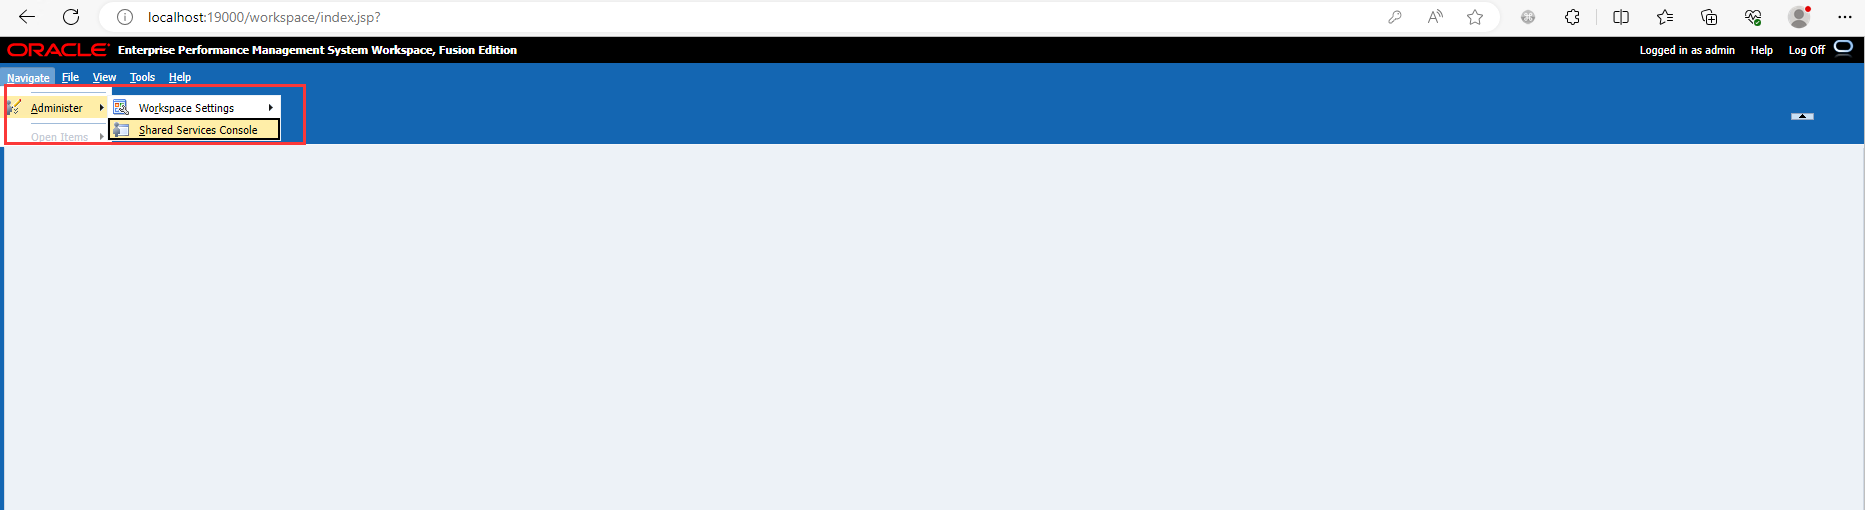
- Select Adminstration, and then Configure User Directories.
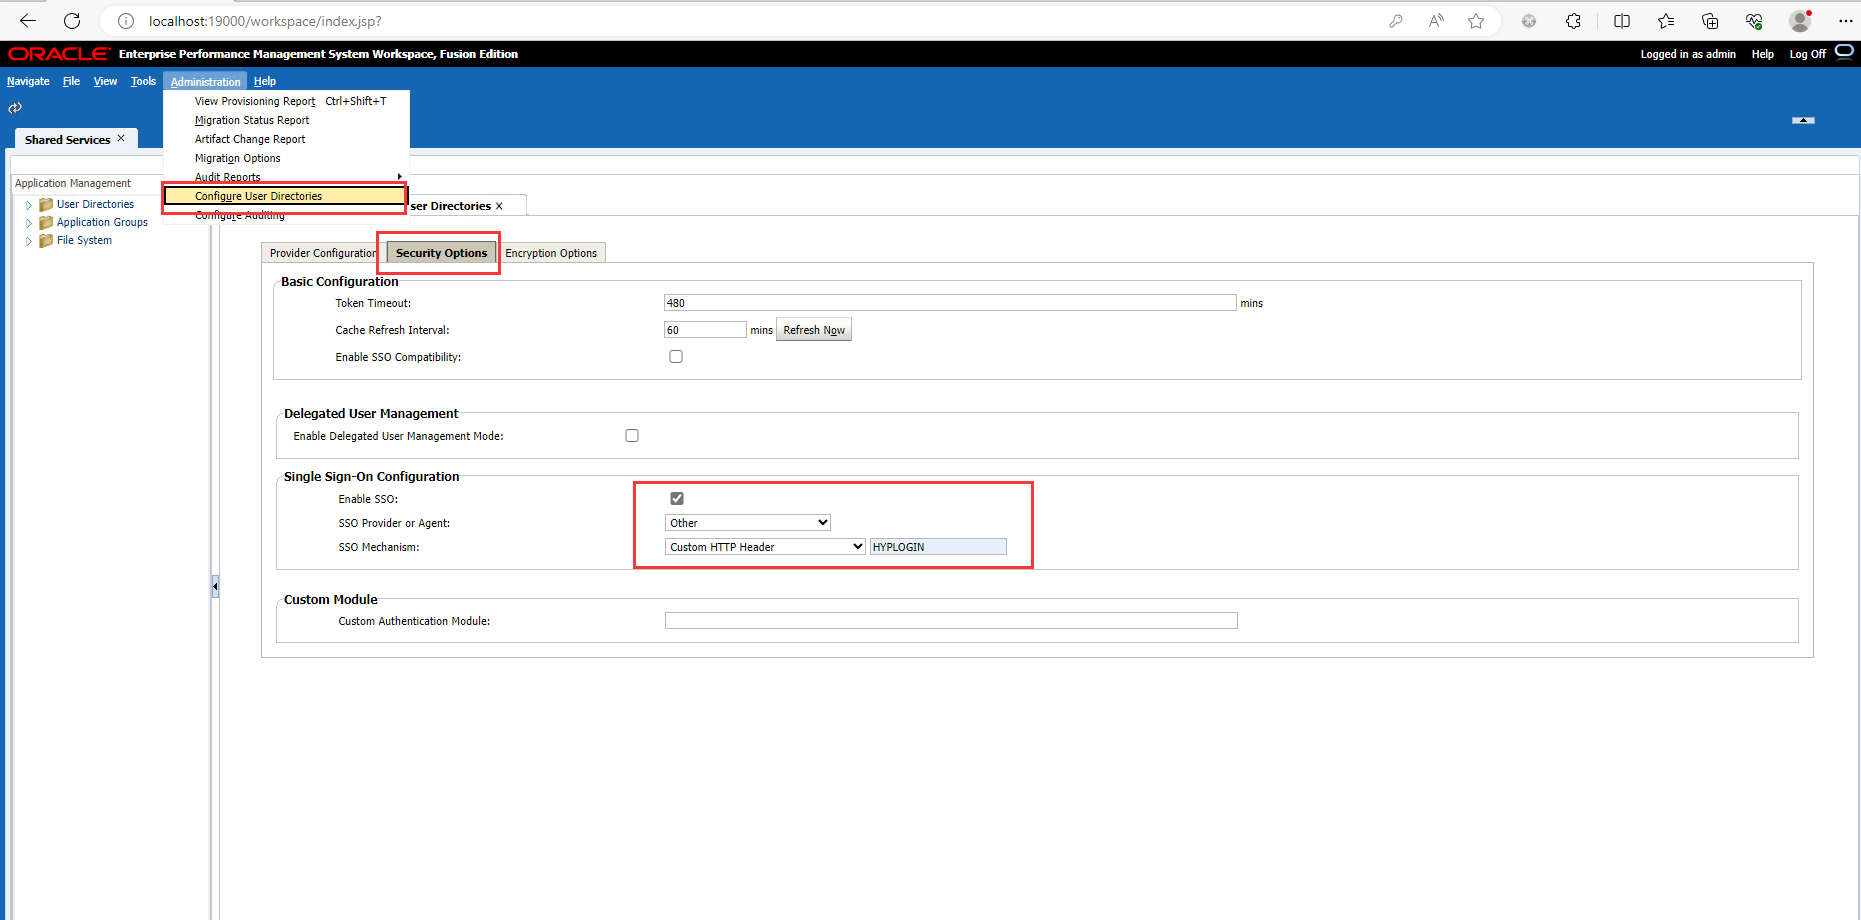
- Click Security Options.
- In the Single Sign-On Configuration section:
- Select the Enable SSO check box.
- From SSO Provider or Security Agent drop-down list, select Other.
- From SSO Mechanism drop-down list, select Custom HTTP Header and then specify the name of the header that the security agent passes to EPM System, which is HYPLOGIN.
- Click OK.
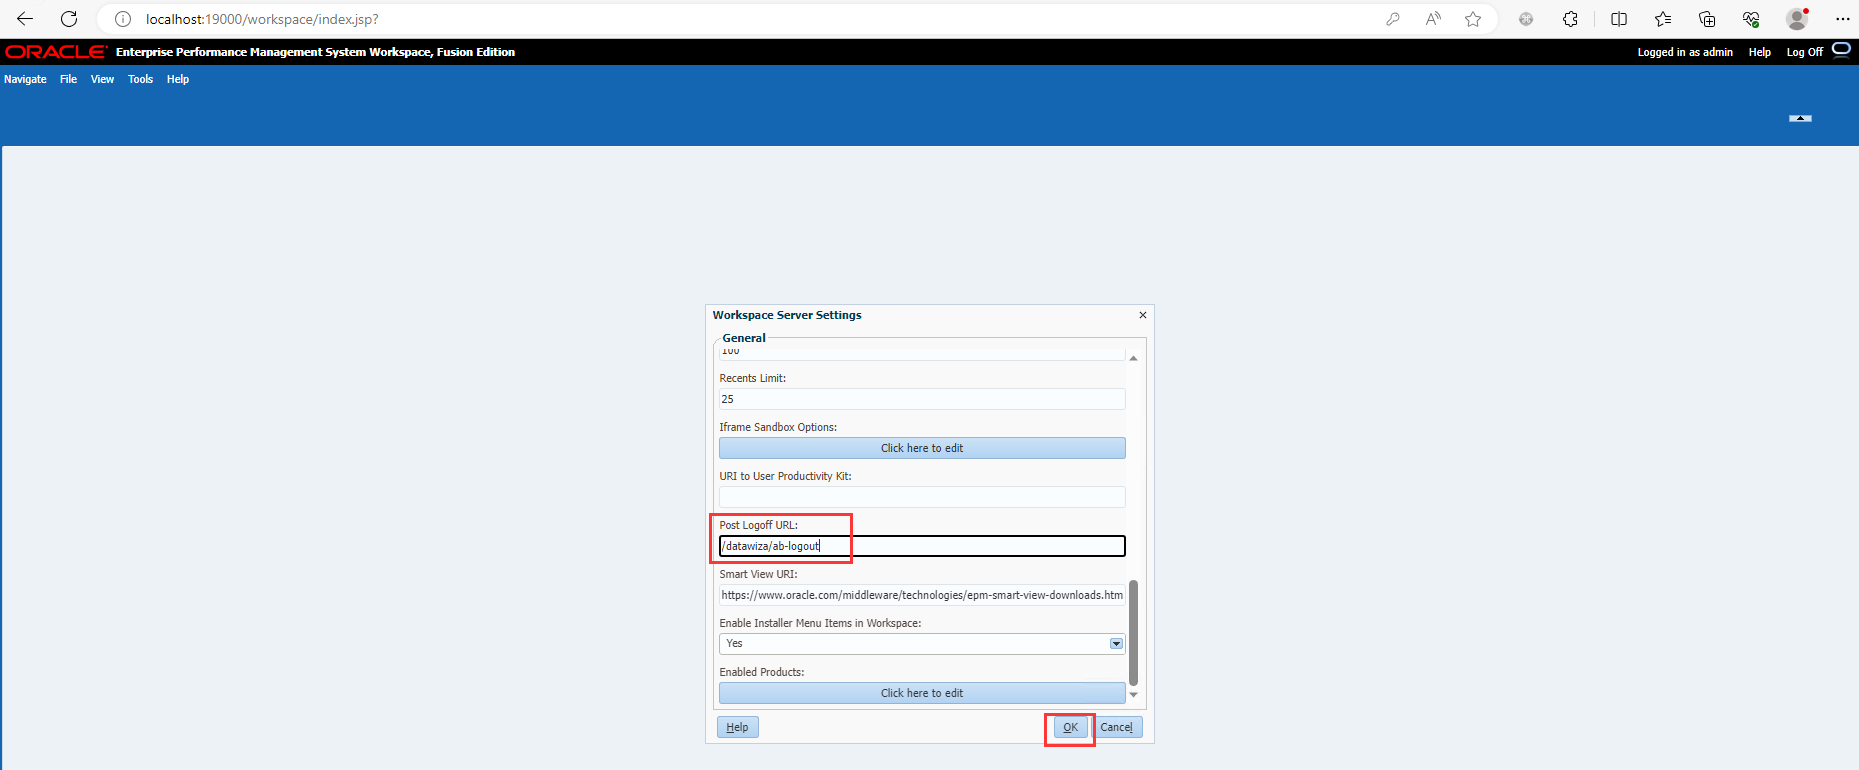
Update Post Logoff URL setting in EPM Workspace
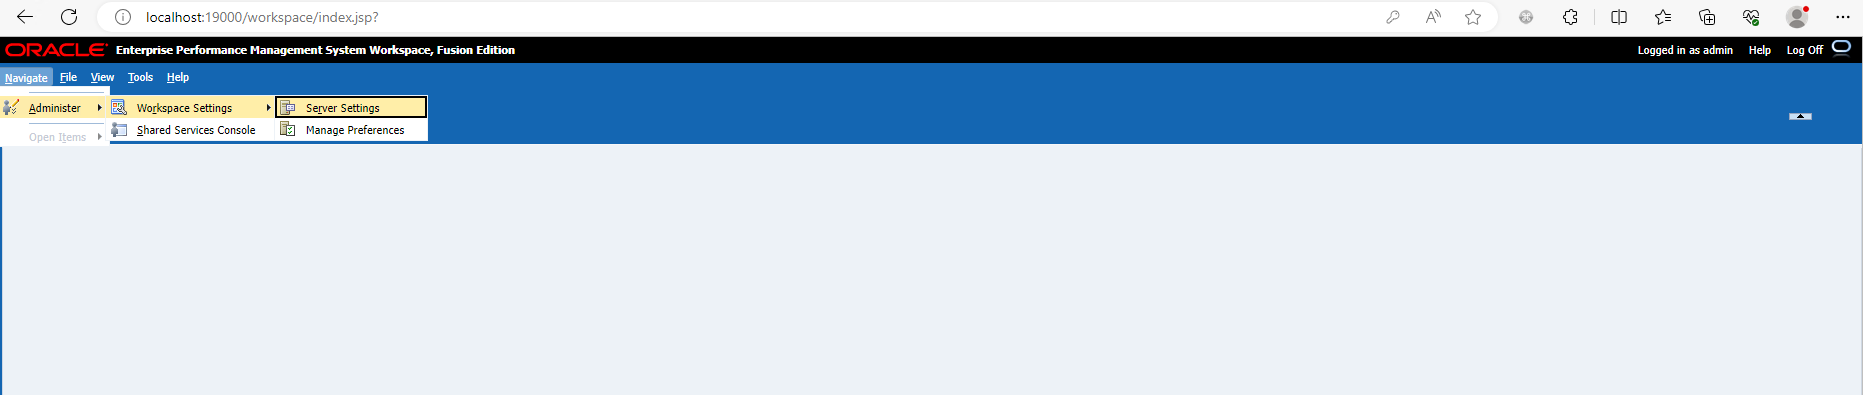
- Select Navigate, then Workspace Settings, and then Server Settings.
- In Workspace Server Settings, change POST Logoff URL to the URL of the web page that you want users to see when they log out of EPM System, which is
/datawiza/ab-logout. - Click OK.
Test an Oracle Hyperion application
To confirm SSO and MFA for Oracle Hyperion application work correctly, a prompt should appear to use an Identity Provider account for signing in. Credentials and optional MFA are checked and the Oracle Hyperion home page appears.
Note
For security purpose, organizations using this model in production environment should block all direct access to the application, thus forcing the use of a strict path through the Datawiza Access Proxy.