Enable Microsoft Entra ID (Azure AD) SSO to Atlassian Jira via Datawiza
Do you want to learn how to add Microsoft Entra ID (Azure AD) authentication to your Jira without writing code? In this step-by-step tutorial, you will learn how to integrate Jira with Microsoft Entra ID using Datawiza to implement OIDC/OAuth SSO authentication in 5 mins. Note that Datawiza is a generic identity-aware OIDC/OAuth/SAML proxy with a centralized management console that you can easily use to achieve the same integration with other identity providers like Okta, Auth0, PingIdentity, Google, etc.
The benefits of using Datawiza
- No need to learn complex OIDC/OAuth or SAML protocols
- No need to manage refresh tokens, access tokens, or ID tokens
- No need to manage user sessions
- No need to use SDKs, call APIs or write code
- Reduce weeks or months of engineering work to hours, even minutes
- Avoid security vulnerabilities with a no-code product developed by security experts
Ready to see how easy it is? Let’s get started!
Prerequisites
- For running Datawiza:
- Docker(18.03+)
- Docker Compose
Install Datawiza Access Plugin
We will install Datawiza Access Plugin through Jira Add-ons: 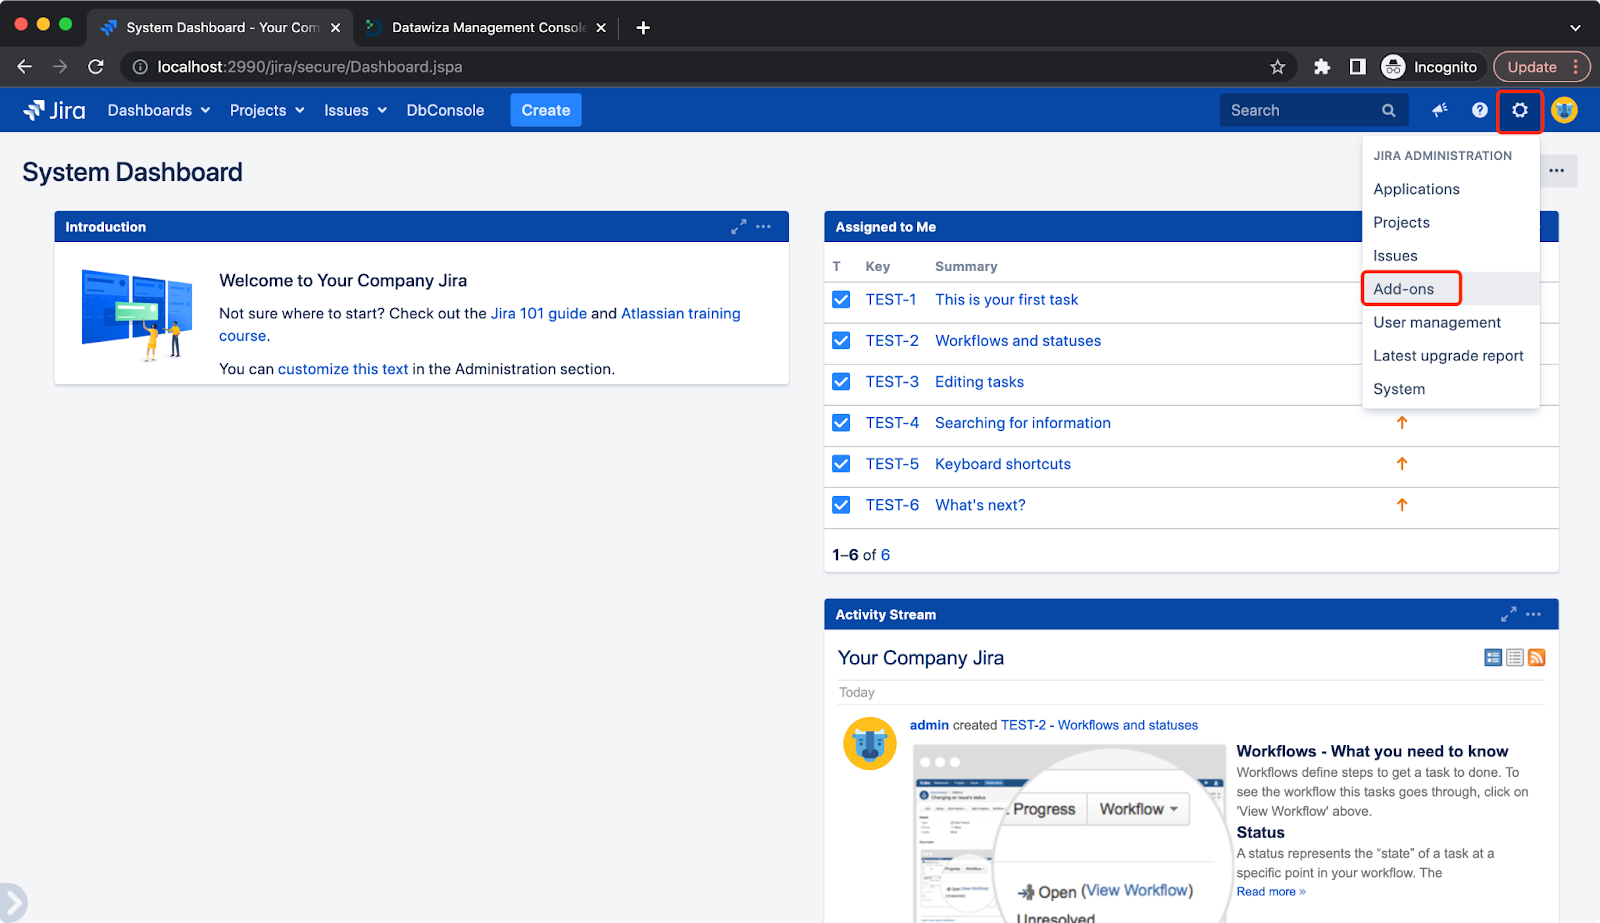 Select
 Manage add-ones then click Upload add-on: 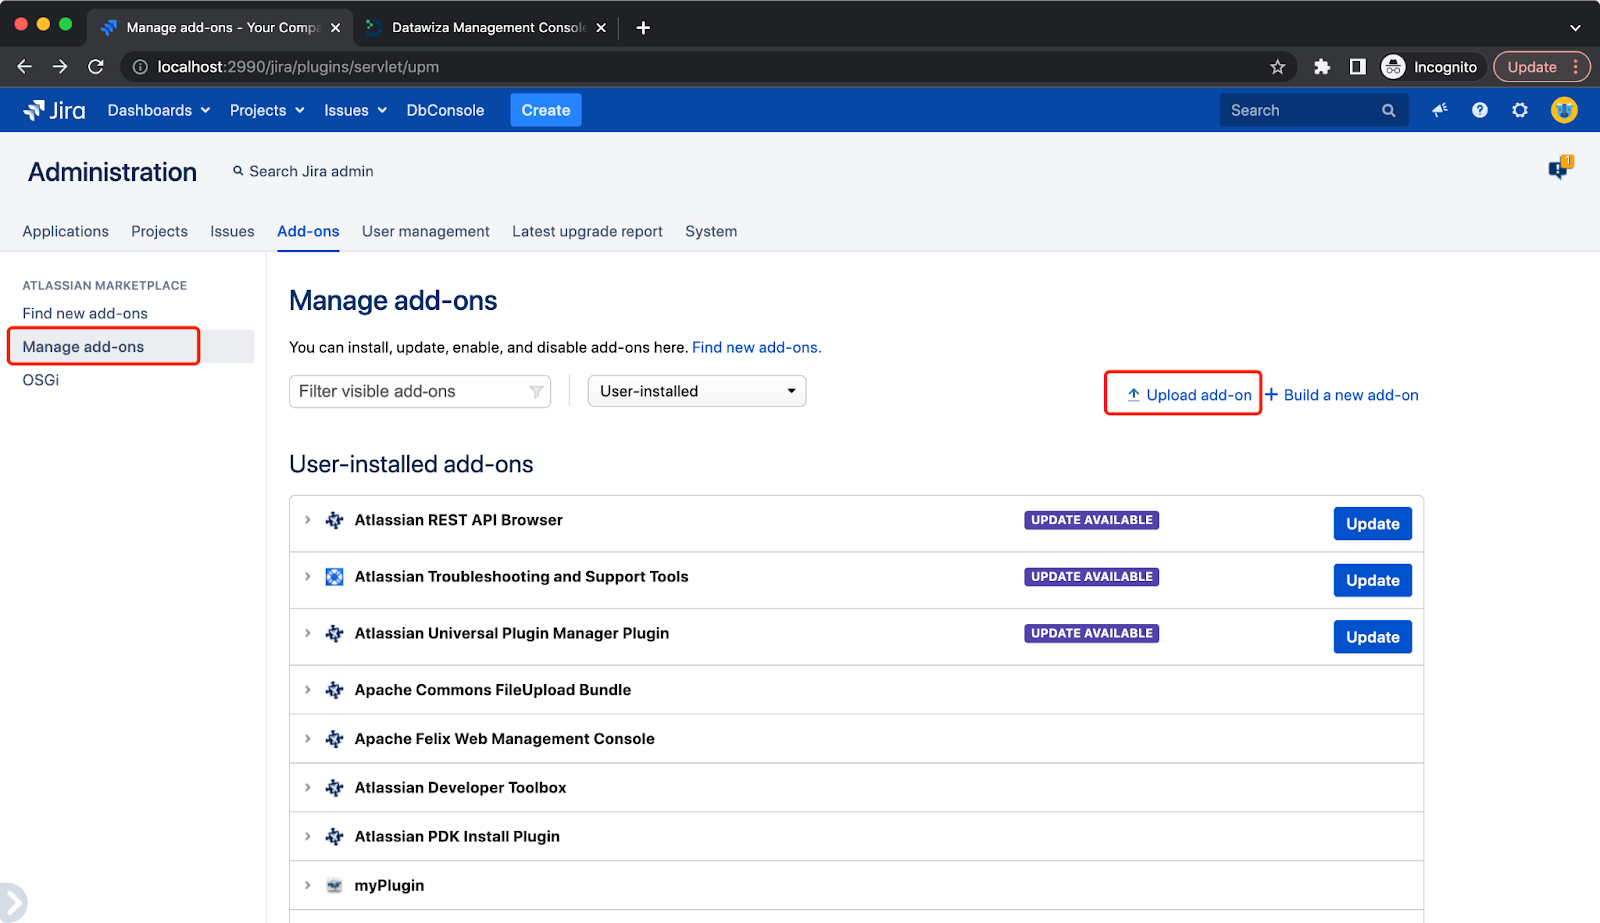 Please contact us at info@datawiza.com for the plugin.
 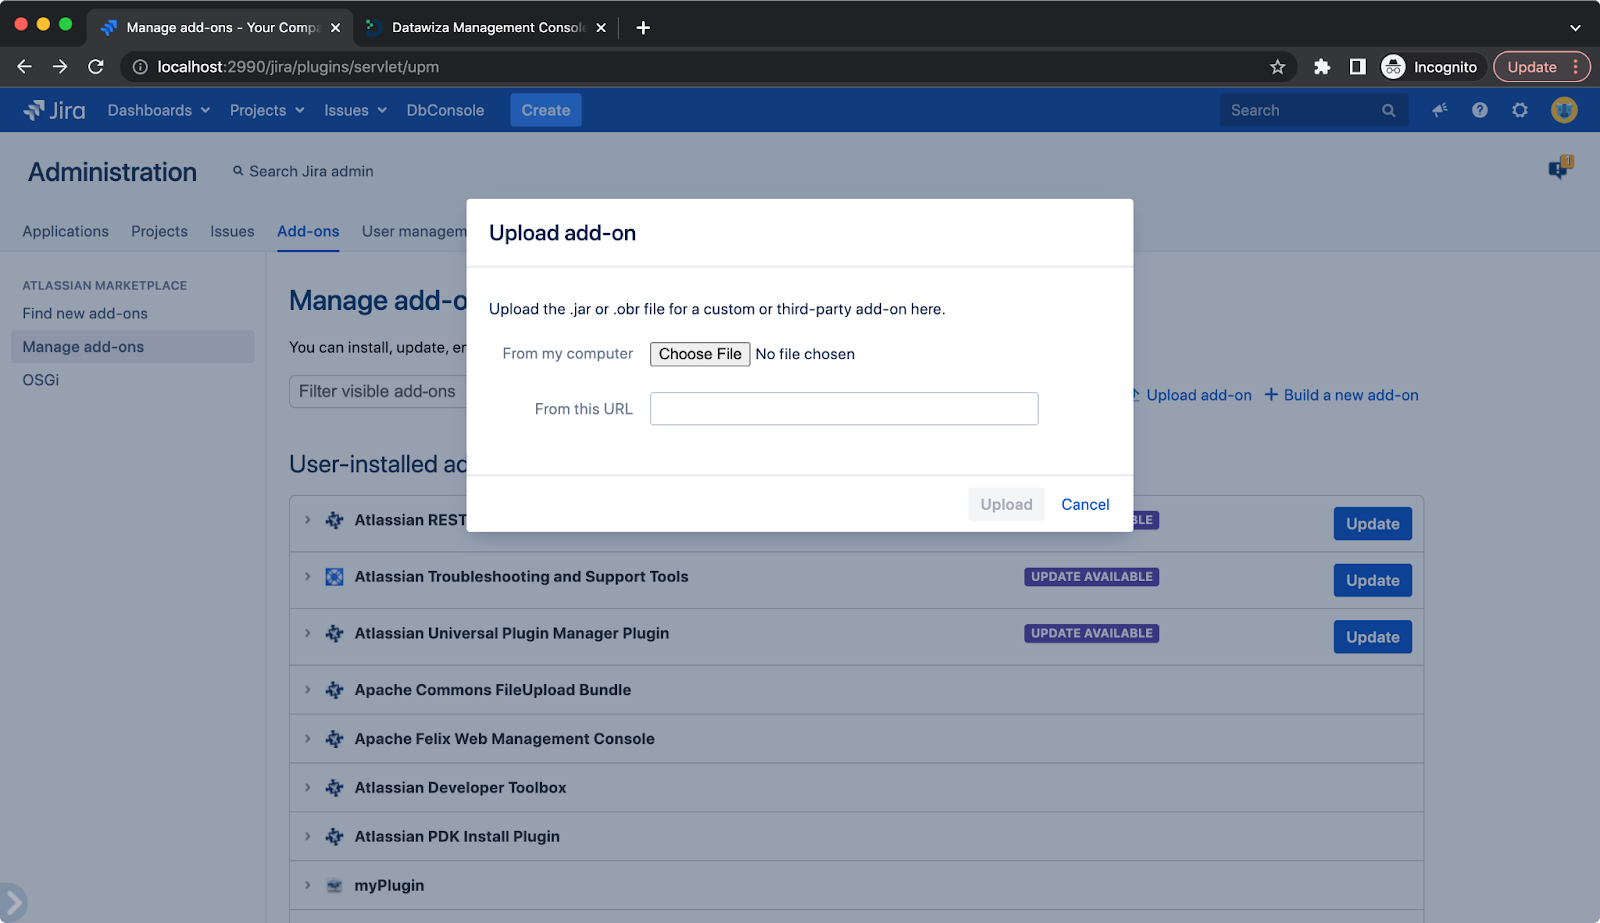 The plugin will not create users automatically, so we need to create users through Jira
 User management: 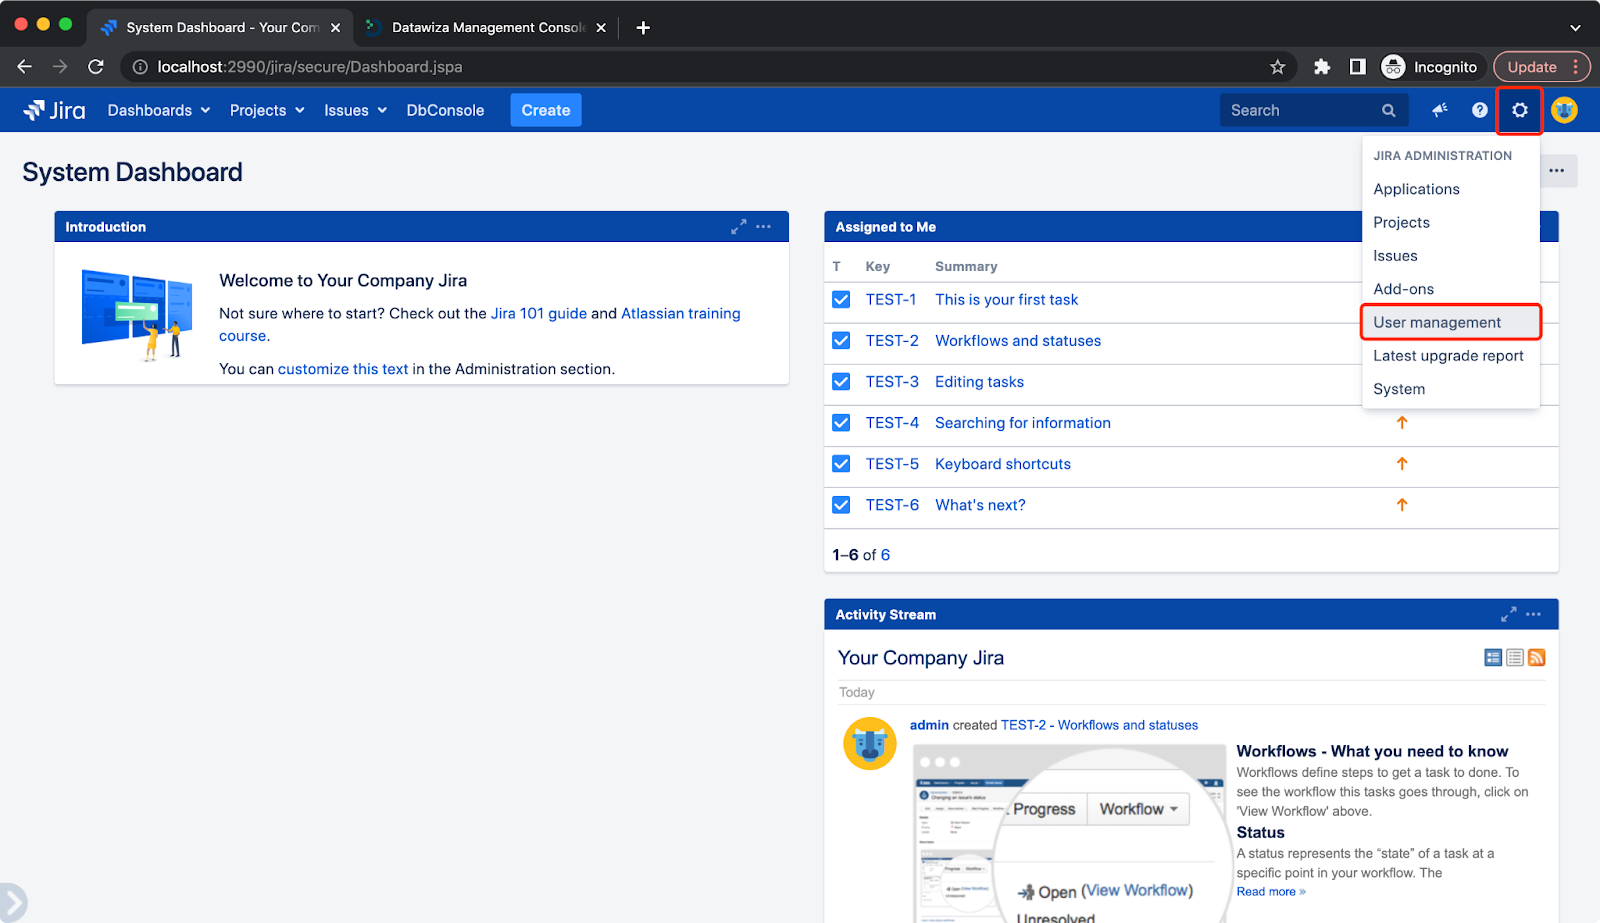 Click
Click Create user: 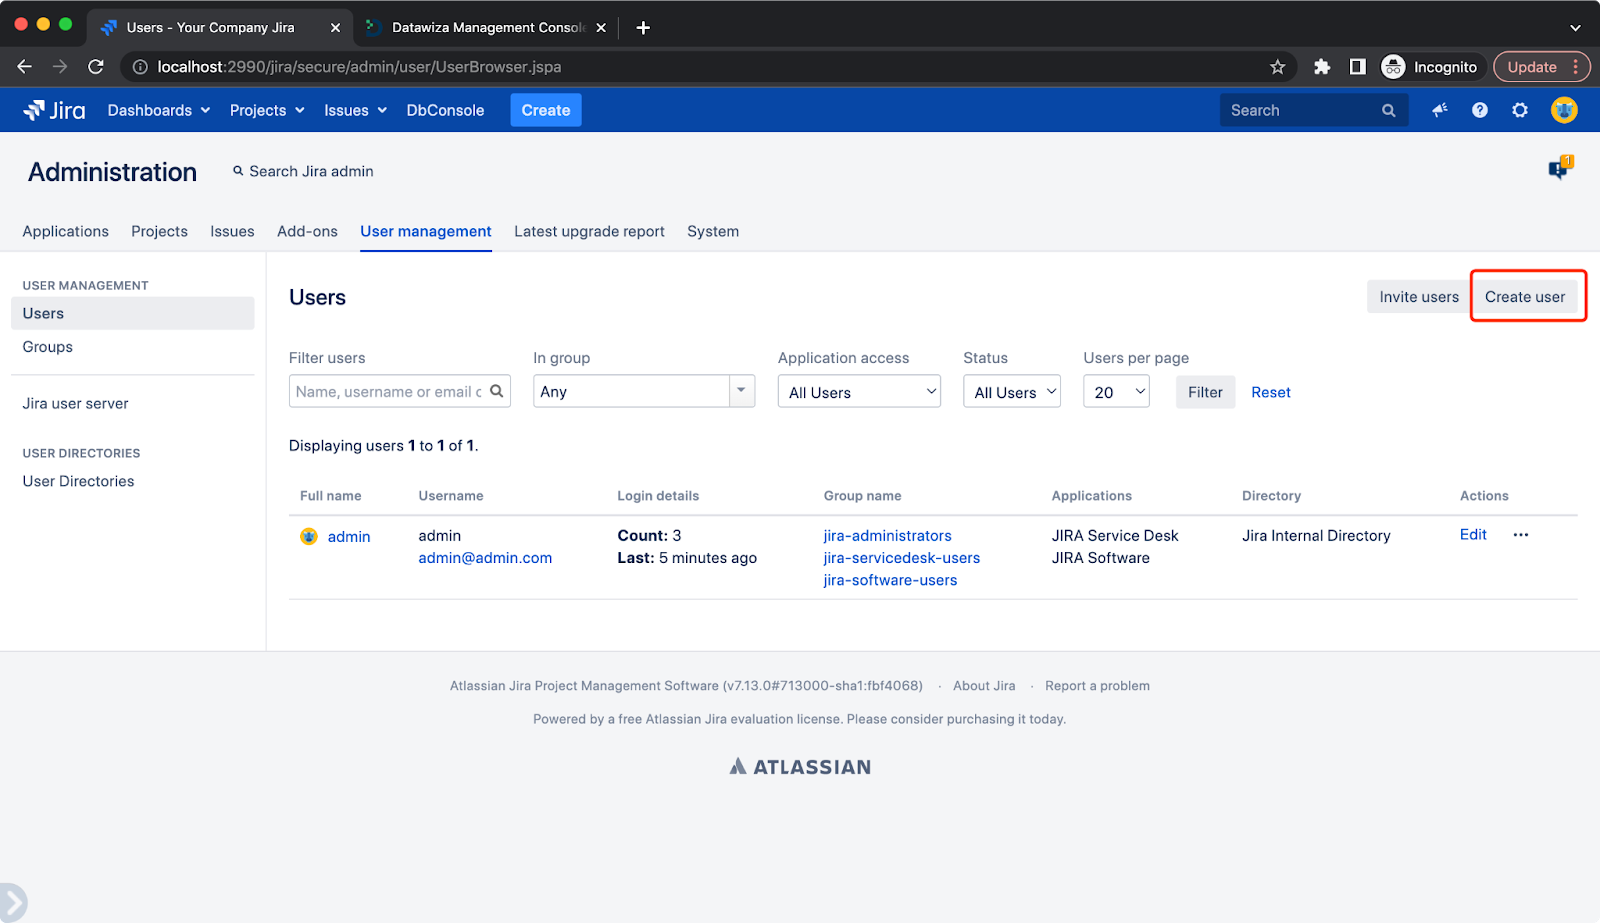 Use email for both
 Email address and Username: 
Introduction to the Datawiza Platform
The Datawiza Platform is a cloud-delivered platform. It includes a data plane and a control plane: Datawiza Access Proxy (DAP) and Datawiza Cloud Management Console (DCMC).
DAP is a lightweight, container-based access proxy deployed close to your application via the sidecar (agent) or gateway mode. It talks to Azure AD on behalf of your applications, so you don’t need to worry about the integration work. DCMC is a cloud-based management console where you can configure and manage the policies of DAPs. Such a SaaS-based design makes the whole platform much easier to use.
Configurations in Datawiza Cloud Management Console
Self-register an account in the Datawiza Cloud Management Console. You can easily get started with your Google account, Microsoft account, or GitHub account.
Upon logging into the Datawiza Cloud Management Console, click the orange Getting started button.
This runs a step-by-step guide for configuring your application. 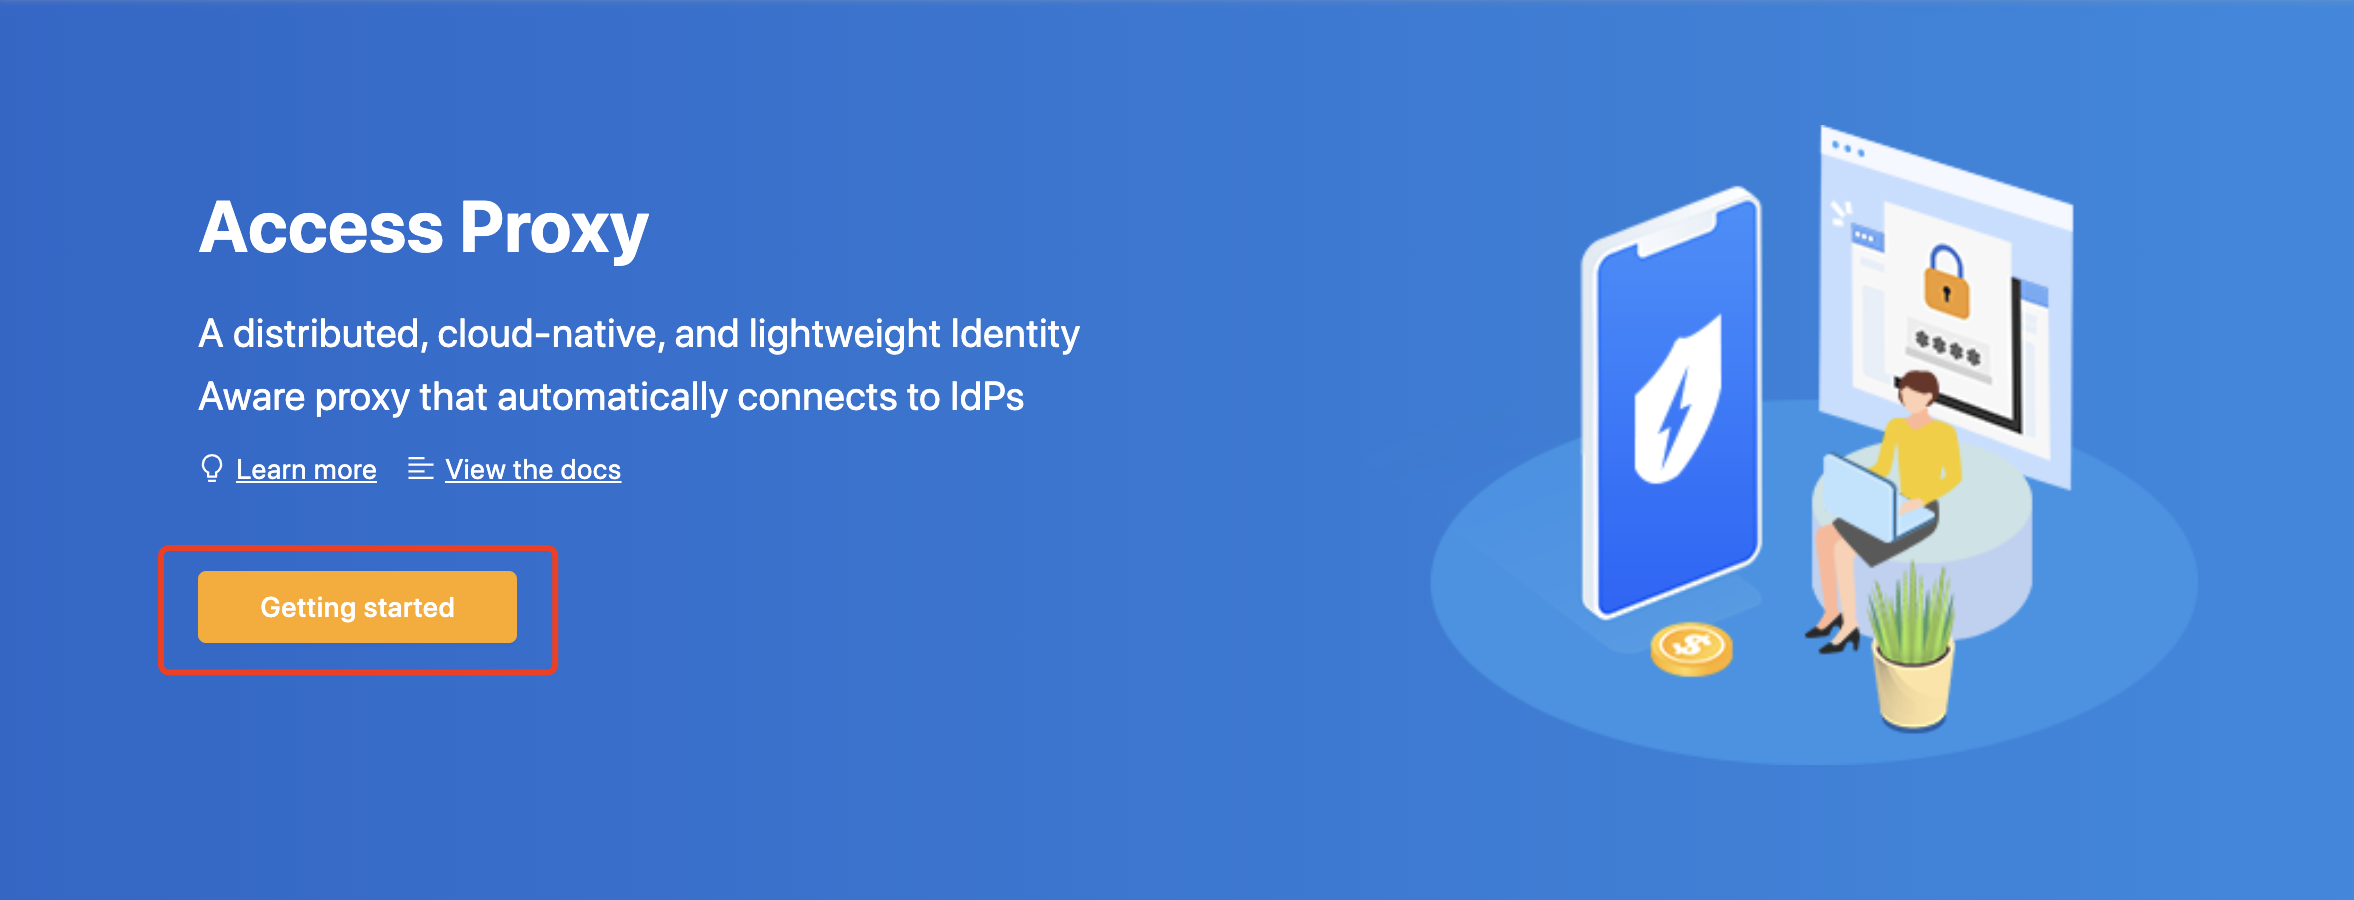
Add a New Deployment
The first step of the configuration process is creating a “deployment.” A deployment is a way of organizing applications and identity providers that are associated with the same cluster as Datawiza Access Proxies. Don't worry if this seems a bit complicated to understand in the beginning. You will get used to it when you work with it more. For now, just give your deployment a meaningful name and description. 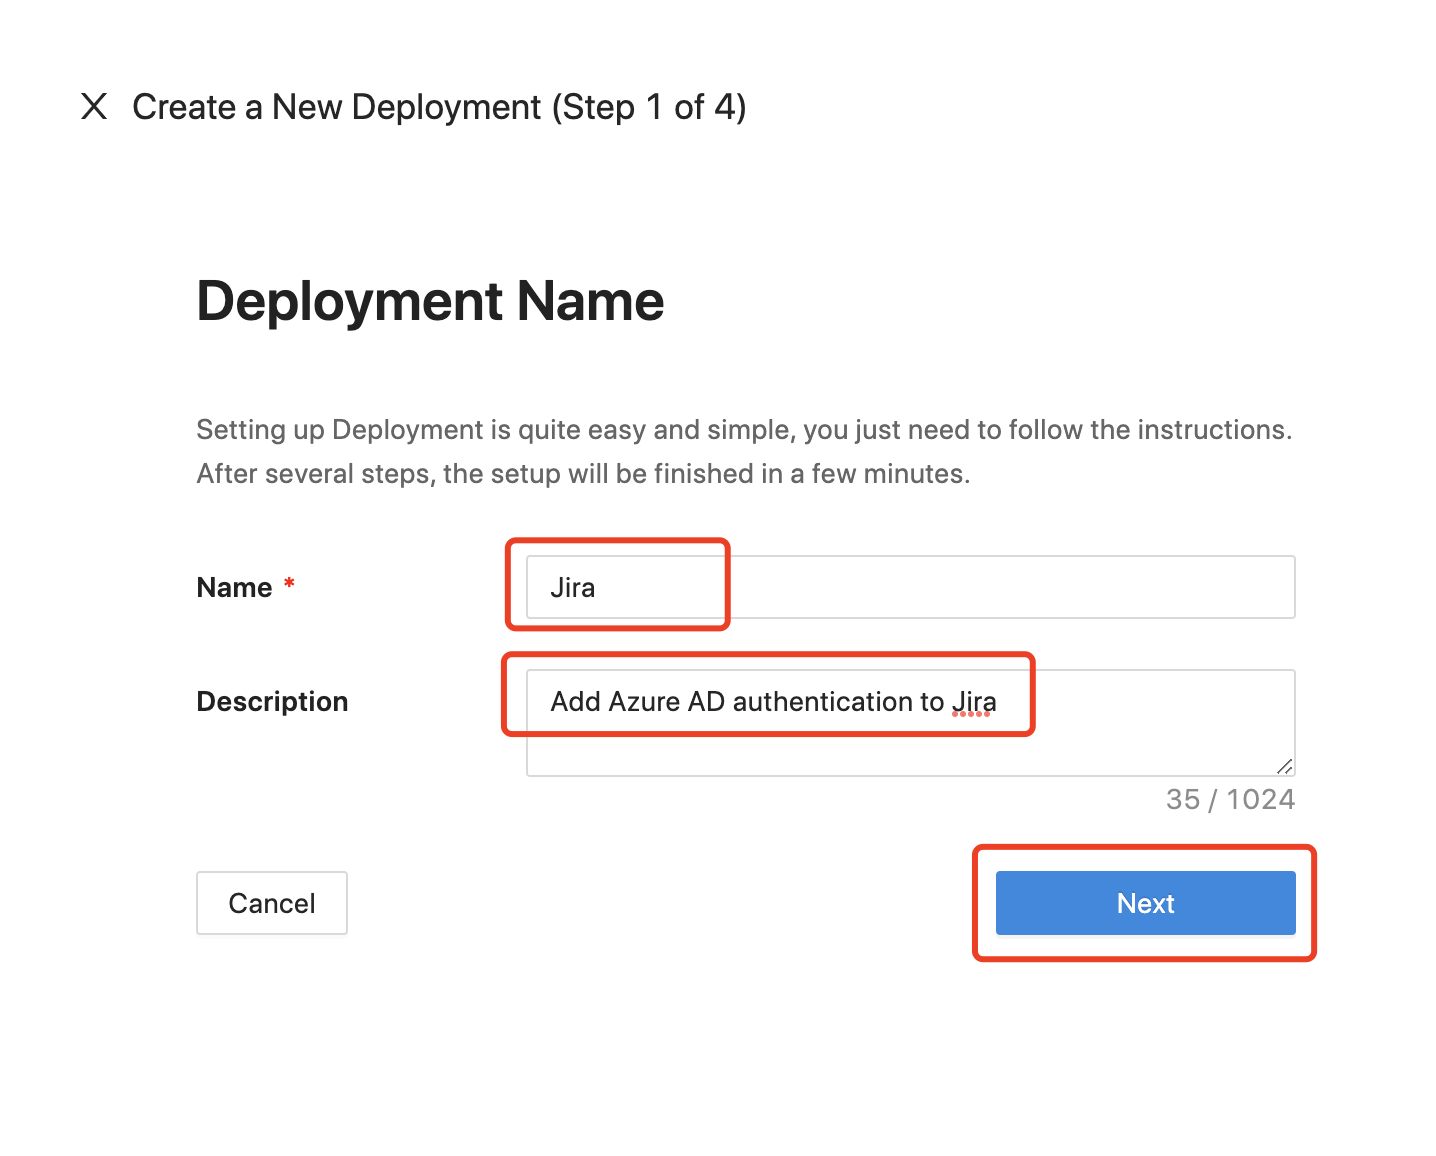
Add a New Application
The second step is to create an application. This is simply collecting the network information of your application.
Here is an explanation of each field.
- Platform: Select WEB here.
- App Name: The name of your application. Put a meaningful name here. I use the Jira demo app.
- Public Domain: This is how your user will access your application. Normally it's the URL in the address bar. You can use
http://localhostif you are running locally. Be sure to add the port if you have a non-standard one. We usehttp://localhost:9772as an example. - Listen Port: This is the port that the Datawiza Access Proxy listens on. For simplicity, you can use the same port as the one in Public Domain above if you are not deploying the Datawiza Access Proxy behind a Load Balancer.
- Upstream Servers: The URL and port combination of the Jira is being protected. Mine is
http://host.docker.internal:2990.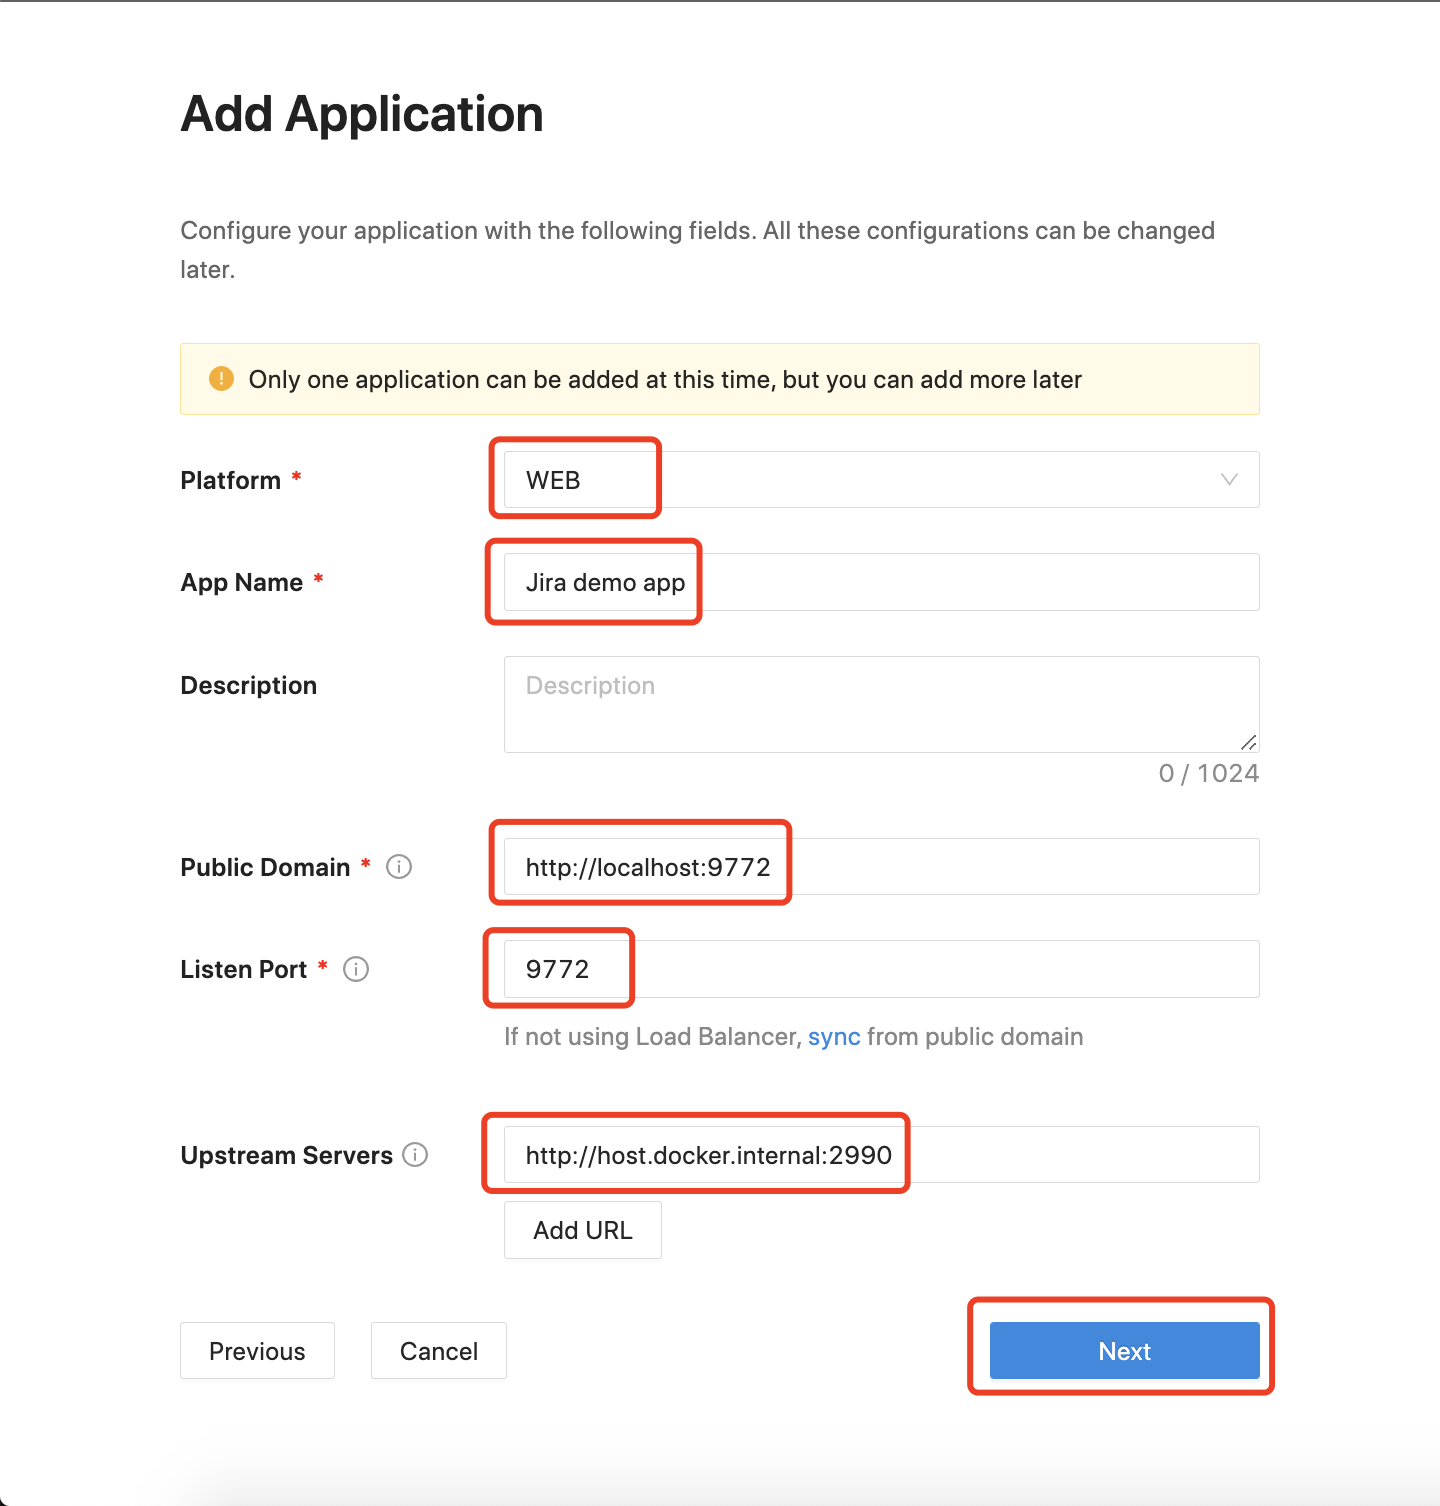
Add a New Identity Provider
The third step is to fill in the identity provider information. For Microsoft Entra ID, we offer a more convenient way to integrate Microsoft Entra ID with DCMC, which can create a new application on your behalf in your Azure tenant.
Here is the explanation of each field.
- Name: A reasonable name for your identity provider.
- Protocol: Modern identity providers support OIDC, and so does Microsoft Entra ID. Therefore I use OIDC here.
- Identity Provider: Select the one that you are using, e.g. Microsoft Entra ID.
- Automatic Generator: Whether to use one-click integration, which will create a new application on your behalf in your Azure tenant
- Supported account type: Put restrictions on who can use this application.
- Tenant ID: If you want to create the Microsoft Entra ID application in a specified tenant, you can enter the tenant ID here.
Click on Create to proceed. 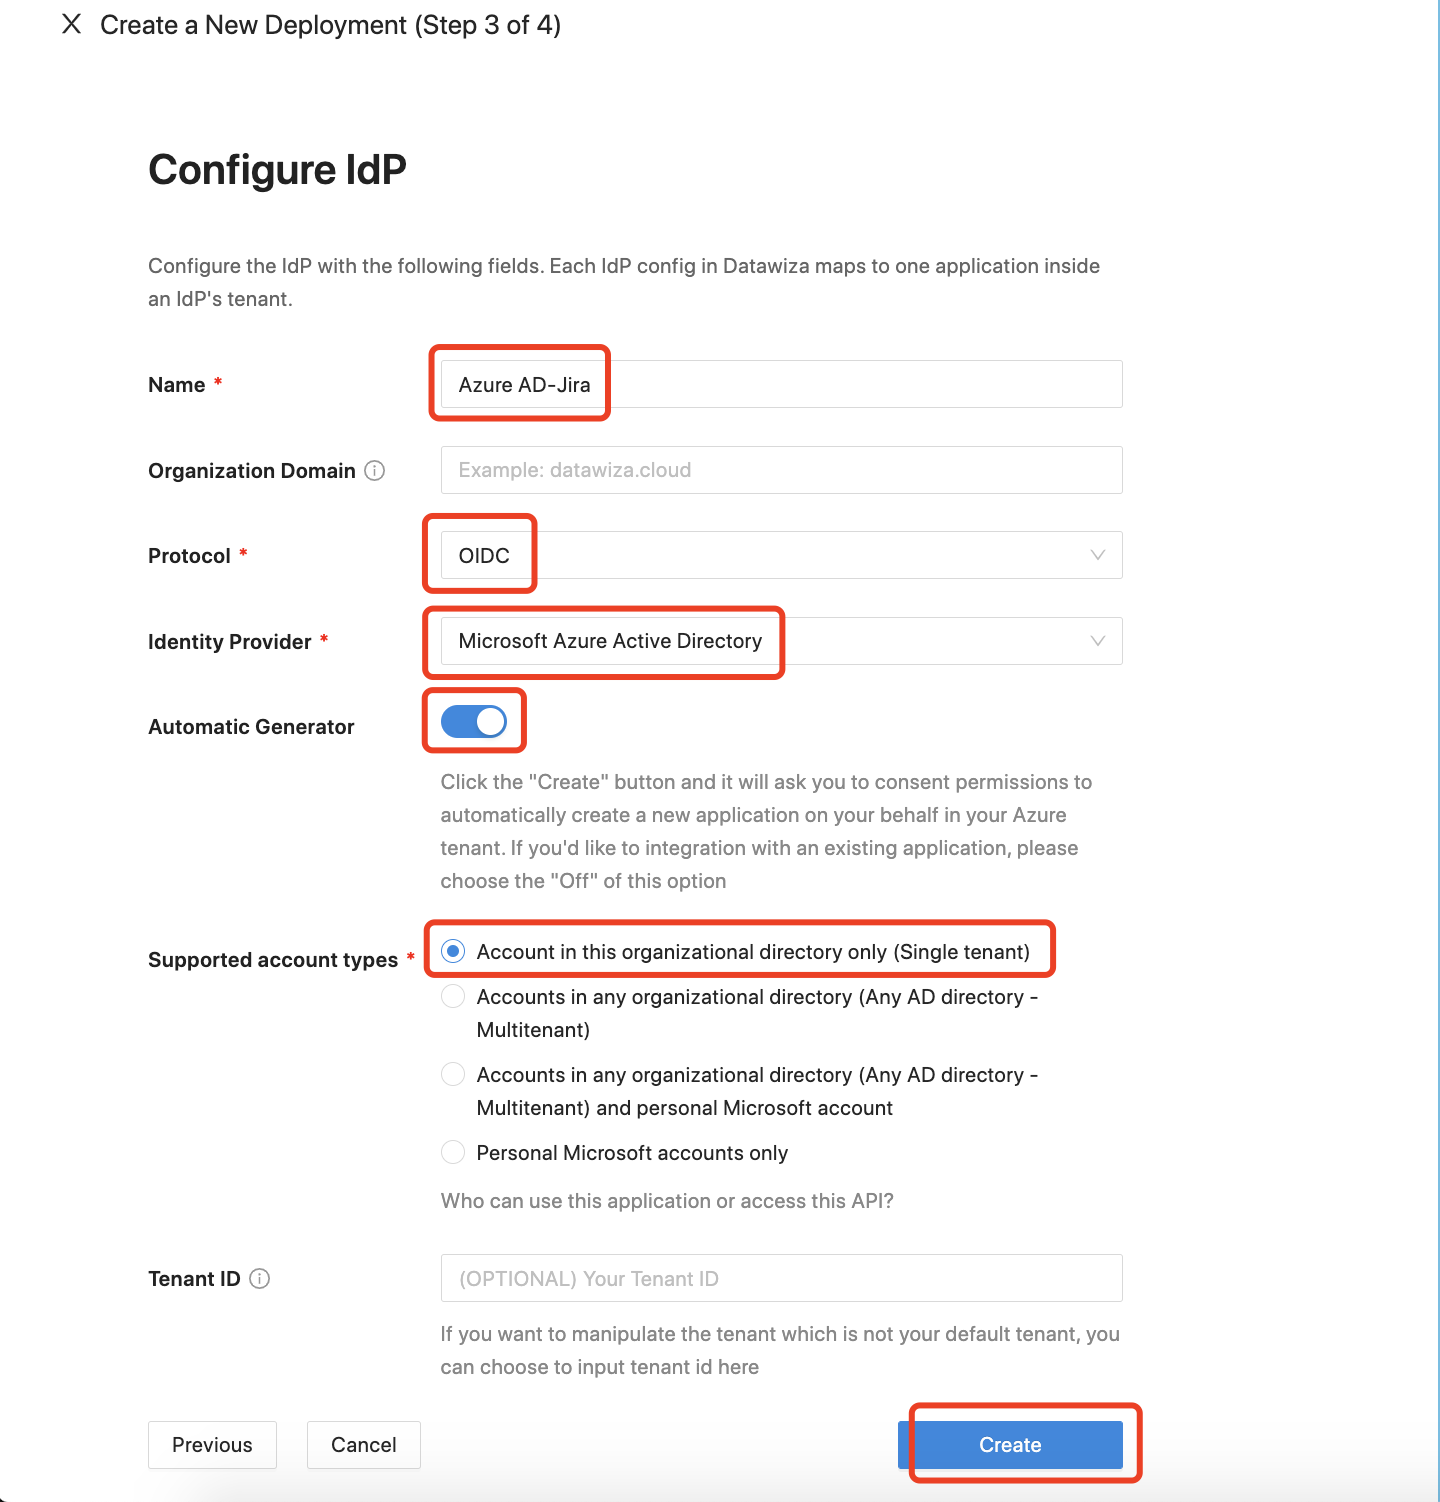
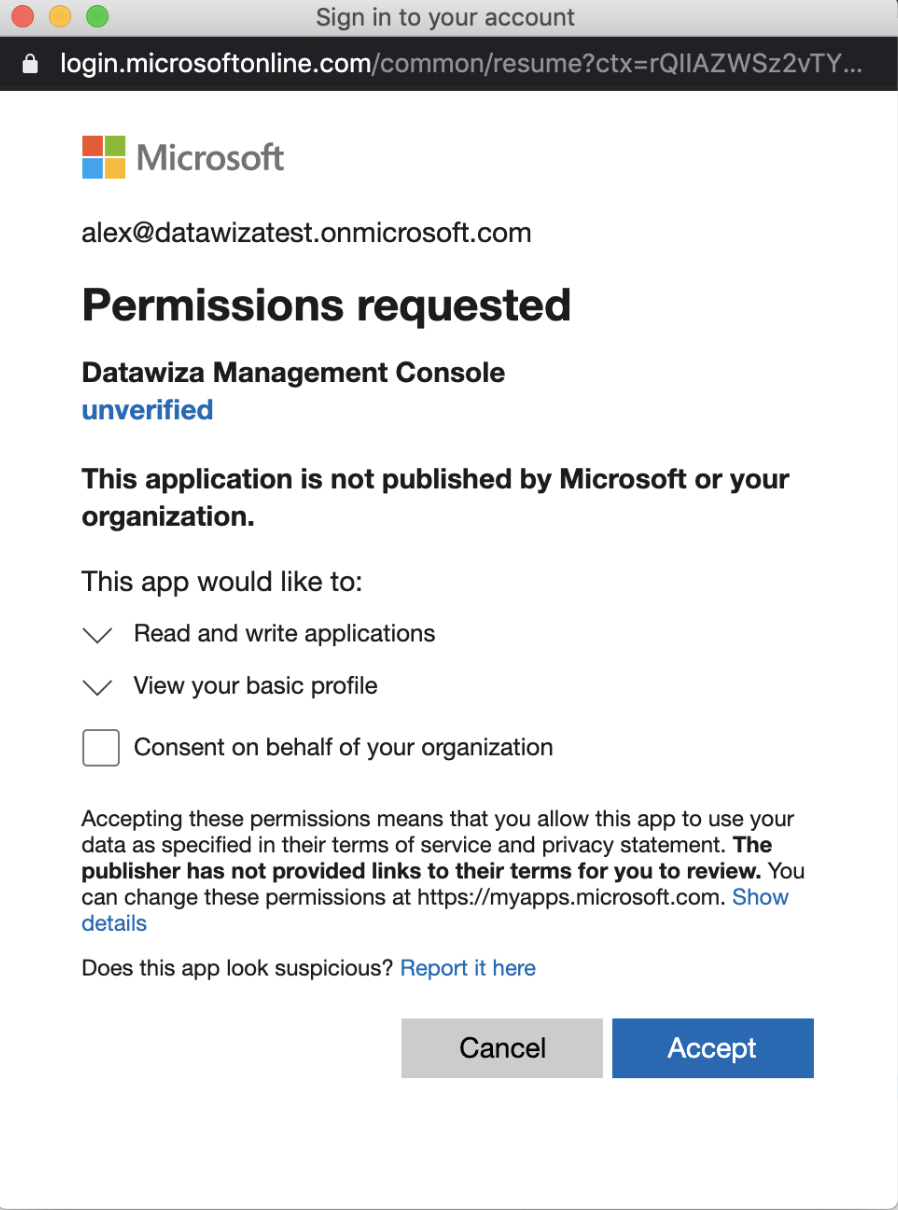
Log in to your Microsoft Entra ID account. You will be asked to consent to permission to automatically create a new application on your behalf in your Azure tenant. Accept the permission. 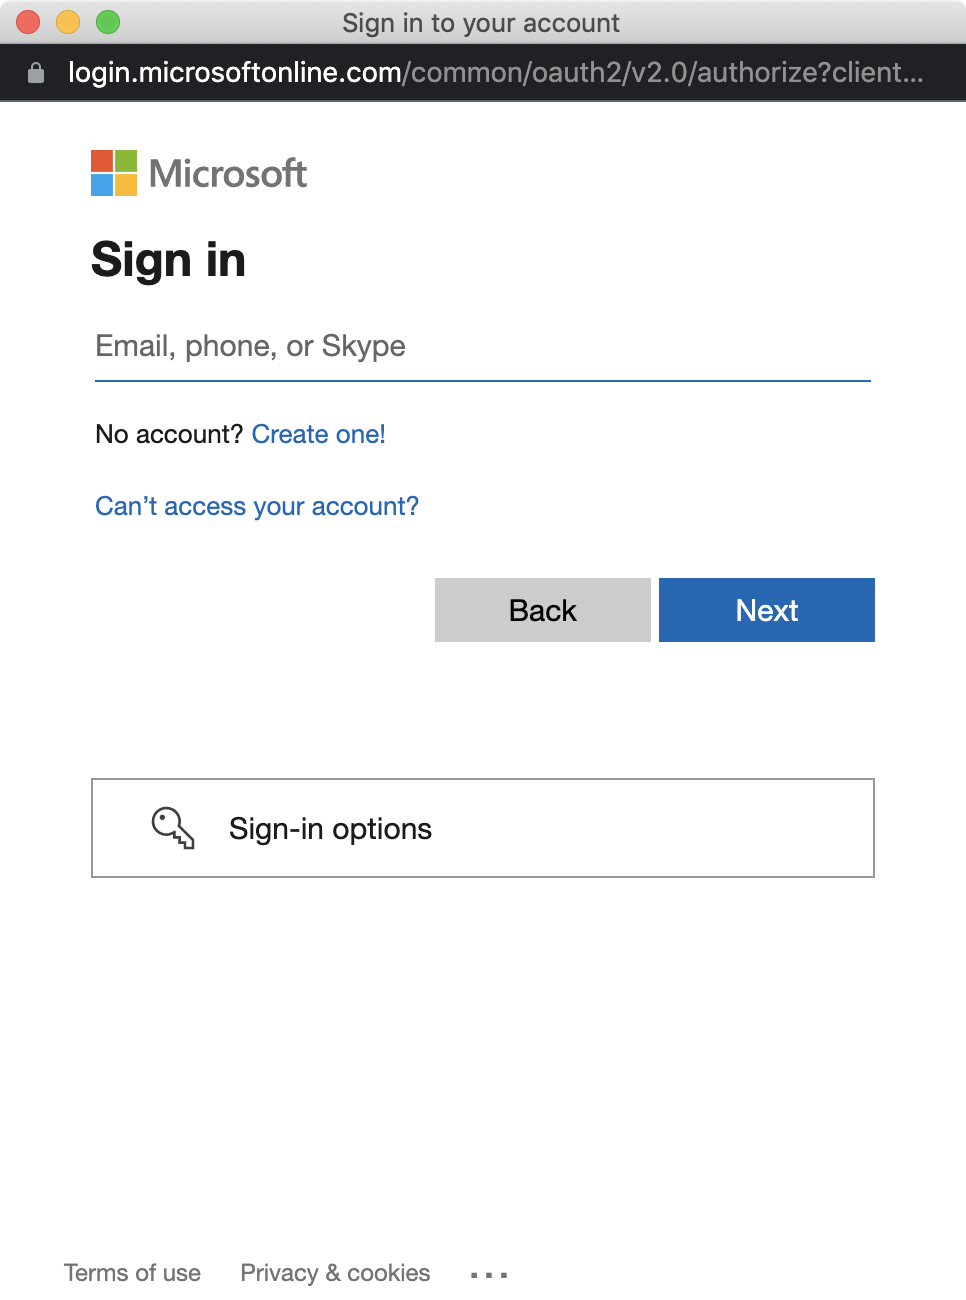
Start the Access Proxy
The last step of this guide will provide you with the environment configurations. Here you will see the Provision Key and Provision Secret. Follow the steps (1, 2, and 3 below) on the page to log in to our docker registry, pull the Access Proxy image, and use the docker-compose.yml file we provided to start the DAP. 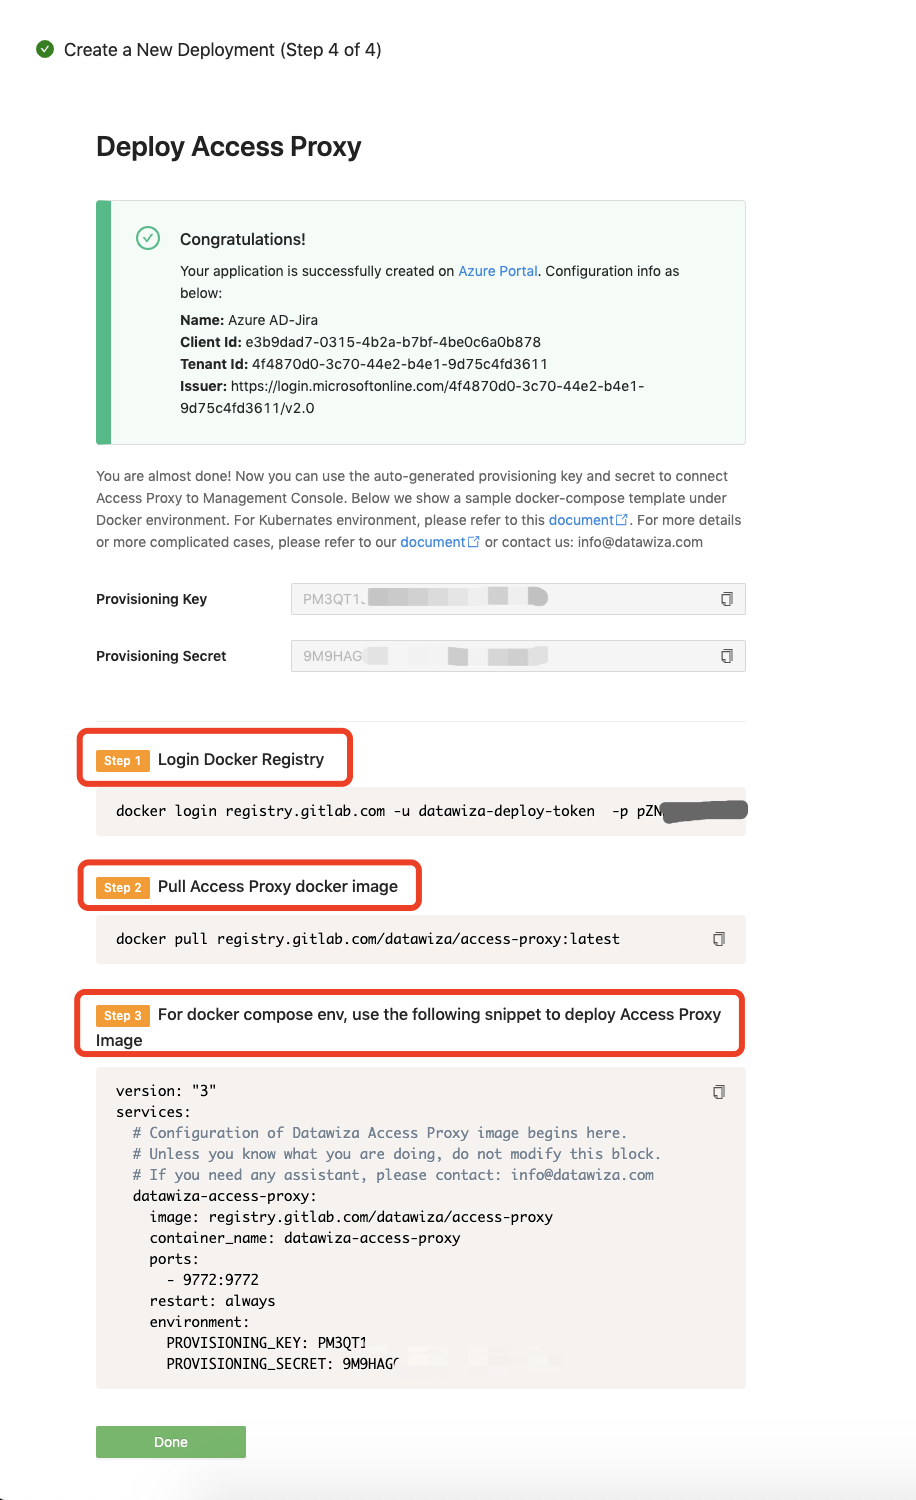
Click Done, then you will be redirected to the configuration page. Click the Applications tab and click the application:  Click
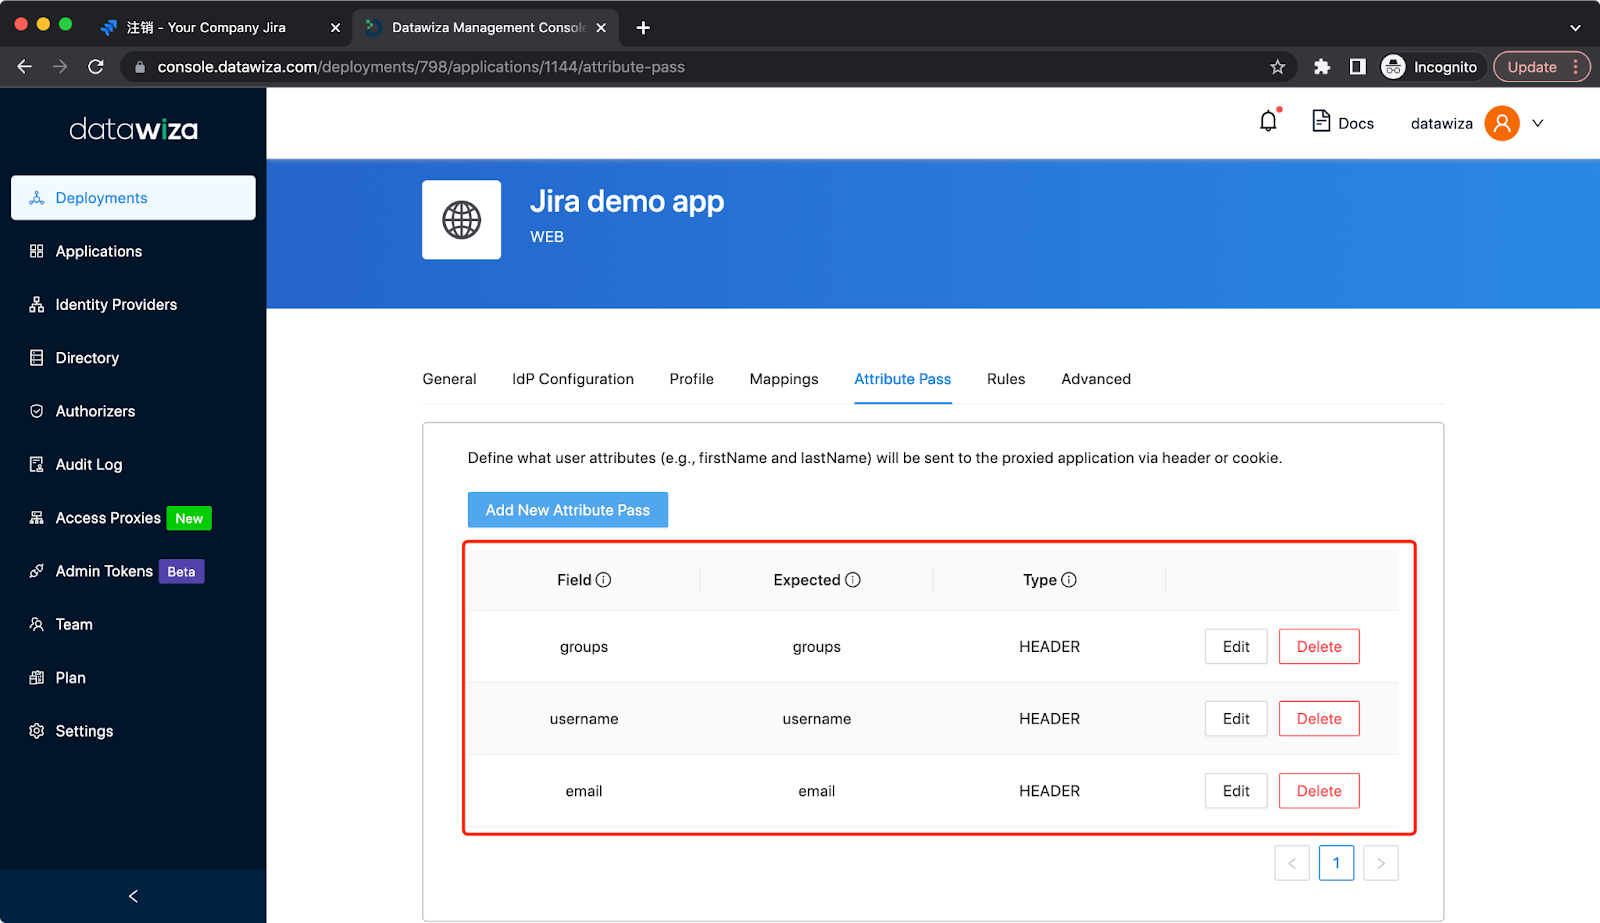
Click Attribute Pass and Click Add New Attribute Pass: 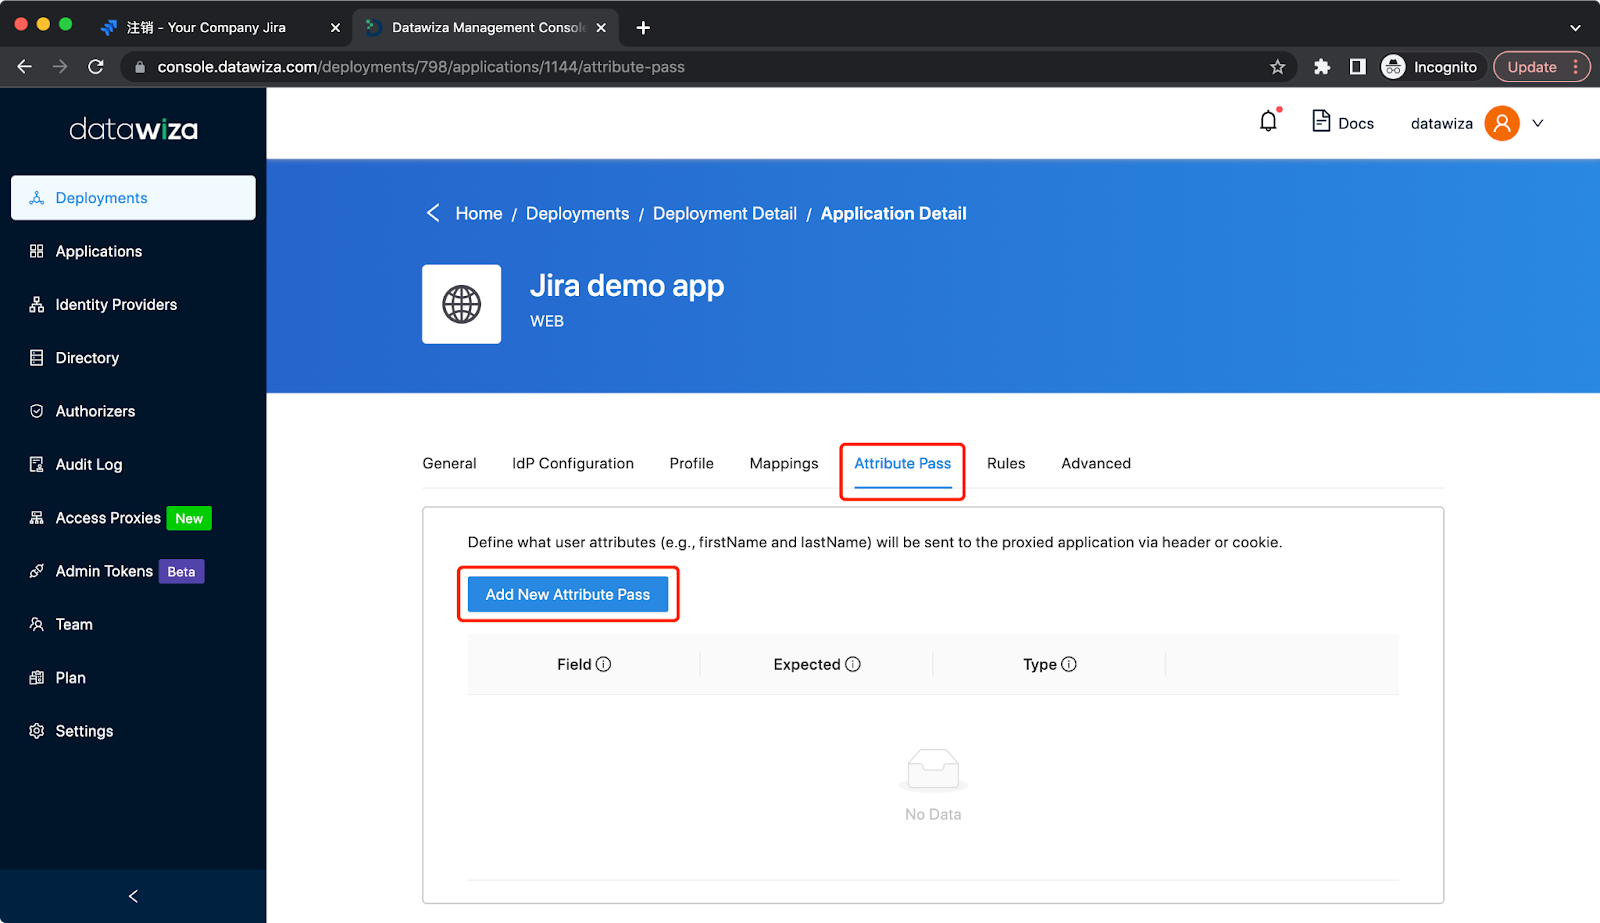 Add basic user info attribute pass in the type of Header (case sensitive):
| Field | Expected | Type |
|---|---|---|
| Header | ||
| username | username | Header |
| groups | groups | Header |
JIRA requests some URLs internally through HTTP. Using Access these requests will require authentication but JIRA does not provide any means of passing authentication for these requests. This will cause JIRA Gadgets not to work after installing the plugin. As a solution, we need to add the Not Protected Rule: Select Rules tab and click Create Rules: 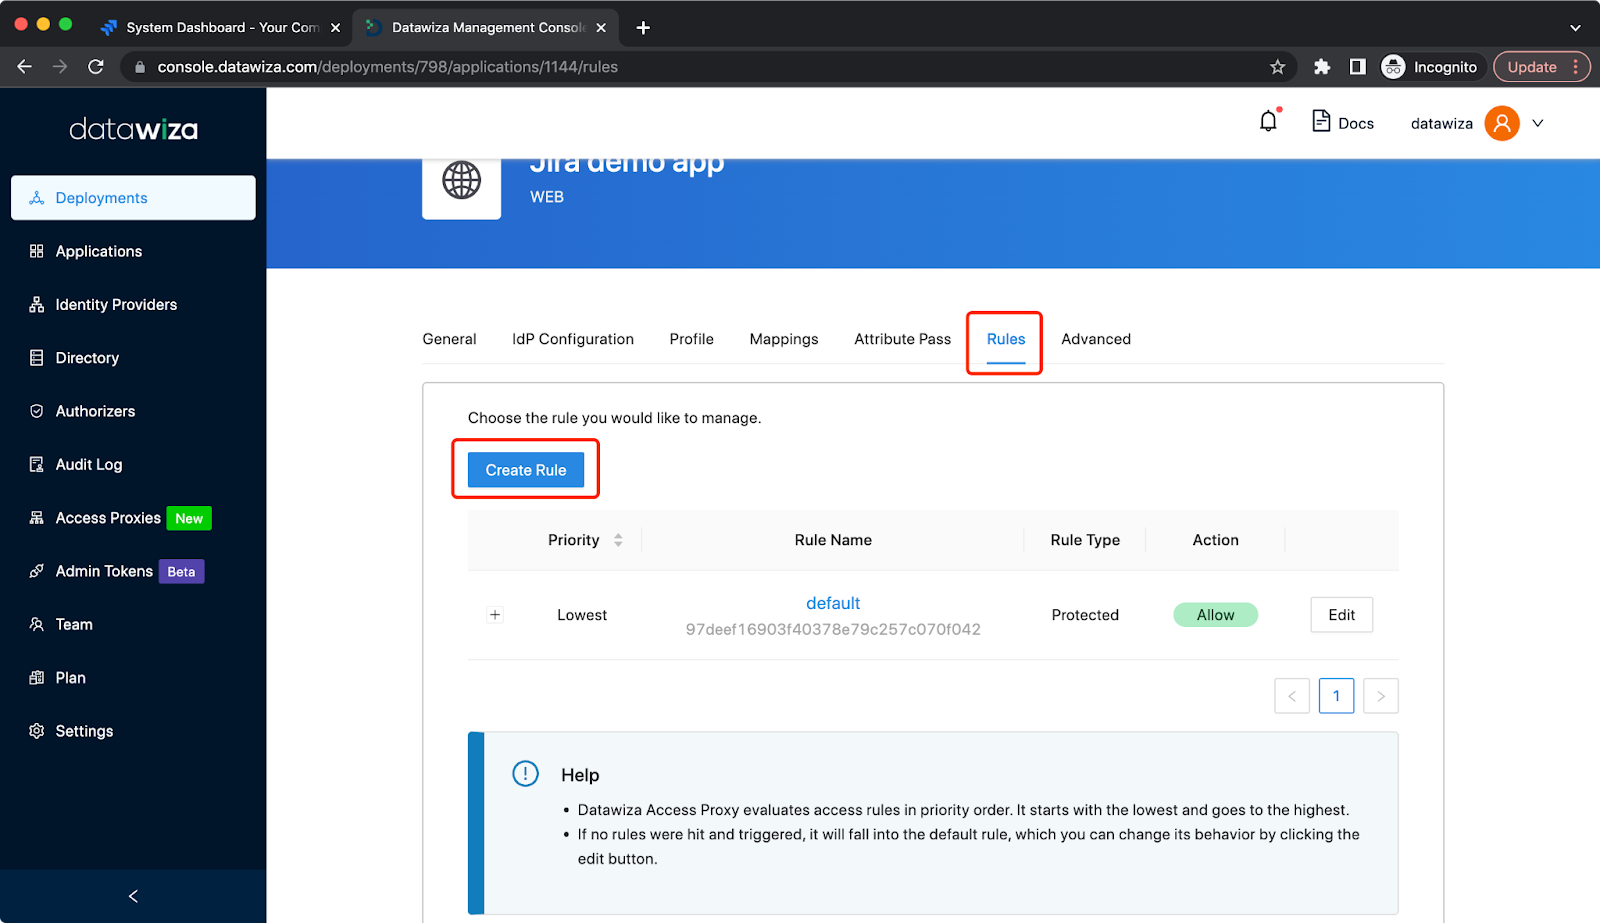 Create a Not Protected Rule to bypass requests containing
 /rest/gadgets/, example: If your main policy path is /jira you should create a new one setting the path as /jira/rest/gadgets/ and containing a bypass policy for everyone. 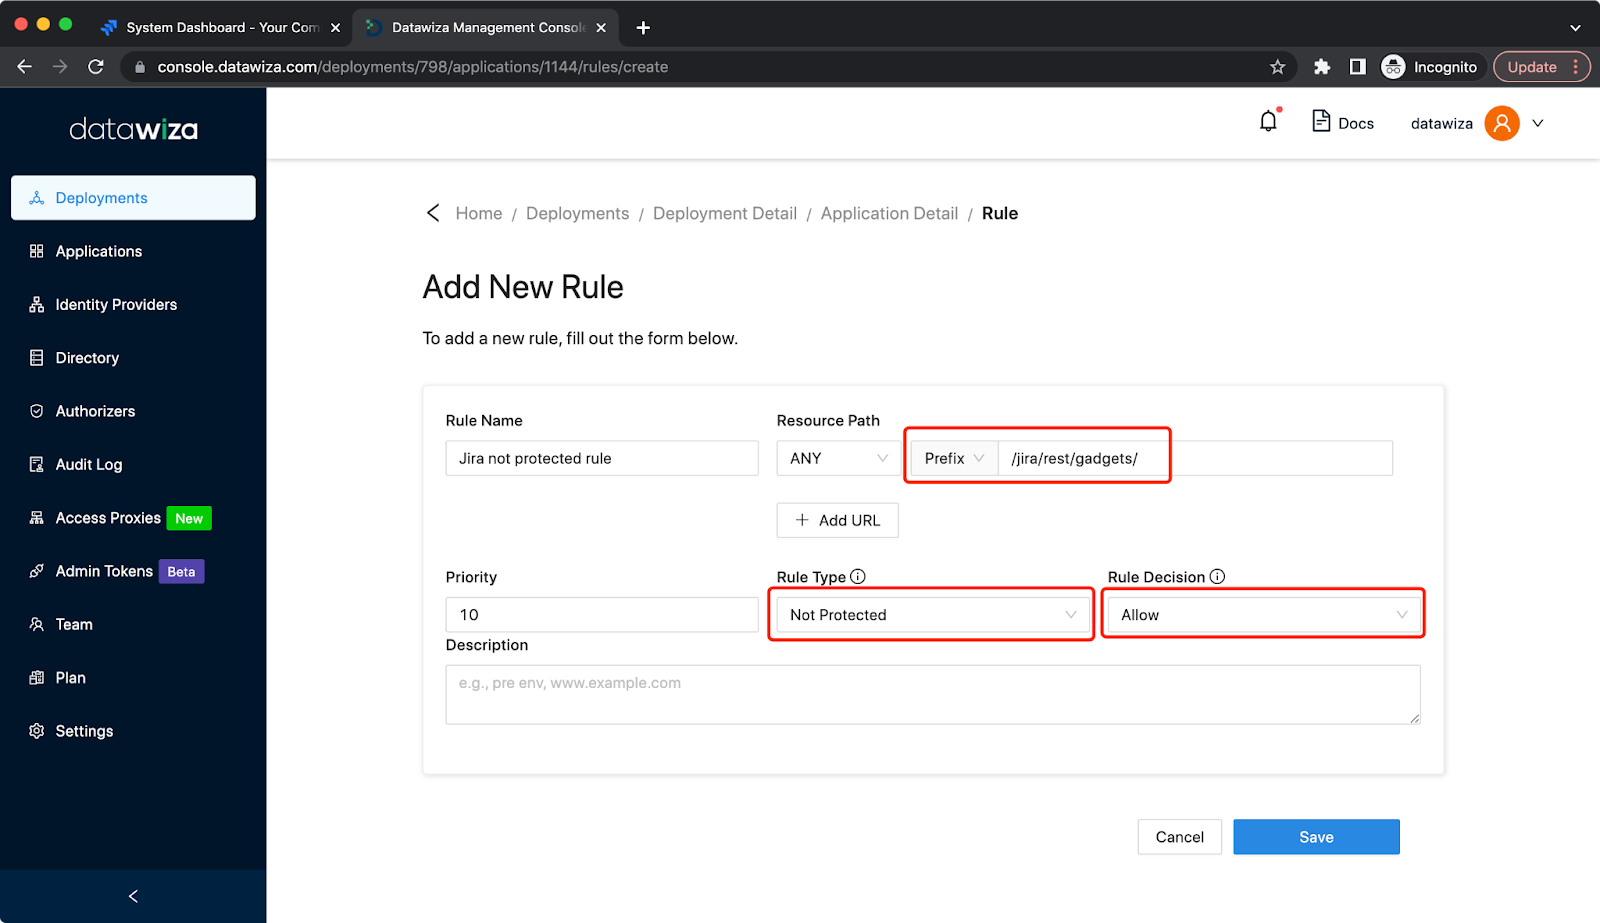
Now run
docker-compose -f docker-compose.yml up -d
In your browser, hit the Public Domain with path /jira as you set previously, for example, http://localhost:9772/jira. You should then see the DAP login page. Select the IdP we created, then the identity provider login page will be shown. 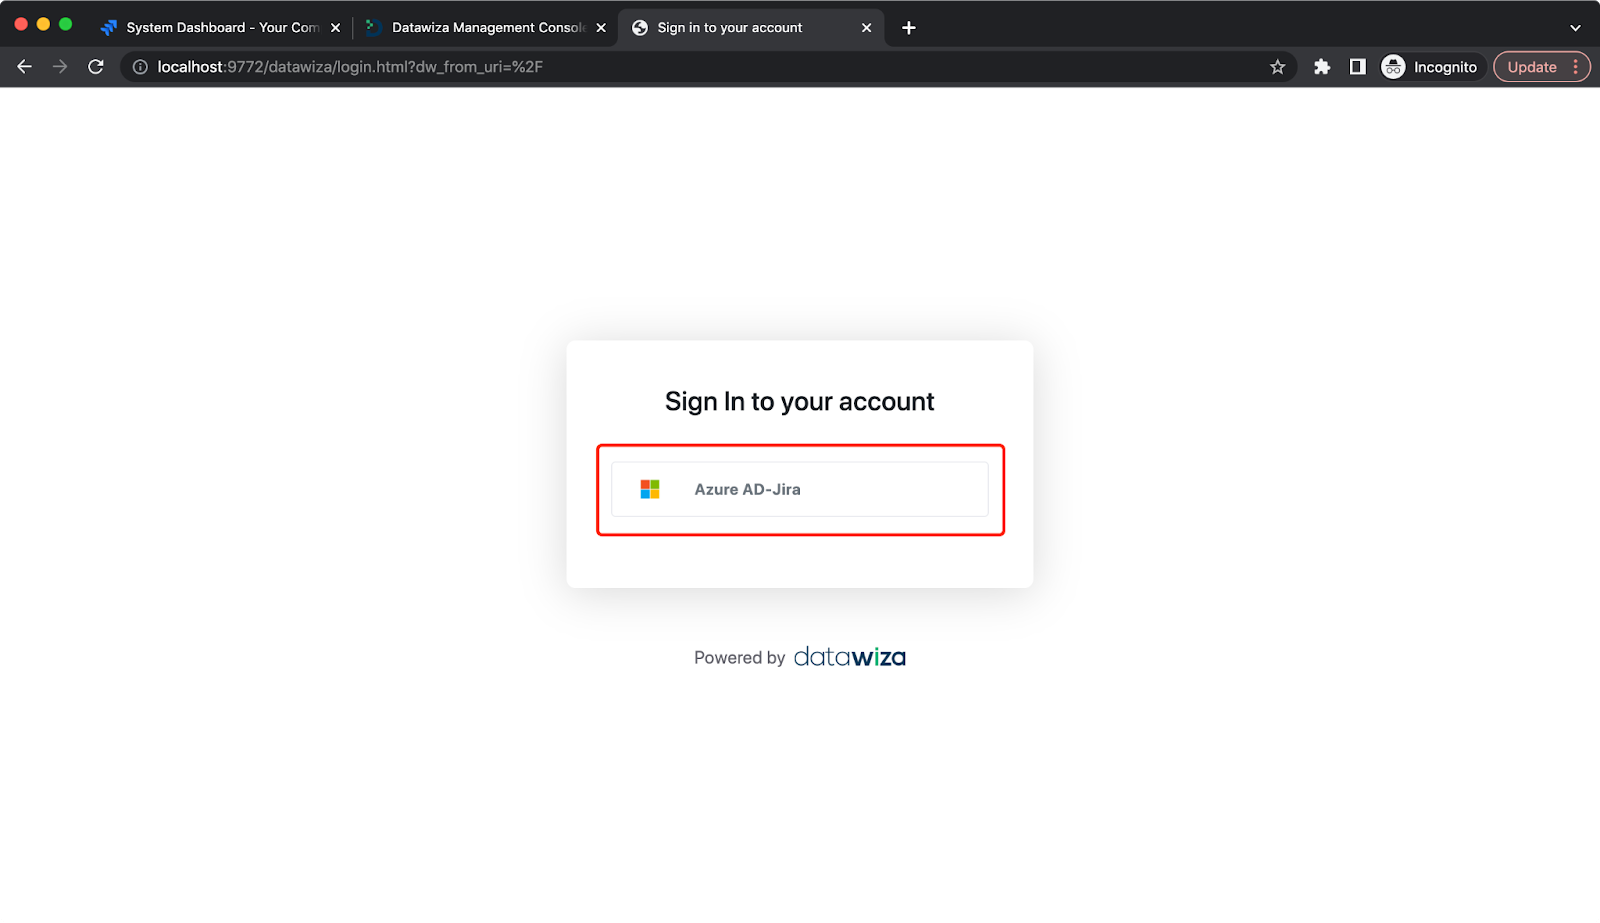
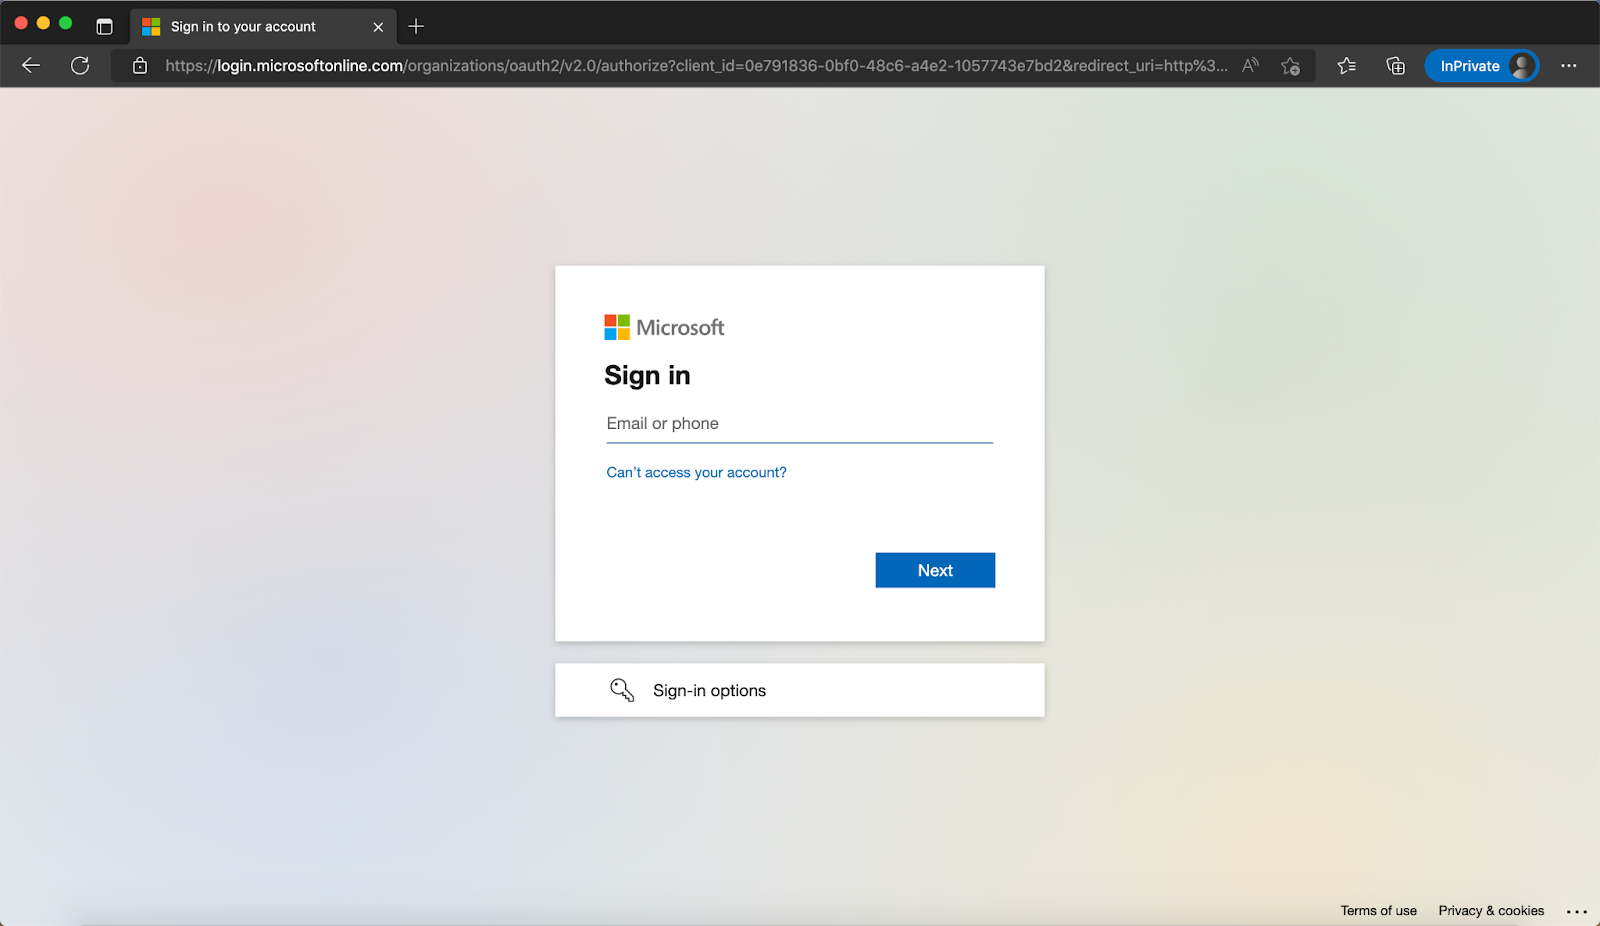
Note that if you are already logged into Microsoft Entra ID in your browser, you may need to log out to see the login page.
After logging in to Microsoft Entra ID, the Jira will be shown. Update the base URL if necessary: 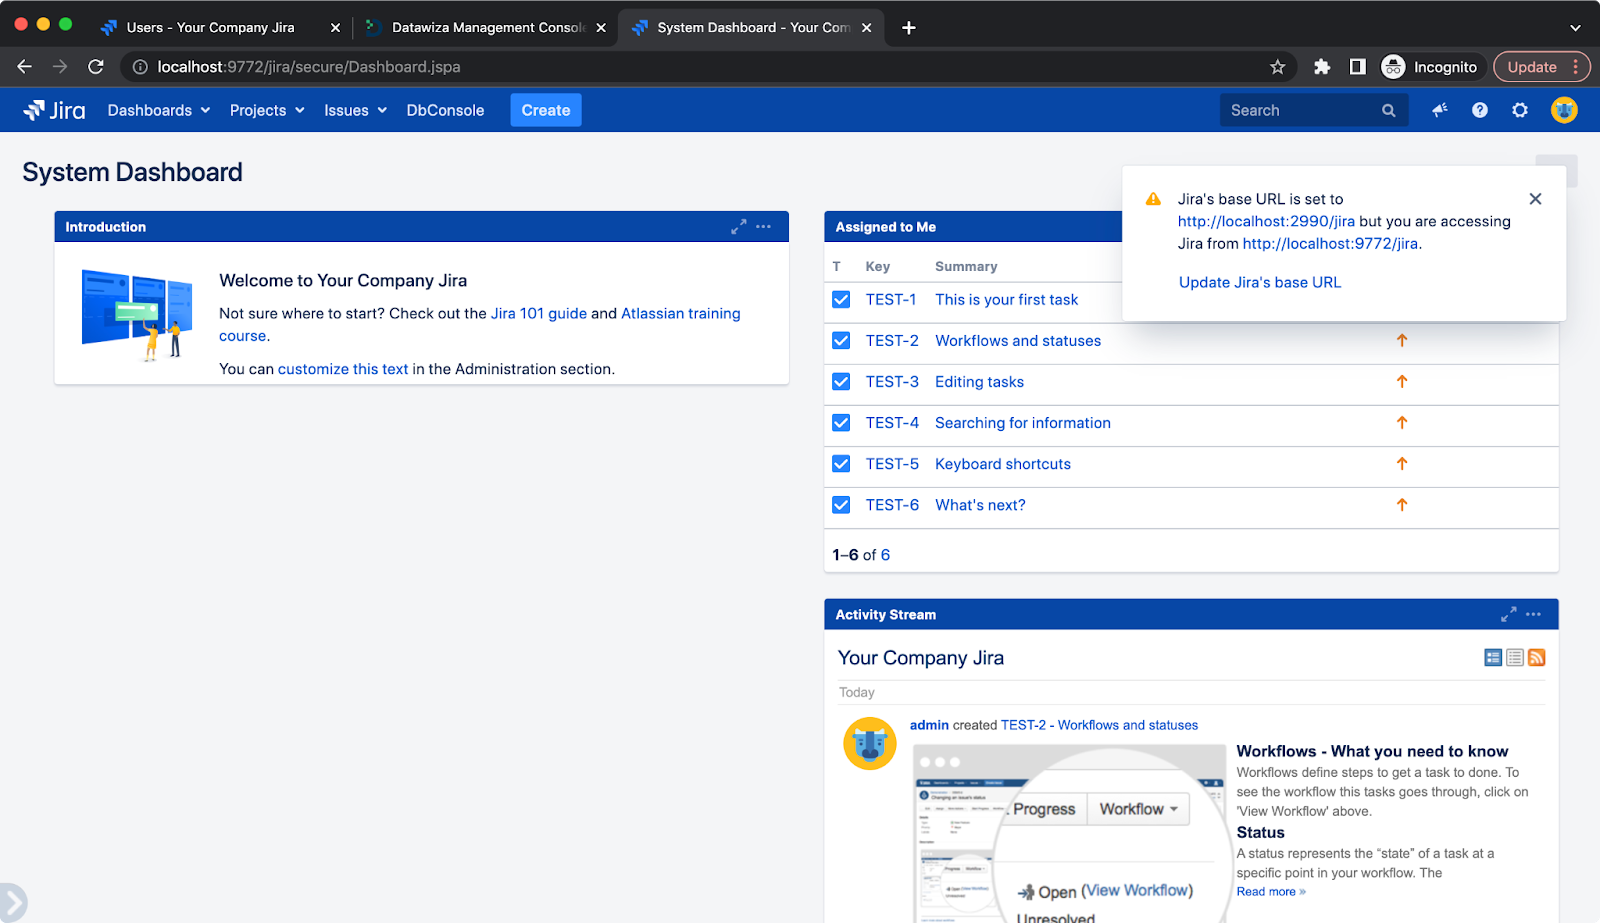
Summary
Congratulations! You secured the Jira by adding Microsoft Entra ID authentication using Datawiza, in minutes instead of weeks or months. This is only a small sampling of what Datawiza can do. See Datawiza’s online docs or official website for much more information. You can also get a free trial by signing up here!