Implementing Datawiza Access Proxy with AIS using Entra ID: A Step-By-Step Guide
Overview
This documentation provides detailed instructions on how to integrate a Datawiza Access Proxy (DAP) with AIS using Entra ID.
Prerequisite
Before initiating the configuration process, ensure that you have a valid certificate. This could be a personal keystore file or one generated for you by the Datawiza Cloud Managememnt Console (DCMC).
If you choose to use your own certificate, it must be a PKCS12 keystore. Make sure to prepare the public certificate and private key accordingly:
To extract the private key, run the following command:
openssl pkcs12 -in certificate.pfx -nocerts -nodes -out privatekey.pem
In this command, certificate.pfx is your certificate file and privatekey.pem is the output file for the private key.
To extract the public key/certificate, use the following command:
openssl pkcs12 -in certificate.pfx -clcerts -nokeys -out publickey.pem
This command creates a .pem file (referred to as publickey.pem) that contains only the public key.
Register an OIDC Web application on the Microsoft Portal
Refer to our guide on how to register an OIDC Web application on the Microsoft Identity Platform. Upon successful registration, note down the following required values for future configuration in the DCMC:
- Tenant ID
- Application (client) ID
DCMC Configuration
In this section, we will show you how to create an AIS application on the DCMC and generate a pair of PROVISIONING_KEY and PROVISIONING_SECRET for this app. This key pair is used by the DAP to get the latest configurations and policies from the DCMC.
Log into the DCMC: 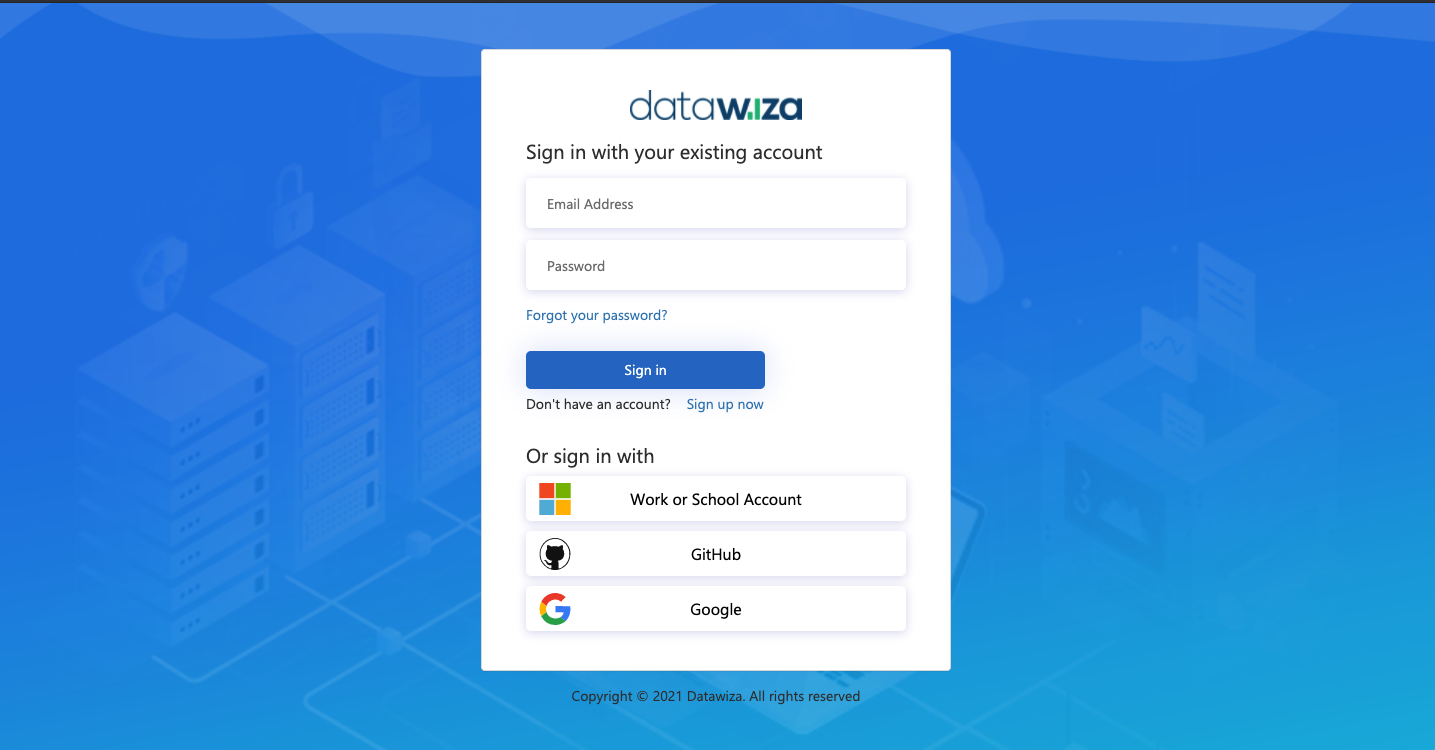
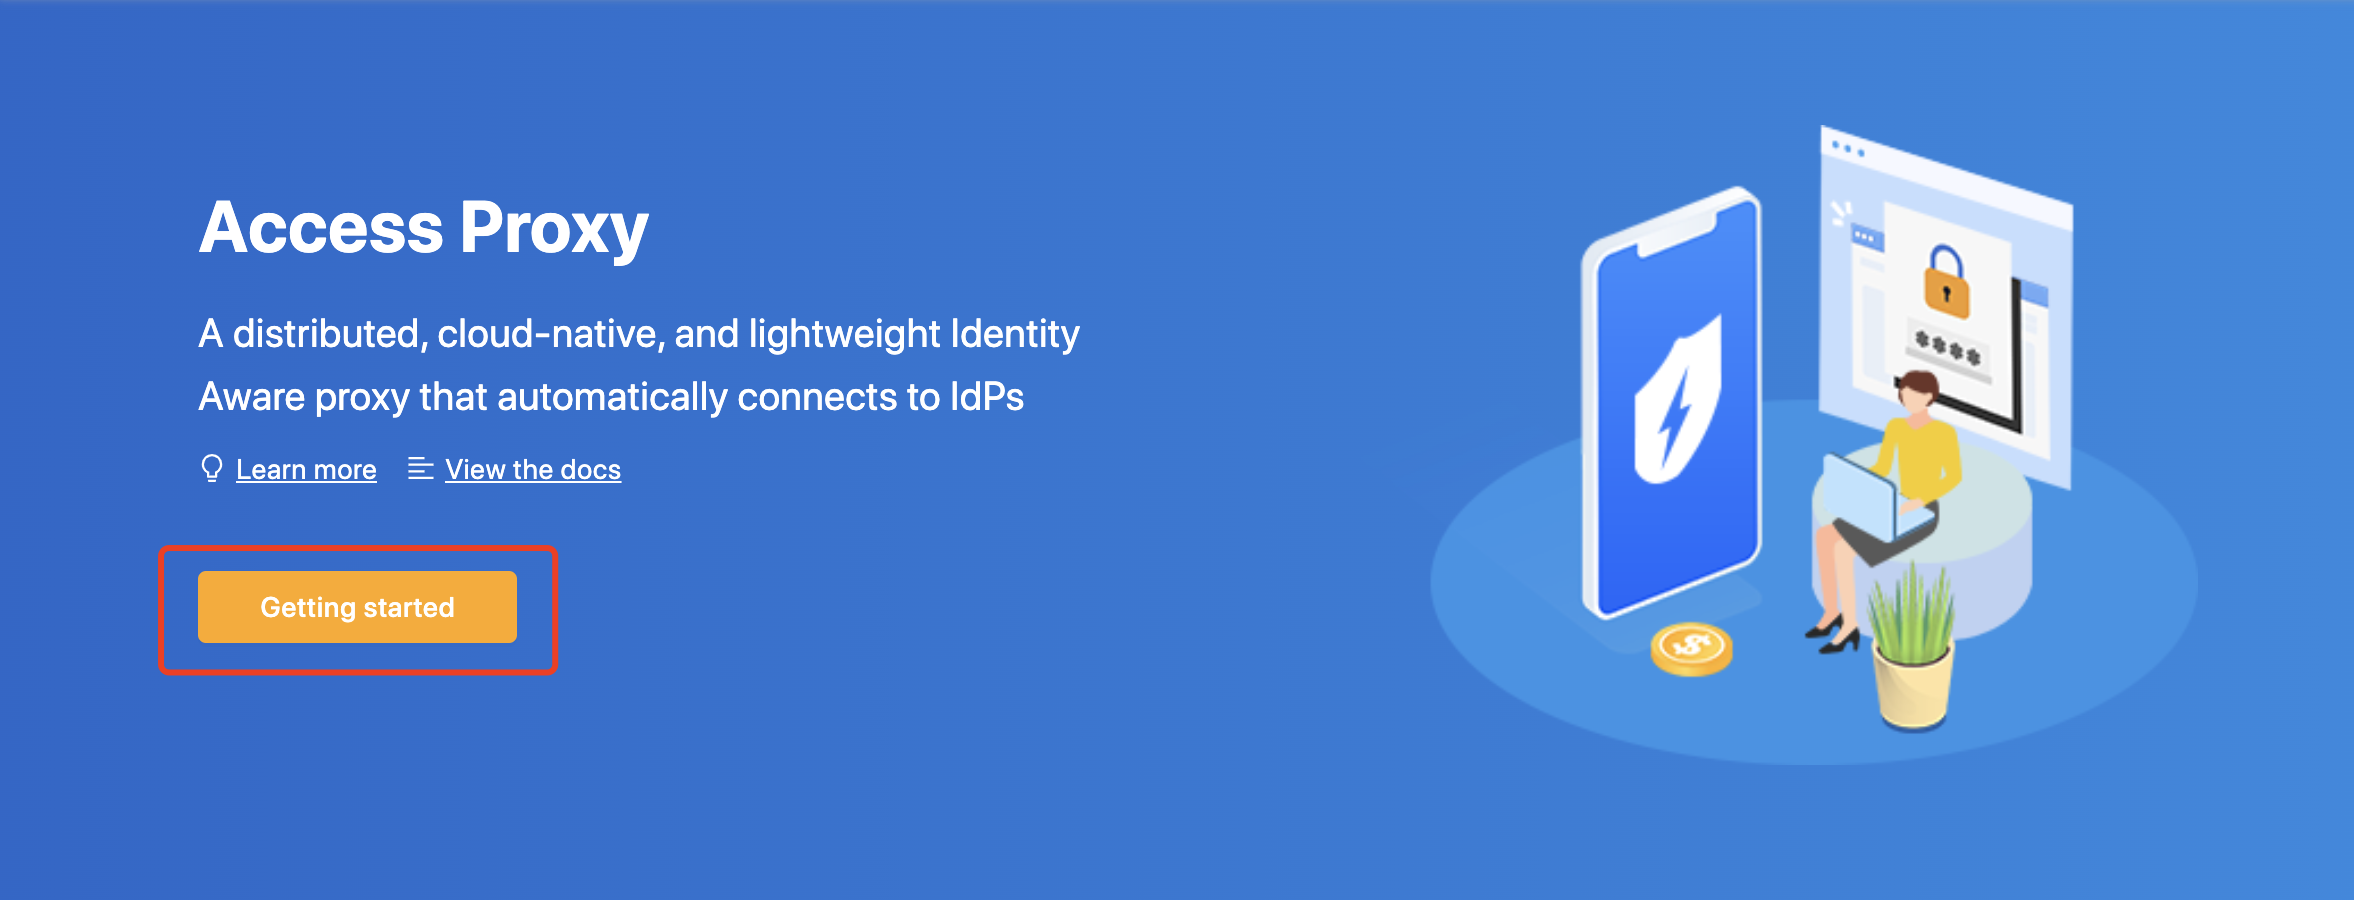
Click the orange button Getting started.
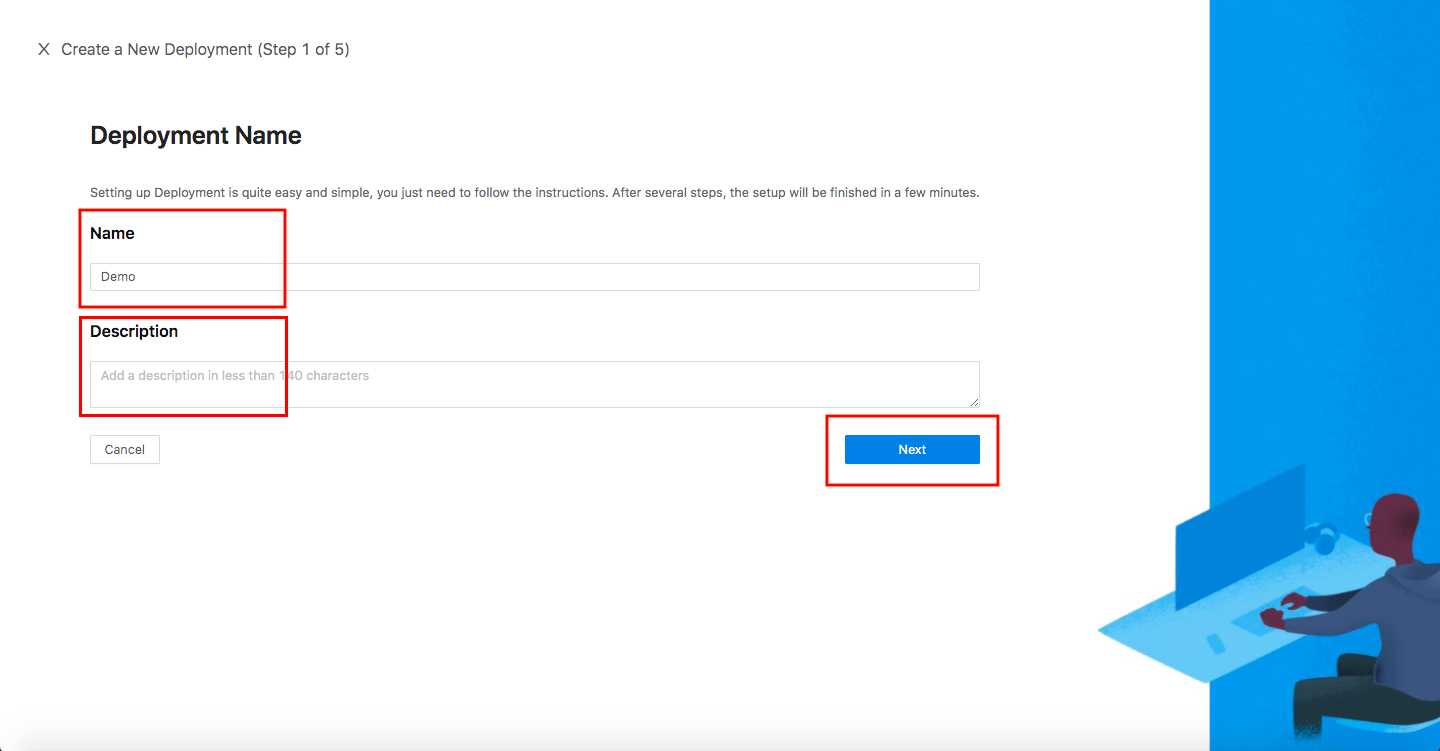
Specify a Name and a Description, and click Next.
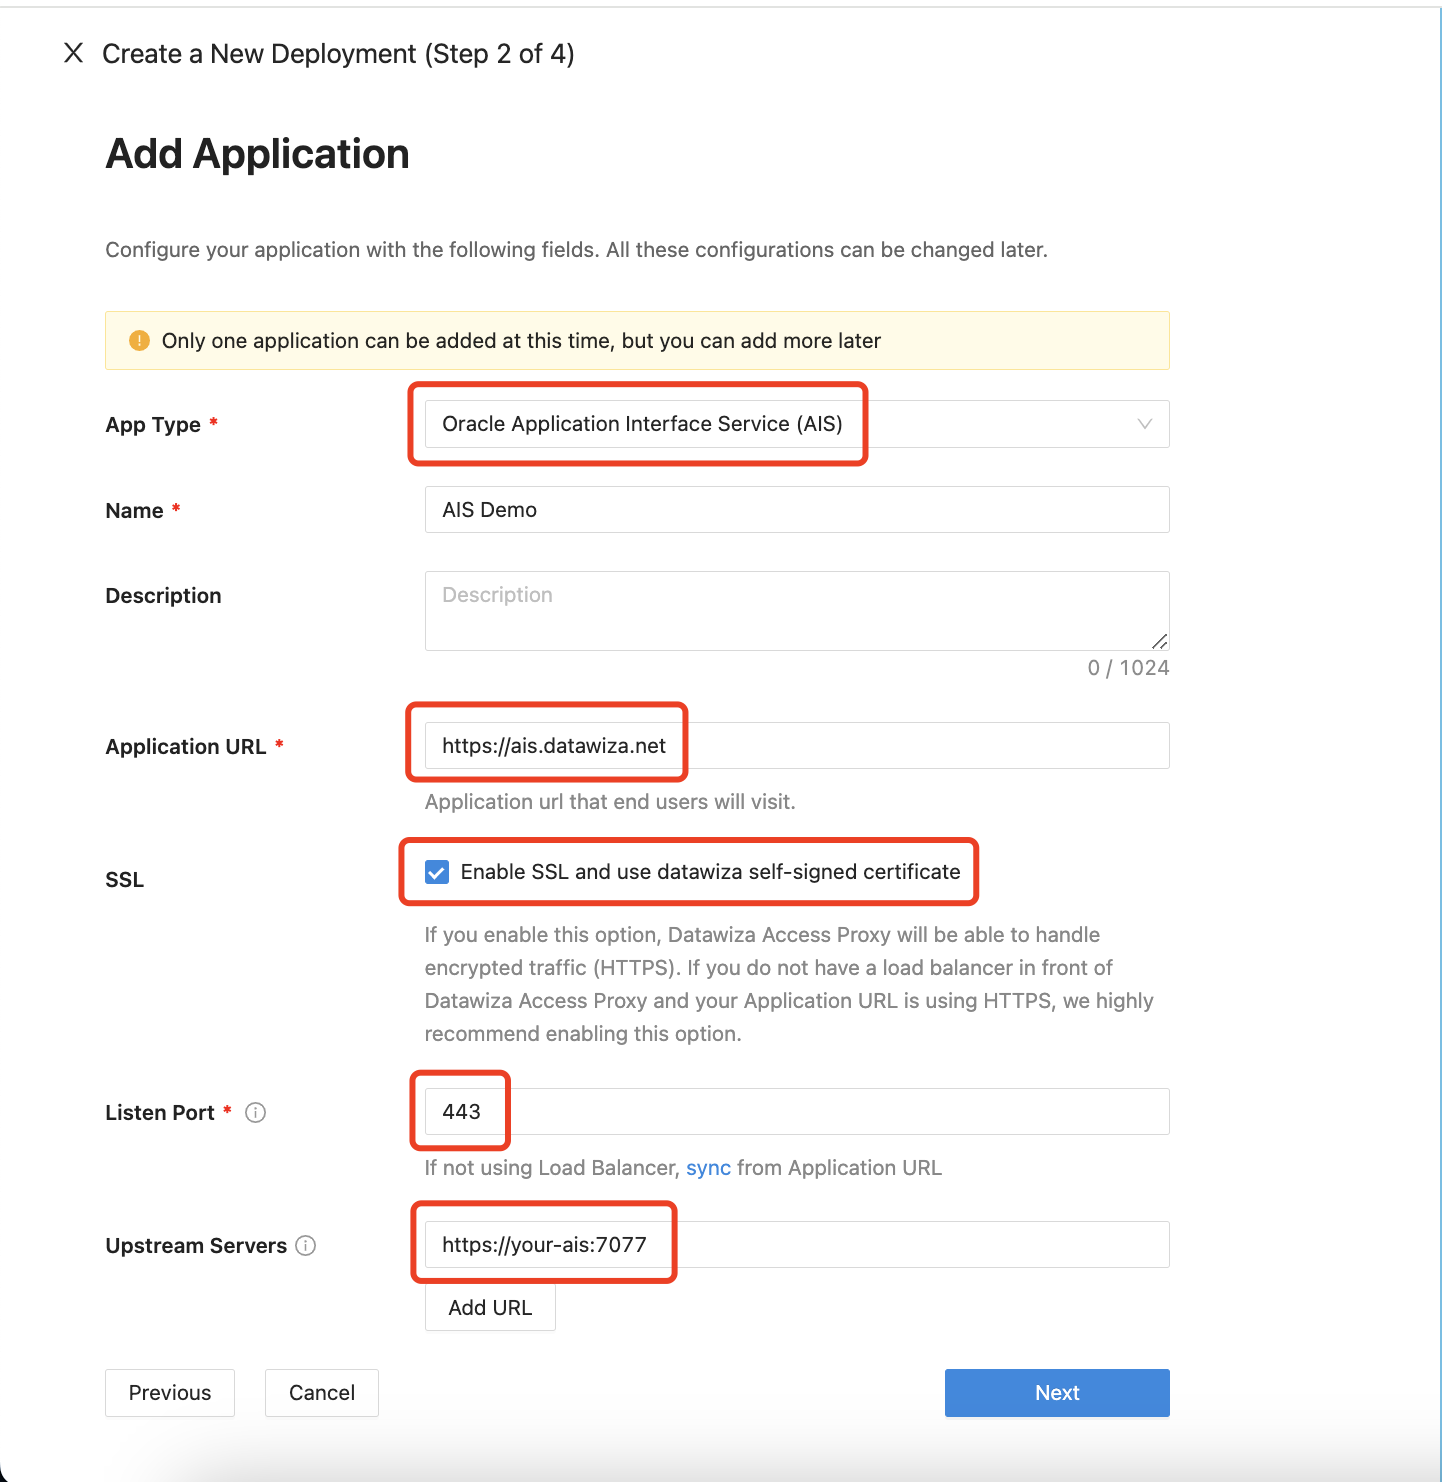
Configure your application with the following values:
- App Type:
Oracle Application Interface Service (AIS) - Name:
AIS Demo - Application URL:
https://ais.datawiza.net - Listen Port:
443 - Upstream Servers:
https://your-ais:7077
Select Next.
Now, configure your AIS Identity Provider (IdP), entering the Tenant ID and Client ID from the previous step. The AIS Login Identity aids in defining the delegated identity for authentication when disparities arise between user login identities. Click Create to finish the setup.
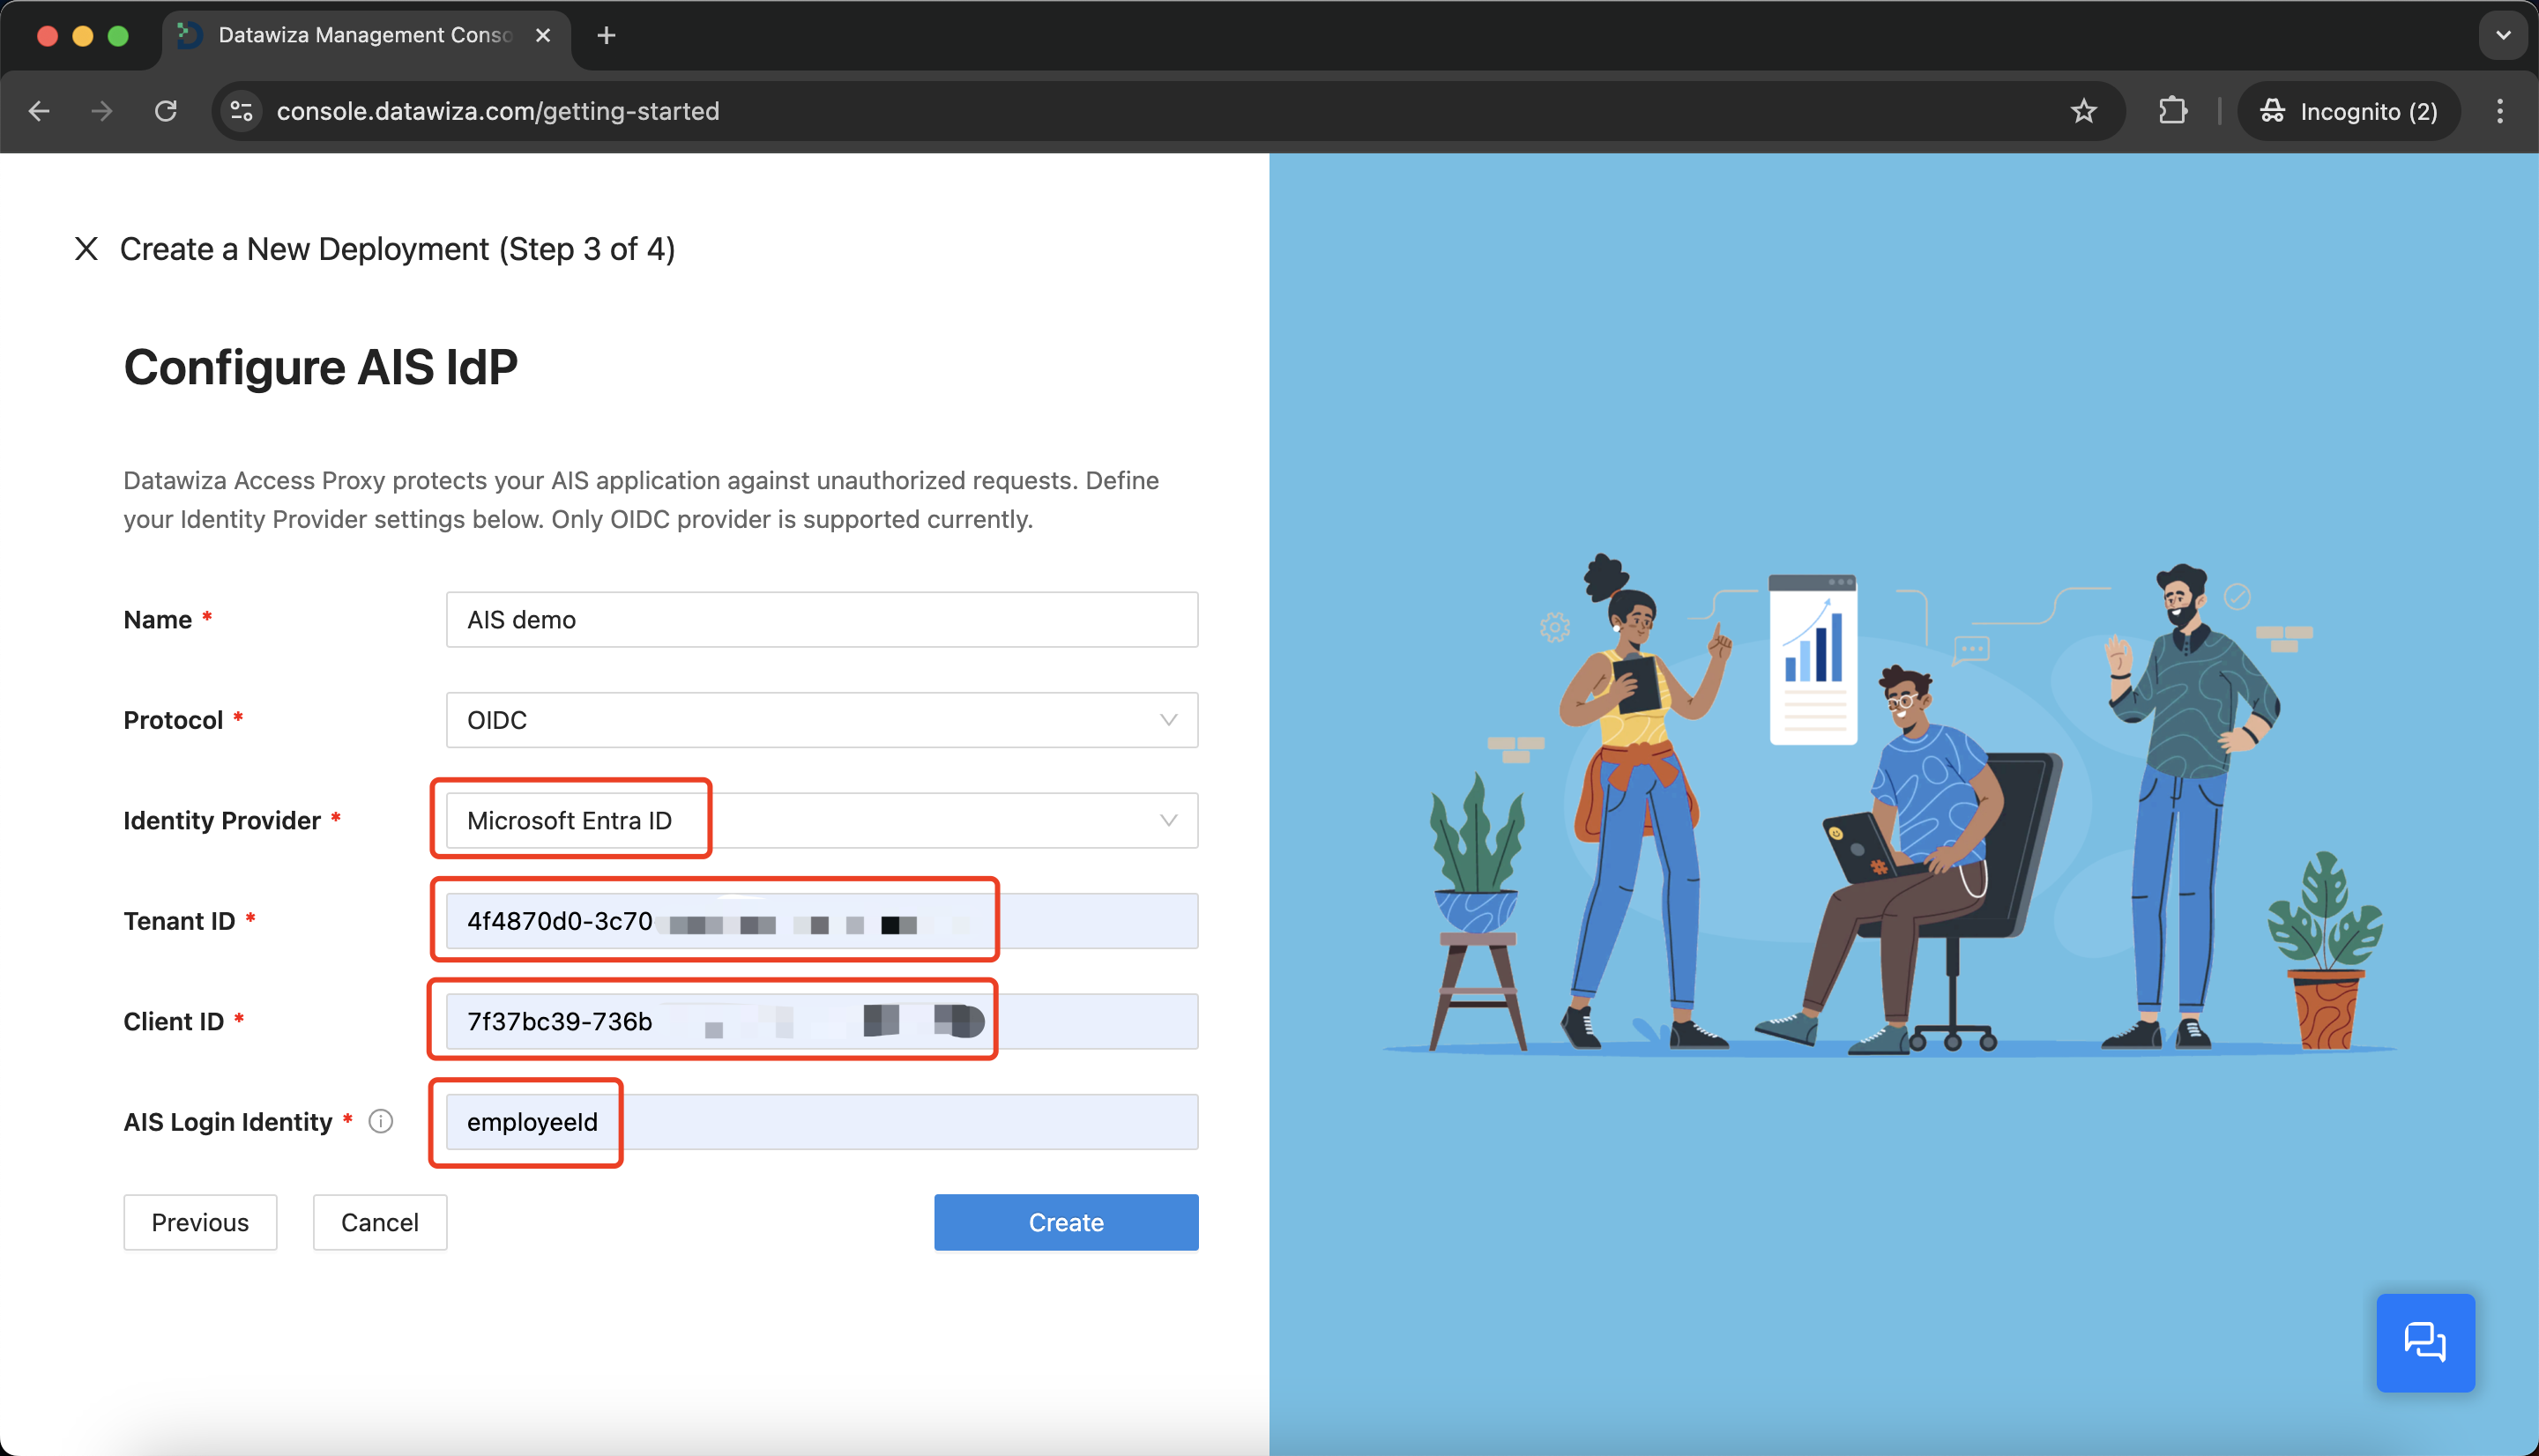
Deploying DAP
To launch DAP, you will need to have Docker installed. Please refer to our Quick Start guide for instructions on how to install Docker and deploy DAP on your operating system.
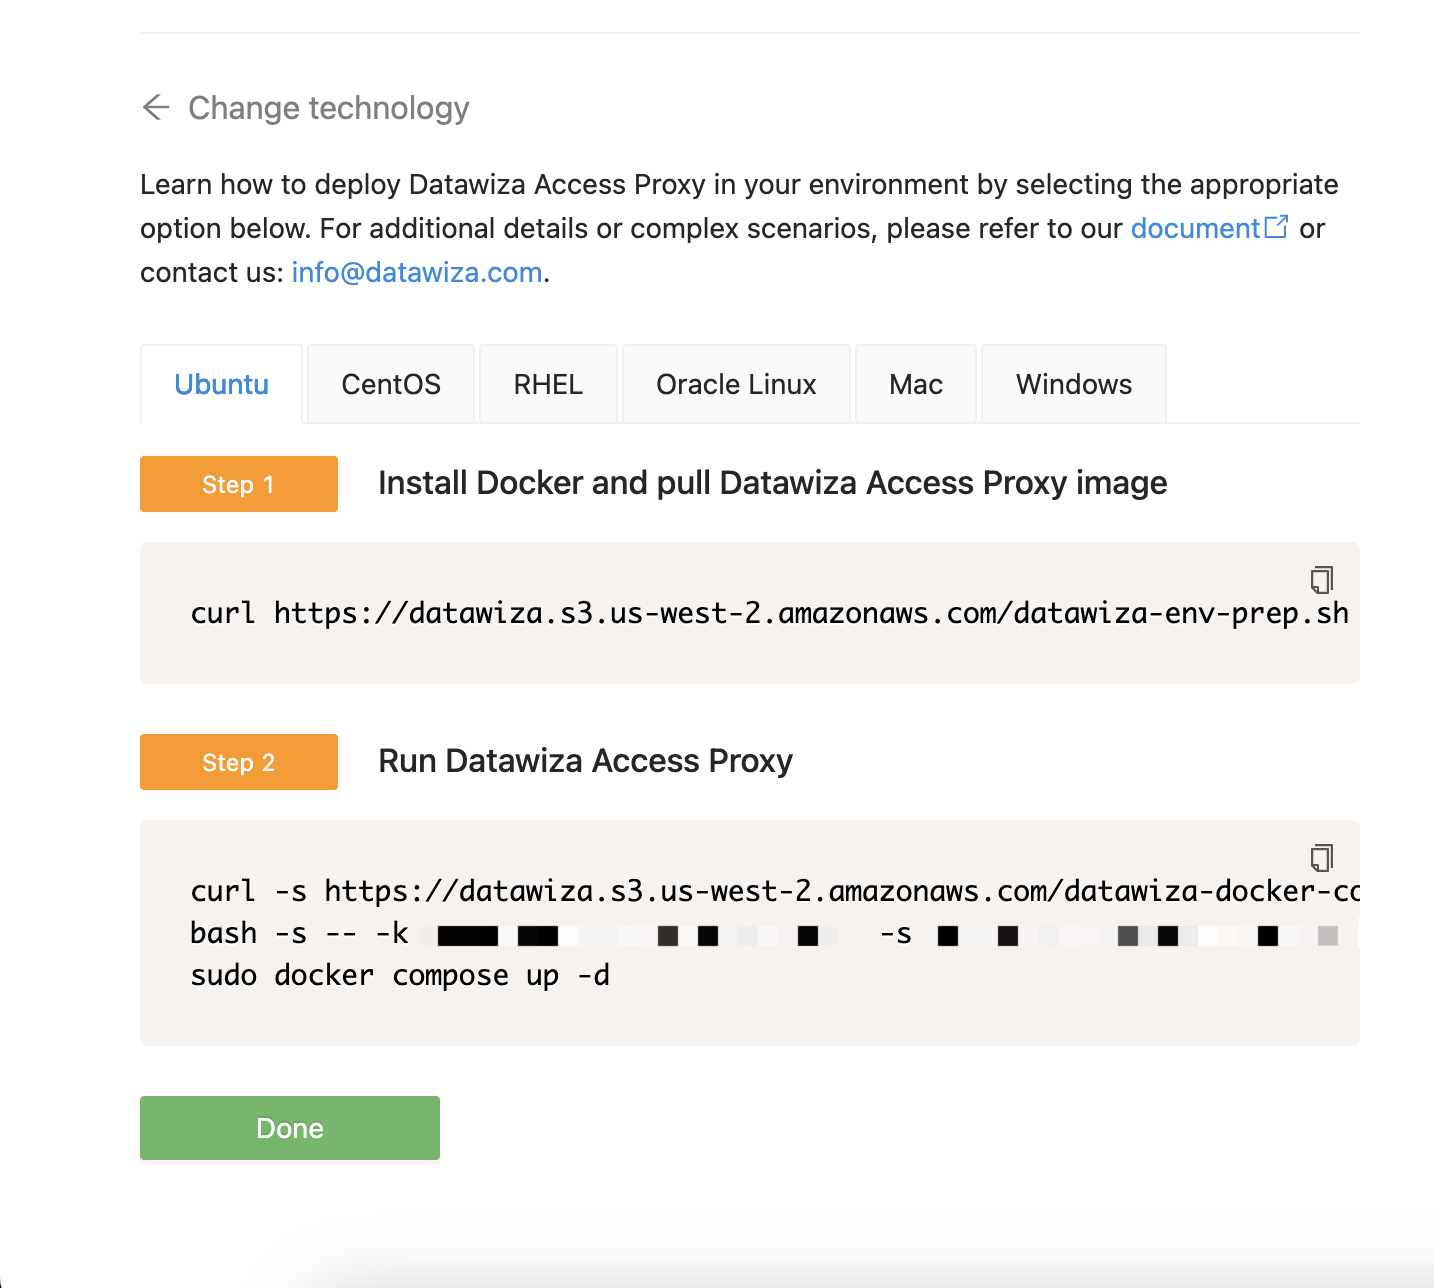
After executing the needed steps, the DAP should be up and running.
JWT Configuration
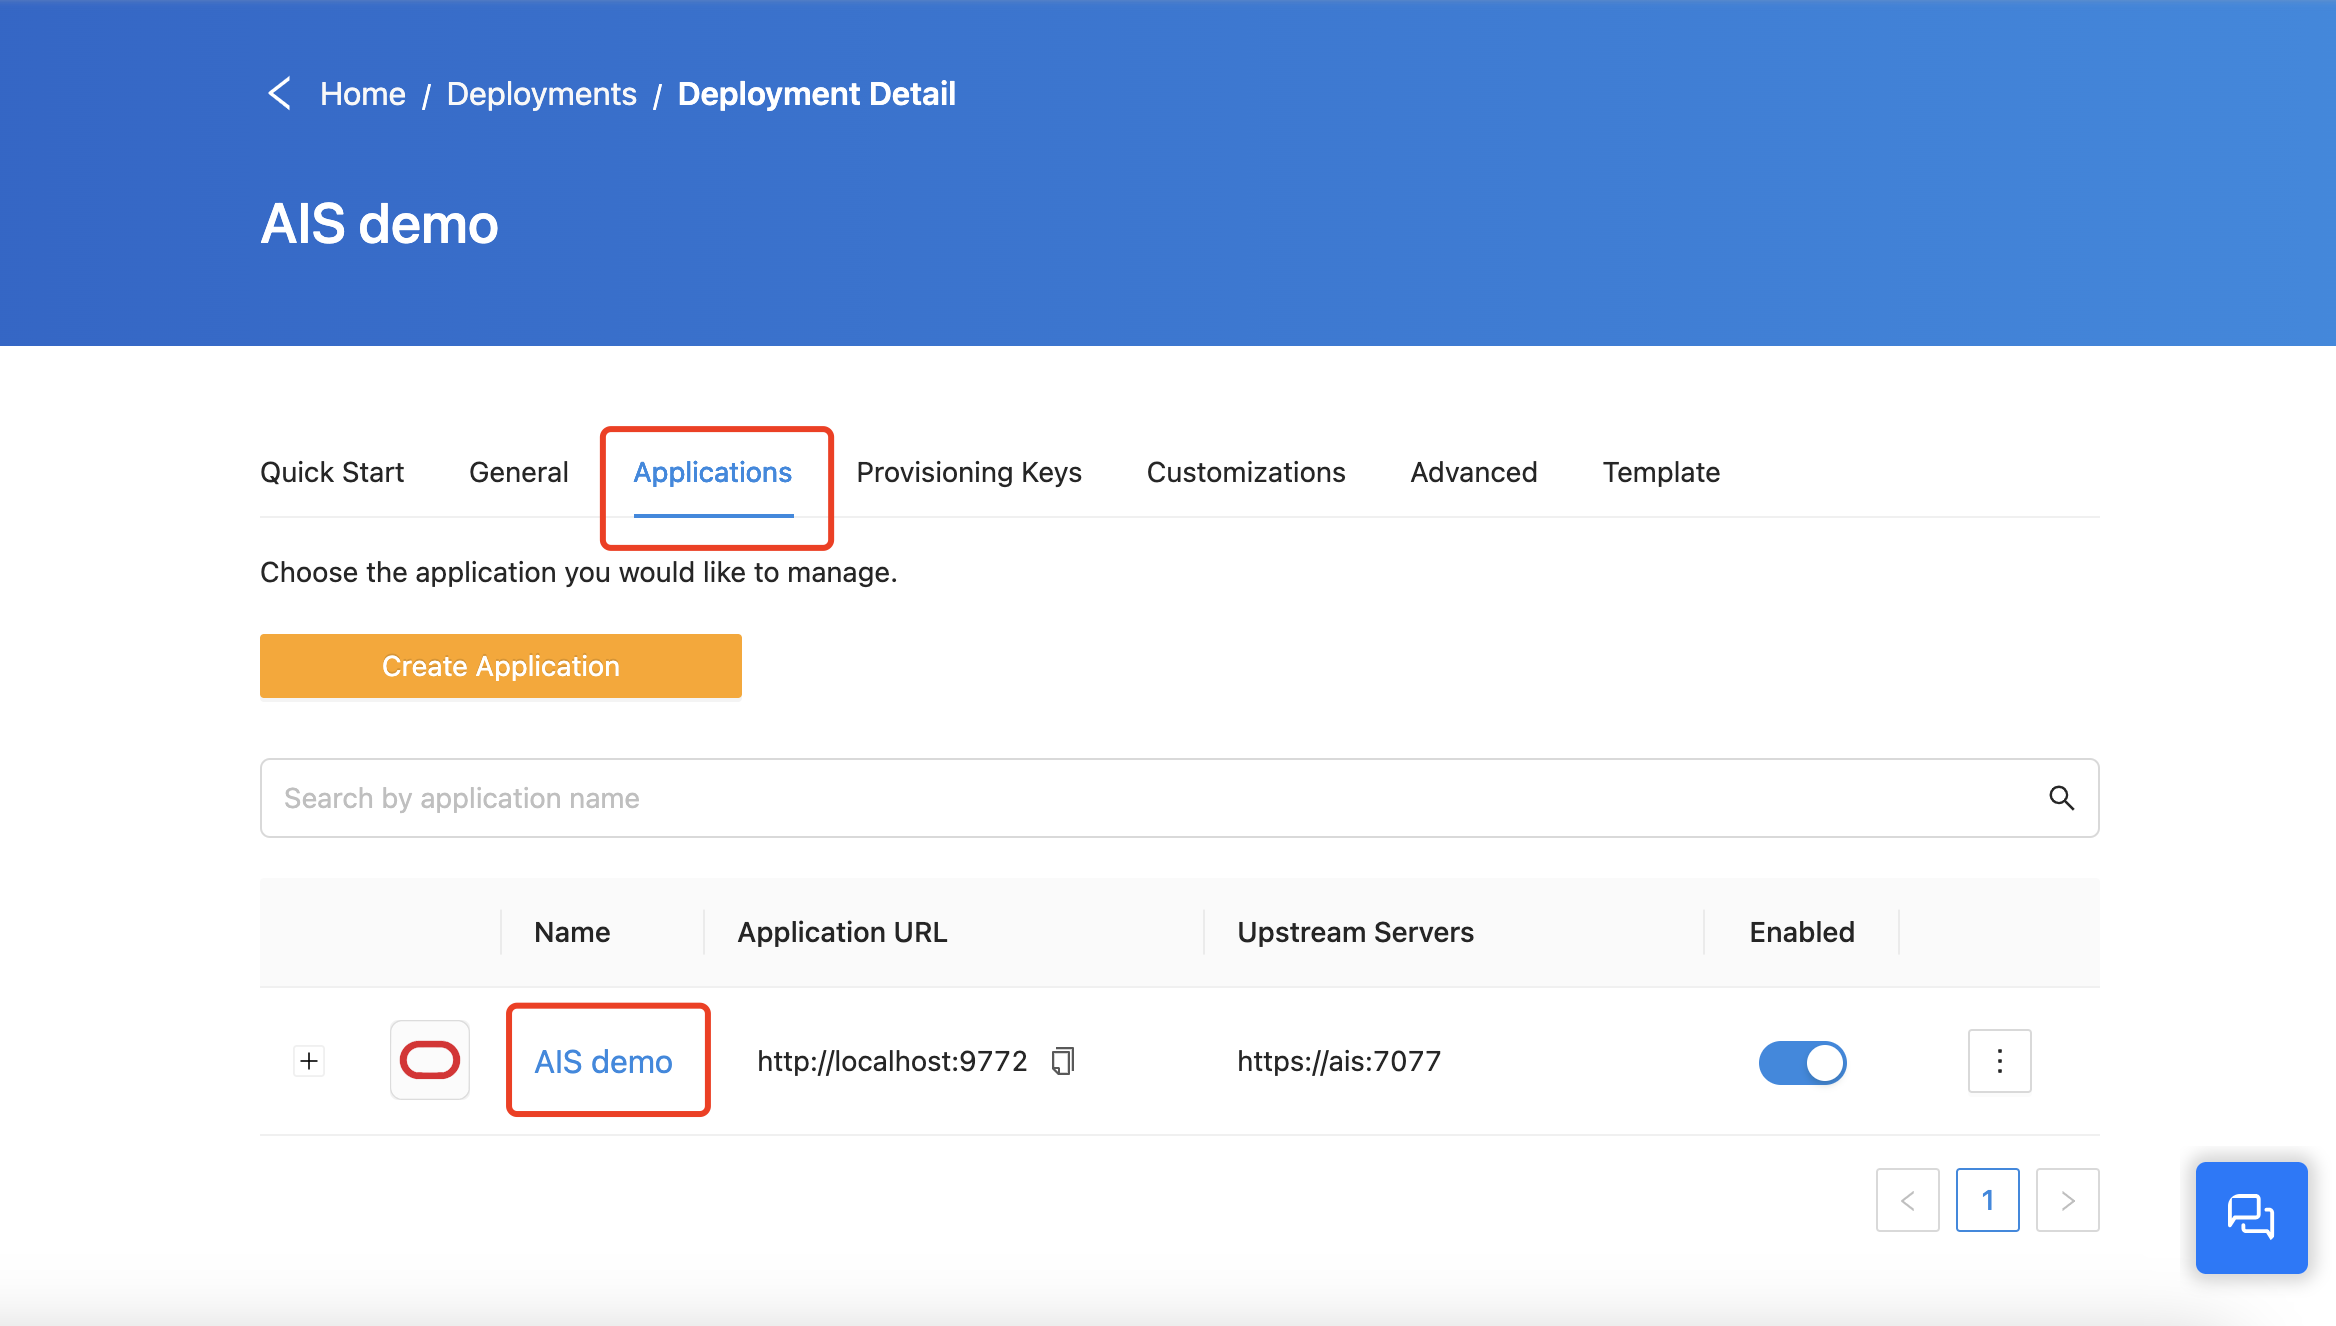
Click the application you've just created:
Navigate to the Advanced tab and select the JWT sub-tab. Choose RS256 as the JWT algorithm and then input your prepared public key and private key.
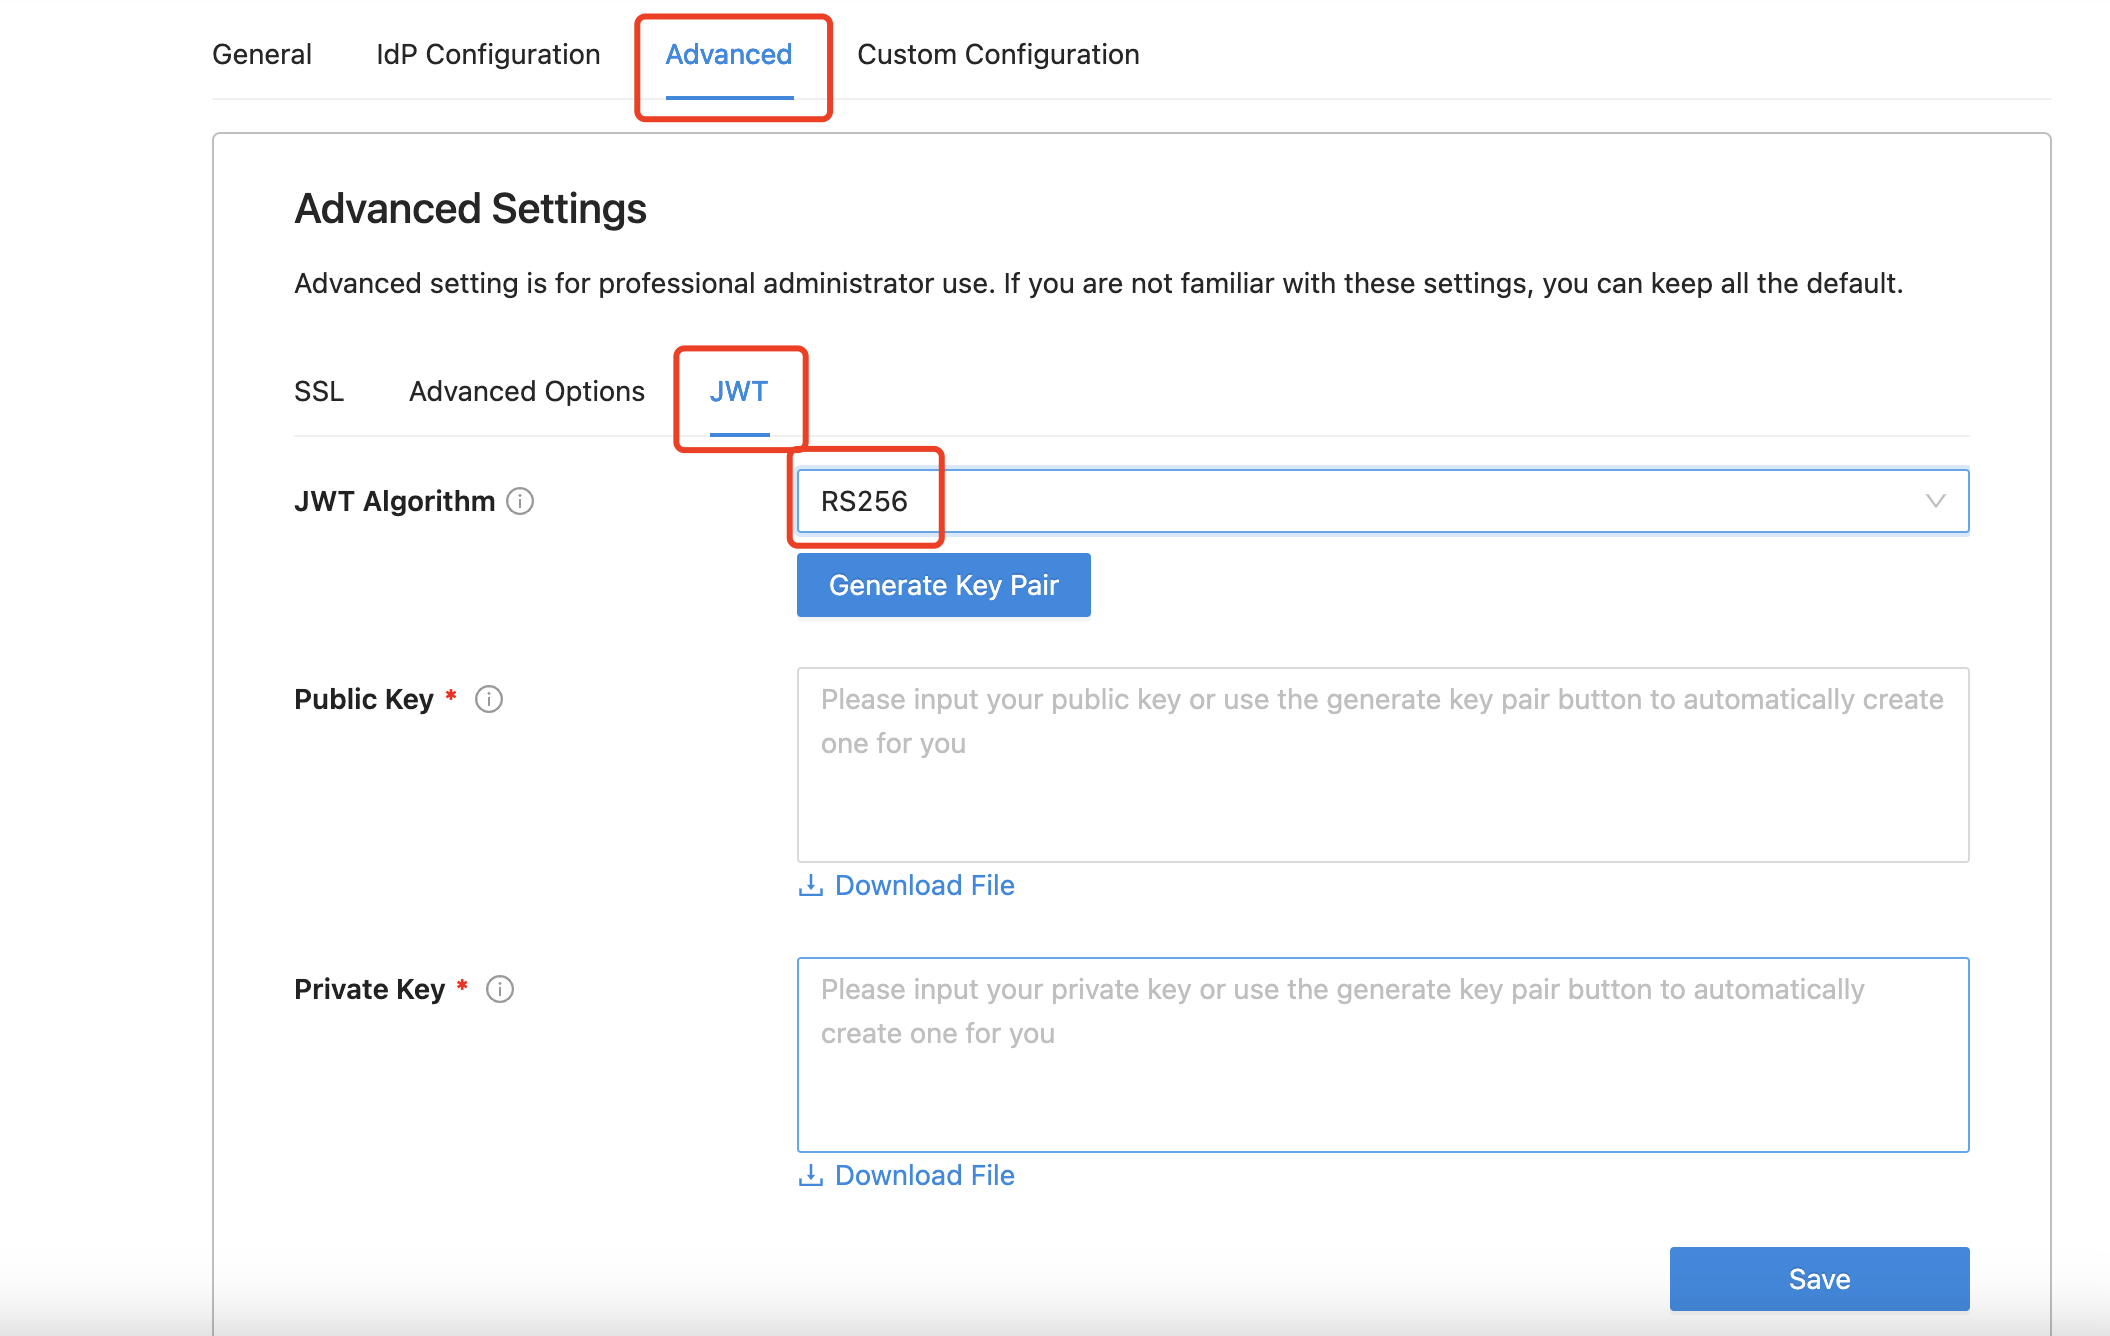
If you choose to ask Datawiza to generate one for you, you can click the Generate Key Pair button. Then, you will have the chance to download the PKCS12 file, as the following screenshot:
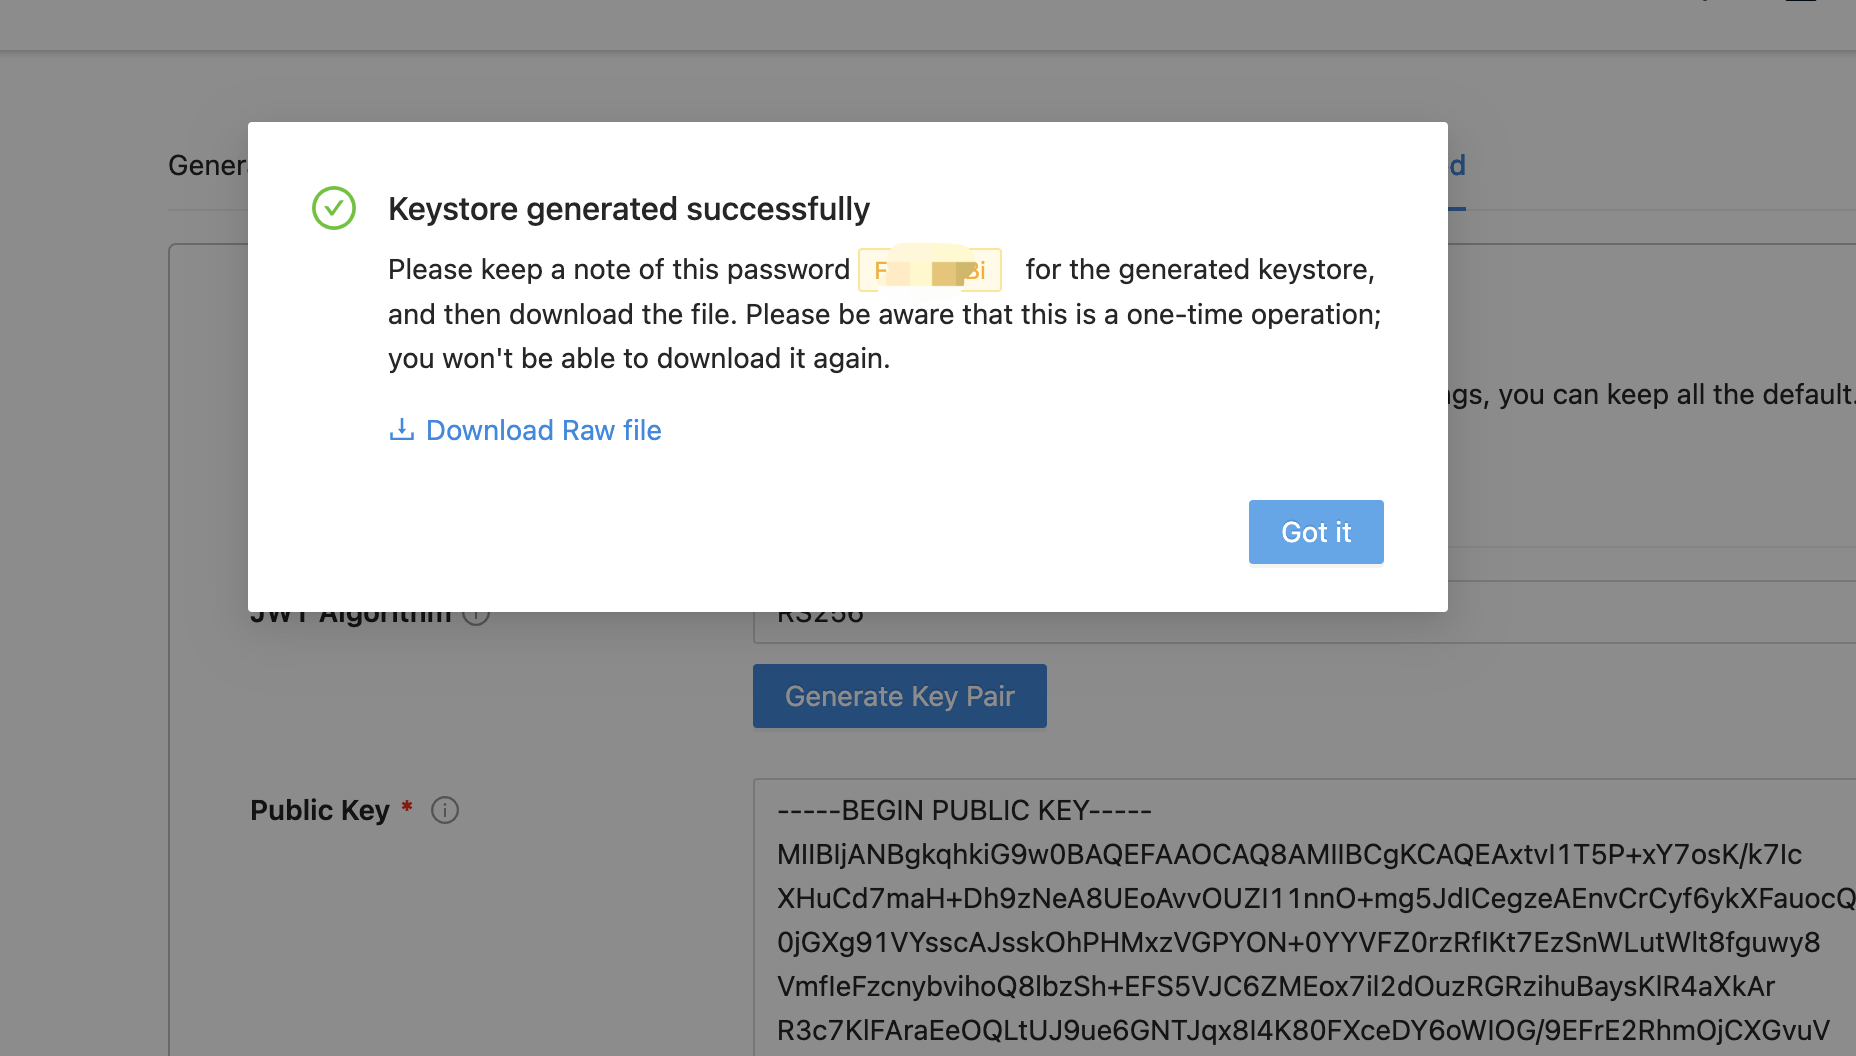
Download the raw file and keep a note of the password. The download is a pfx file with a file name like yyyy-mm-dd-keystore.pfx.
AIS Configuration
This section provides a comprehensive guide on configuring the JDE in association with AIS.
Certificate Upload
To begin, upload the certificate file into the /u01/keystores directory on the JDE server.
Please ensure that the server has accurate read permissions for both the folder and its contained files.
Execute the command below to set the right permissions:
chmod 777 -R /u01/keystores/
Configuring JDE Server Manager
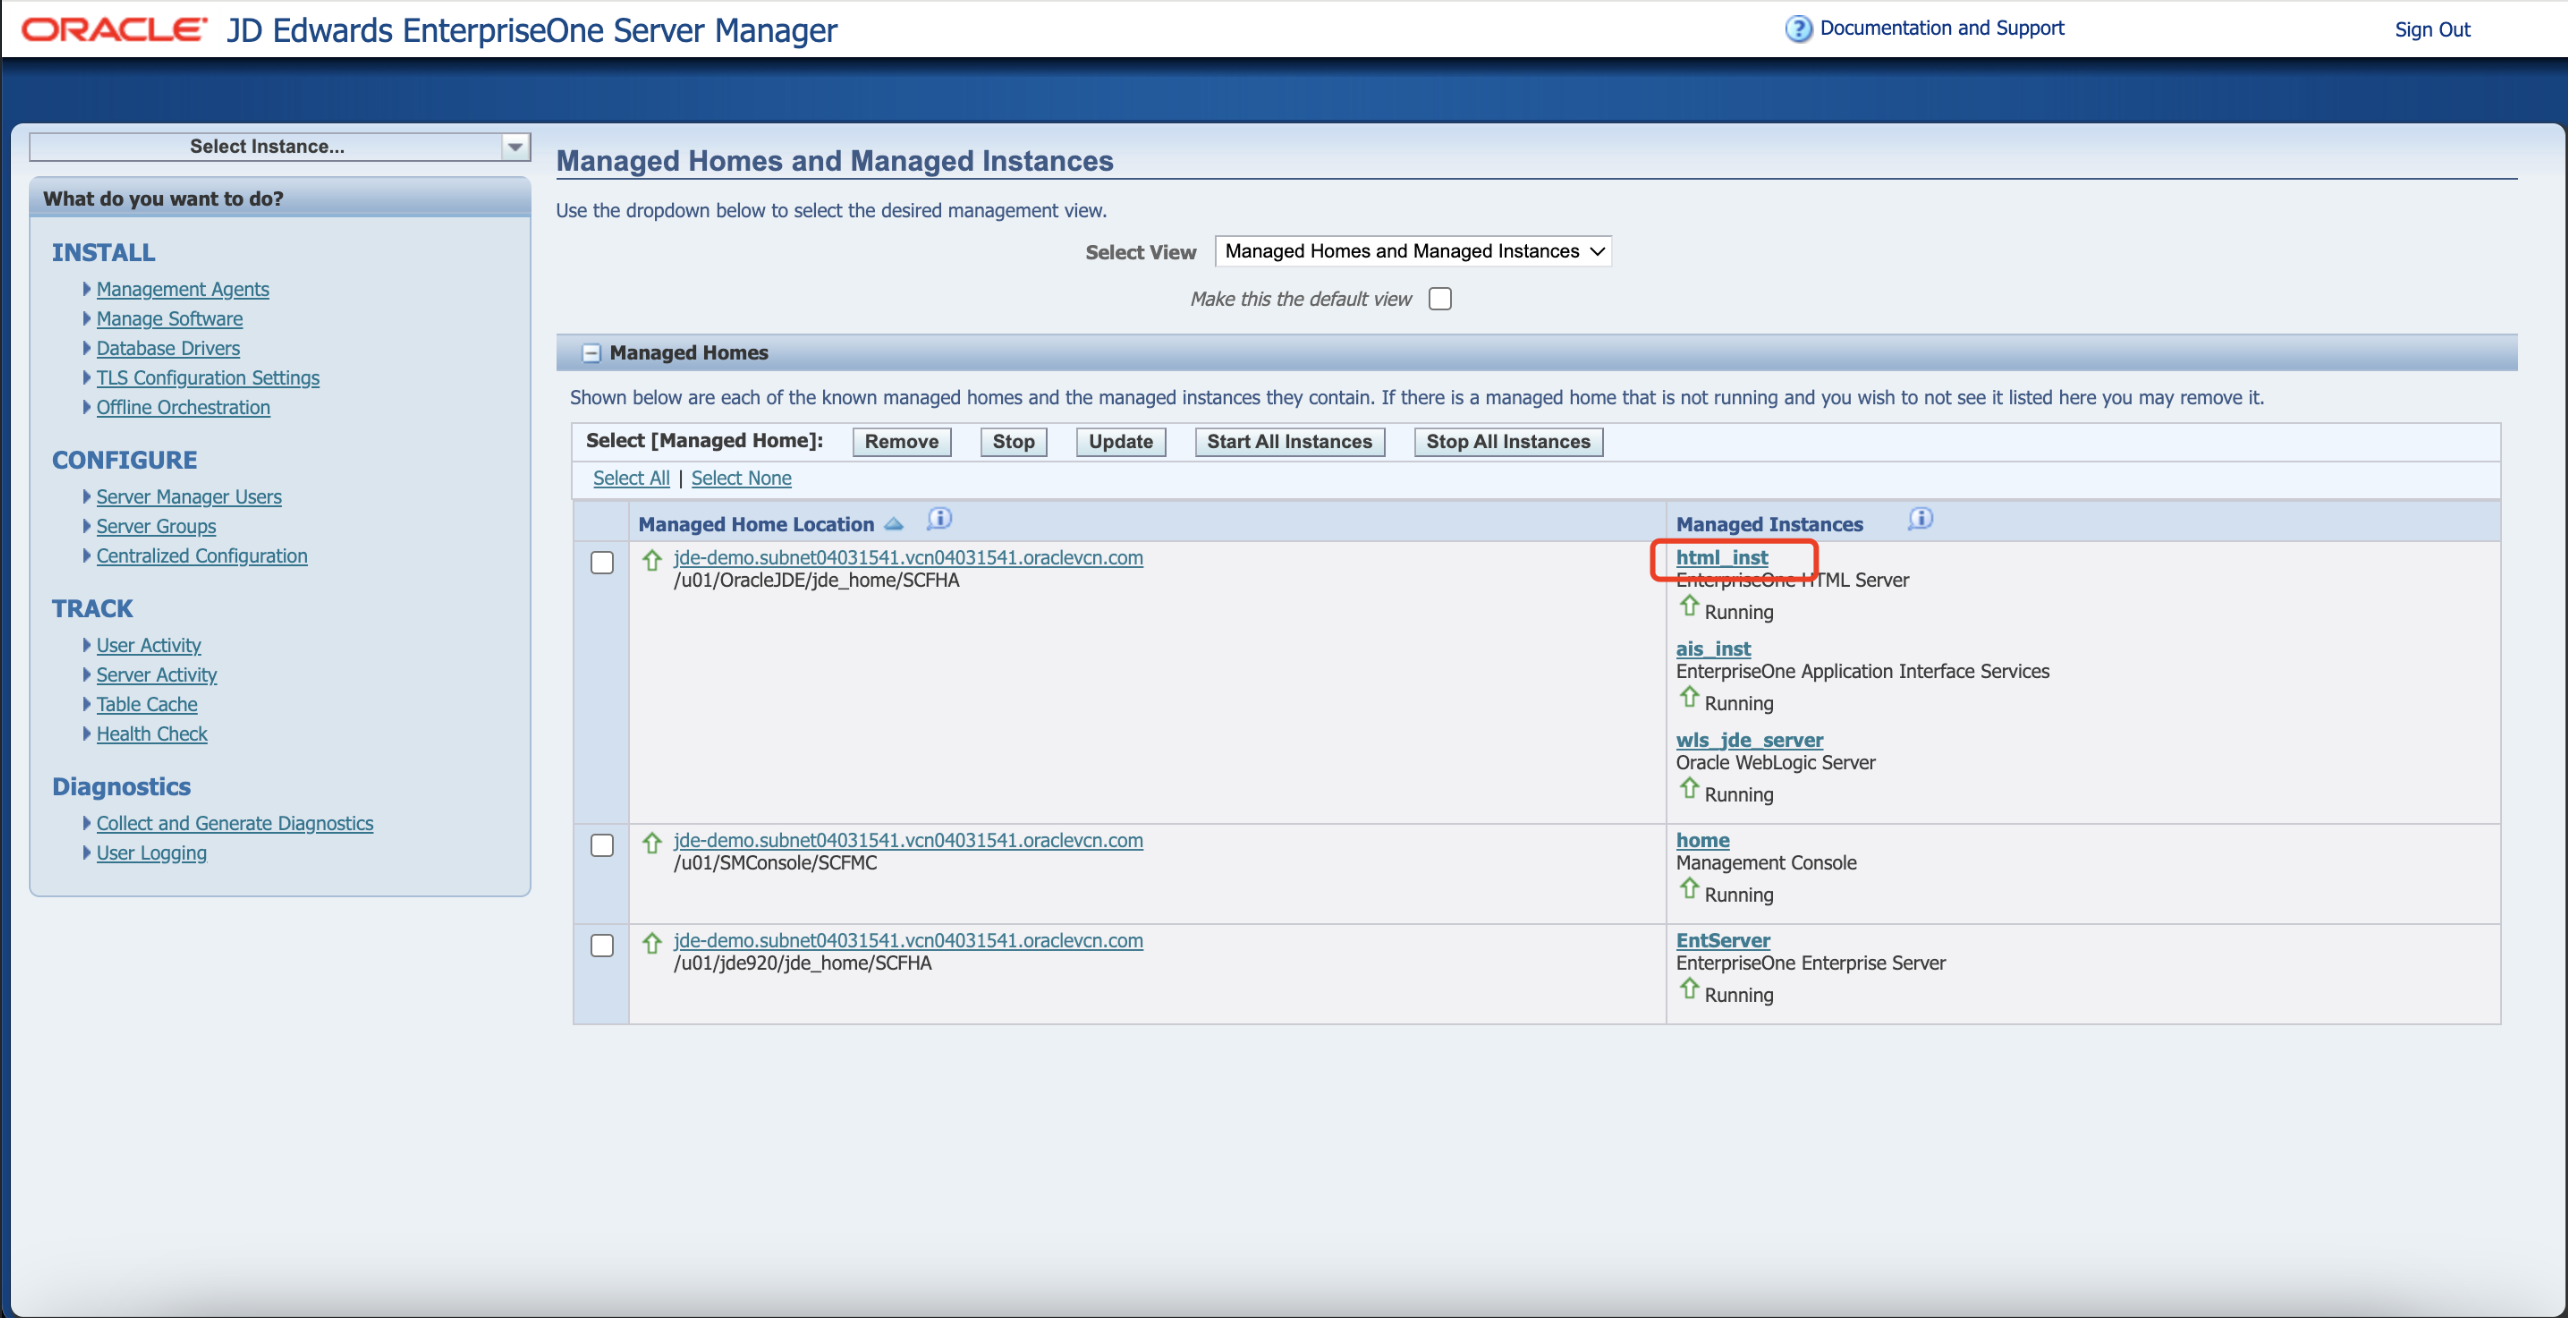
Next, proceed to log in to the JDE Server Manager.
Within the Server Manager, choose the Security configuration designated for the AIS.
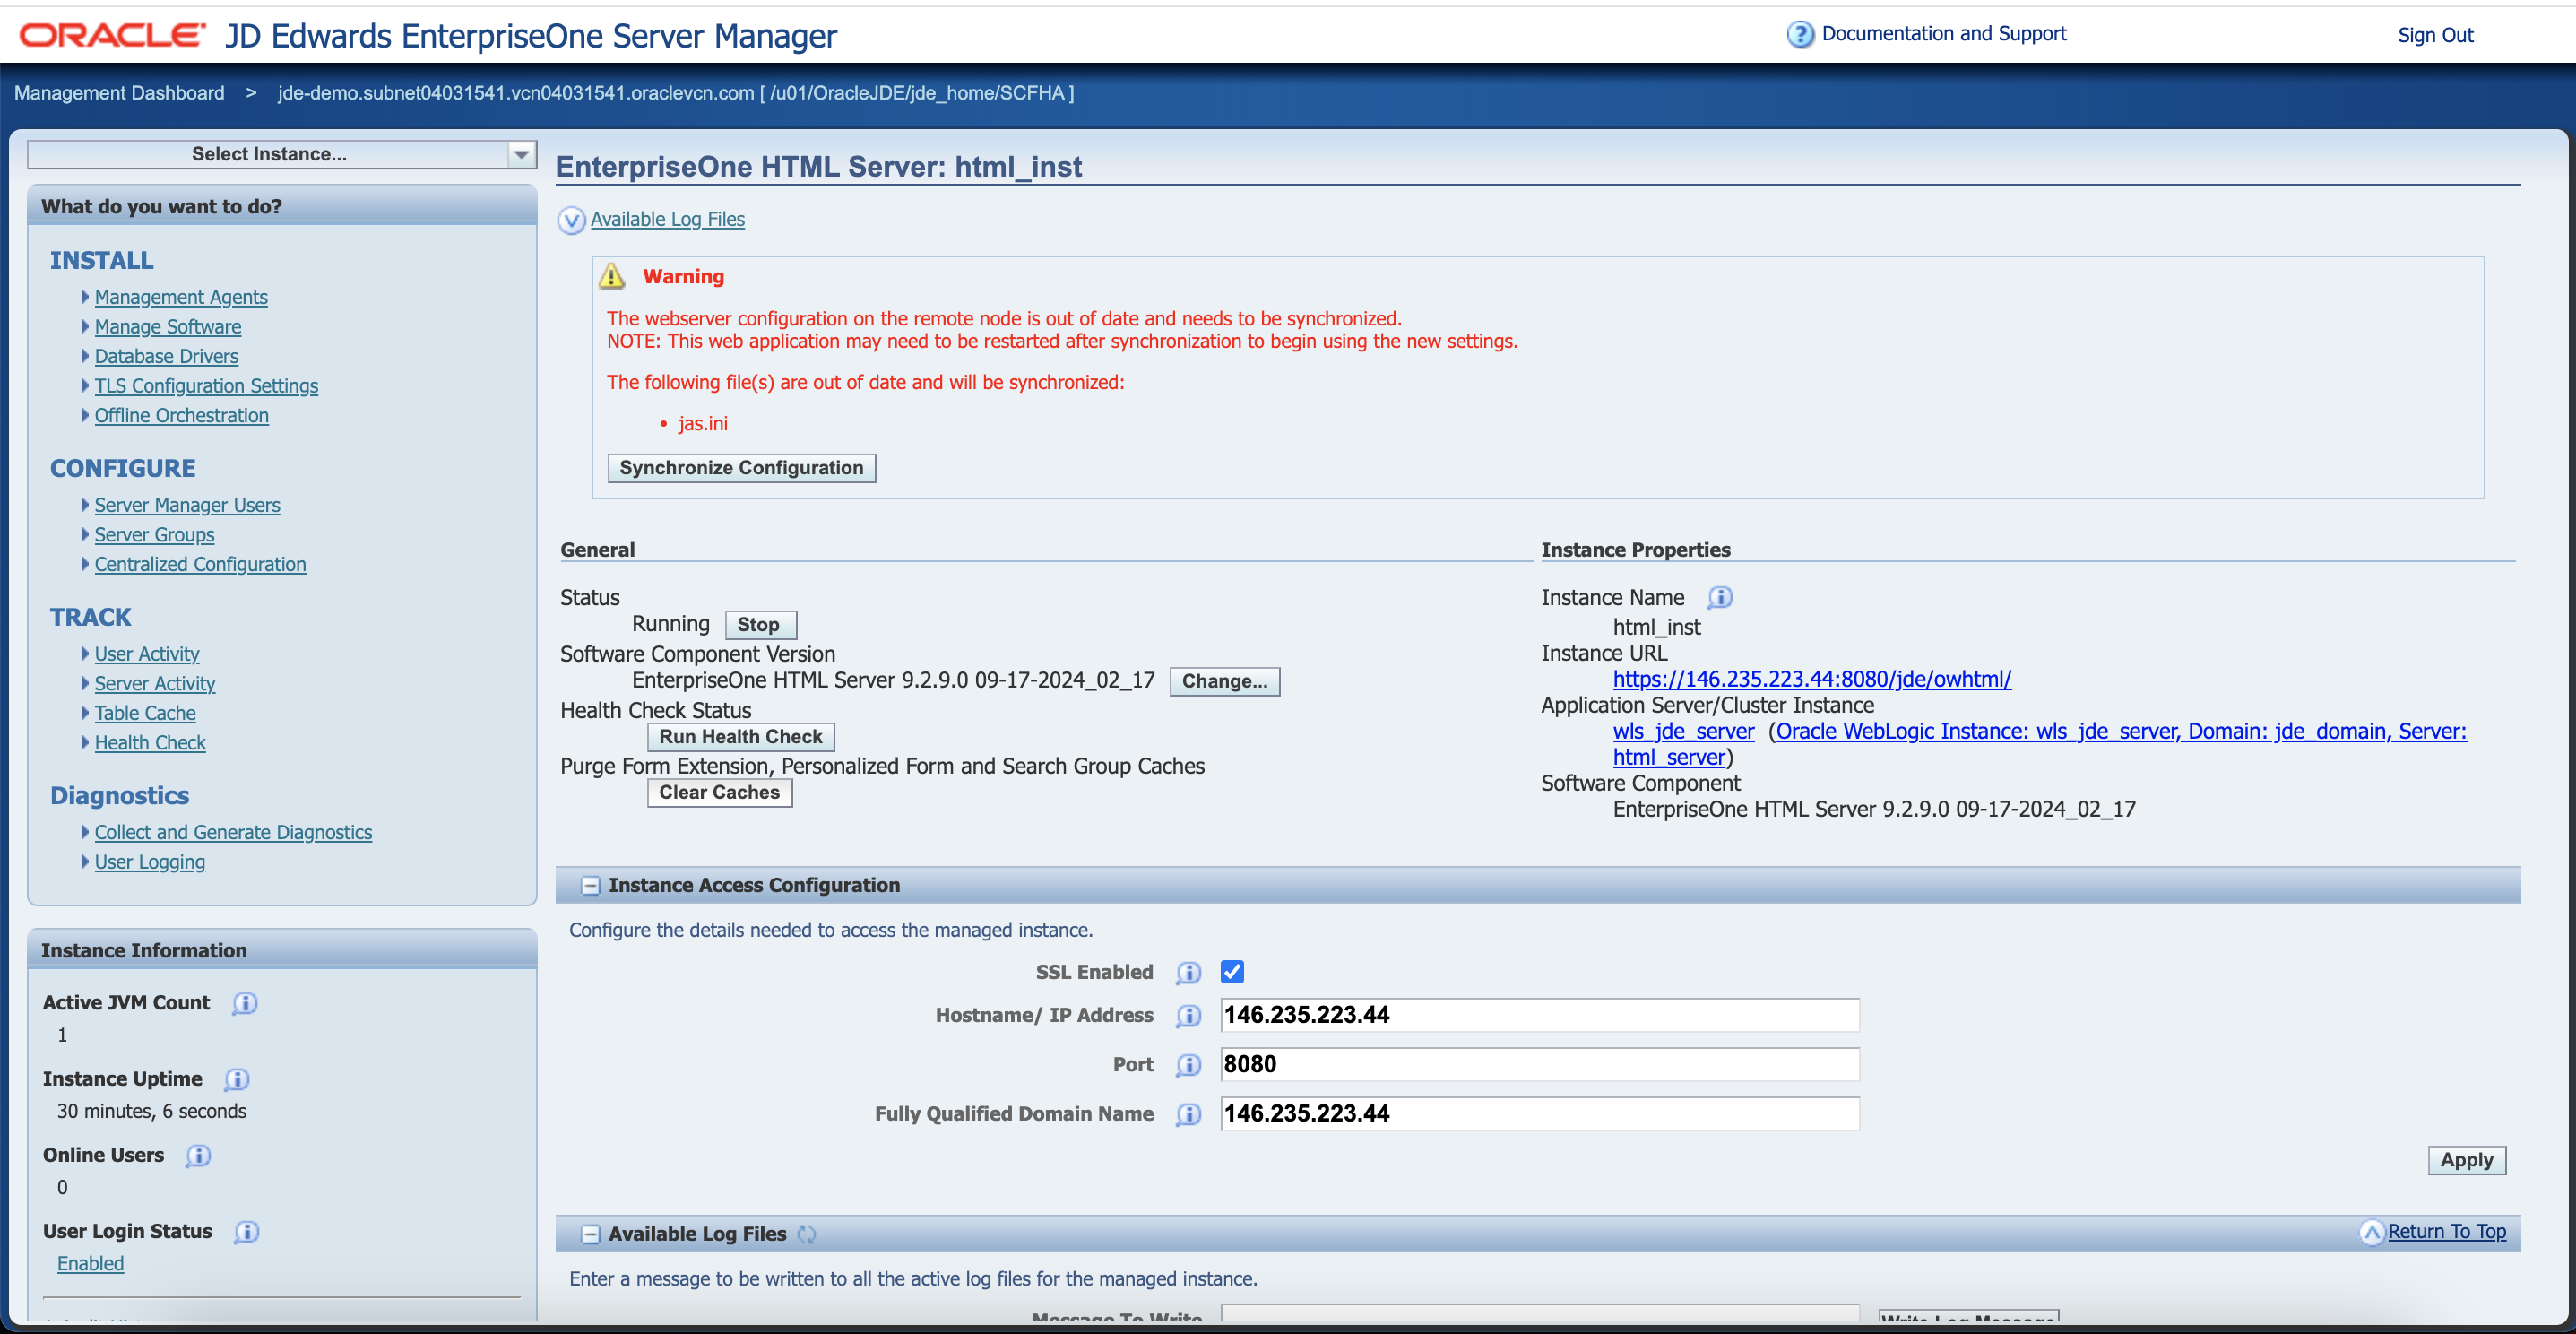
Placed below are screenshots depicting the process:
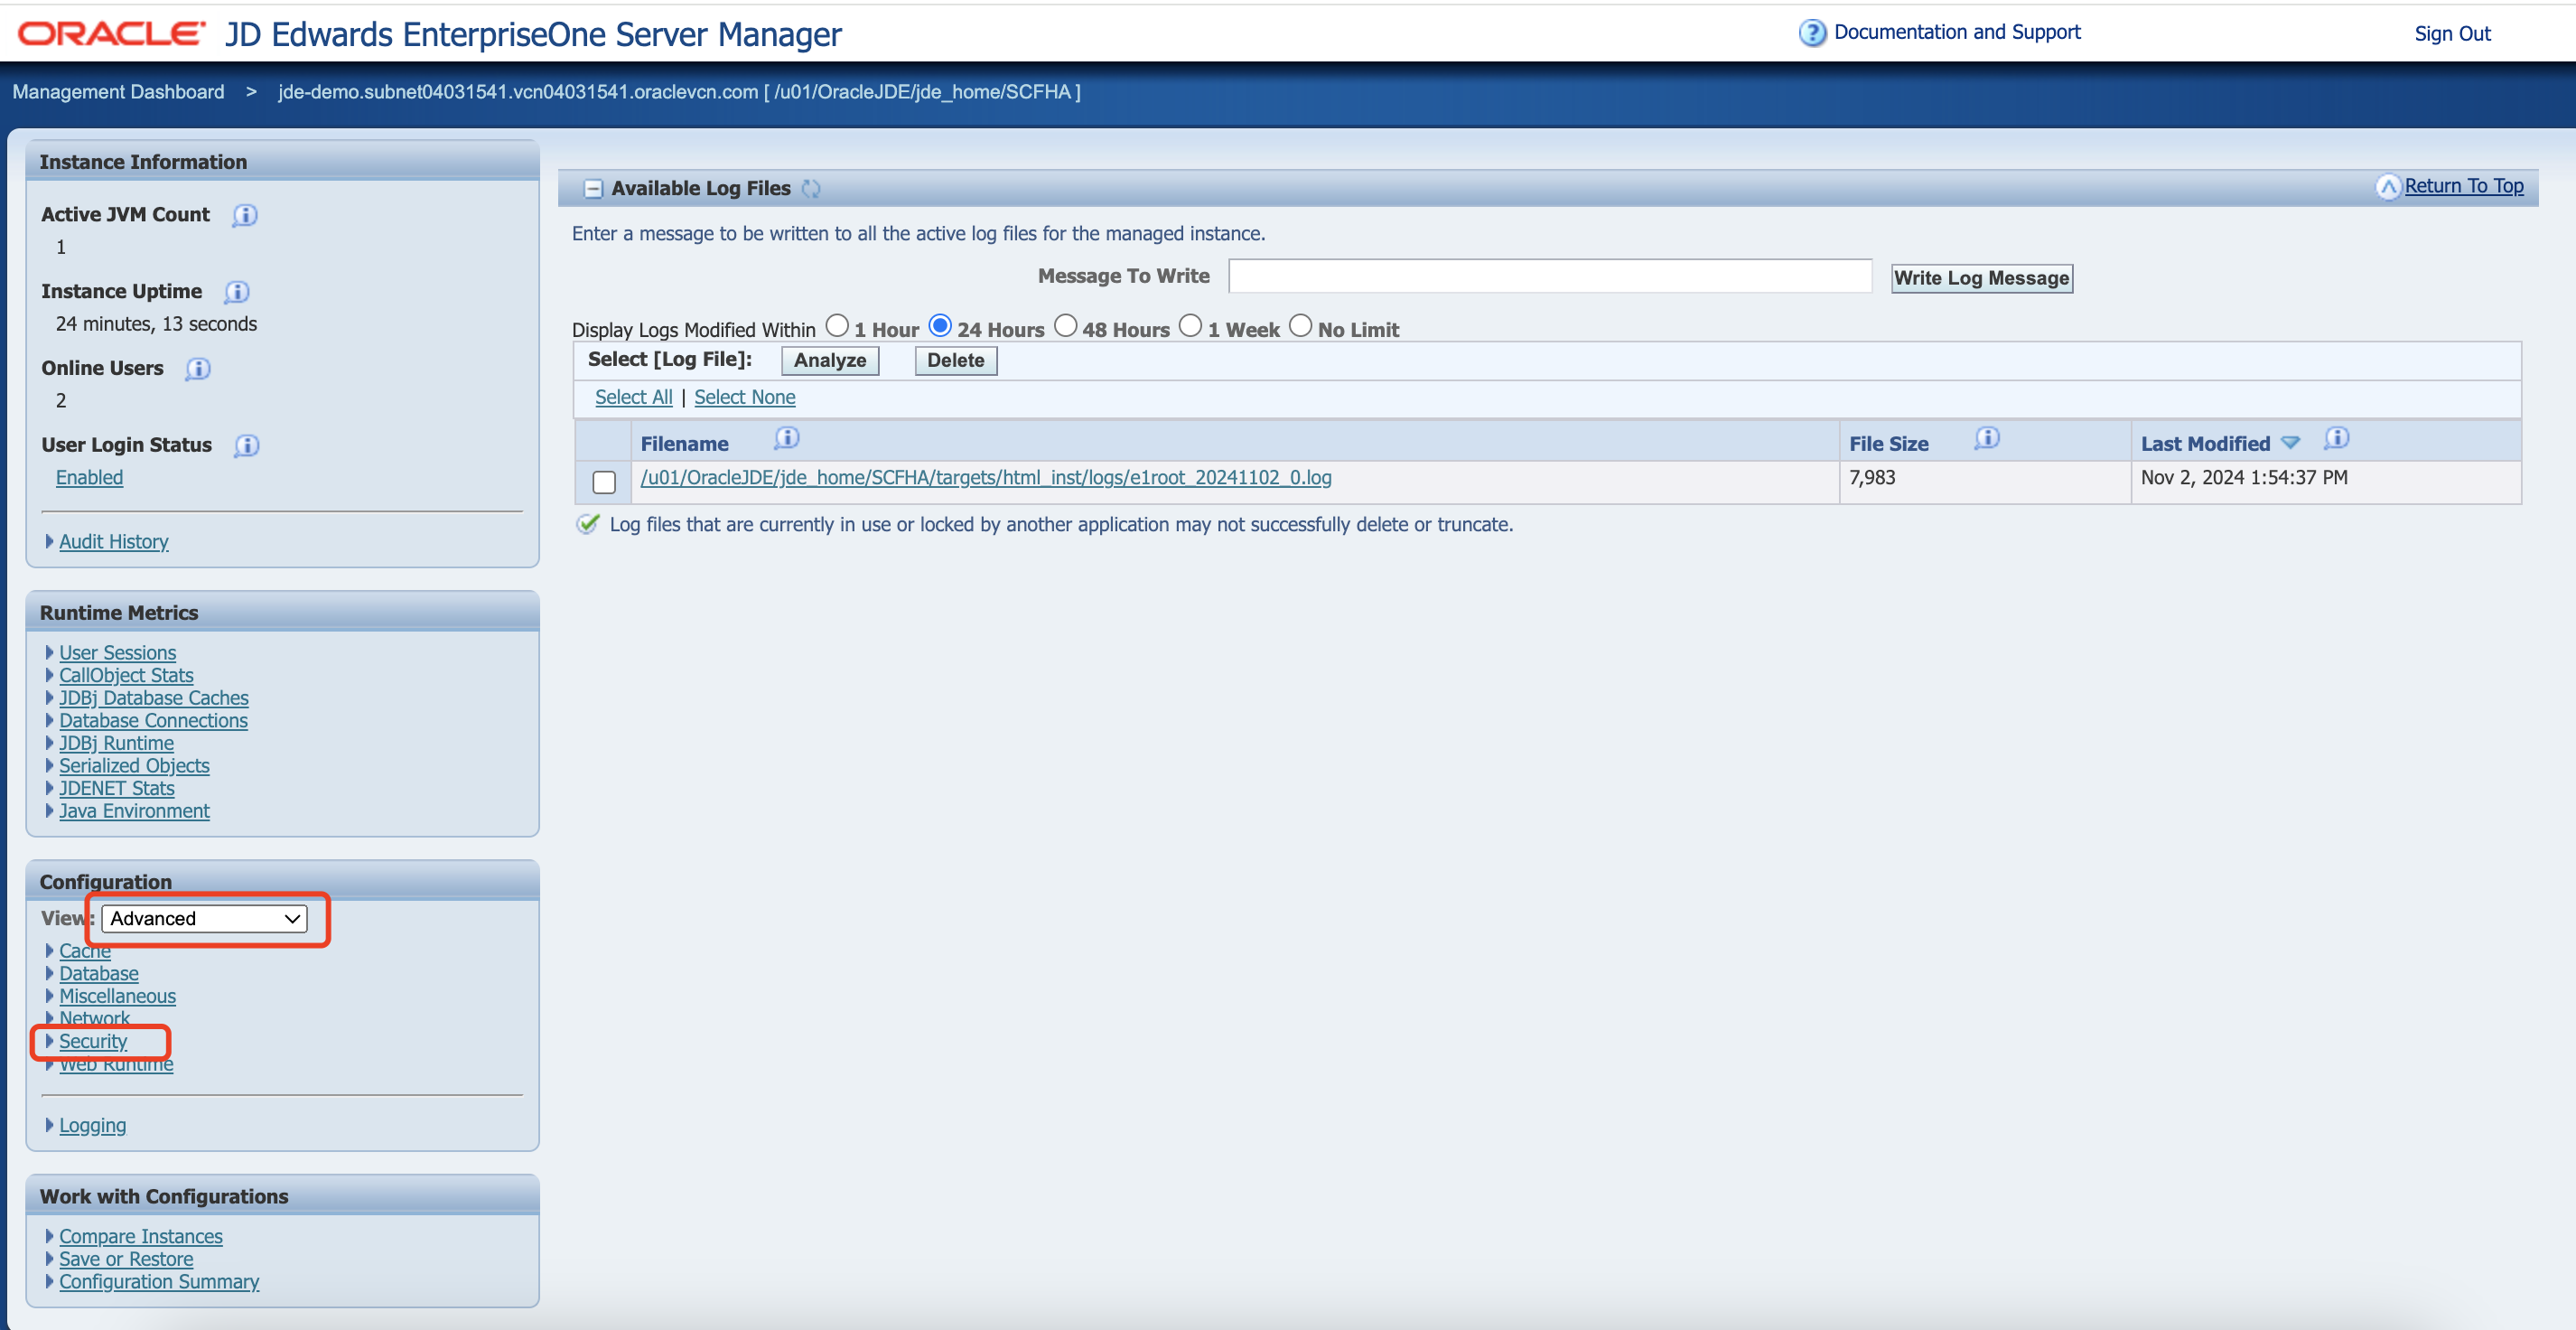
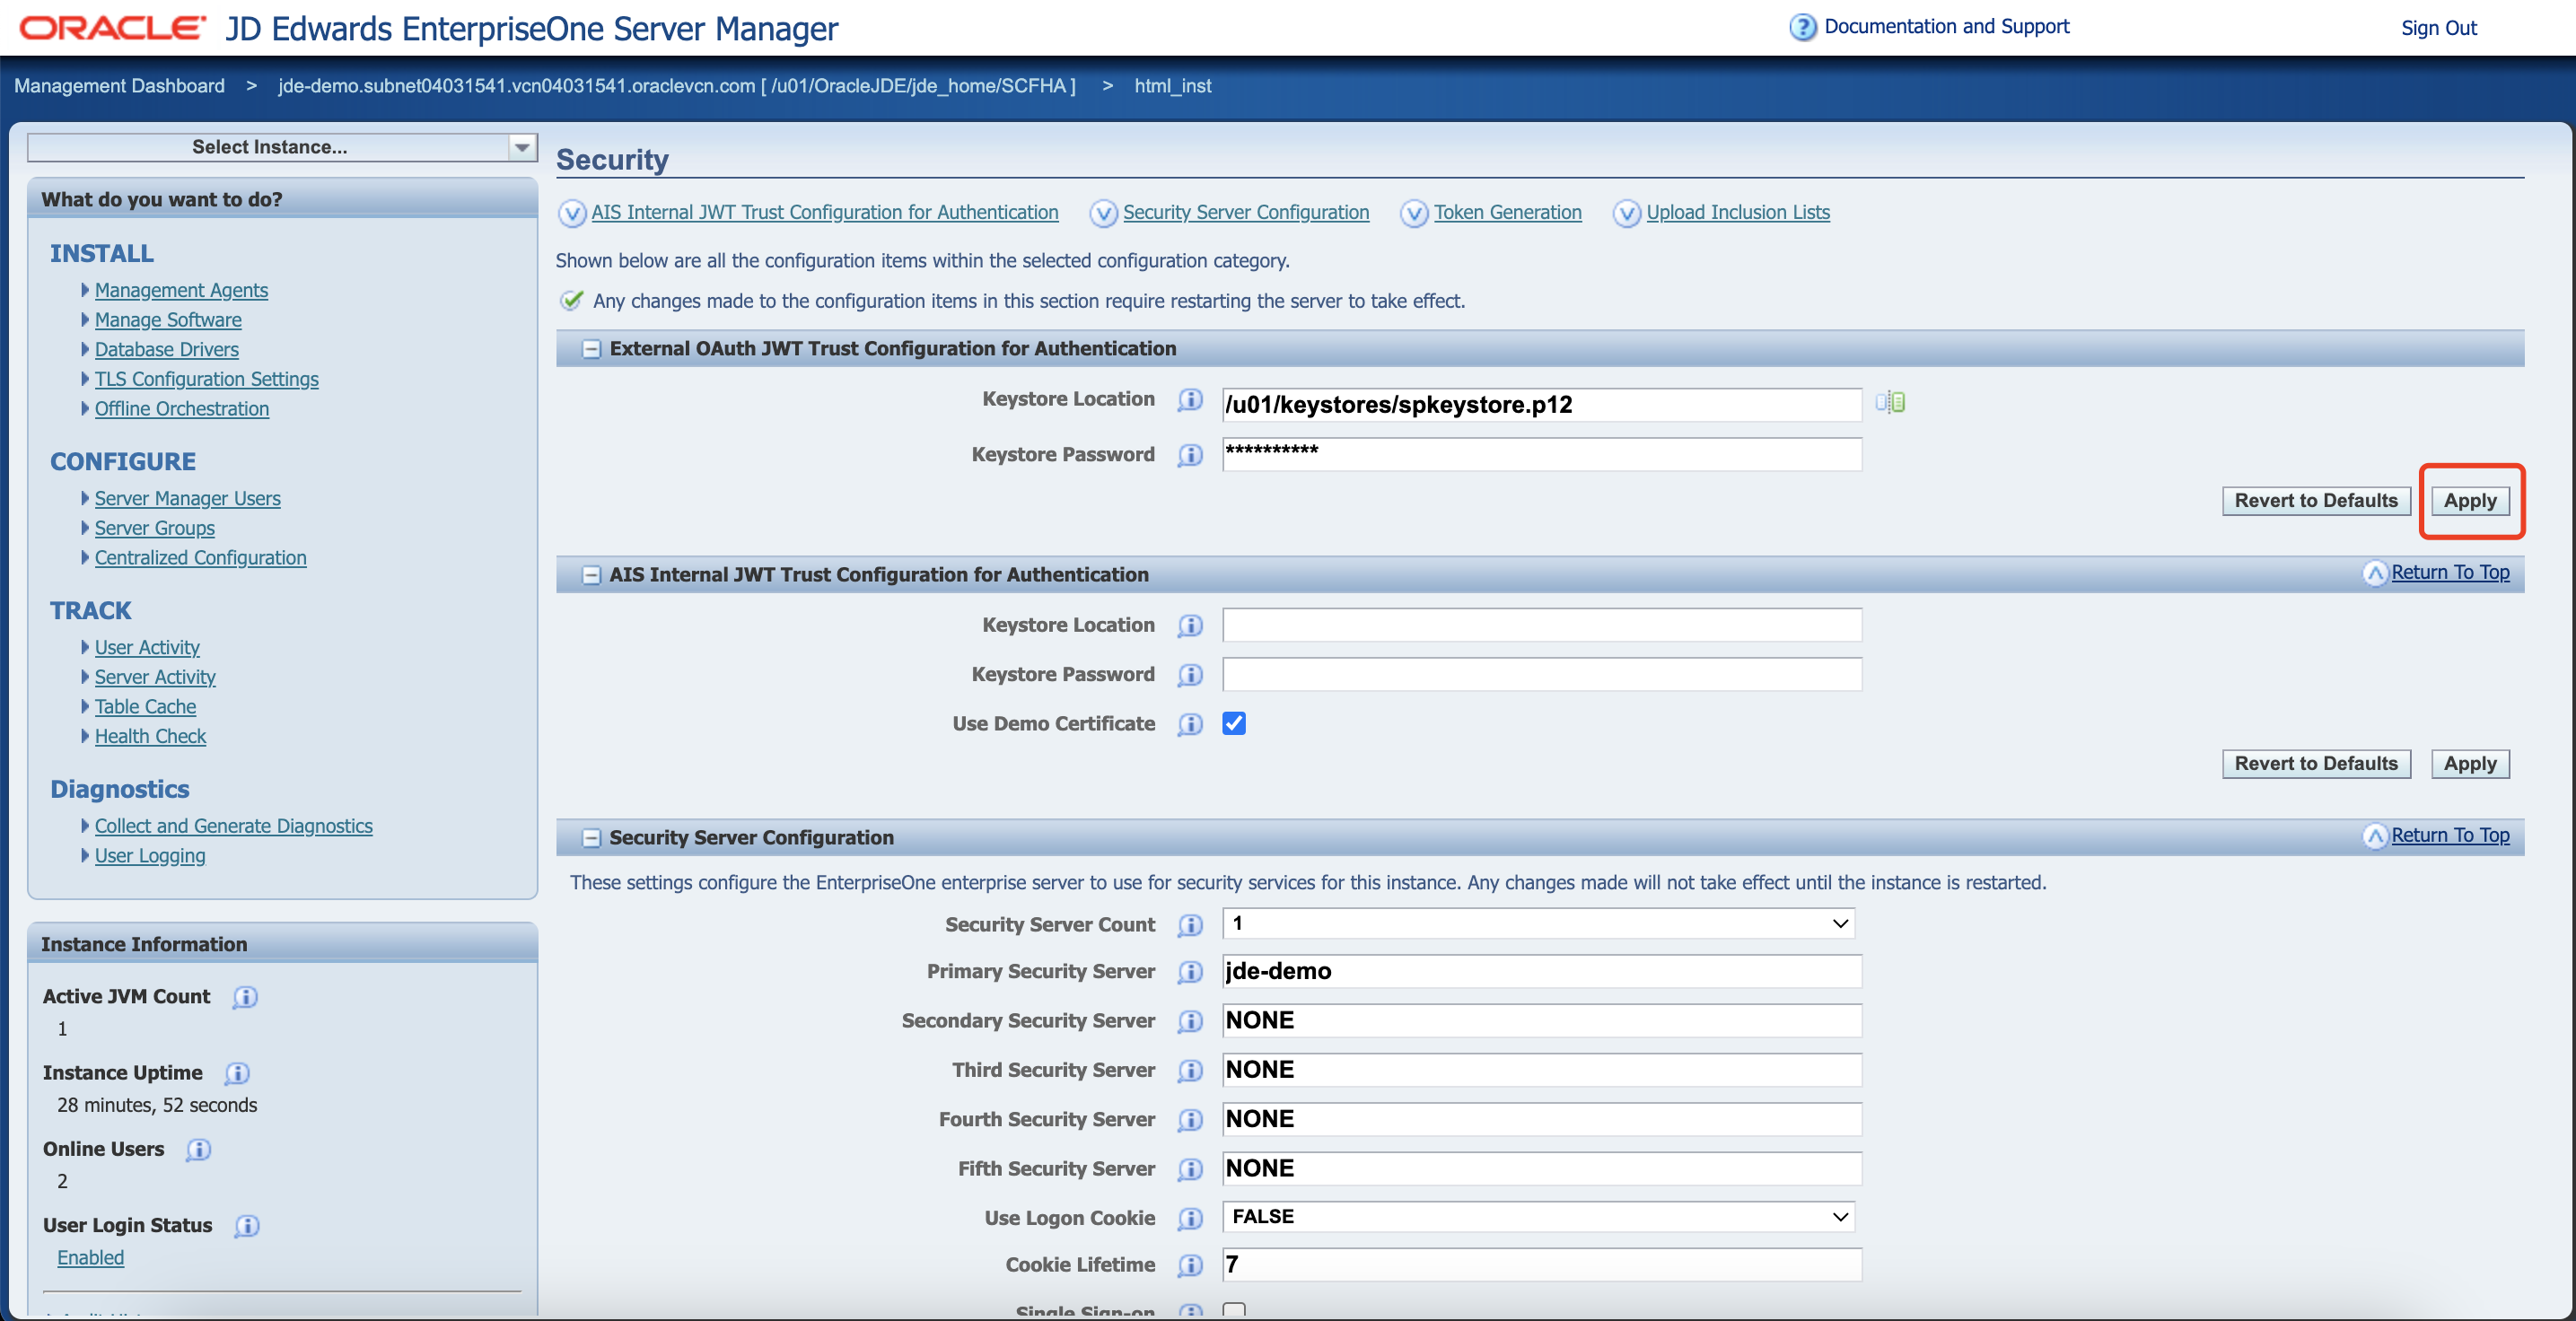
Under the Keystore Location and Keystore Password fields, input the required file name and password, and then click Apply.
Assuming the certificate filename is spkeystore.p12 and it is located at /u01/keystores, the configuration should appear as shown below:
Lastly, implement the synchronize configuration:
AIS Endpoint Request and Response Example
This section explains the process of requesting an Oracle AIS token for subsequent requests using the Datawiza AIS endpoint. The operation requires authenticated credentials.
HTTP request
GET /datawiza/api/auth/jdetoken
Request headers
| Header | Value | Description |
|---|---|---|
| Authorization | Bearer {token} | Required. It is the access token getting from Microsoft Entra ID. Used for authorization of the request. |
| jde-AIS-Auth-Device | {Device Name} | Optional. Used to specify the device name. |
Request body
No request body is needed for this operation.
Response
A successful response from the service will return an HTTP status code 200 (OK) accompanied by the JDE token endpoint response present in the body of the response. However, in case of any failure, the DAP will reply with a direct AIS message, accompanied by either an HTTP status code 403 or 500.
Example
Request Example
Here is an example of a request:
GET https://ais.datawiza.net/datawiza/api/auth/jdetoken
Authorization: Bearer {token}
curl --location 'https://ais.datawiza.net/datawiza/api/auth/jdetoken' \
--header 'Authorization: Bearer {token}'
Response Example
The following example illustrates a successful response from the Datawiza AIS endpoint, conforming to the AIS token request standard response structure:
HTTP/1.1 200 OK
Content-type: application/json
{
   "username": "JDE",
   "environment": "JDV920",
   "role": "*ALL",
   "jasserver": "http://jas_server_url",
   "userInfo":    {
      "token": "0448Pf+4aytugDOBJsaGdF6iyKpRaWazb9+GC1ubN4qKDw==",
      "langPref": "  ",
      "locale": "en",
      "dateFormat": "MDE",
      "dateSeperator": "/",
      "simpleDateFormat": "MM/dd/yyyy",
      "decimalFormat": ".",
      "addressNumber": 1,
      "alphaName": "Financial/Distribution Company",
      "appsRelease": "E920",
      "country": " ",
      "username": "JDE"
   },
   "userAuthorized": false,
   "version": null,
   "poStringJSON": null,
   "altPoStringJSON": null,
   "aisSessionCookie": "cDxFuGIaMbAfre8q43mIULN15UNQRM!541095169!1478638461466",
   "adminAuthorized": true
}
In contrast, the subsequent example features a failed response. Should such an event occur, the DAP will promptly manifest the error message originating from the AIS token request endpoint:
{
    "status": 500,
    "message": "Cannot get userinfo: 401: {\"error\":{\"code\":\"InvalidAuthenticationToken\",\"message\":\"Lifetime validation failed, the token is expired.\",\"innerError\":{\"date\":\"2024-11-04T09: 53: 57\",\"request-id\":\"c66172d5-1c96-4752-8ba3-0dd05c542c6a\",\"client-request-id\":\"c66172d5-1c96-4752-8ba3-0dd05c542c6a\"}}}"
}
Troubleshooting
Keystore unconfigured or mismatched with DCMC settings
Symptom
DAP error log 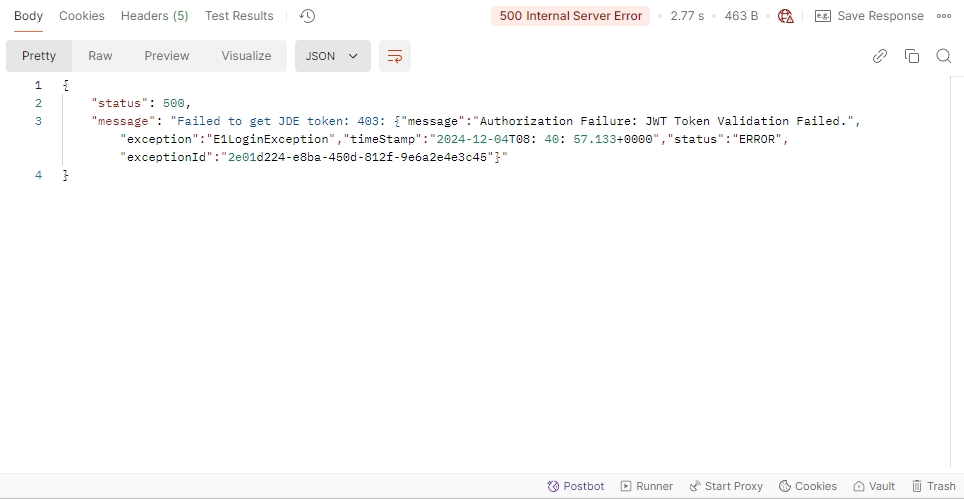
AIS error log 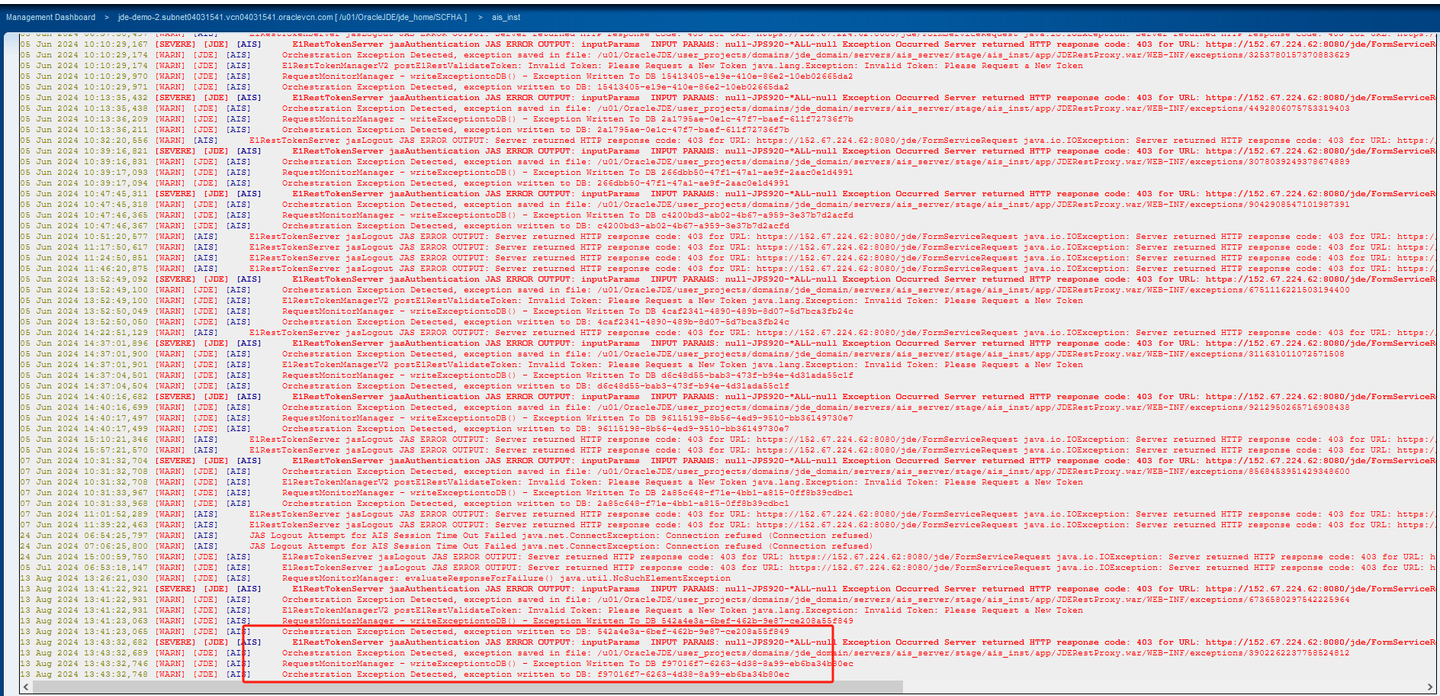
JAS error log 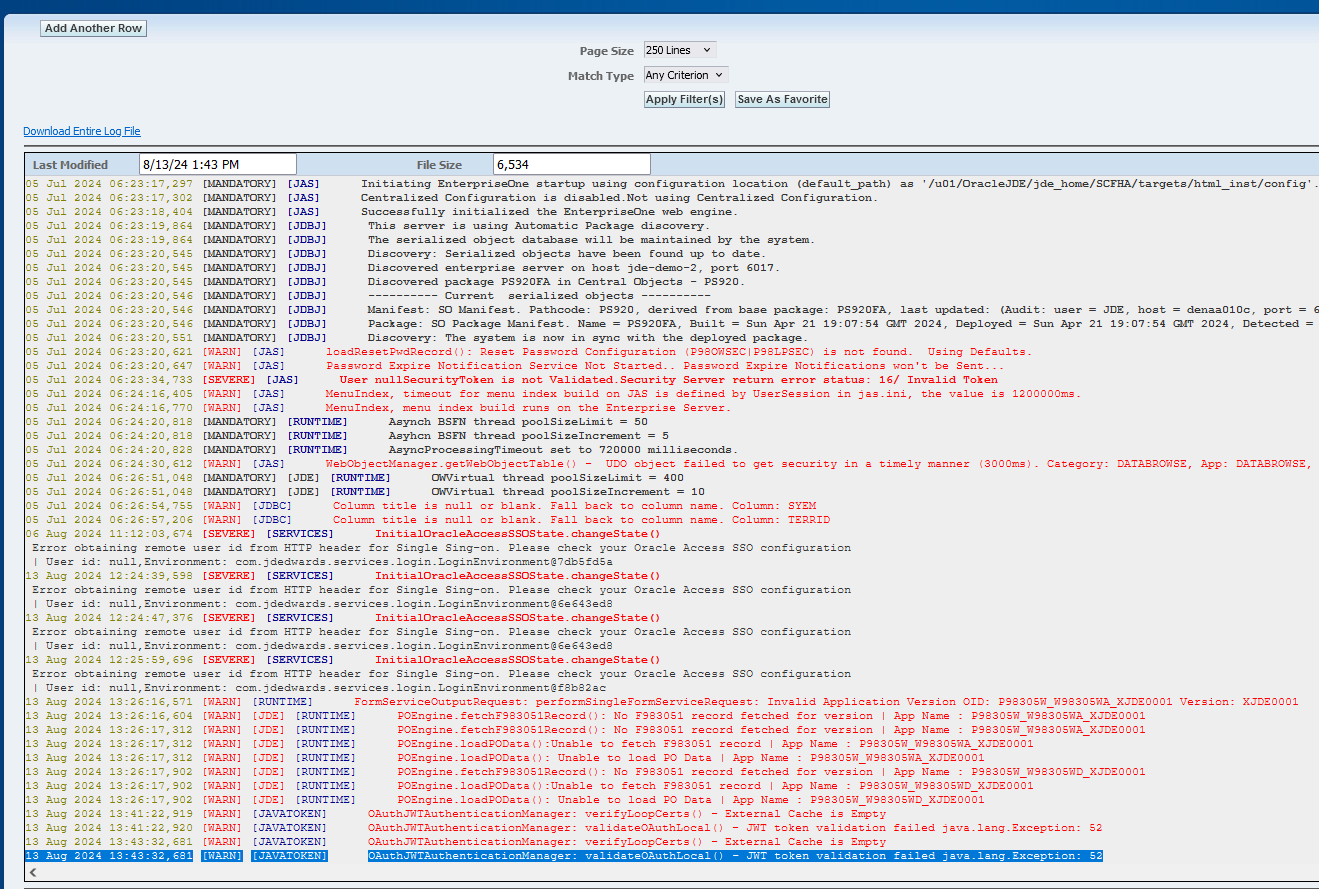
Root Cause
It is because the keystore is not configured or not correctly configured.
Solution
Please ensure that the keystore settings are correctly configured on your HTML server (not on the AIS server). Additionally, verify that these settings match the key pair set in the DCMC.
Invalid token error
Symptom
The JDE token can be successfully retrieved from the Datawiza API, but it persistently returns an invalid token error upon usage.
Possible Causes
The problem could likely be due to either of these two reasons:
- Improper placement of the token while calling the Orchestration REST API - the token is supposed to be in the header, with
jde-AIS-Authas the header name. - Requirement of a device name while calling the Datawiza API - Typically, if the issue pertains to this reason, a similar error stating 'device name does not match' will appear in the AIS logs as the below screenshot.
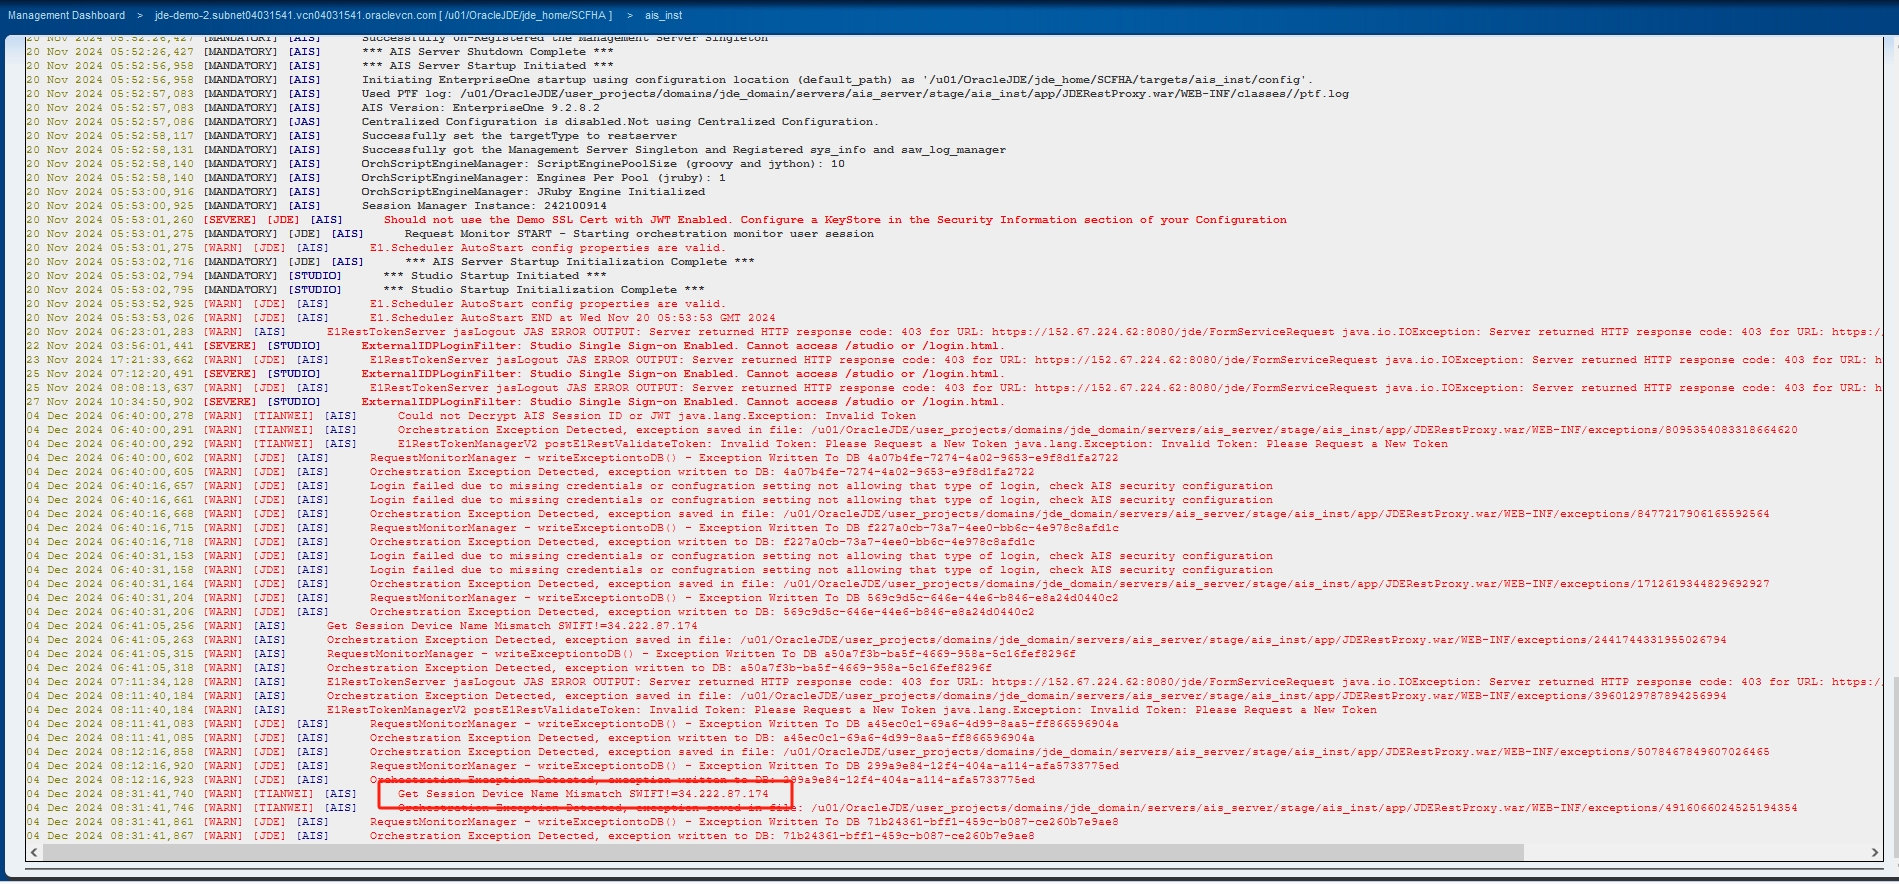
Solution
Please revisit your API implementation for correction. When calling the Datawiza API, consider using the optional header jde-AIS-Auth-Device.
