Enable Datawiza MFA (2FA) for EBS
Overview
This guide walks you through configuring Datawiza Multi-Factor Authentication (MFA/2FA) for Oracle E-Business Suite (EBS). Learn more about configuring Datawiza Multi-Factor Authentication.
Prerequisite
Before proceeding, ensure you have the following:
- A Datawiza Cloud Management Console (DCMC) account
Part I: Datawiza Cloud Management Console (DCMC) Configuration
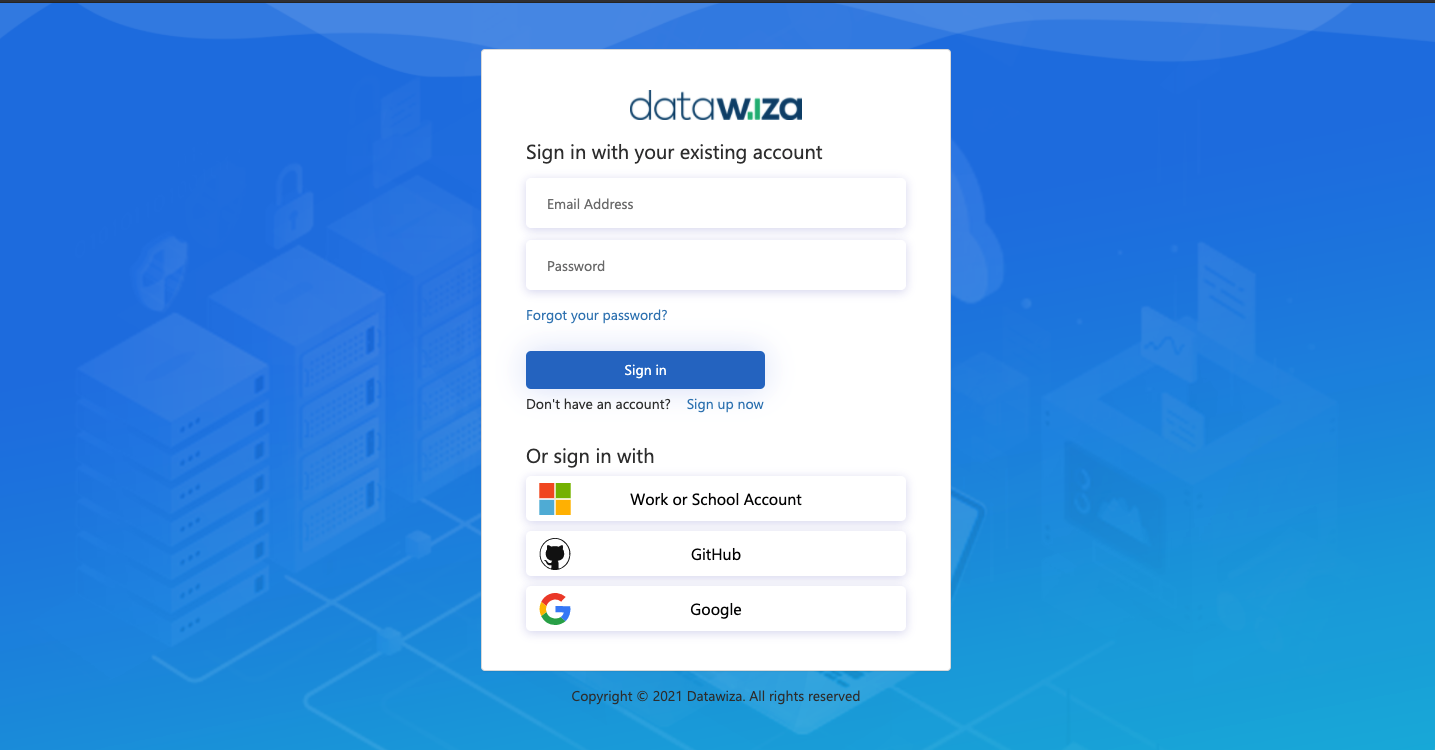
Step 1: Sign in to DCMC
- Log into the DCMC.
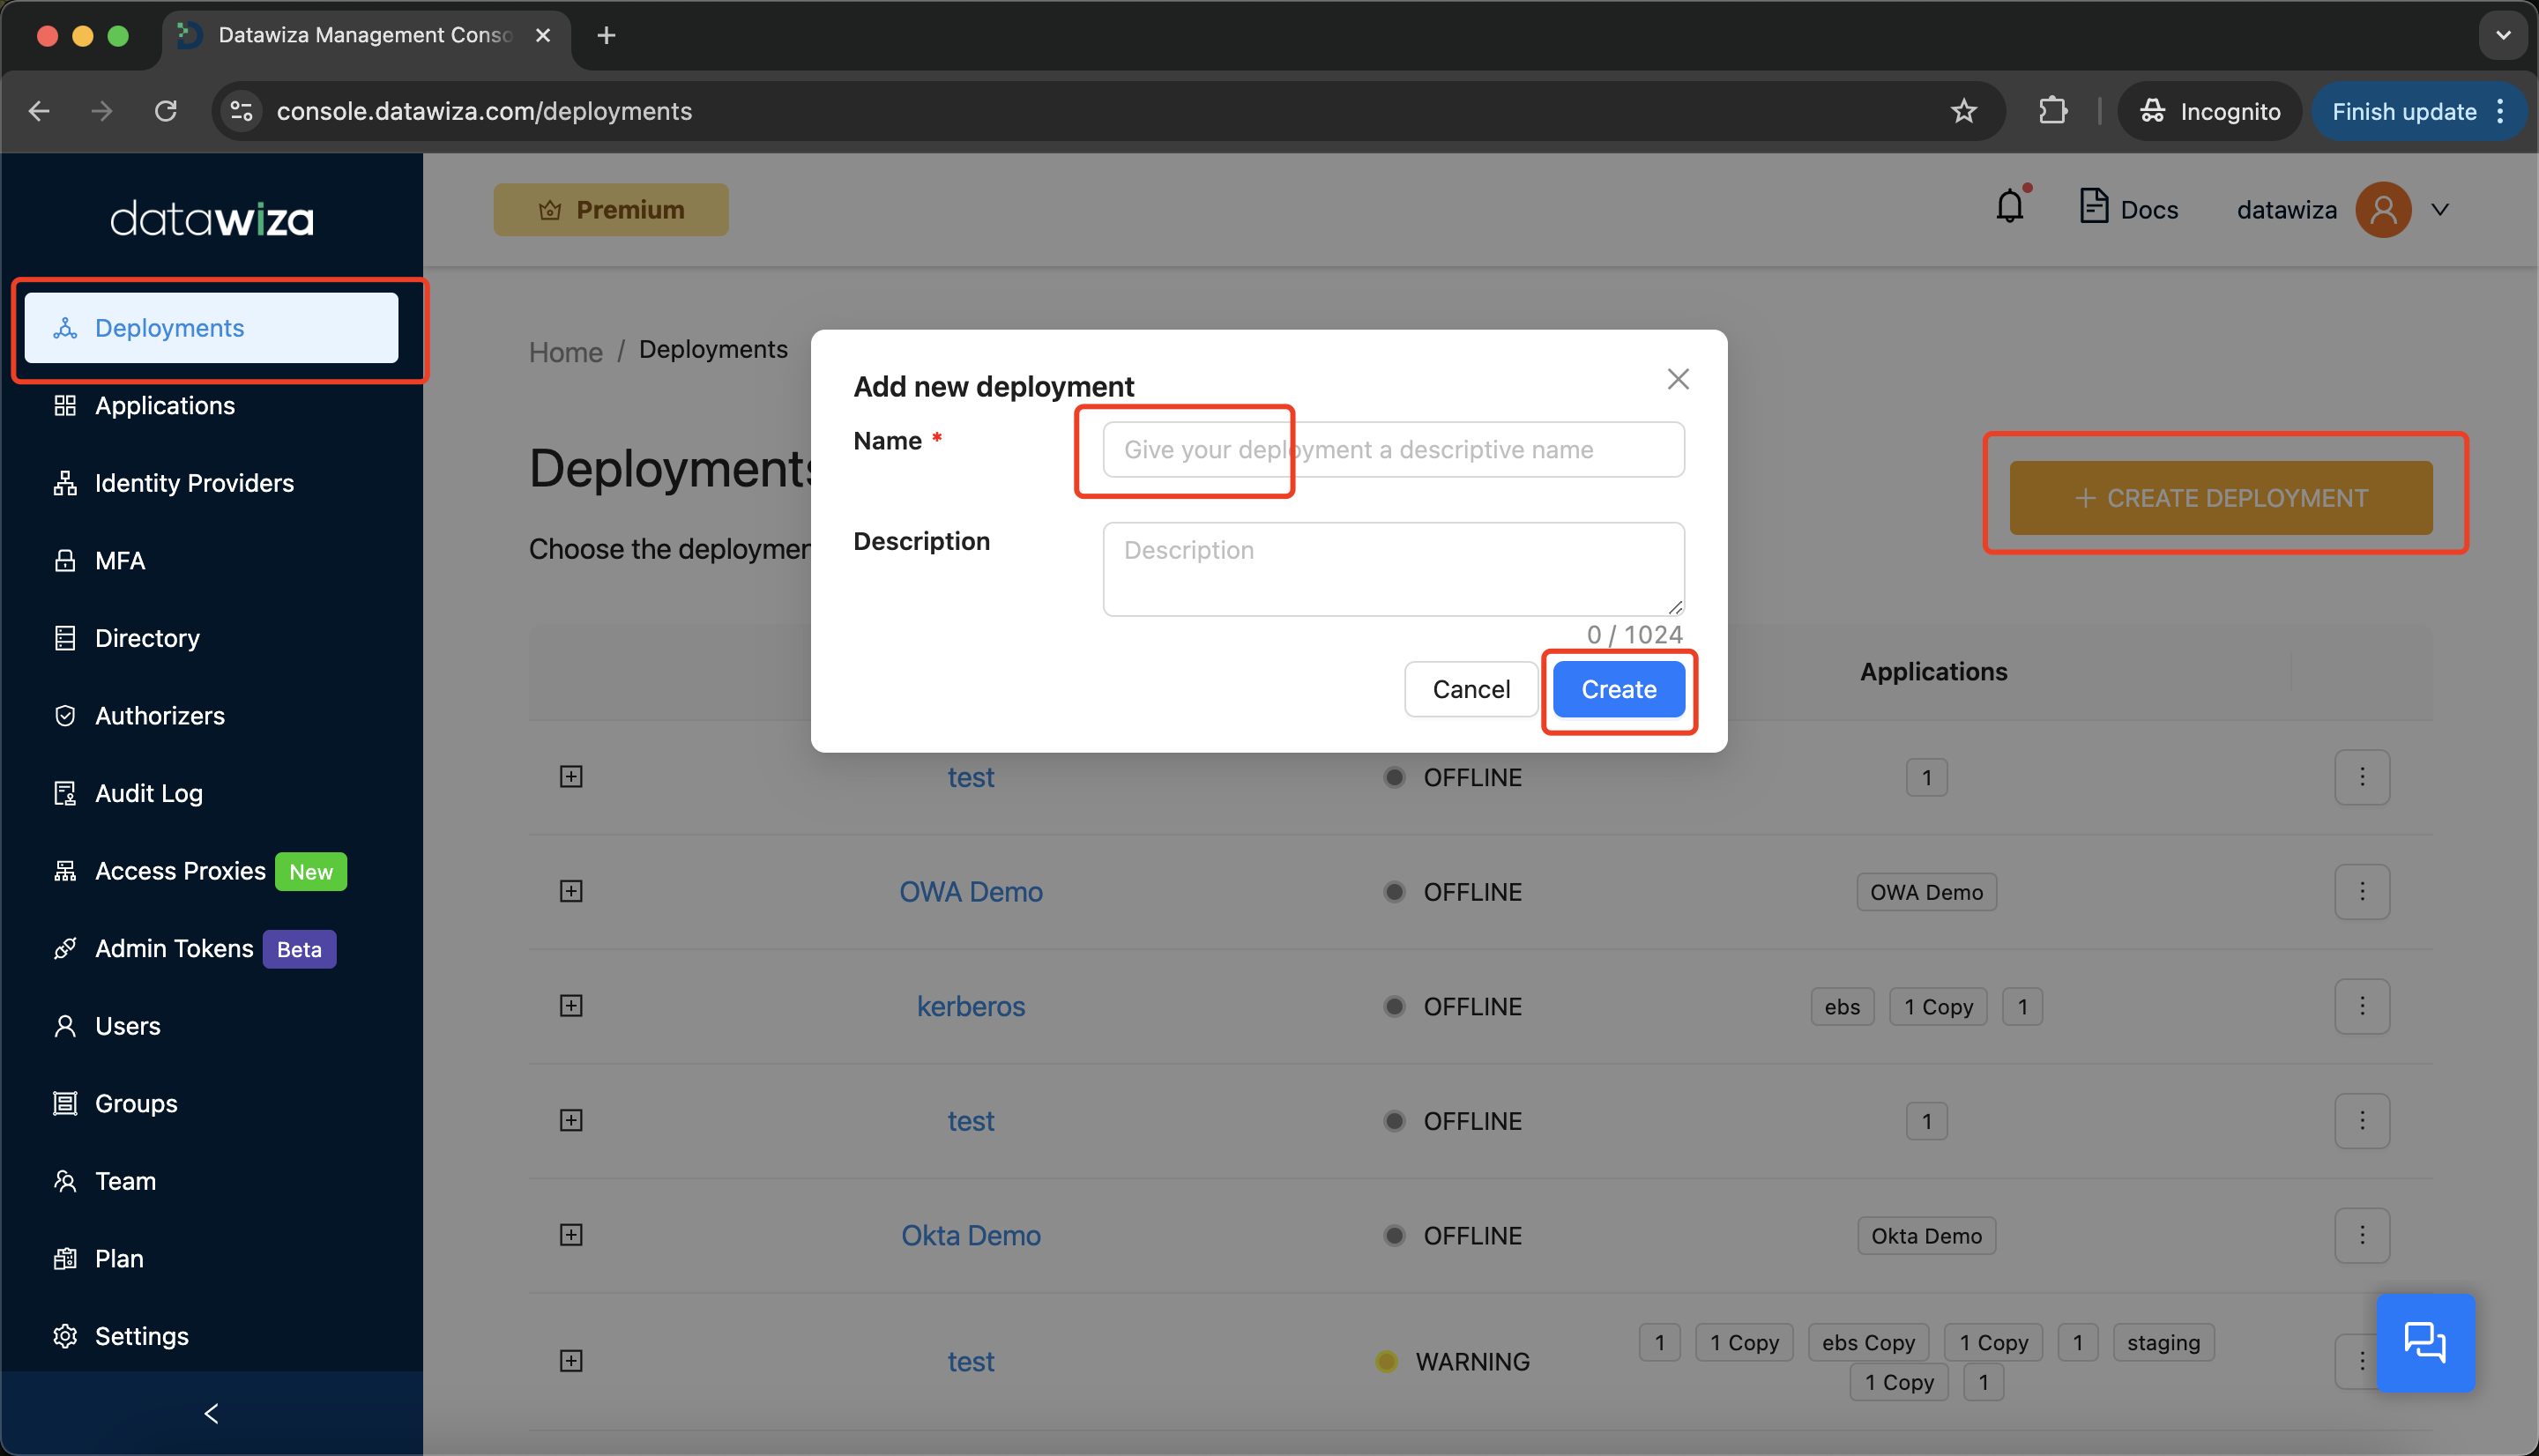
Step 2: Create a New Deployment
- Navigate to the
Deploymentstab. - Click
+ CREATE DEPLOYMENT. - Enter a
NameandDescription, then clickCreate.
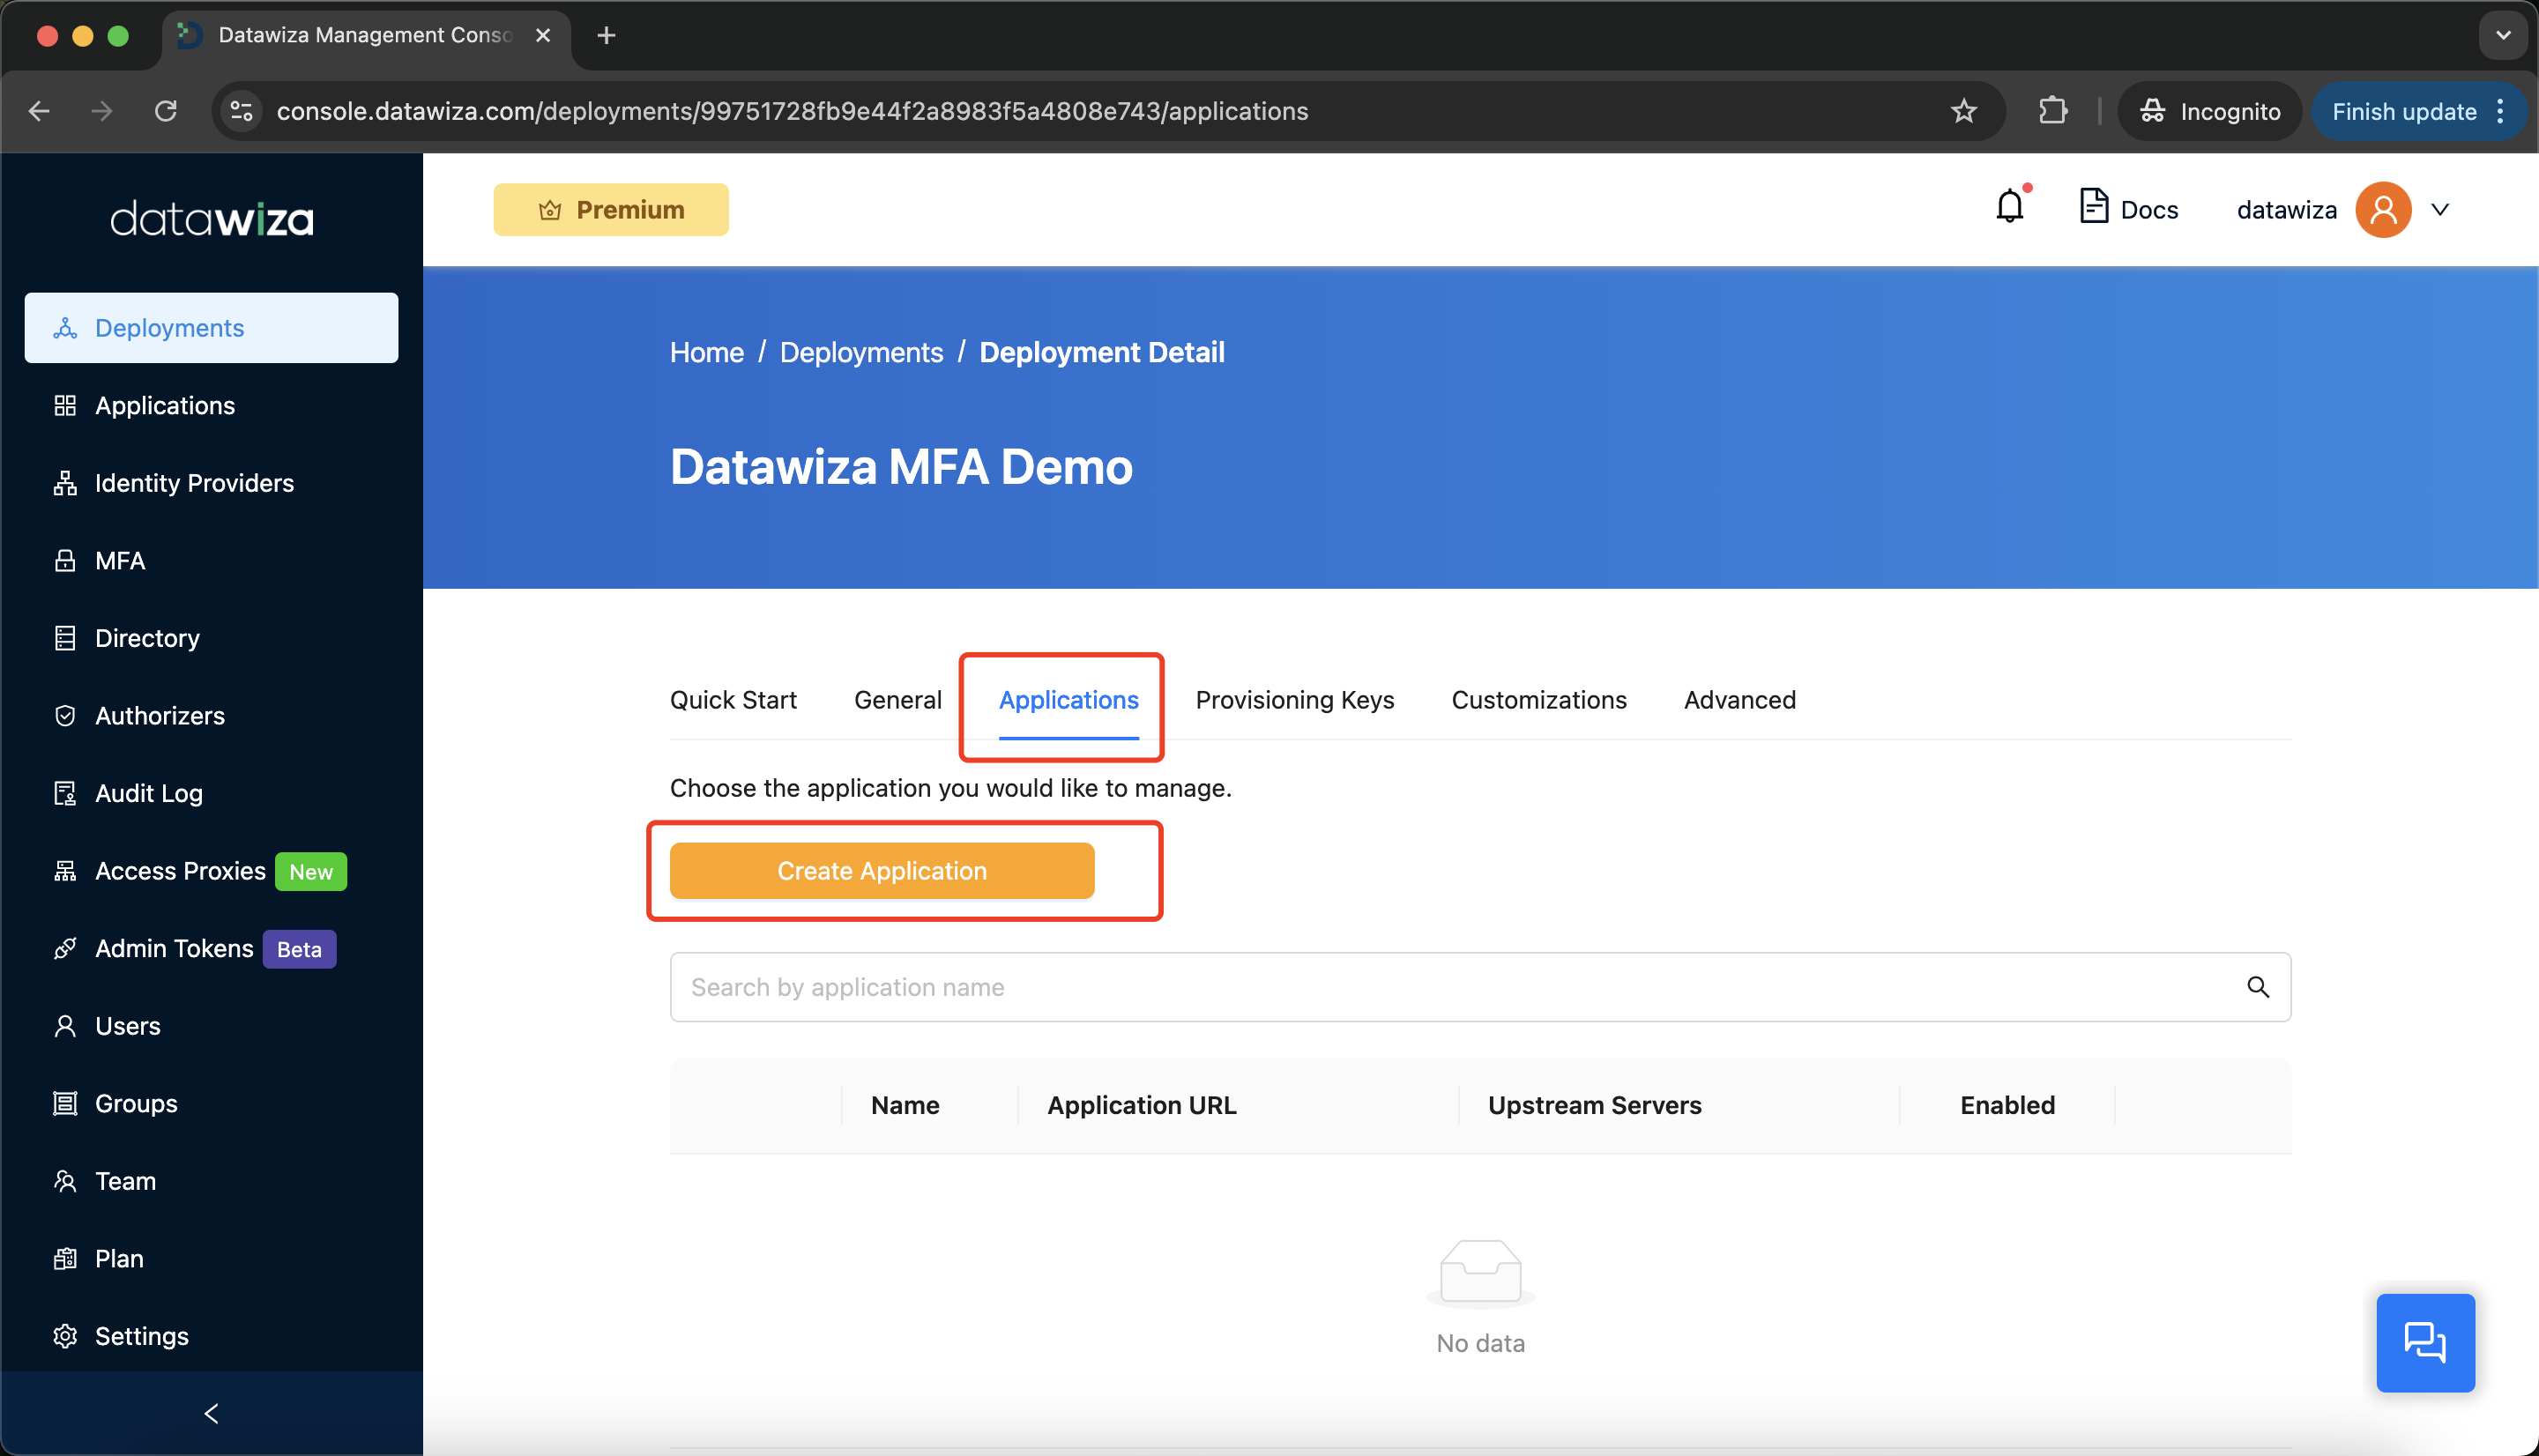
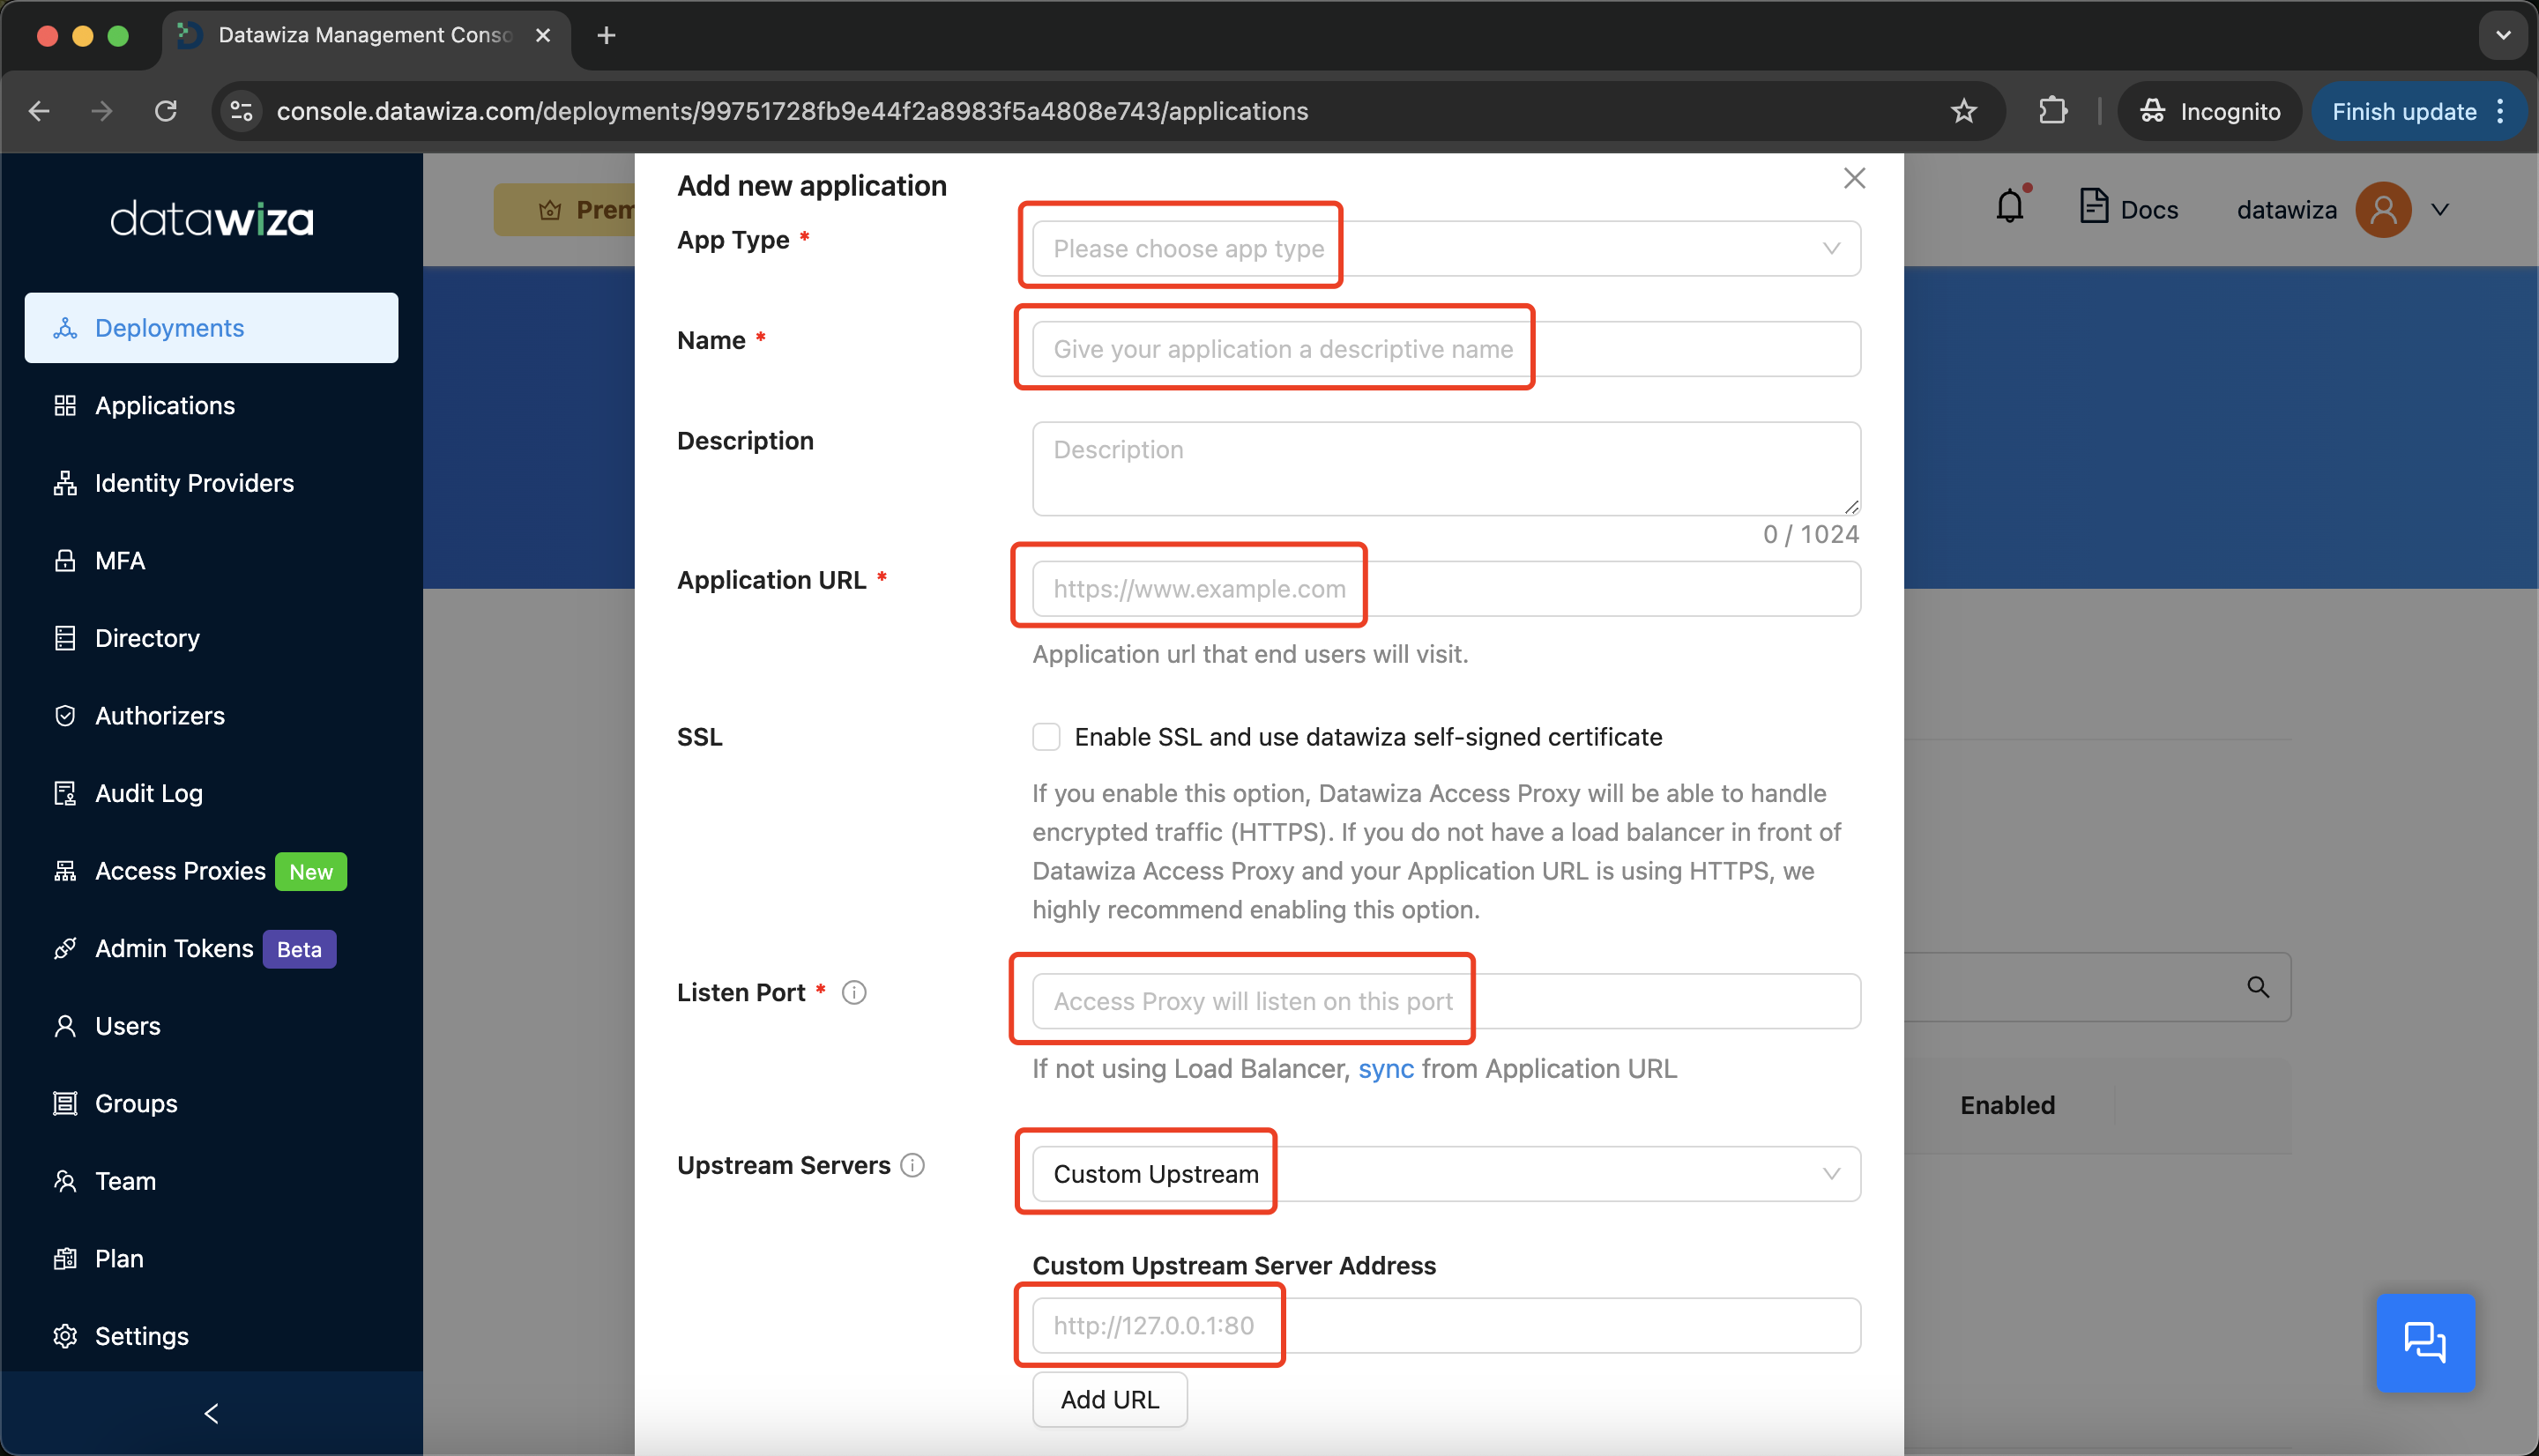
Step 3: Add a New Application
- Go to the
Applicationstab and clickCreate Application.
Configure your application with the following values:
App Type:WEB.Name:Demo App.Application URL:https://ebs.datawiza.net(replace with your own DNS name). This DNS name should match the Site Value setting in your EBS, on the Define Profile Values: Application Authenticate Agent page. The DNS name (e.g., ebs.datawiza.net) should resolve to the IP address of the Datawiza Access Proxy (DAP), or to the IP address of the load balancer or reverse proxy that sits in front of the DAP.SSL: Enable SSL and use datawiza self-signed certificate.Listen Port:443.Upstream Servers:Custom Upstream.Custom Upstream Server Address:http://10.0.1.85:8000(replace with the actual IP address or hostname of your EBS web server).- Click
Next.
Step 4: Update Access Rules
- Go to the
Rulestab. - Edit the default access rule and set the Rule Type to
Not Protected.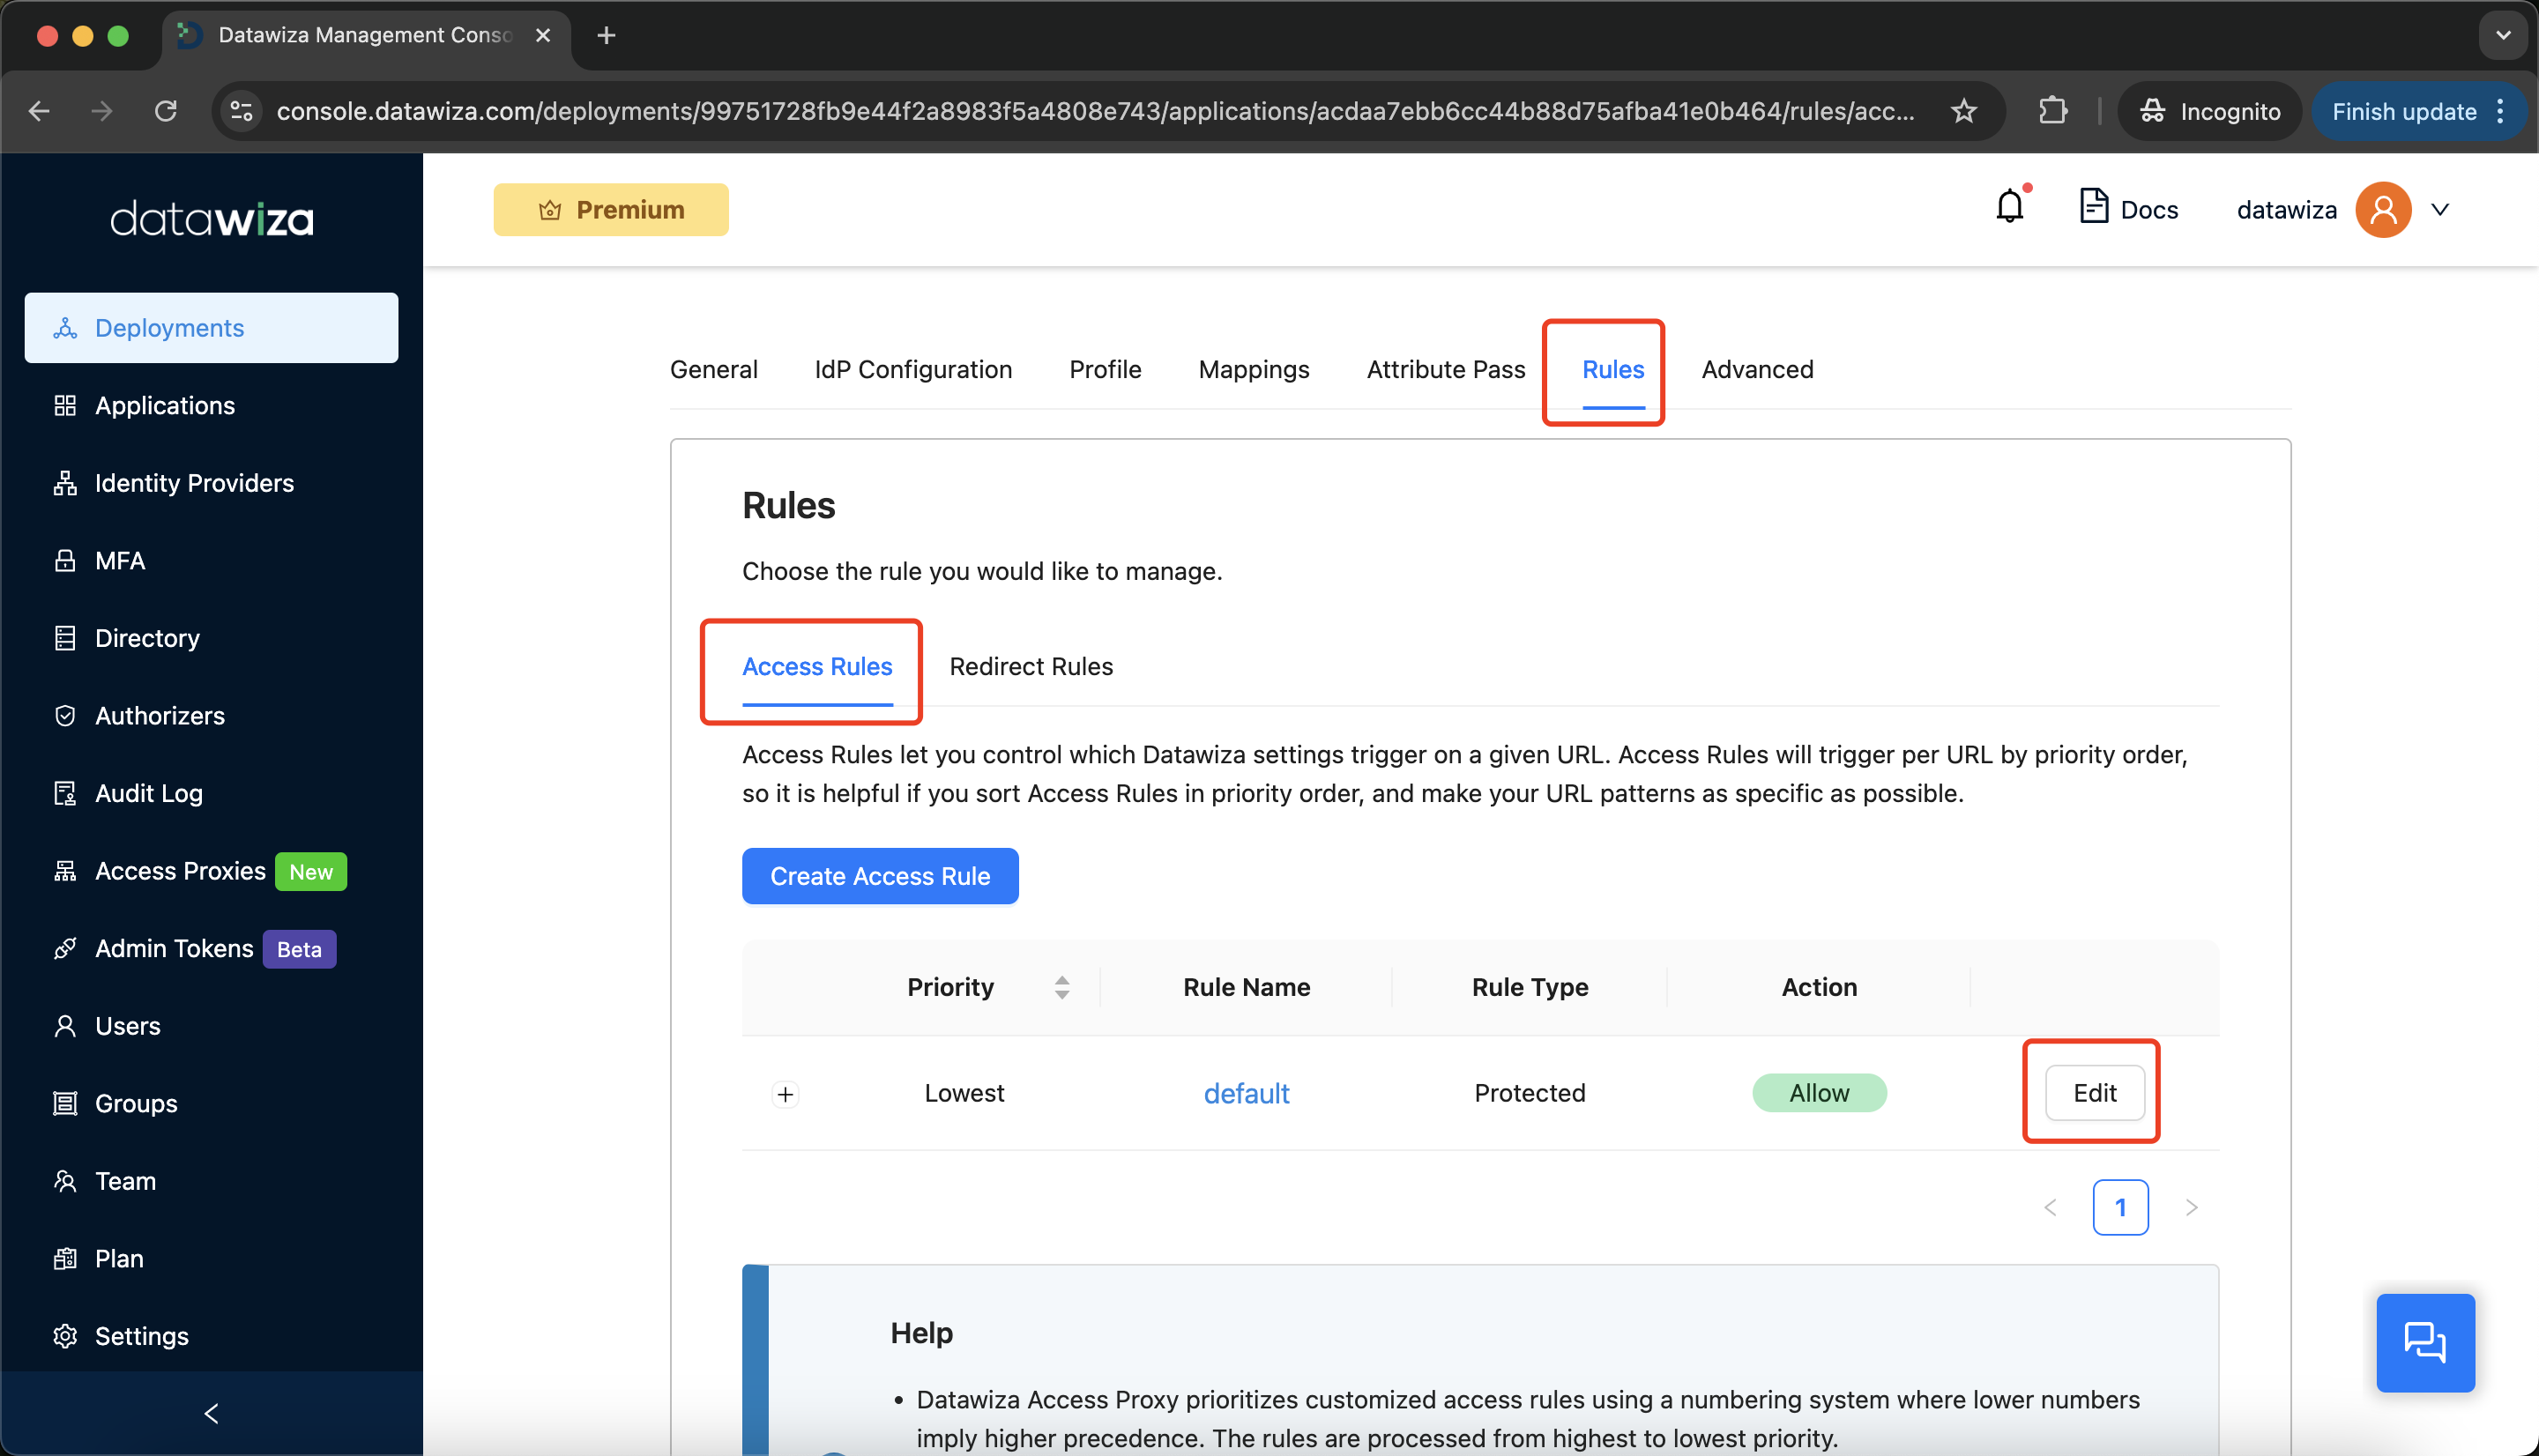

Step 5: Enable Datawiza MFA
- Navigate to the
Advancedtab. - Under Advanced Settings, select
MFA, then clickCreate MFA Configuration.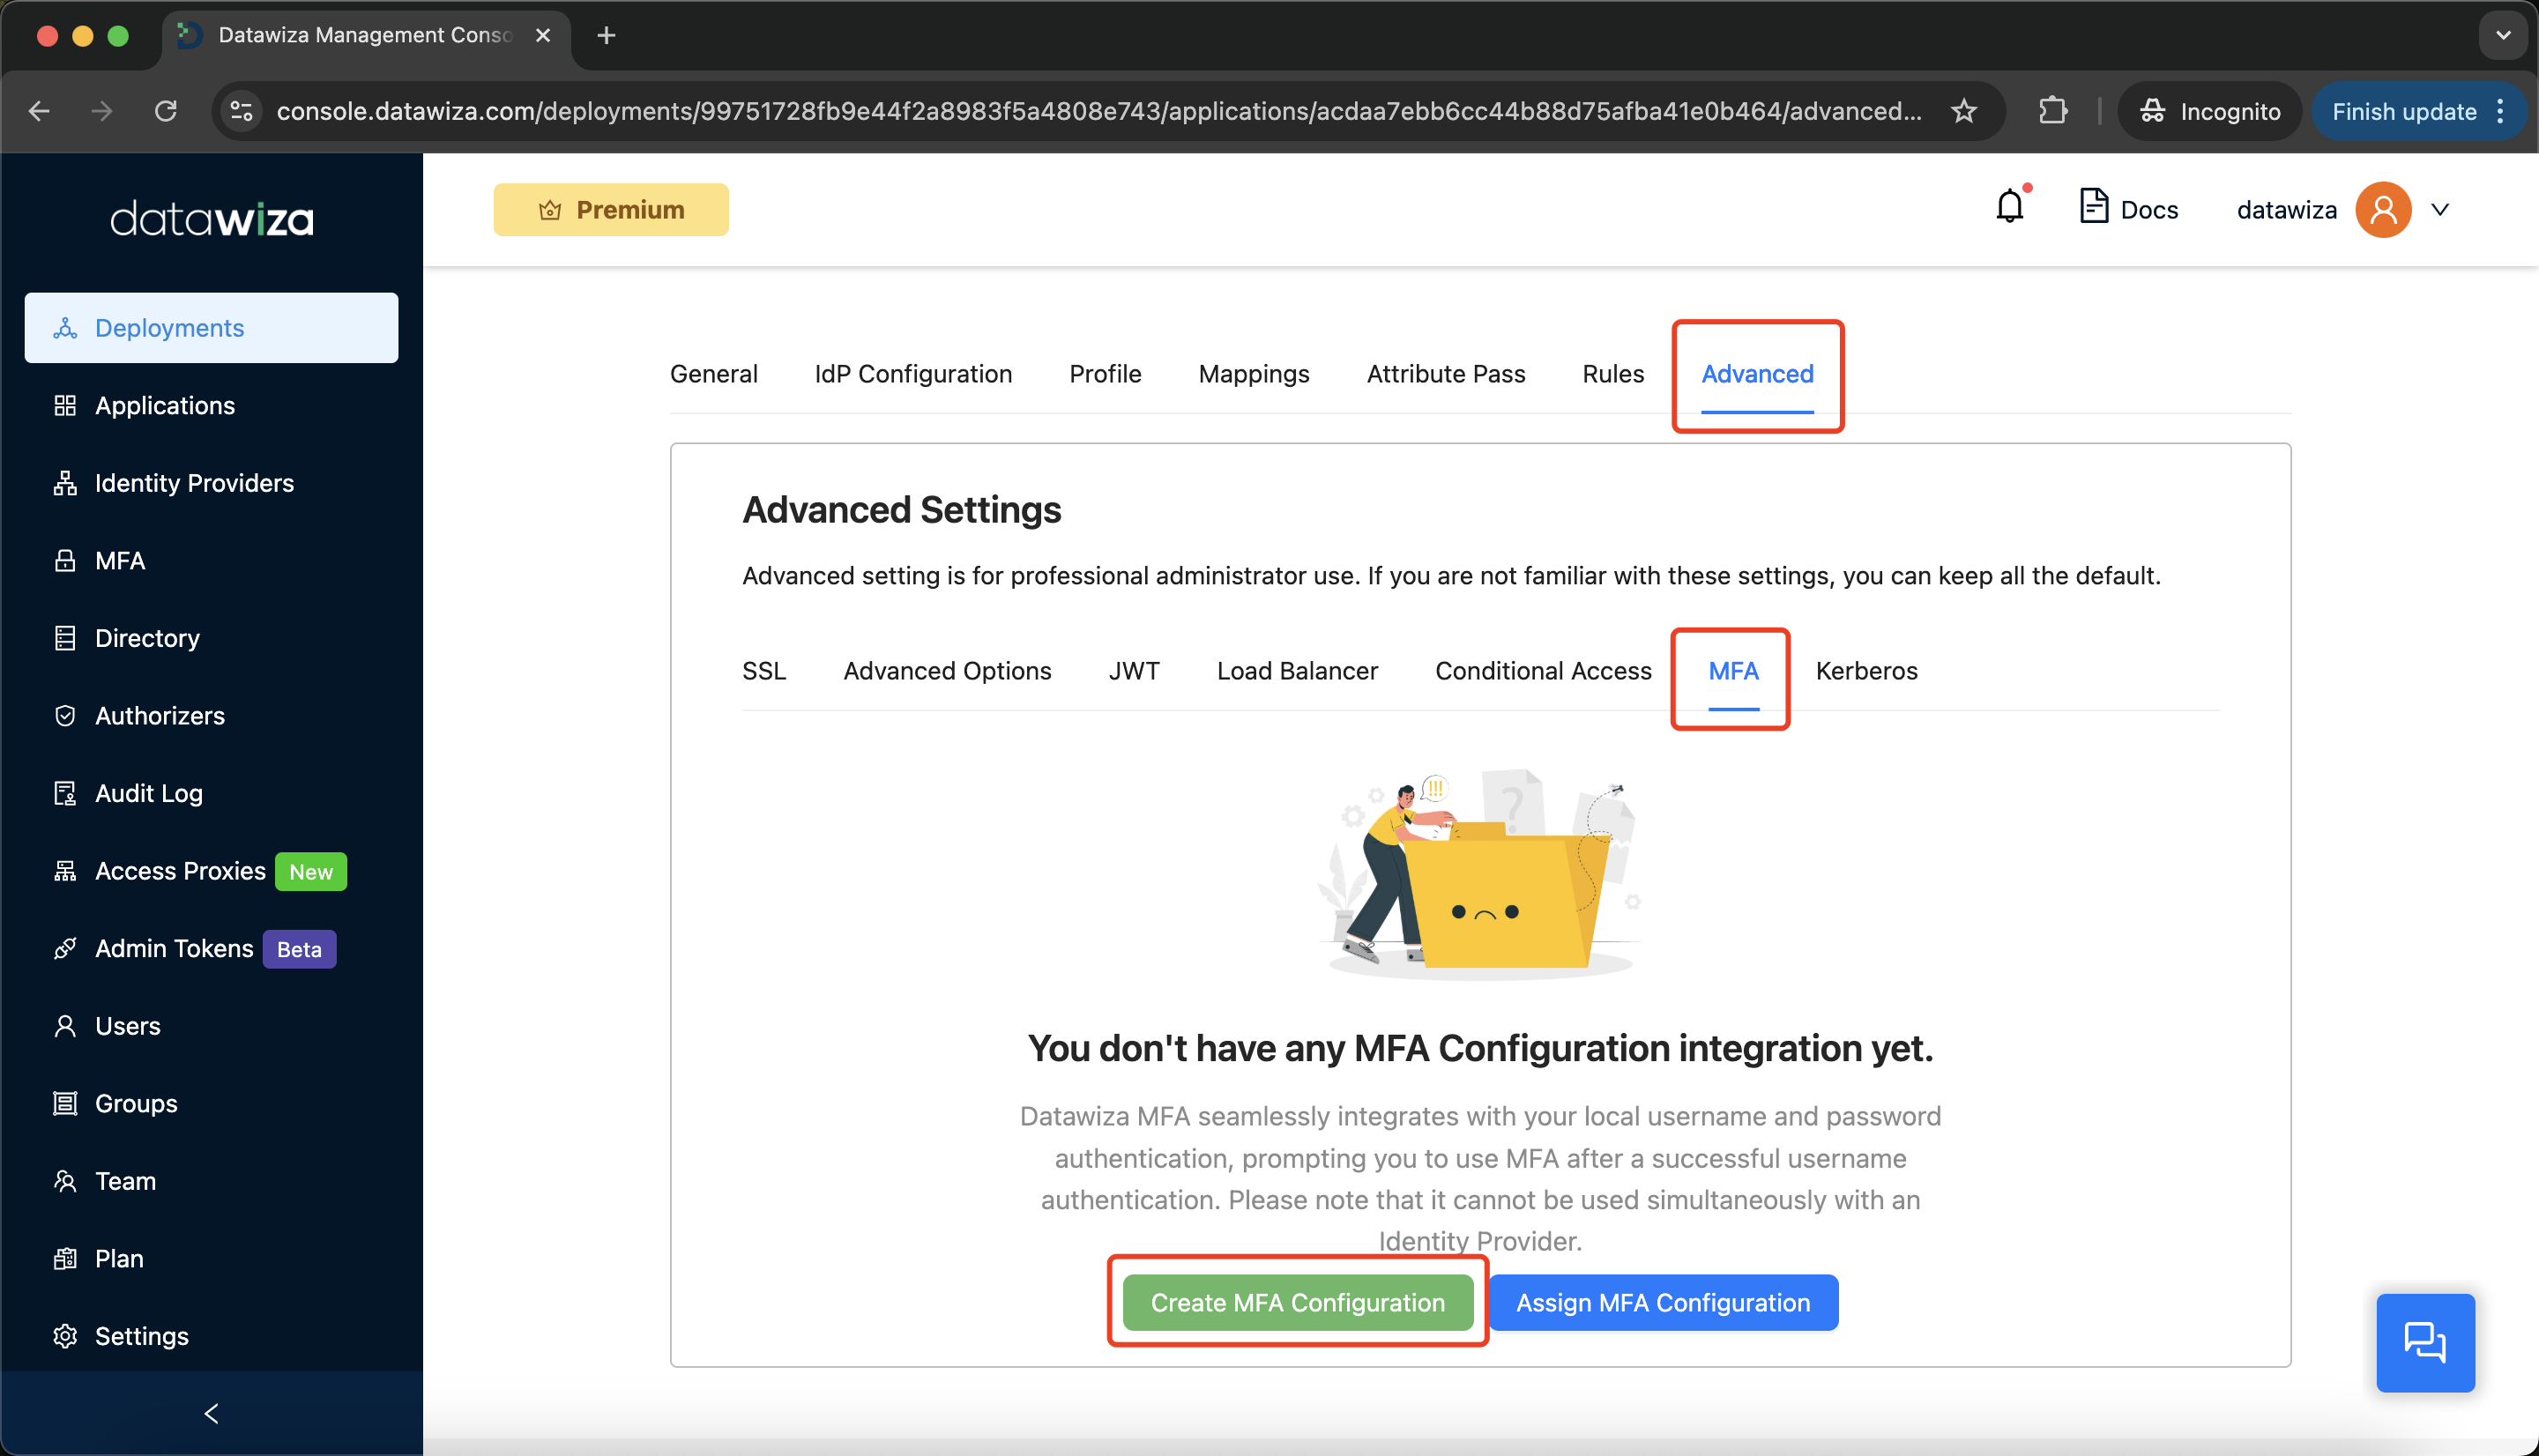
- Enter a name and select
DATAWIZAas the provider.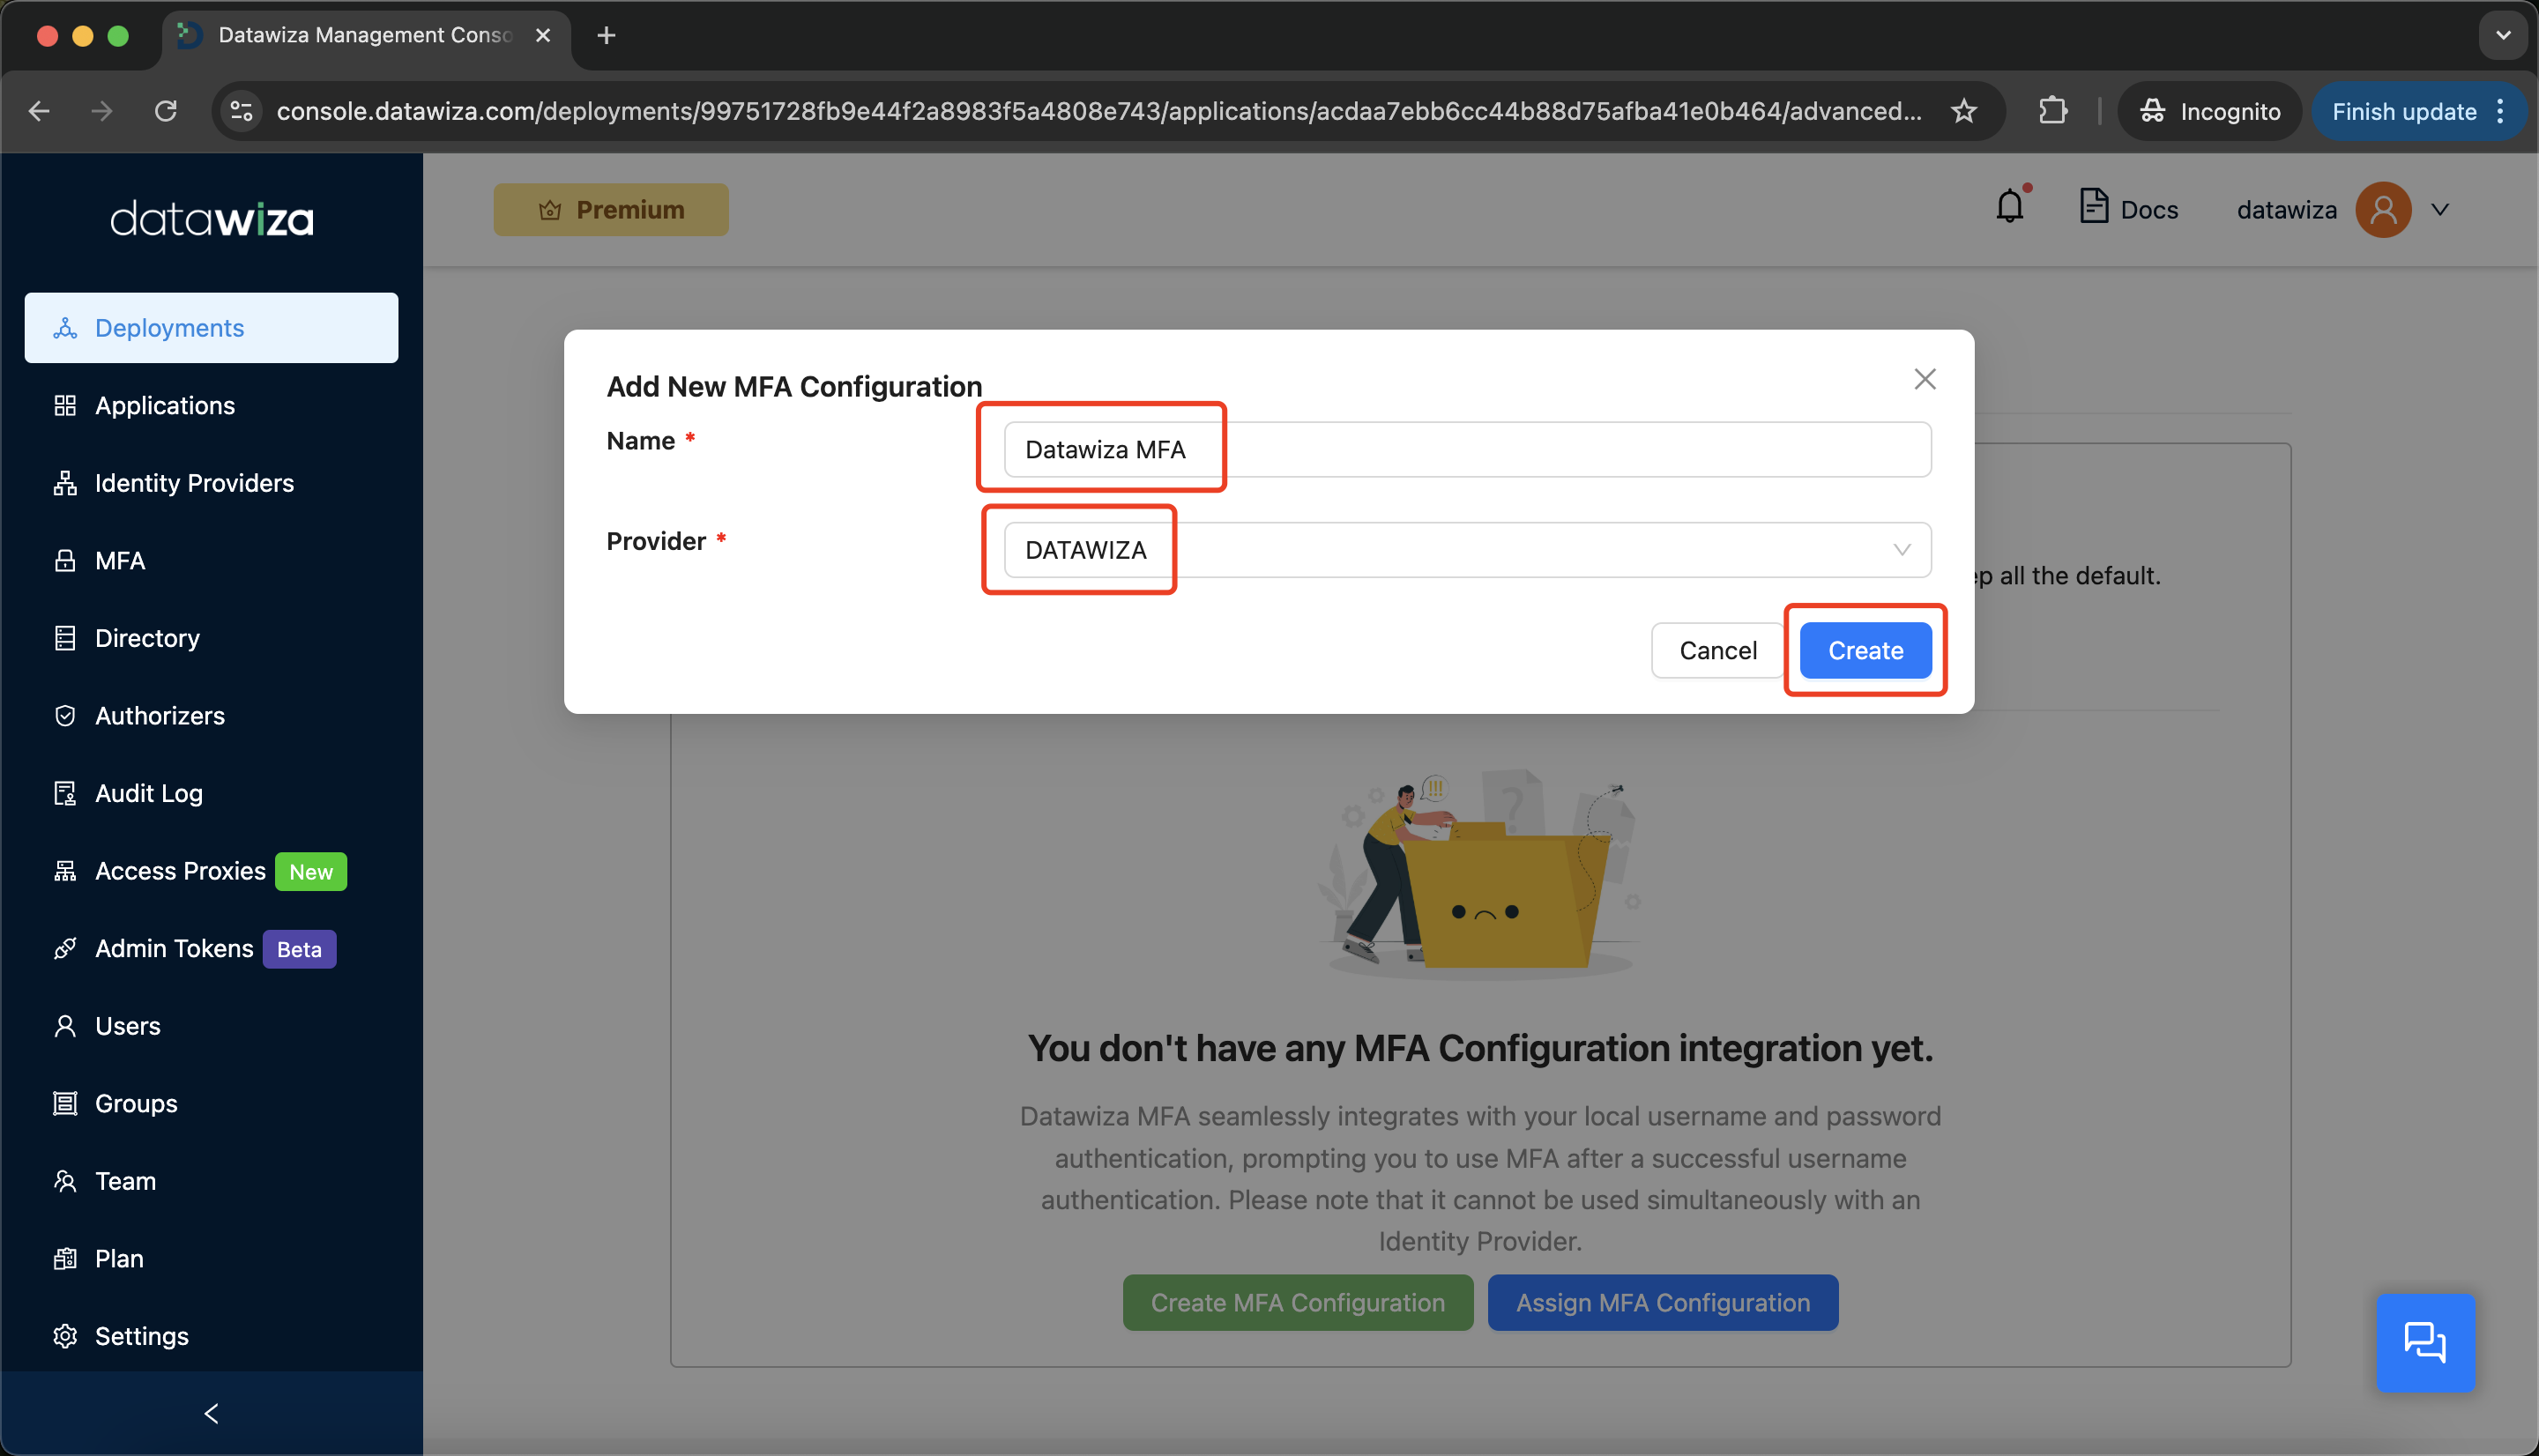
Step 6: Generate Provisioning Keys
Click on
Deployment Detail.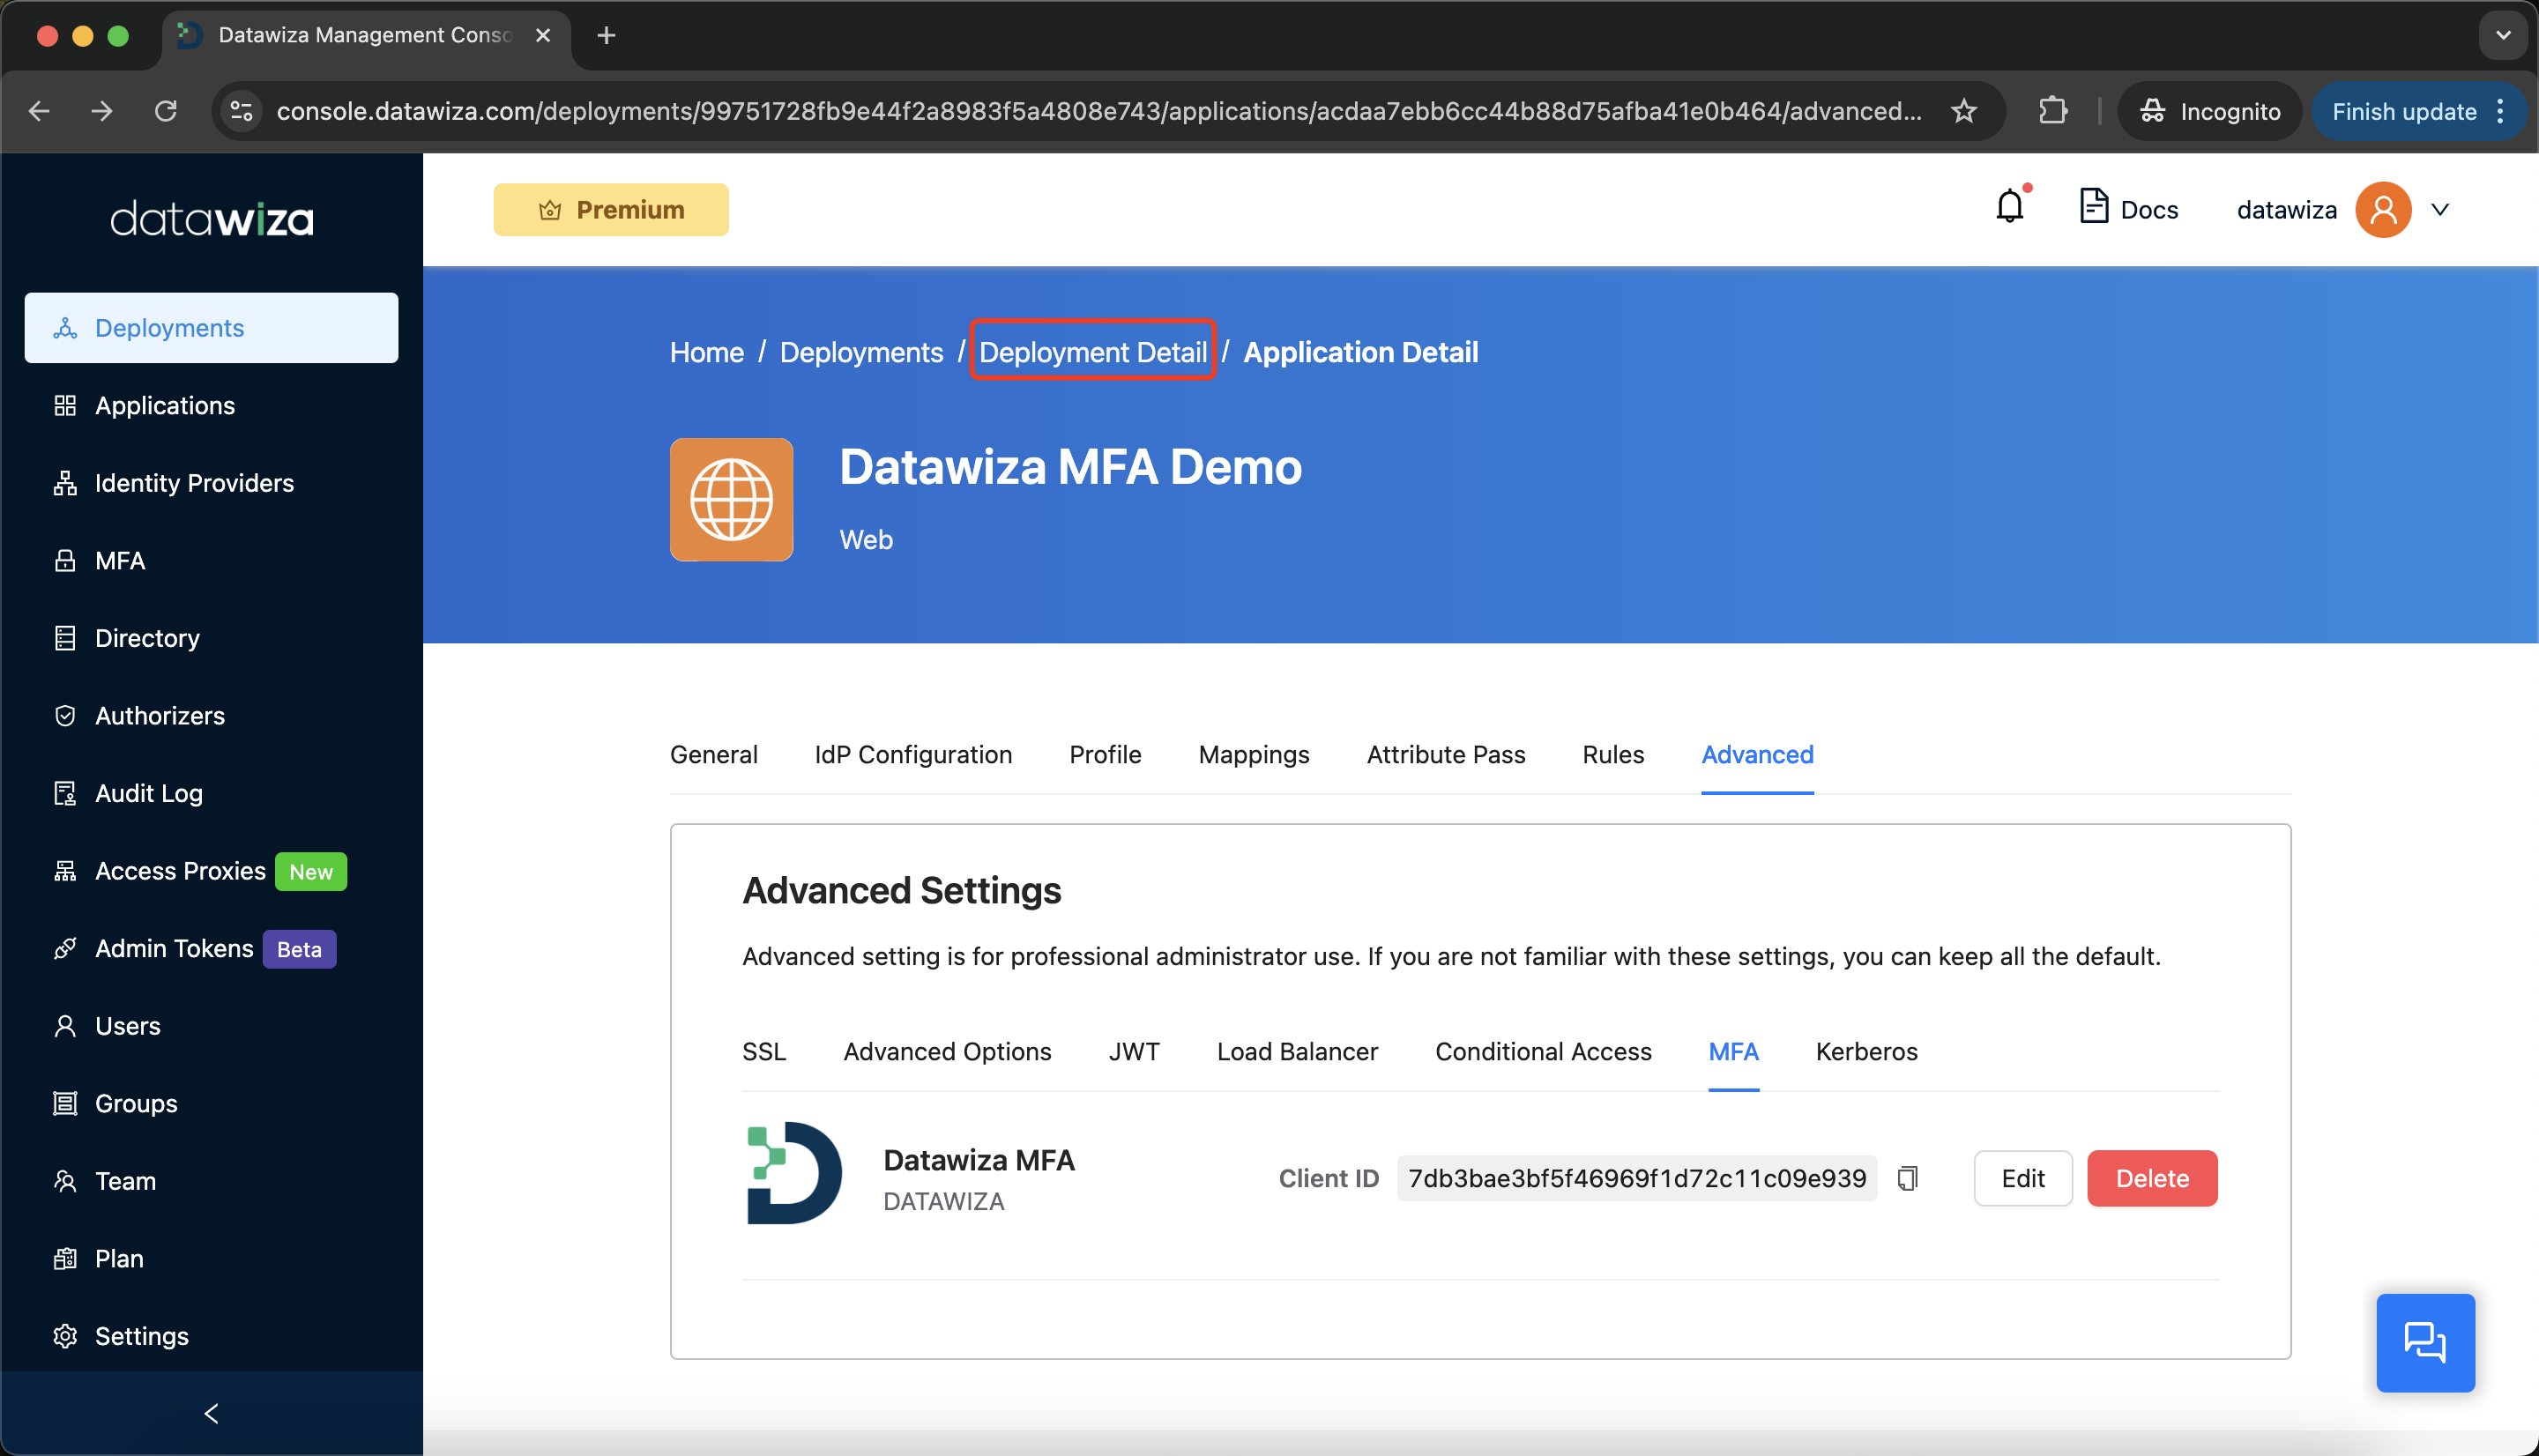
Select the
Provisioning Keystab, then clickCreate Provisioning Key.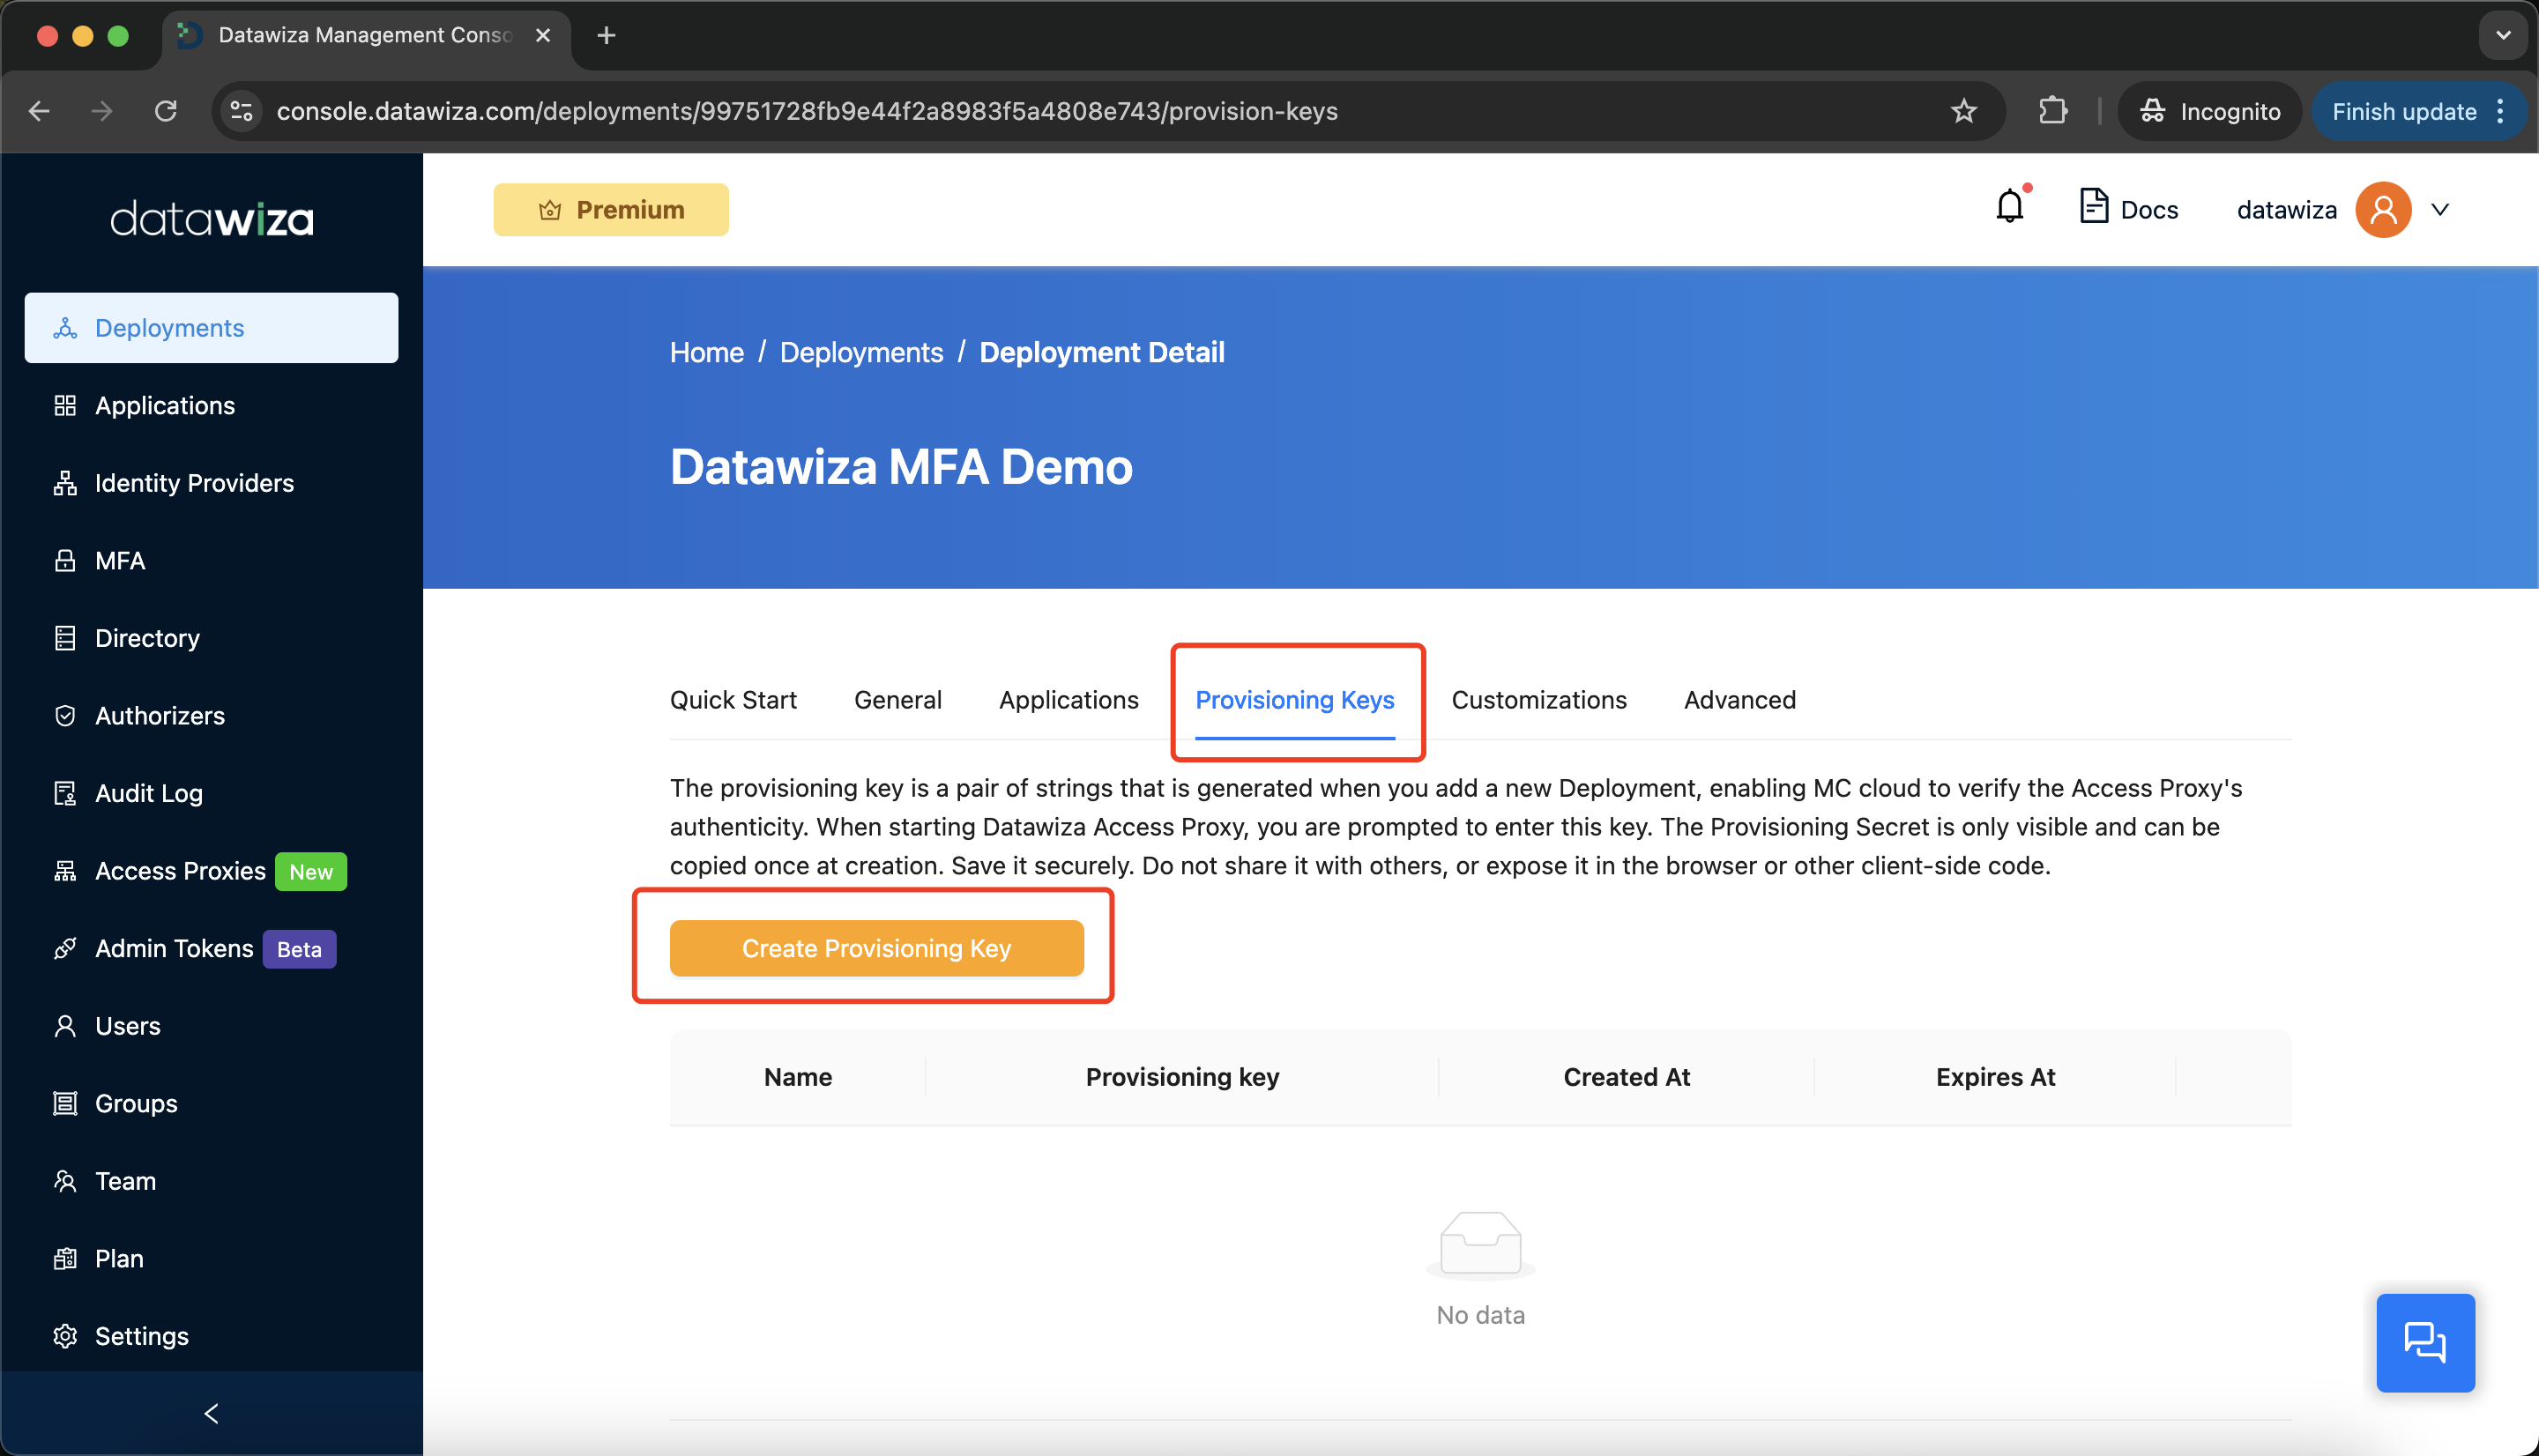
Enter a key name and click
Create.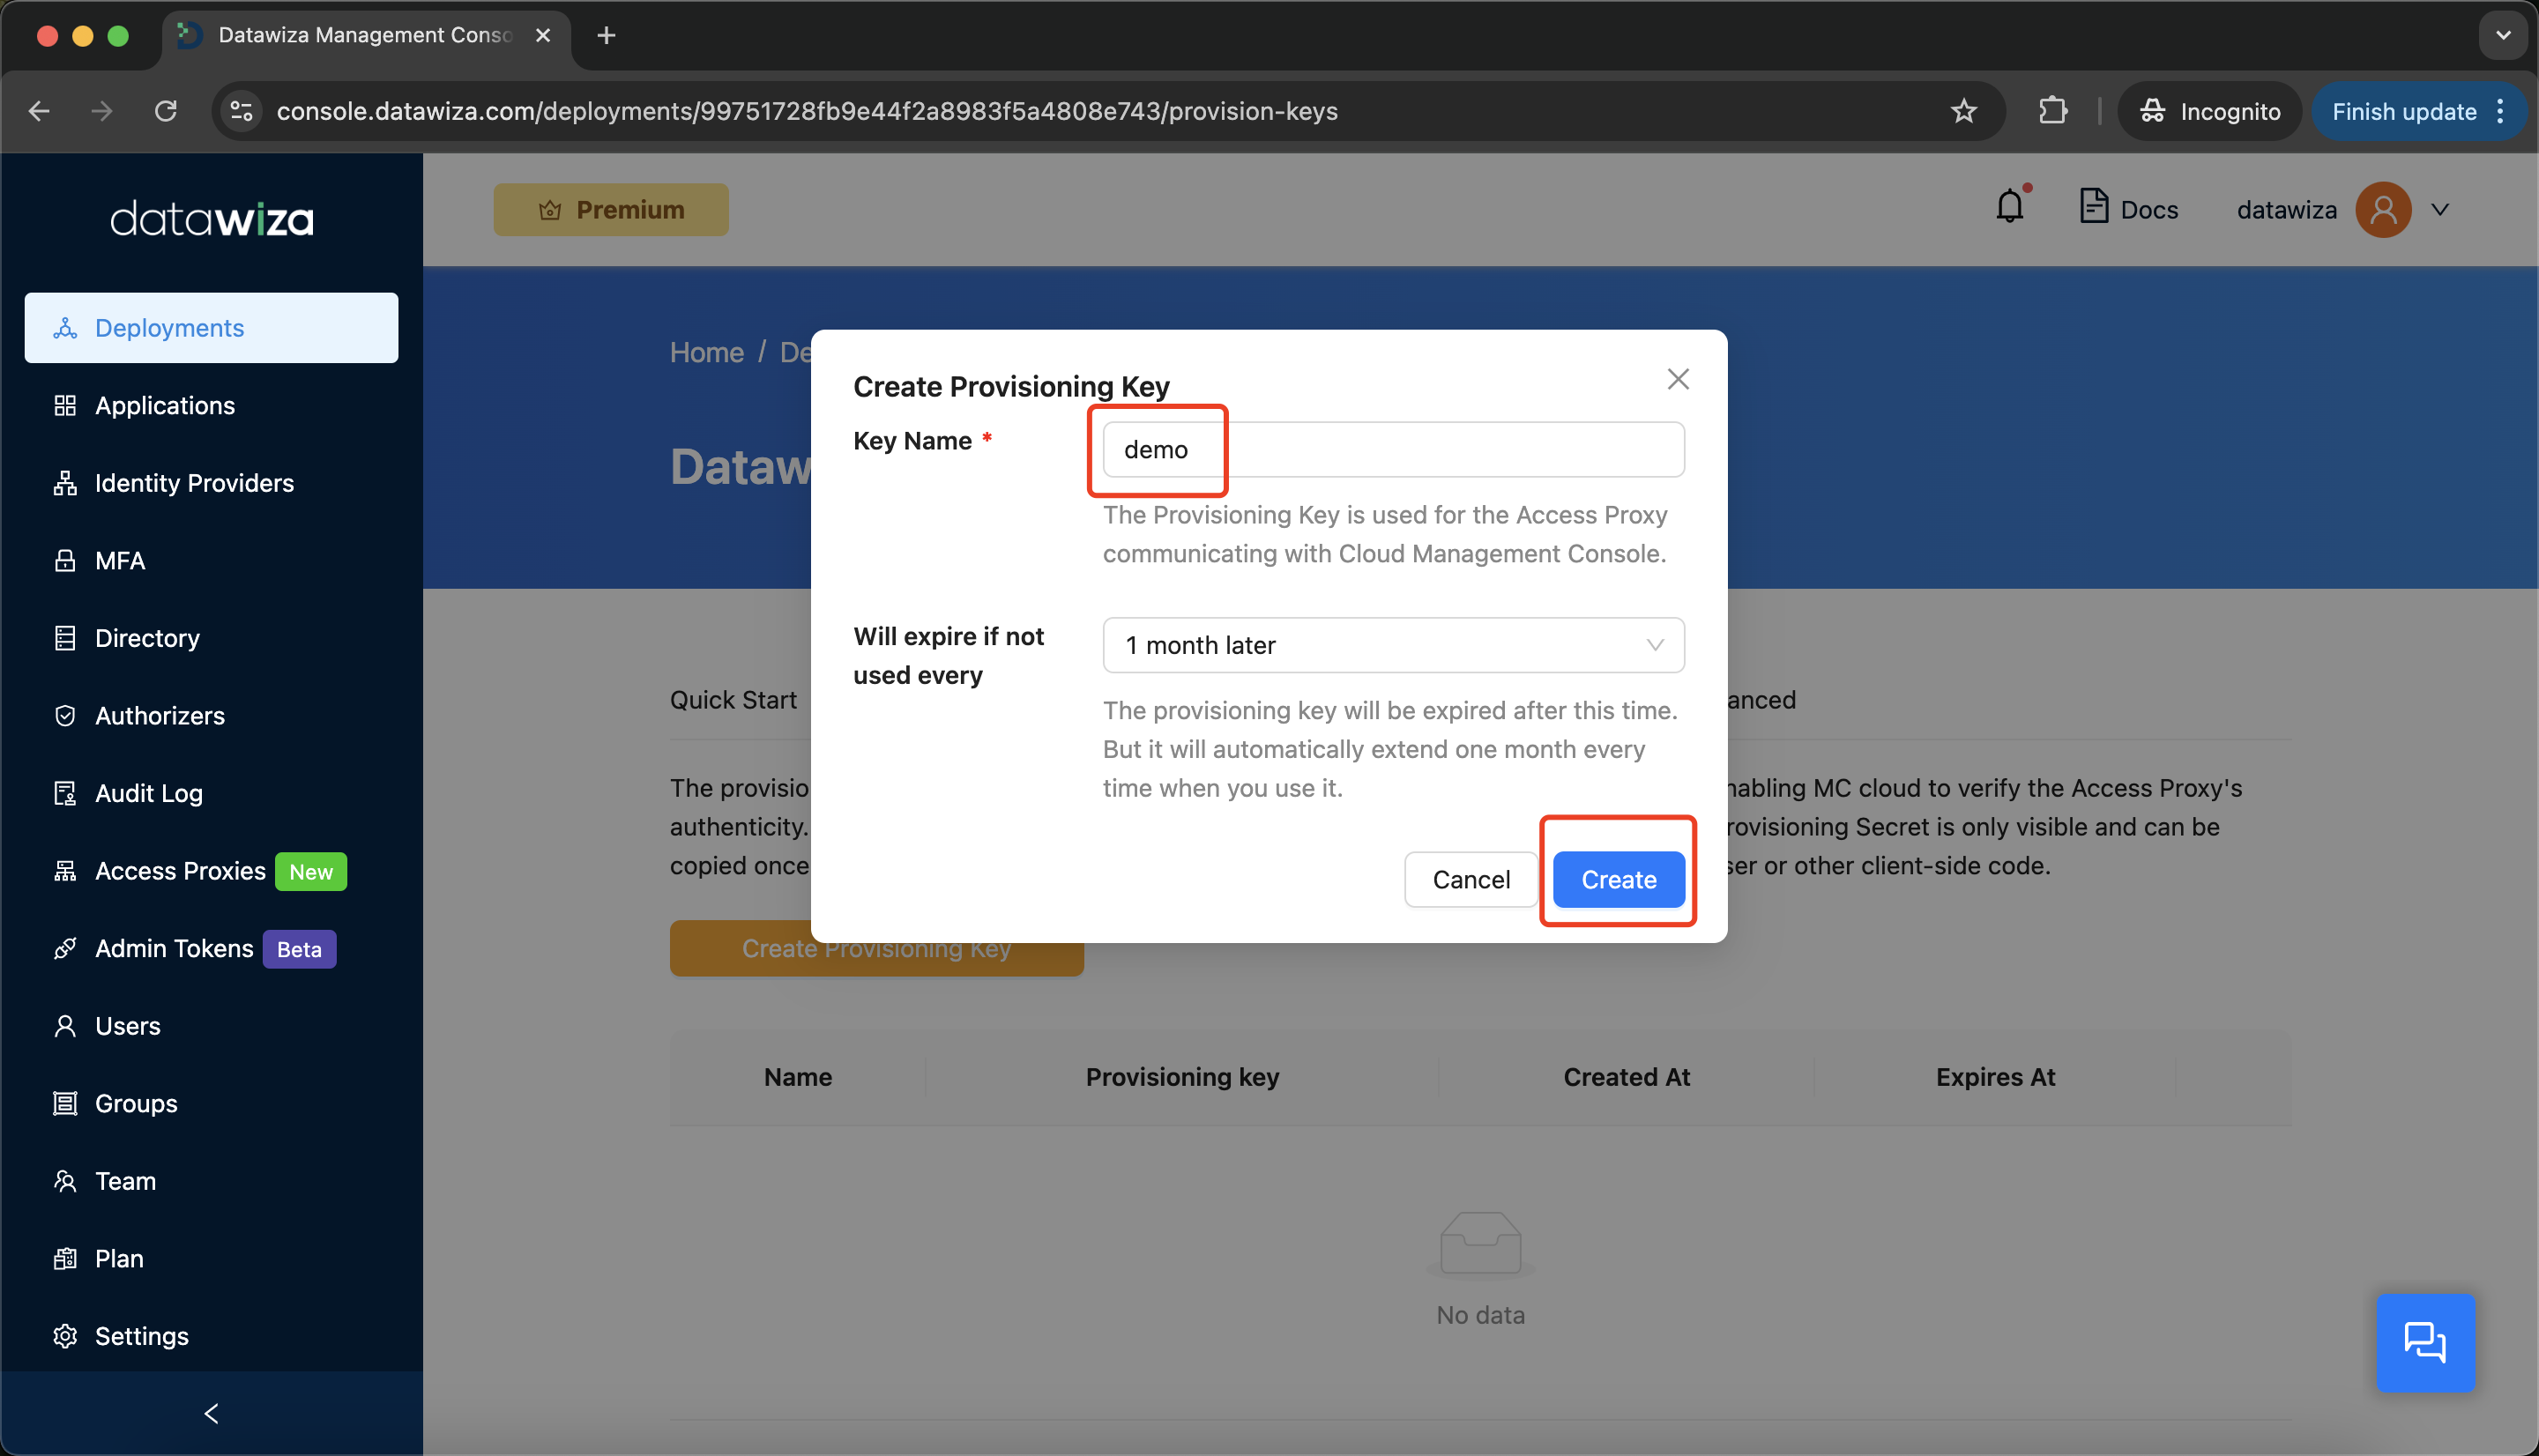
Save the
PROVISIONING_KEYandPROVISIONING_SECRET. You'll use these in your deployment.
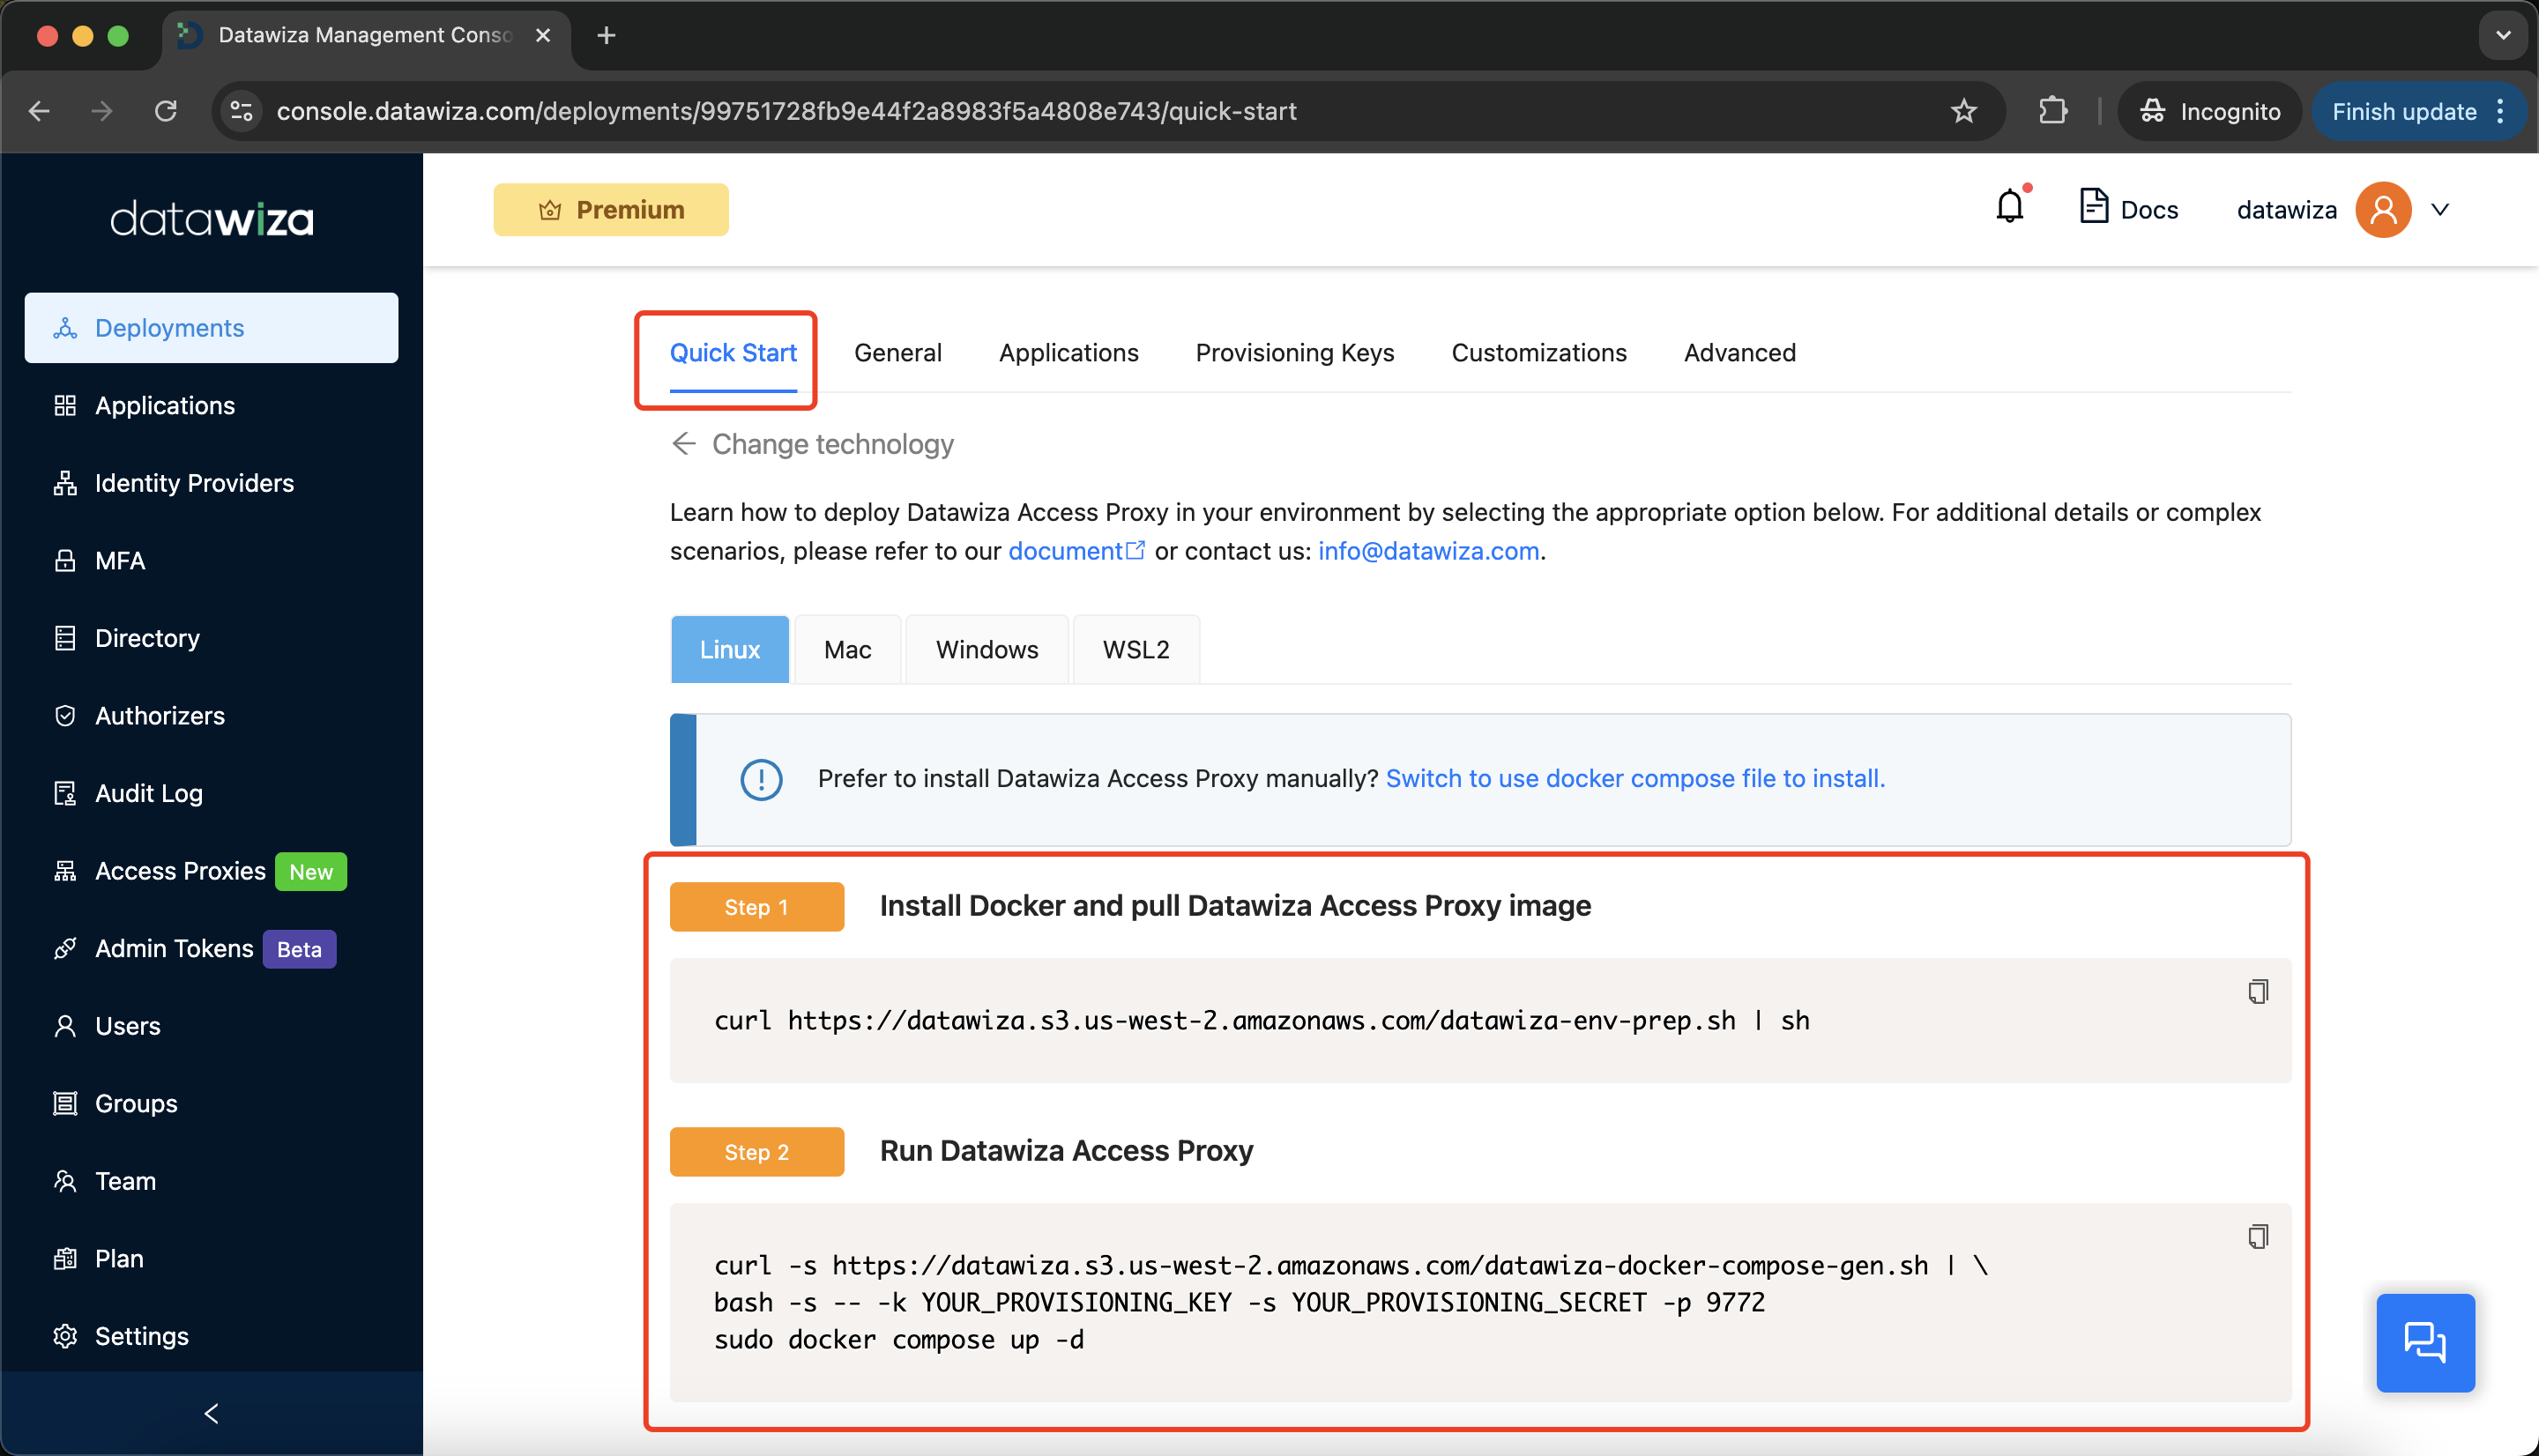
Step 7: Run the Datawiza Access Proxy (DAP)
- Go to the
Quick Starttab. - Follow Step 1 to install Docker and pull the DAP image.
- Follow Step 2 to generate a
docker-compose.yamlusing your provisioning keys and start the DAP container.
Part II: MFA User Configuration
Datawiza provides a user management interface for handling MFA users.
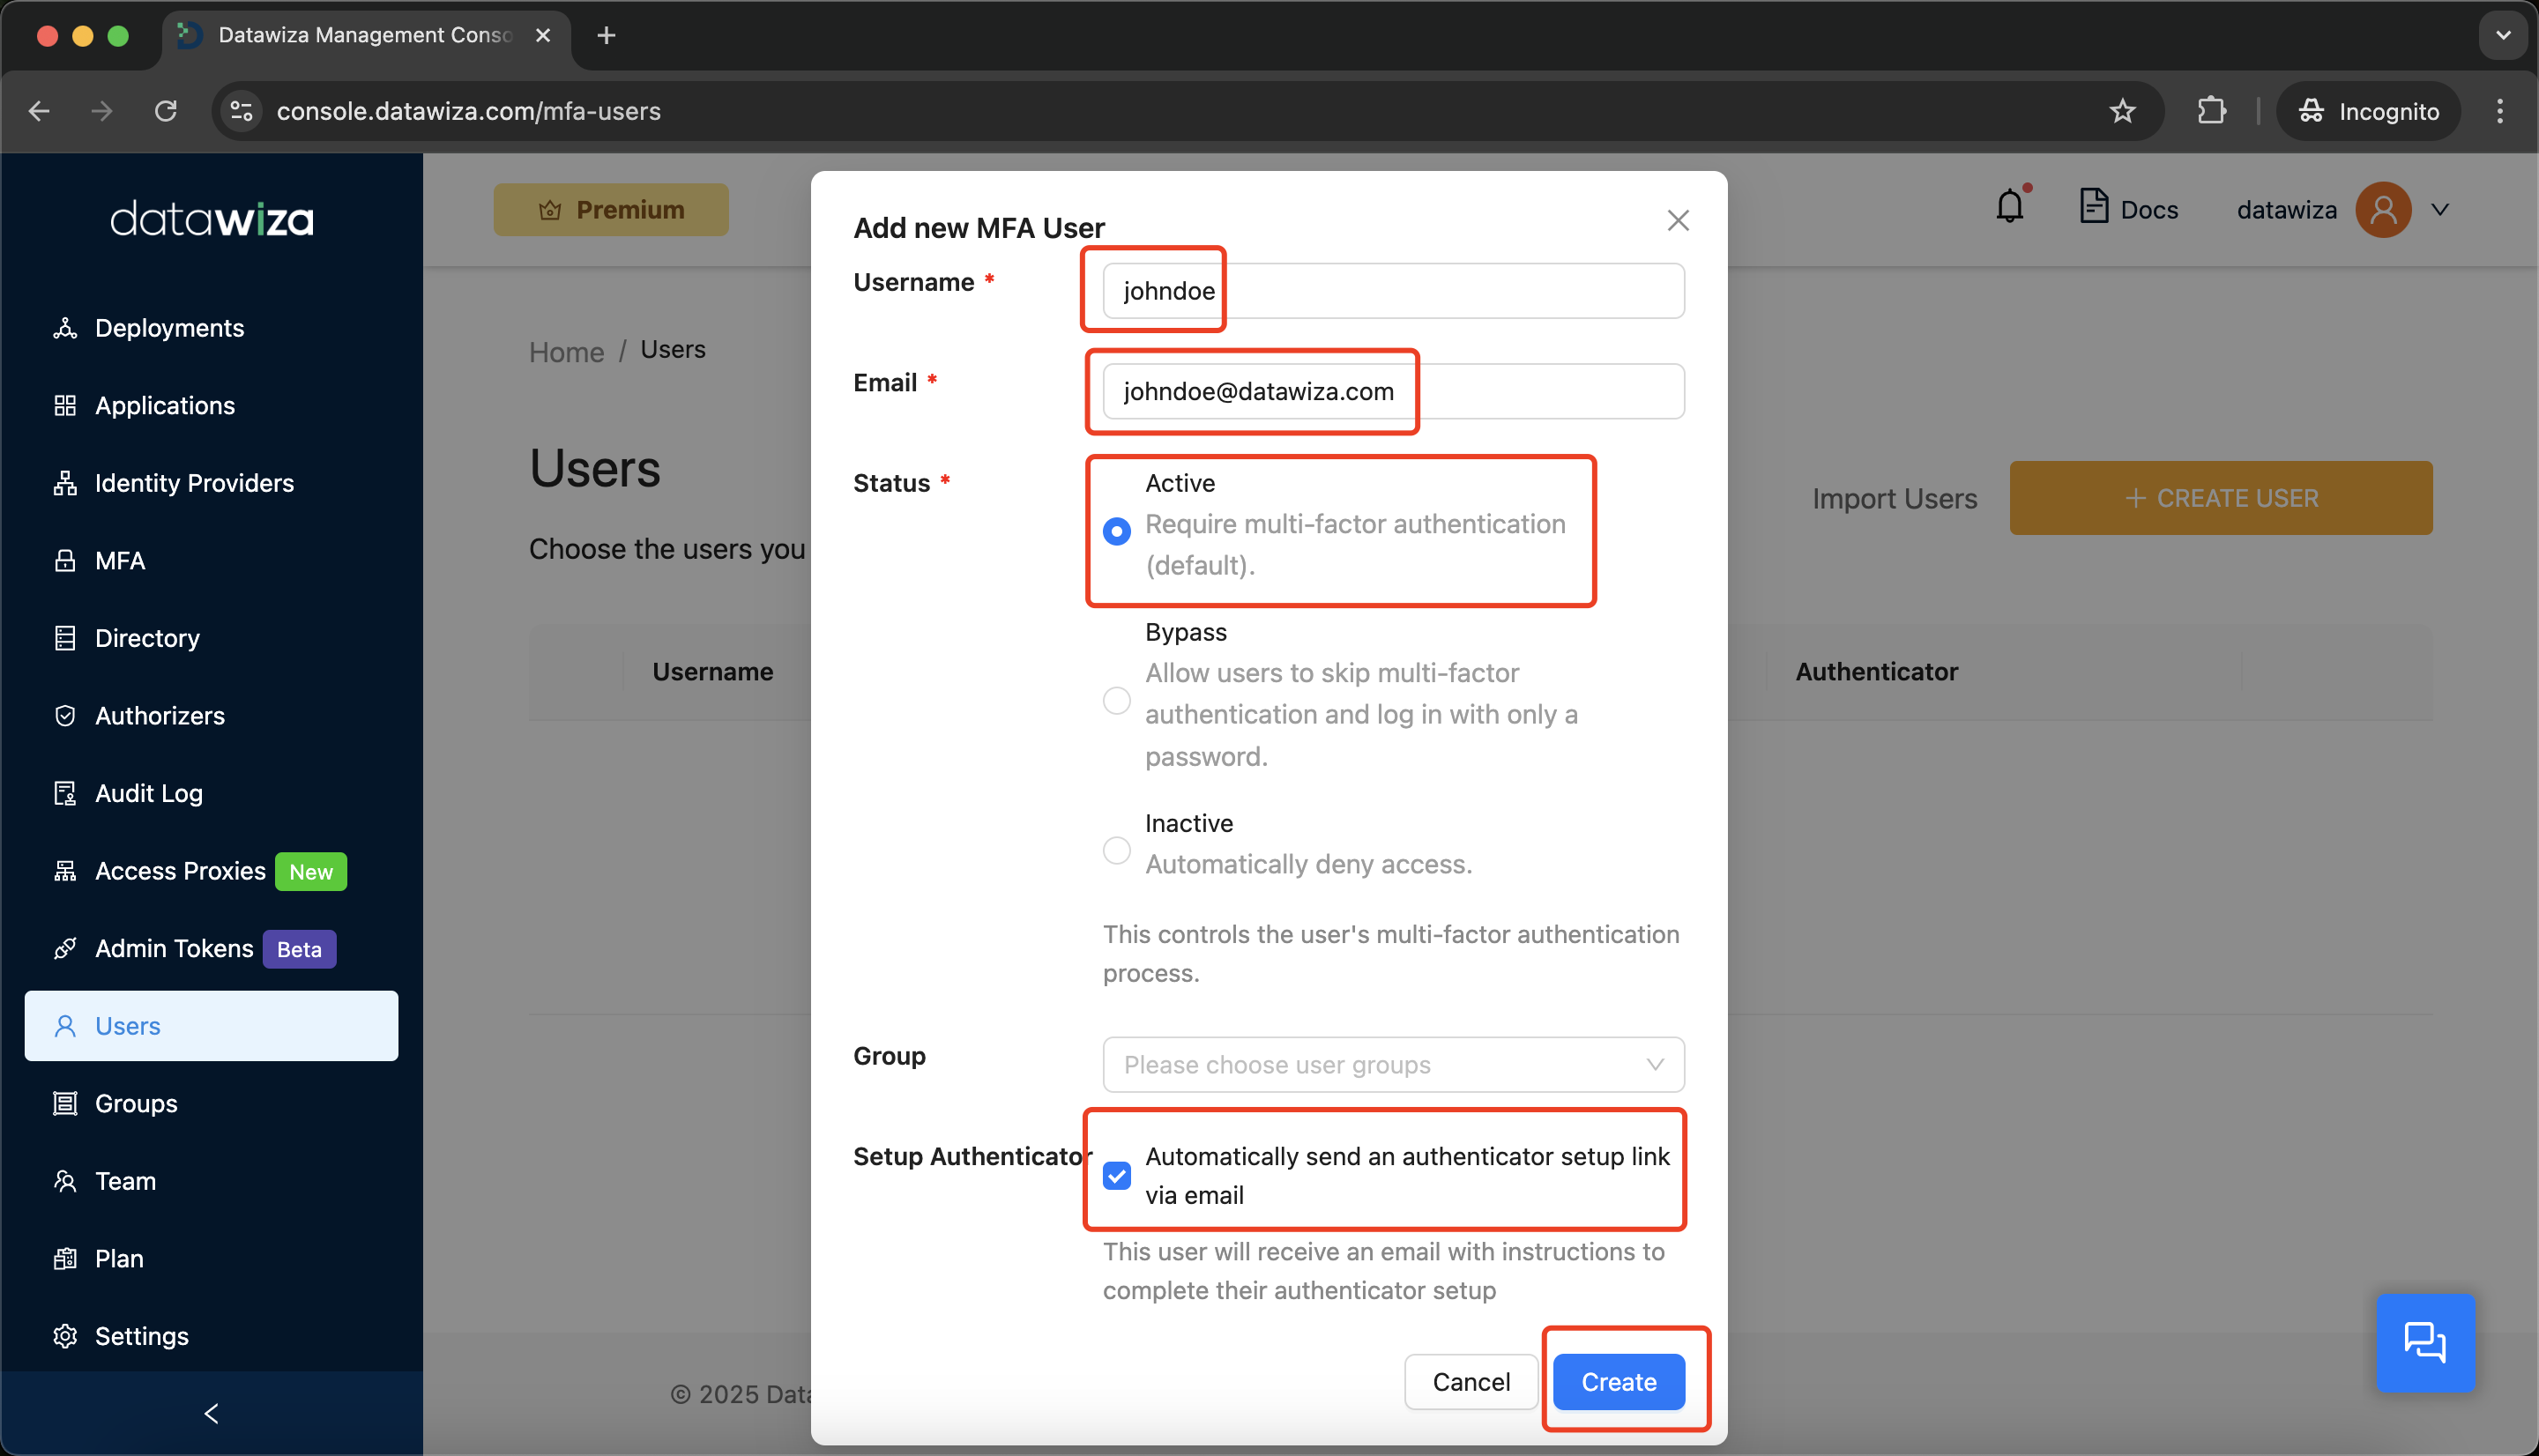
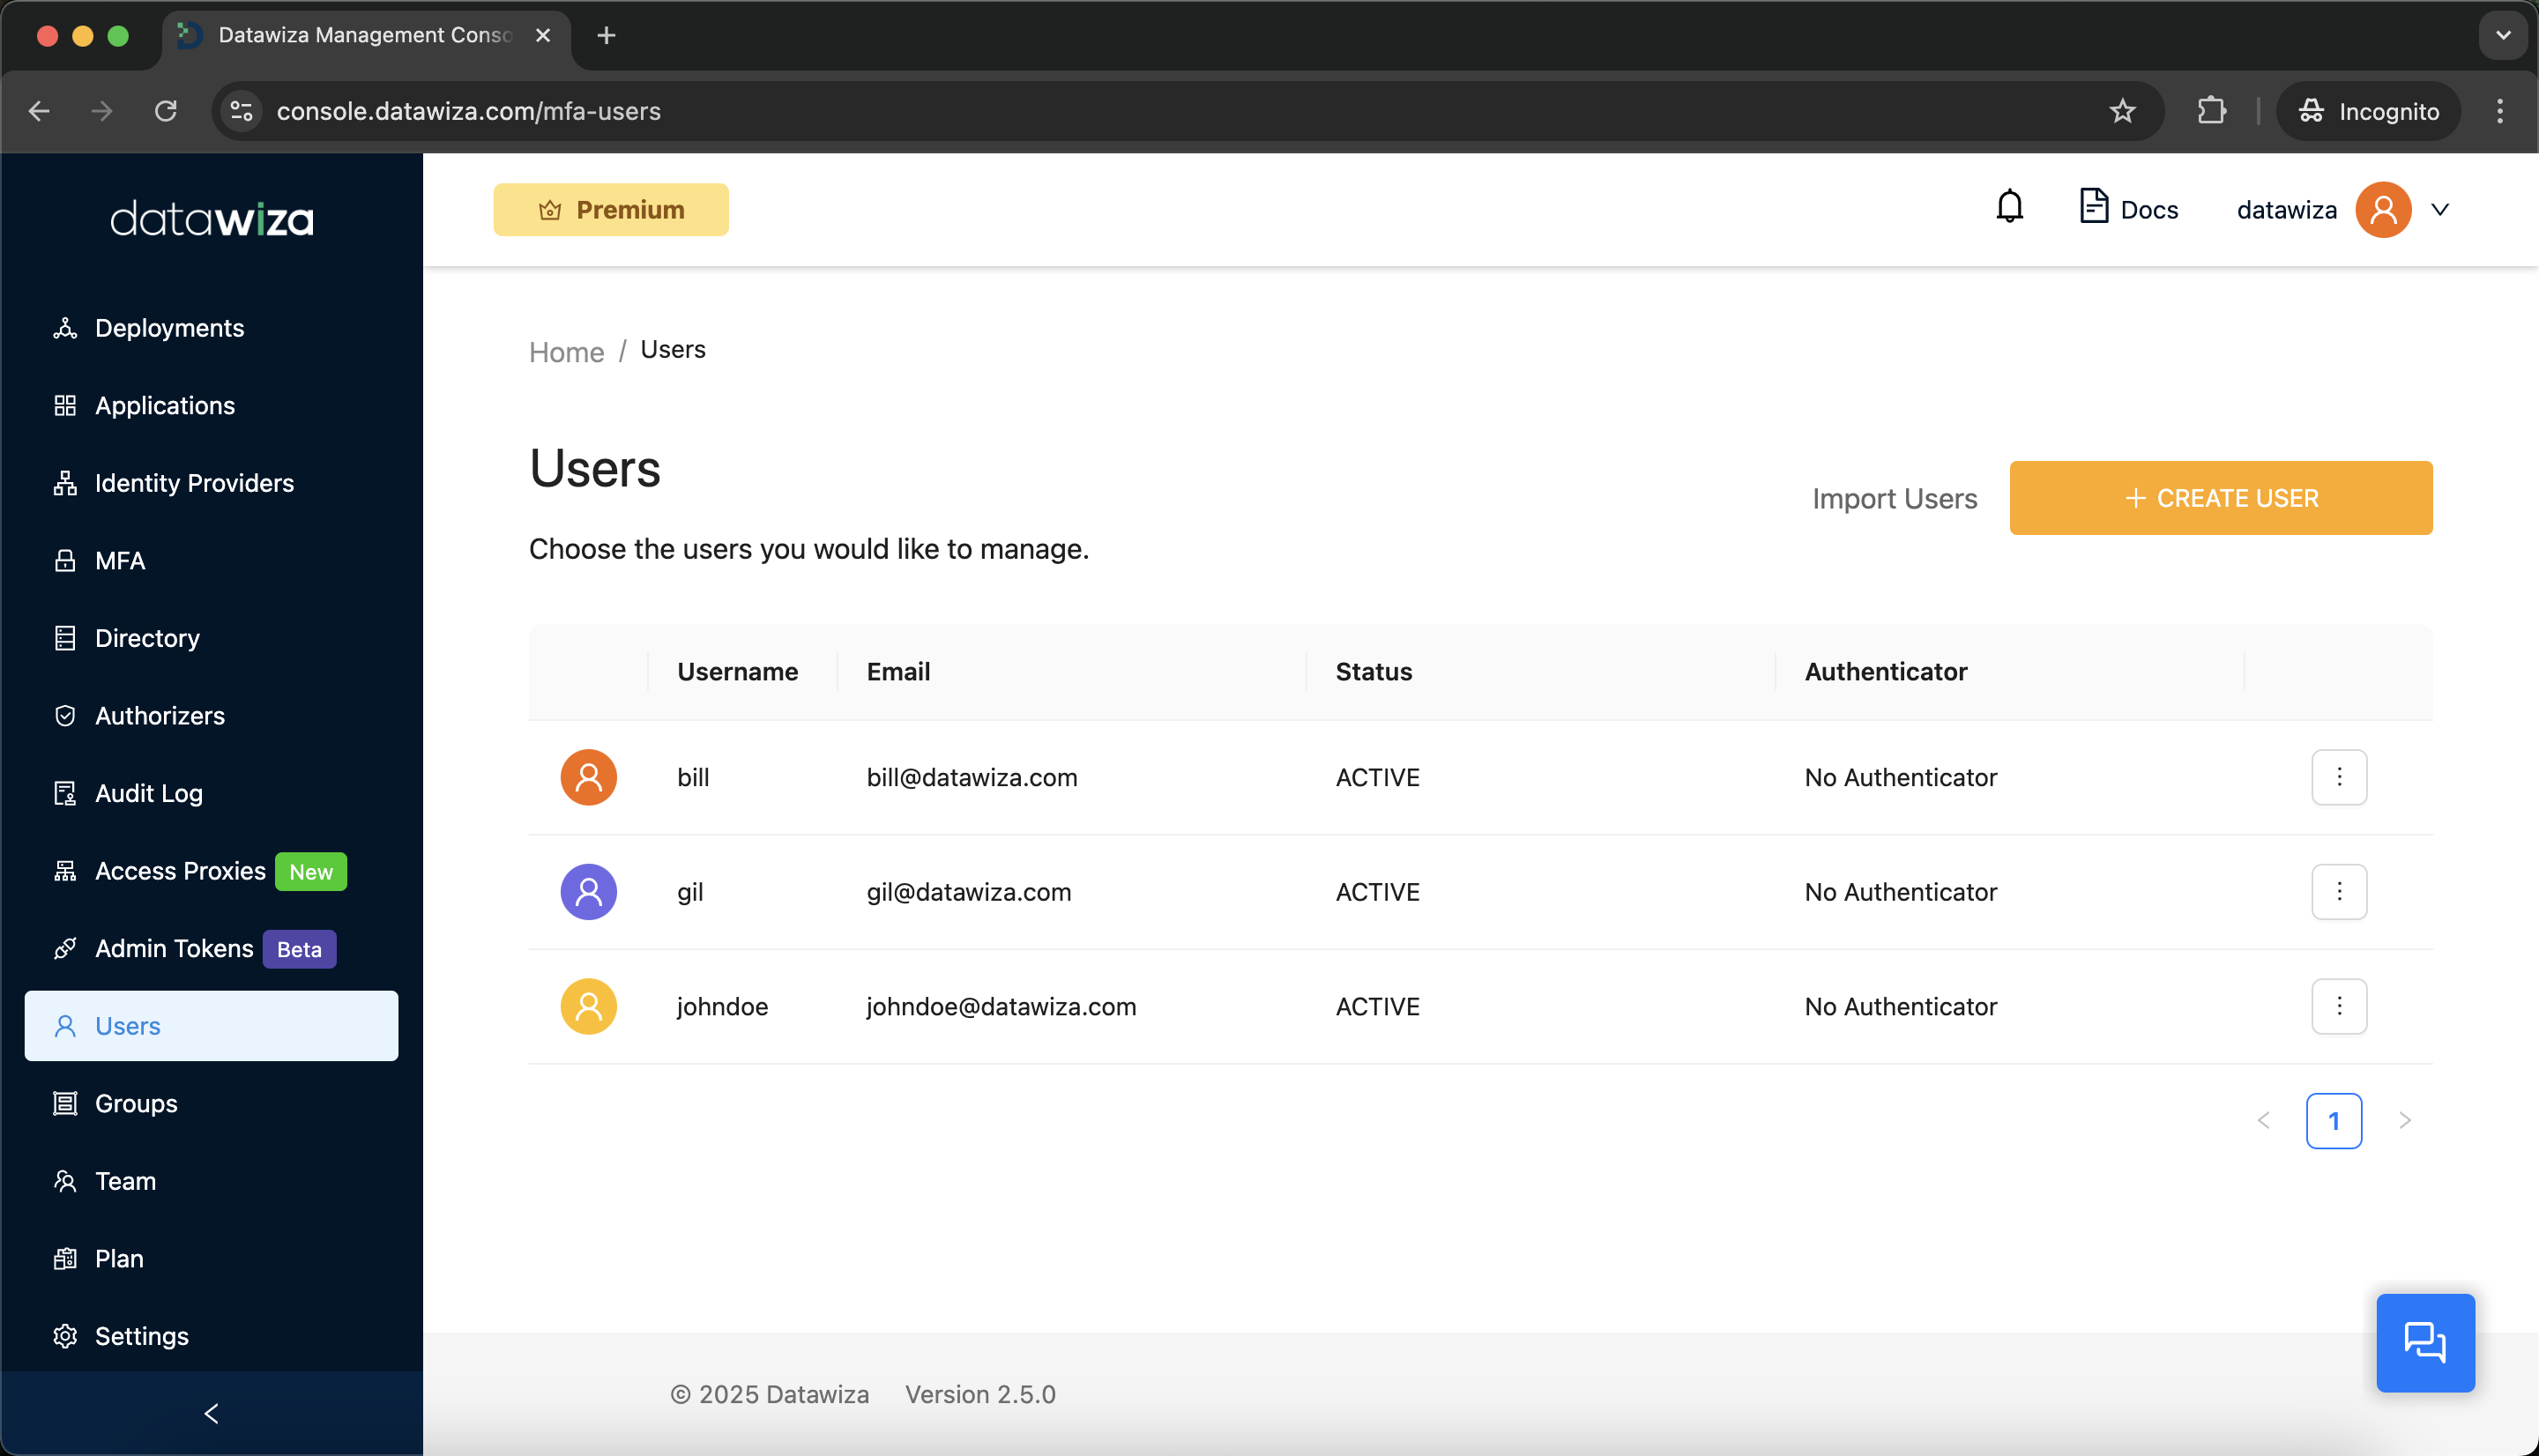
Step 1: Add a New MFA User Manually
Go to the Users tab and click + CREATE USER.
Provide the following details:
Username:johndoe(We use this user as the example)Email: The user's email address for receiving setup instructionsStatus:ActiveSetup Authenticator: Enable "Automatically send an authenticator setup link via email"- Click
Create.
Step 2: Complete MFA Enrollment
The user will receive an email with a QR code to scan with an authenticator app (e.g., Google Authenticator, Microsoft Authenticator). 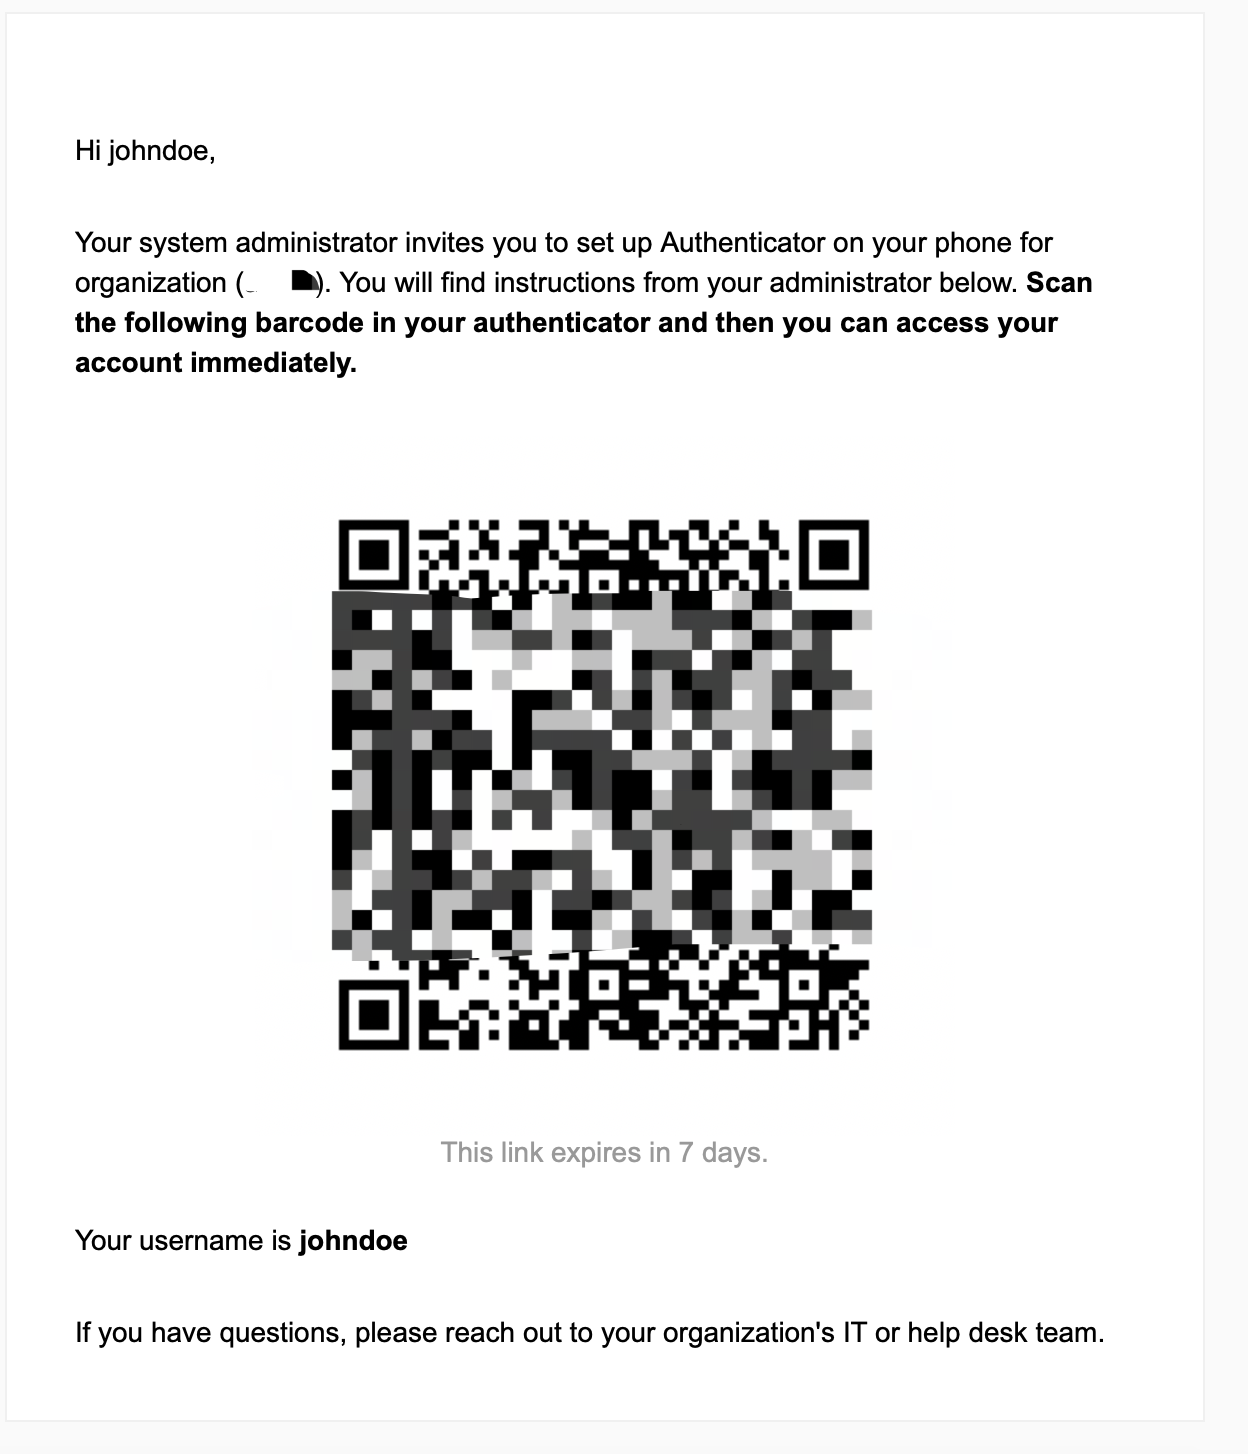
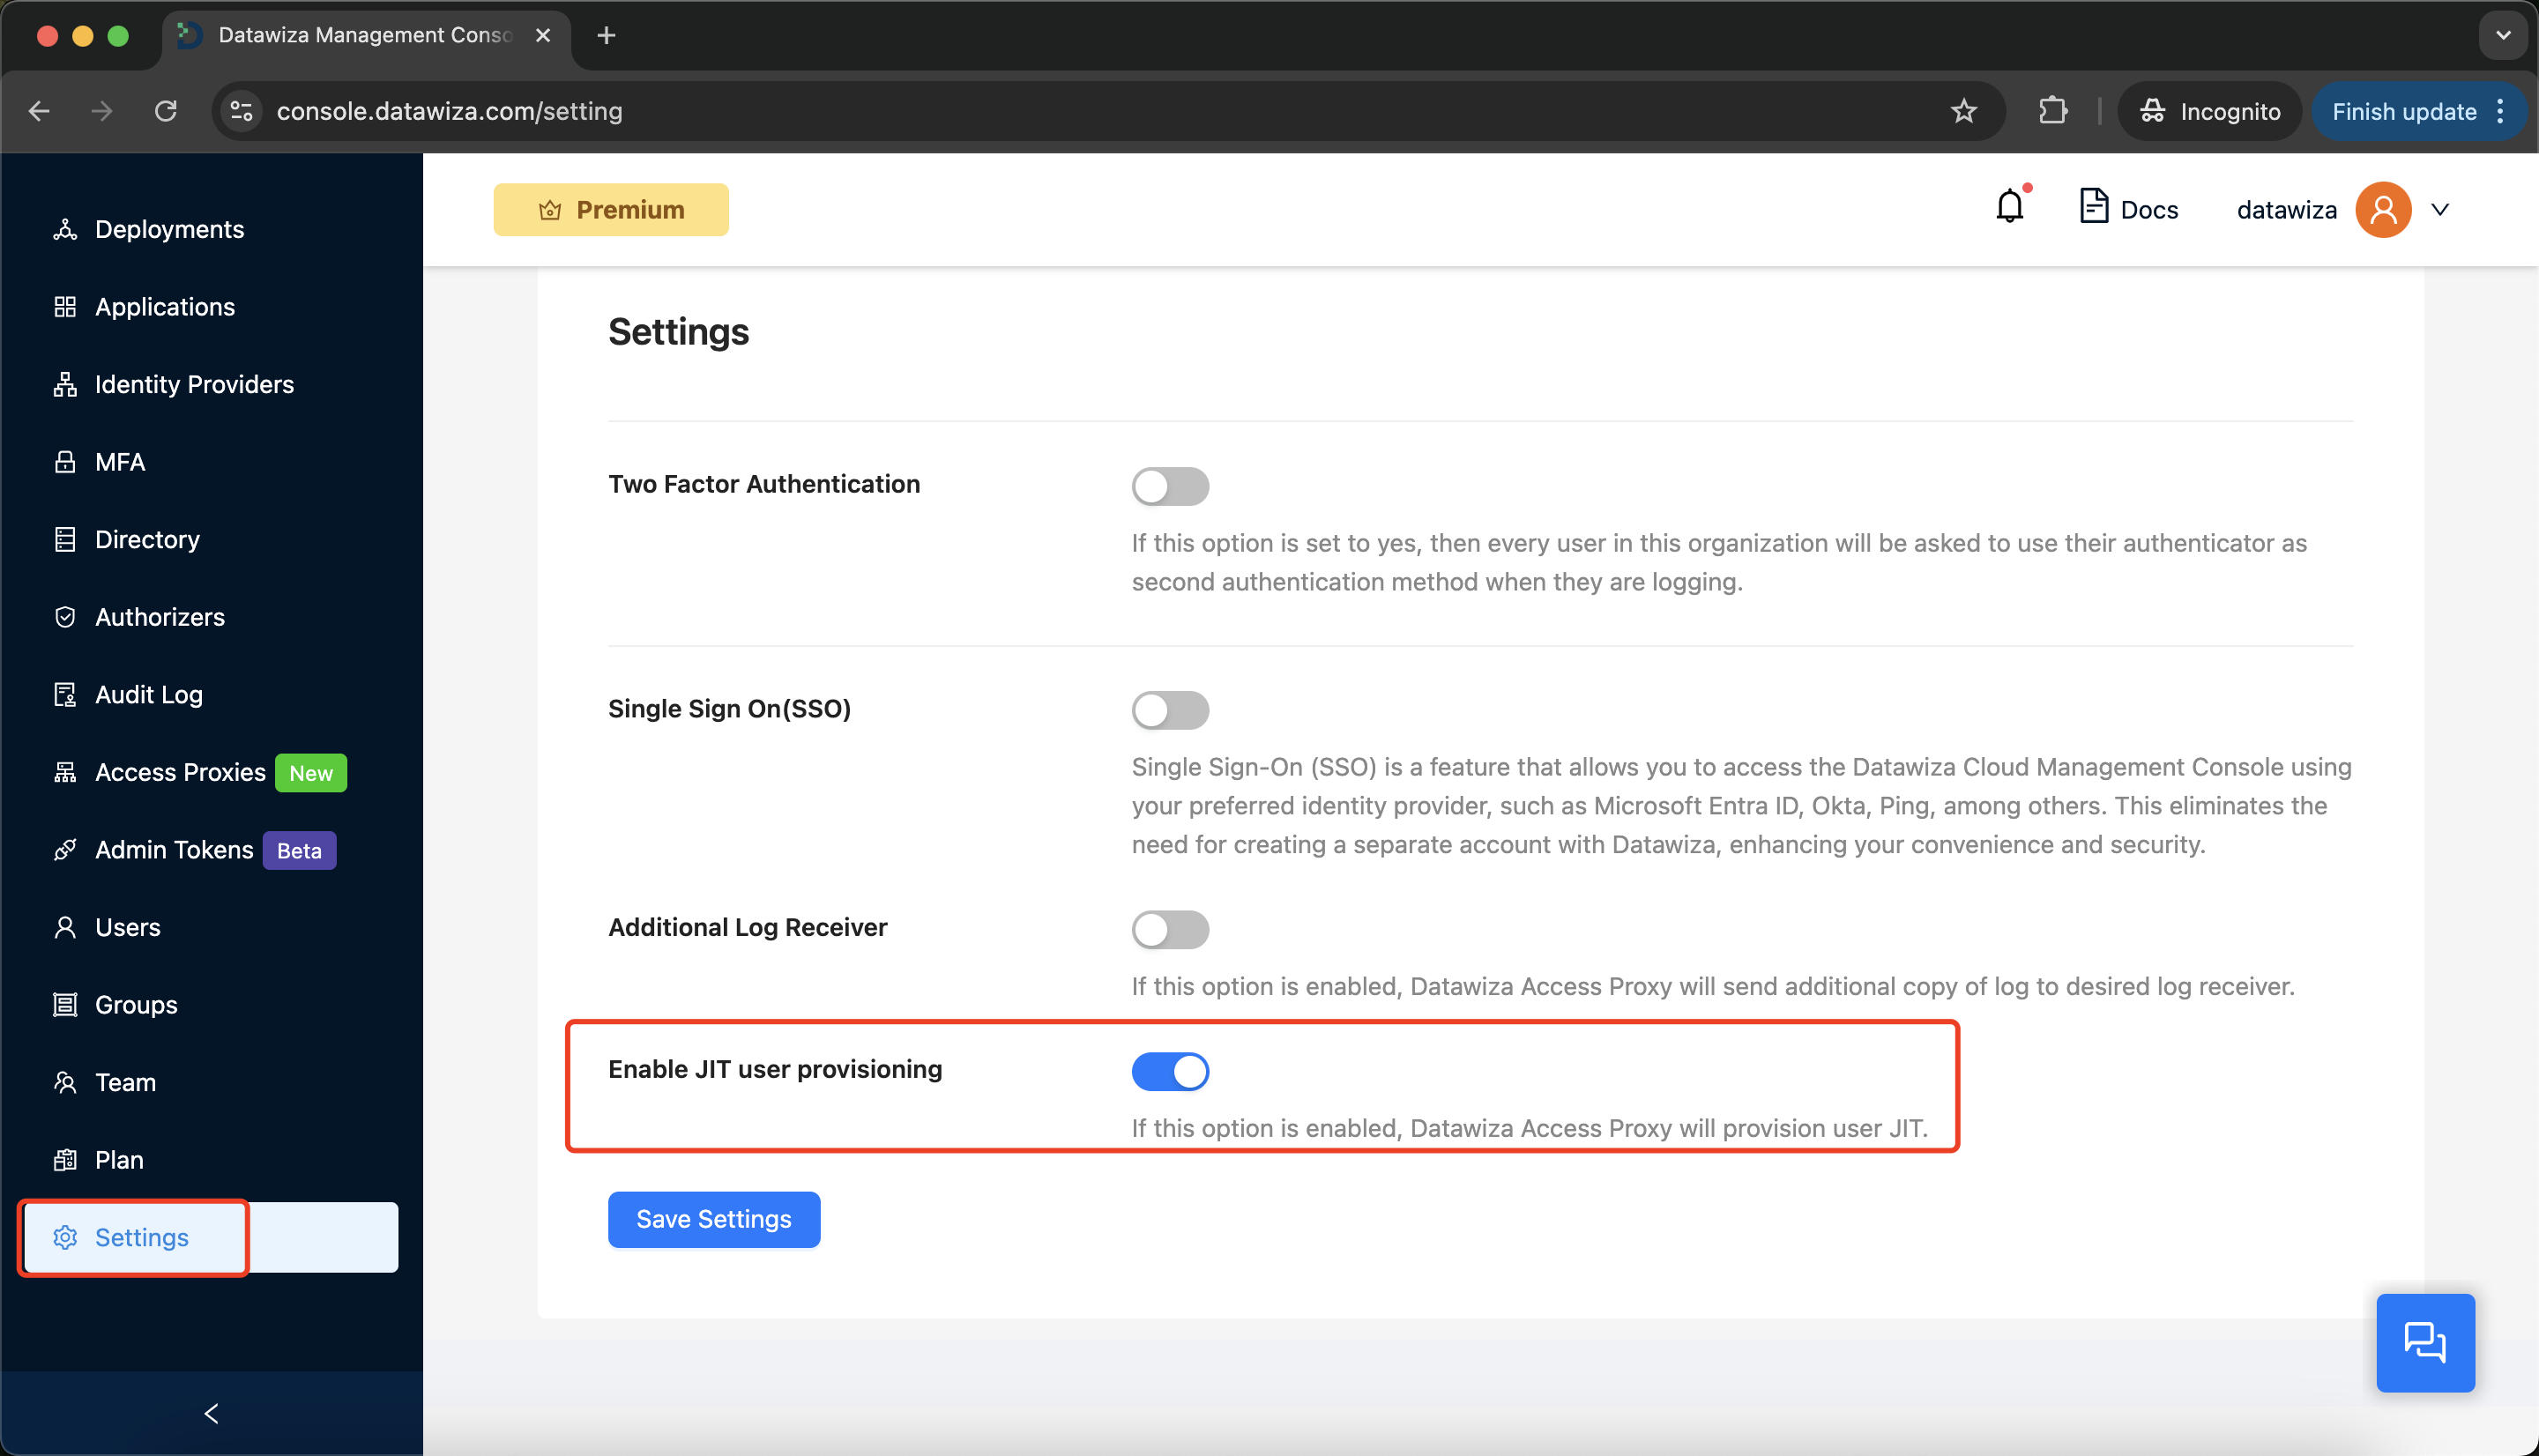
Step 3: (Optional) Enable JIT User Provisioning
To streamline the onboarding process, you can enable Just-In-Time (JIT) user provisioning, which automatically creates a user record the first time a user logs in.
Step 4 (Optional): Bulk Upload MFA Users via CSV
Instead of manually creating users one by one, you can bulk upload multiple users using a CSV file. 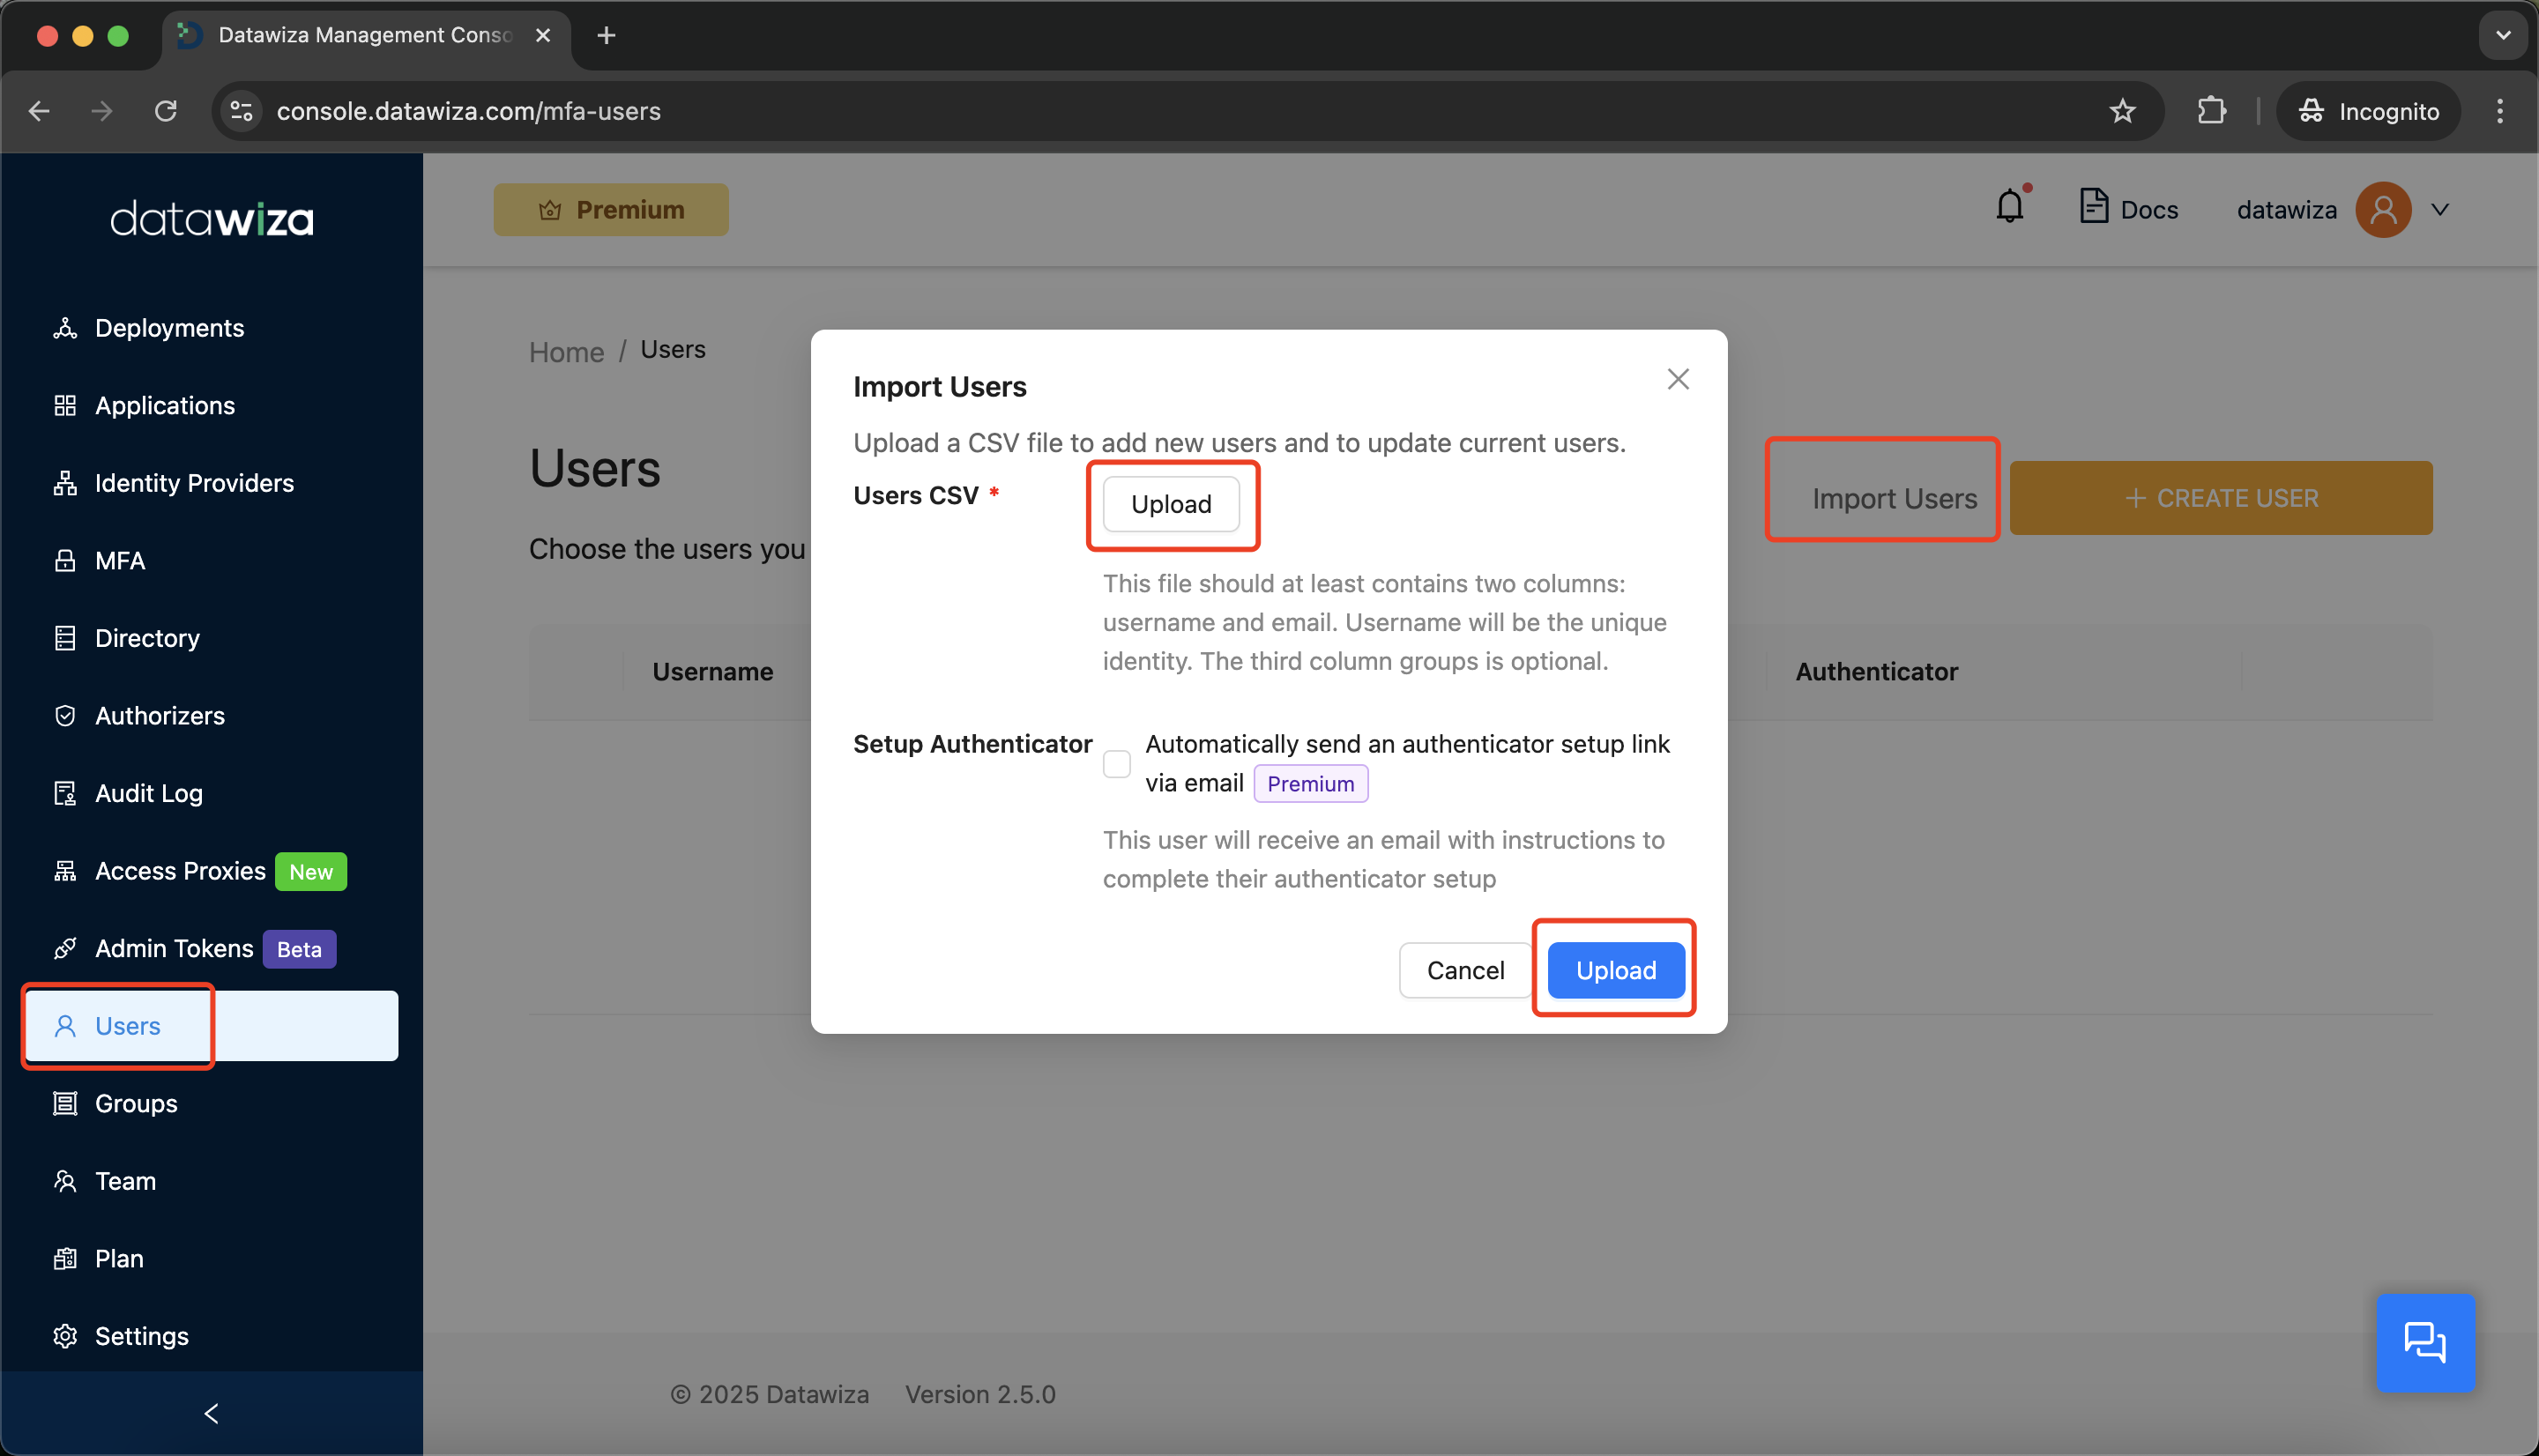
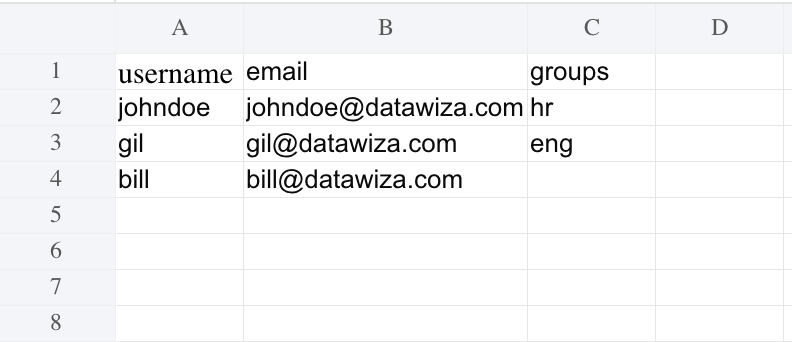
CSV Format Example
| username | groups | |
|---|---|---|
| johndoe | johndoe@datawiza.com | hr |
| gil | gil@datawiza.com | eng |
| bill | bill@datawiza.com |
- username and email are required.
- groups is optional.
Authenticator Enrollment via CSV Upload
If the "Automatically send an authenticator setup link via email" option is enabled during the CSV upload:
- Each user will receive a QR code via email.
- Their Authenticator status will be set to
Enrolled. - They will be prompted with the MFA challenge during login.
If the option is not enabled, users will have an Authenticator status of
No Authenticator.- These users will be required to complete enrollment upon their first login to Oracle EBS.
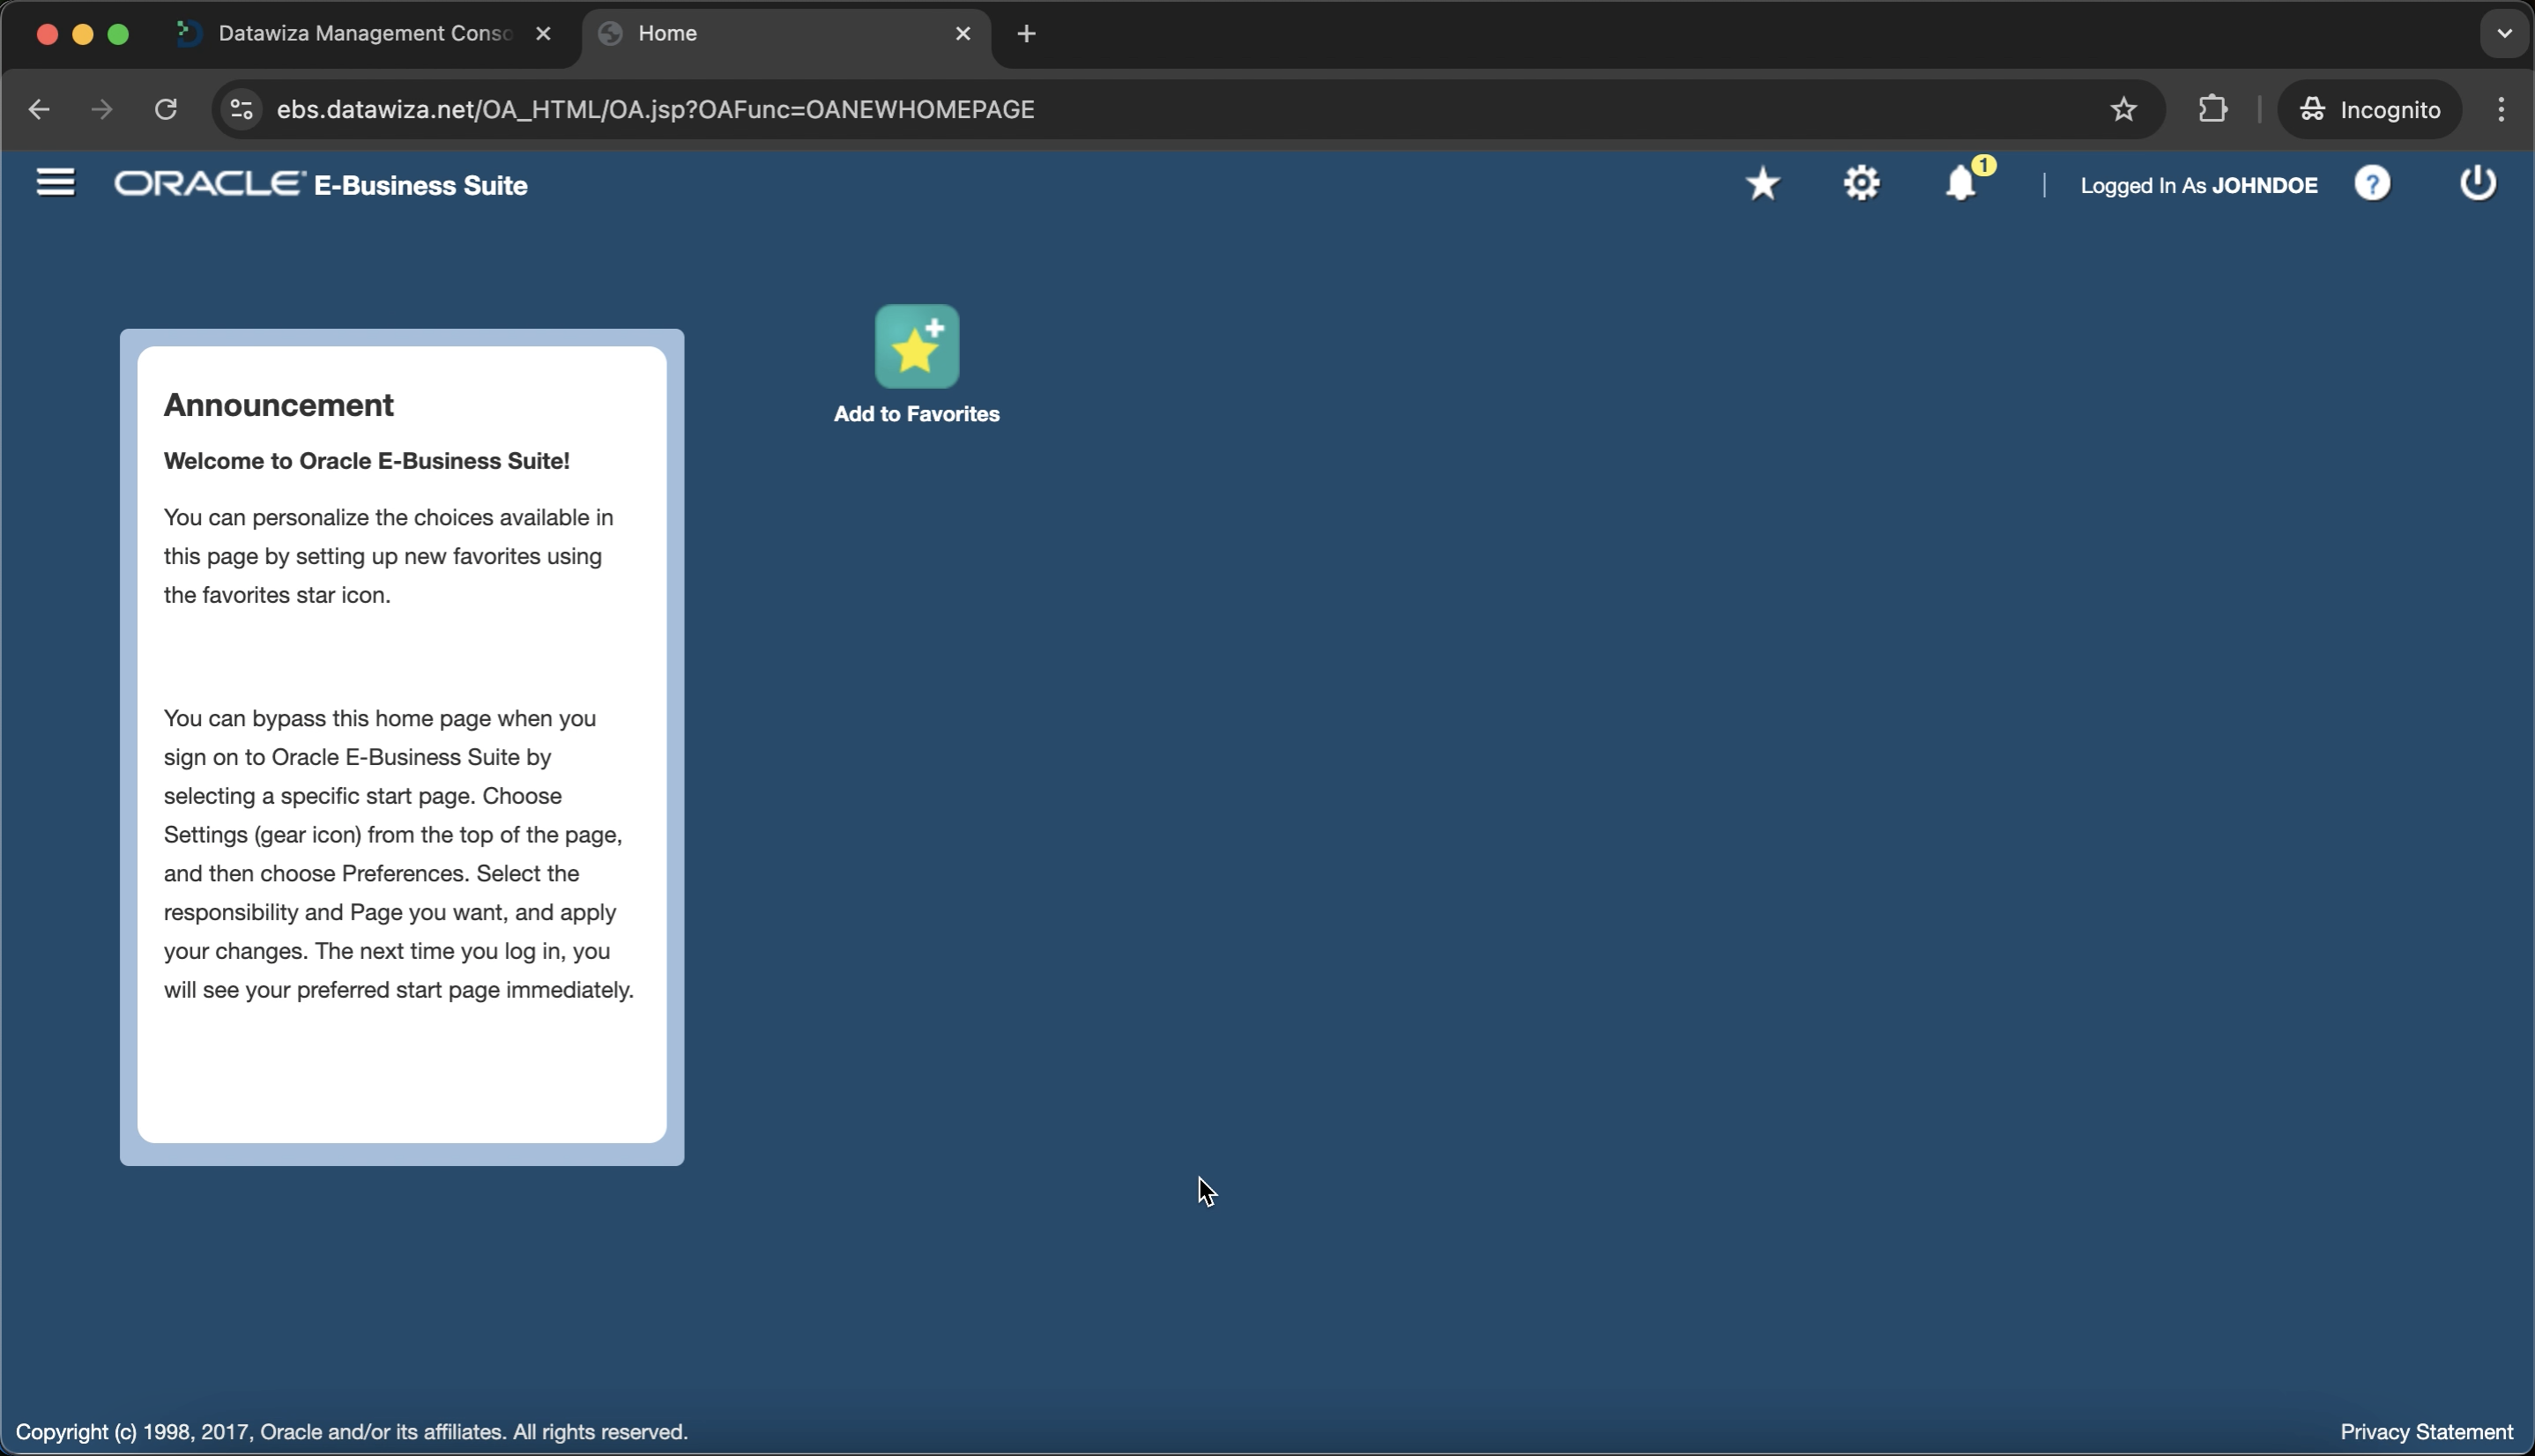
Part III: Verify MFA (2FA) for Oracle EBS
Open a browser and visit: https://ebs.datawiza.net/
You'll be redirected to the EBS login page.

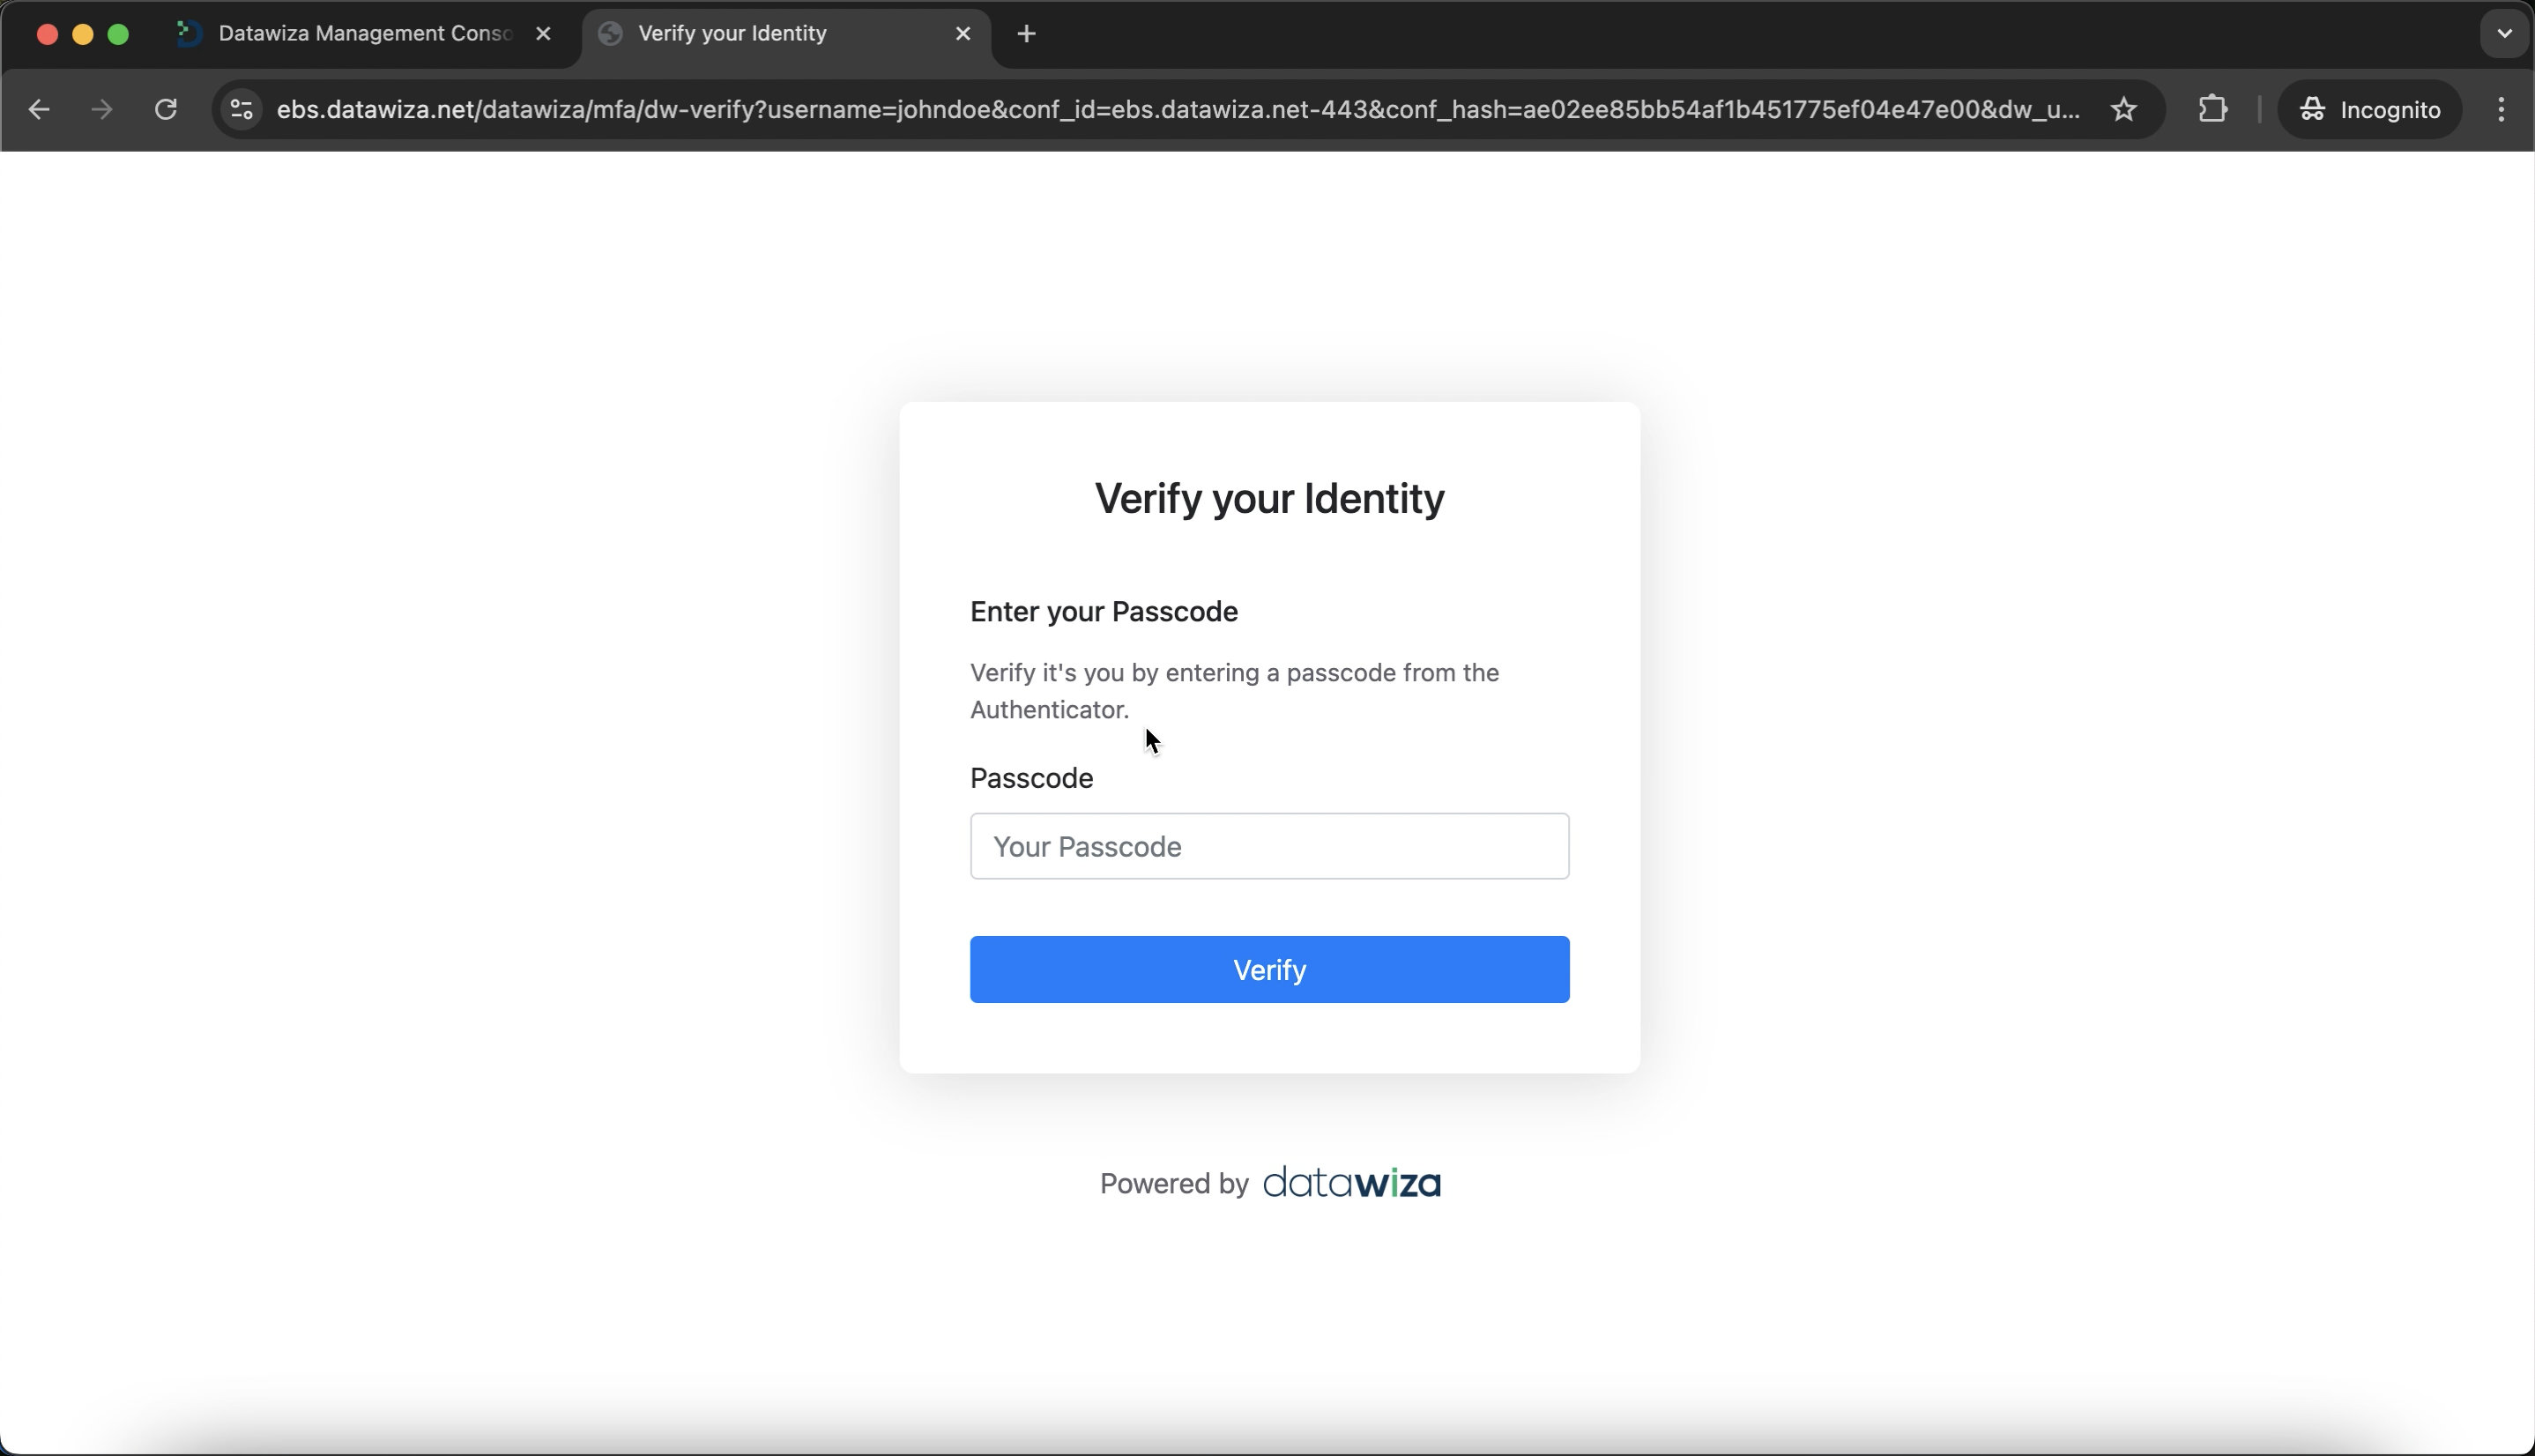
After successful login, you'll be prompted with the Datawiza MFA challenge.
 If you enable the JIT user provisioning, newly authenticated users will see the enrollment page immediately after login:
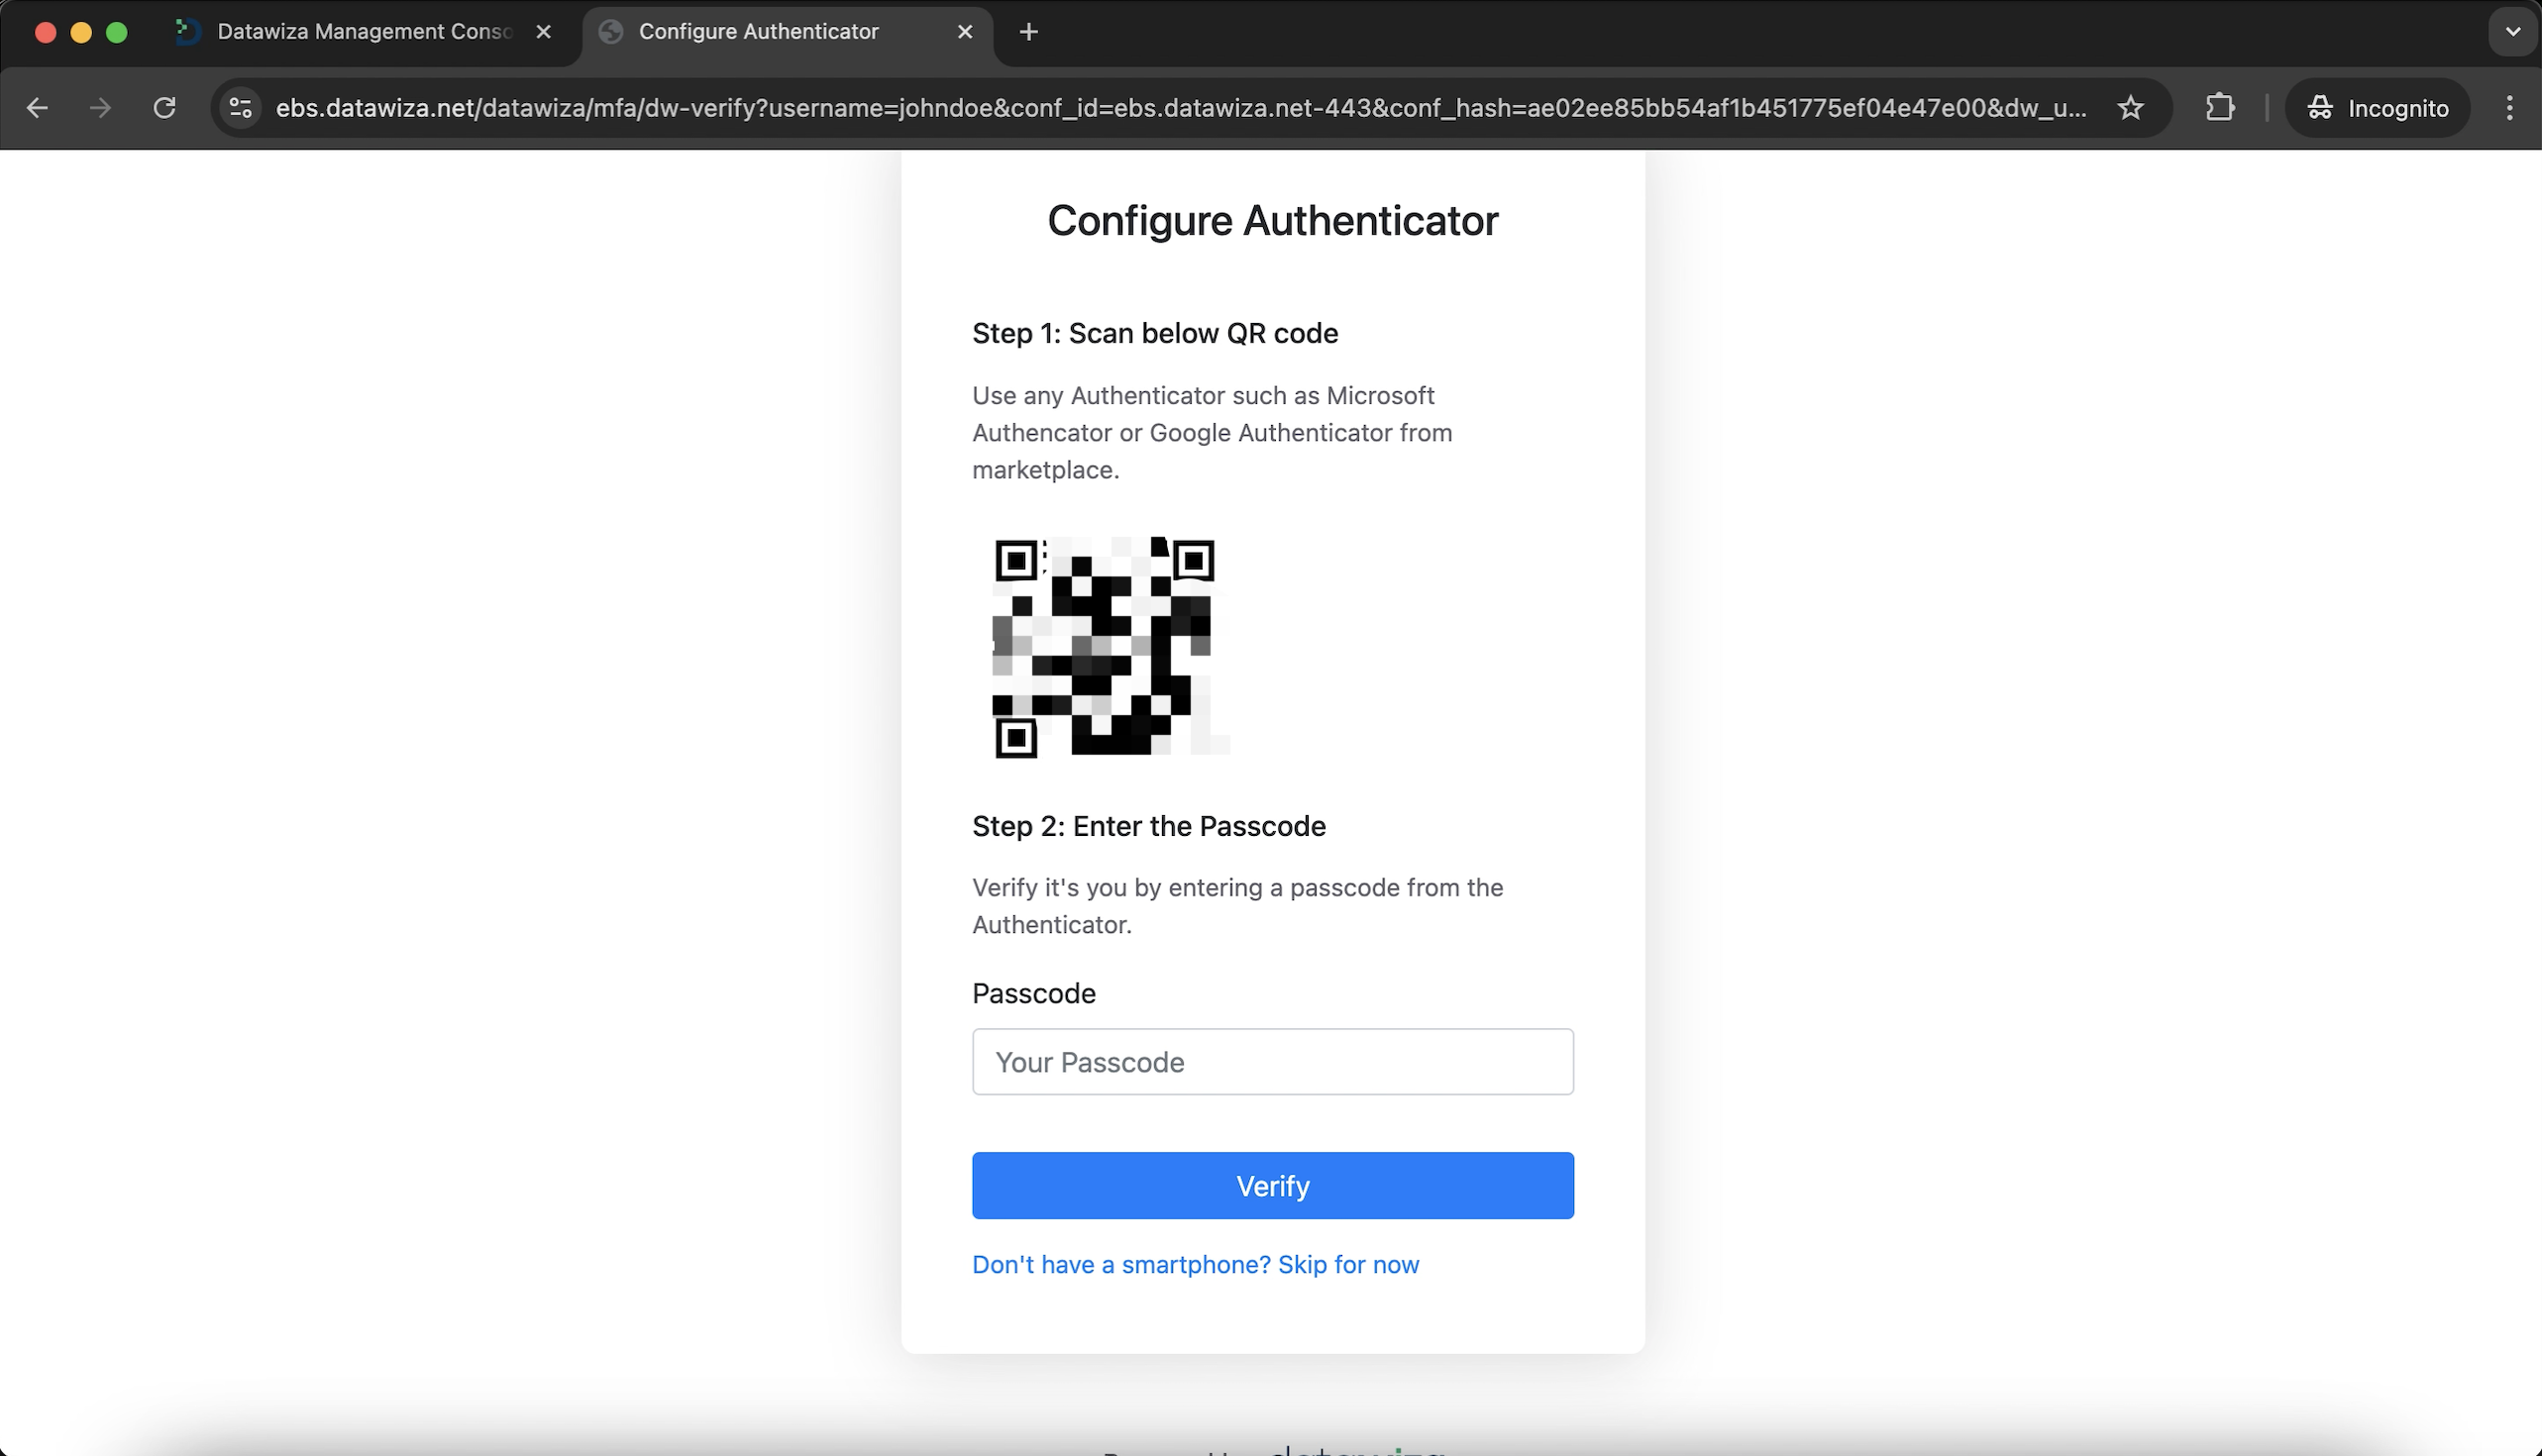
After the user successfully completes MFA, they should be able to access Oracle EBS as usual.