Enable Duo 2FA for SSO with On-Premise AD through Datawiza
Overview
This document provides step-by-step instructions on how to set up and configure Datawiza Cloud Management Console (DCMC) with Duo Multi-Factor Authentication (MFA) using an on-premise Active Directory (AD). The guide is divided into four sections:
Duo Configuration - This section outlines how to configure AD as the Authentication Source for Duo SSO and how to create and update a Generic OIDC Relying Party application in Duo.
DCMC Configuration - Here, we show you how to create an application on DCMC and generate a key pair (PROVISIONING_KEY and PROVISIONING_SECRET) used by the Datawiza Access Proxy (DAP).
Running DAP with a Header-Based Application - This part provides guidance on deploying Docker and DAP for your operating system, helping you to bring your DAP online.
Testing the Application - The final part provides a practical test to ensure that your integration is functioning correctly. Here you will login using your on-premise AD account credentials, undergo Duo two-factor authentication and access a header-based app.
By the end of this guide, you will be able to incorporate Datawiza's cloud-based access management into your organization's system, and leverage Duo MFA with an on-premise Active Directory for added security.
Prerequisite
- A Duo Administrator to enable the feature
- On-premise AD
- A Datawiza Cloud Management Console (DCMC) account
- Docker and Docker-compose
Part I: Duo Configuration
Enable Duo Single Sign-On
Log in to the Duo Admin Panel and click
Single Sign-Onin the navigation bar on the left.Review the information on the "Single Sign-On" page. If you agree to the terms, check the box and then click
Activate and Start Setup.On the
Customize your SSO subdomainpage you can specify a subdomain you'd like your users to see when they are logging in with Duo Single Sign-On. For testing purposes, just clickComplete laterto skip this step for now.On the
Add Authentication Sourcepage chooseActive Directoryas your authentication source. Click the button at the bottom of the option you'd like to use to add that source type, and follow the instructions in the next section.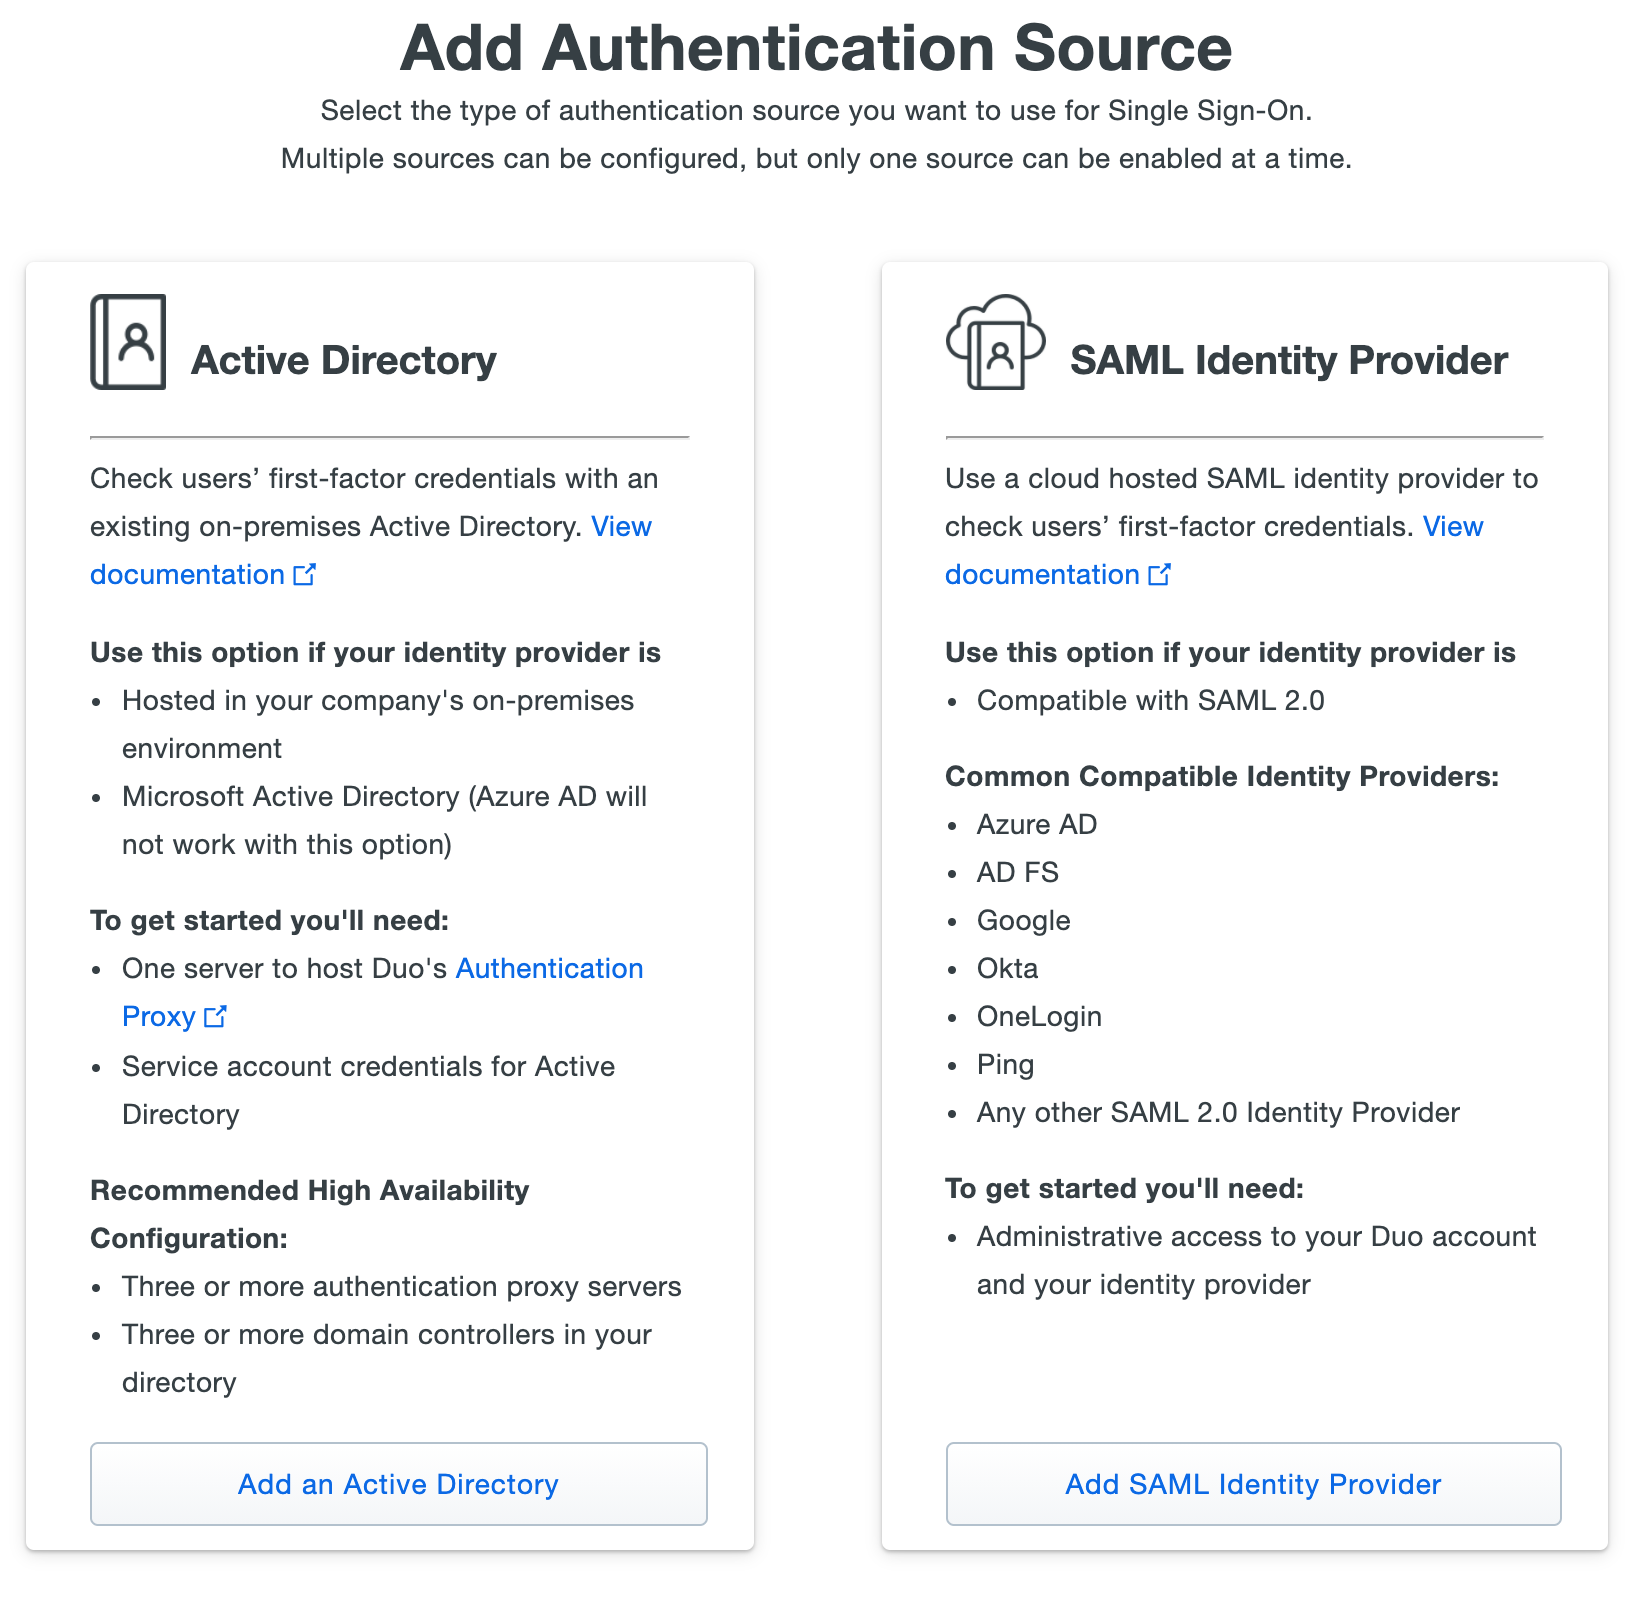
Configure Your Authentication Source
Follow the steps below to first configure an on-premises Authentication Proxy to connect to Duo Single Sign-On. You'll then configure Duo Single Sign-On to talk to your Active Directory domain controllers through the Authentication Proxy.
Install Duo Authentication Proxy
Duo Single Sign-On communicates with your Active Directory by having an Authentication Proxy installed and configured on-premises to connect Duo Single Sign-On and Active Directory together.
Install Duo Authentication Proxy 5.5.1 or higher on a Windows or Linux server following the installation instructions. If you already have a Duo Authentication Proxy that you'd like to use, you can upgrade the proxy to a supported version.
Confirm that your Authentication Proxy can communicate with your Active Directory domain controllers over LDAP/LDAPS (commonly ports 389/636).
Confirm that your Authentication Proxy has outbound internet access over port 443.
Connect Authentication Proxy to Duo Single Sign-On
On the "Active Directory Configuration" under "1. Install the Authentication Proxy" click
Add Authentication Proxy. This redirects you to a new page.You can rename your Authentication Proxy by editing the
Namefield to give it an easily identifiable name. You can add a description of the proxy in theDescriptionfield.Select the "Windows" or "Linux" tab based on your Authentication Proxy install to view platform-specific instructions.
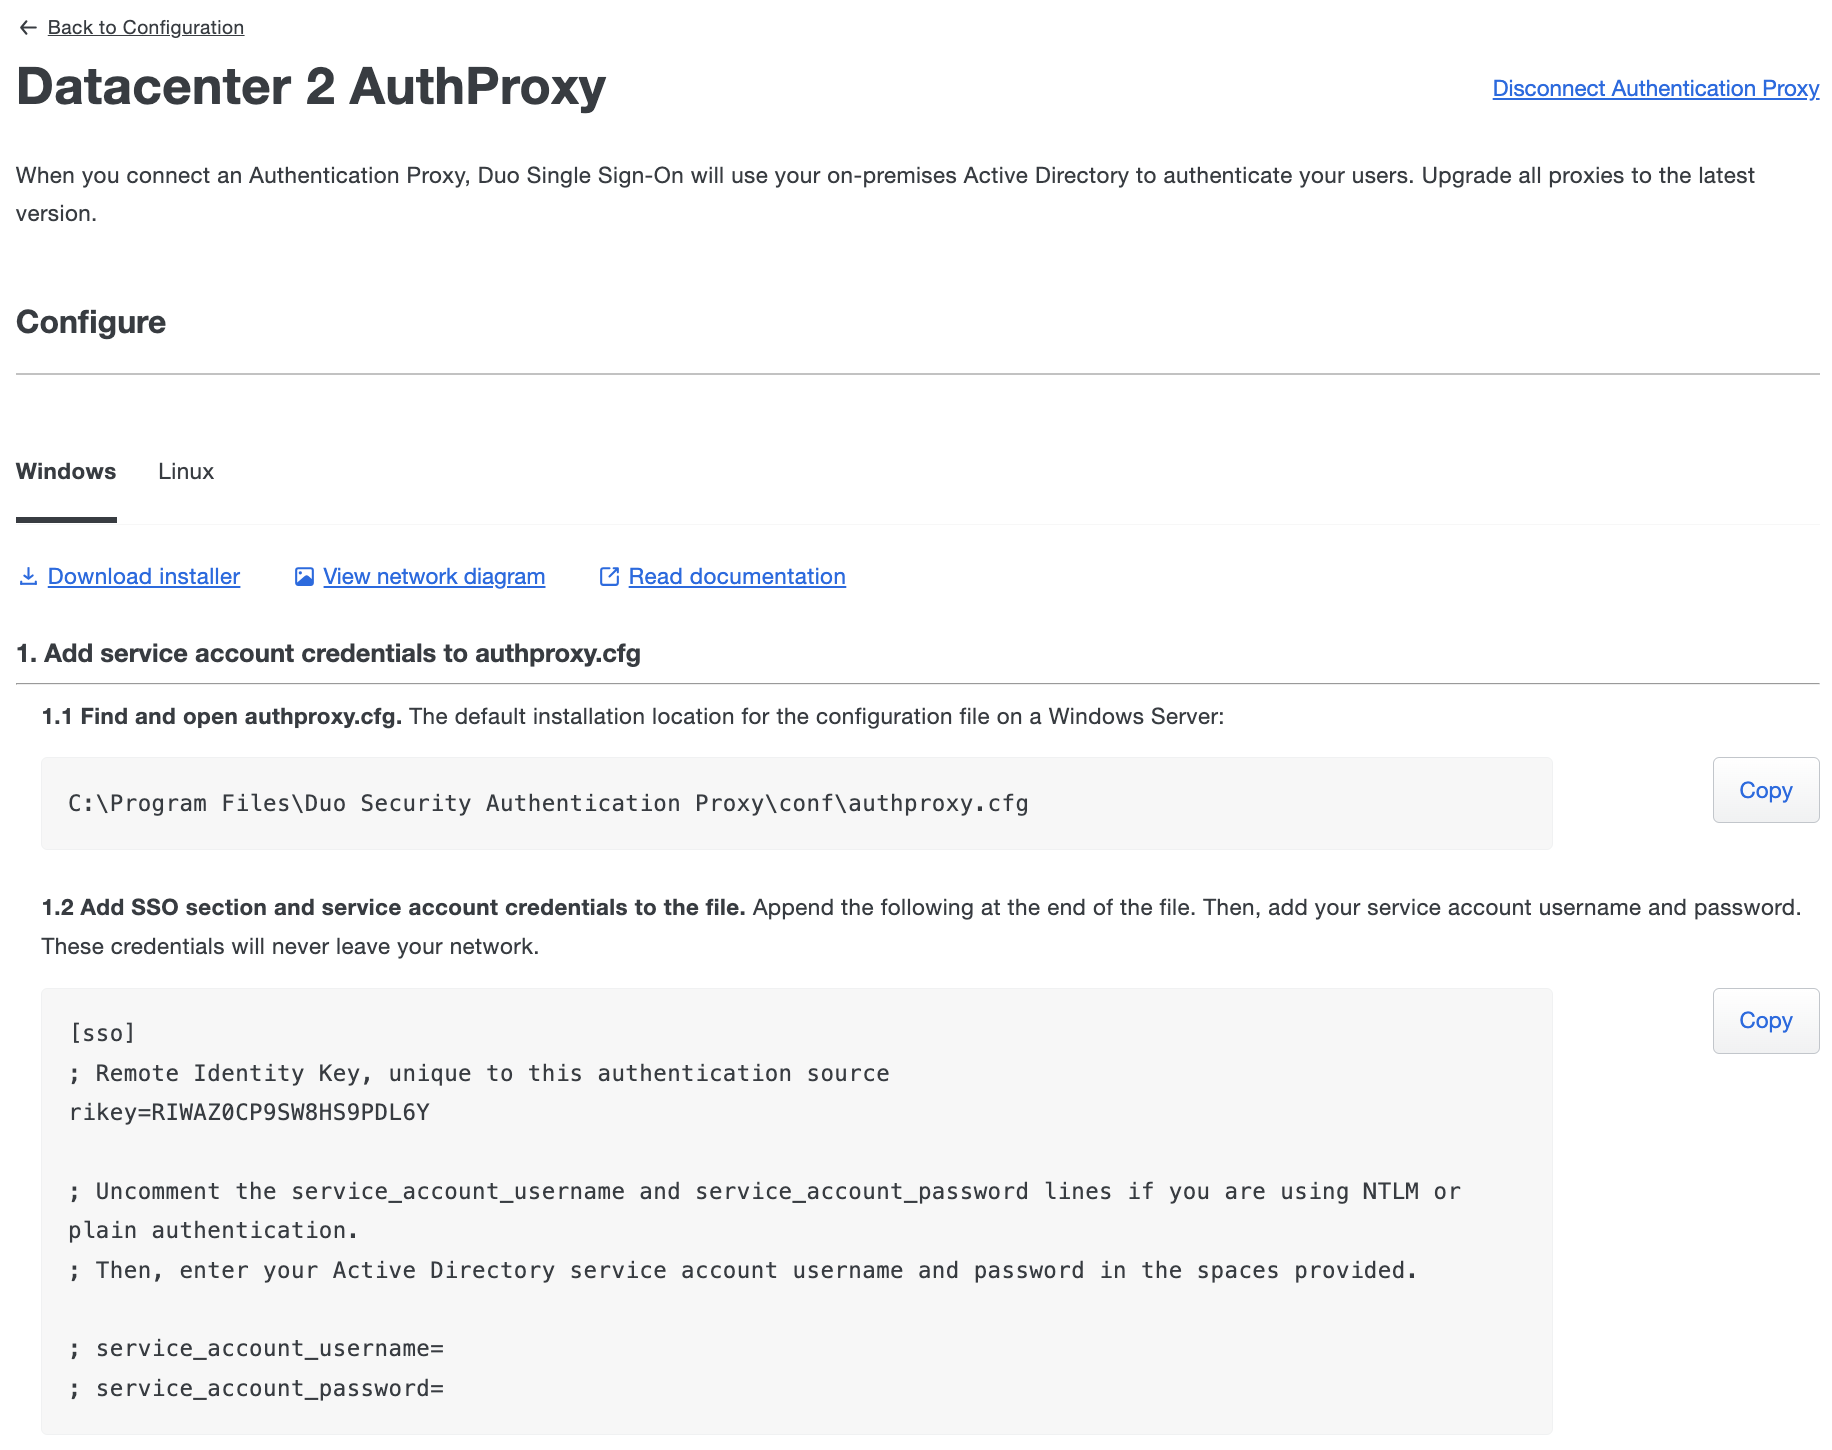
On your Authentication Proxy server locate and open the authproxy.cfg file in a text editor or the Proxy Manager application (available for Windows servers starting with Authentication Proxy version 5.6.0) with elevated permissions.
OS Path Windows C:\Program Files\Duo Security Authentication Proxy\conf Linux /opt/duoauthproxy/conf Click
Copyunder "Add service account credentials to authproxy.cfg" and append this to your authproxy.cfg file. A first time Authentication Proxy install may include an existing authproxy.cfg with some example content. For the purposes of these instructions, however, you should overwrite the existing sample content and paste in the copied data.If you plan to use NTLMv2 or Plain authentication then uncomment and populate the service_account_username and service_account_password lines with the credentials for a service account in your Active Directory. You do not need these lines in your authproxy.cfg if you plan to use Integrated authentication.
 Any service account credentials specified in the config will be ignored during user authentication if you select Integrated authentication when completing Active Directory configuration.
Save and close the authproxy.cfg file. If using the Proxy Manager for Windows, click
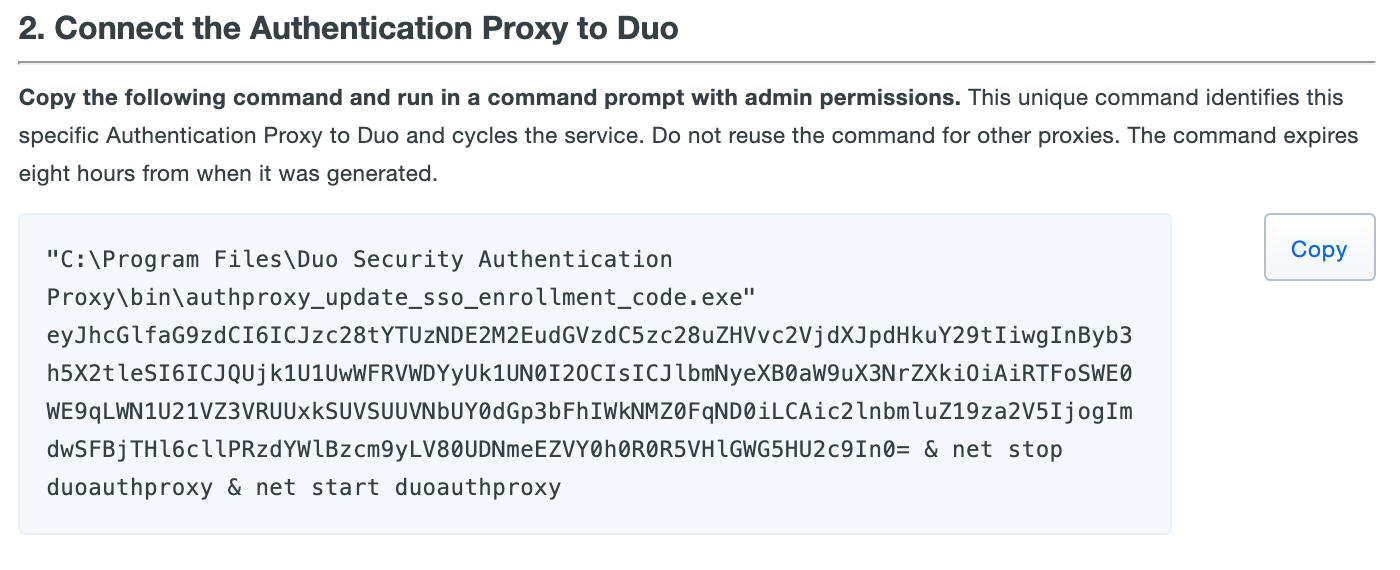
Validateto check your configuration, and then clickSavebefore closing the application.Follow the "2. Connect the Authentication Proxy to Duo" instructions shown in the Admin Panel to generate and then copy the command to run on your proxy server to connect your Authentication Proxy to Duo Single Sign-On. Note that the specific command syntax differs depending on whether you installed the Duo Authentication Proxy on a Windows or Linux server.
Click
Run testunder "3. Verify the proxy is connected" to confirm your Authentication Proxy is connected to Duo. If you encounter any issues check the logs on the Authentication Proxy.Once the Authentication Proxy is connected to Duo click
Return to Configurationto return to the "Active Directory Configuration" page.You can add additional Authentication Proxy servers by repeating steps 1 through 9.
The code below shows a demo Authentication Proxy configuration:
[ad_client]
host=127.0.0.1
service_account_username=datawiza_admin
service_account_password=************
search_dn=cn=Users,dc=datawiza,dc=com

[sso]
; Remote Identity Key, unique to this authentication source
rikey===************
service_account_username=cn=datawiza_admin,cn=Users,dc=datawiza,dc=com
service_account_password=************
Configure Active Directory
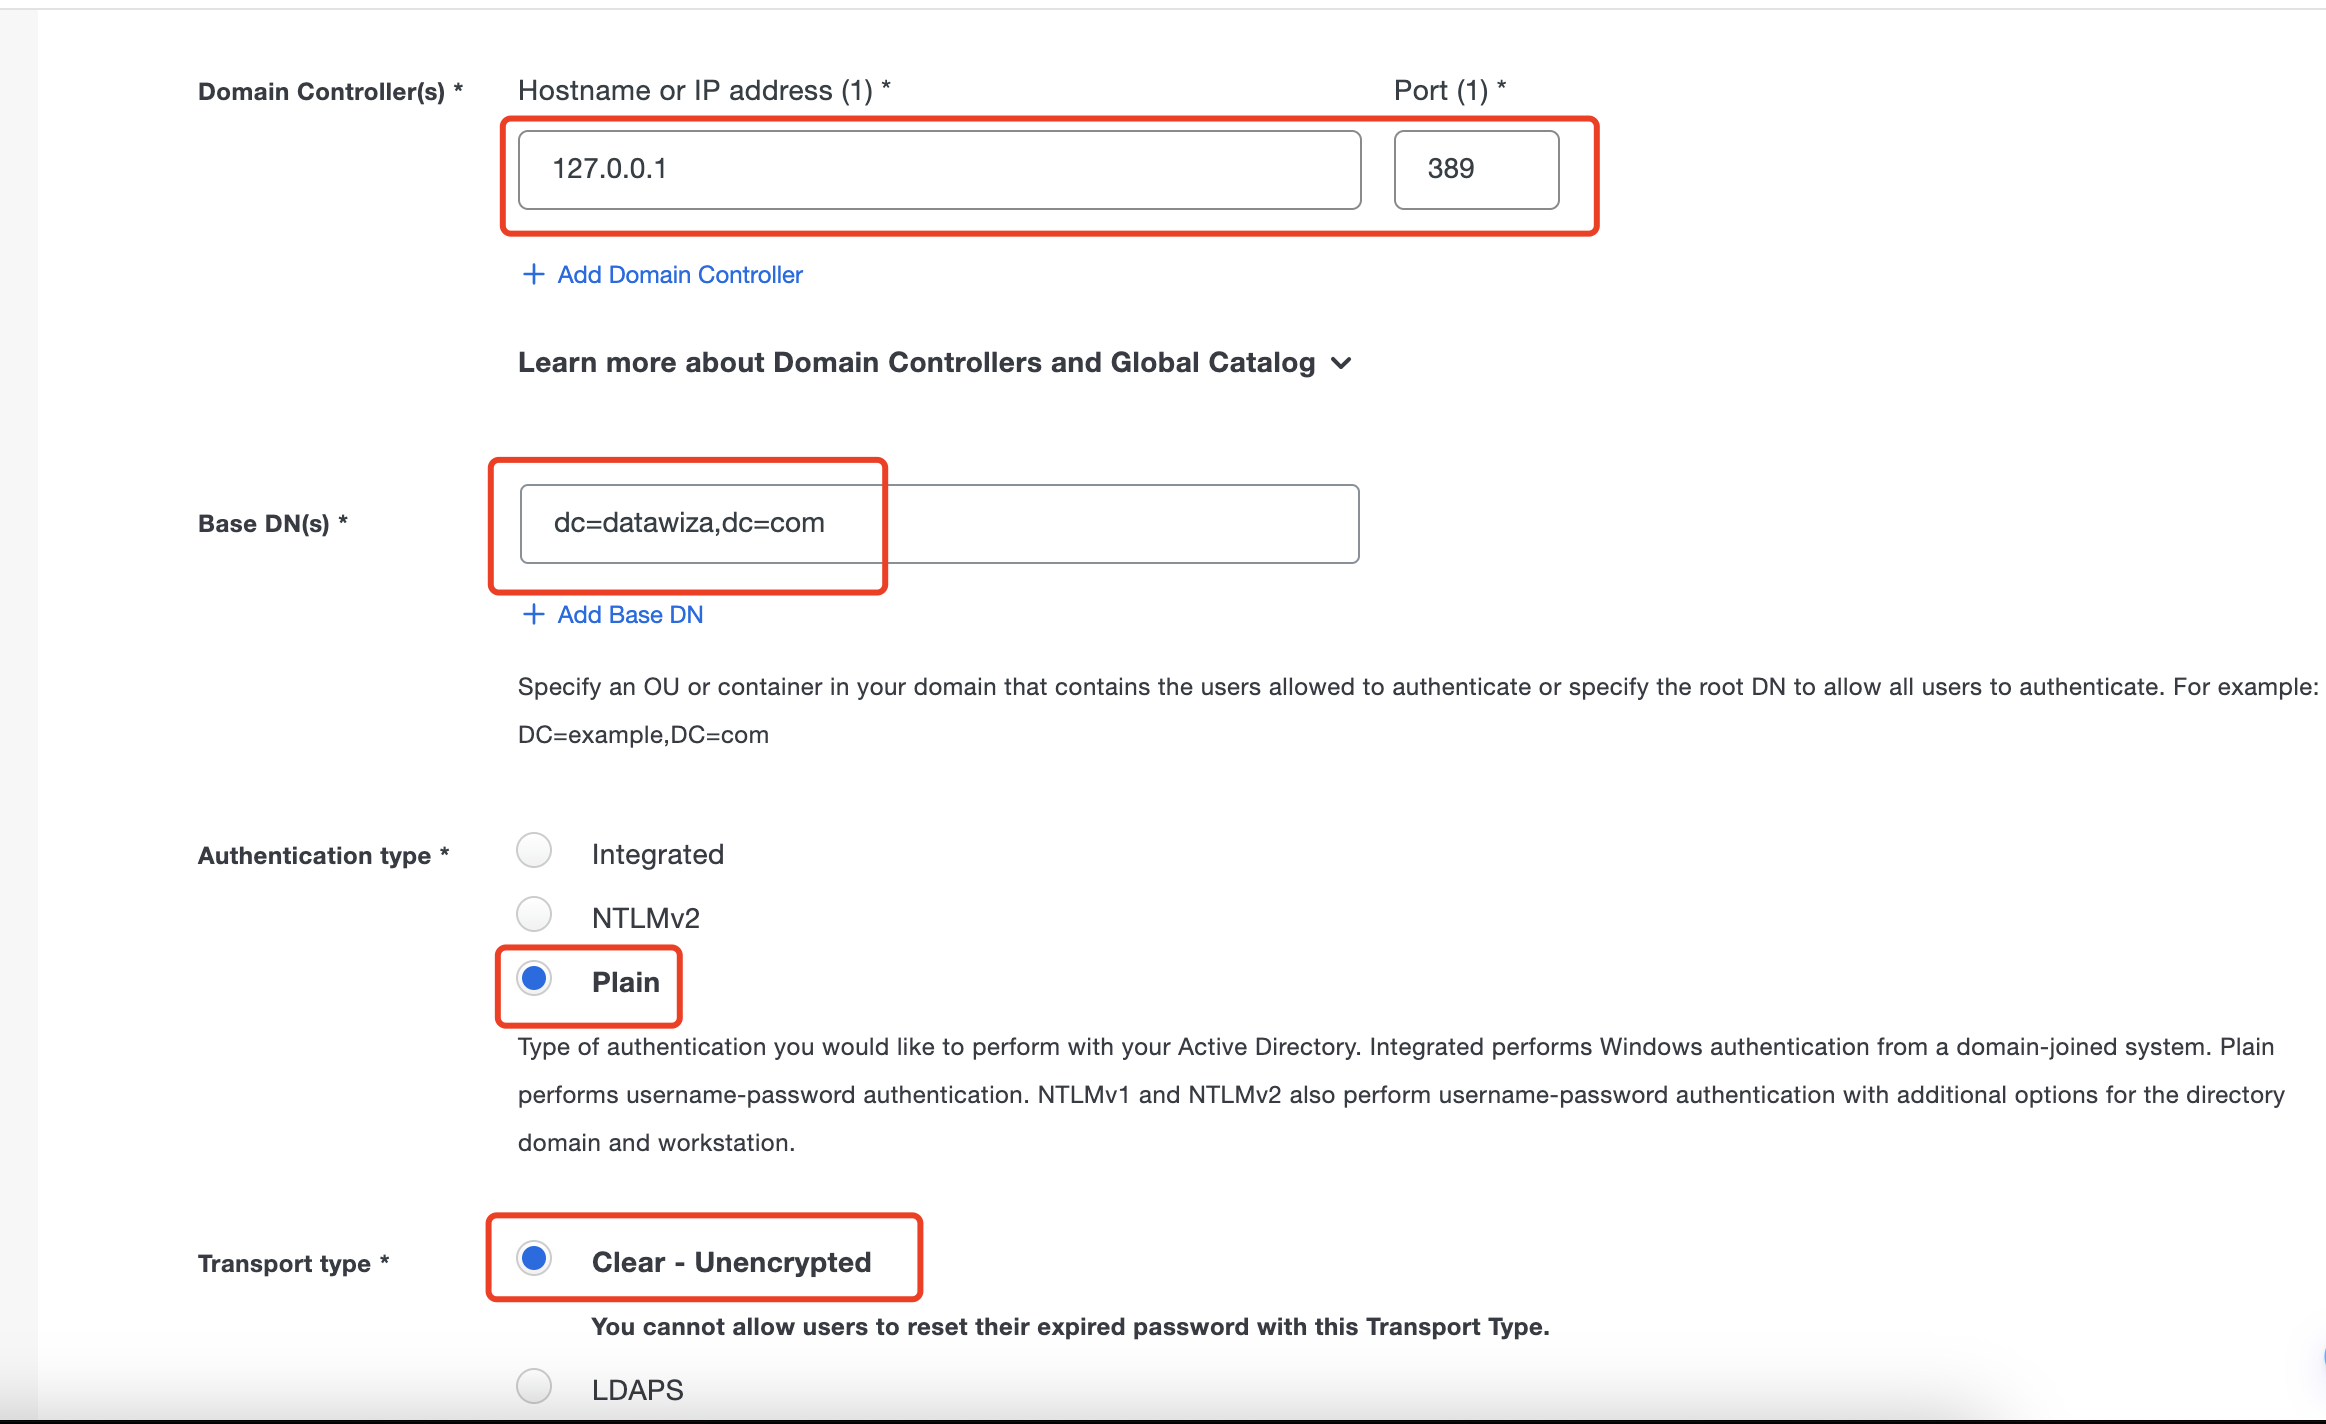
- On the "Active Directory Configuration" page scroll down to "2. Configure Active Directory" and fill out the form. And the image below shows a demo Active Directory Configuration corresponding to the demo config of Authentication Proxy above:
 The value of
 Email attributesis determined by the specific attribute from the AD you intend to use for login.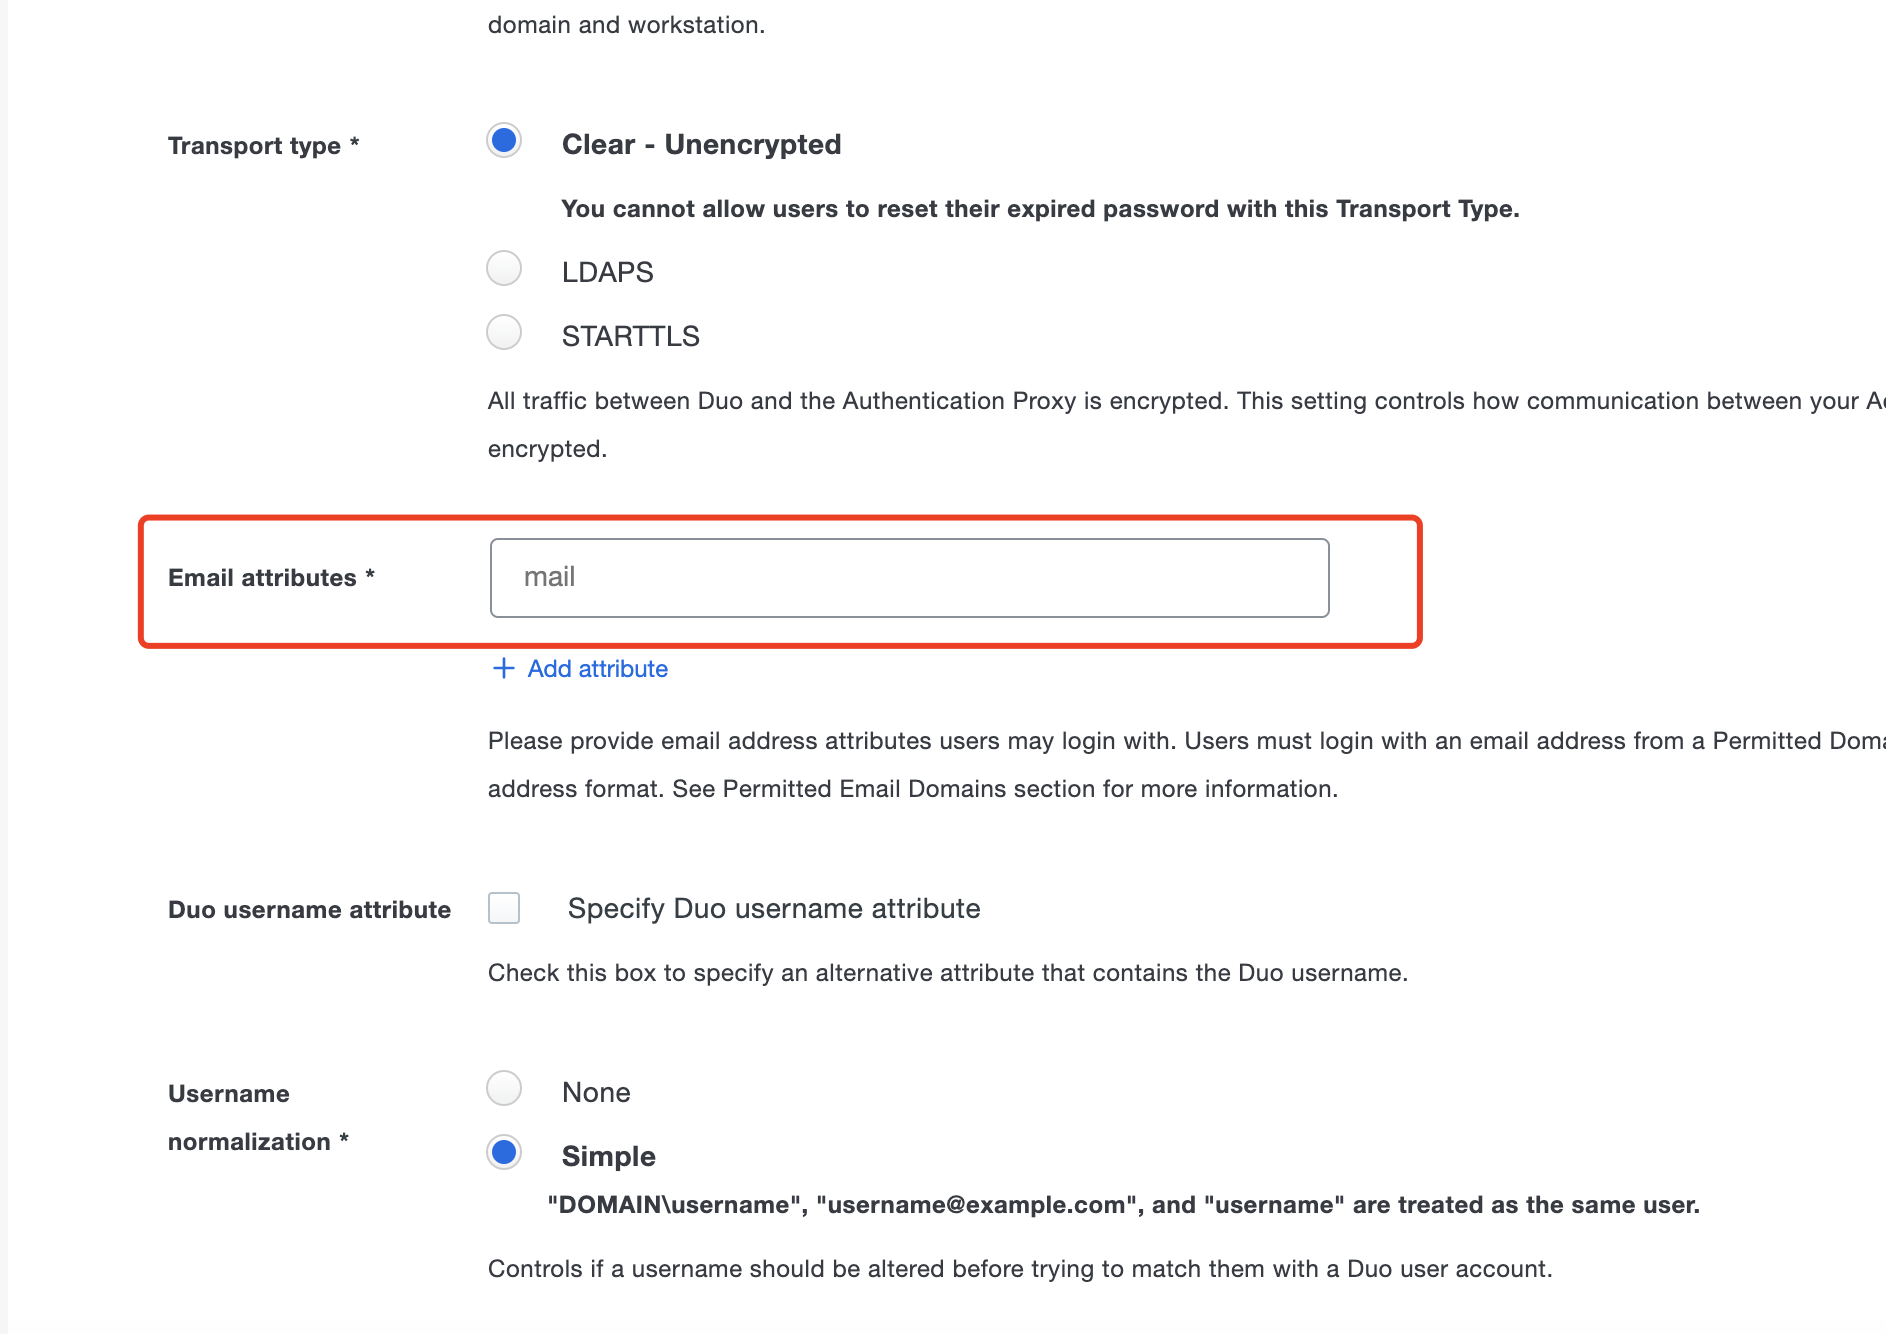 For instance, if you wish to use the
 E-mailattribute of AD for login, you must entermail.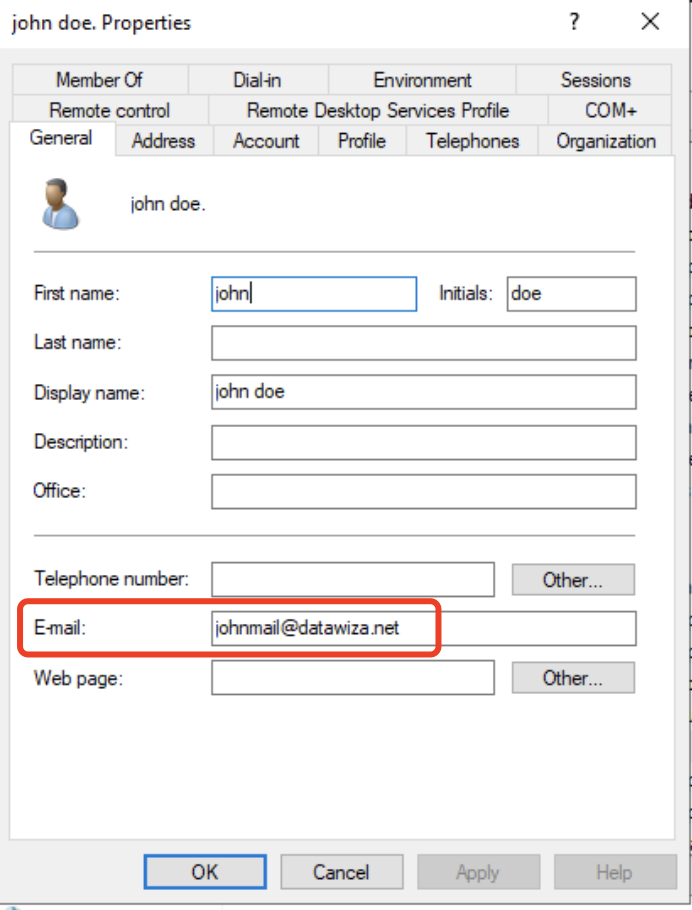 Conversely, if your preferred login attribute is the
 User logon namefrom AD, you should inputuserprincipalname.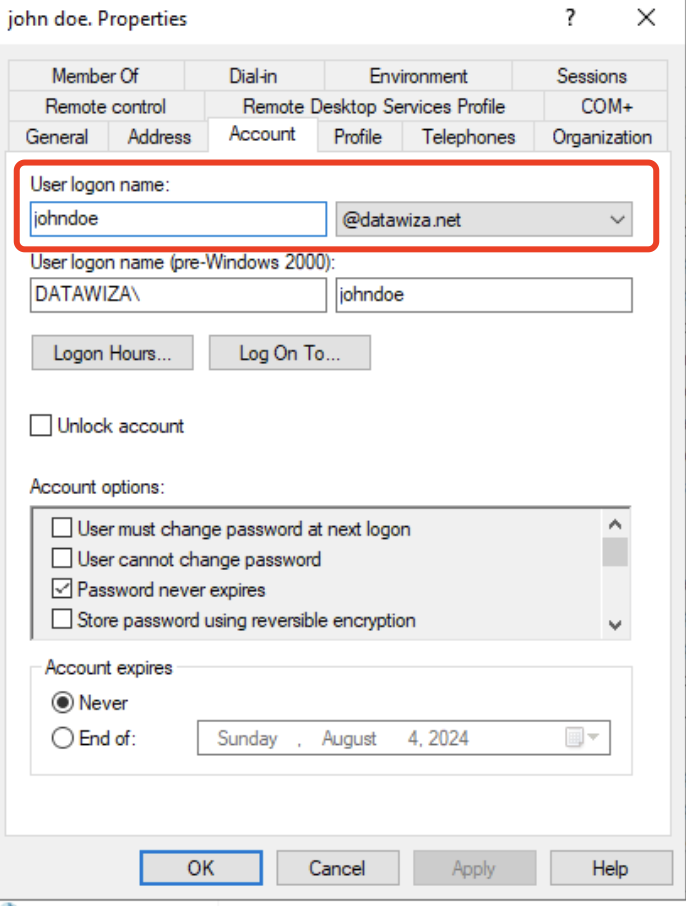 Keep everything else as the default.
Configure Permitted Email Domains
Duo Single Sign-On requires that you verify control of the email domains users will be logging in with by adding a DNS TXT record to the email domain's public (external) DNS.
When a user attempts to log in with an email address that has not been verified by their organization, the authentication will be rejected and the user's credentials will not be sent to the Authentication Proxy for verification. This prevents your users from accidentally exposing their credentials to a Duo Single Sign-On not owned by your organization.
Type in the domain name of an email address that users from your organization will use to log in. Example: If your email address is
username@datawiza.nettypedatawiza.netunder step 1 and click Add.
A table appears showing the domain name you just added, along with additional information about the DNS TXT record that needs to be created.
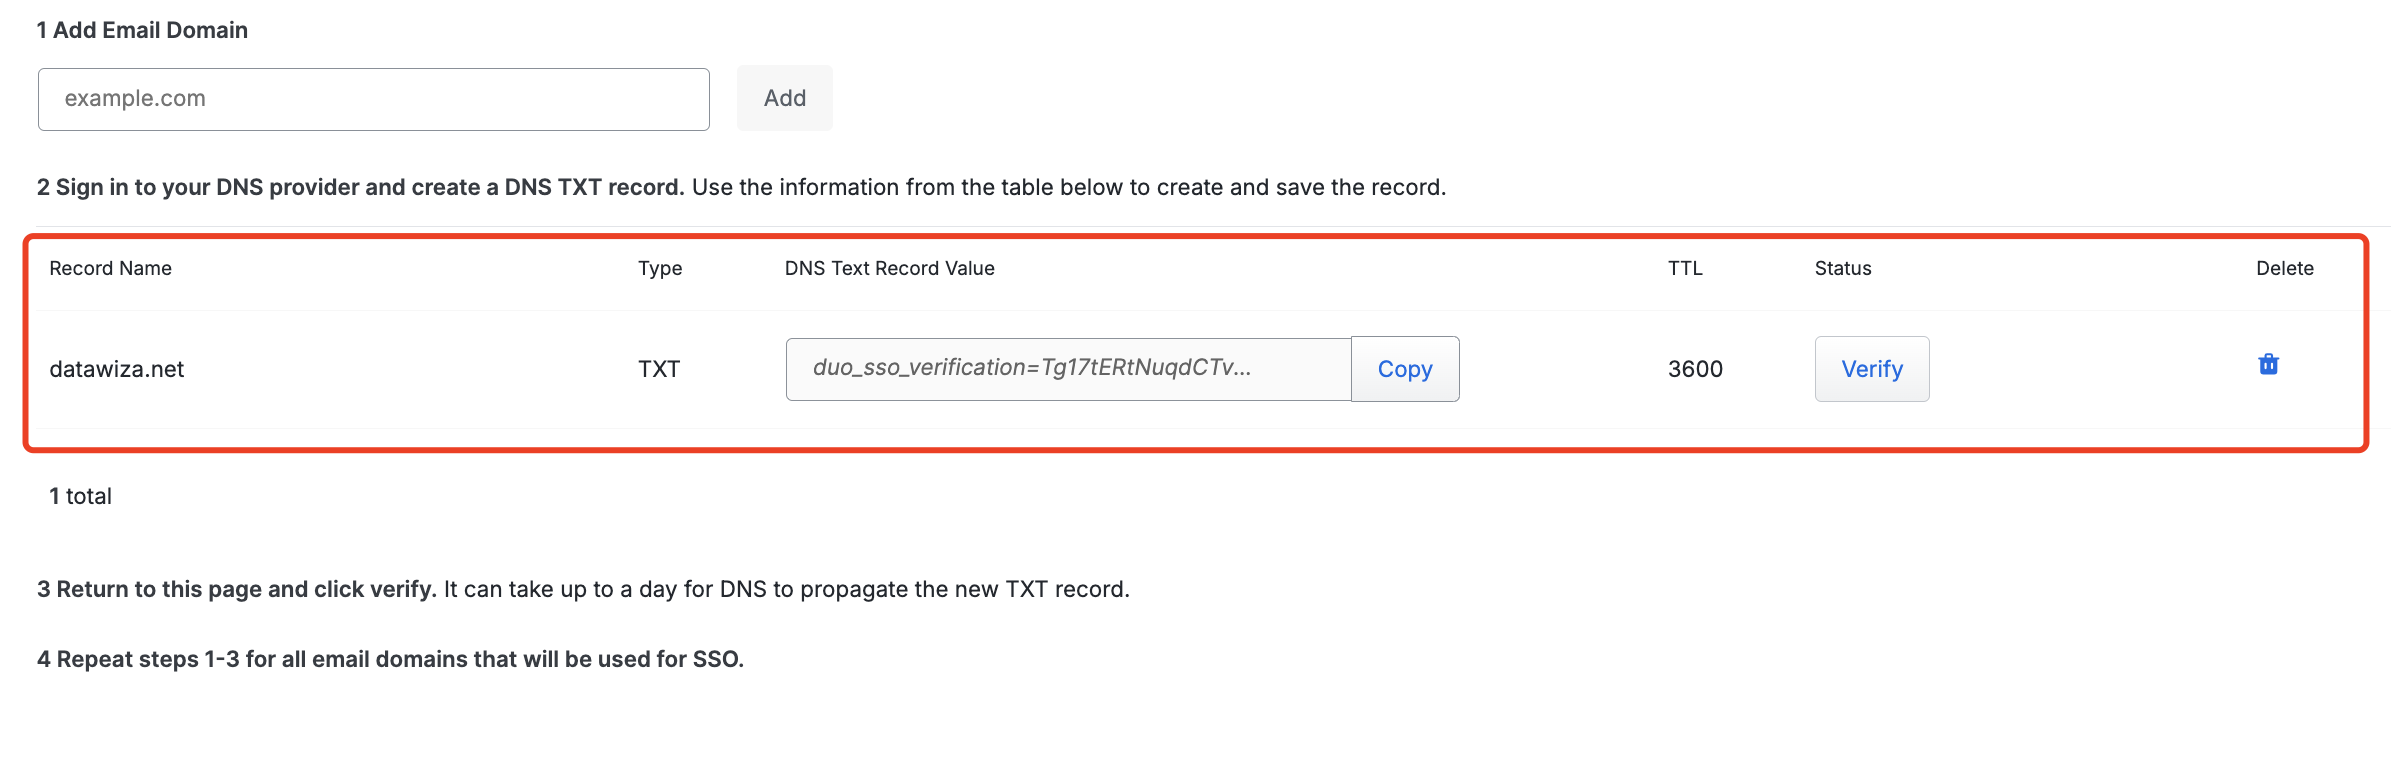
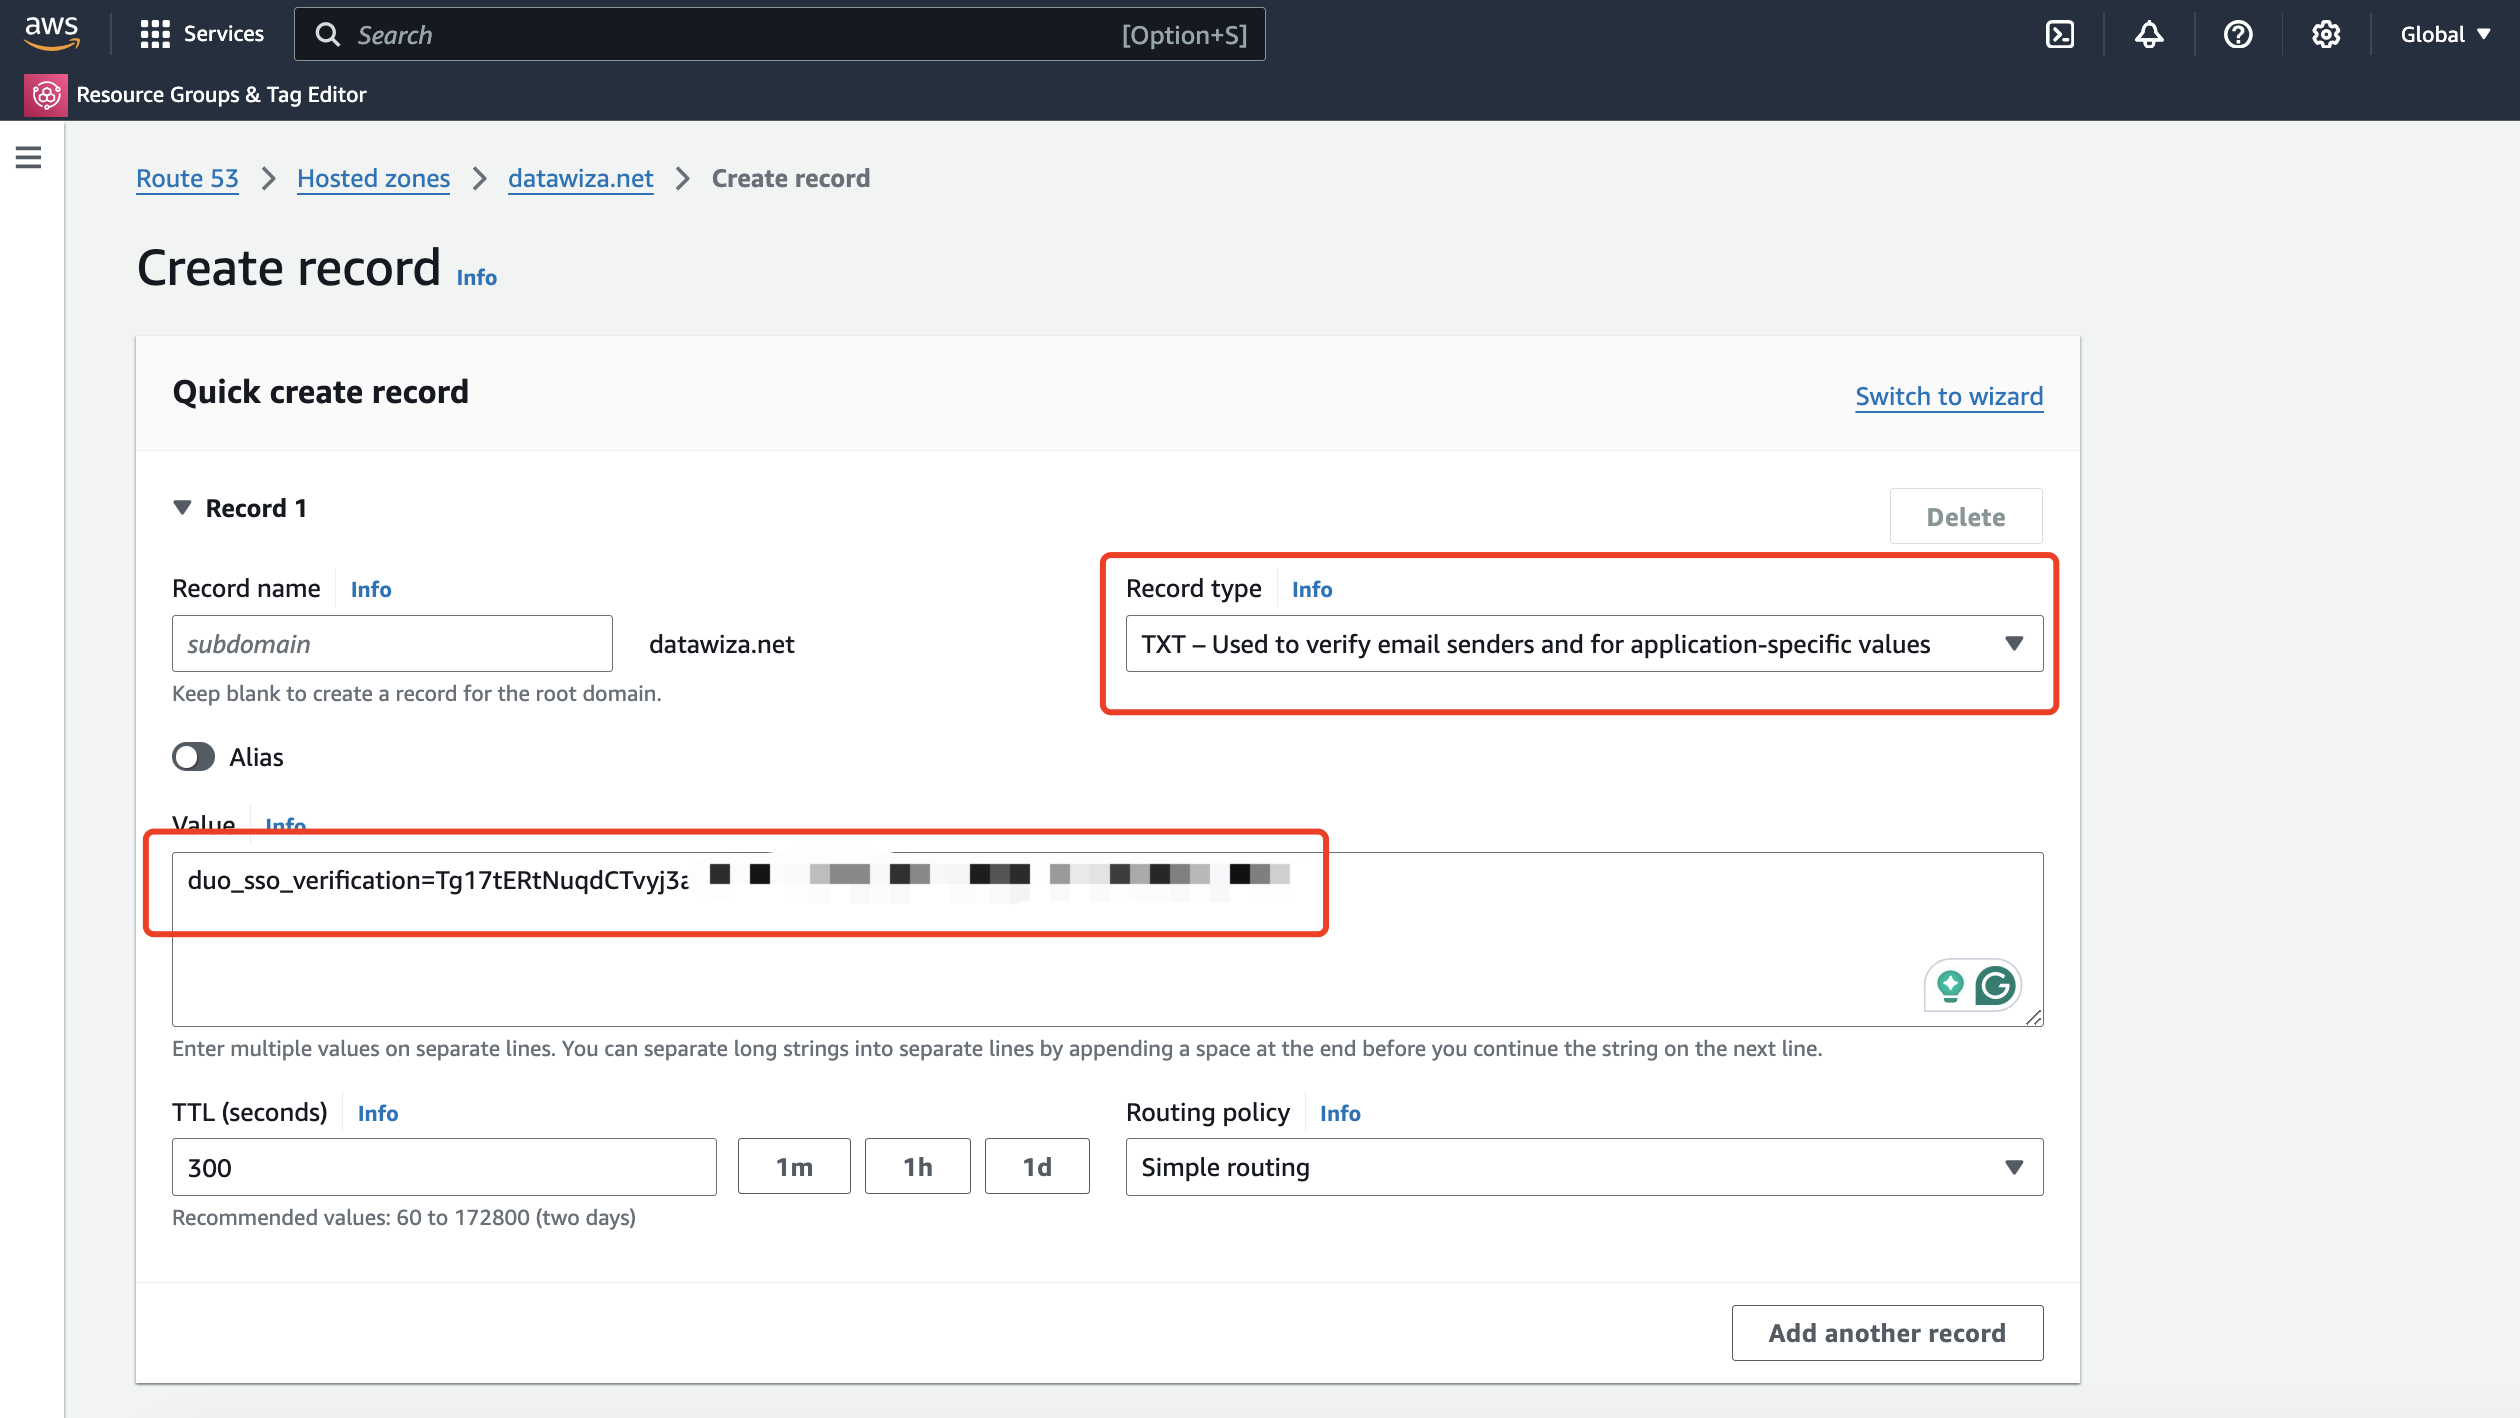
Log into your DNS provider and create a DNS TXT record for the domain you just added in Record Name (eg. datawiza.net) with the value in the corresponding DNS Text Record Value column. We use AWS Route 53 here as the example:
Once your DNS record has been created, return to the Duo Admin Panel and click the Verify button under the Status column. Duo's service queries your public DNS for the expected new TXT record.
Once the record has been verified the Status column will change to
Verified. Users using the verified domain will now be able to log into Duo Single Sign-On.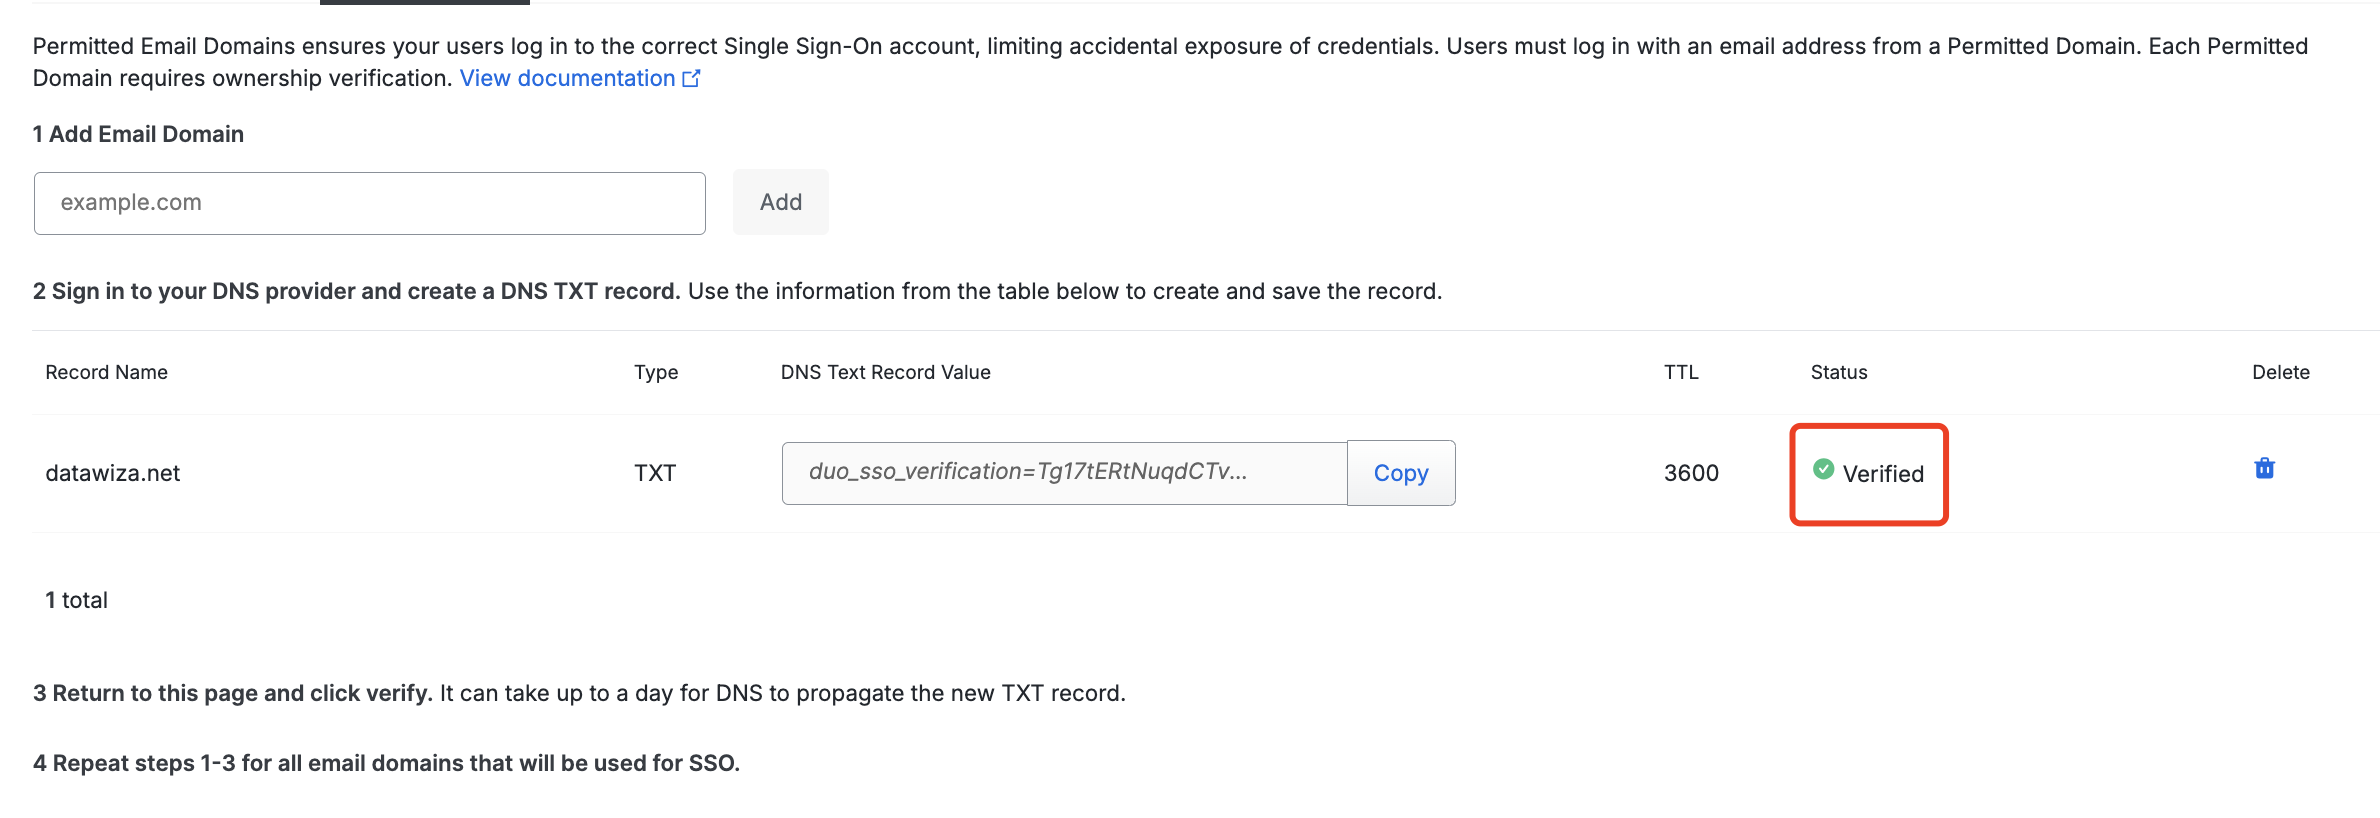
Test Your Setup
Under "Test Active Directory Configuration" click
Run tests. This will test connections between Duo Single Sign-On, your Authentication Proxy server(s), and your Active Directory. It will only report the status of an individual connection if there is an error. If you encounter an error, make the appropriate changes and click Run tests again.Click
Save.
Create Your Cloud Application in Duo
Navigate to
Applications.Click
Protect an Applicationand locate the entry forGeneric OIDC Relying Partywith a protection type of "2FA with SSO hosted by Duo (Single Sign-On)" in the applications list. Click Protect to the far-right to start configuring Generic OIDC Relying Party.
Update Your Cloud Application in Duo
After creating the application, make sure to write down the Client ID, Client Secret, and Issuer. You will need this information to configure in DCMC. 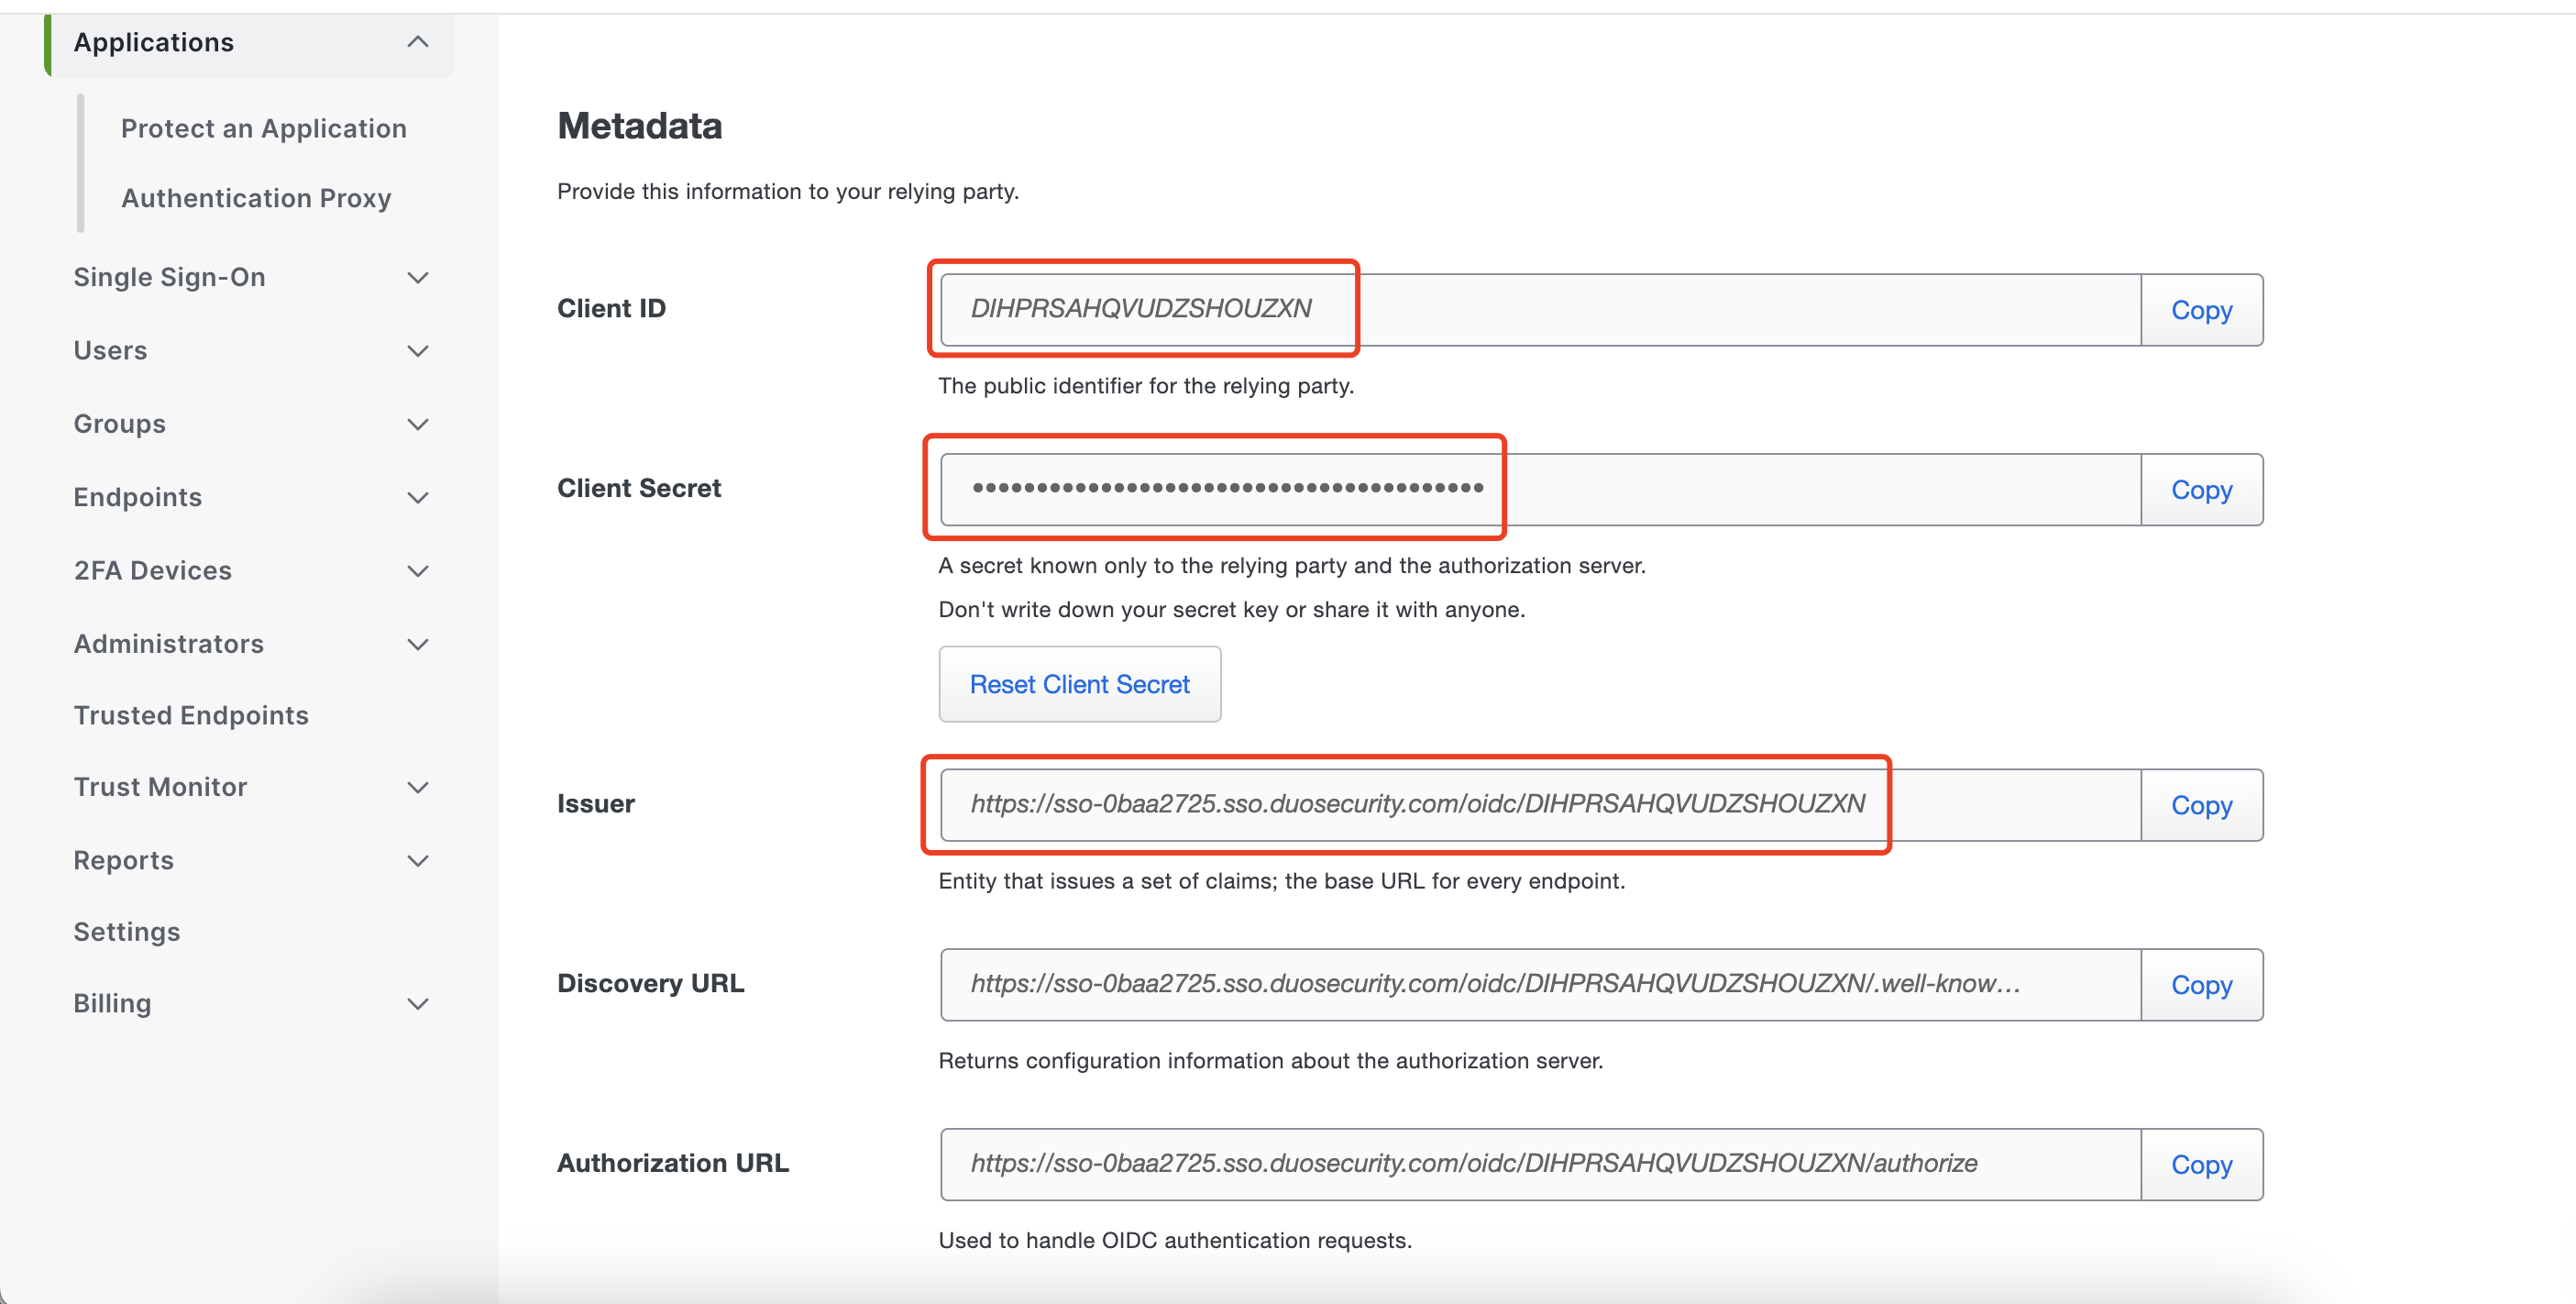 As DAP will function on
 localhost:9772, so we need to add http://localhost:9772/datawiza/authorization-code/callback as the Sign-In Redirect URLs:  Add needed scopes:
 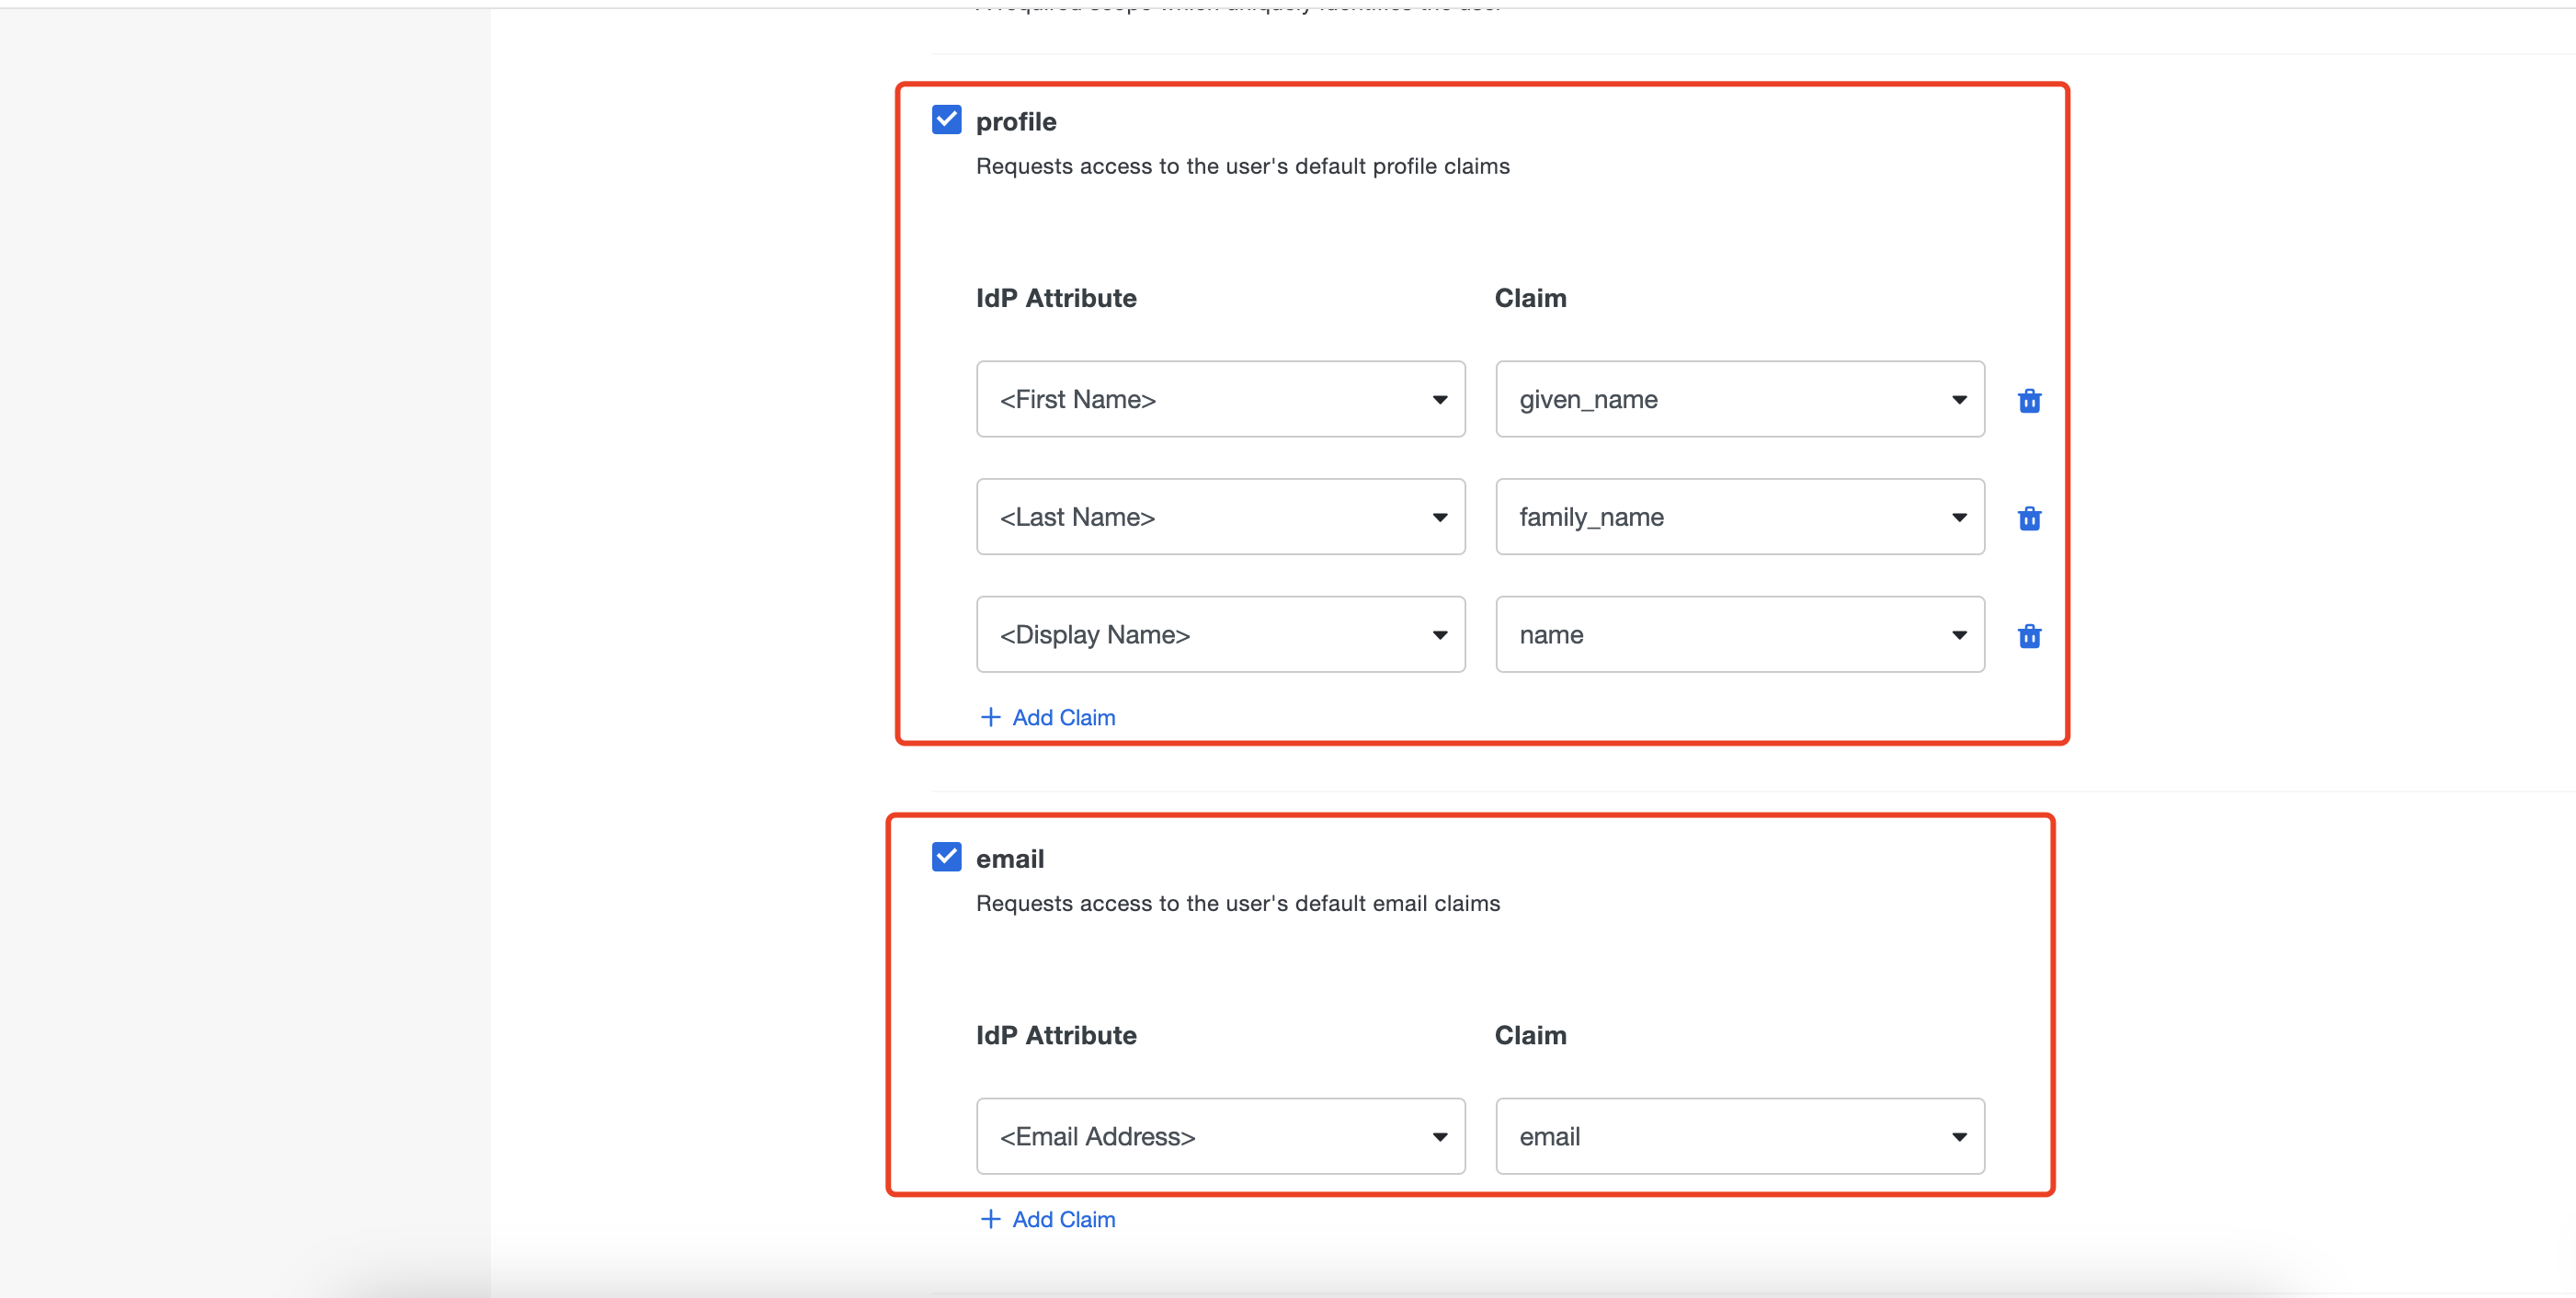 Scroll down to the bottom of the page and click Save.
Part II: Datawiza Cloud Management Console (DCMC) Configuration
In this section, we will show you how to create an application on the Datawiza Cloud Management Console (DCMC) and generate a pair of PROVISIONING_KEY and PROVISIONING_SECRET for this app. This key pair is used by the DAP to get the latest configurations and policies from the DCMC.
Sign Into DCMC
- Log into the DCMC.
Create New Deployment In DCMC
Welcome to the DCMC homepage! Let's get started:
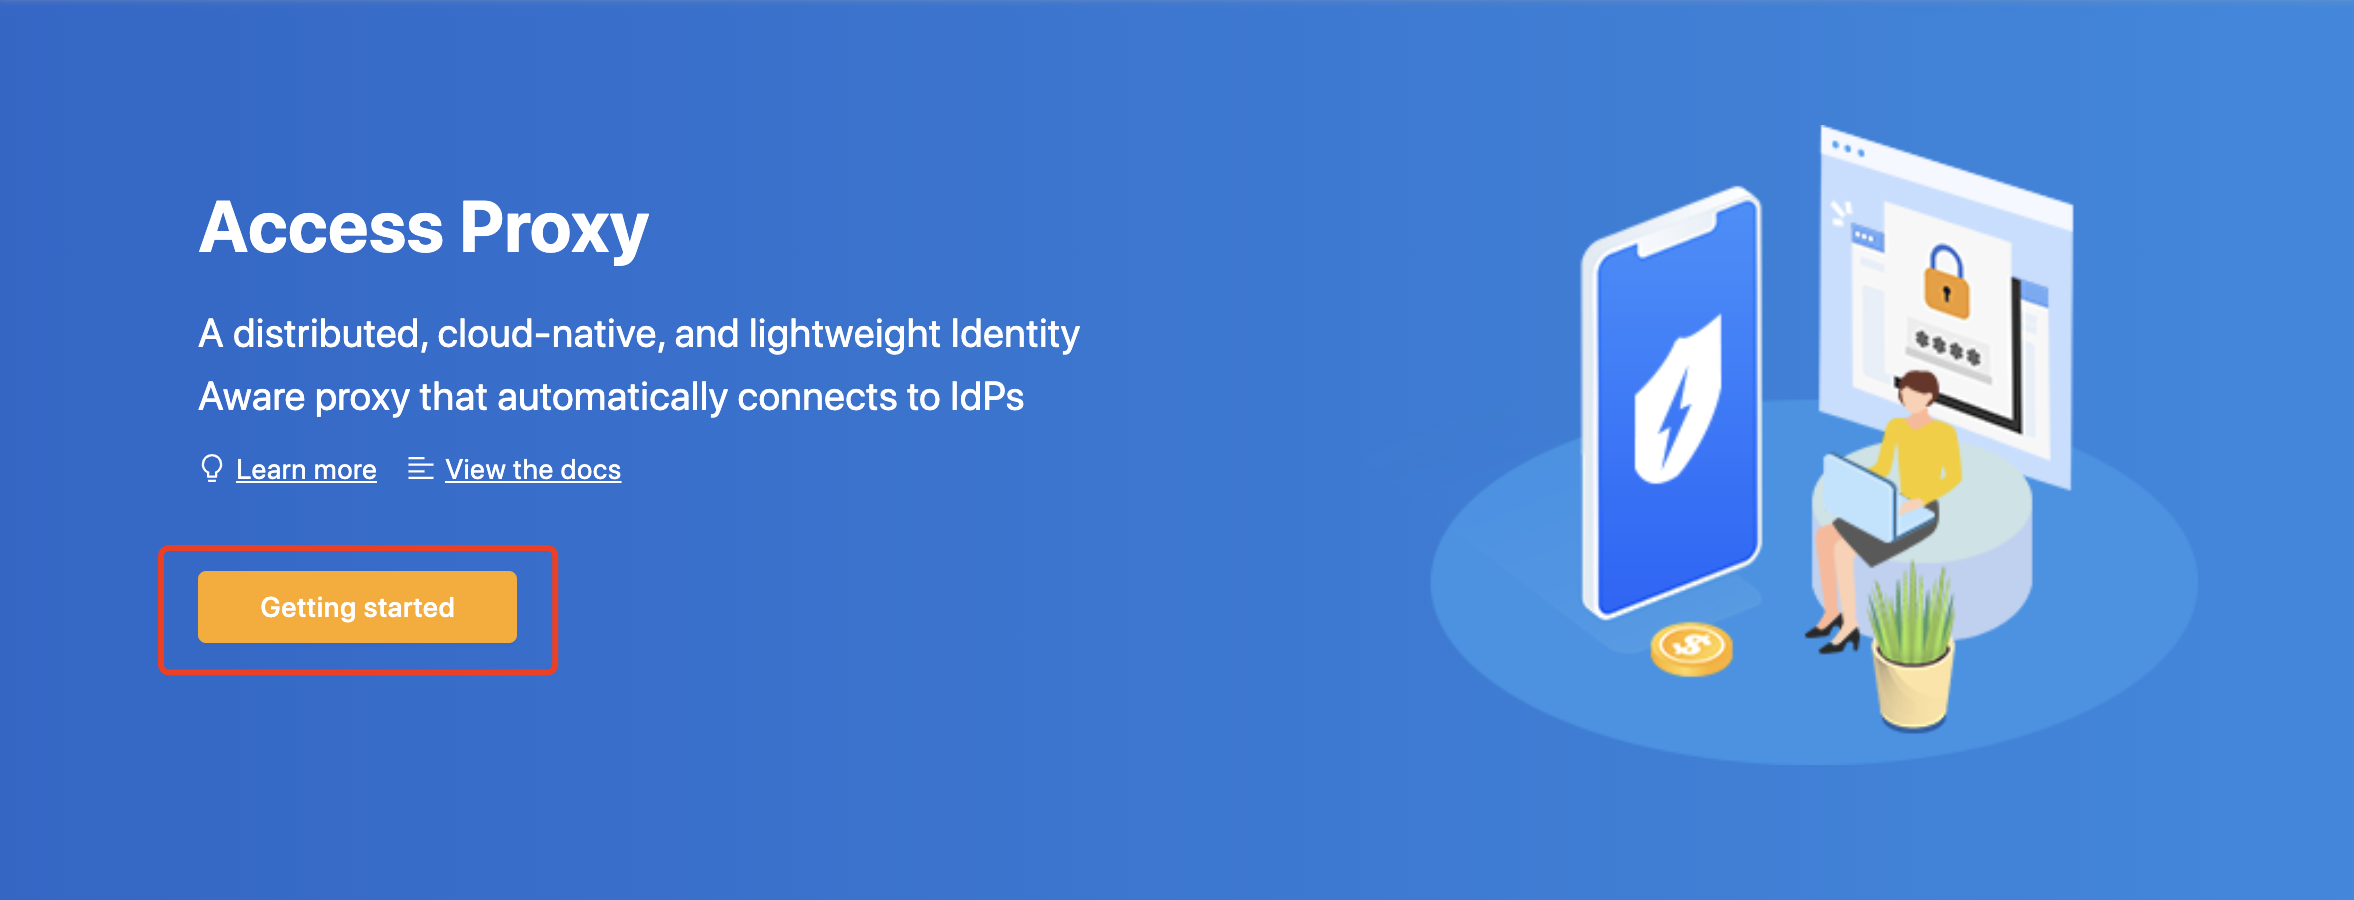
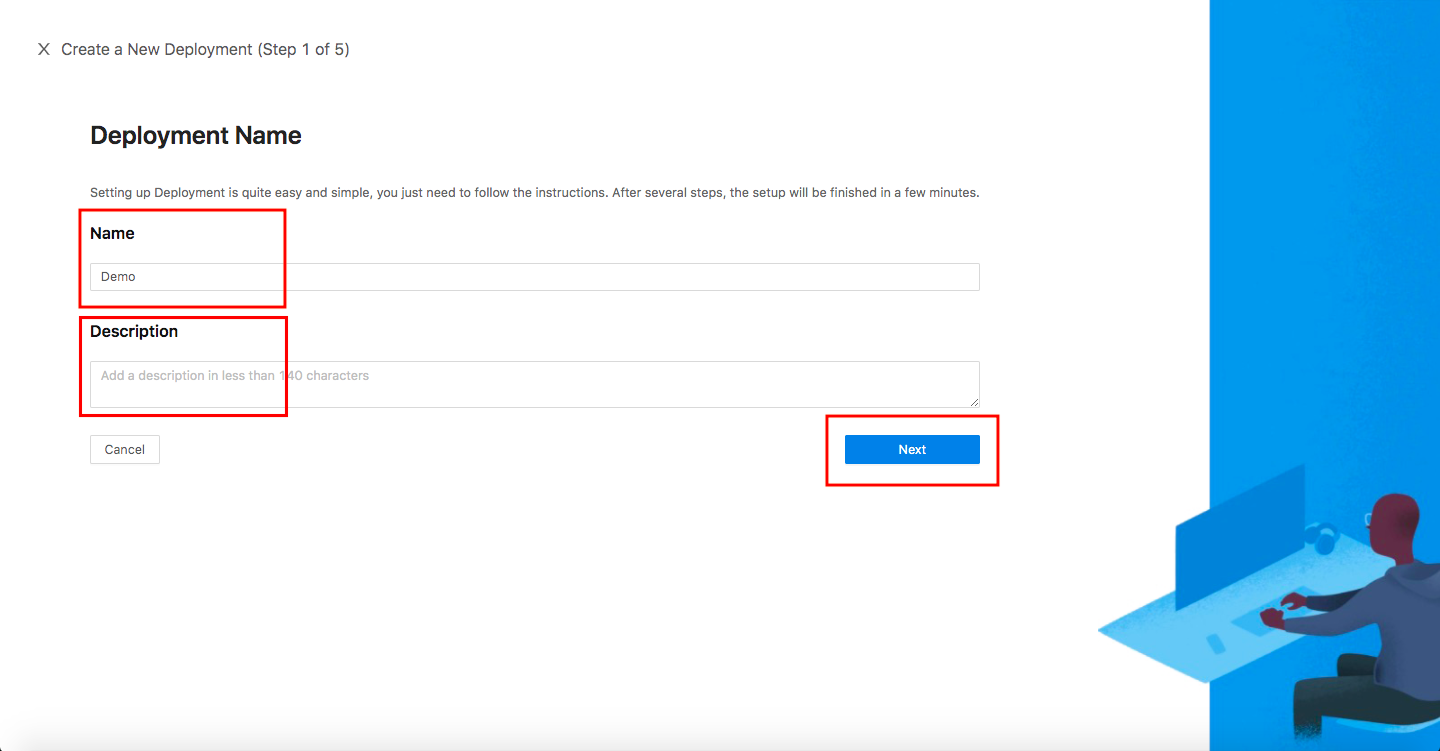
- Click the orange button
Getting started. Specify aNameand aDescription, and clickNext.
Add Application
Configure your application with the following values:
App Type:WEBName:Demo AppApplication URL:http://localhost:9772Listen Port:9772Upstream Servers:Dummy Application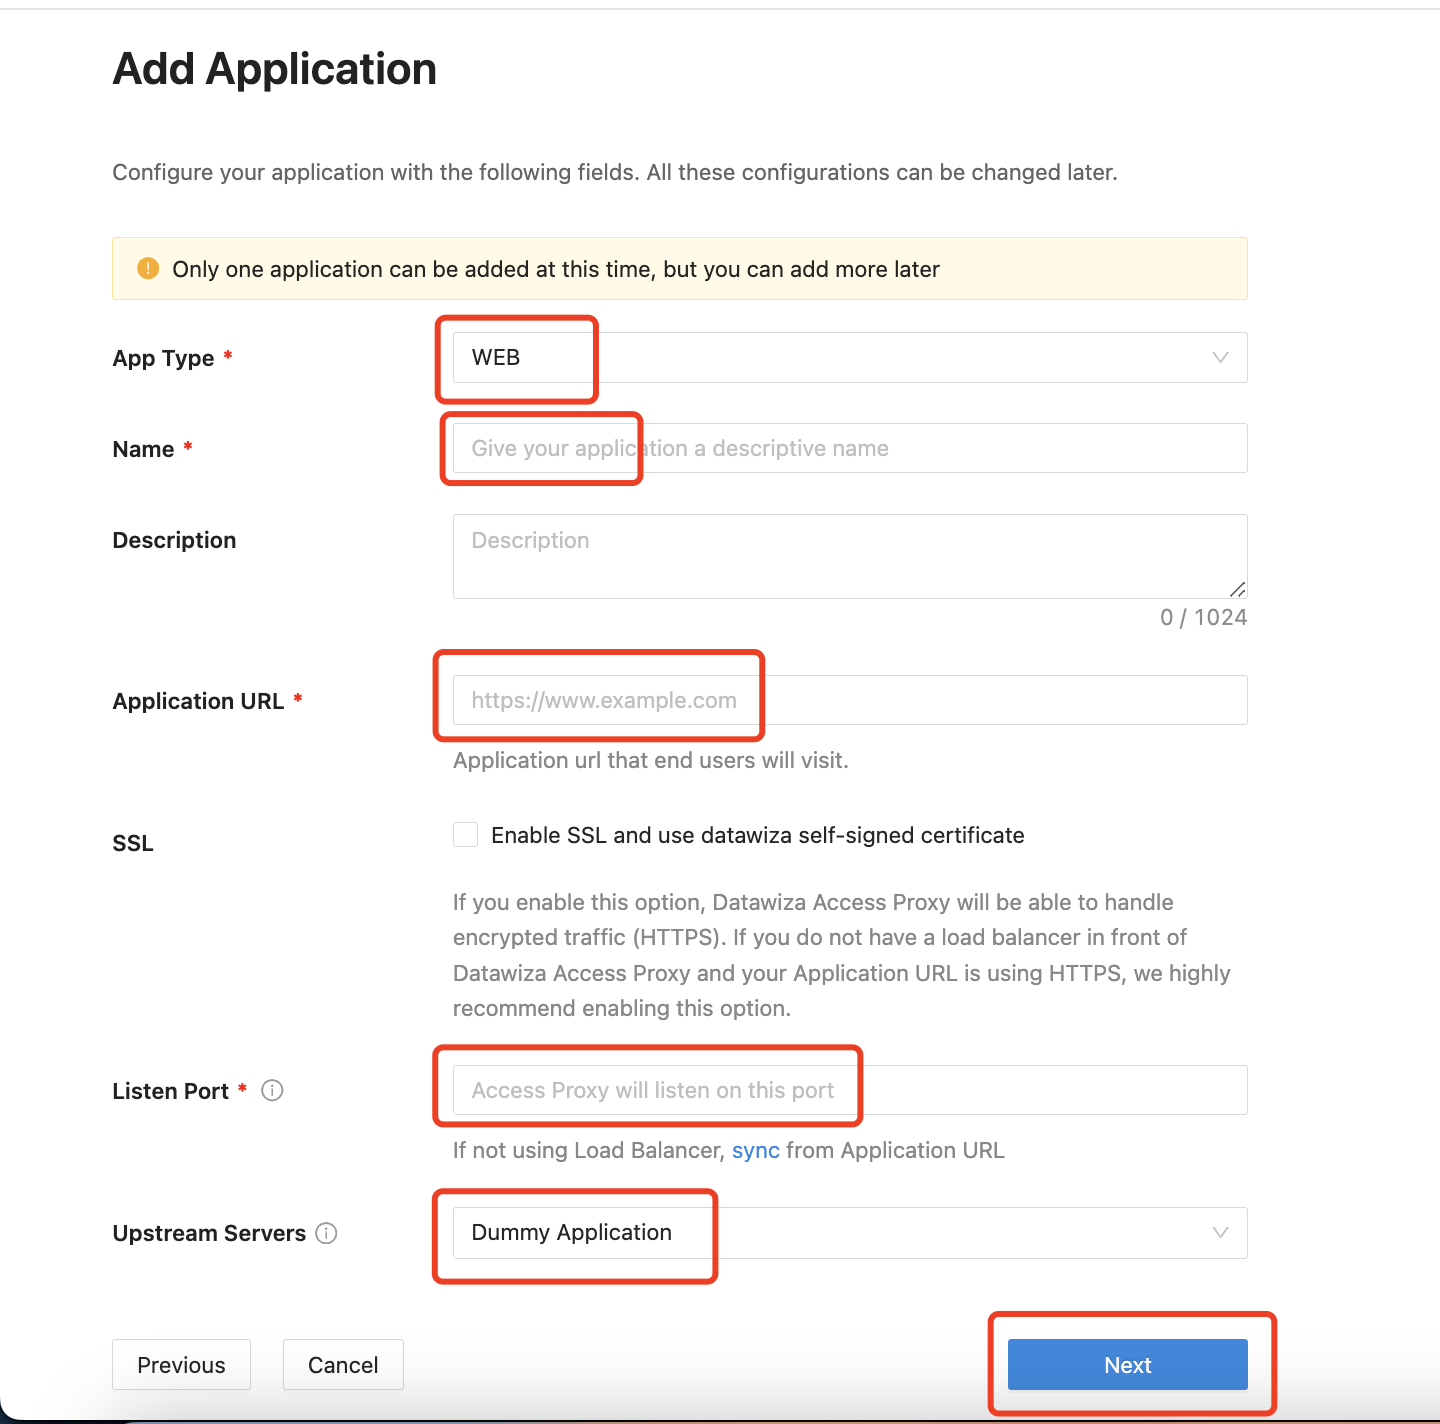 Select
 Next.
IdP Configuration
- Select OIDC as the
ProtocolandGenericas theIdentity Providerfrom the drop-down menu. Input theClient ID,Client Secret, andIssuergotten from the Duo Cloud Application above. Usehttp://localhost:9772as theOIDC Logout URL.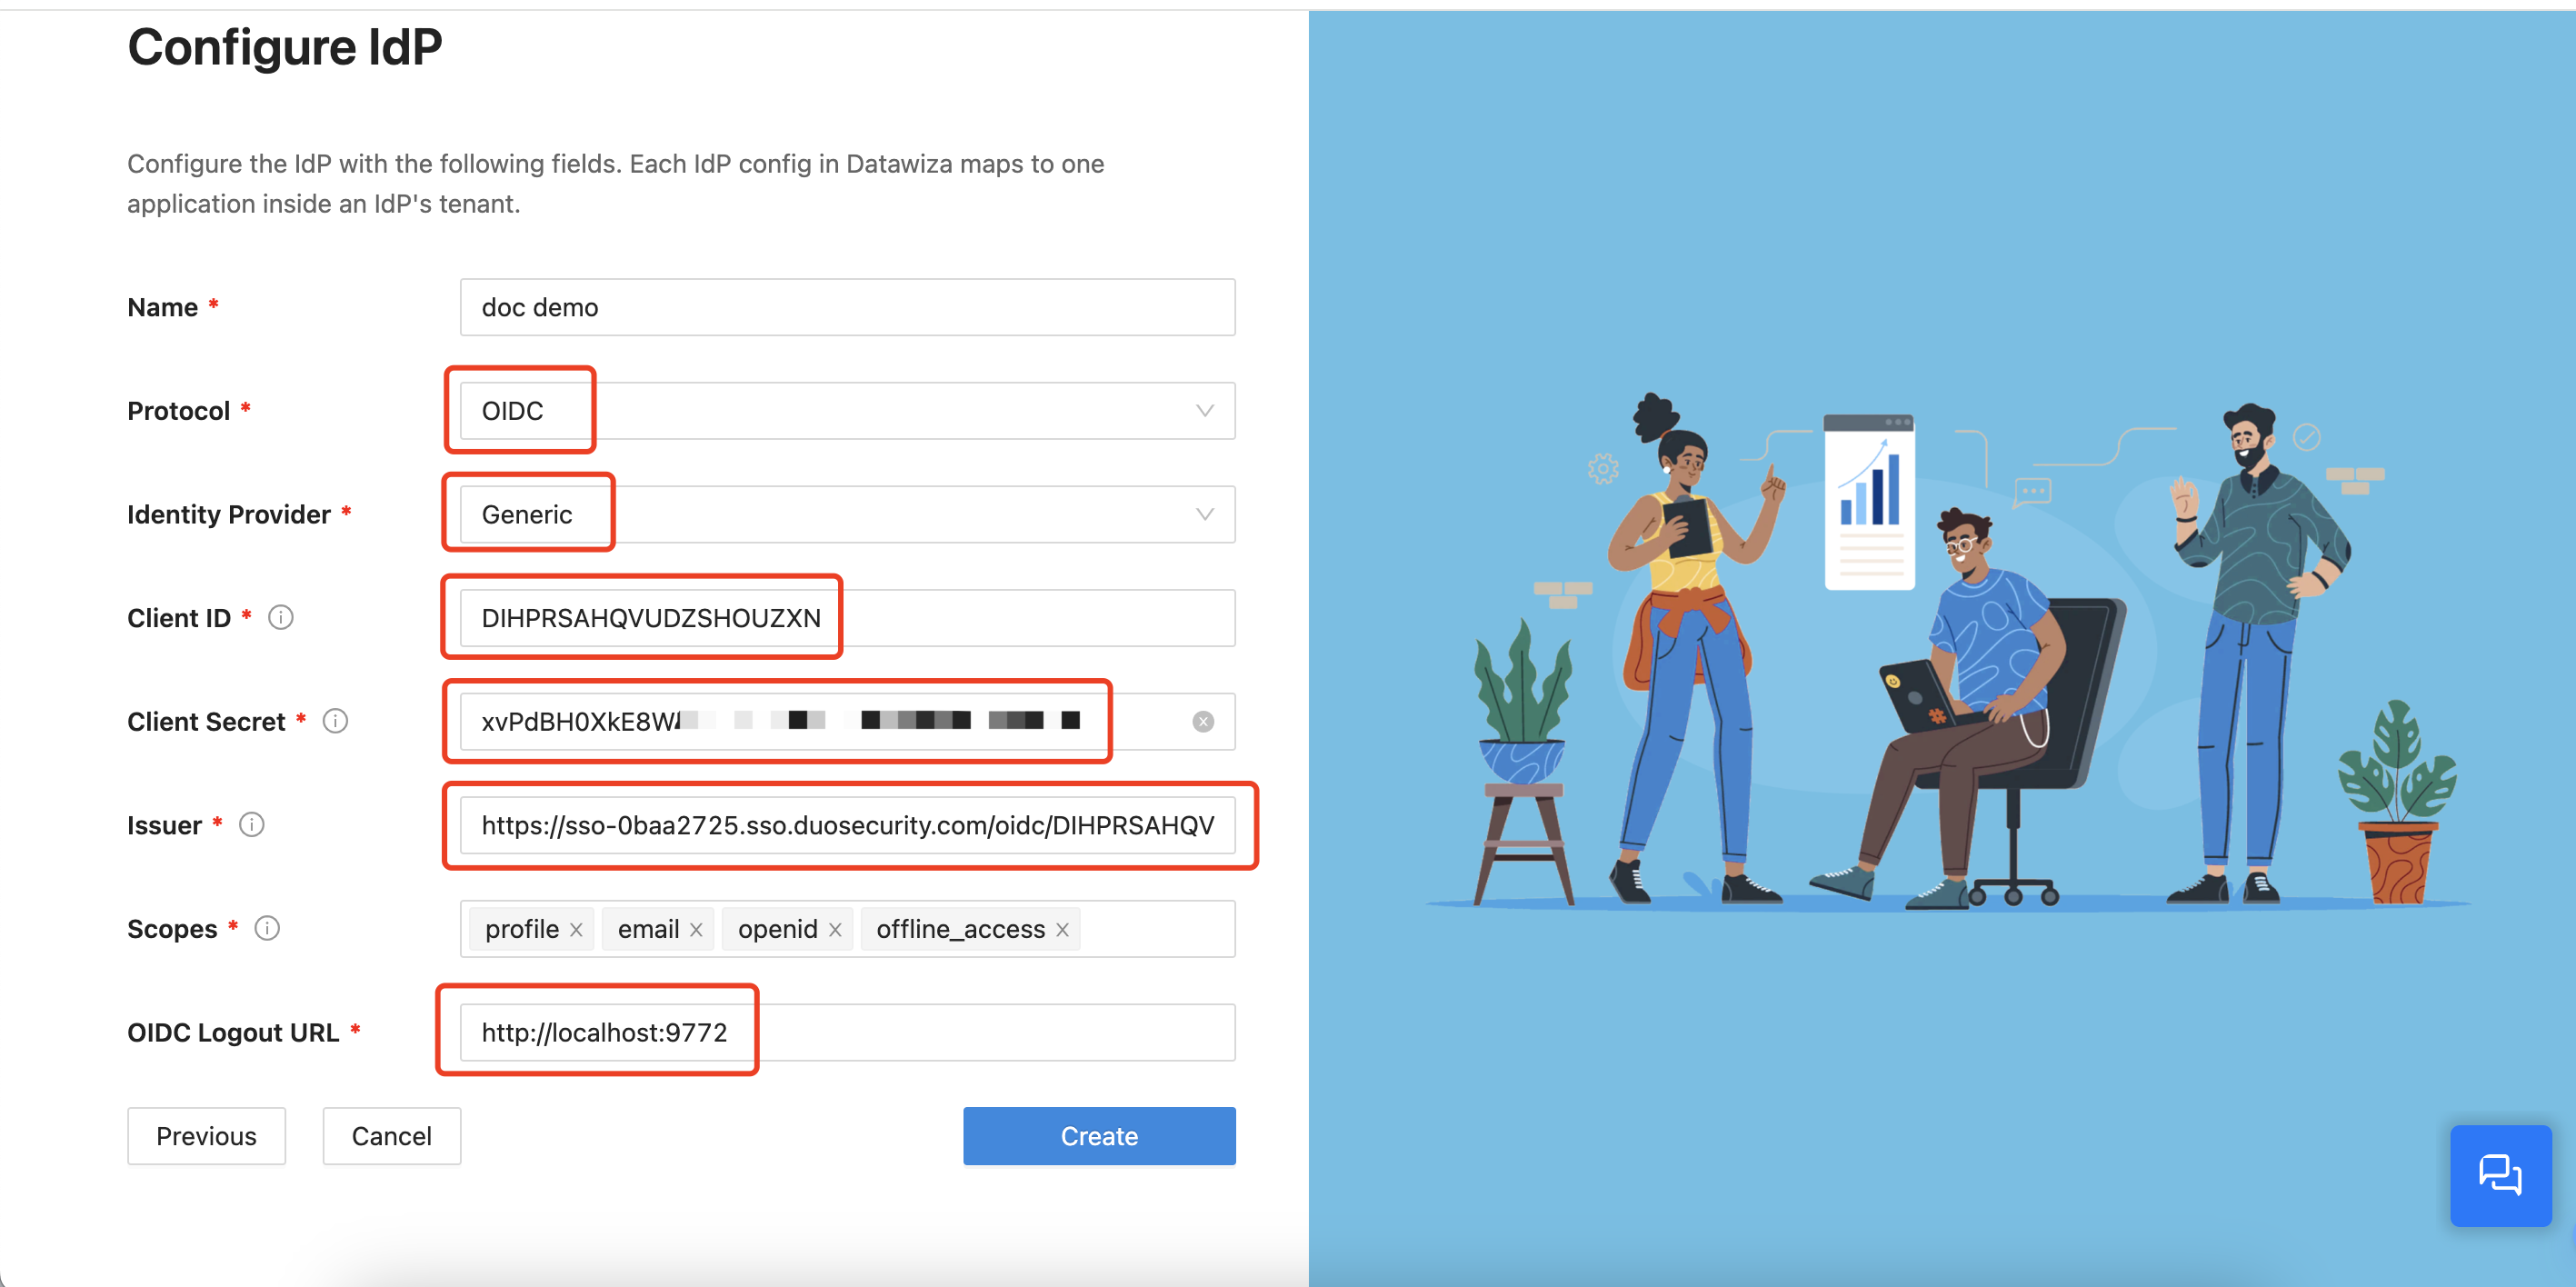 Click
Click Create.
Part III: Run DAP With a Header-Based Application
To launch DAP, you will need to have Docker installed. Please refer to our Quick Start guide for instructions on how to install Docker and deploy DAP on your operating system.  After executing the needed steps, the DAP should be up and running.
Part IV: Test the Application
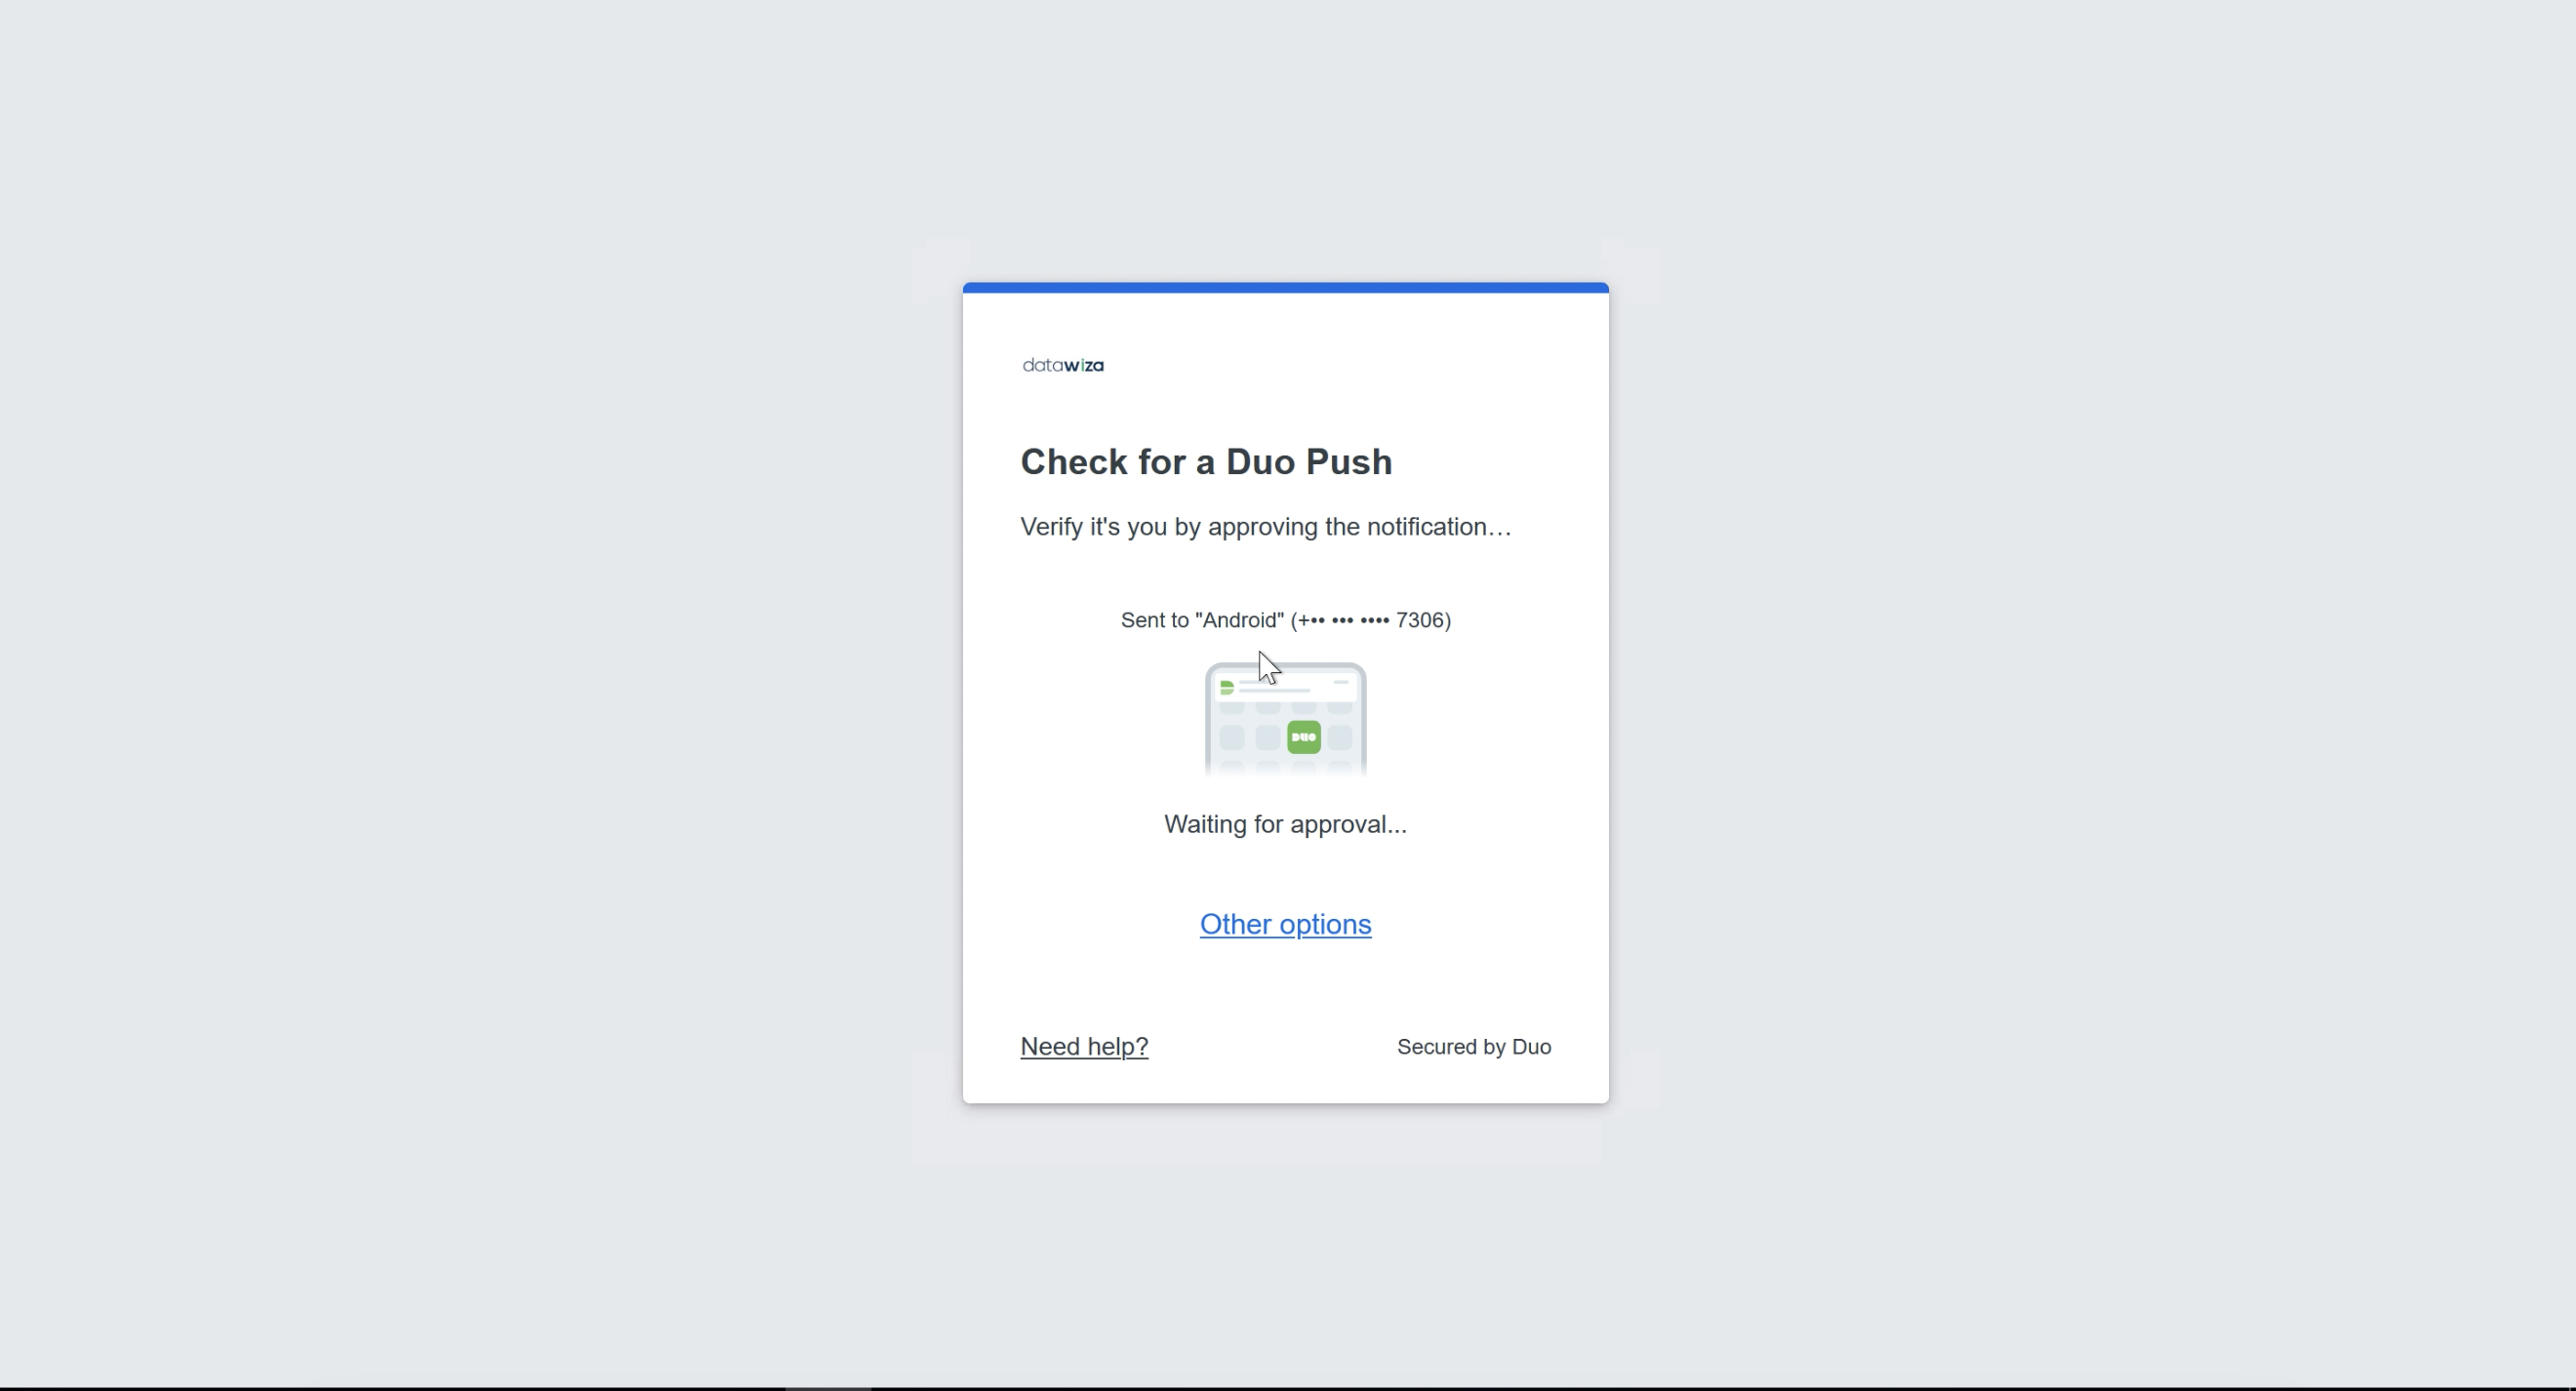
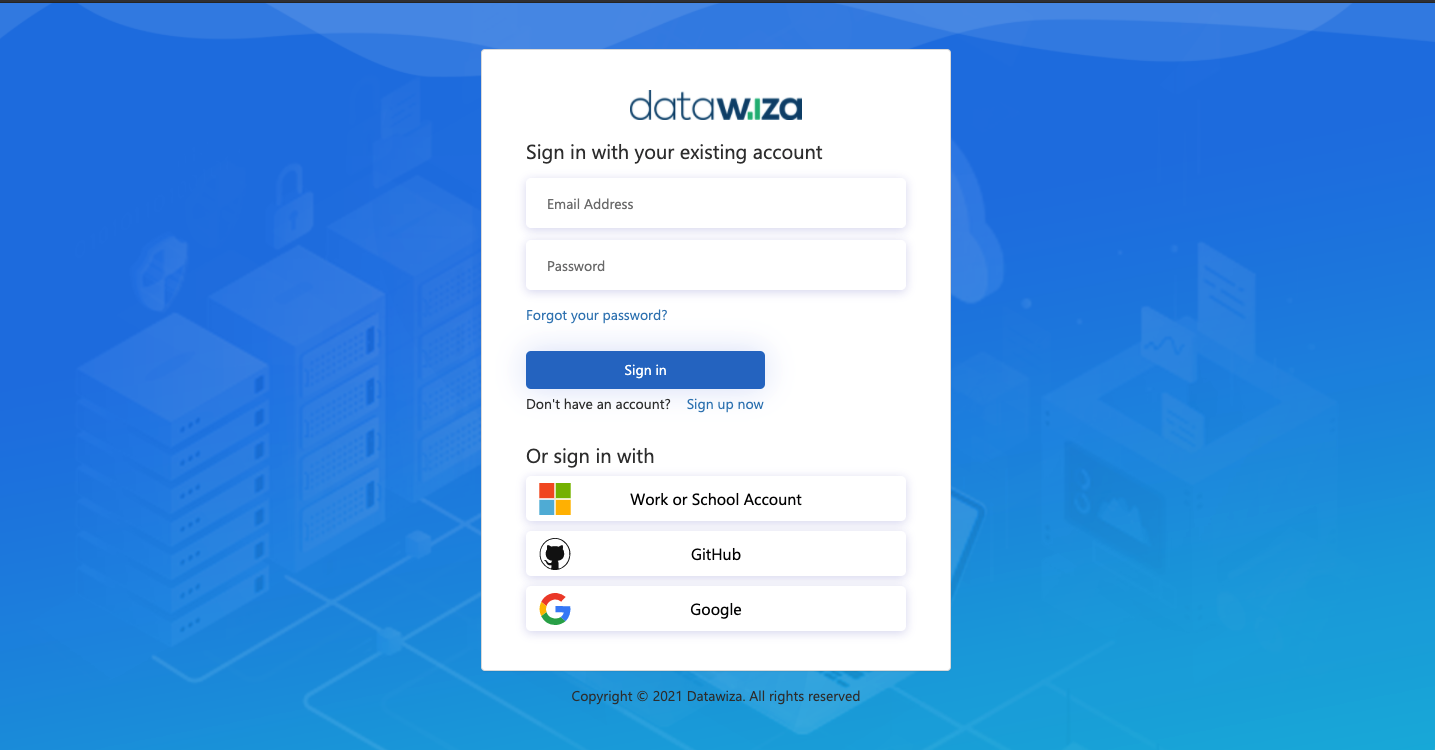
Open a browser and type in http://localhost:9772/. The login page of the Duo should be shown: 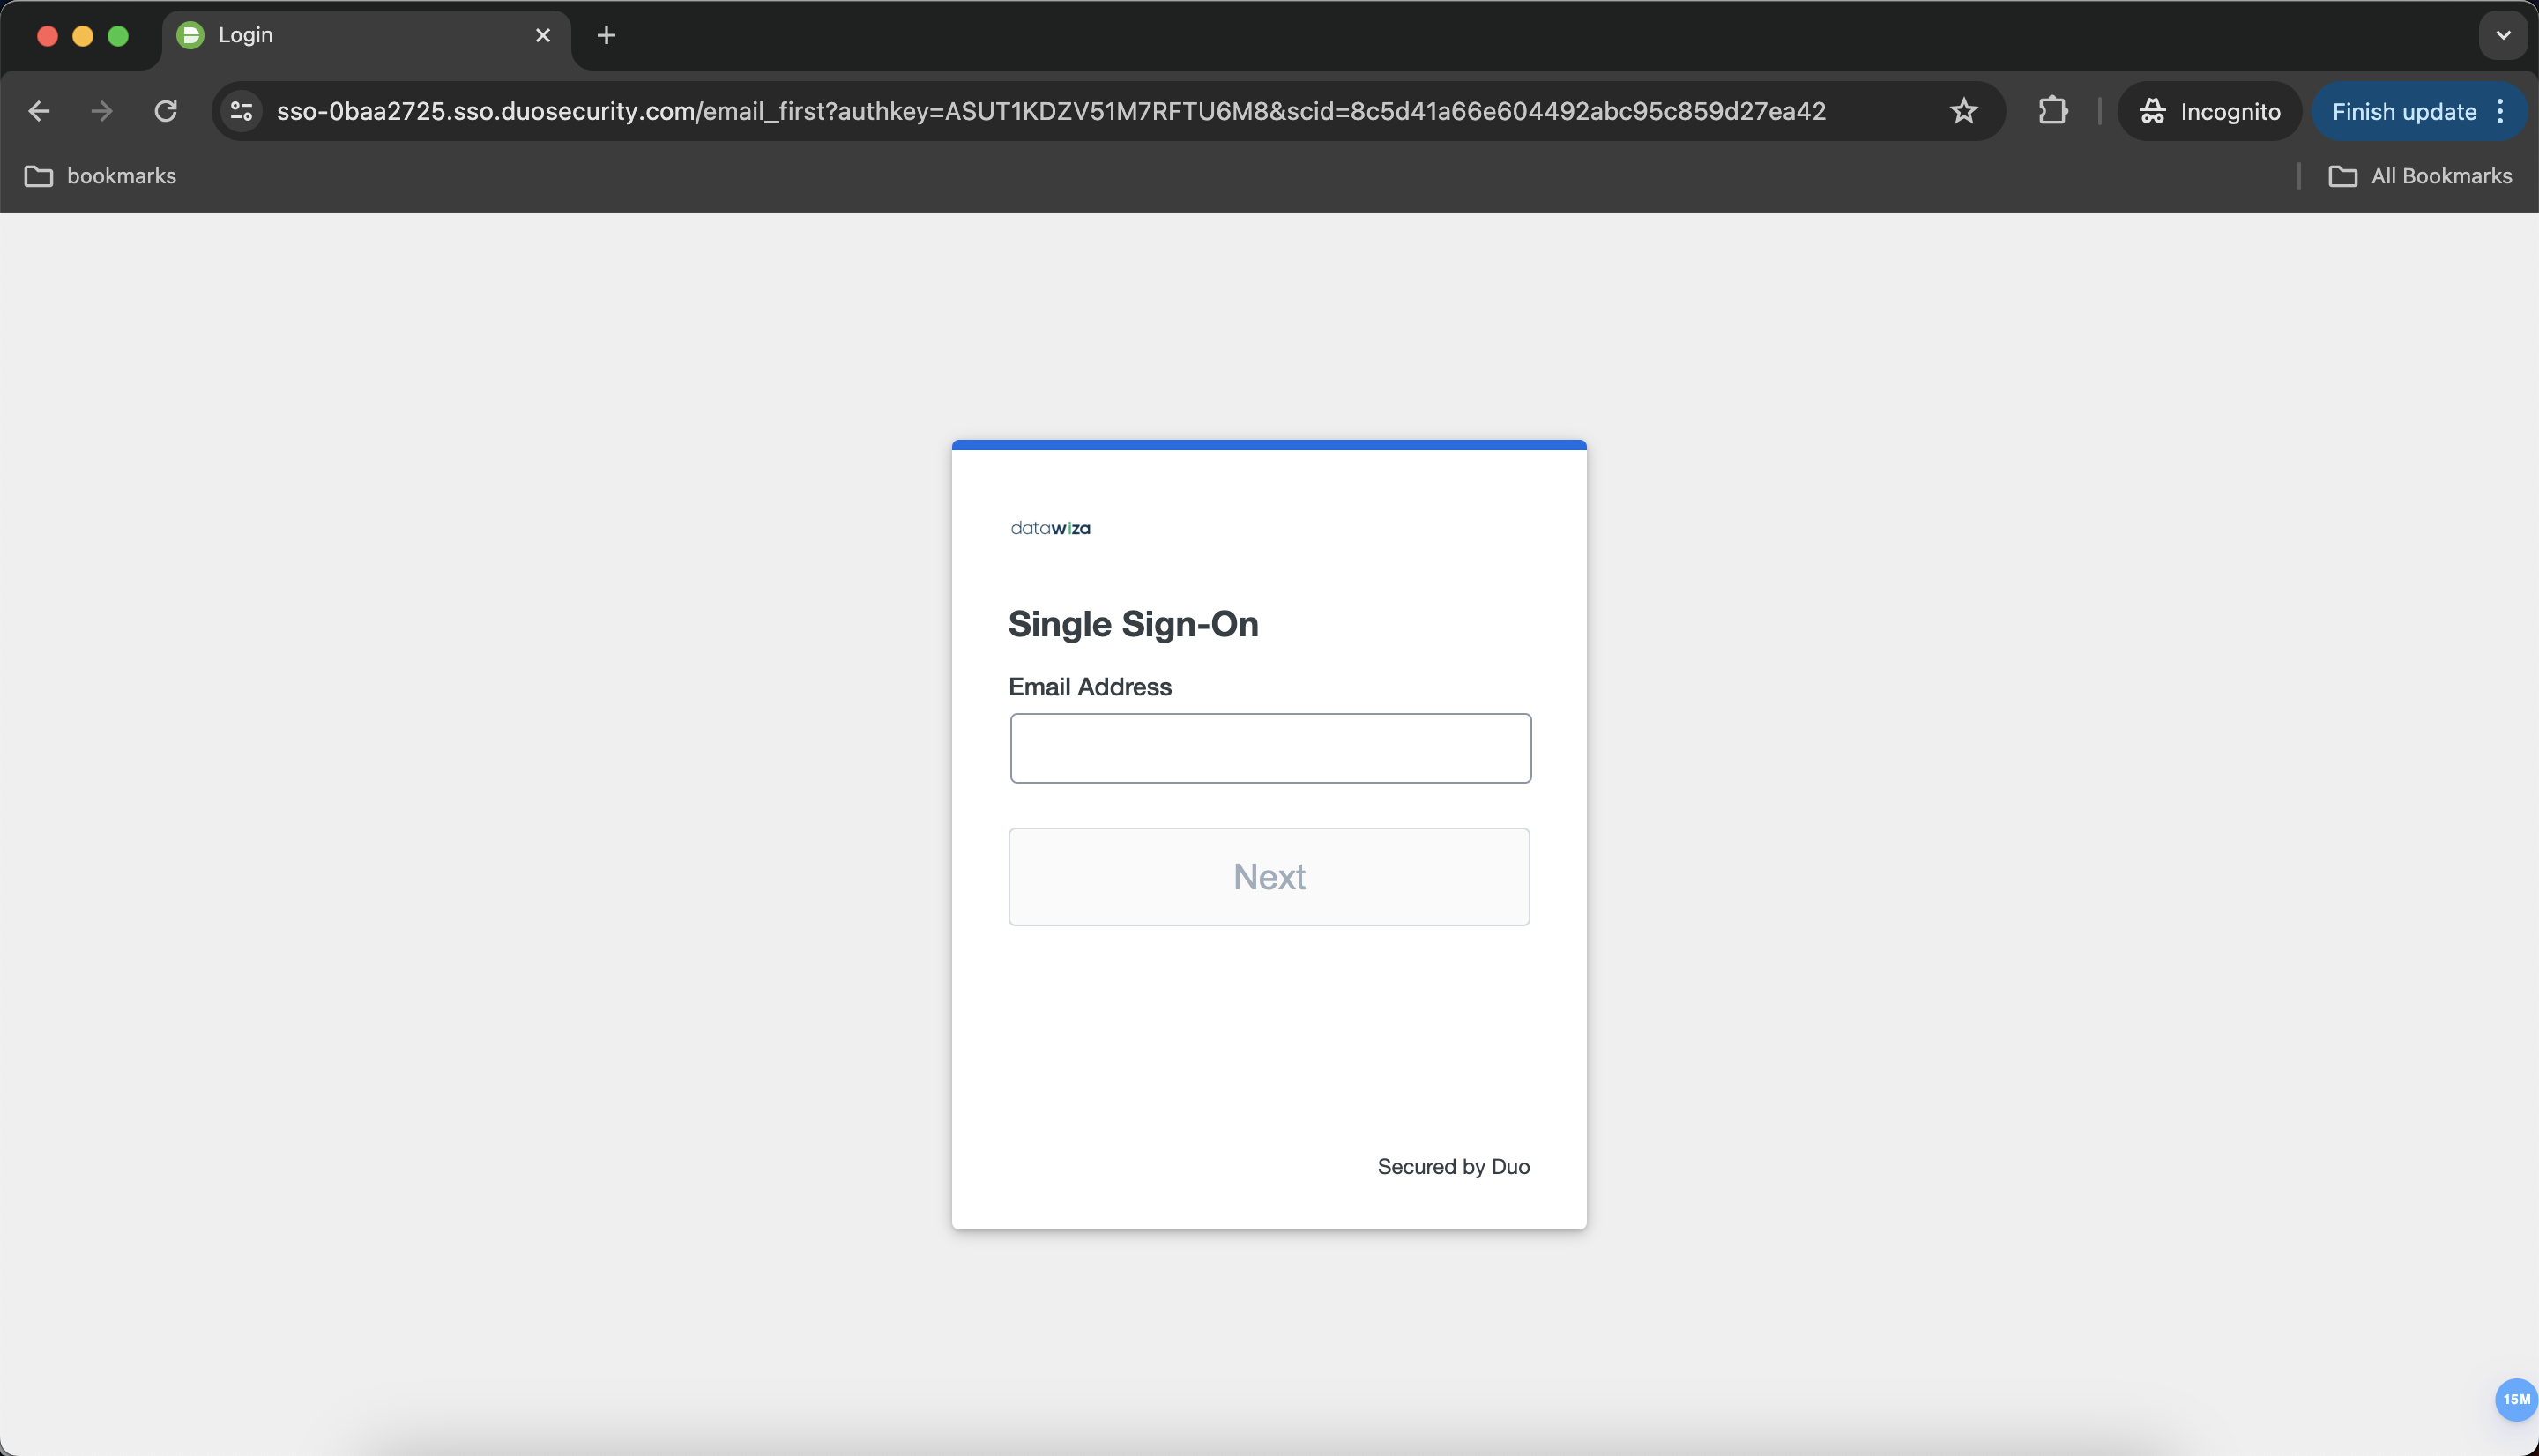 Input the credential of your on-premise AD account. After logging in successfully, you will be redirected to Duo two-factor authentication. Complete Duo two-factor authentication when prompted and then get redirected back to the header-based app.