Use Datawiza Access Proxy for AWS API Gateway
The section will talk about how to use Okta as the authorizer to protect AWS private rest API. To achieve that, there will be several steps involved:
1. Create and Configure EC2
2. Create and Configure VPC Endpoint
3. Create and config API Gateway
4. Configuration in DCMC
And we will cover each step in details below.
Create and Configure EC2
Go To EC2 homepage. Select Instances tab and click Launch instances: 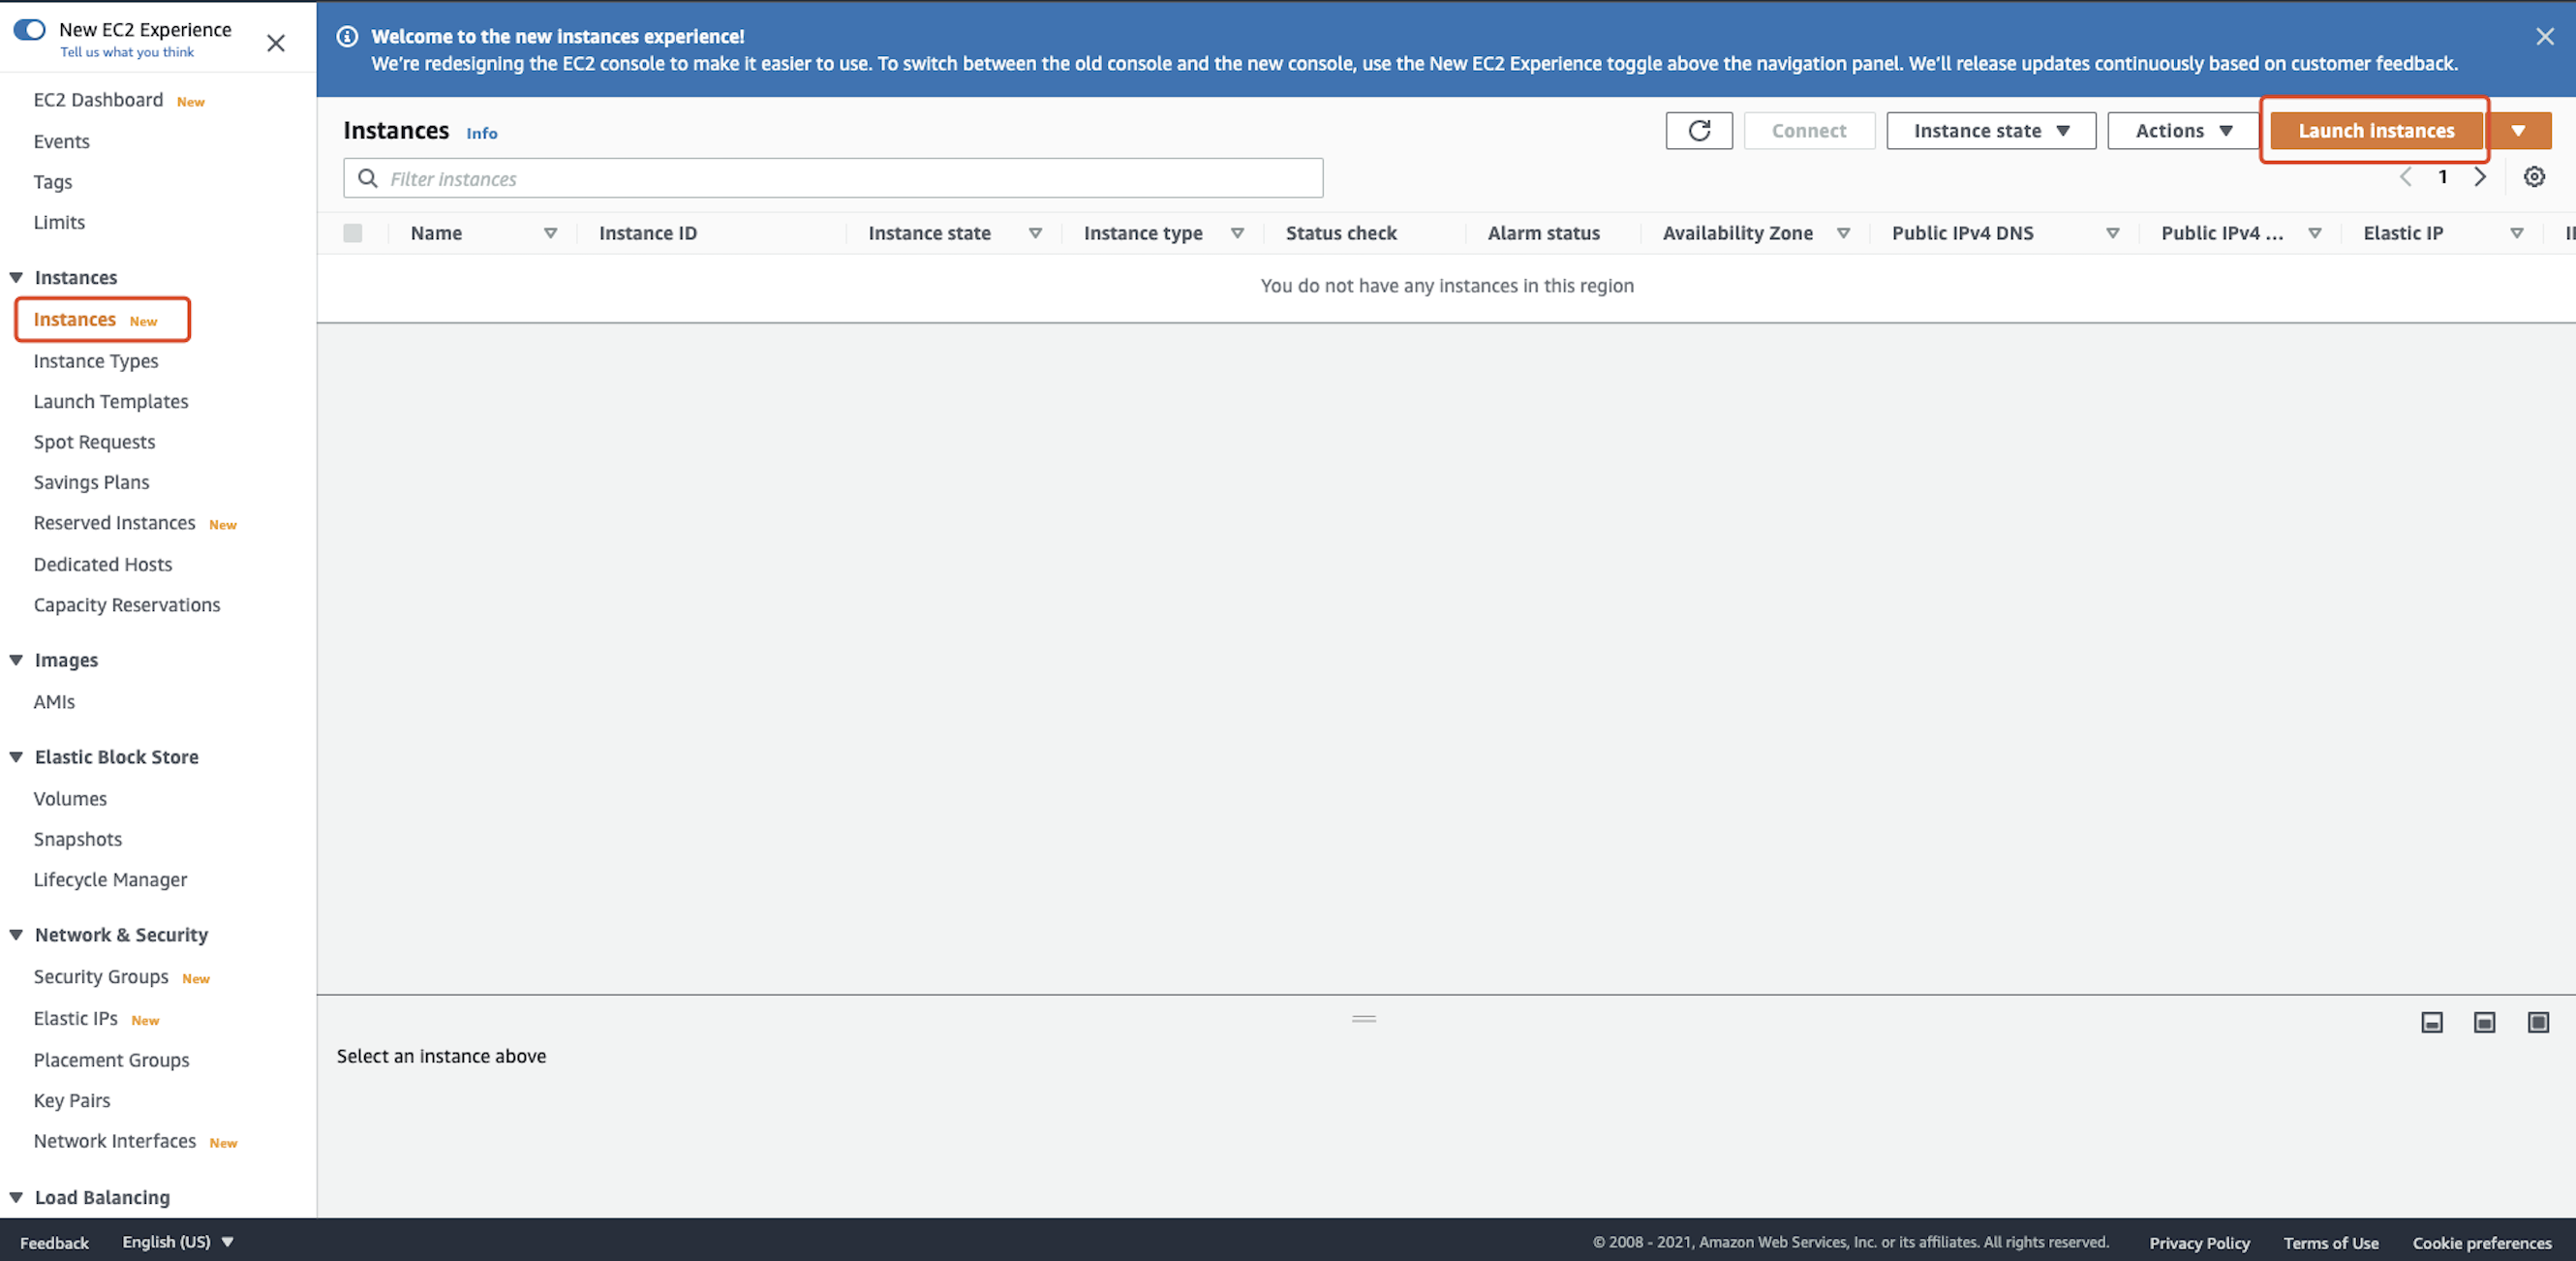 We use Centos 8 provided by AWS as an example:
 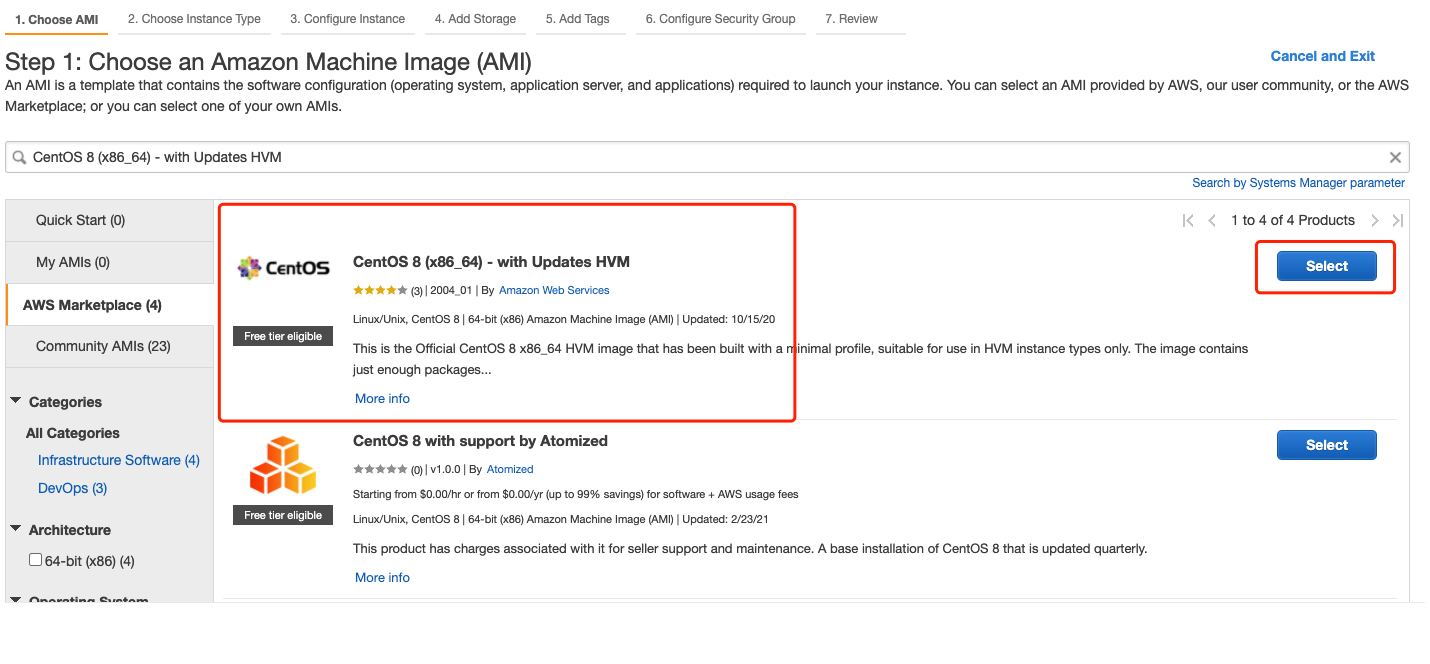 For
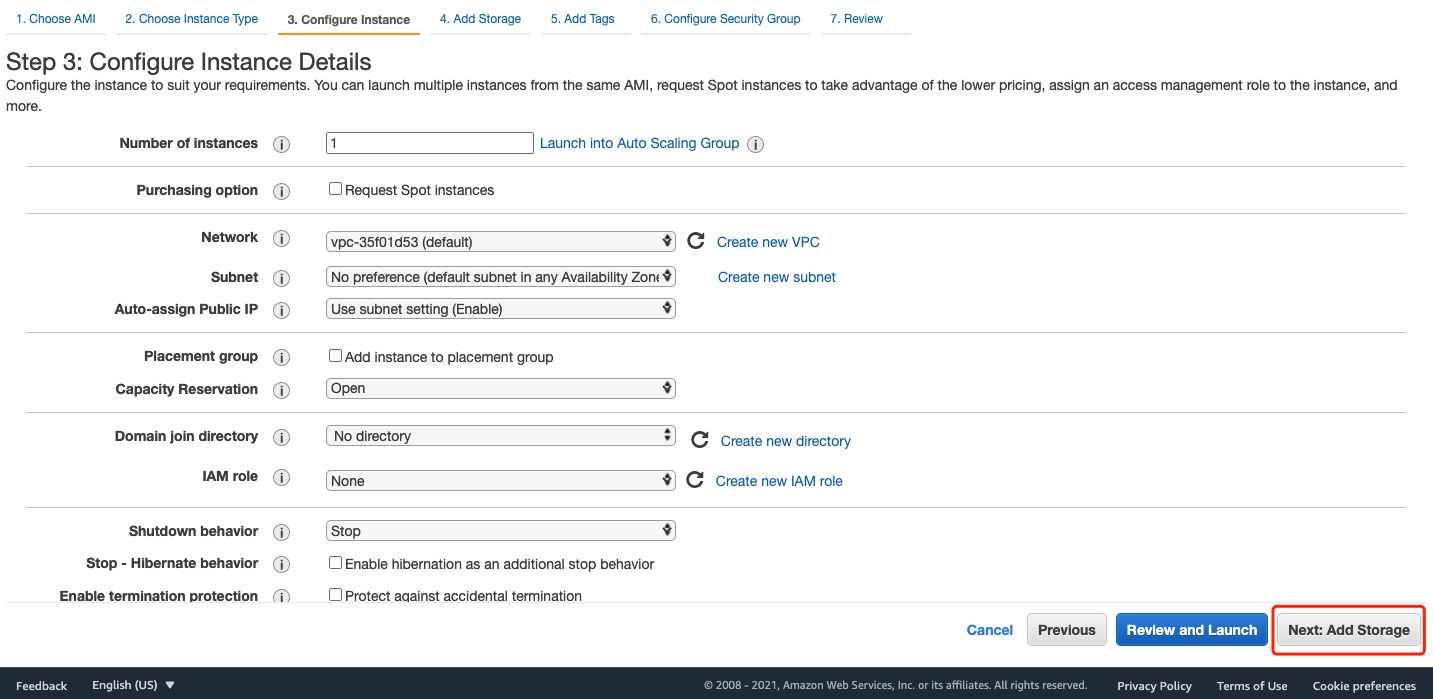
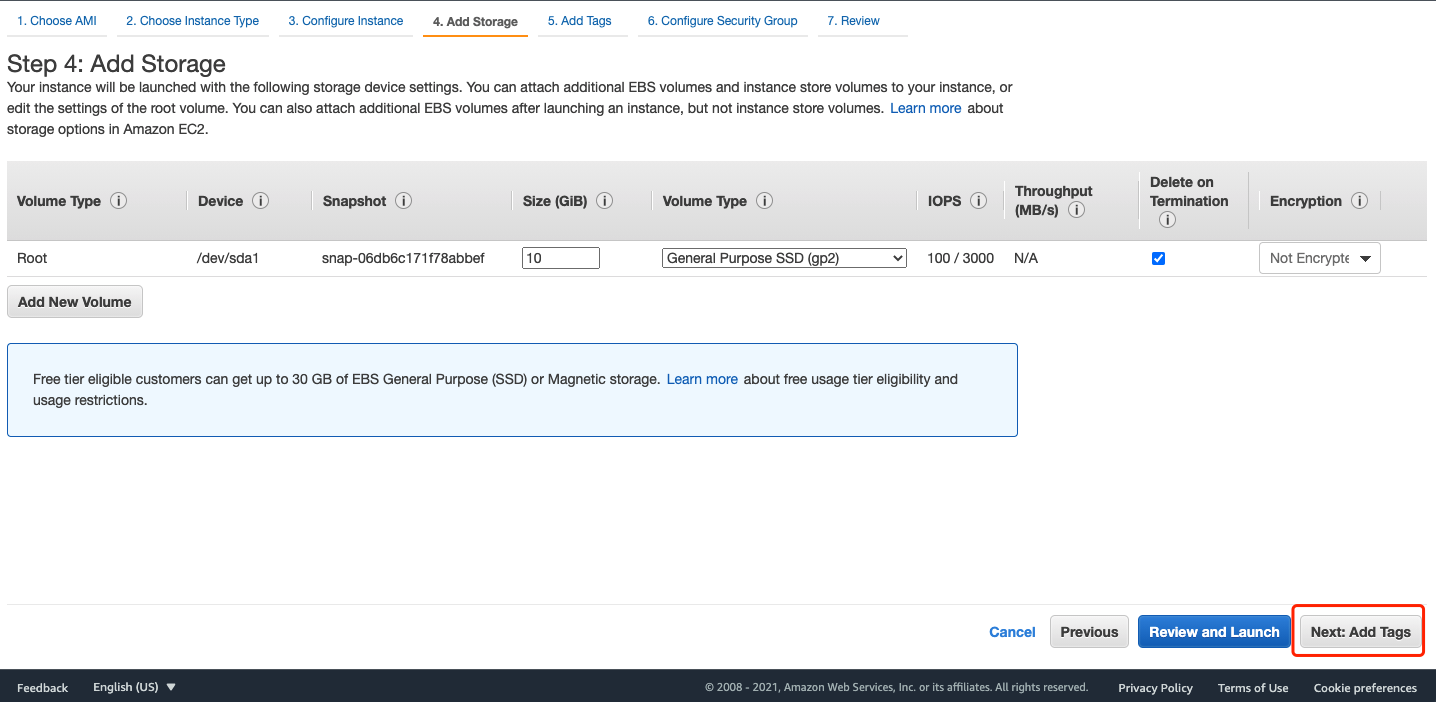
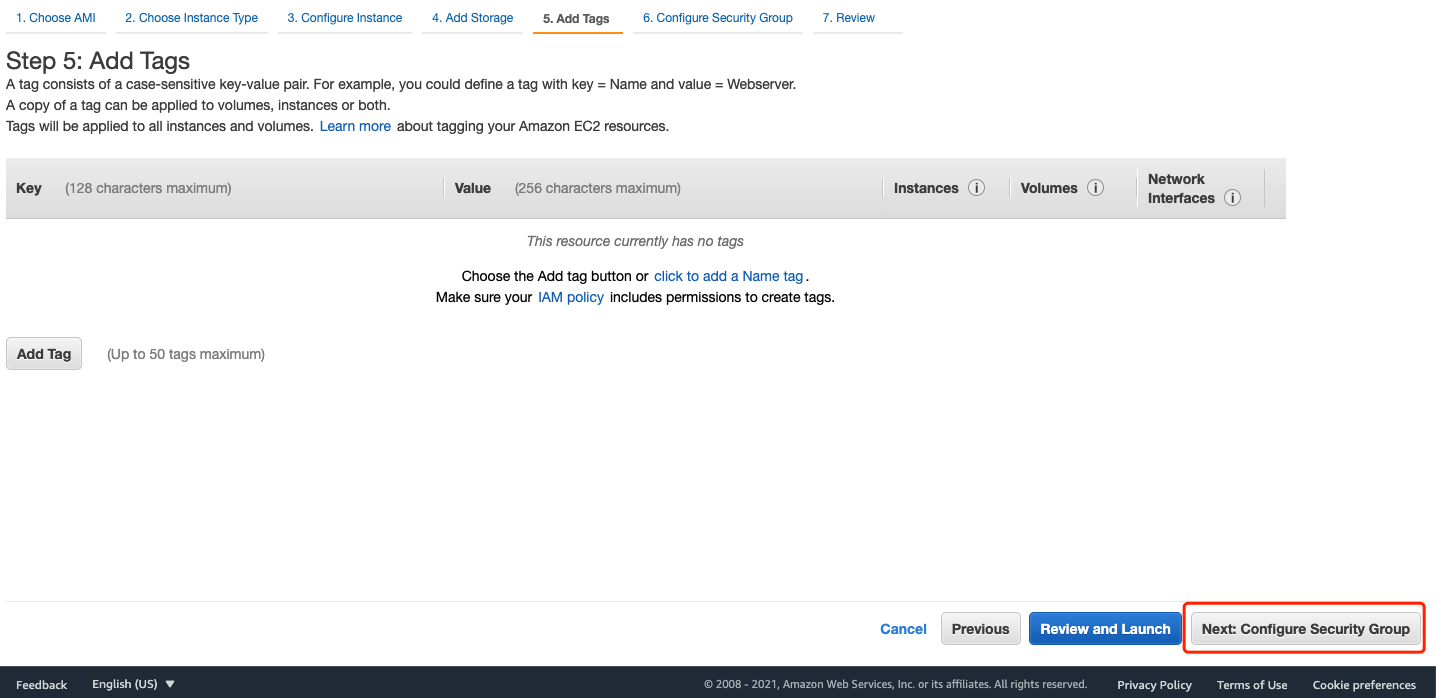
For Instance Type, Instance Details, Storage, and tags, leave the default settings: 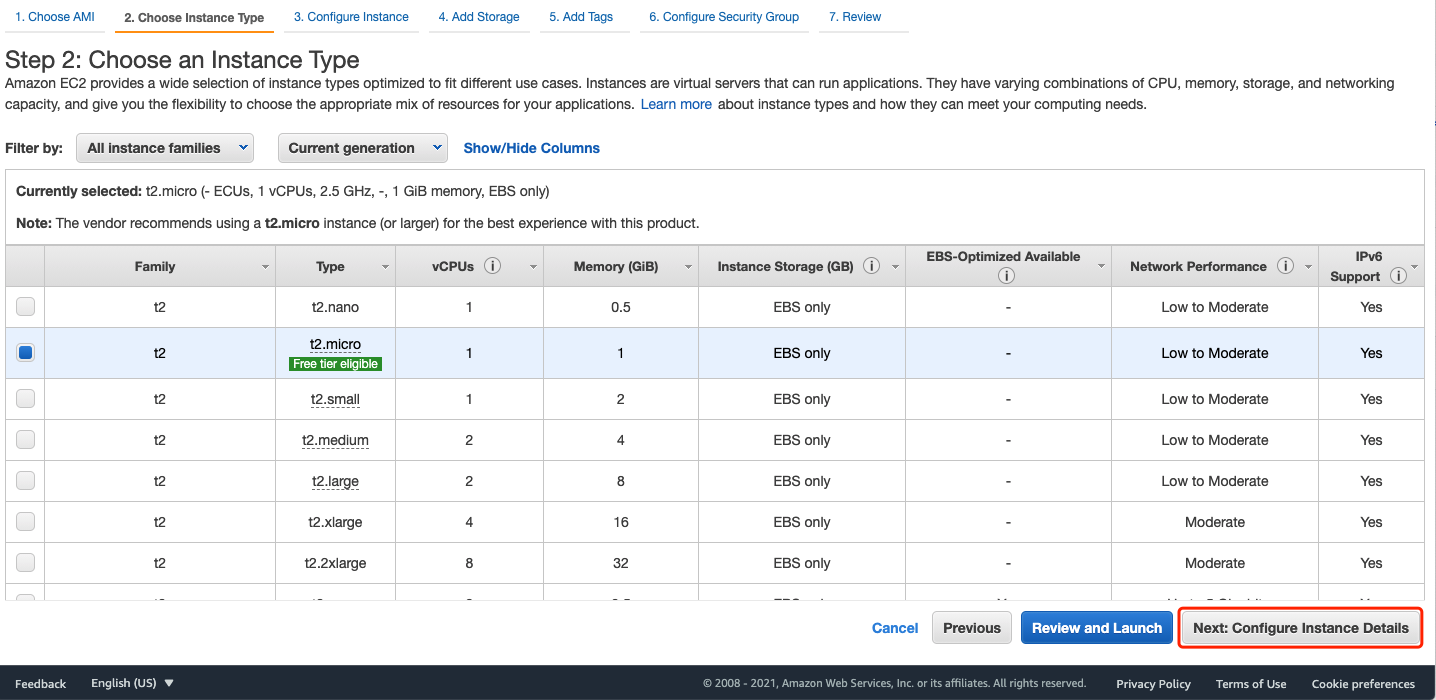
 Create a new security group and add type
 HTTPS, click Review and Launch: 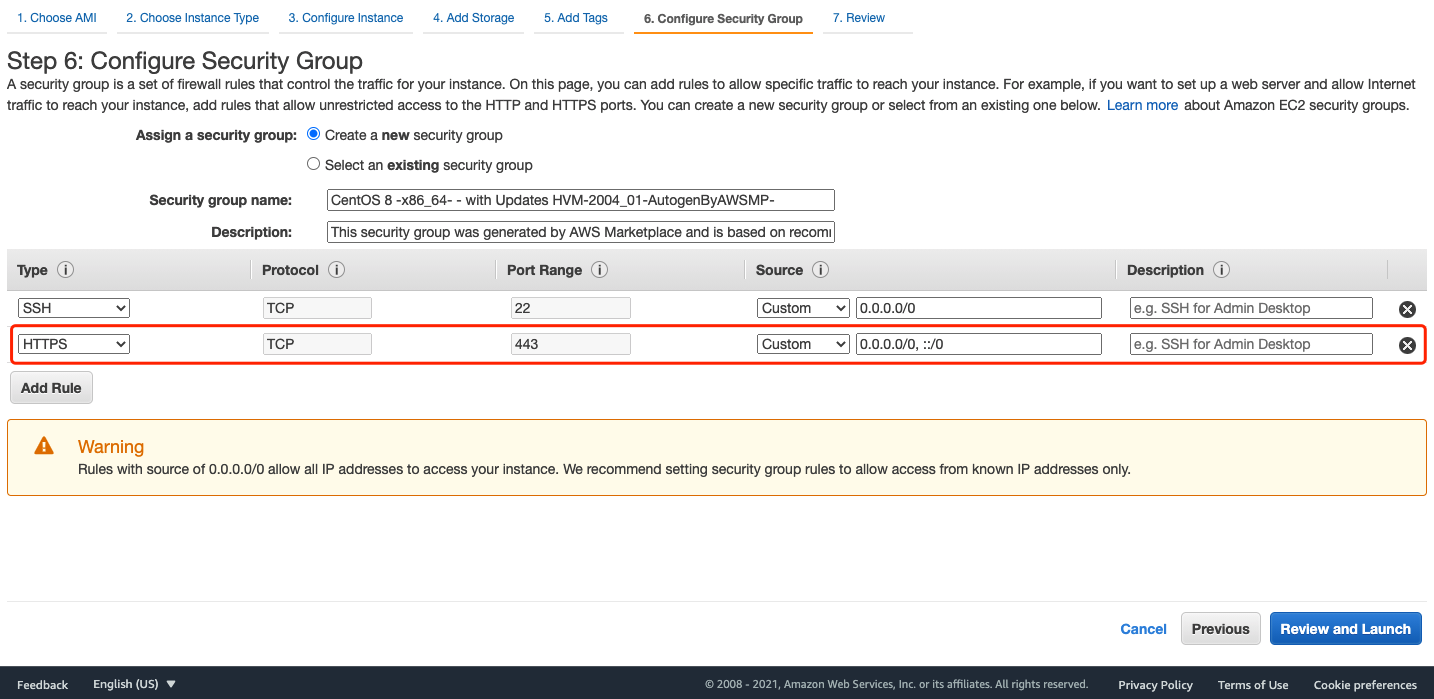 Check the configuration and click
 Launch: 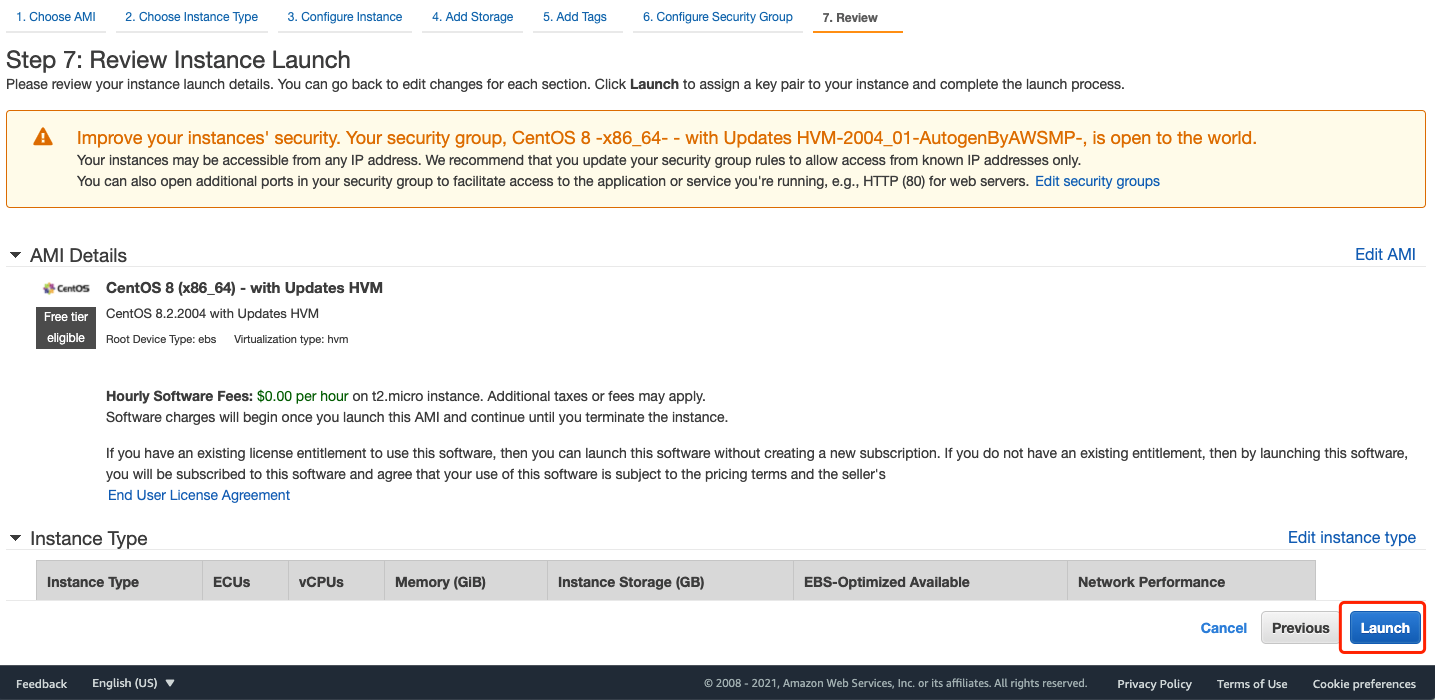 Download the key pair and click
 Launch instance: 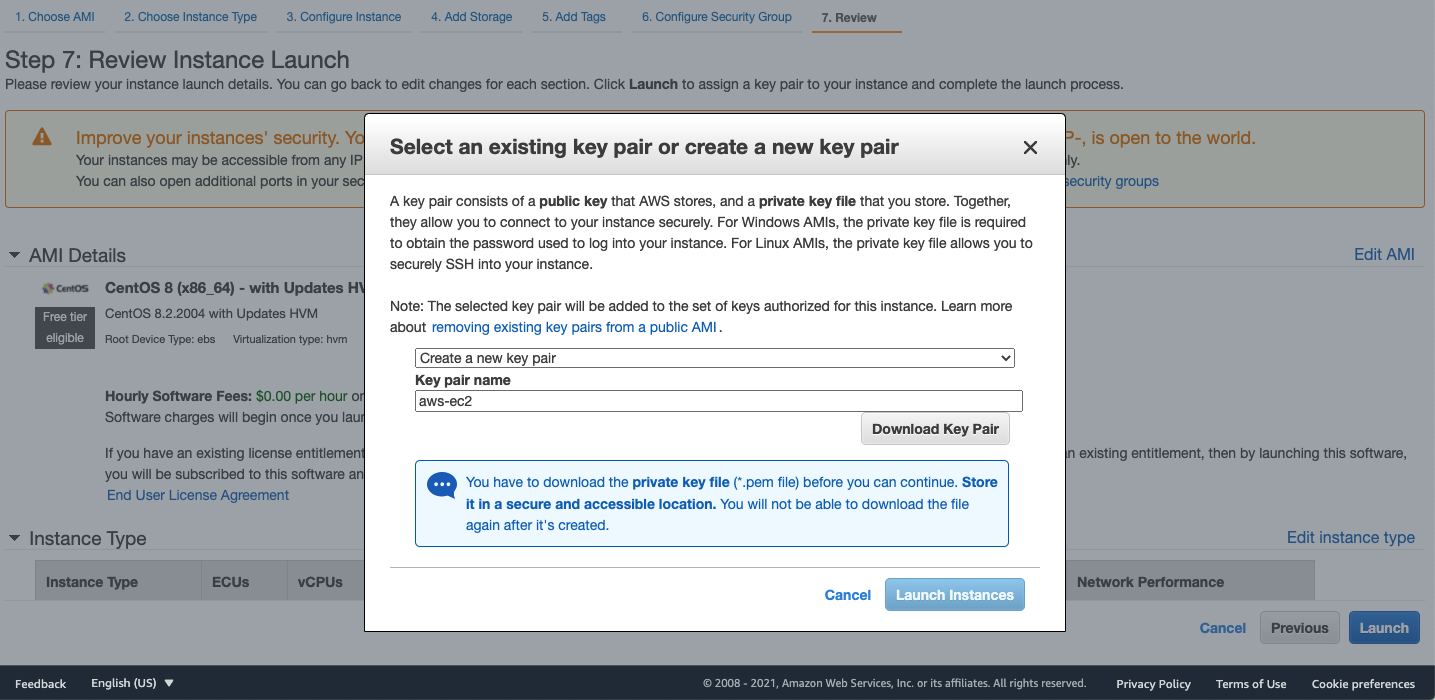 Note down the VPC ID and Public IPv4 DNS for the following configuration after launching the instance:
 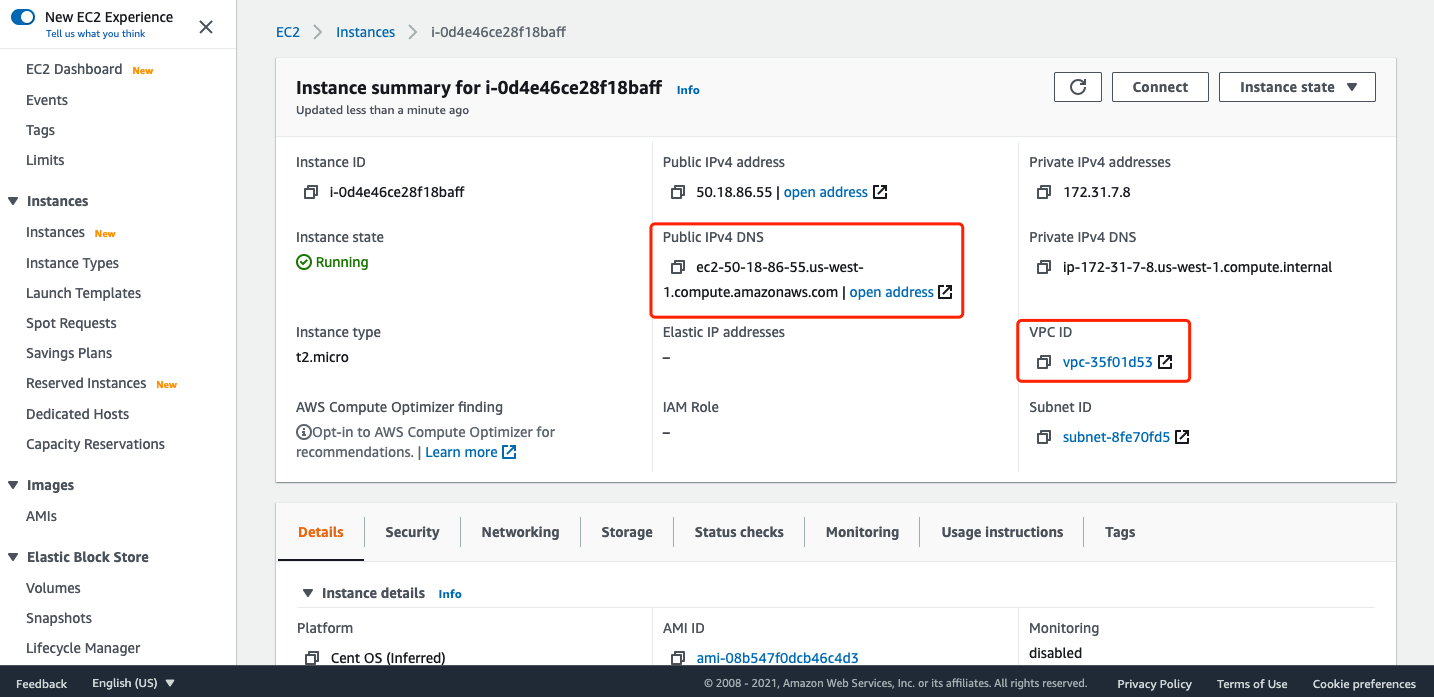 Now, you can ssh to the EC2 with the downloaded key pair:
ssh -i ~/your-downloaded-key-pair-path/key-pair.pem centos@<your-ec2-ip>
Before continuing, you need to install docker and docker-compose in this EC2.
Create and Configure VPC Endpoint
Go To VPC homepage. Select Endpoints tab and click Create Endpoint: 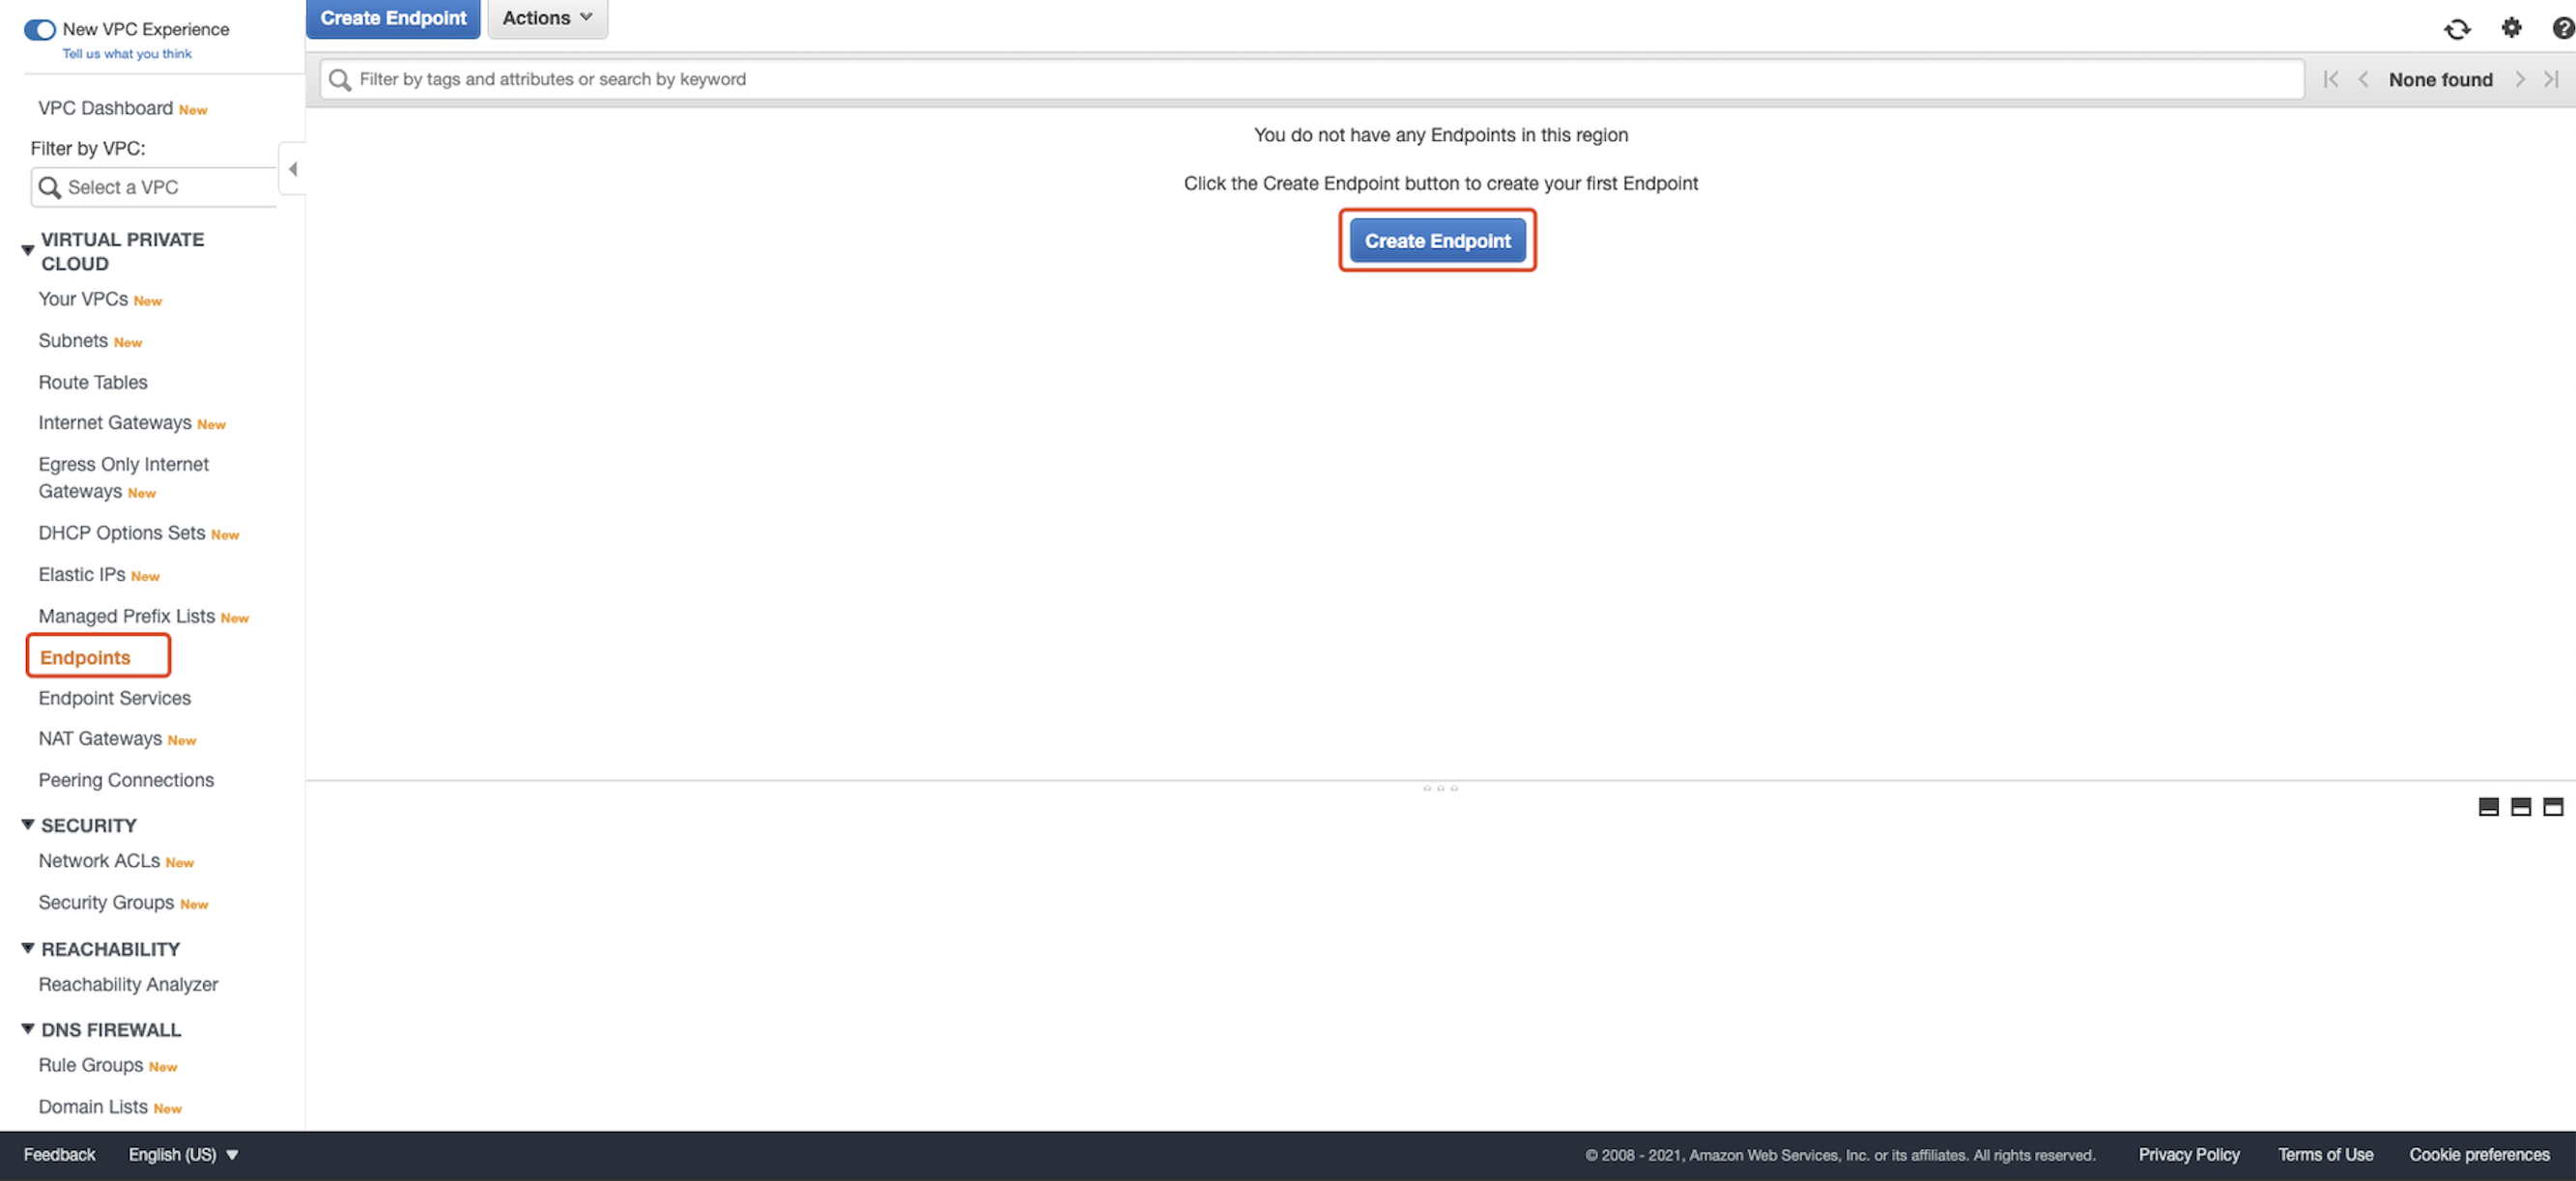 For
For Service category, choose AWS services. For Service Name, choose com.amazonaws.<region name>.execute-api. 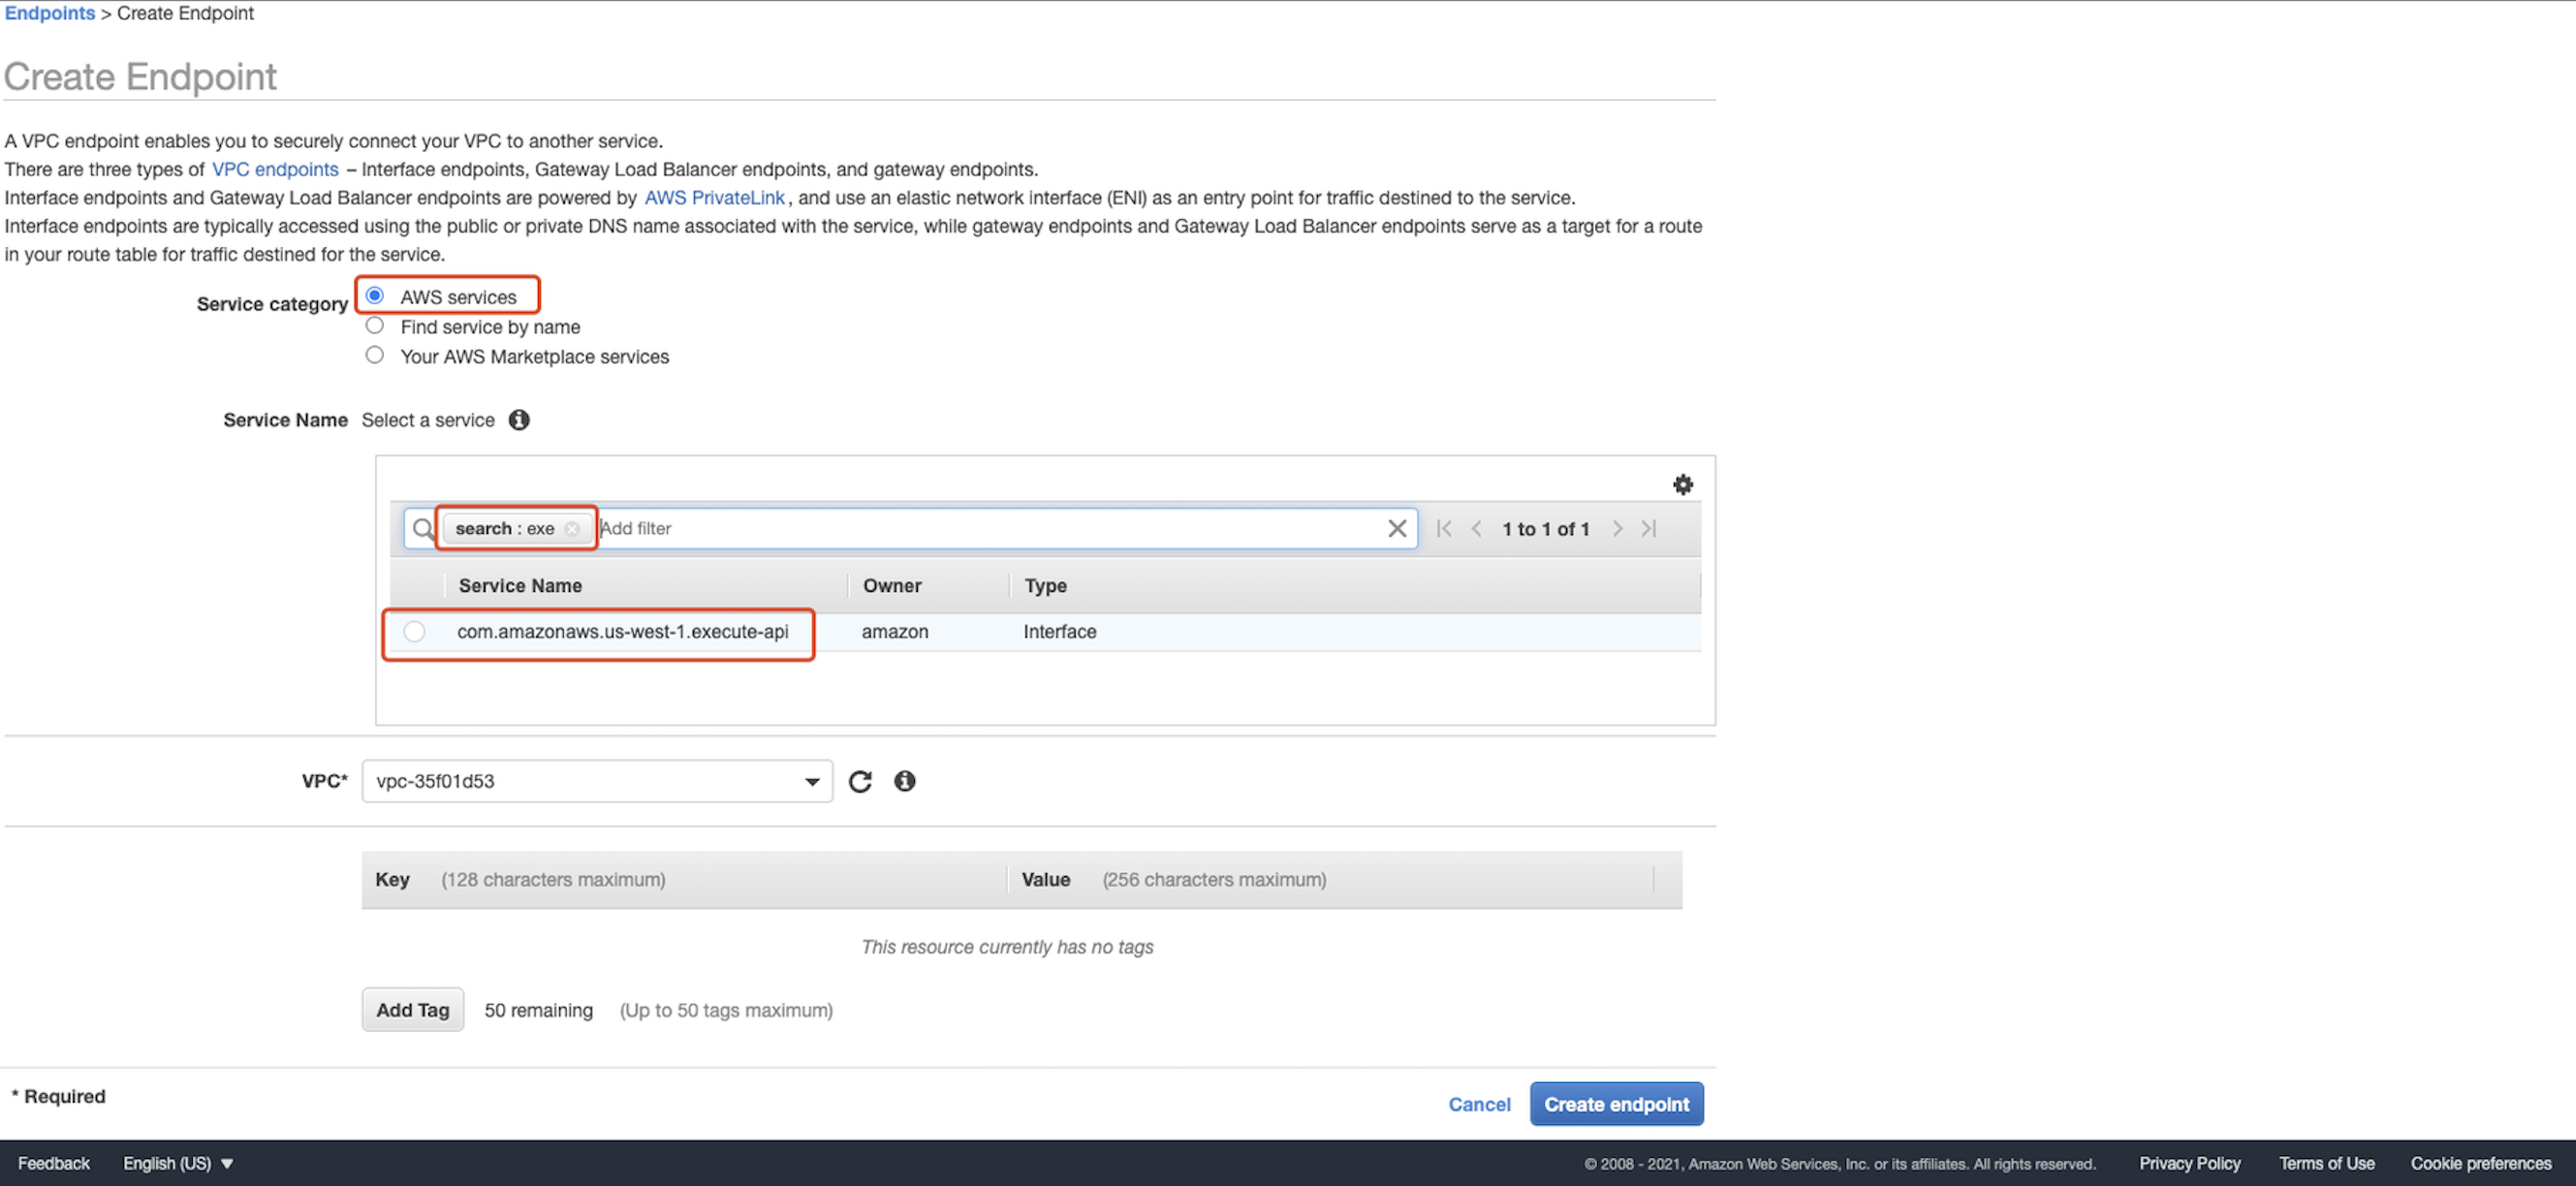 For
For VPC, choose the Amazon VPC where you want to create the interface endpoint. For Subnets, select the subnets in which you want to create the endpoint network interfaces. We can keep both of them to default values in our tutorial. For Enable DNS name, keep the Enable for this endpoint check box selected to enable private DNS for the interface endpoint. With private DNS enabled, you can connect to your private API using private or public DNS. Note: When you enable private DNS for an interface VPC endpoint, you can no longer access API Gateway public APIs from your Amazon VPC. For more information, see Why do I get an HTTP 403 Forbidden error when connecting to my API Gateway APIs from a VPC? 1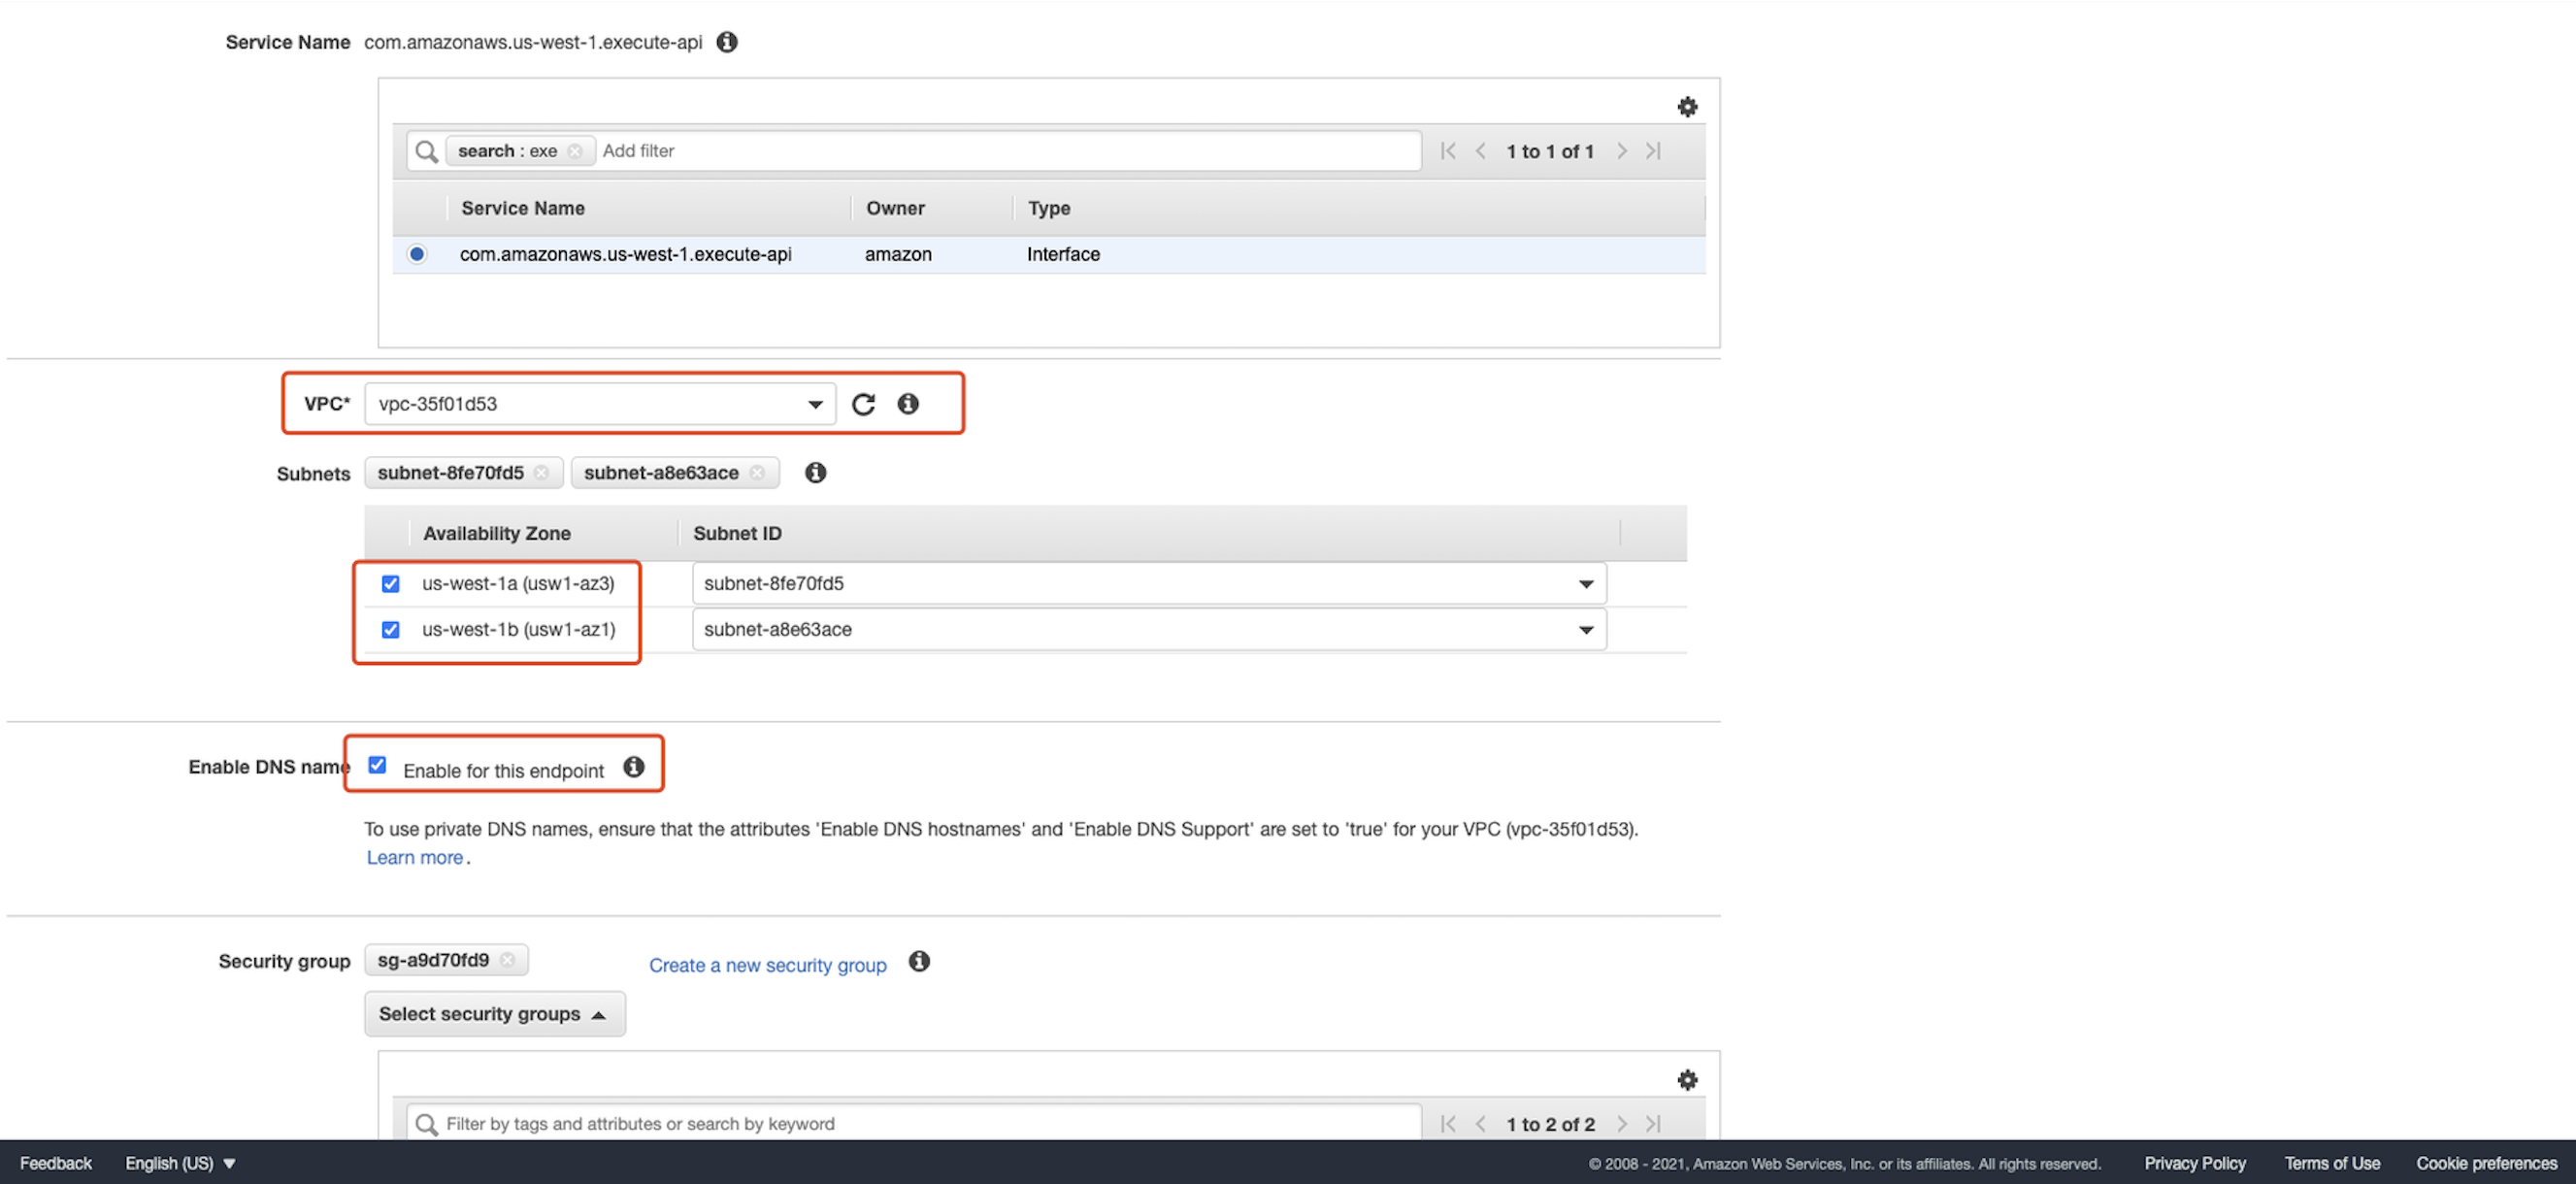 For
For Security group, select at least one security group to associate with the endpoint network interfaces. The security group that you choose must have a rule that allows TCP Port 443 inbound HTTPS traffic from either an IP address range in your Amazon VPC or another security group in your Amazon VPC. If you don't have a security group that meets those requirements, choose Create a new security group to create a security group. If you don't specify a security group, a default security group is associated with the endpoint network interfaces. 1 For Policy, choose Full Access. 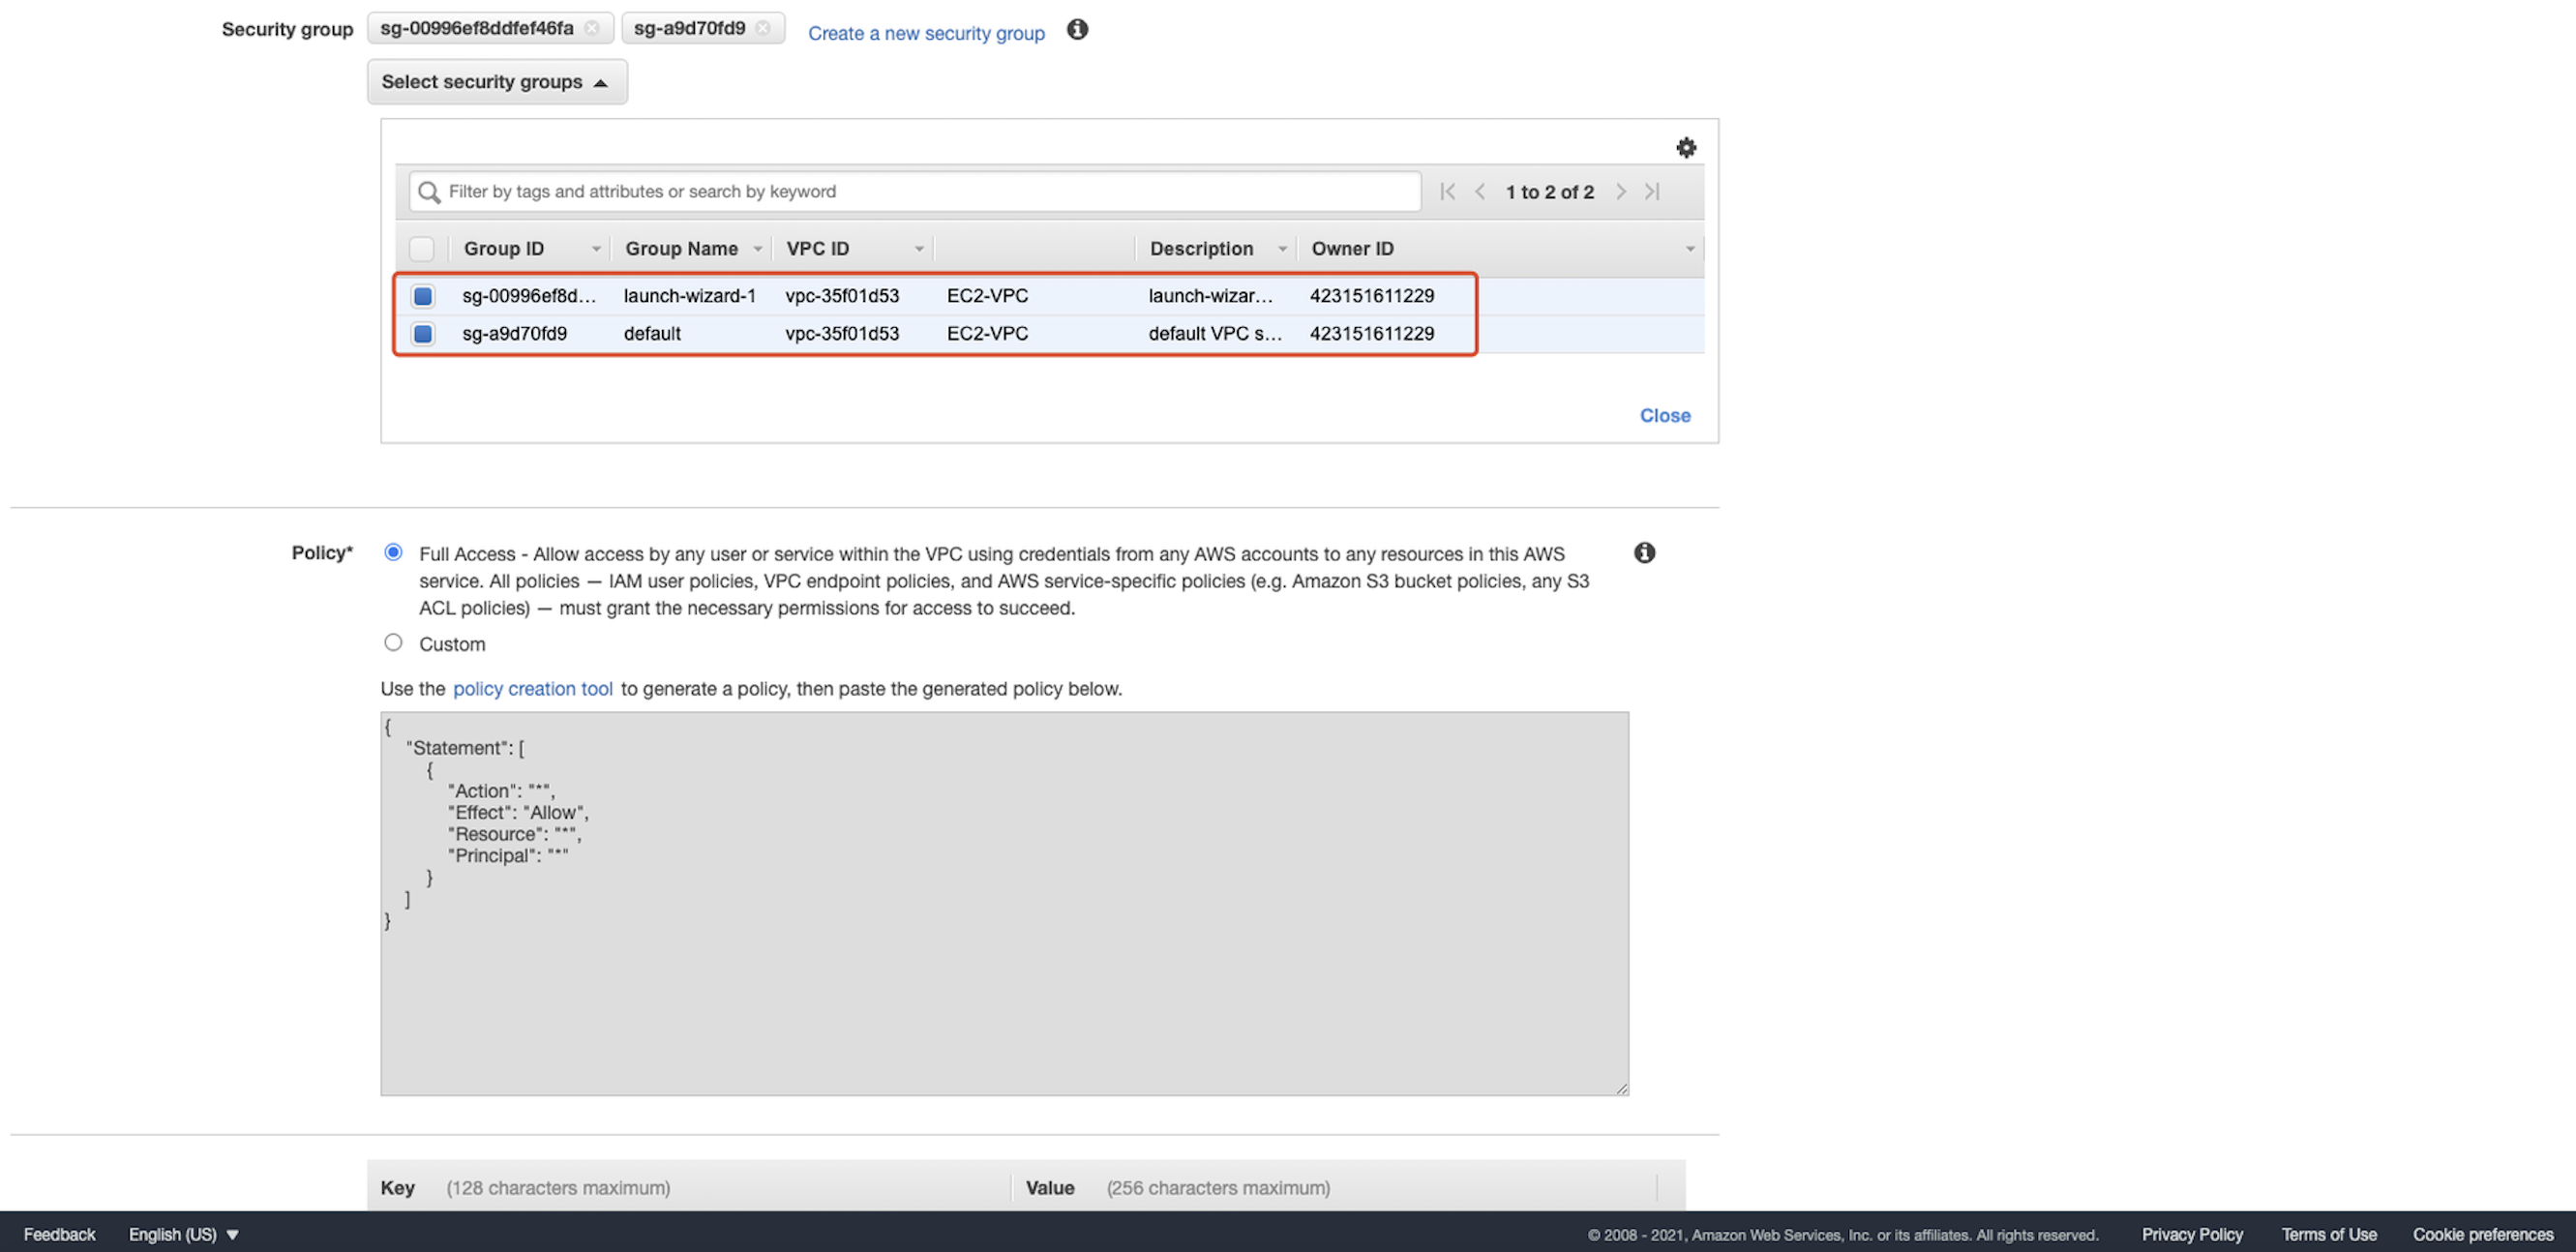 Click
Click Create endpoint.
Create and config API Gateway
Go to API Gateway homepage. Click create API: 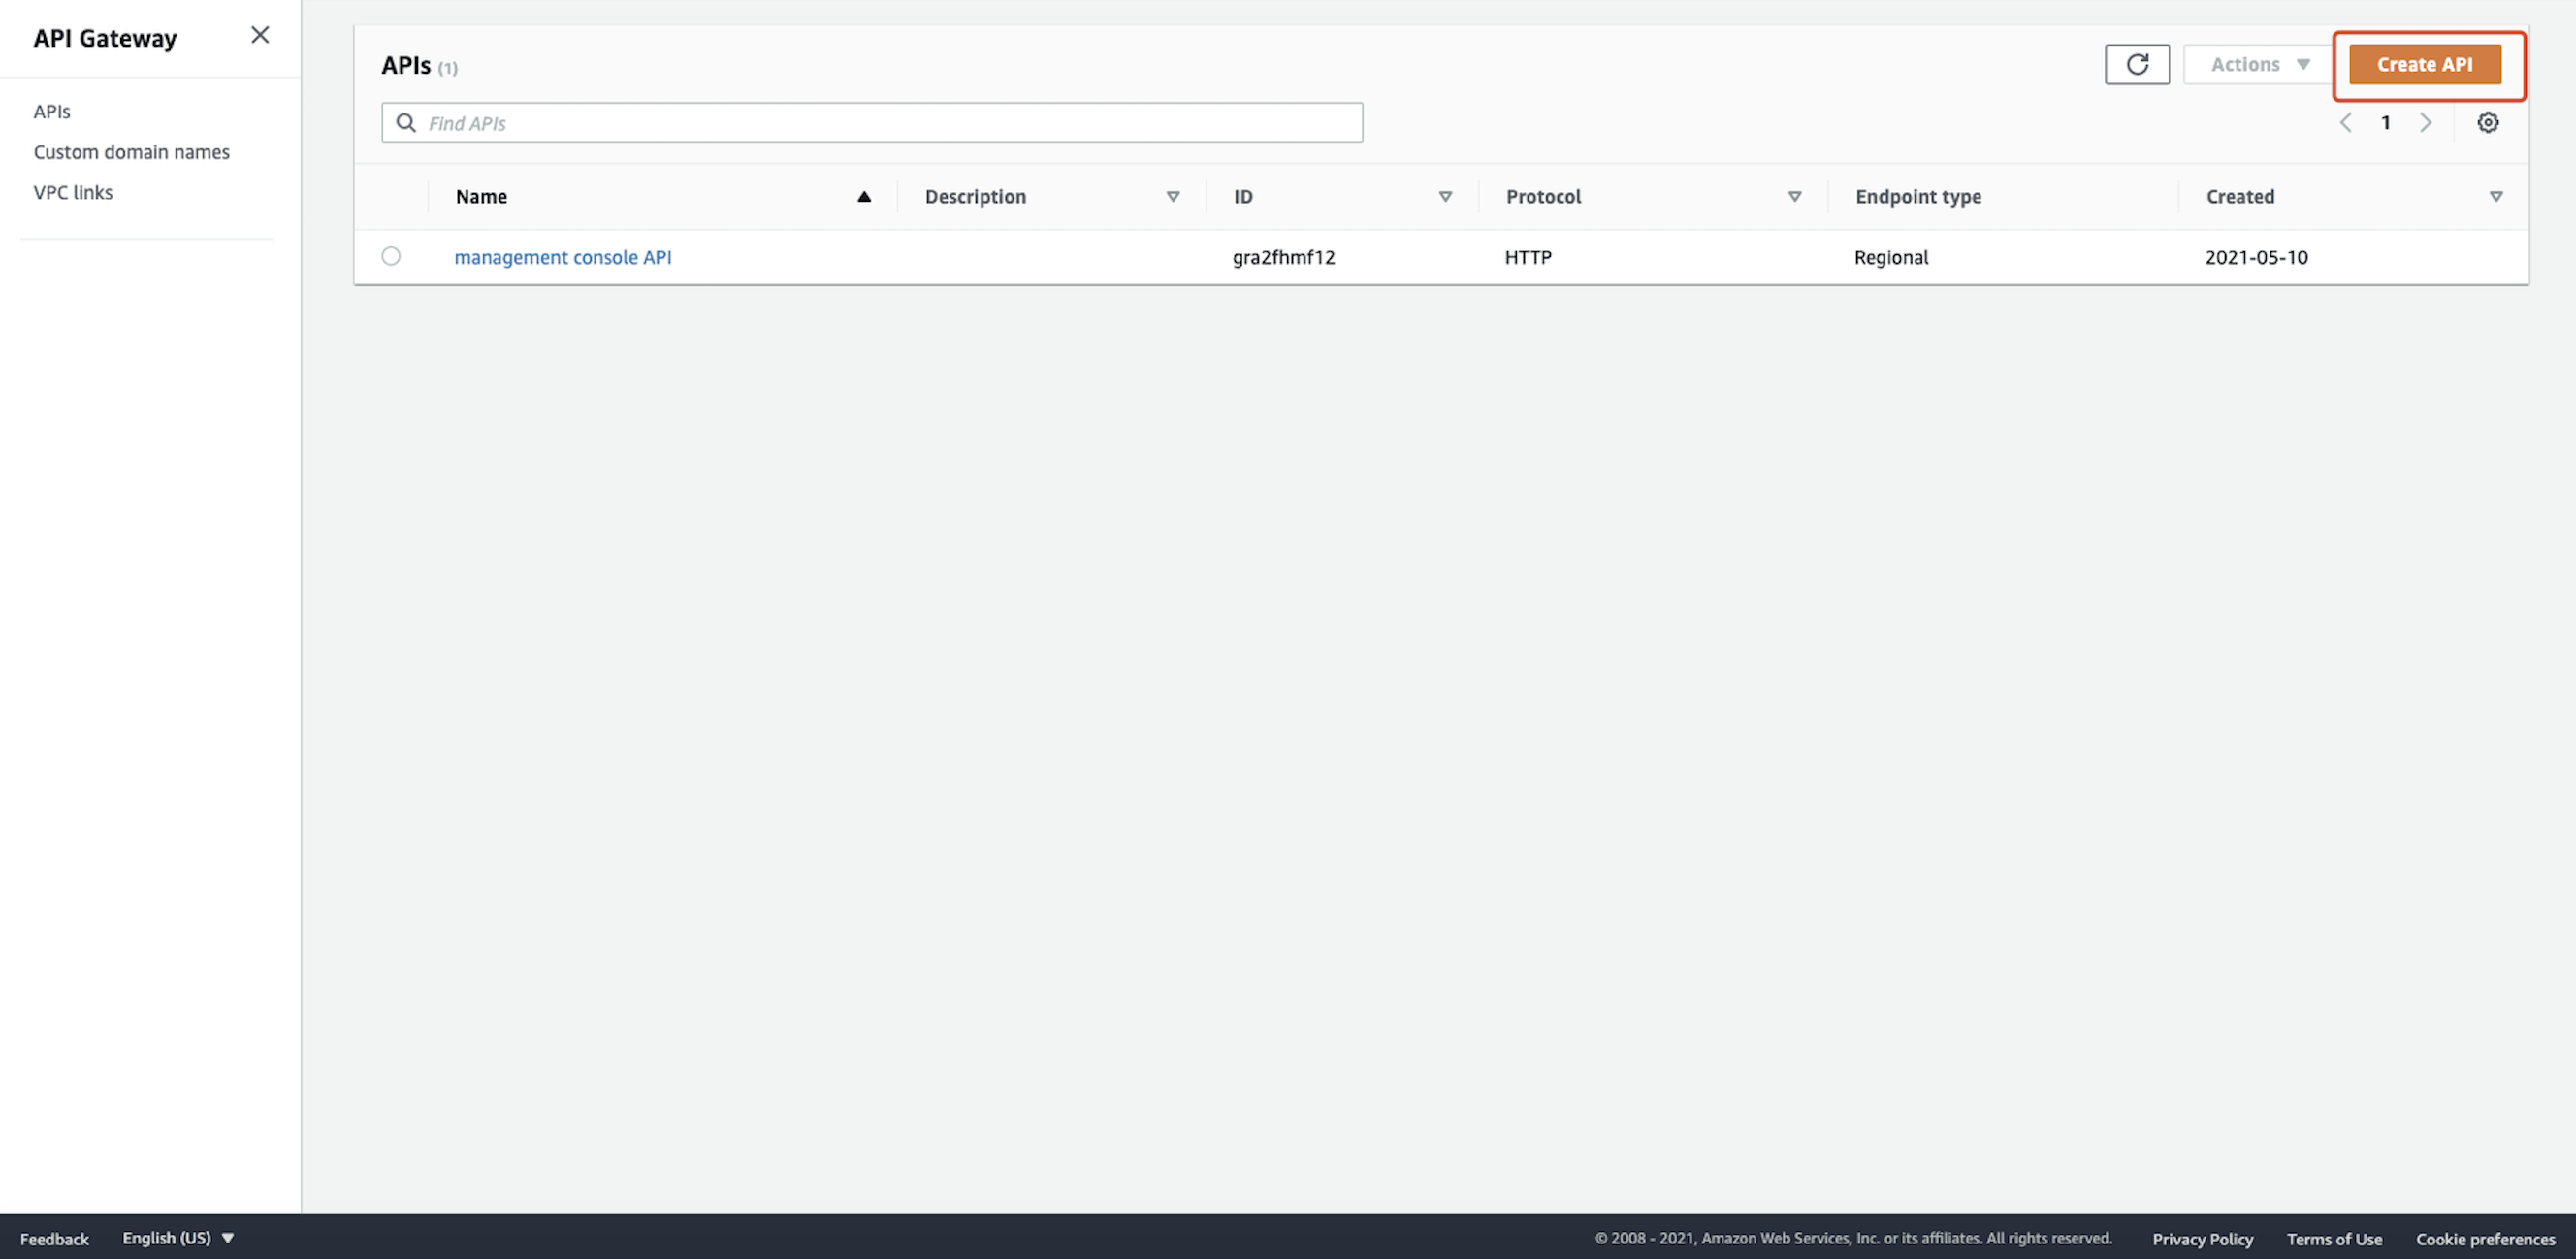 Build a private REST API that cannot be accessed directly:
 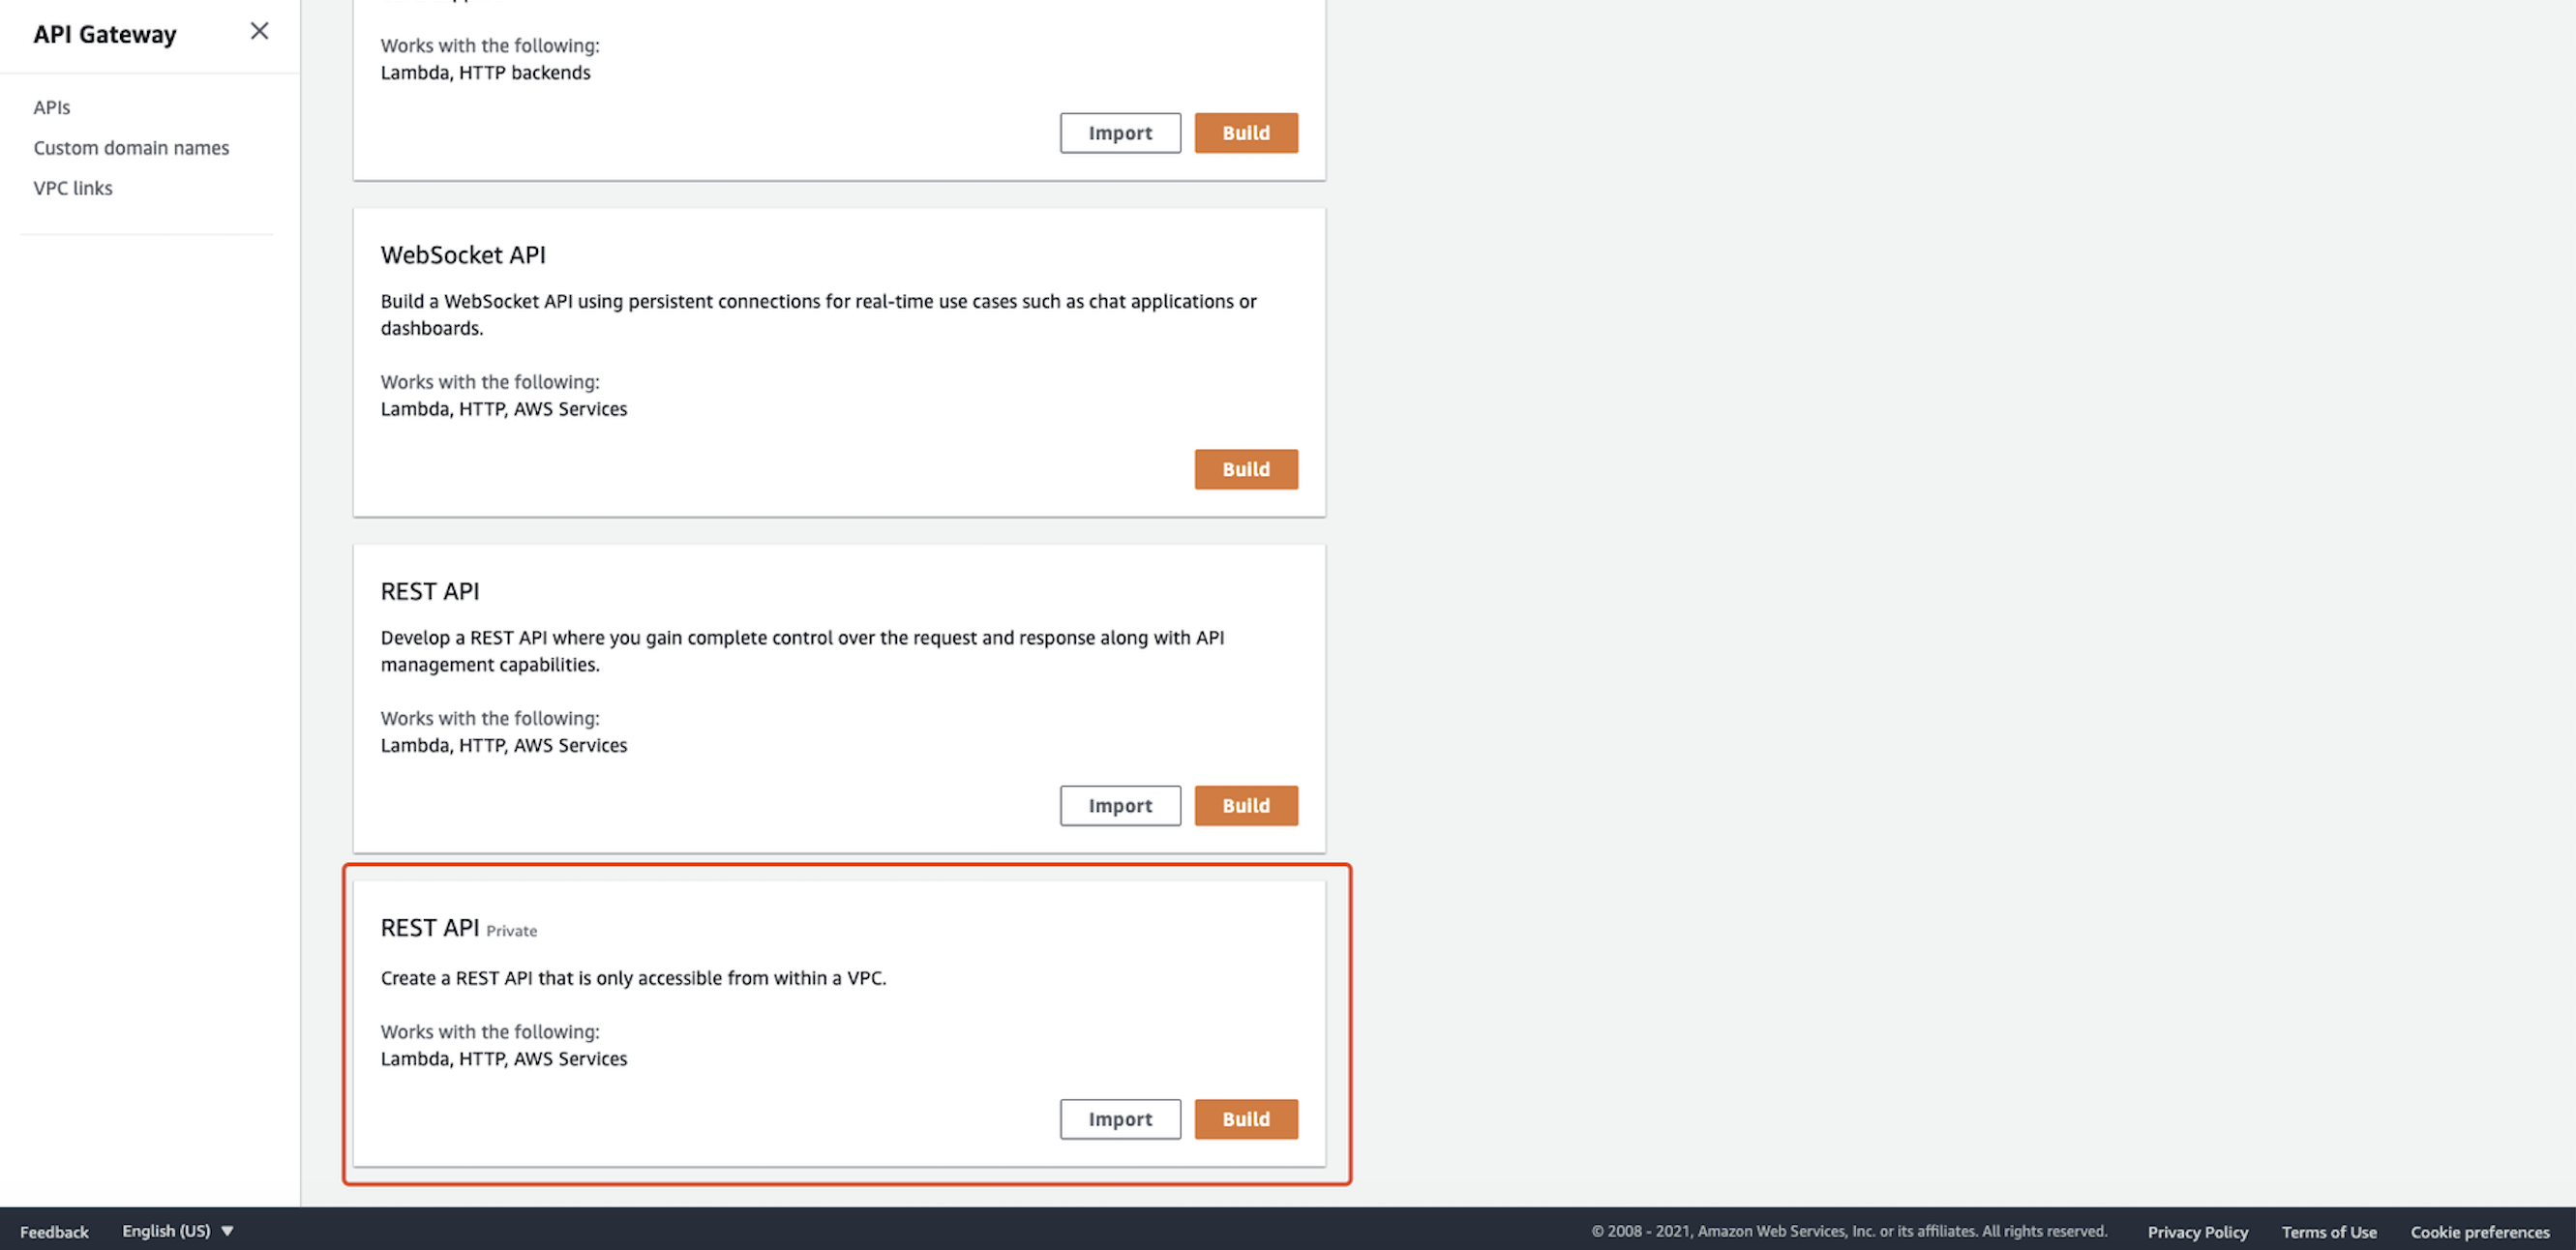 You can also change the existing API to private in
 Settings → Endpoint Configuration: 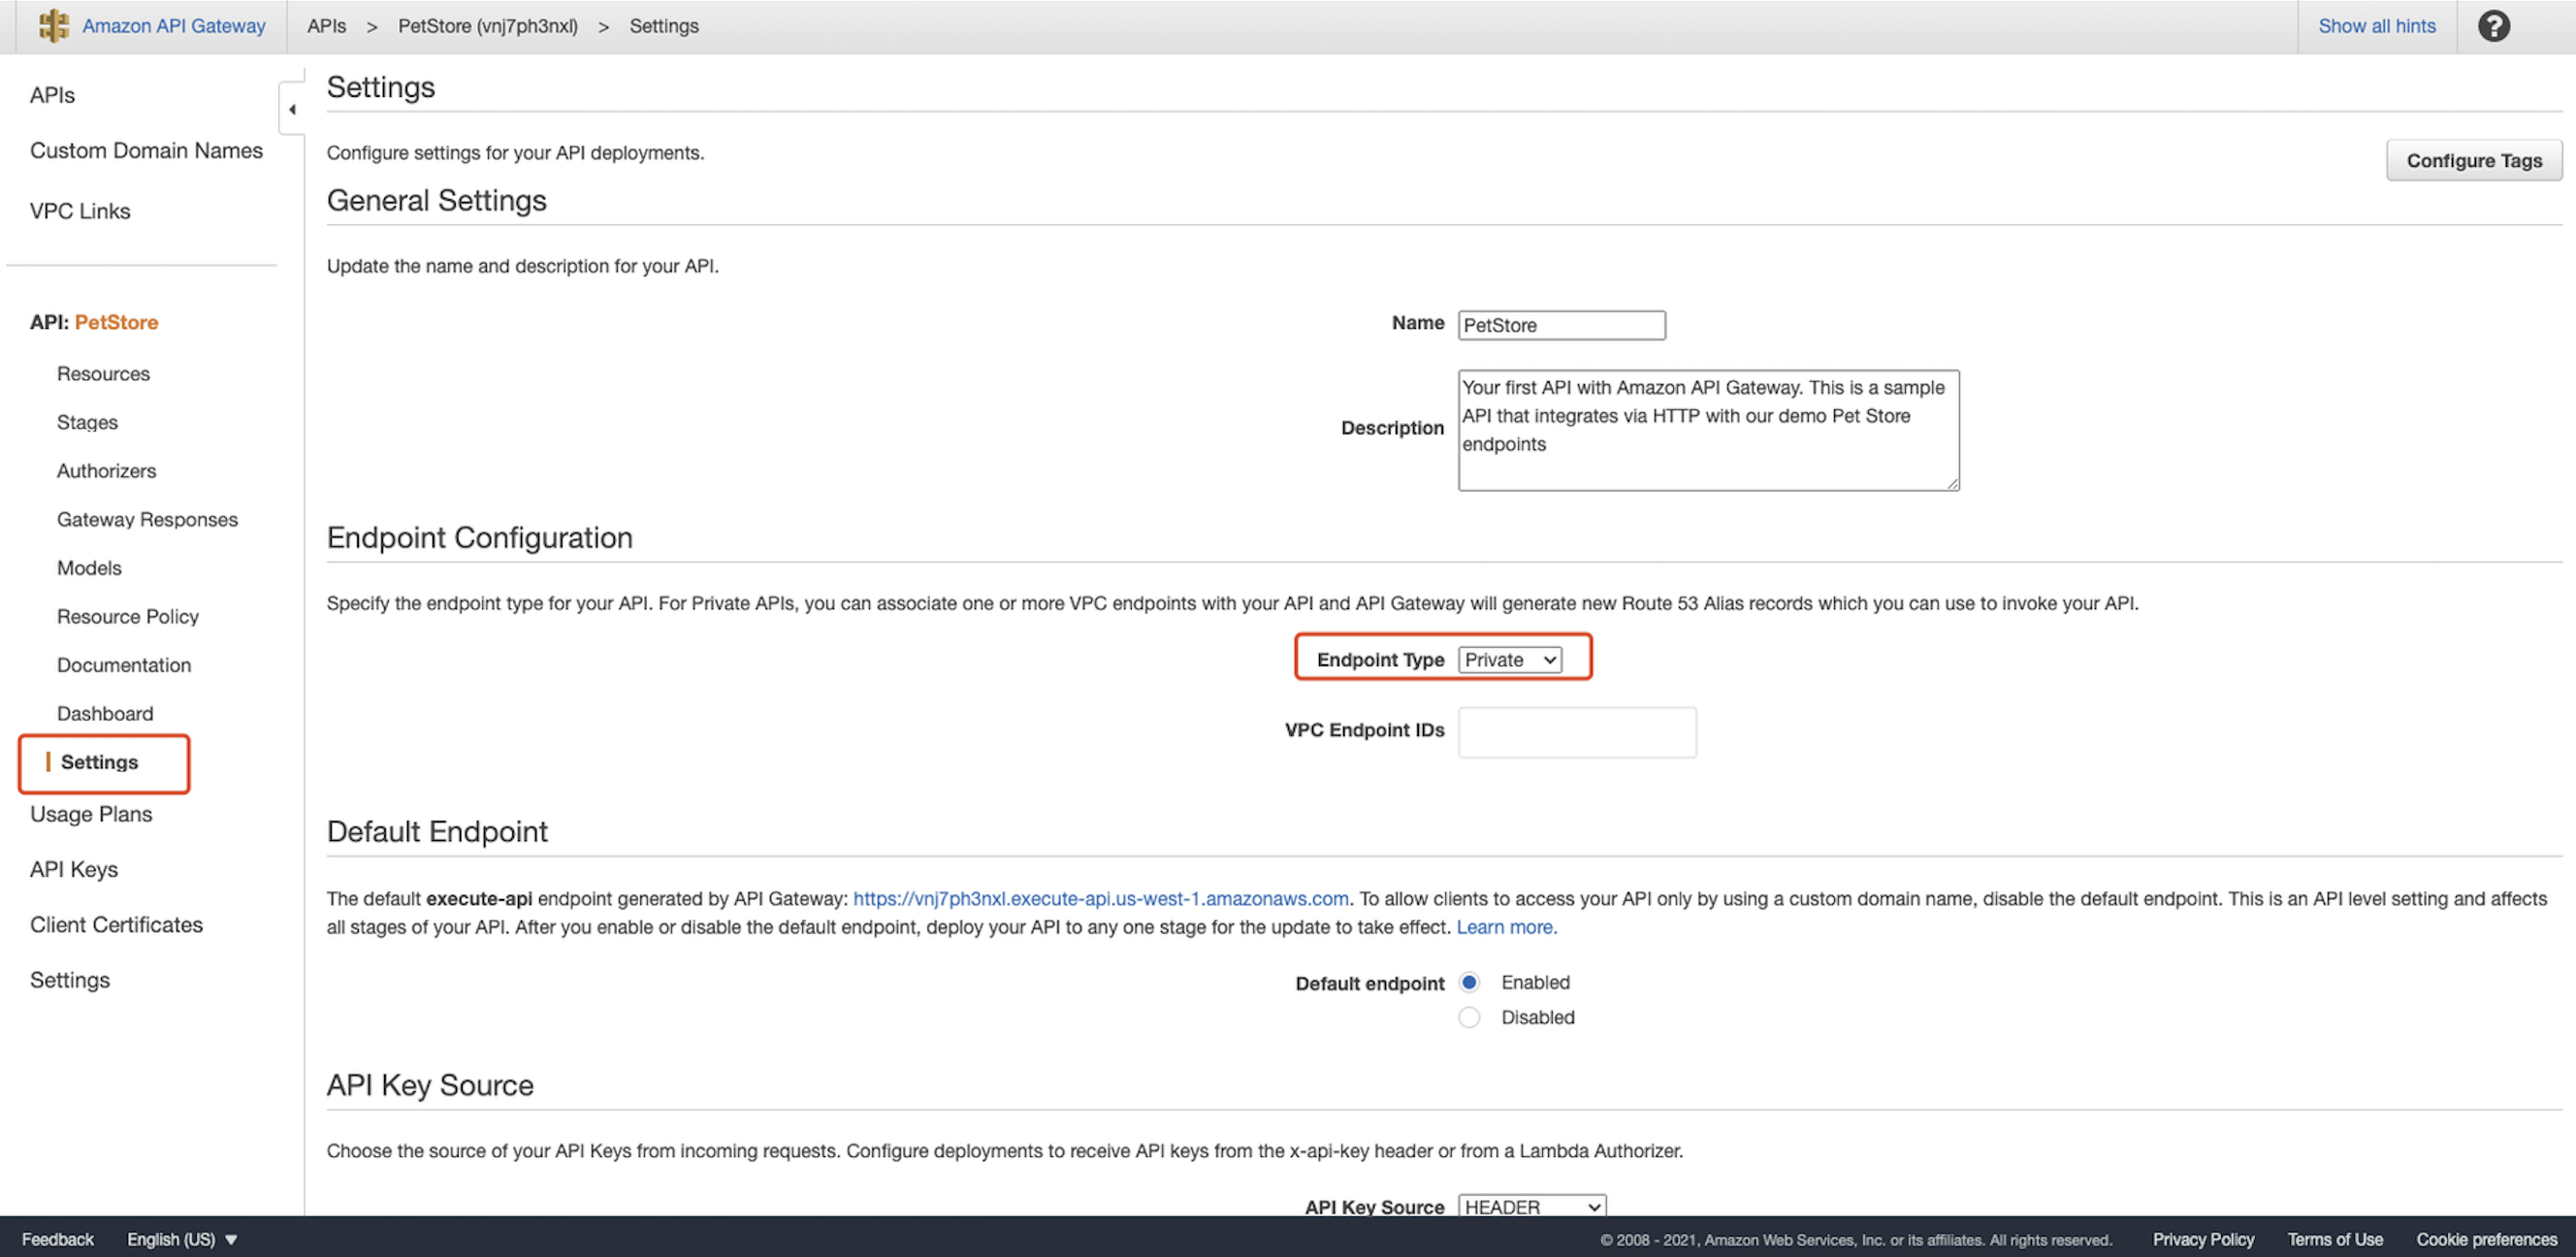 We use the example API for testing purposes and click import:
 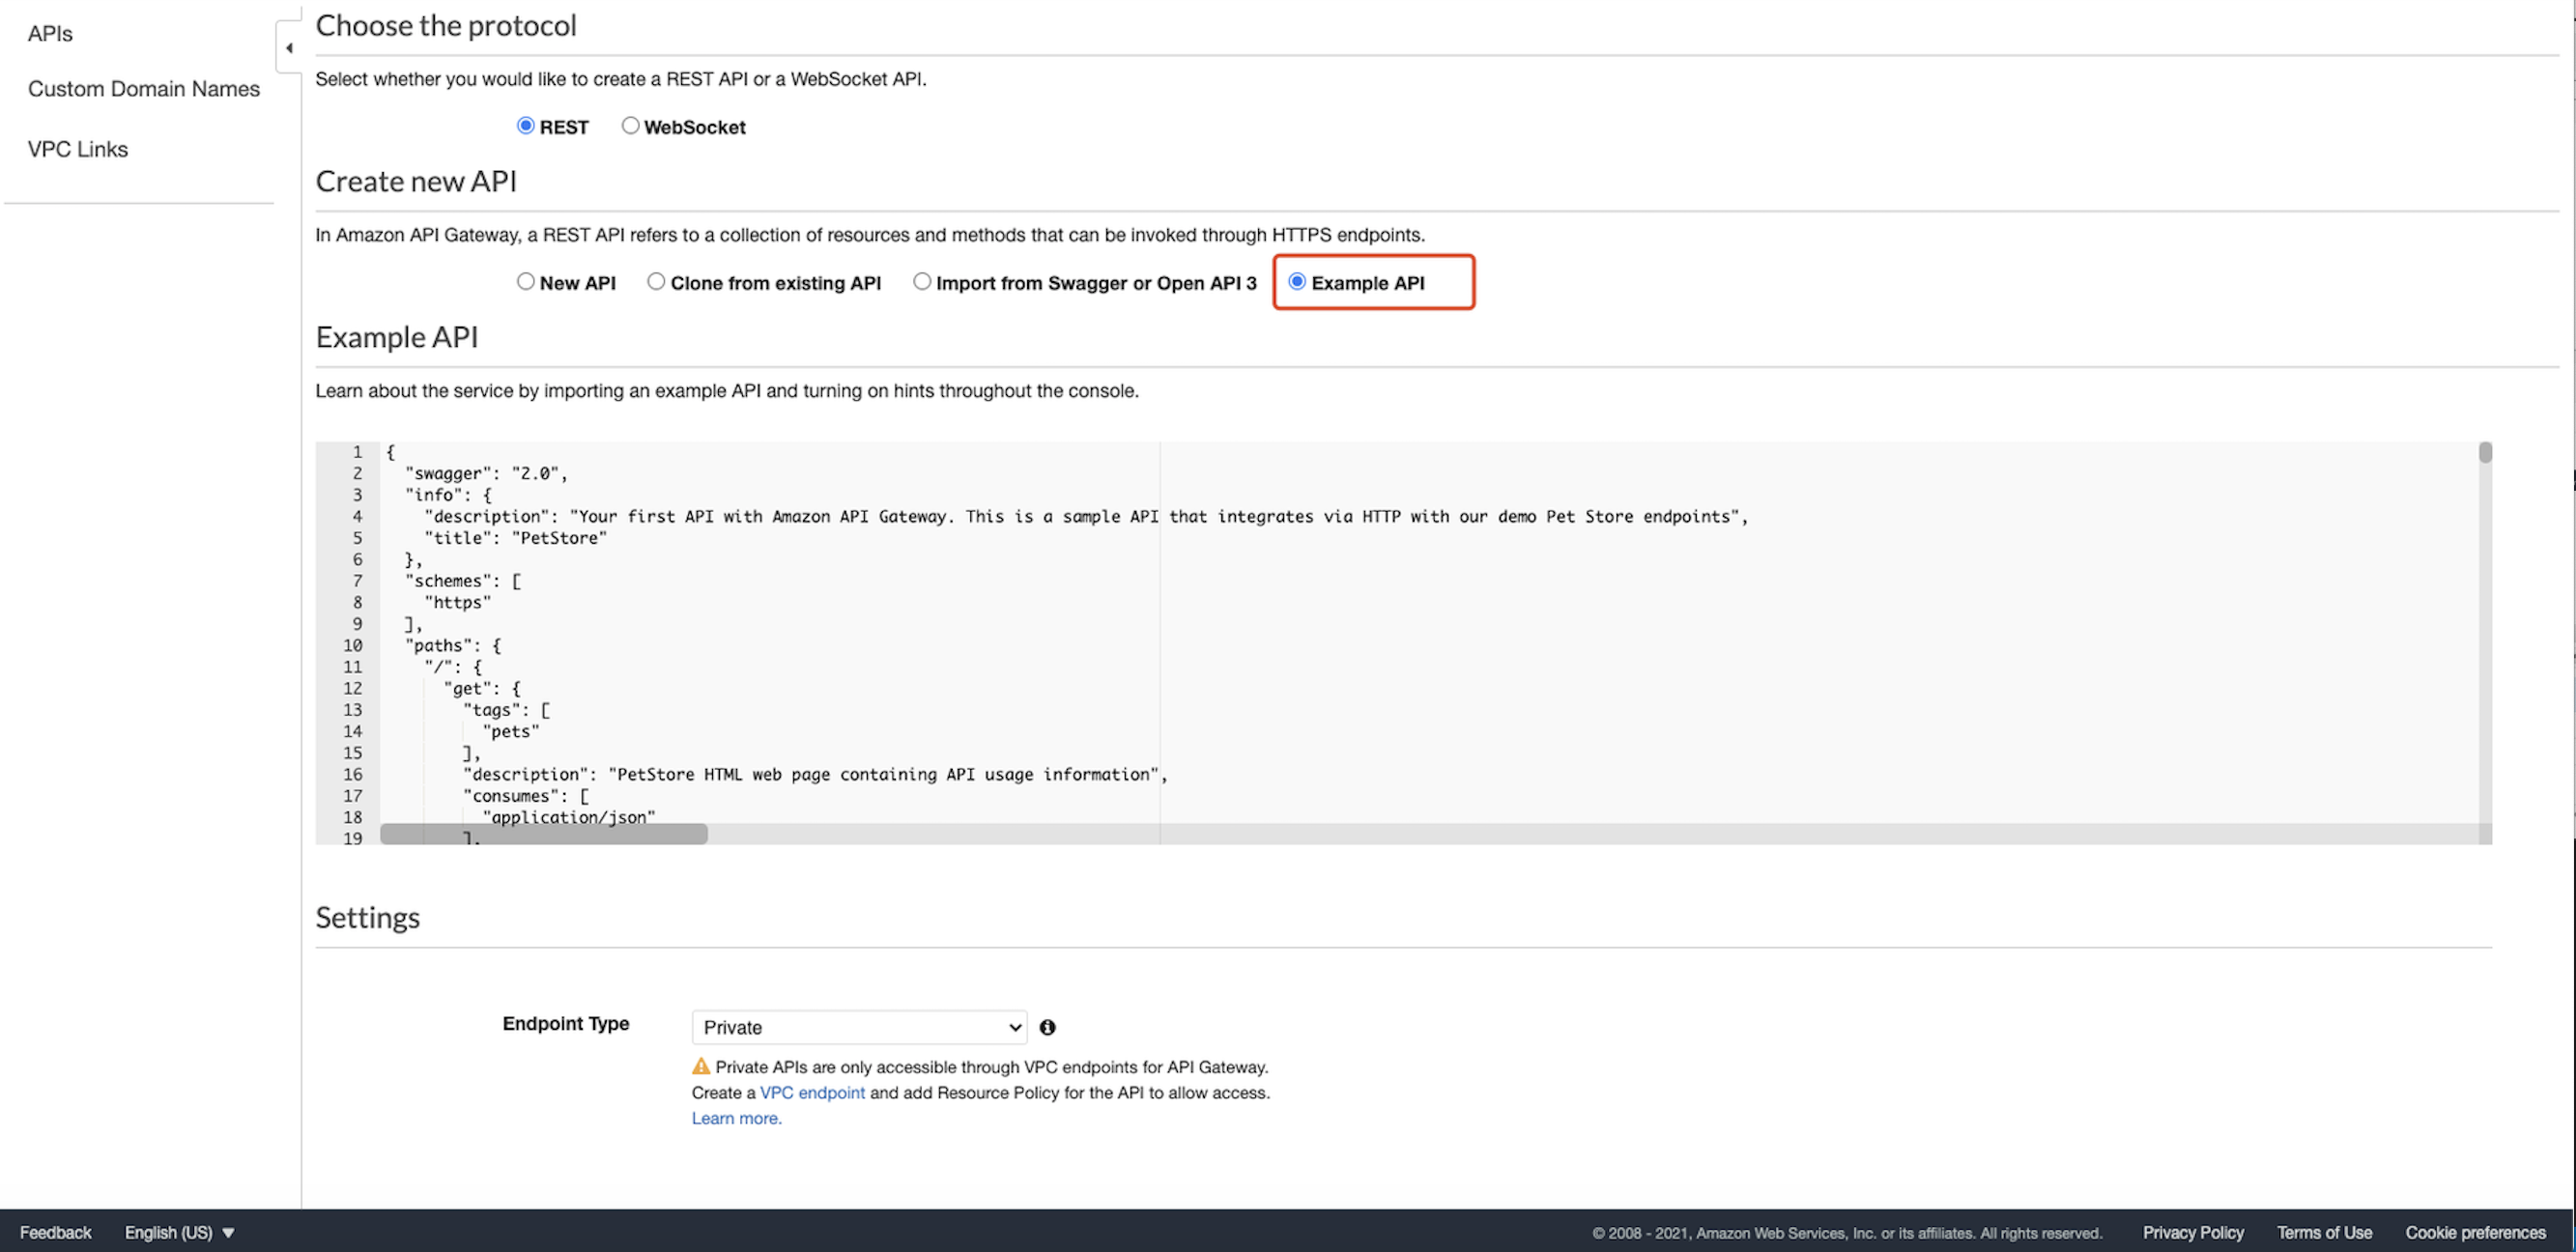 Select
 Resource Policy tab and use Source VPC Allowlist as the example:  Replace the
 vpcID with the real VPC ID that you noted down after creating the EC2. It should be like "aws:sourceVpc": "vpc-12345678". You can also find it in the Endpoints: 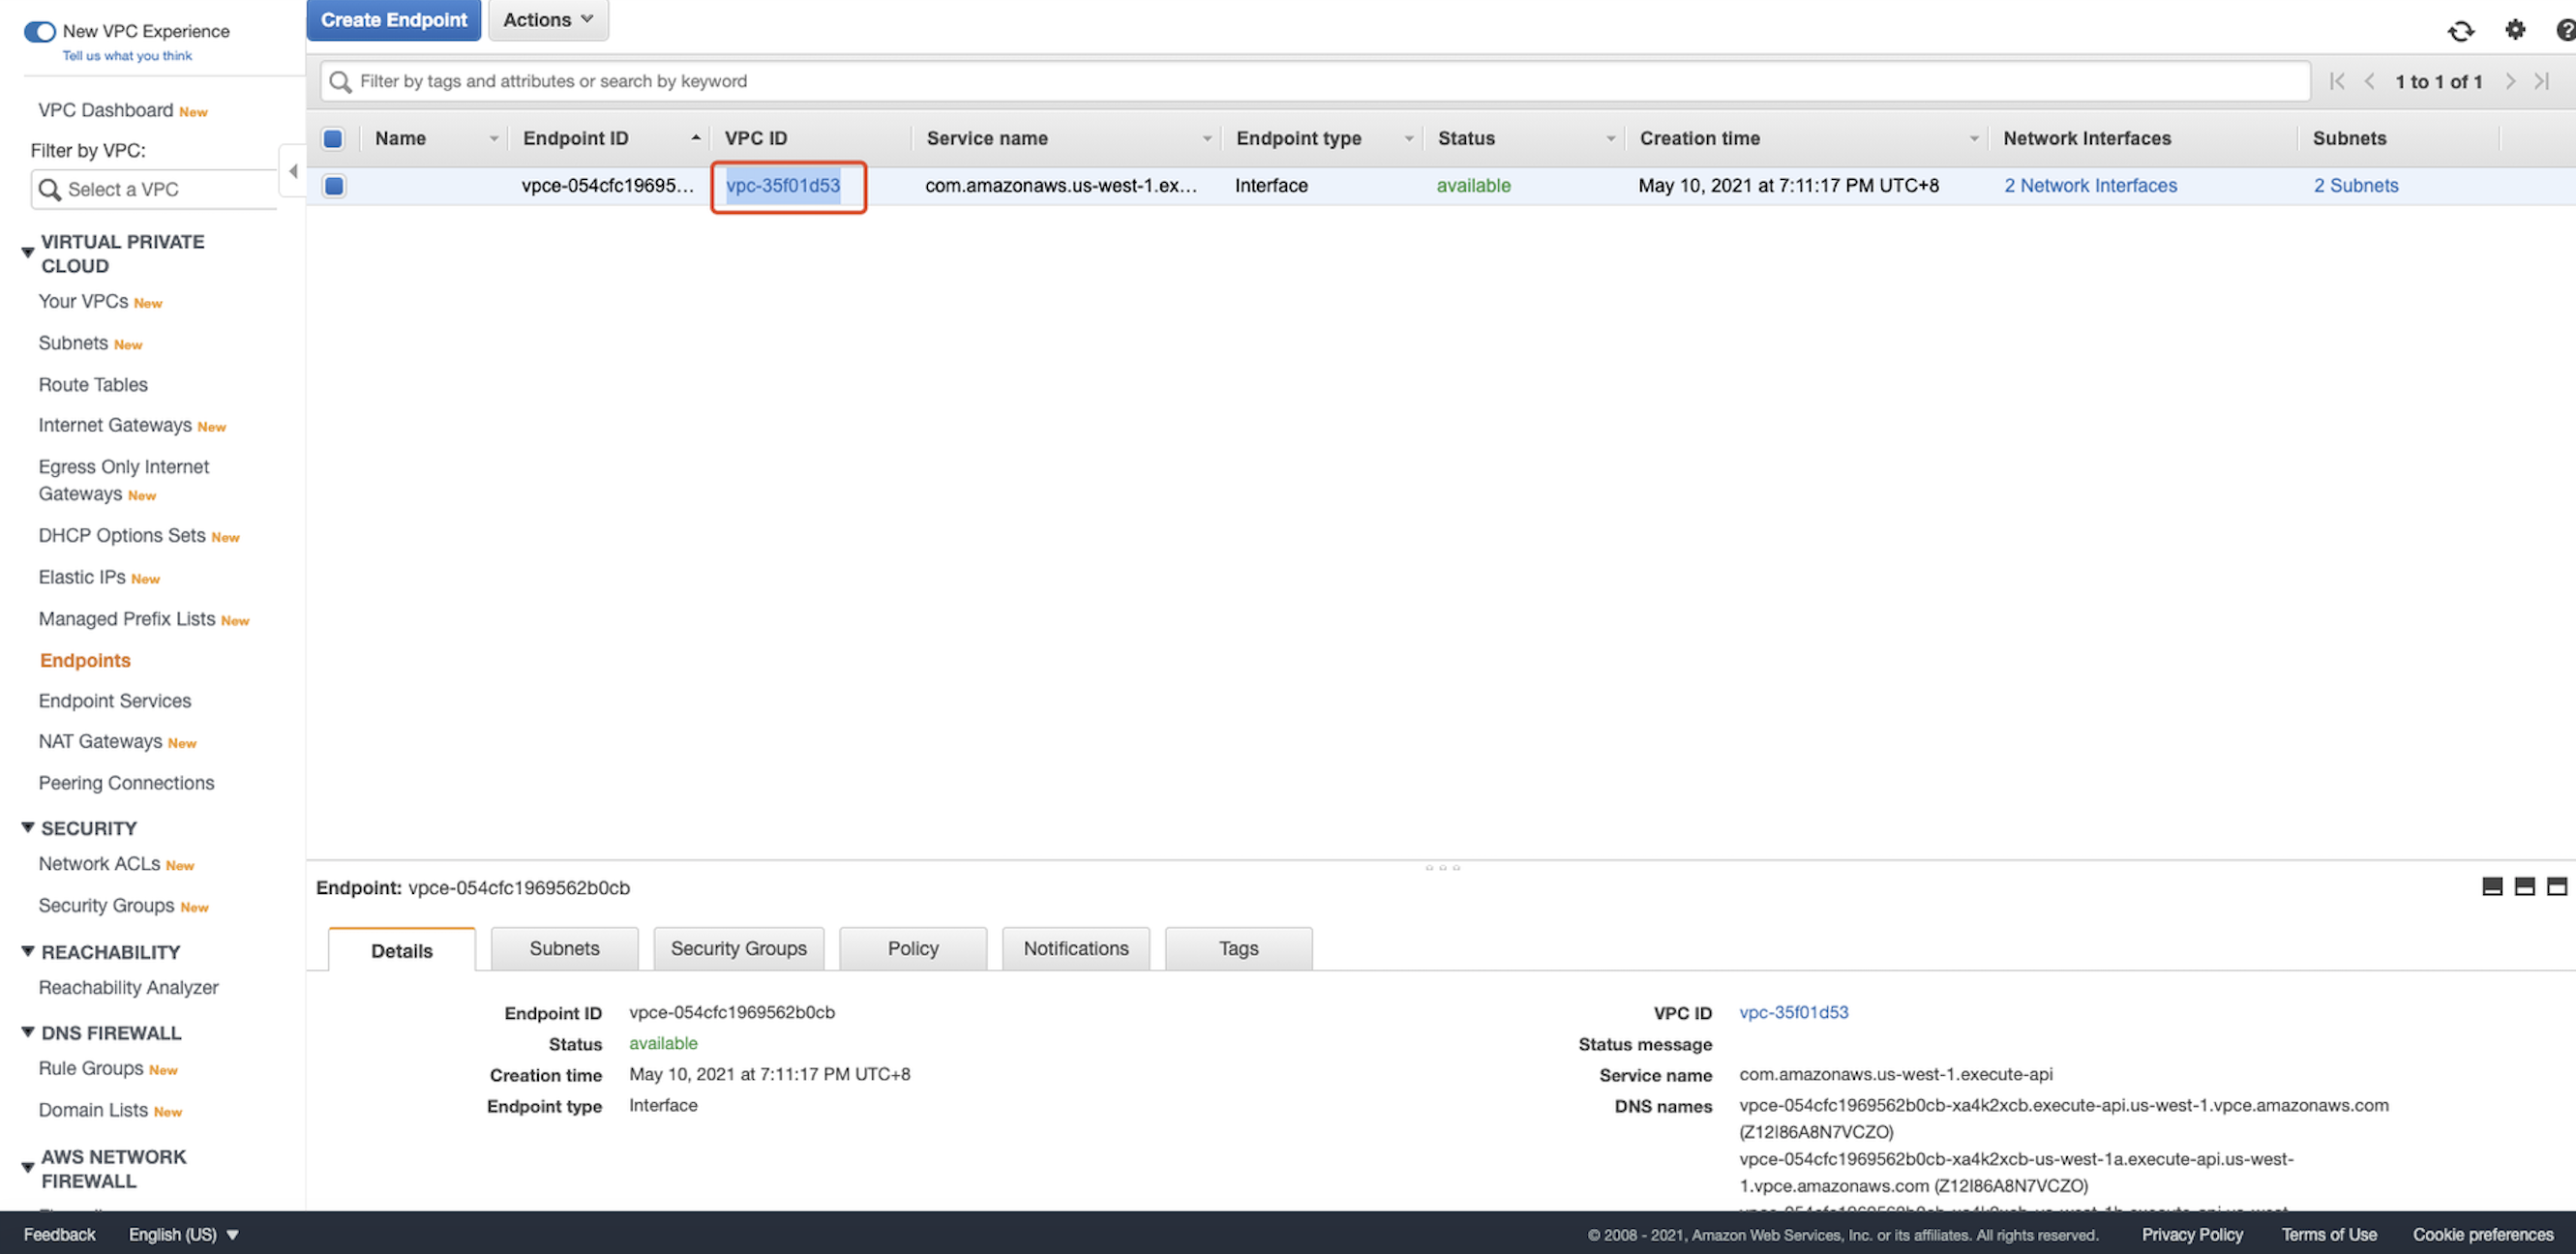 For testing purposes, we set the resource to wildcard. And the policy should be like this:
{
    "Version": "2012-10-17",
    "Statement": [
        {
            "Effect": "Deny",
            "Principal": "*",
            "Action": "execute-api:Invoke",
            "Resource": "execute-api:/*/*/*",
            "Condition": {
                "StringNotEquals": {
                    "aws:sourceVpc": "vpc-12345678"
                }
            }
        },
        {
            "Effect": "Allow",
            "Principal": "*",
            "Action": "execute-api:Invoke",
            "Resource": "execute-api:/*/*/*"
        }
    ]
}
Click Save. In the left navigation pane of the API Gateway console, under your API, choose Resources. On the Resources pane, choose Actions, and then choose Deploy API: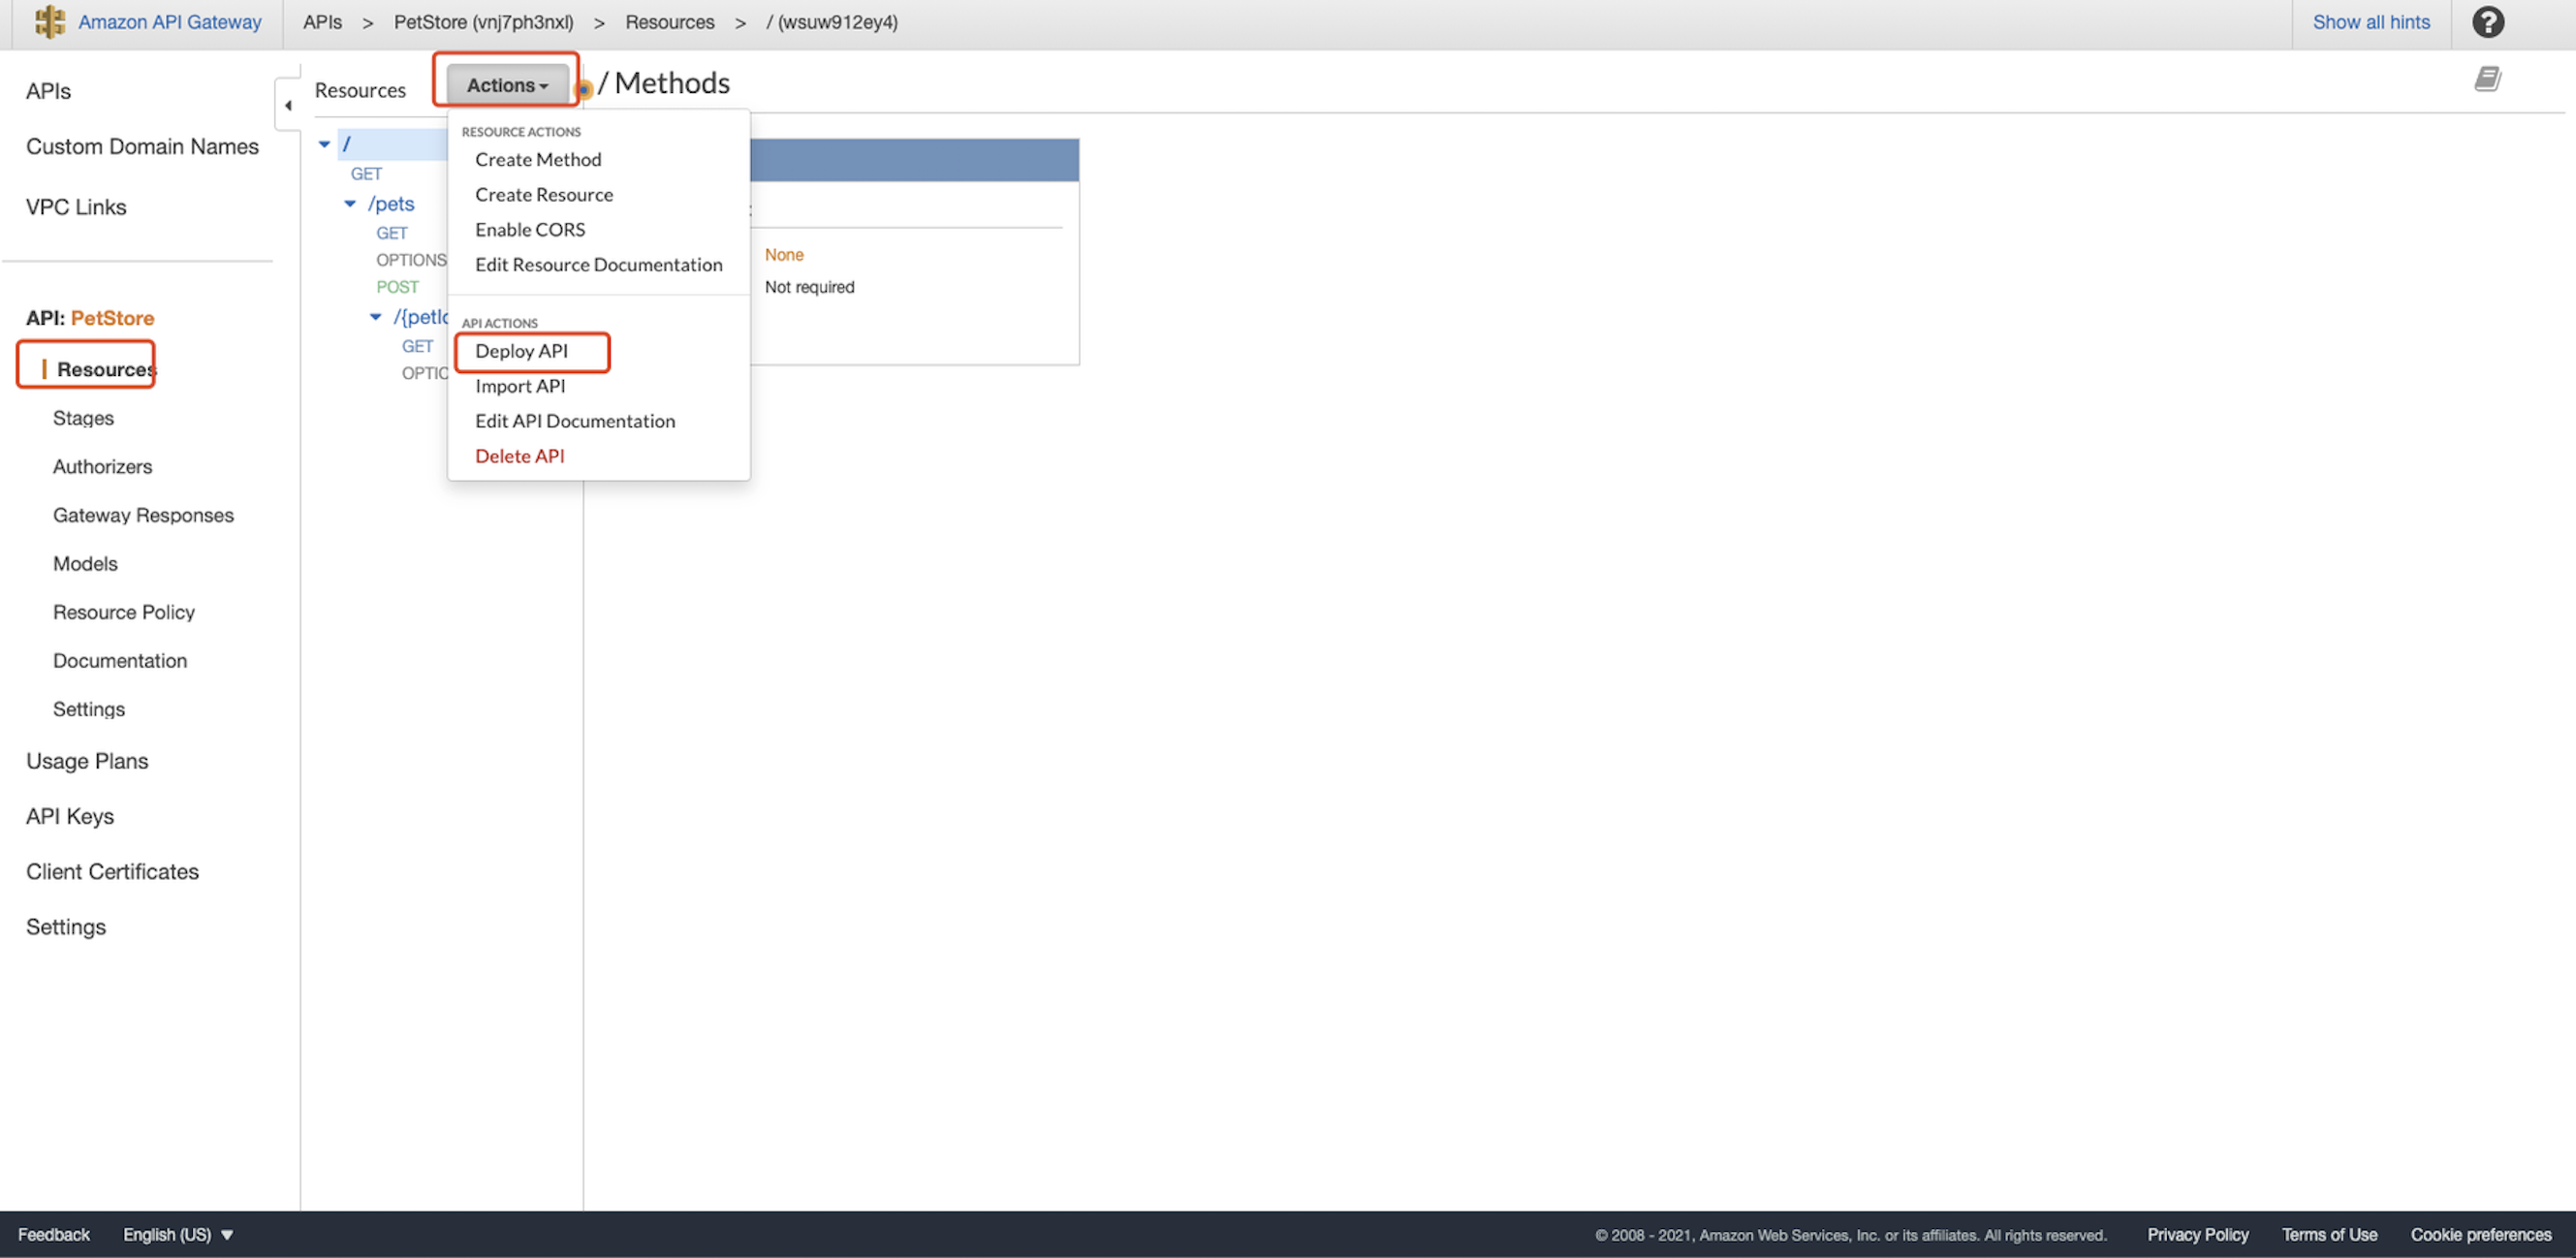 Create a new stage called
 test and click Deploy: 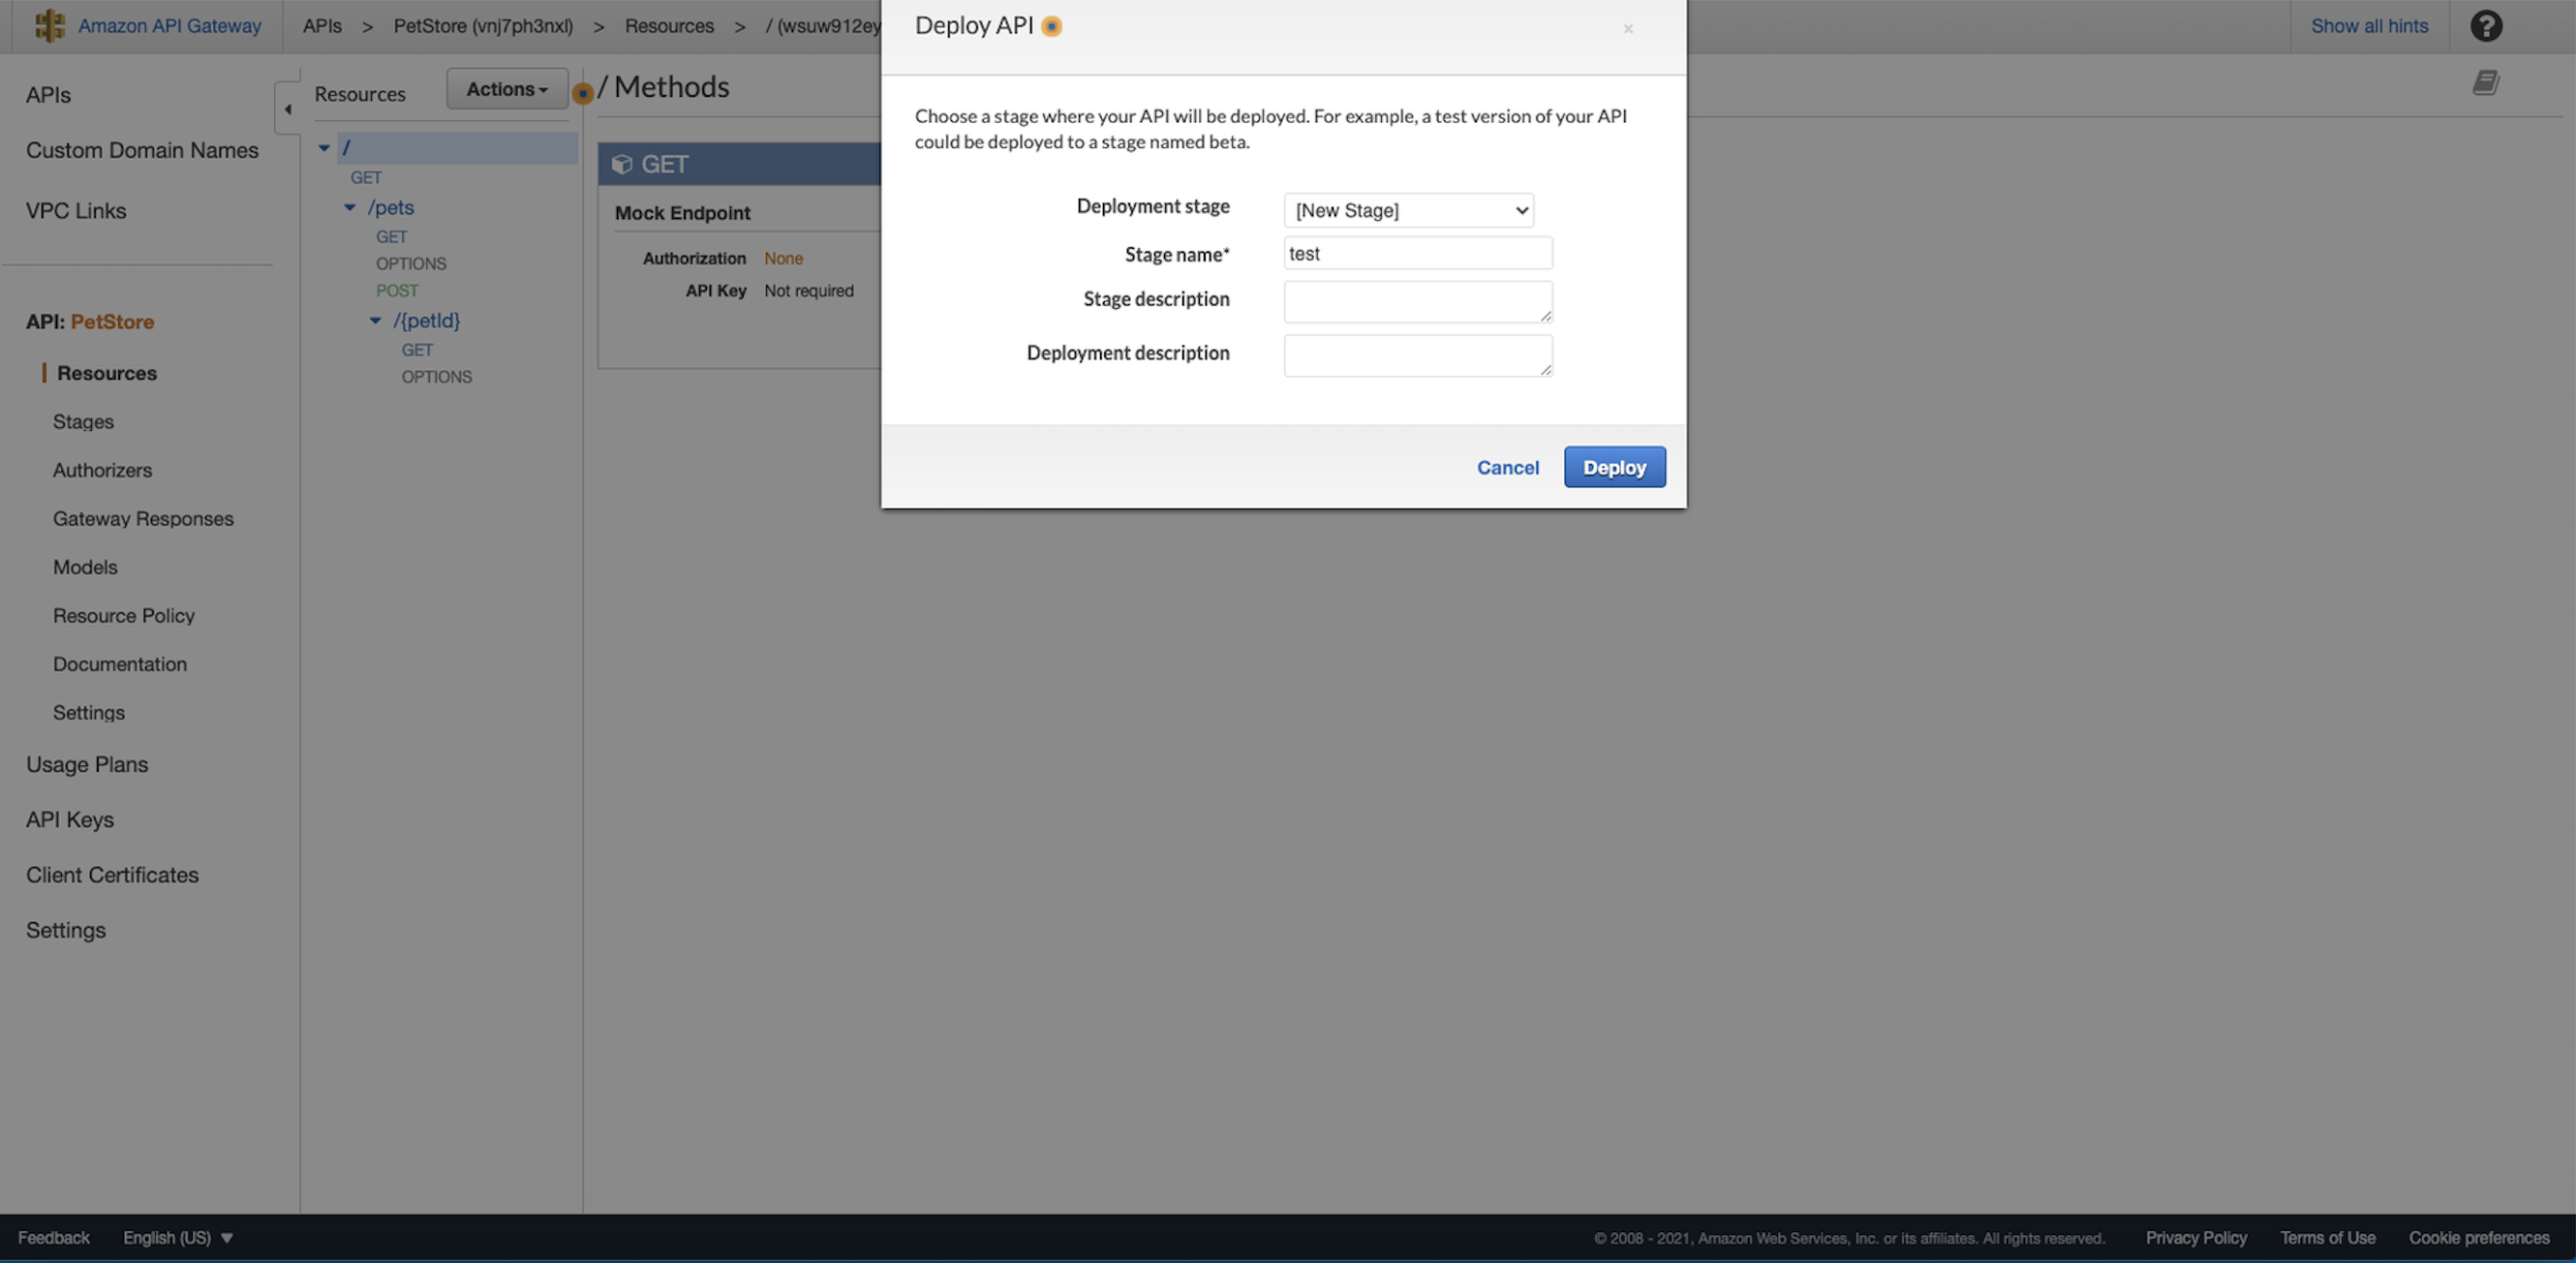 Now, the private REST API URL should be shown. Note it down:
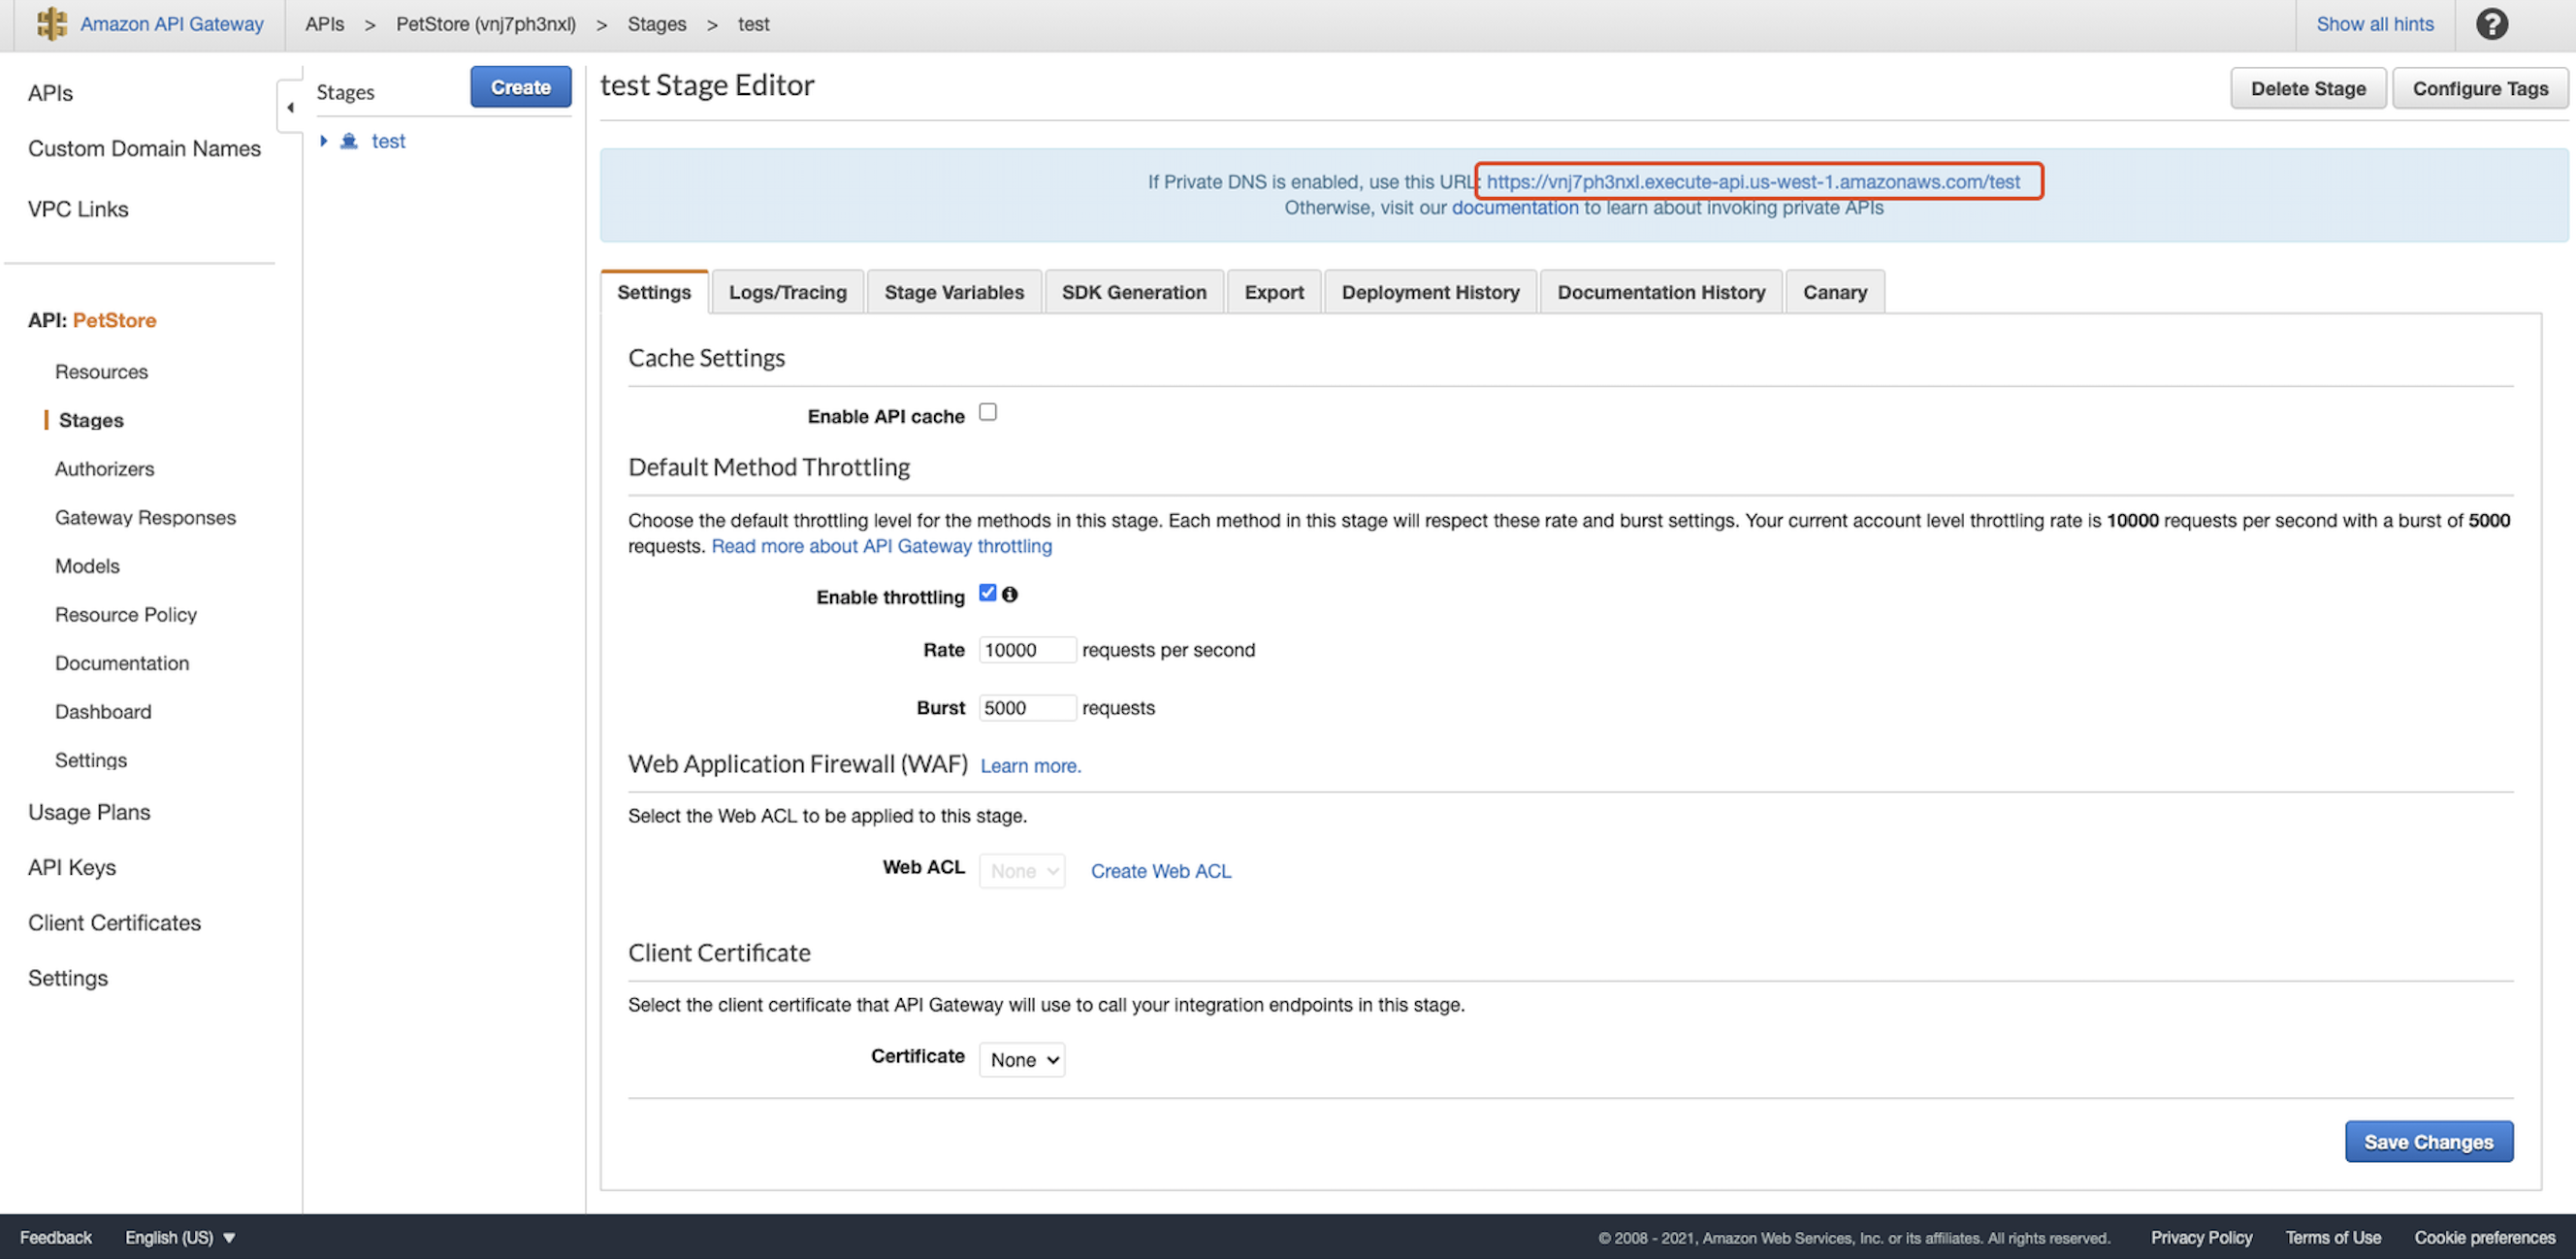
Configuration in DCMC
Go to DCMC homepage. Click Getting started: 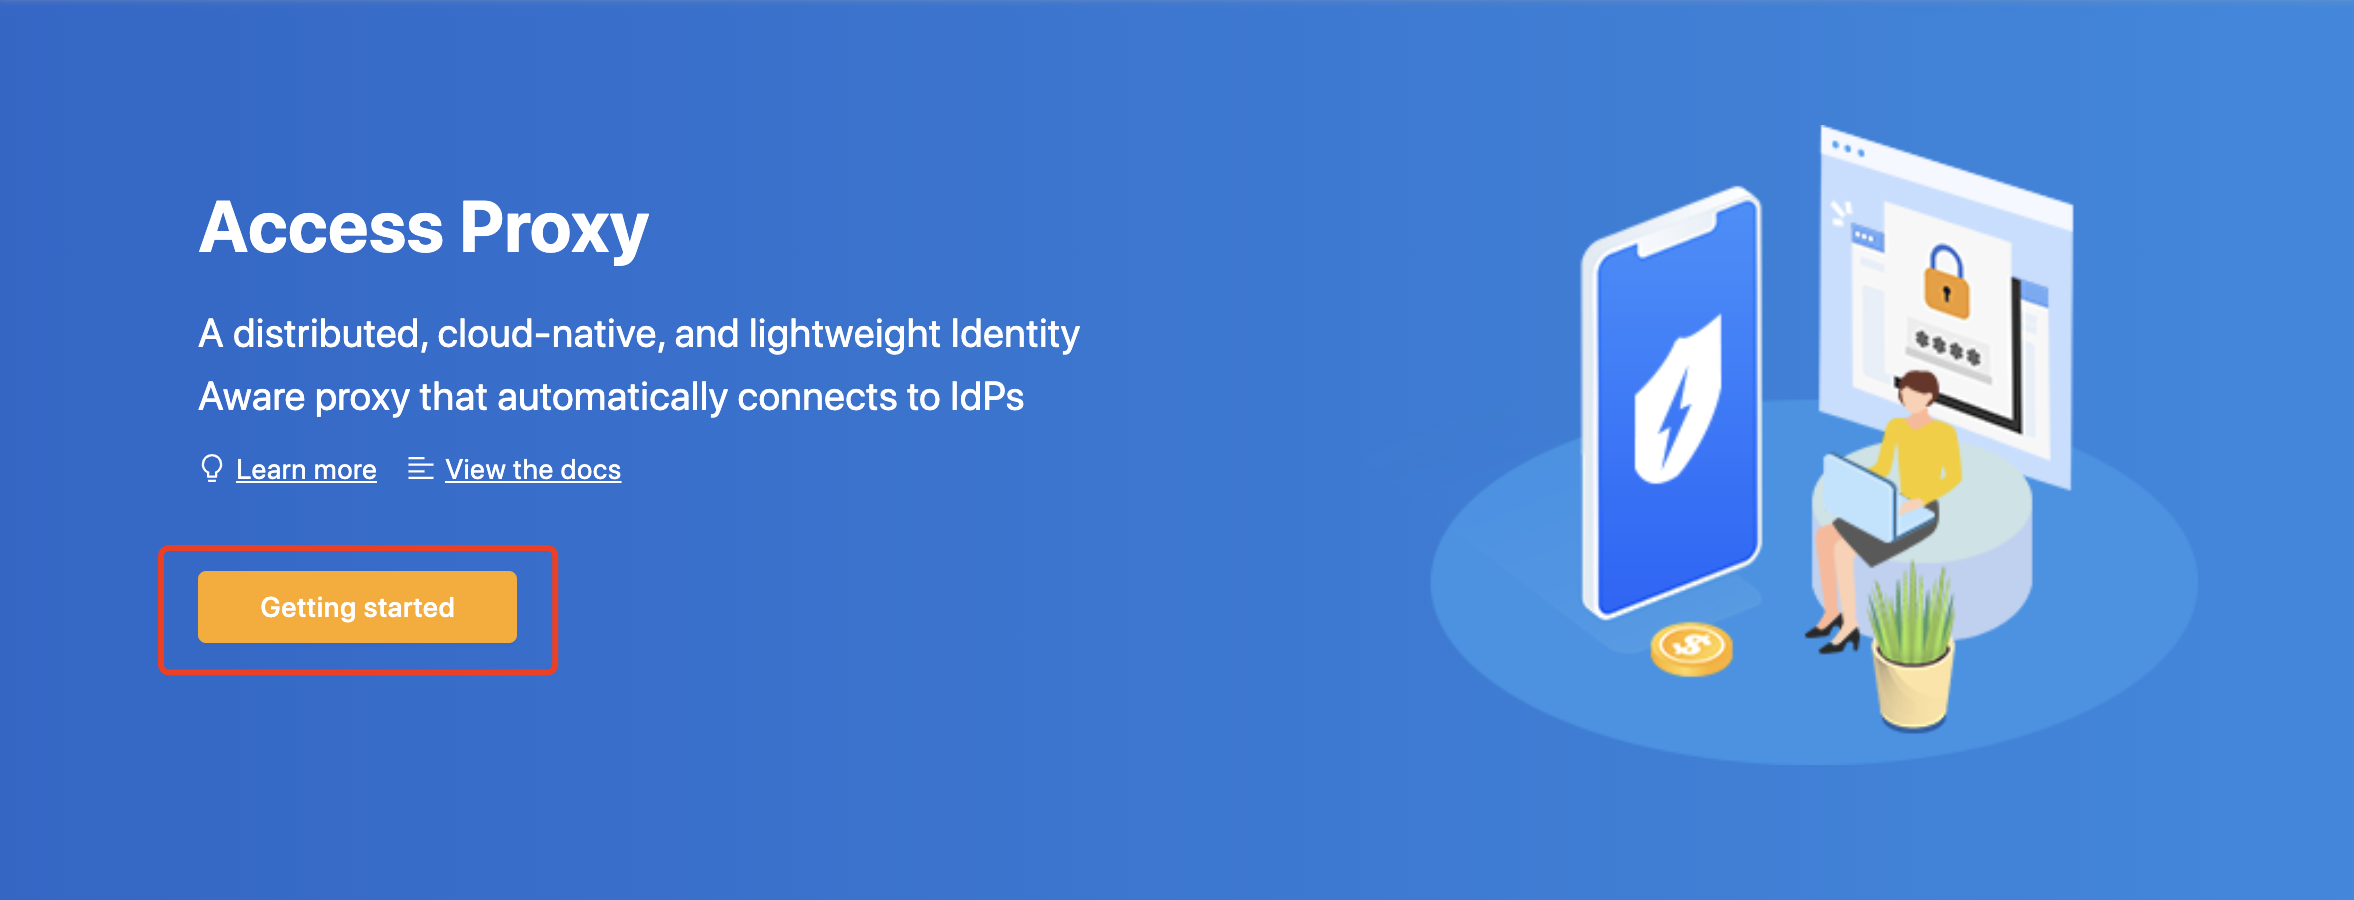 Input Deployment name:
 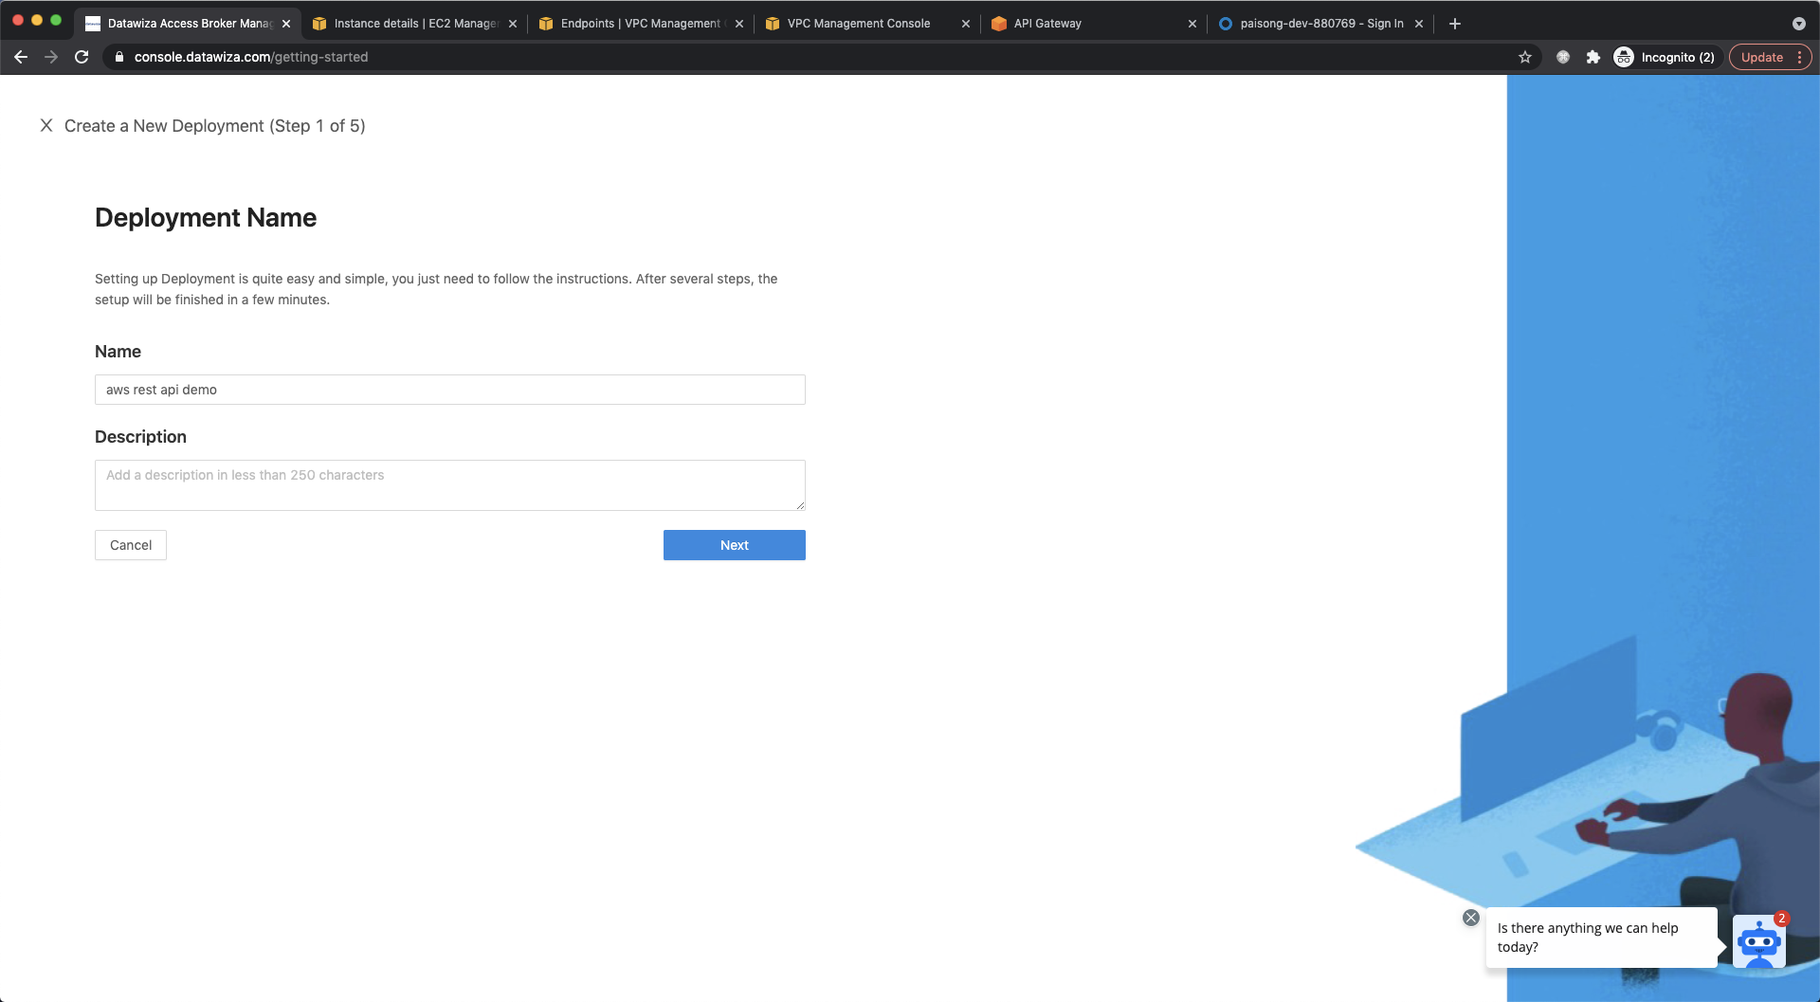 For Application configuration:
 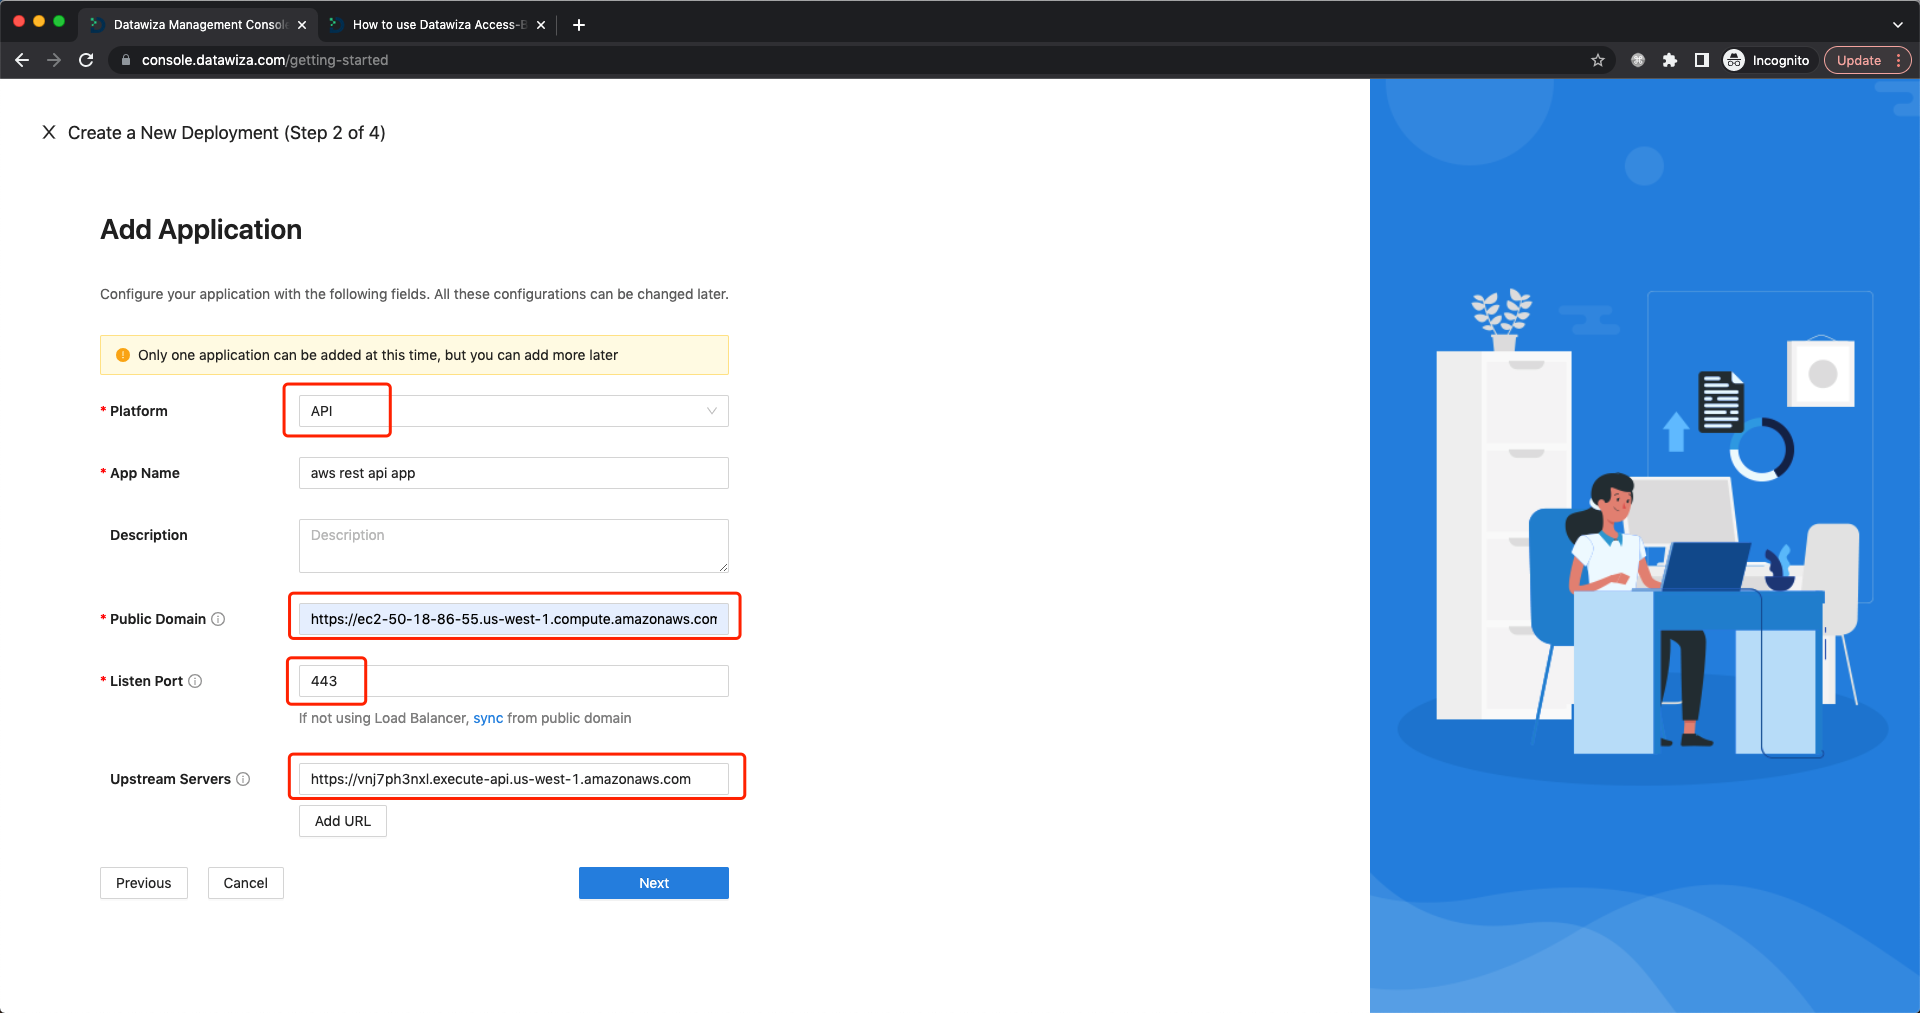 Select
 API as Platform. Set EC2 Public IPv4 DNS we noted after creating the EC2 as Public Domain. Set Listen Port to 443 or you can click sync directly. Set Upstream Servers to private rest API, remove the path and just keep the host: 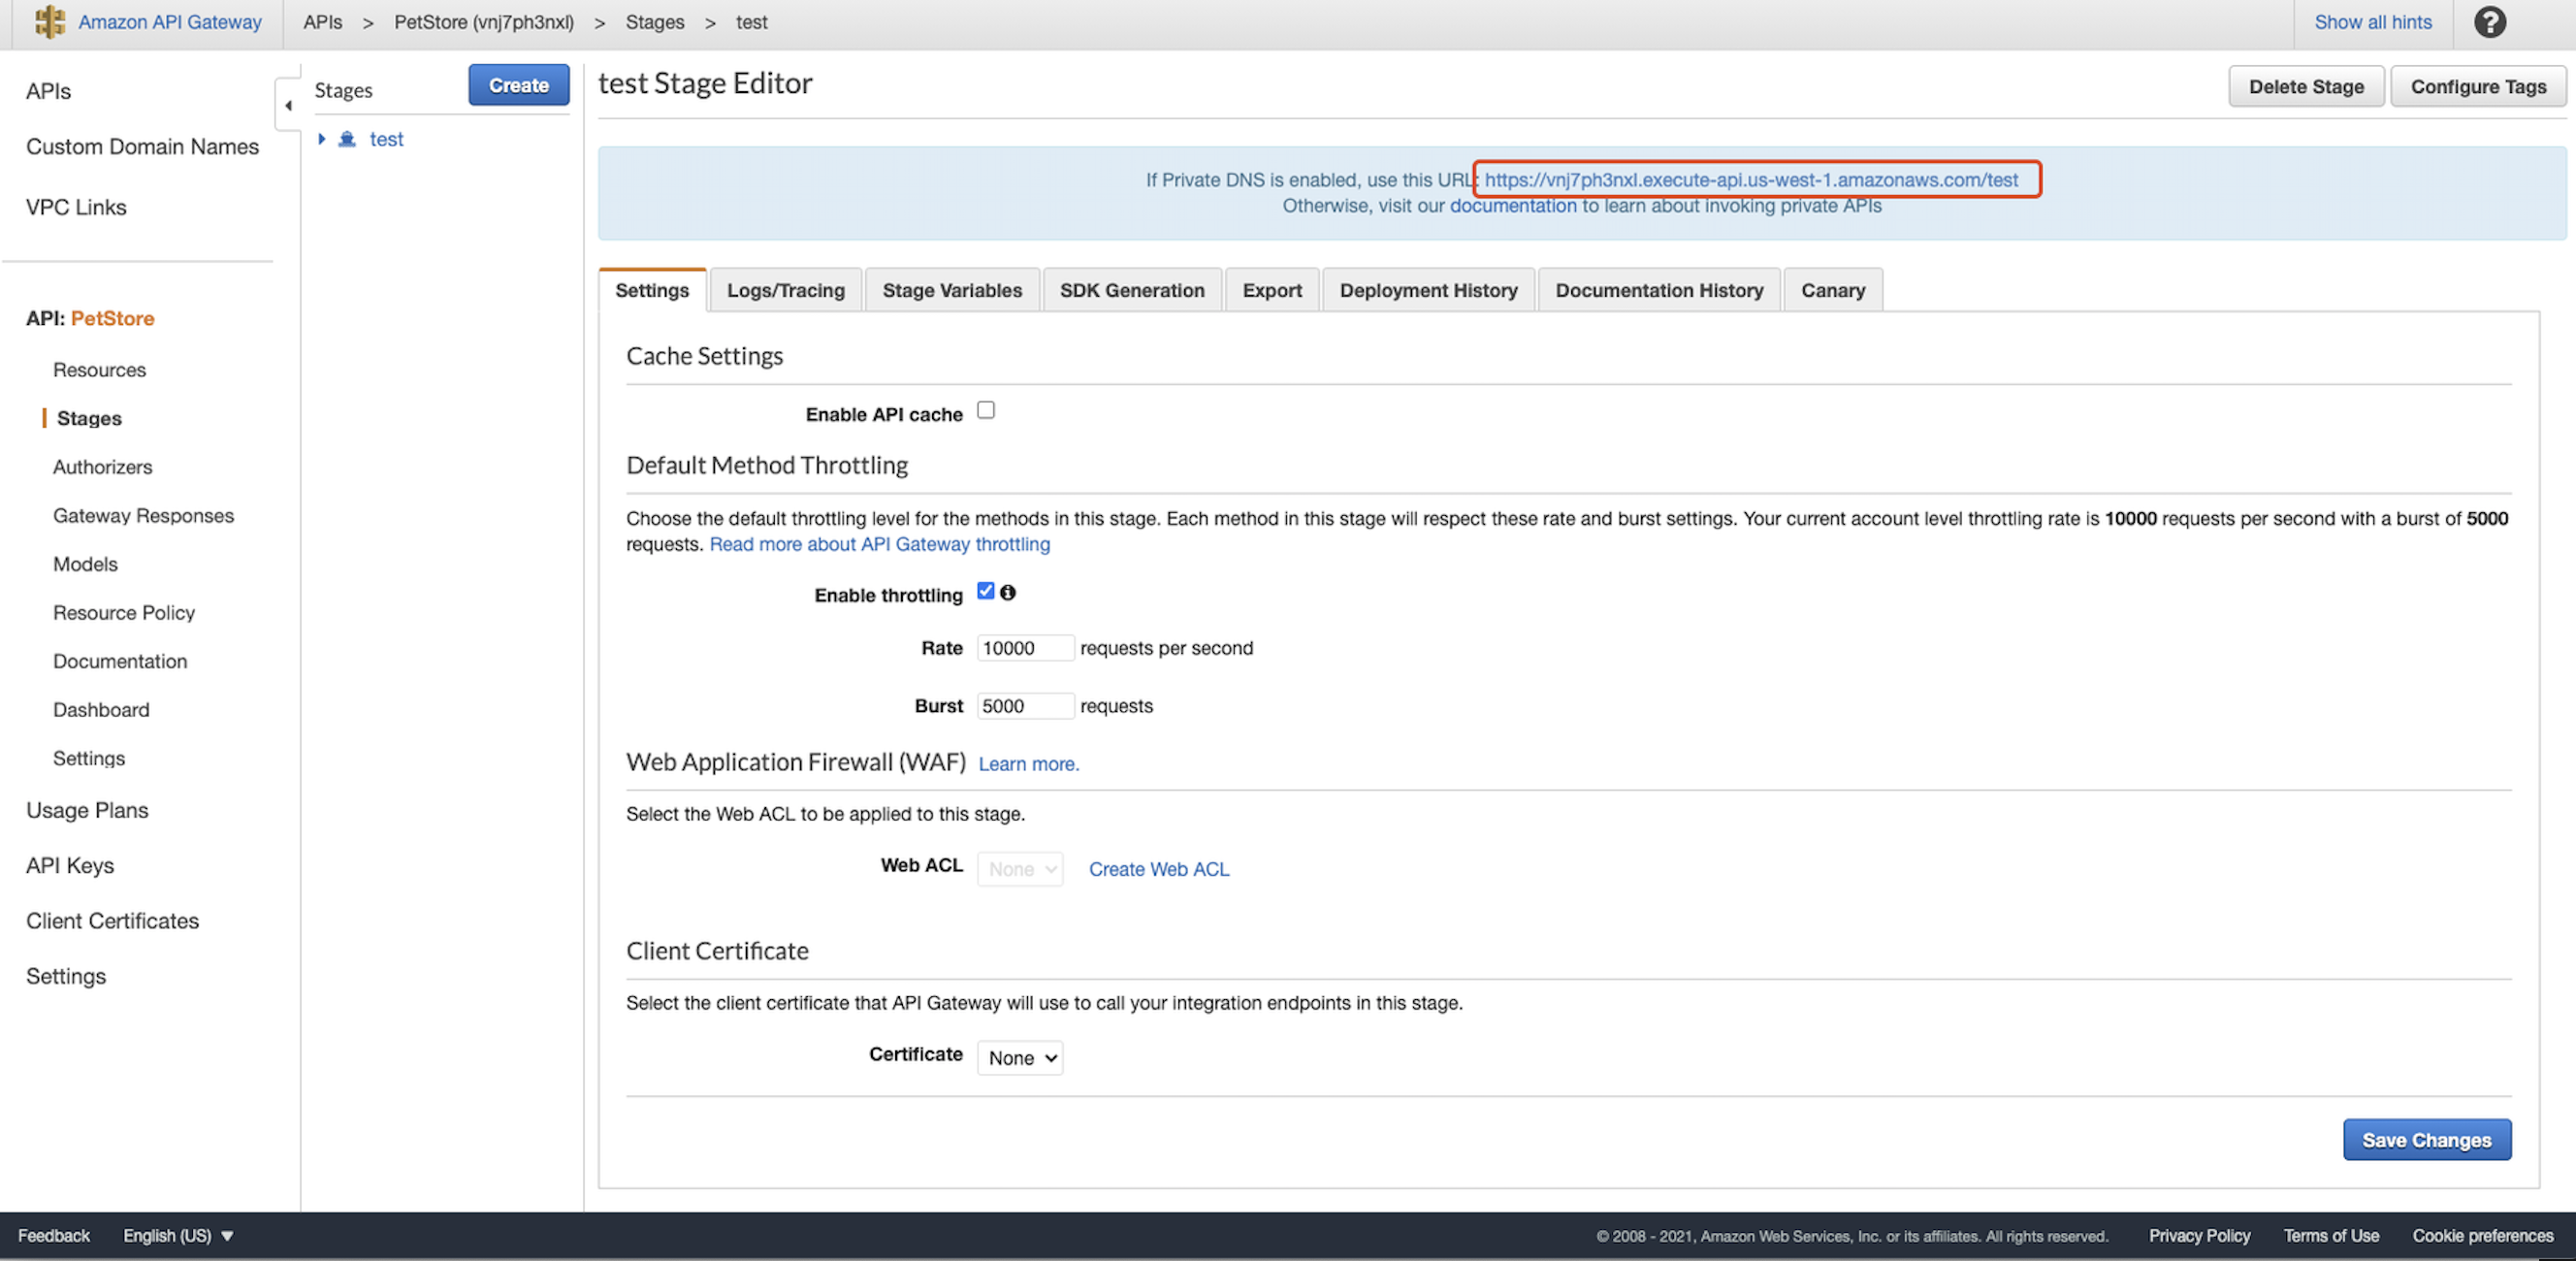 Set
Set Default Action to Allow and click Next. For Authorizer: 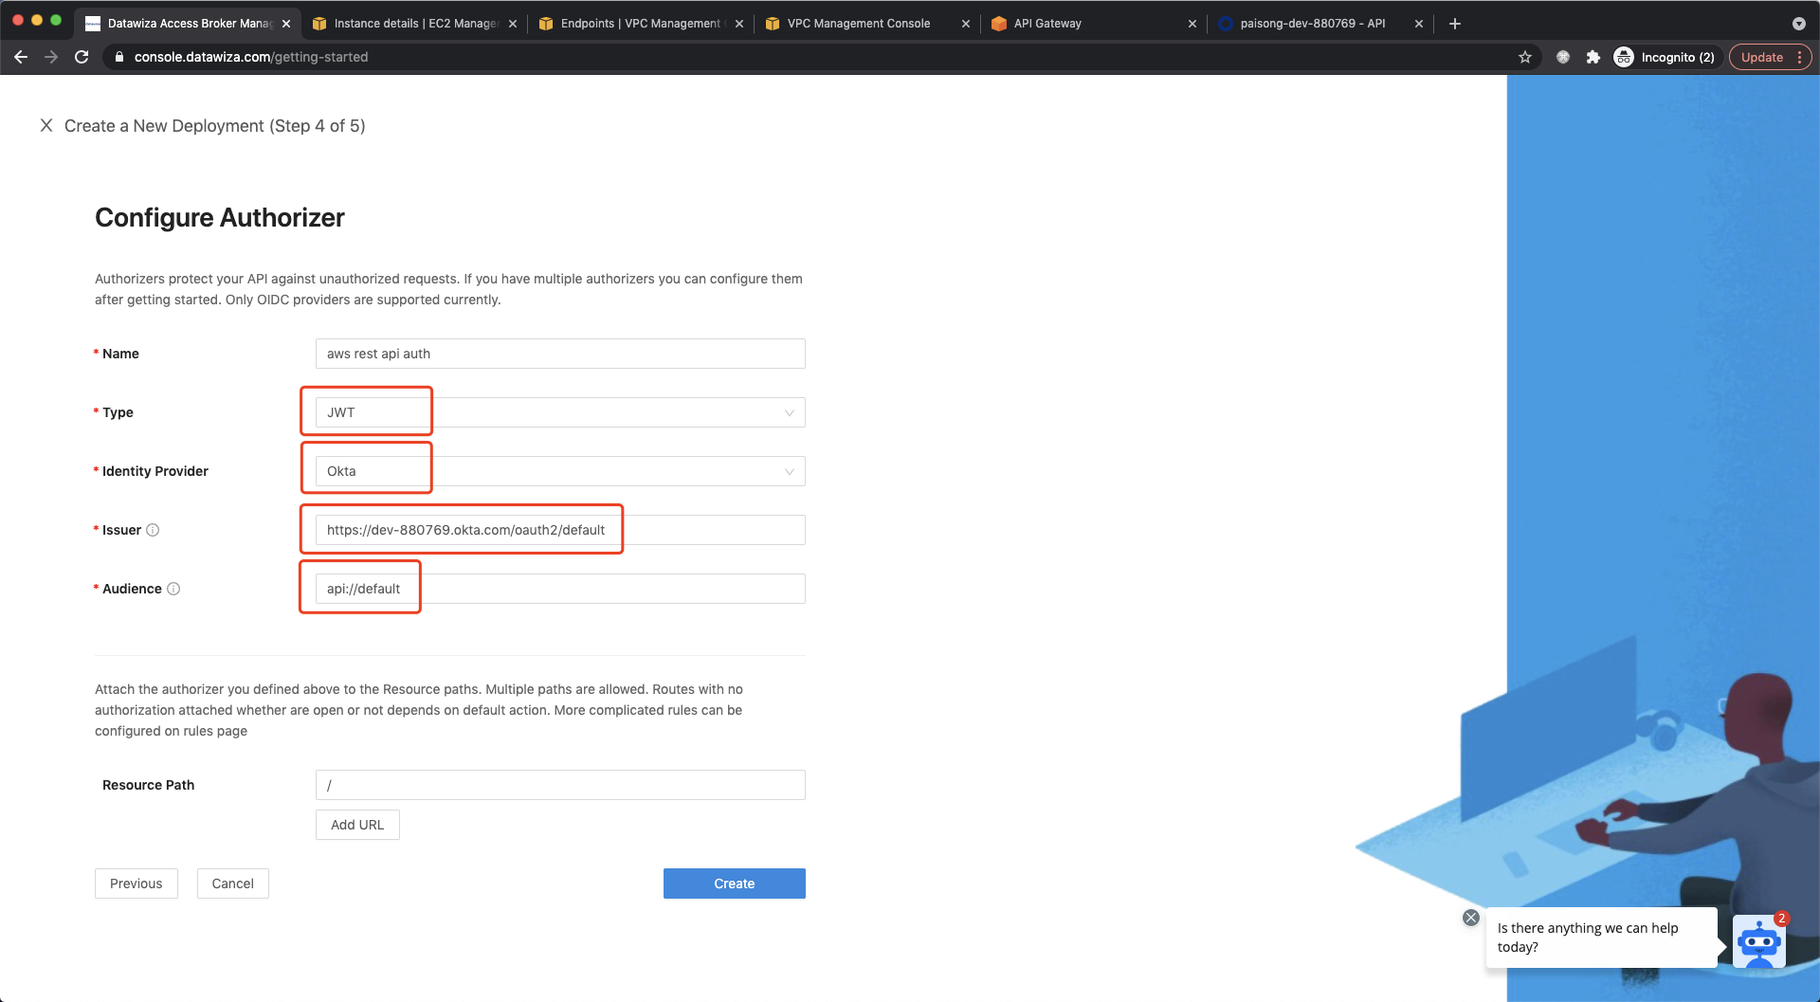 Select
 JWT as Type. Select Okta as Identity Provider. Input the Issuer and Audience. You can find them in Security → API from Okta admin console: 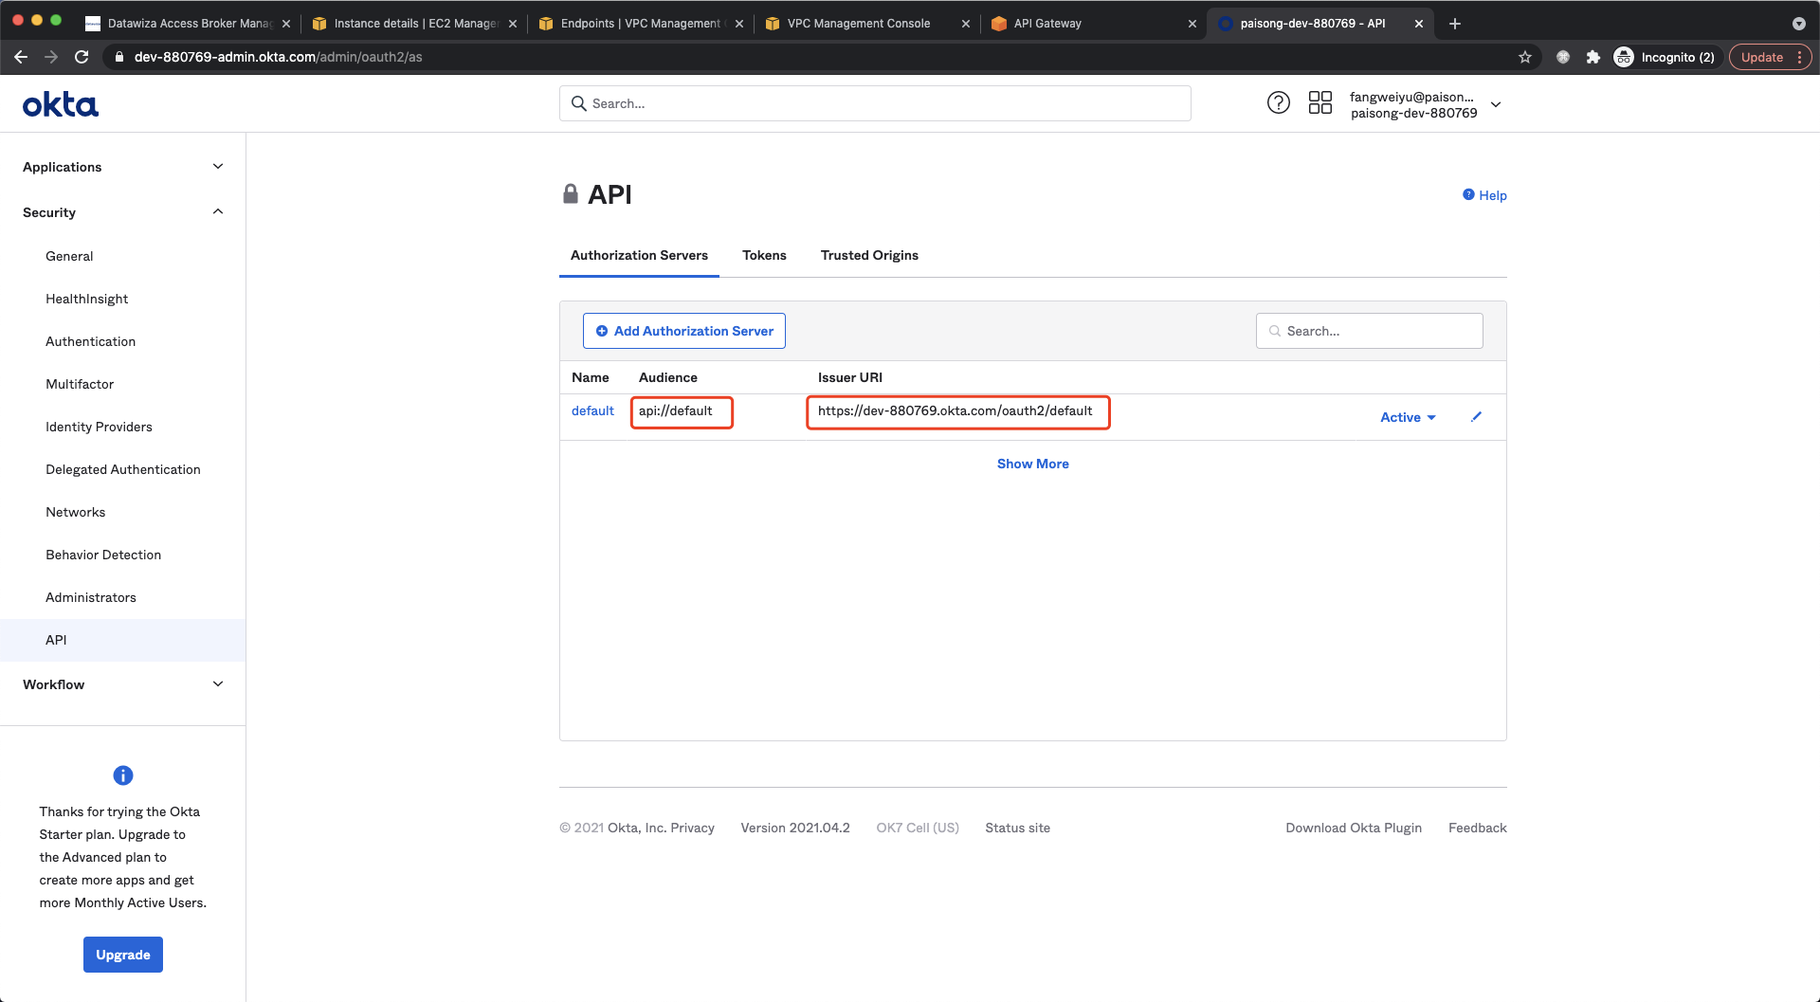 Set root path as
 Resource Path which means any request to any URI should be authorized. Click Create. Follow the steps to pull the Datawiza Access Proxy (DAP) image and create the docker-compose file. Note down the docker-compose file and we will run it on EC2. Click Down. 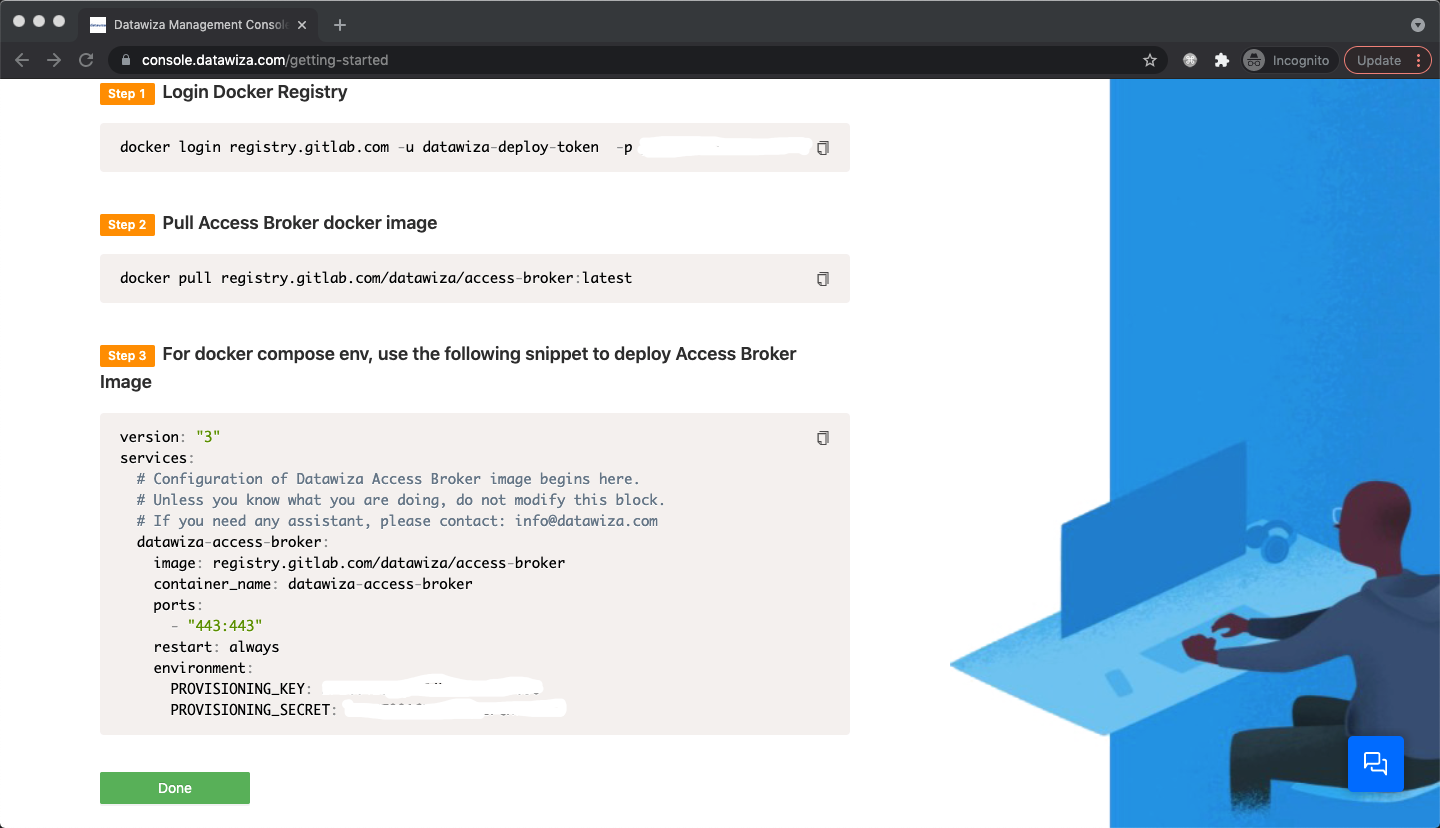 Select the app in the
 Applications tab: 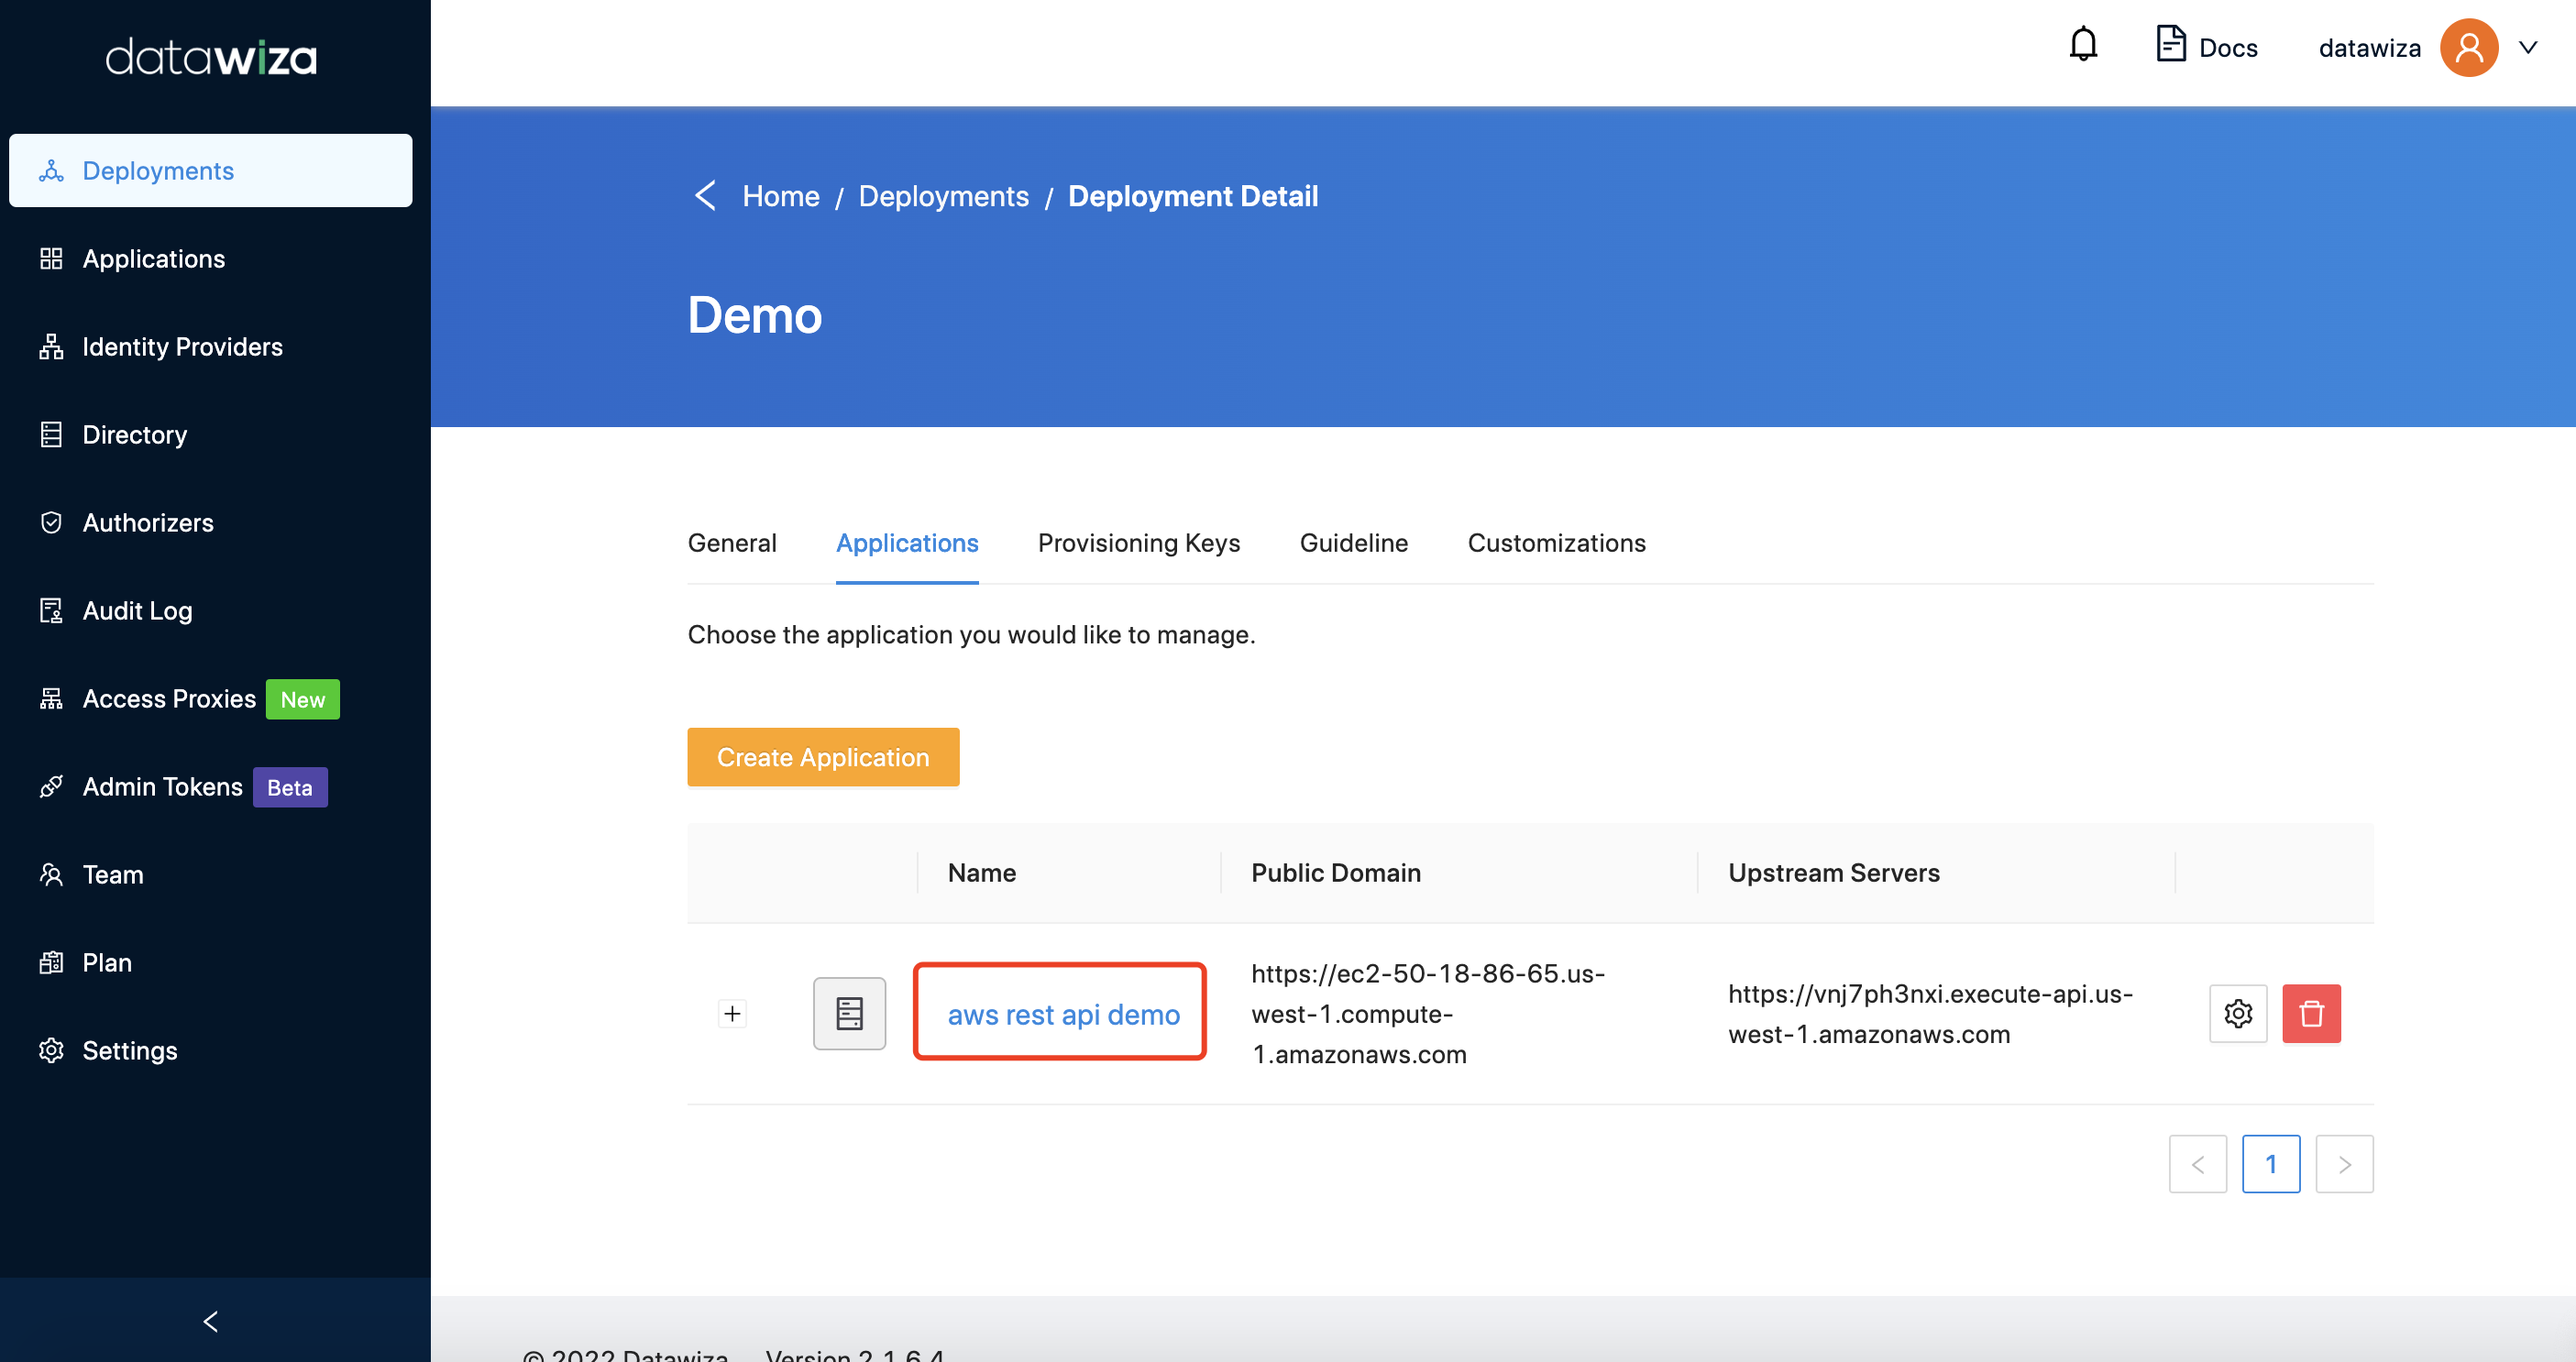 In
In Advanced tab, open the SSL button and upload the cert and private key. We also provide a self-signed cert for testing purposes. You can select the Cert Type to Self Signed to use it.
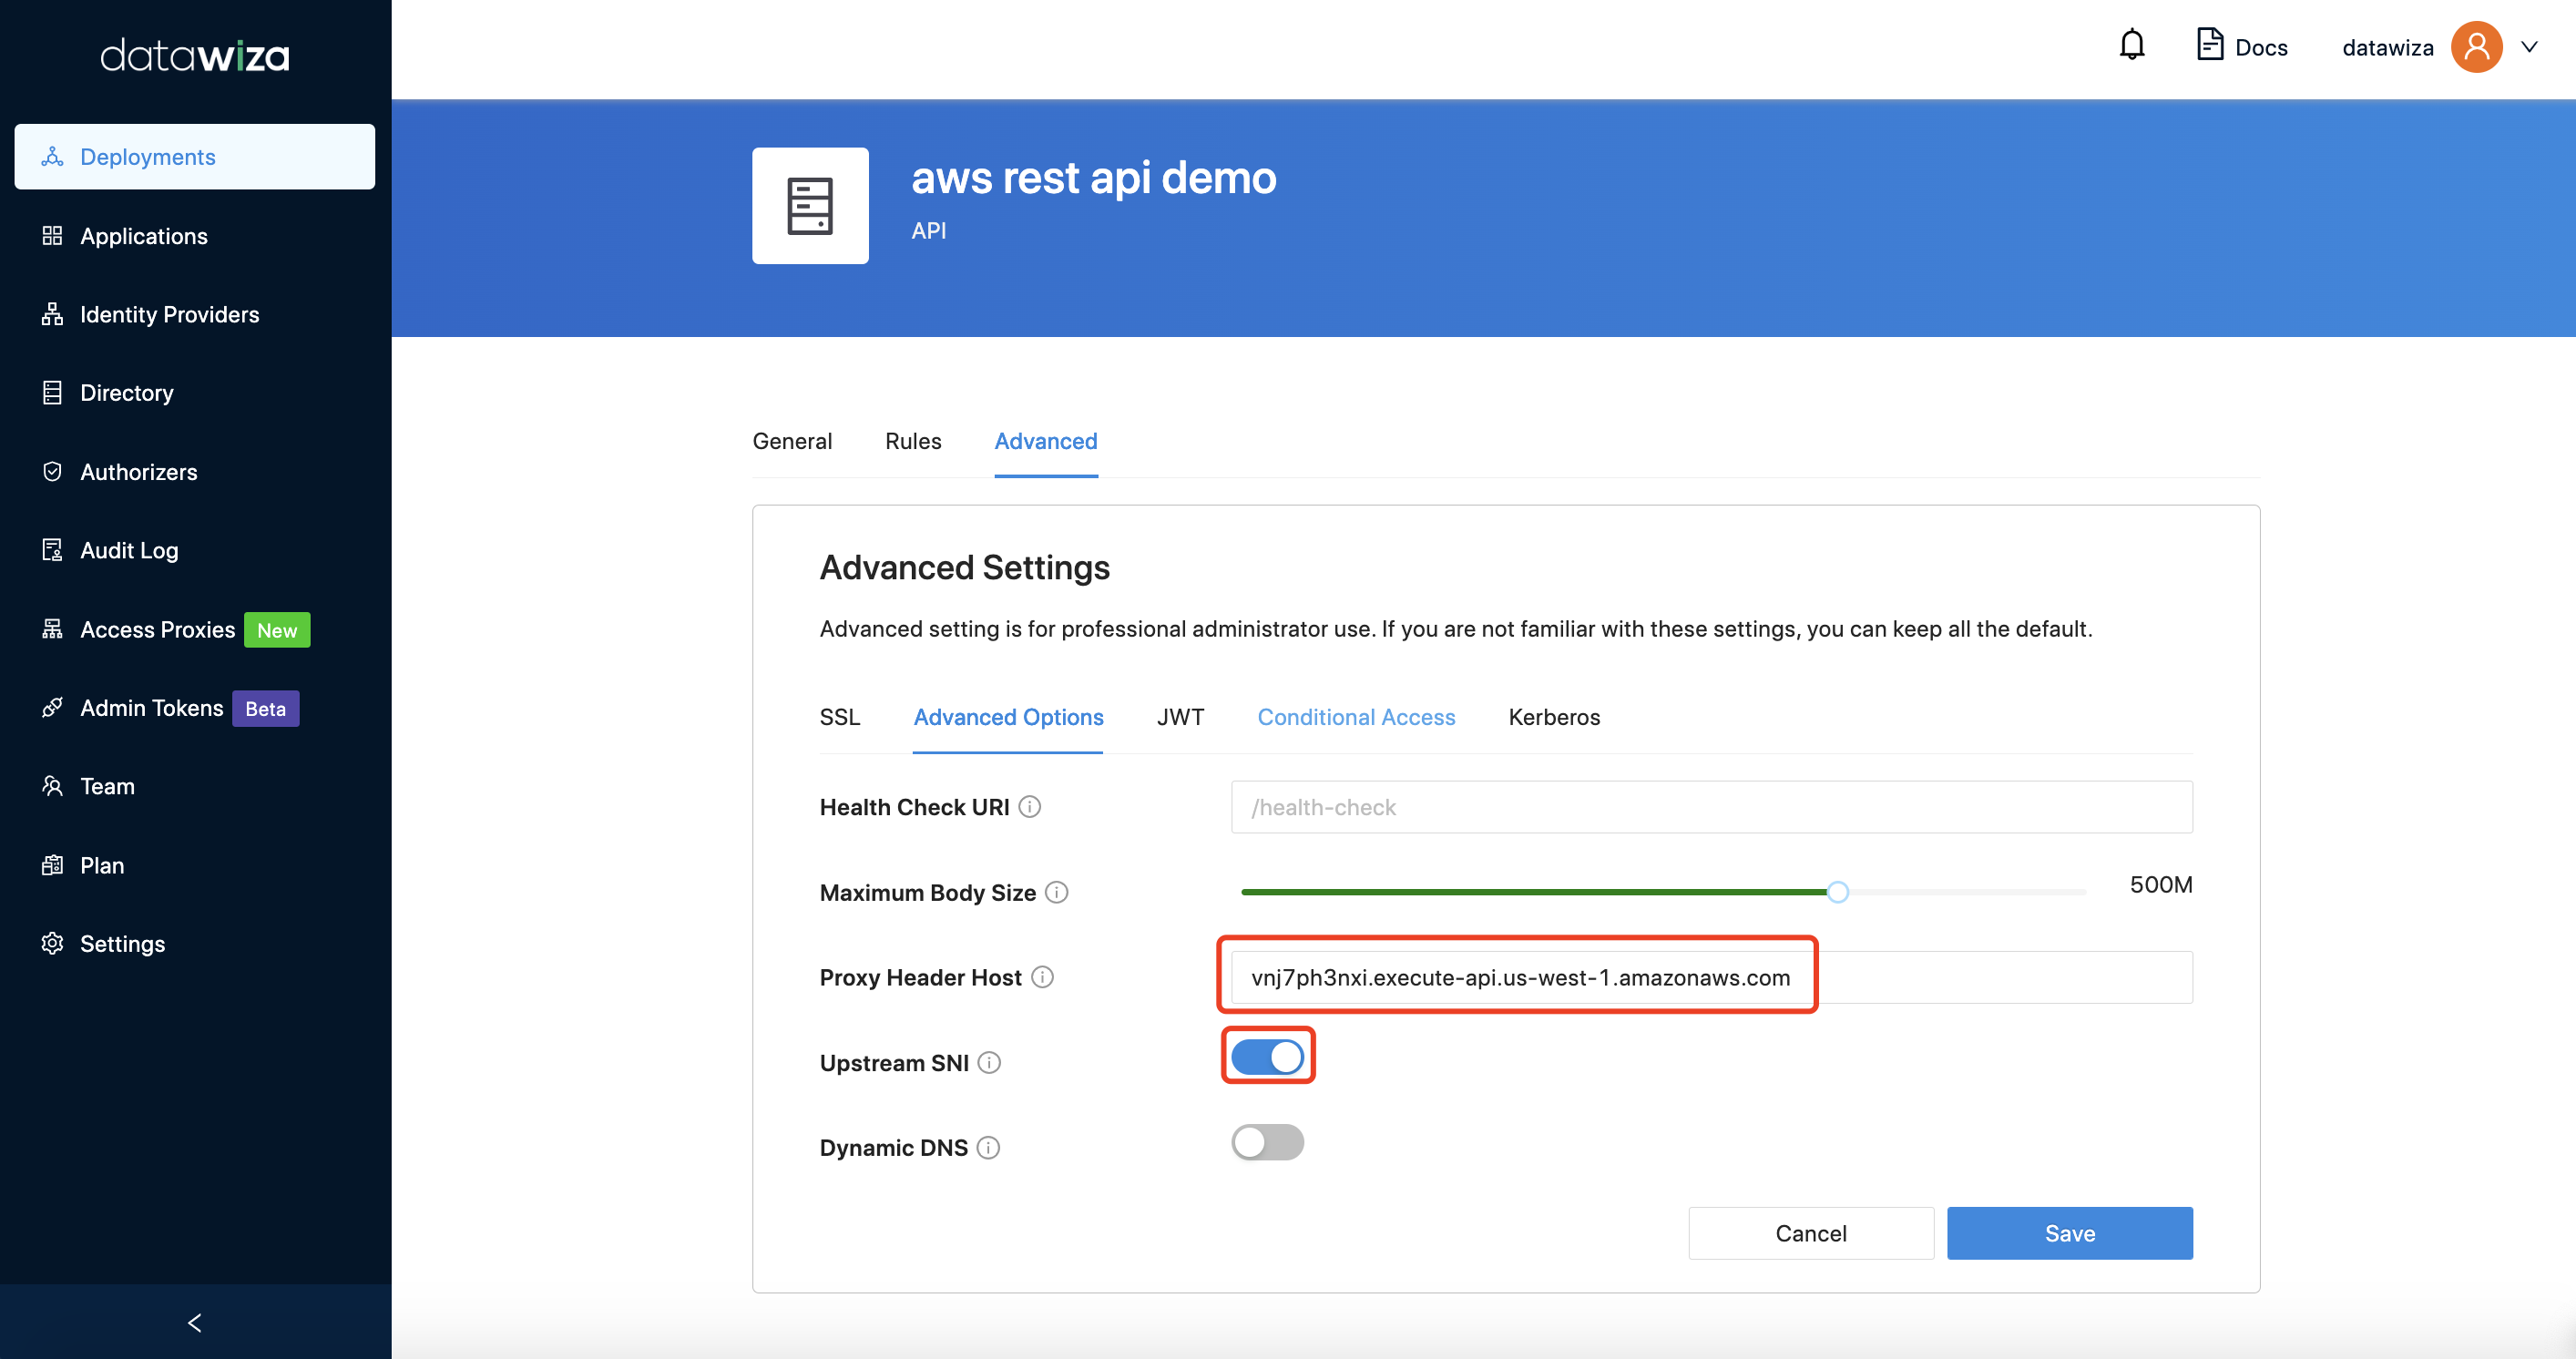
In the same tab, input the Proxy Header Host. It should be the upstream hostname. If your API needs SNI, enable the upstream SNI option. Click Save. 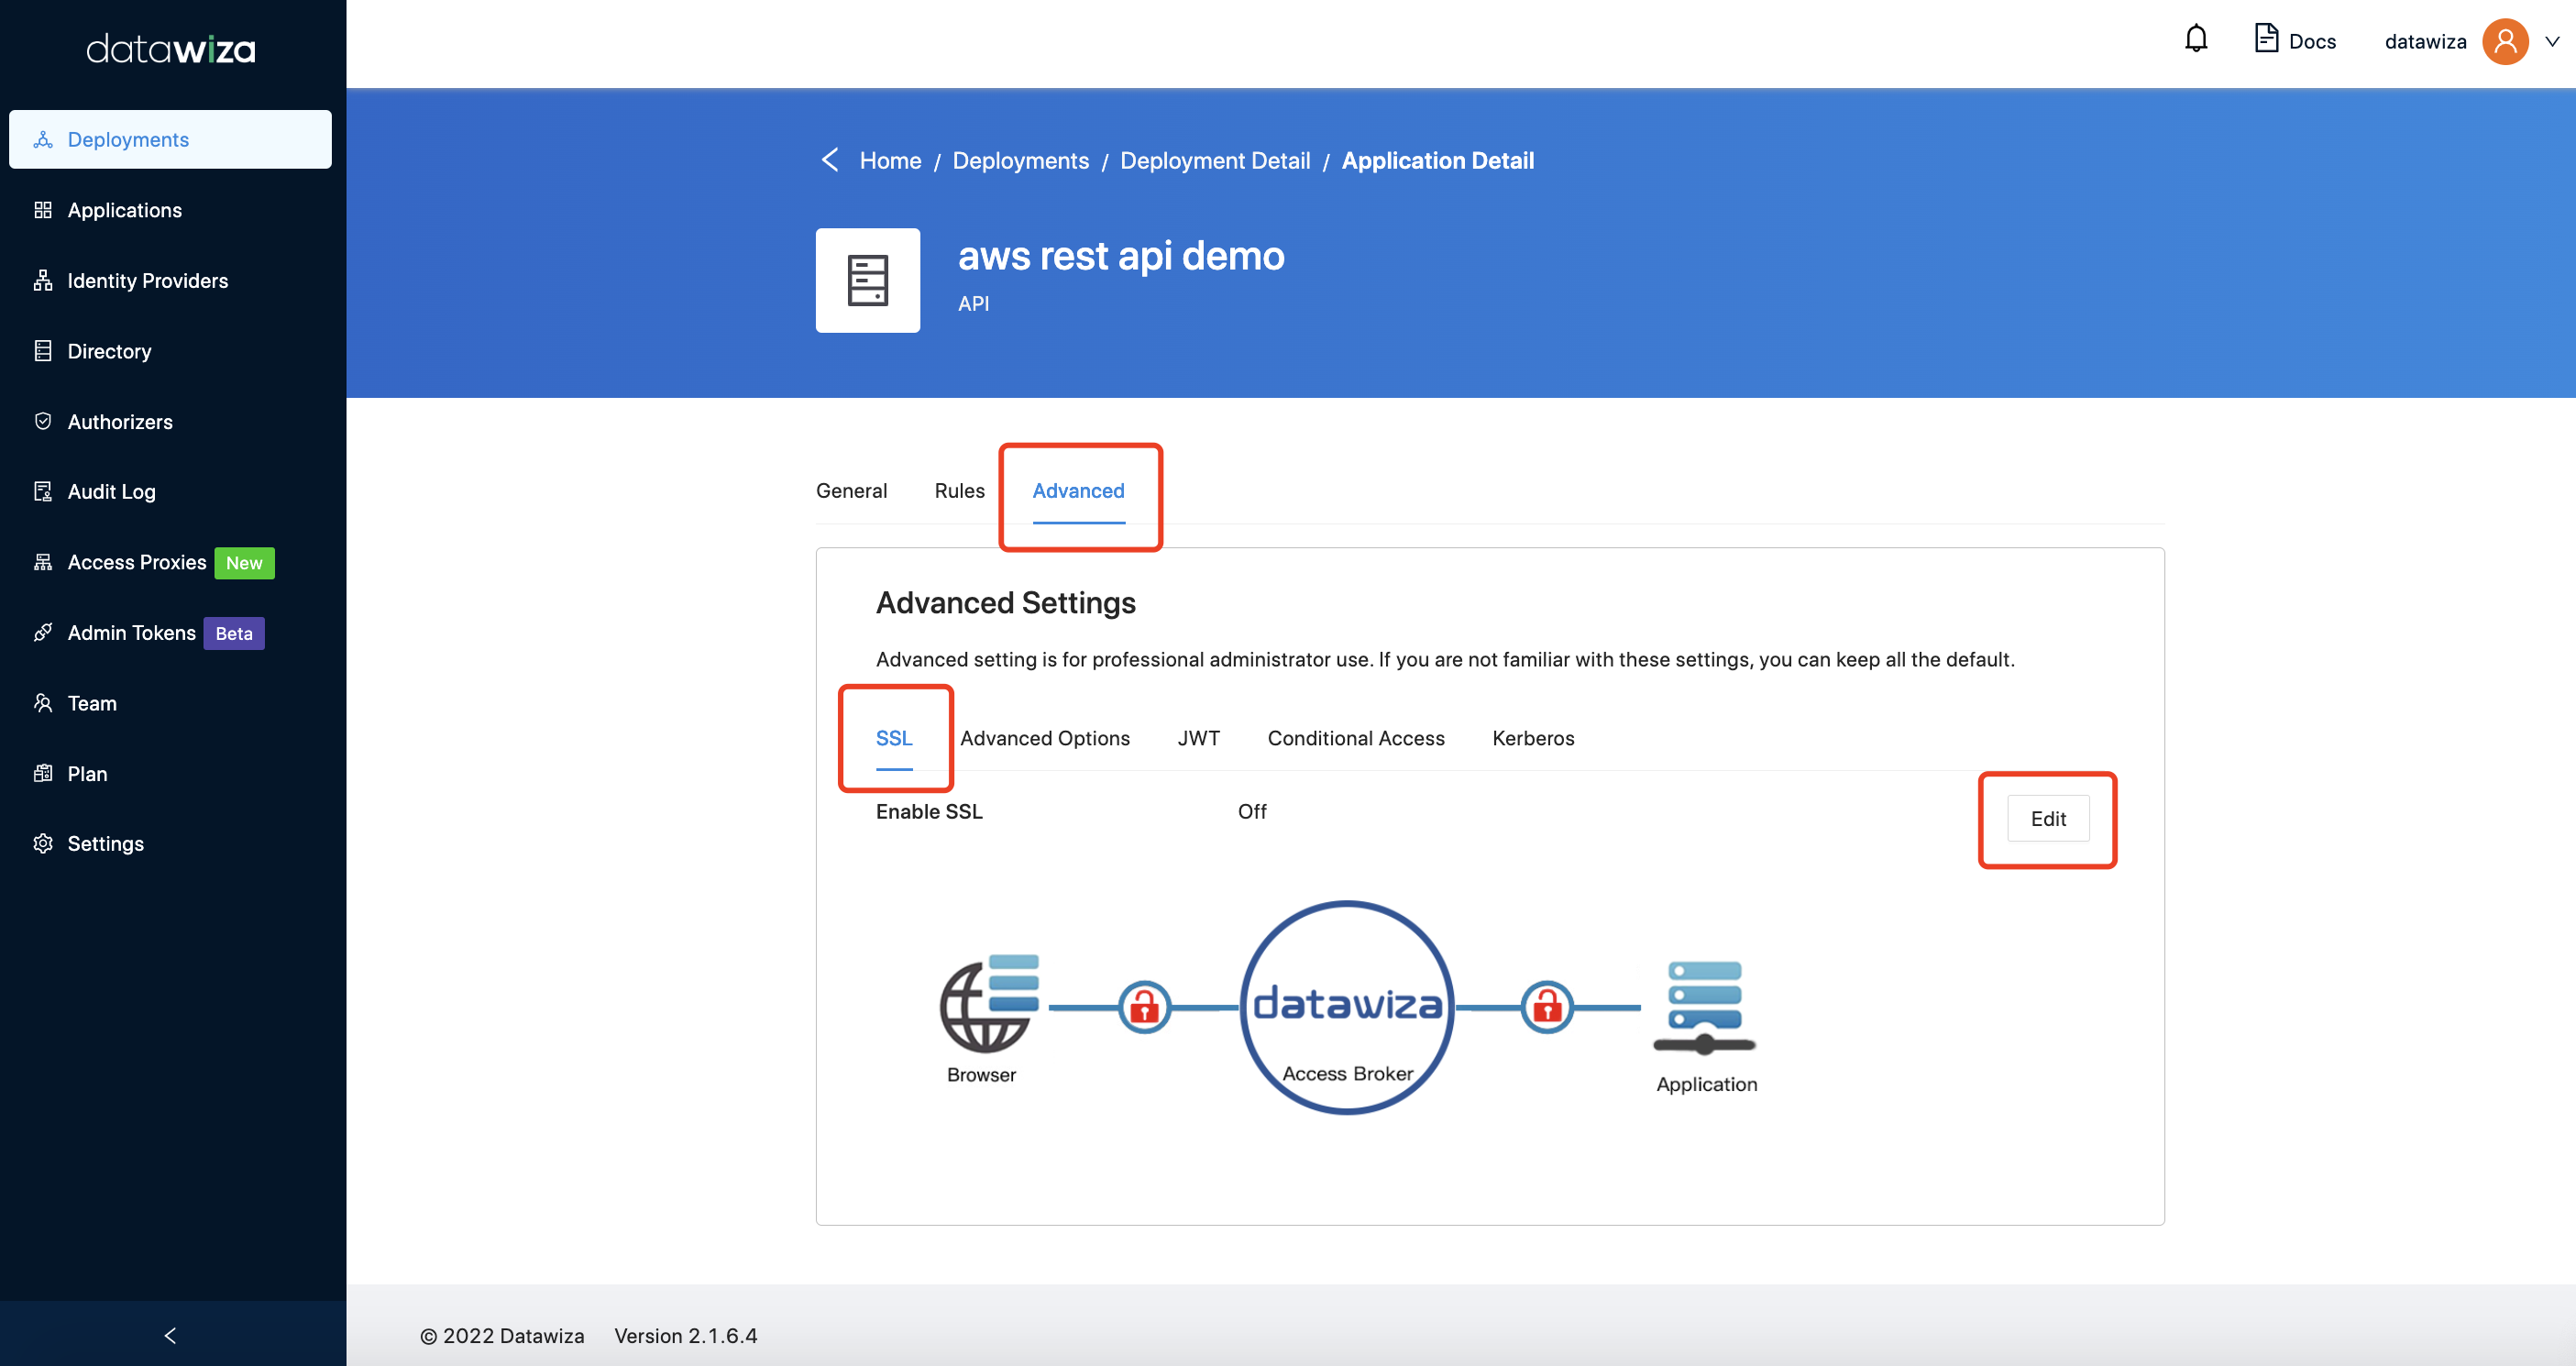
Try it now
Now all the configurations have been done. Run the docker-compose file generated during Configuration in DCMC on EC2. The docker-compose file should be like:
version: '3'

services:
  datawiza-access-proxy:
    image: registry.gitlab.com/datawiza/access-proxy
    container_name: datawiza-access-proxy
    restart: always
    ports:
      - "9772:9772"
    environment:
      PROVISIONING_KEY: #############################
      PROVISIONING_SECRET: #############################
With the Okta token, you can access the AWS private REST API through DAP: 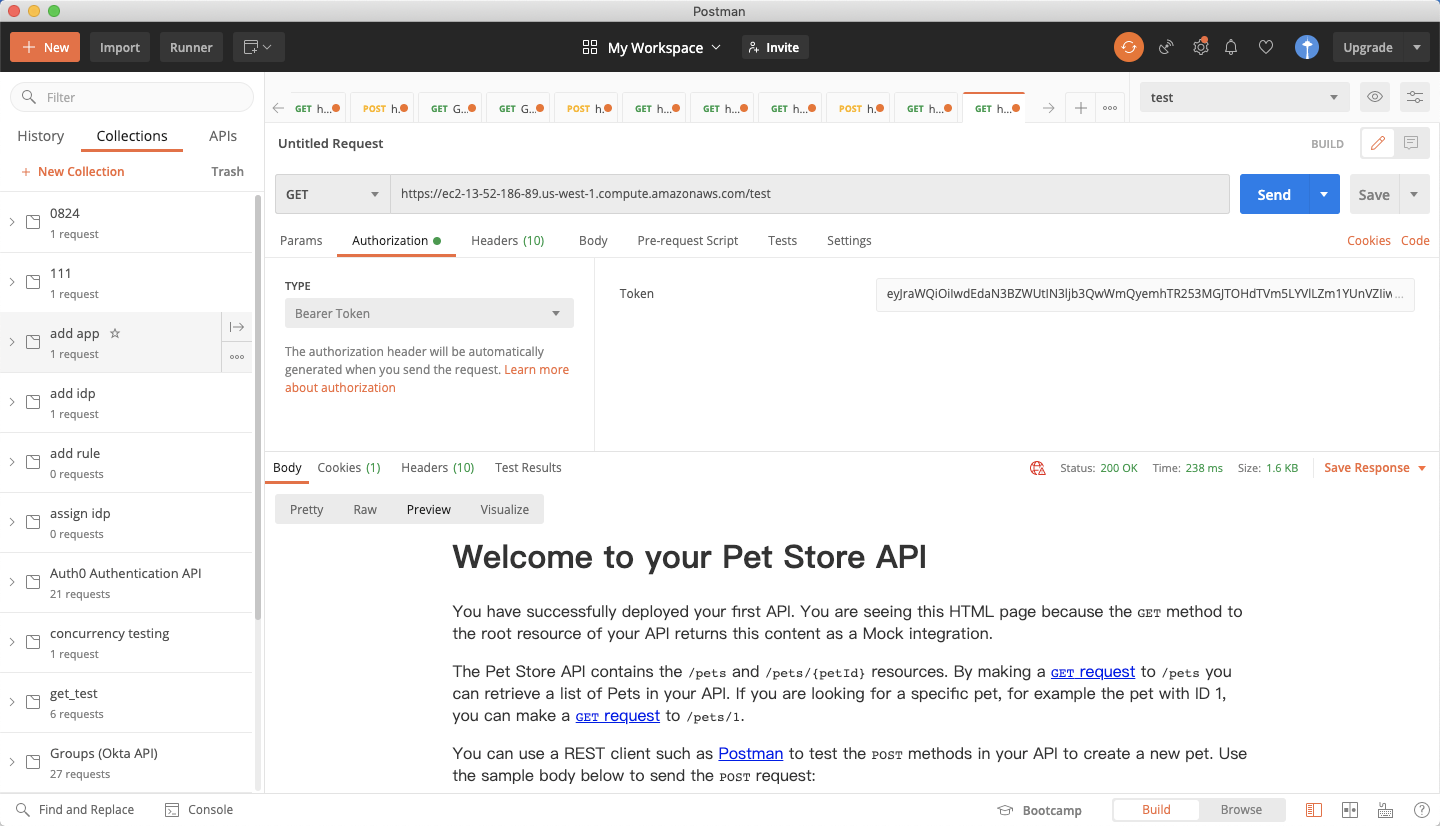 Otherwise, you will get the 401 unauthorized:
 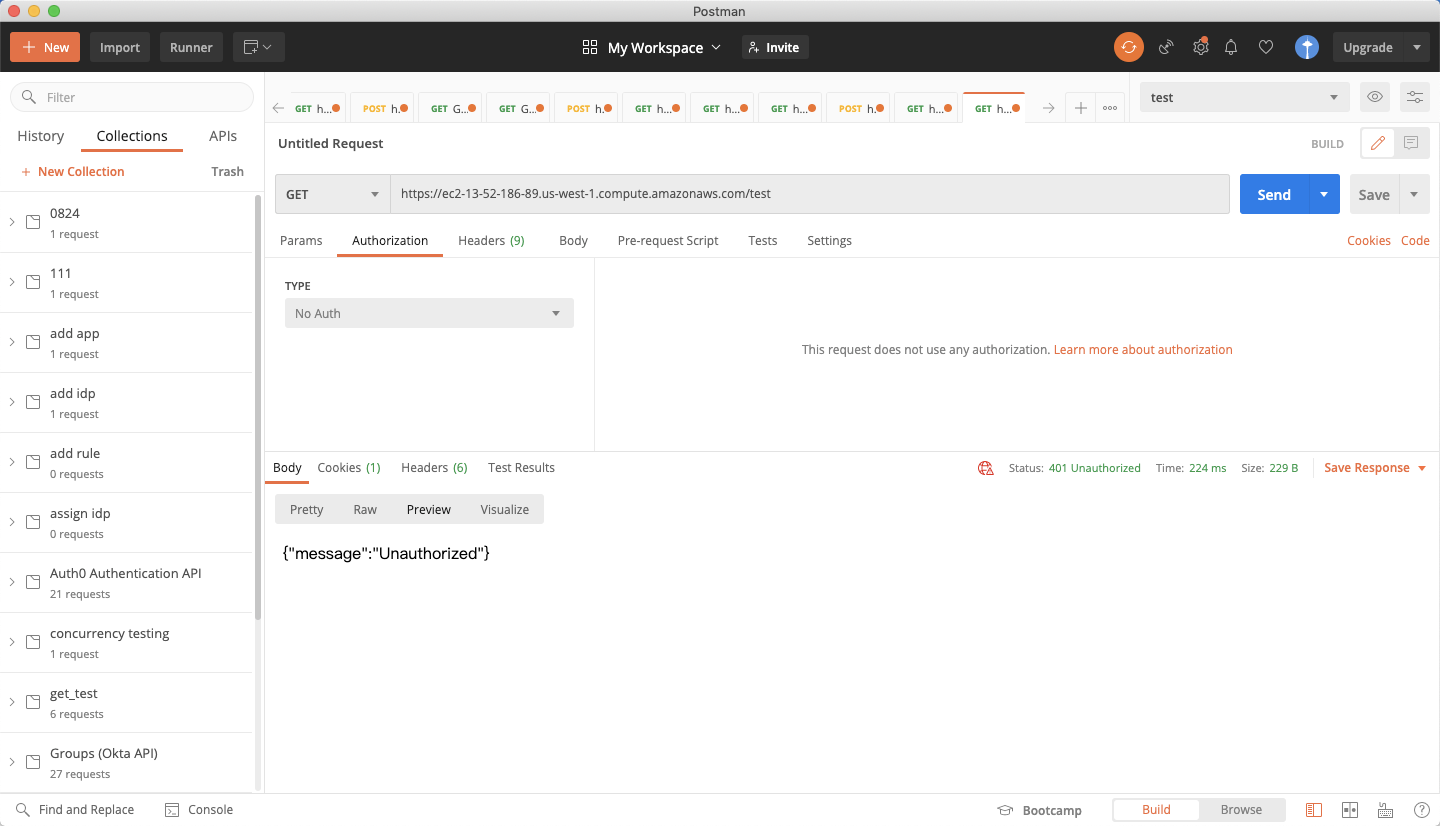 And the AWS private REST API cannot be accessed directly:
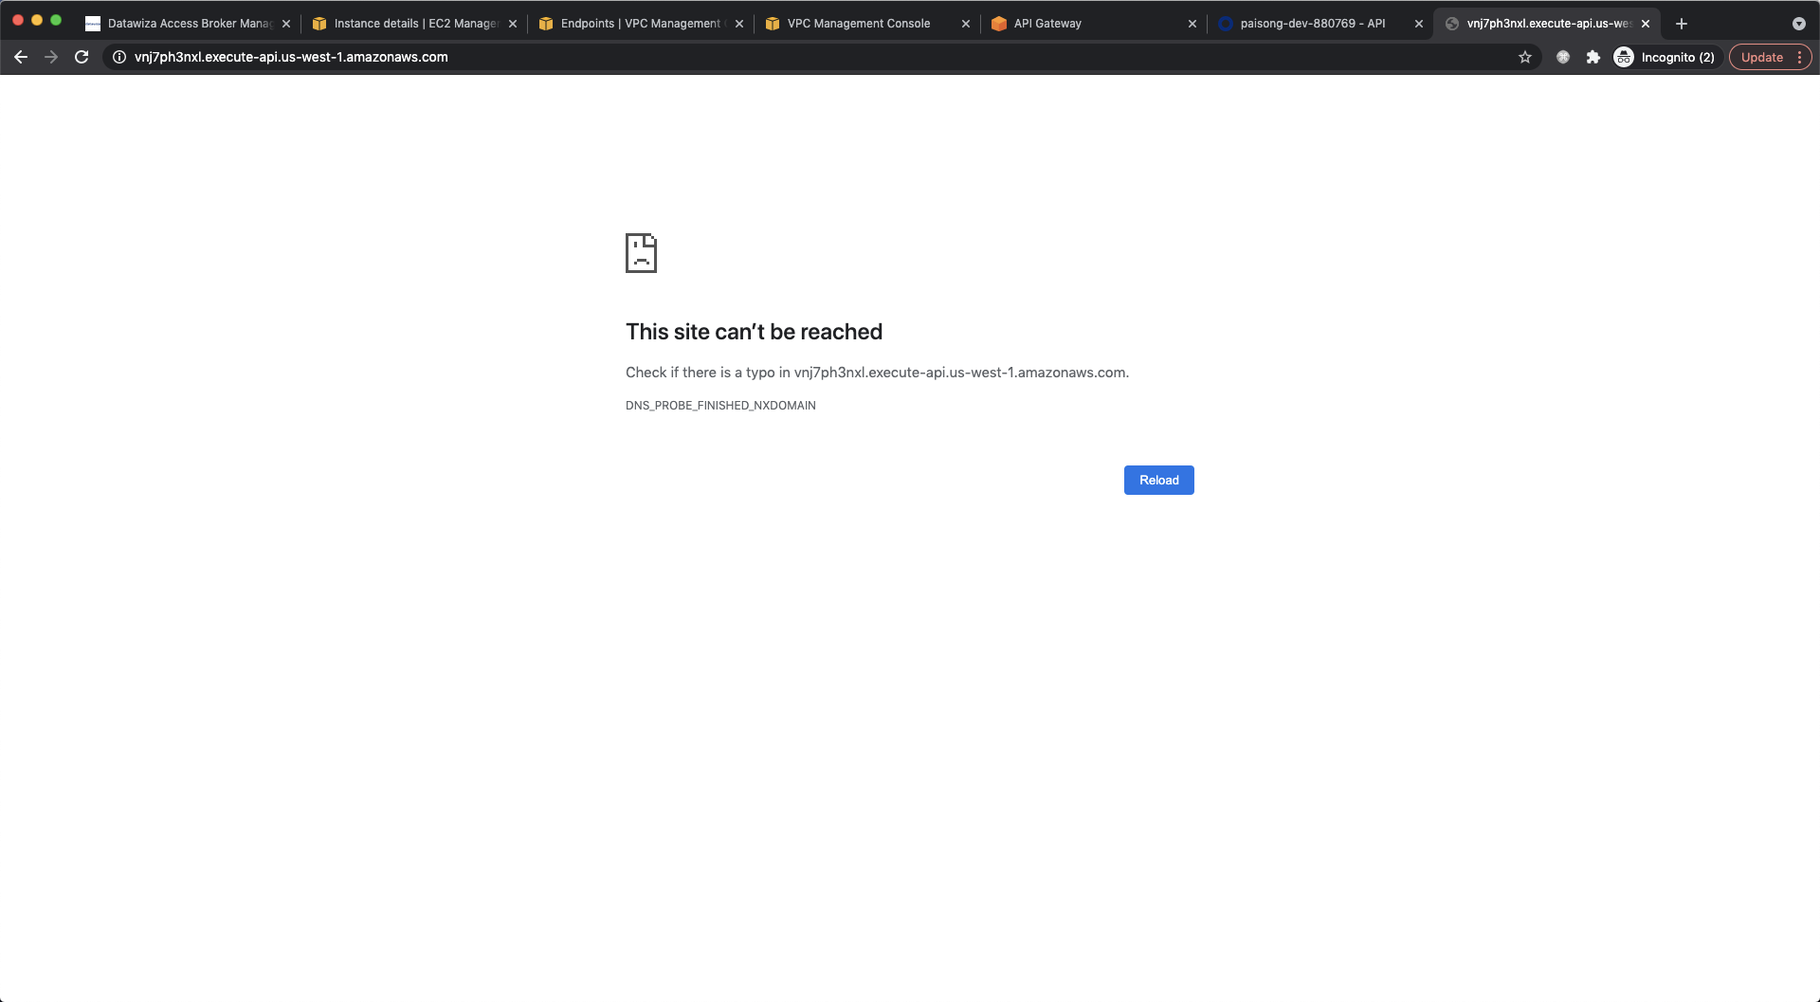
Reference
EC2 getting started
Getting started with Amazon VPC
VPC Security Groups
VPC endpoints
Creating a private API in Amazon API Gateway
How can I access an API Gateway private REST API in another AWS account using an interface VPC endpoint?