Okta
Okta Configuration
This session shows how to register a Web application on the Okta developer console. When registering the application, we are getting the following values that are needed for later configuration in Datawiza Cloud Management Console (DCMC):
- Client ID
- Client Secret
- Okta Org
- (Optional) Okta API Token
Add new application
Create a new application. When performing this step, make sure to login to your developer account on Okta. Visit the link here to create a developer account.

Choose
OIDC-OpenID ConnectasSign-in methodandWeb ApplicationasApplication type, then clickNext.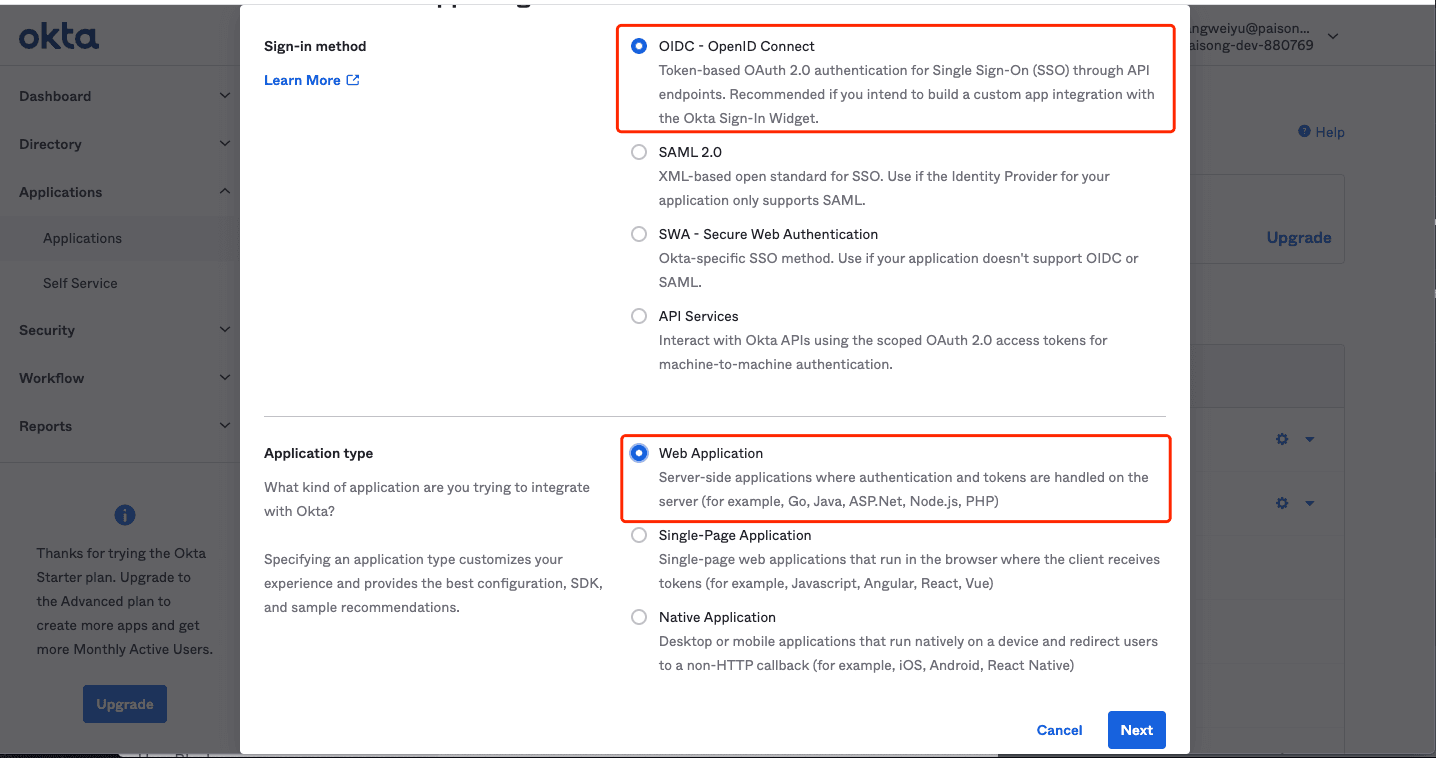
Create your Okta application
- Fill out the form, give your application a descriptive name. e.g., Header base application demo. Follow the steps below:
Login redirect URIs: e.g.,http://localhost:9772/datawiza/authorization-code/callbackLogout redirect URIs: e.g.,http://localhost:9772Base URIs: e.g.,http://localhost:9772- Others remain default settings
- Then click
Save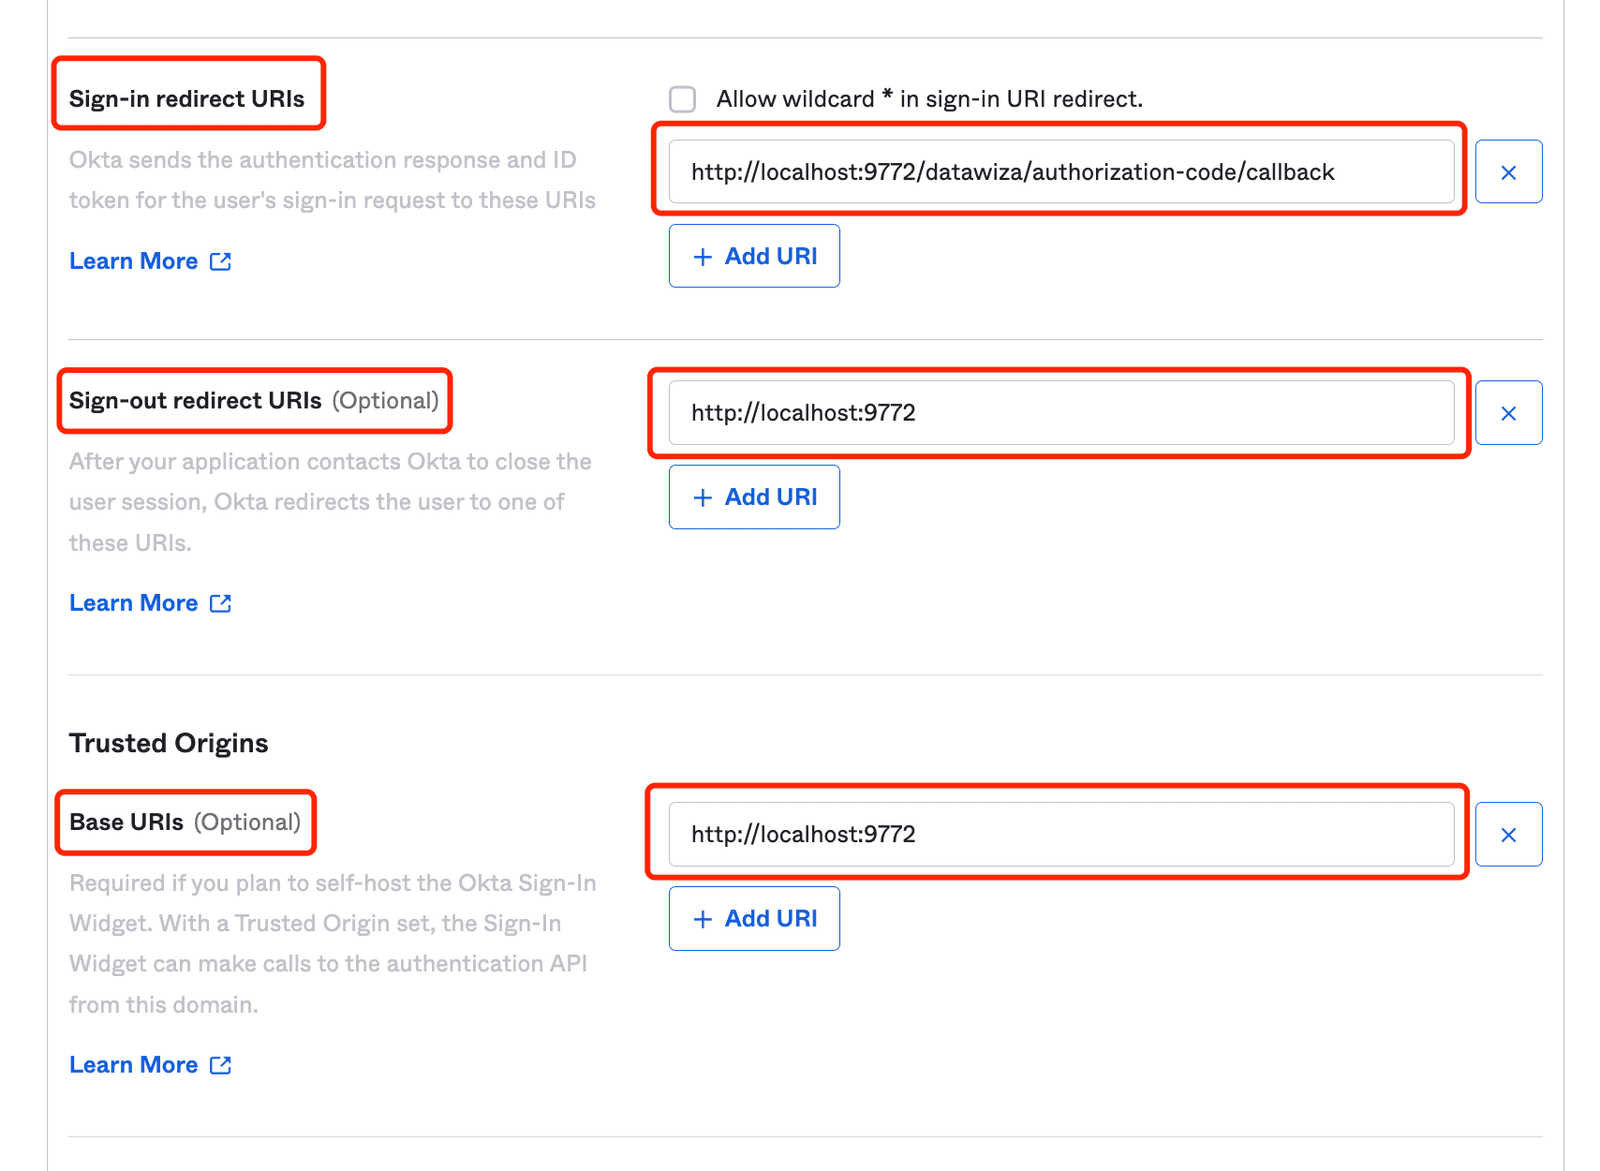
Okta Client ID and Client Secret
- On the general information setting page, please make a copy of Client ID and Client secret under the
Client Credentialssection. You will need these two codes later to build up the connection.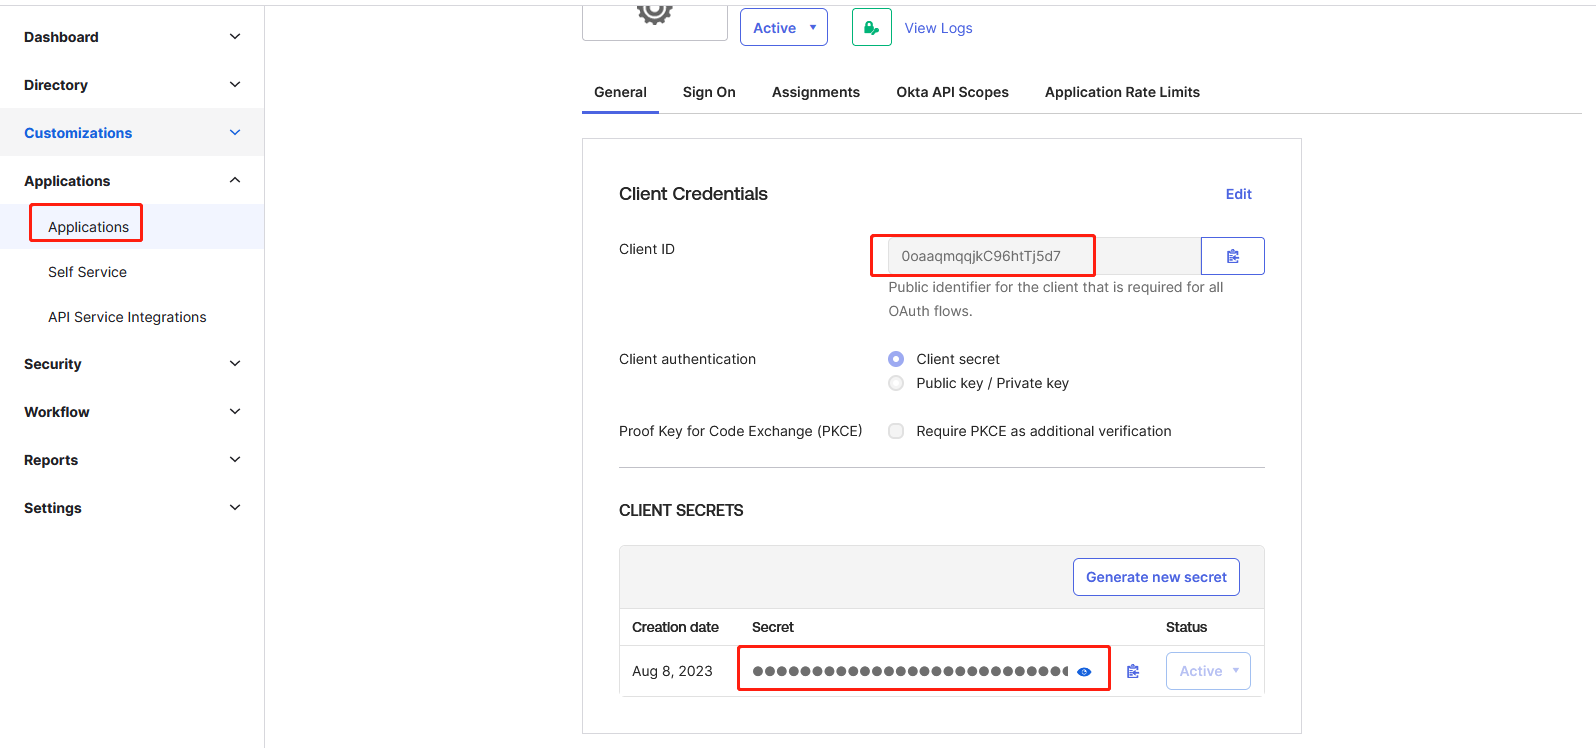
Save ‘Okta Org’ URL
- Locate the organization URL in the upper-right corner which takes the form of
https://your_domain.okta.com. Save this URL asOkta Org.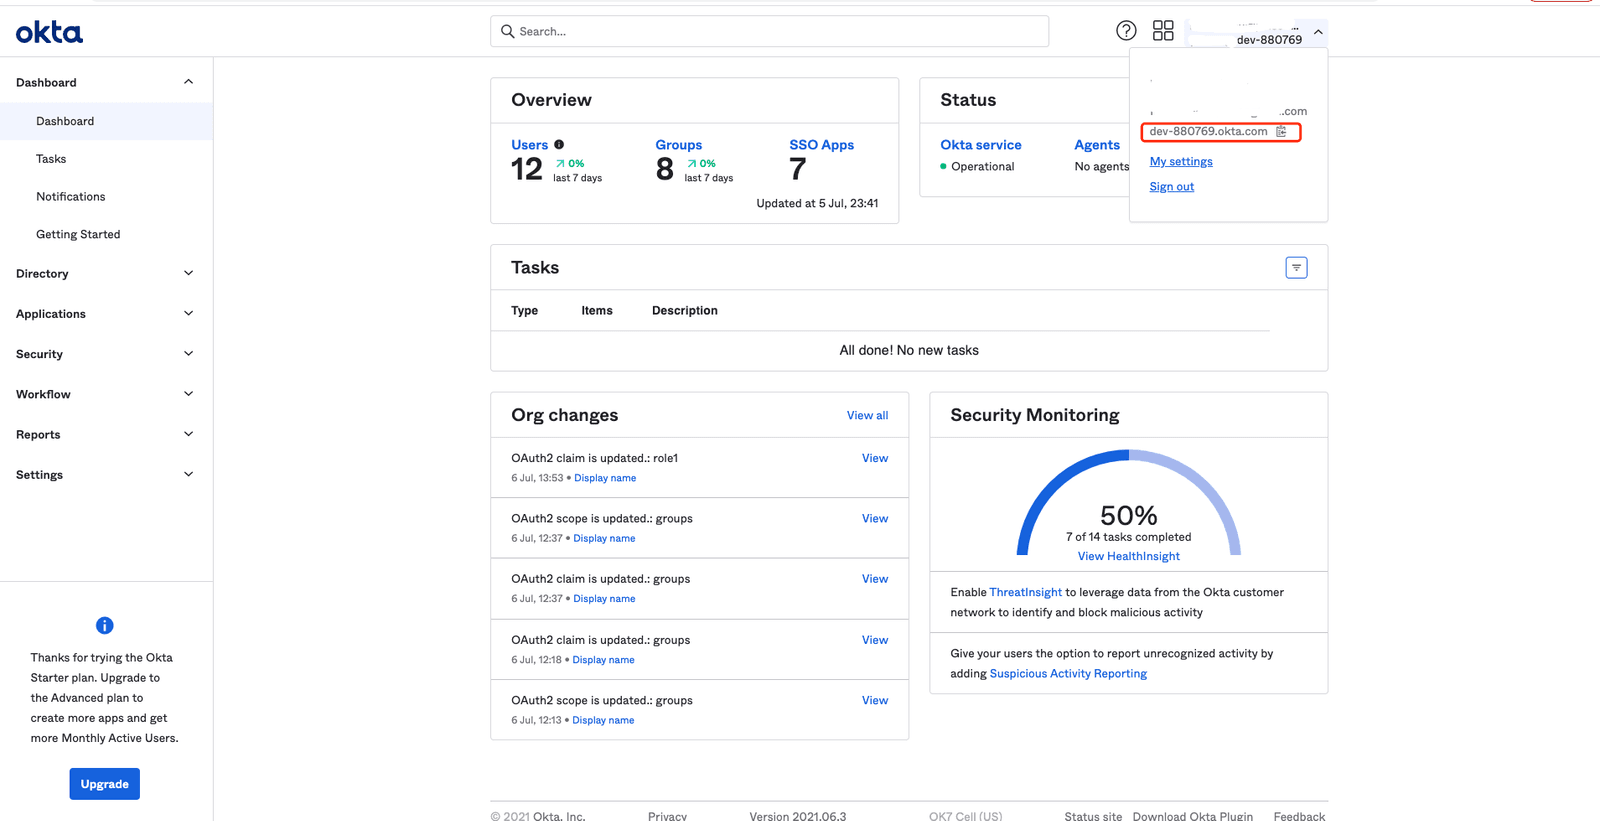
Assign Application in Okta
- Double check members are linked to the right applications (if not, choose
Assign Applicationsby clicking the green button to manually add).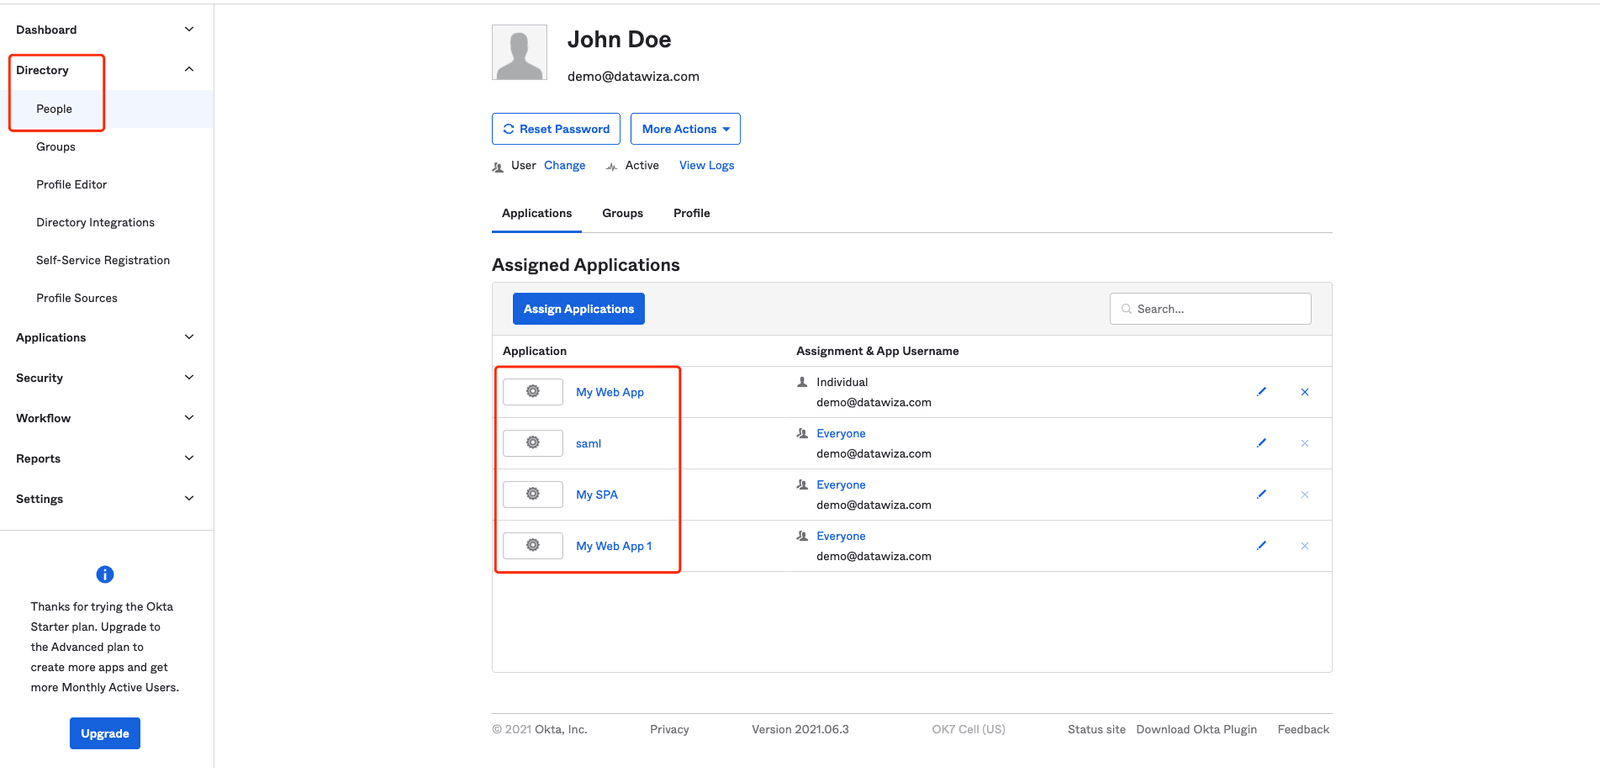
(Optional) Add Claims in ID Token
You can skip this section if you need only default claims (family name, given name, email, and so on) provided by Okta. Otherwise, follow the steps below (mainly based on Add a Custom Claim to a Token) to add custom claims in Okta Console:
- Select
APItab inSecurity, it should be a default authorization server calleddefault. Click default: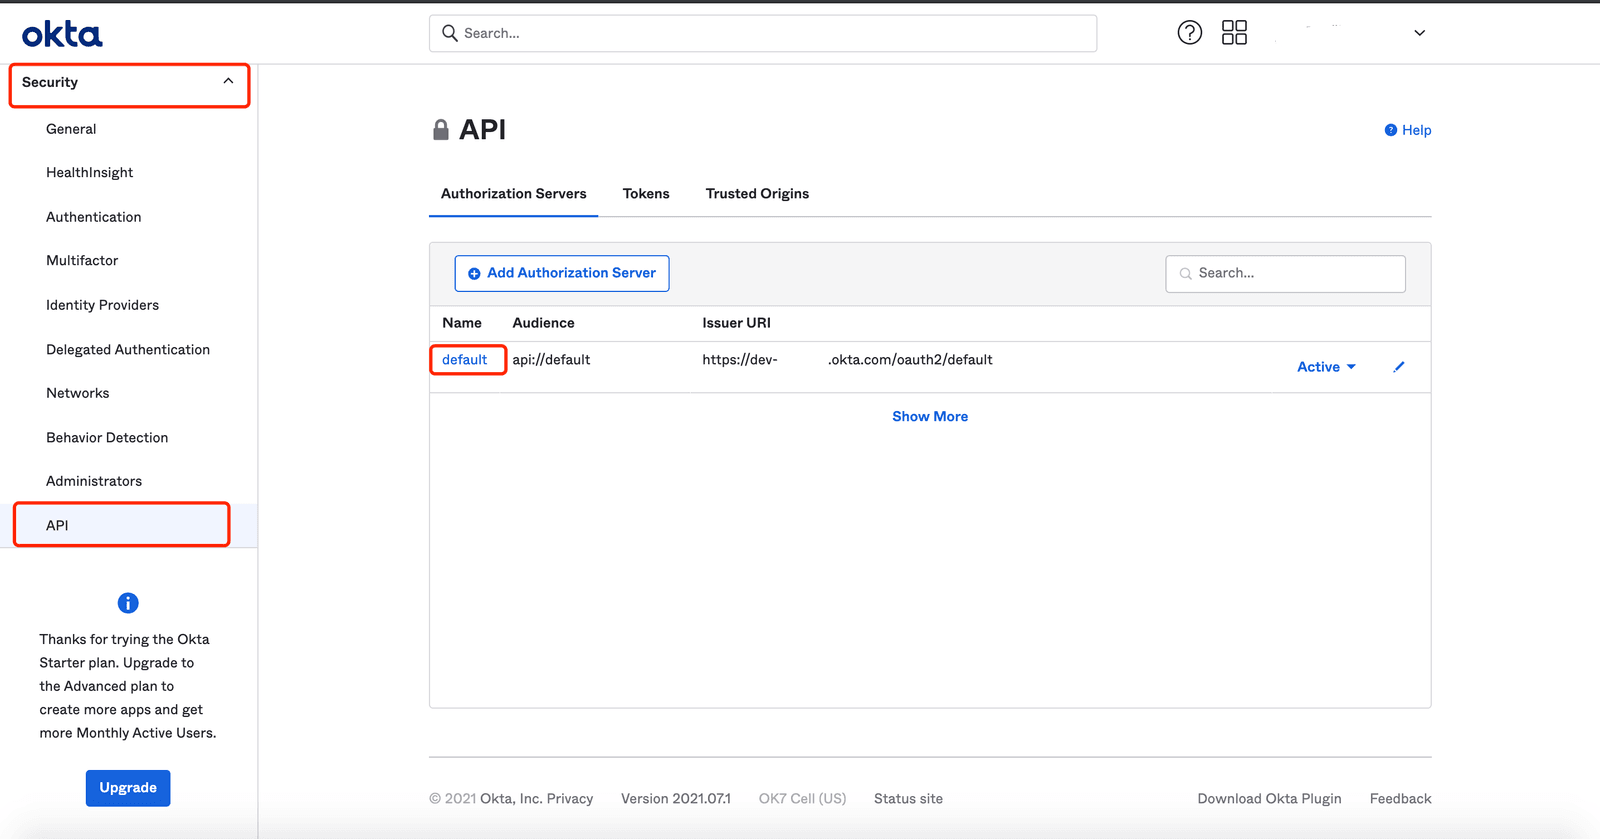
- Select
Claimsand clickAdd Claim: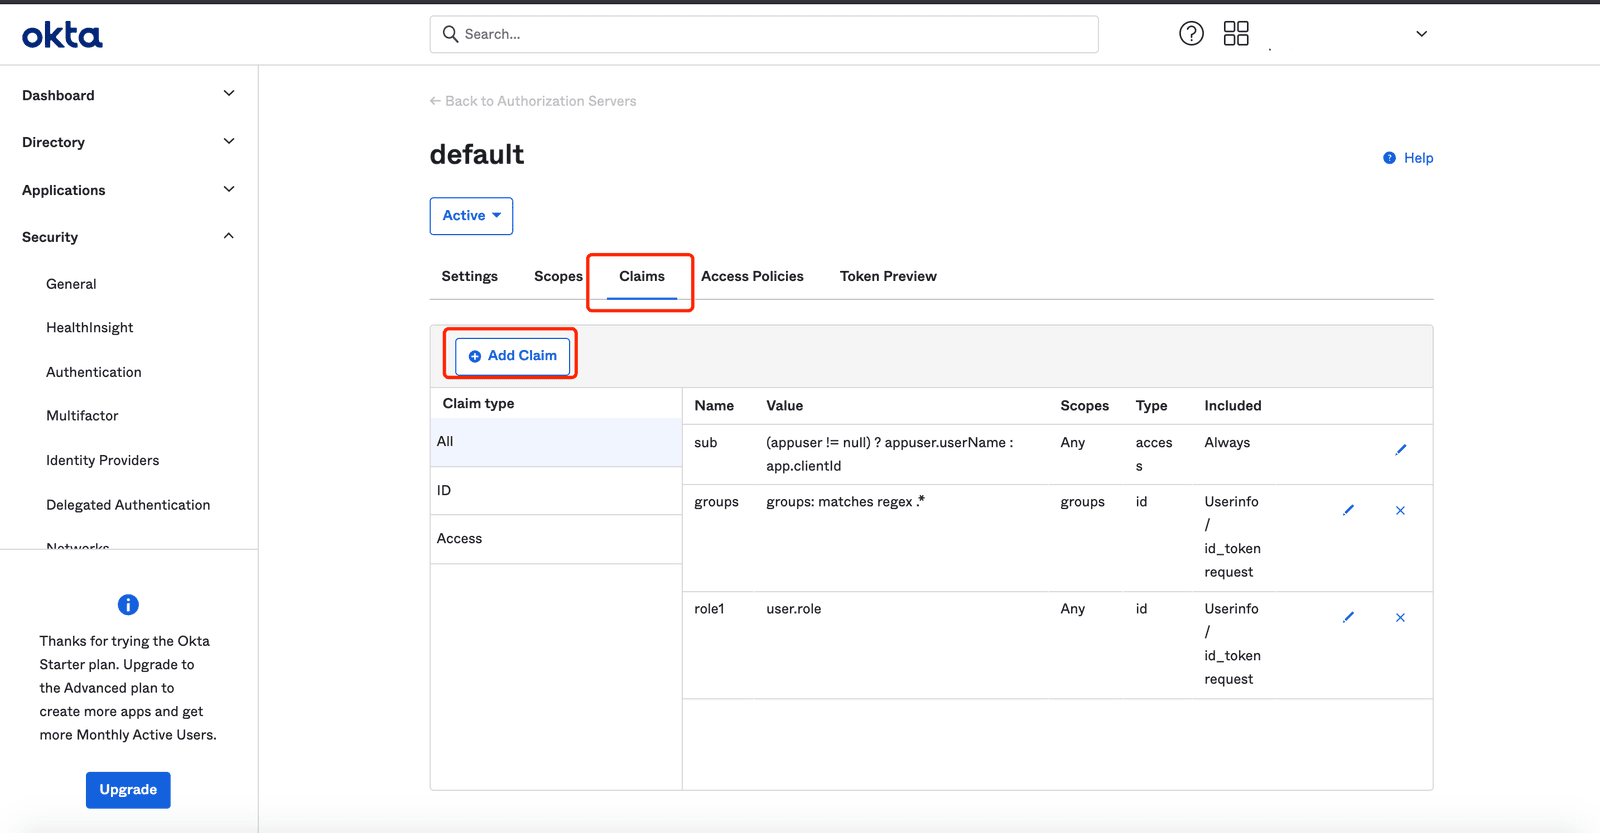
- Include the claim in the ID token:
If you want to get user group, you need to select theValue typeasGroups.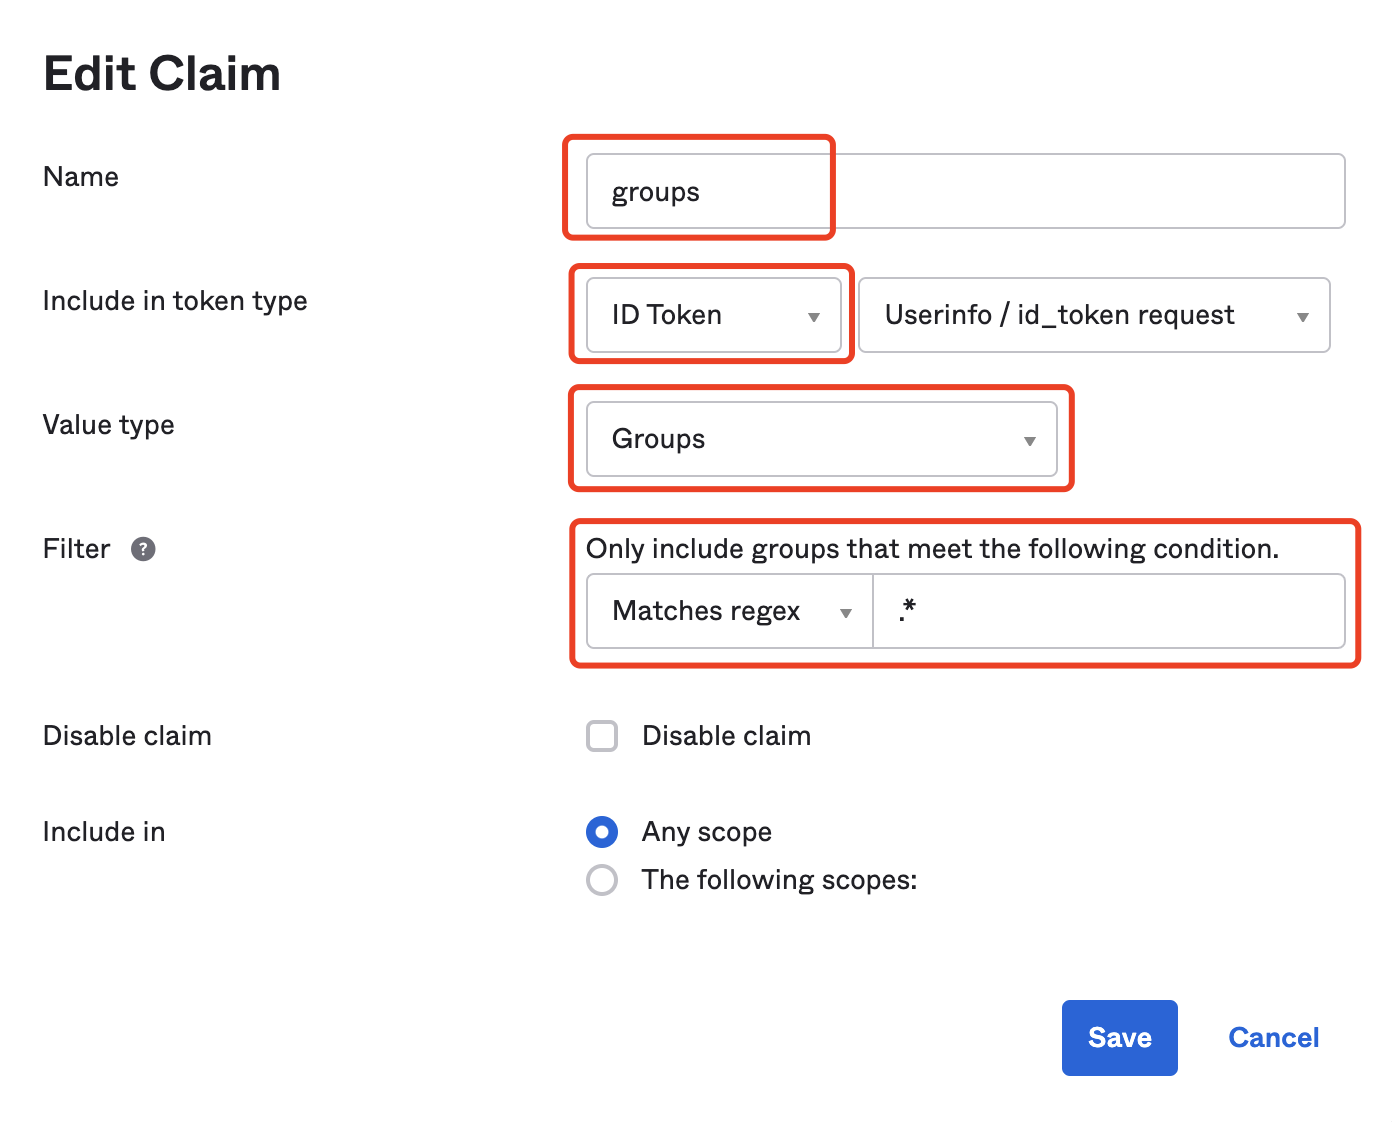
By default it is included inAny scope, you can also add the group in specific scopes: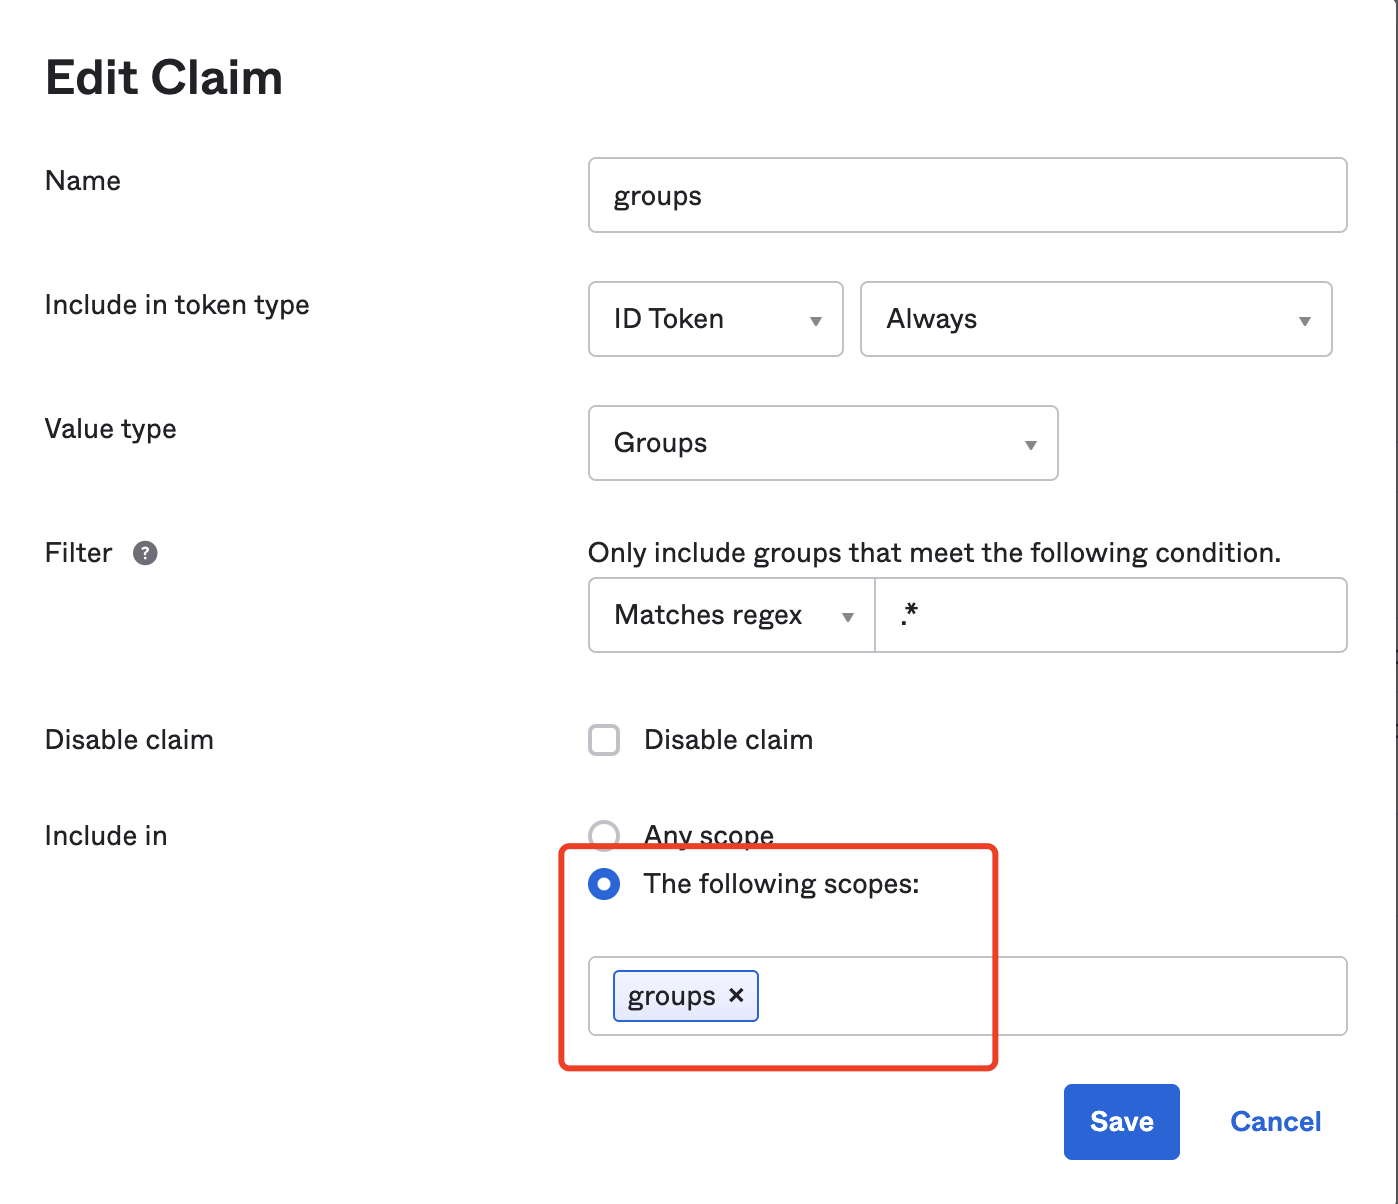
In this way, you need to add the same scopes for your Okta IdP config in the DCMC: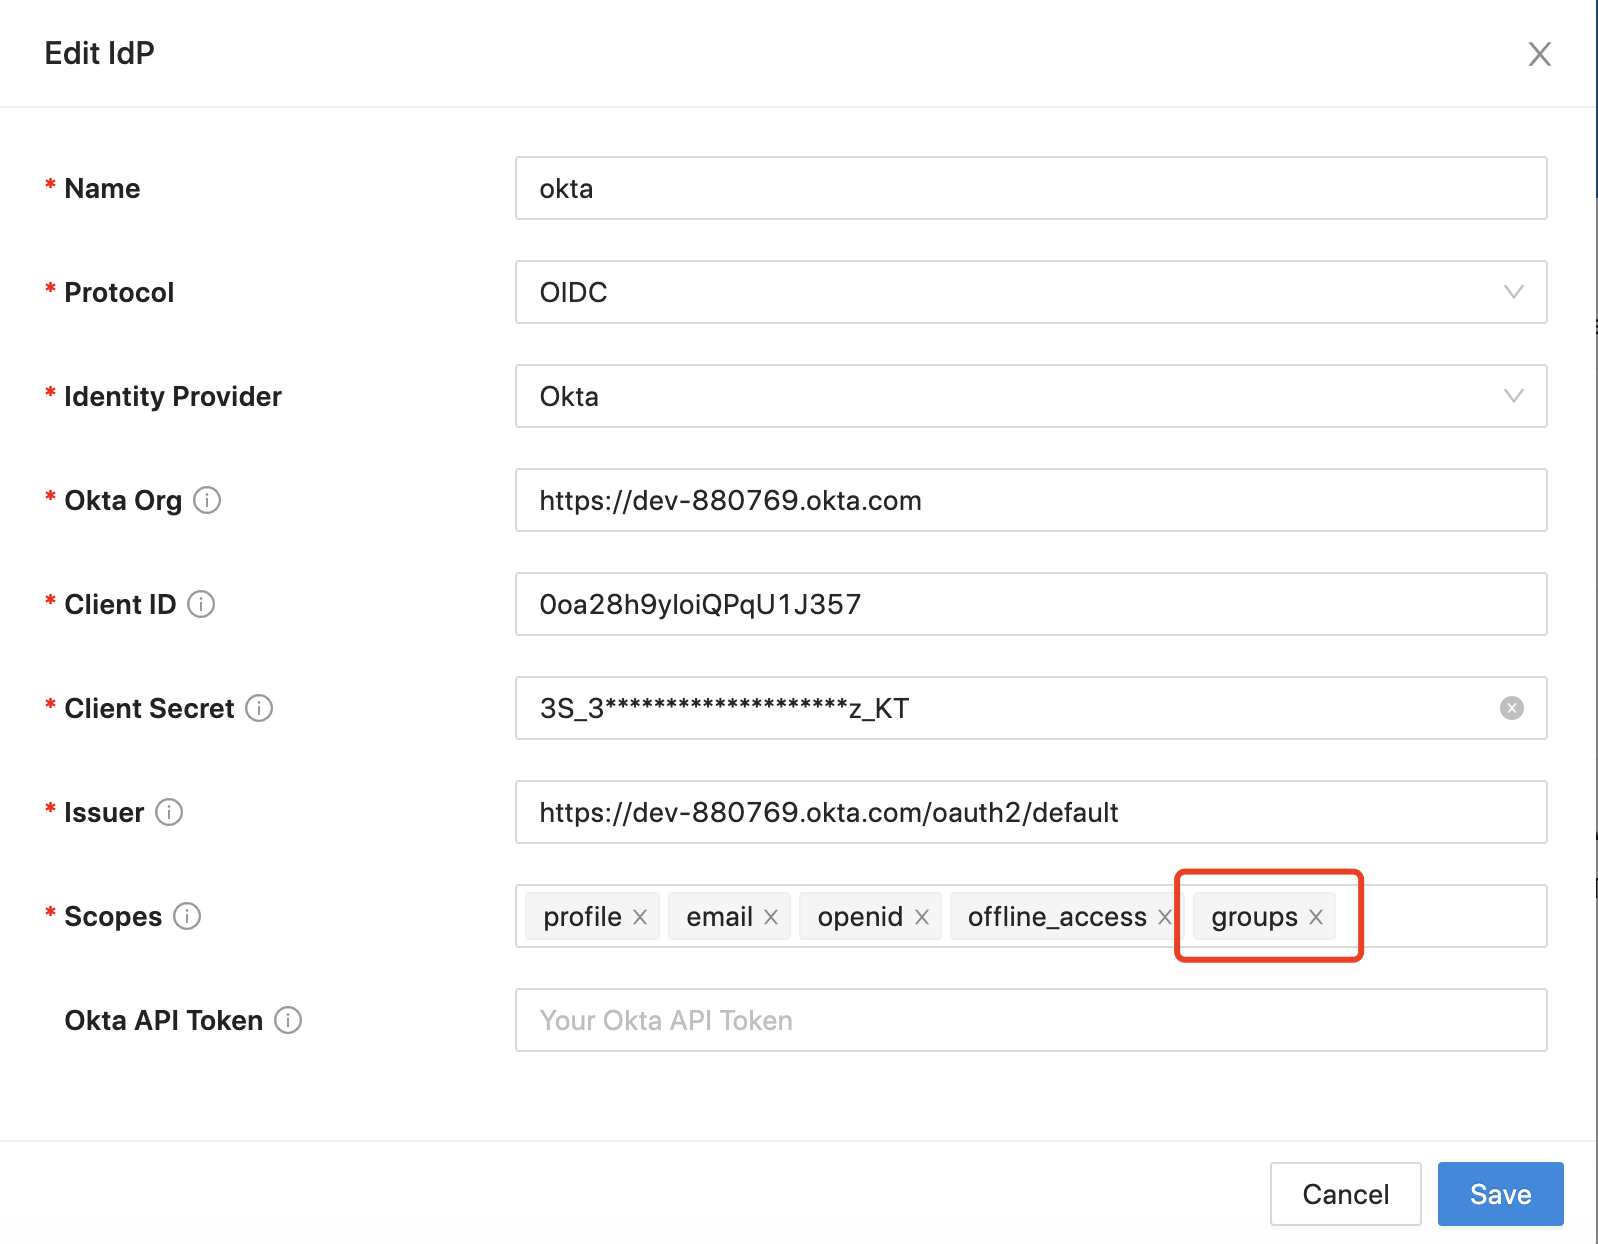
For other custom claims, select theValue typeasExpression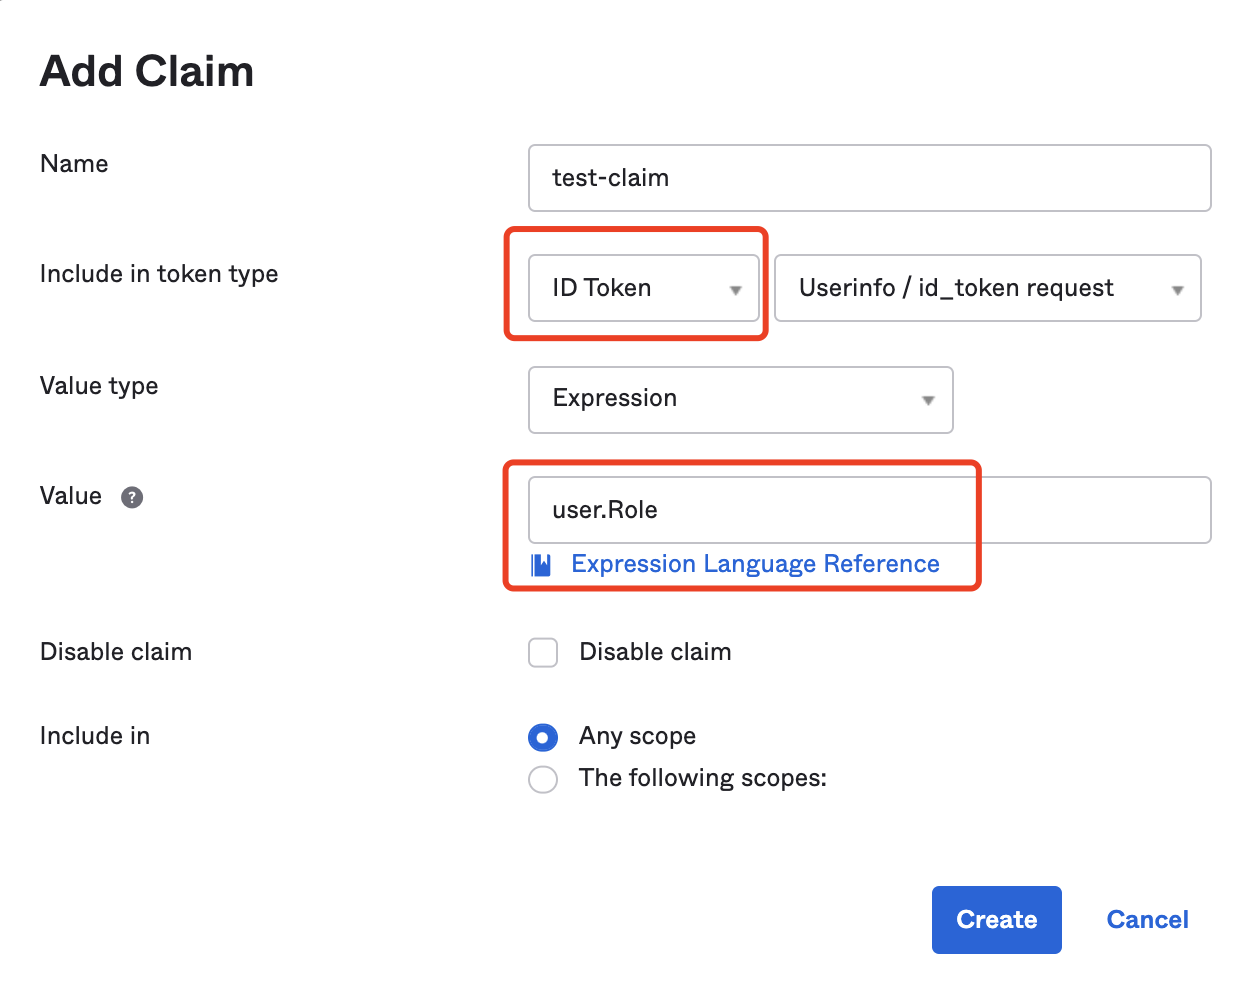
In addition, you can click Okta Expression Language for more details about expression language.
Then, you need to add the customized attribute in DCMC. You can follow Step 4: Pass User Attributes to pass custom claims.
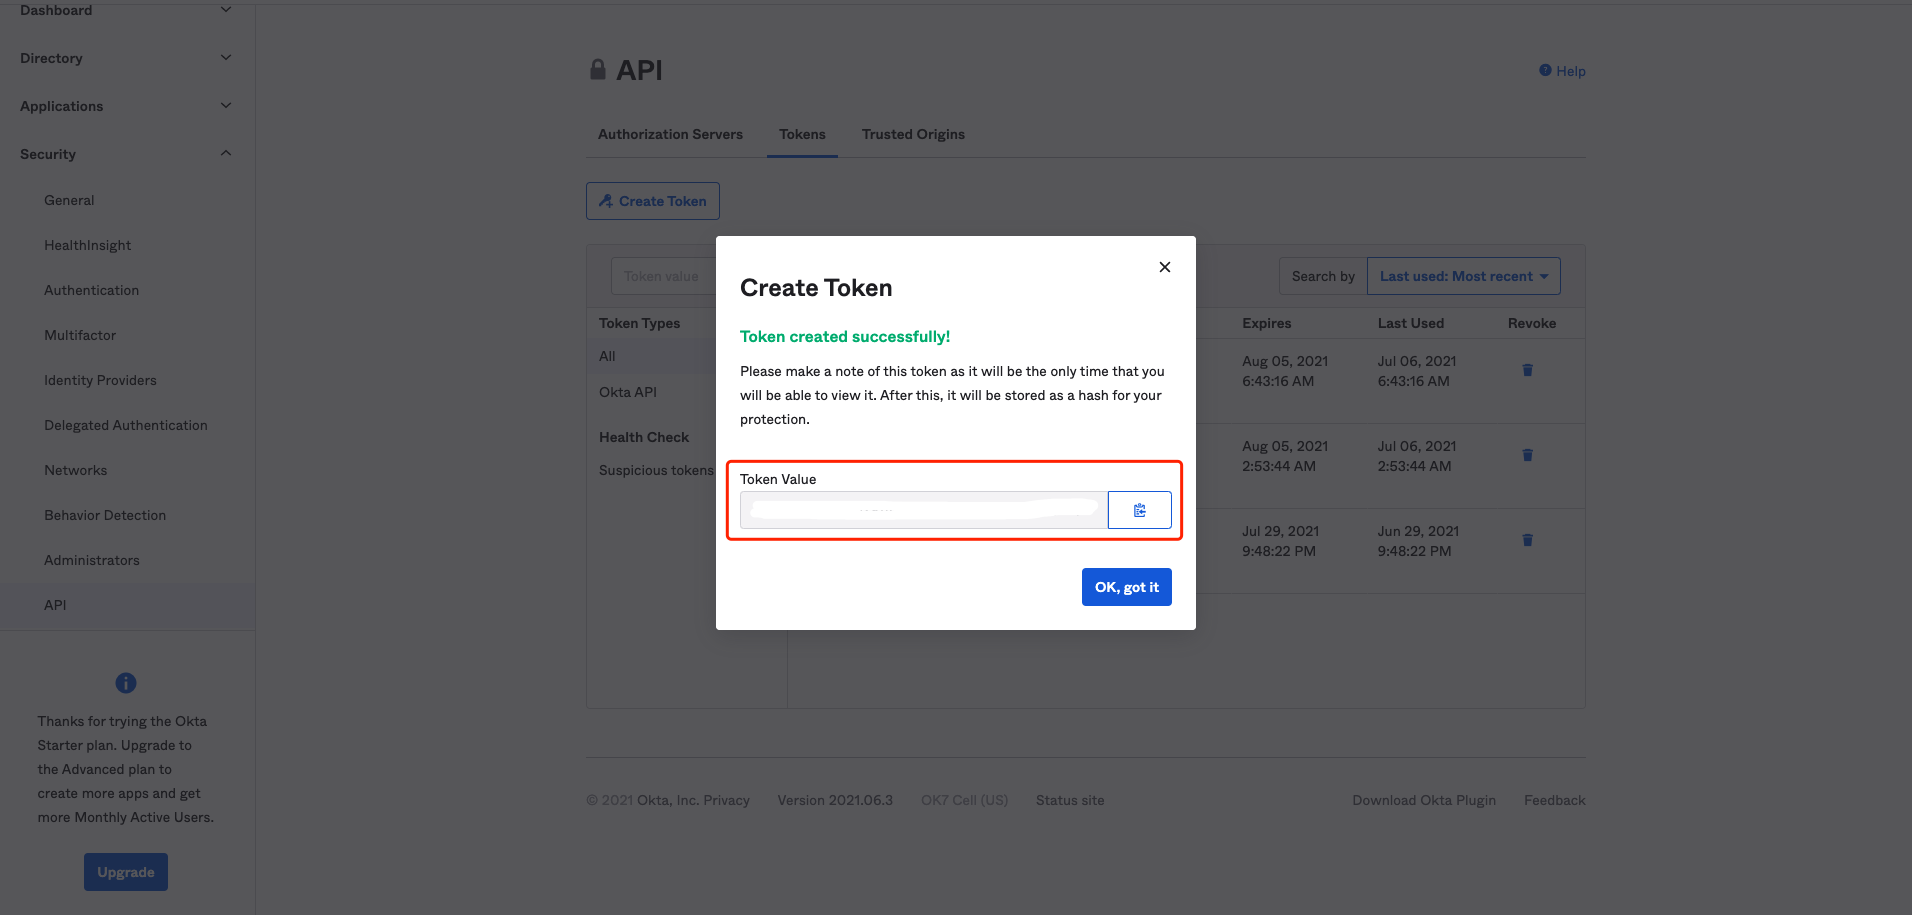
(Optional) Create API token in Okta
Alternatively, we support getting user info from OKTA user info API by API token. By this means, we can get all user info about the user and do not need to add claims in ID Token.
- Choose
APIand then create your own token. Please be aware of the token value. Okta API token is used by DAP to get user information, especially for those customized user attributes.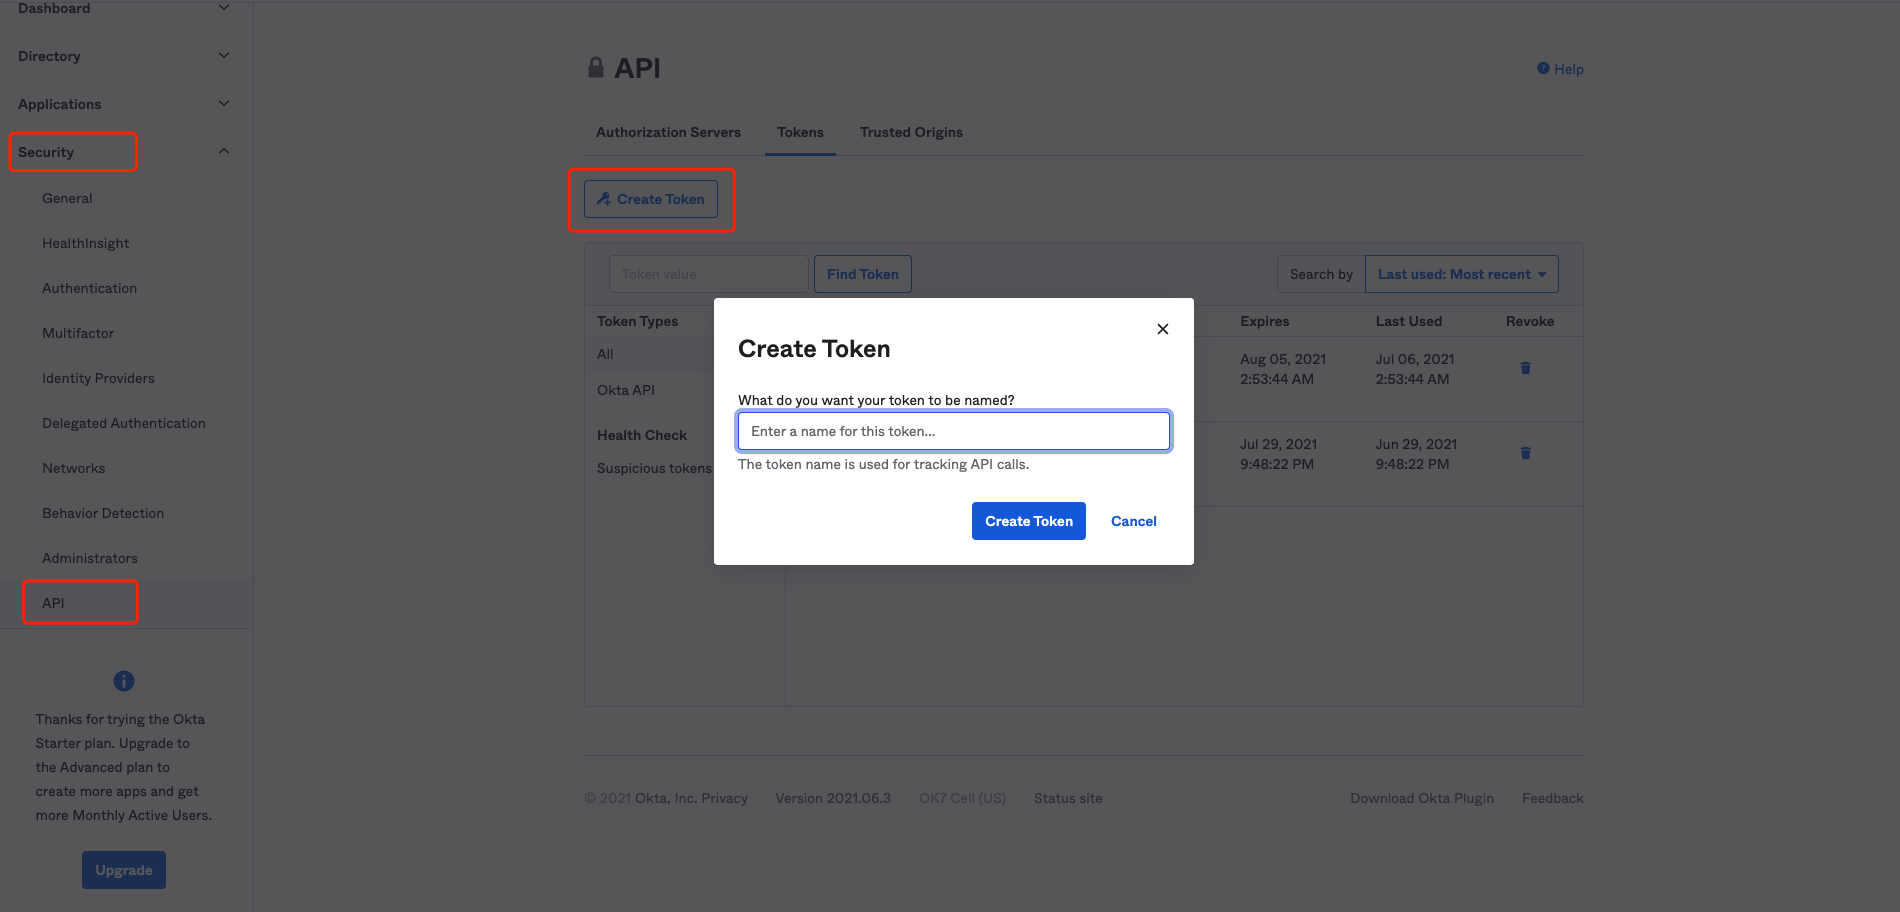
Summary
We have shown how to register a web application on Okta. Please make sure to save the following values for later setting in Datawiza Cloud Management Console.
- Client ID
- Client Secret
- Okta Org
- (Optional) Okta API Token
Reference
Using the Console
Create Claims
Add a Custom Claim to a Token
Okta Expression Language
API Token