Enable Duo 2FA for SSO with Microsoft Entra ID (Azure AD) SAML through Datawiza
Overview
Duo Single Sign-On is a cloud-hosted Security Assertion Markup Language (SAML) 2.0 identity provider that secures access to cloud applications with your users’ existing directory credentials (like Microsoft Active Directory or Google Apps accounts). SAML delegates authentication from a service provider to an identity provider, and is used for single sign-on solutions (SSO).
Duo Single Sign-On offers a generic connector with the ability to provide your own SAML “metadata” and connect to just about any app that supports the SAML 2.0 standard.
In this section, we will talk about how to configure Duo Two-Factor Authentication for the Microsoft Entra ID (Azure AD) SAML SSO with Datawiza Access-Proxy (DAP).
Prerequisite
- A Duo Admin with the Owner role to enable the feature
- A Microsoft Entra ID account with the permission to create the application registration
- A Datawiza Cloud Management Console (DCMC) account
- Docker and Docker-compose
Part I: Duo and Microsoft Entra ID configuration
Enable Duo Single Sign-On
Log in to the Duo Admin Panel and click
Single Sign-Onin the navigation bar on the left.Review the information on the "Single Sign-On" page. If you agree to the terms, check the box and then click
Activate and Start Setup.On the
Customize your SSO subdomainpage you can specify a subdomain you'd like your users to see when they are logging in with Duo Single Sign-On. For testing purposes, just click Complete later to skip this step for now.On the
Add Authentication Sourcepage chooseSAML Identity Provideras your authentication source. Click the button at the bottom of the option you'd like to use to add that source type, and follow the instructions in the next section.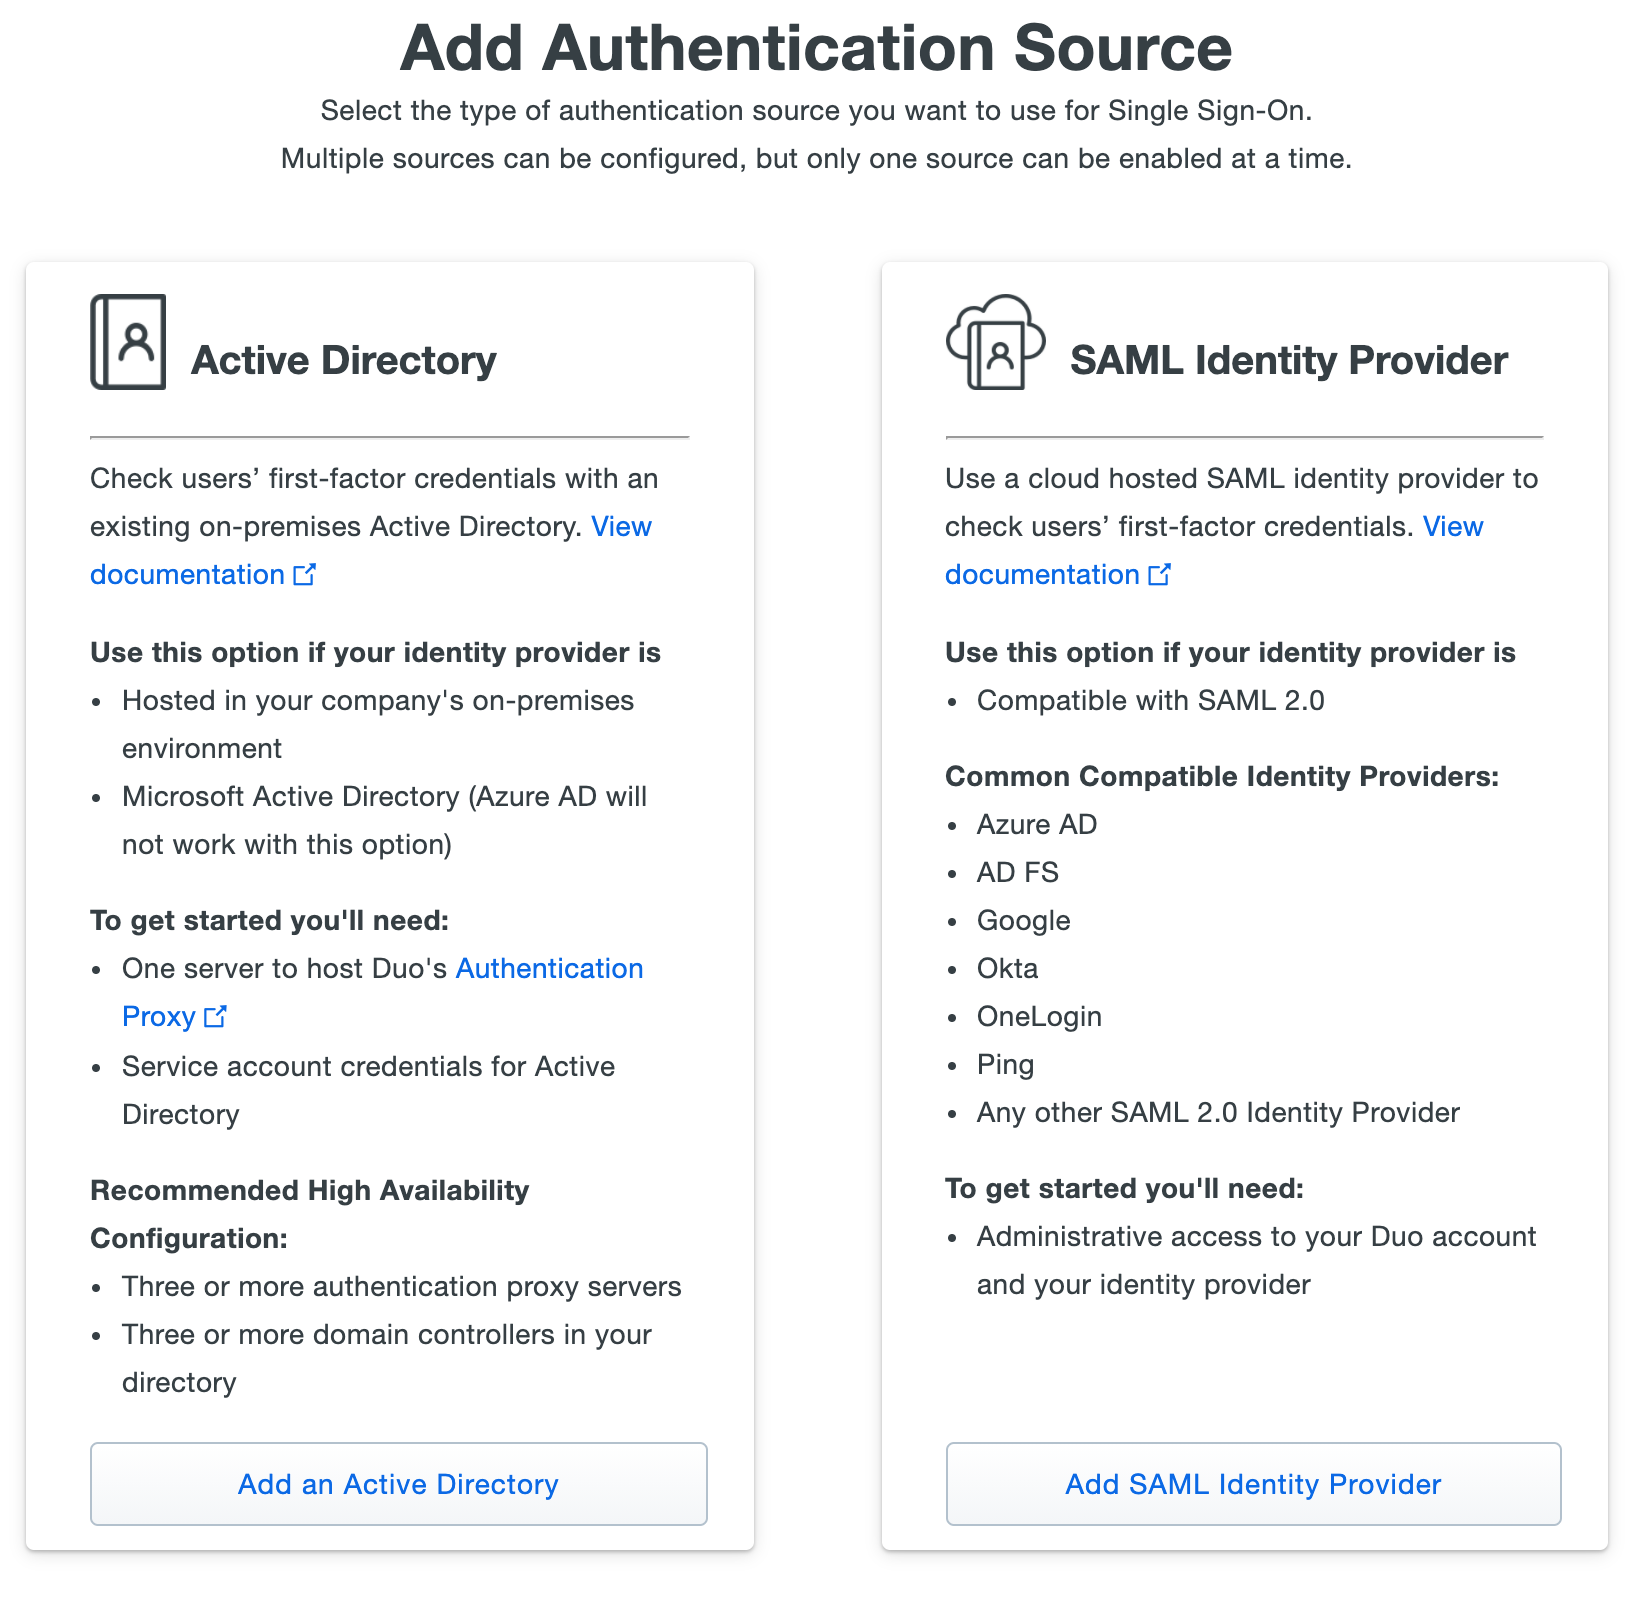
Configure Your Authentication Source
Follow the steps below to configure Duo Single Sign-On as a service provider inside of your SAML identity provider and configure Duo Single Sign-On to use your SAML identity provider for authentication. Keep the Duo Admin Panel open in your browser while you access your SAML IdP's administrative console in a new window or tab. You'll need to return to the Duo Single Sign-On page to complete the configuration steps.
Configure the Duo Single Sign-On app in Azure
On the "Single Sign-On Configuration" page scroll down to
1. Configure your SAML Identity Provider. This is the Duo Single Sign-On metadata information you'll need to provide to your SAML identity provider to configure Duo Single Sign-On as a service provider.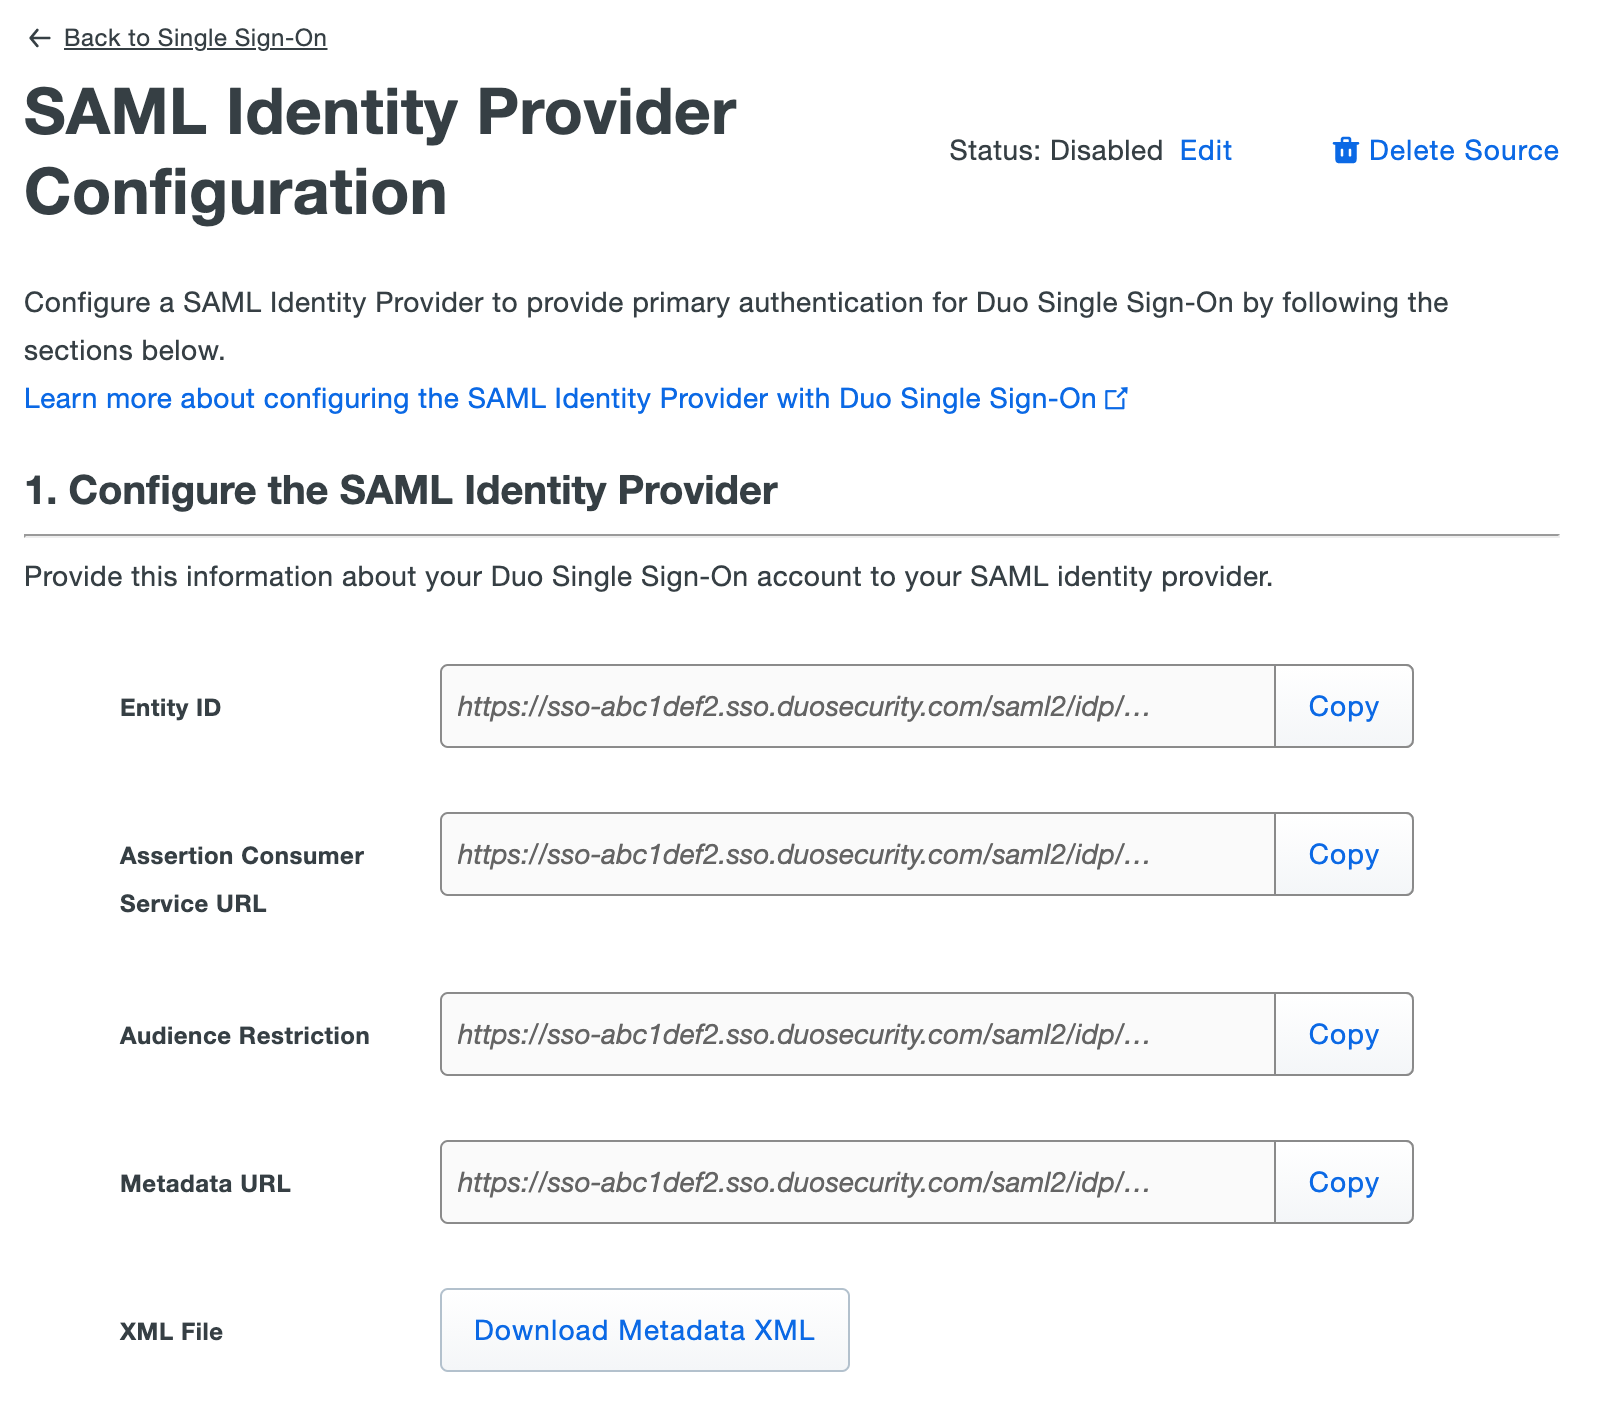
Log into your Microsoft Azure administrative portal.
Click on the menu icon in the upper left-hand side of the page. Click on
Microsoft Entra ID.On the left-hand navigation bar click
Enterprise Applications. Click+ New applicationat the top of the screen.Click the
Non-gallery applicationtile in the "Add your own app" section.On the "Add your own application" page type "Duo SSO" in the
Namefield and clickAddat the very bottom of the page.On the application "Overview" page under "Getting Started" click Assign users and groups.
Click
+ Add usersand select the users and groups that should have access to log in with Azure to Duo Single Sign-On. Once the users and groups are selected click Assign at the bottom of the page.On the left-hand navigation under "Manage" click
Single sign-on. SelectSAMLon the "Select a single sign-on method" page.On the "Set up Single Sign-On with SAML" page under "Basic SAML Configuration" click the
Editicon (a pencil).While on the "Basic SAML Configuration" page copy the
Entity IDfrom the Duo Admin Panel and paste it into theIdentifier (Entity ID)field in Azure. Example:https://sso-abc1def2.sso.duosecurity.com/saml2/idp/RI6WF1LHX9N8GBOEPGZR/metadata.While on the "Basic SAML Configuration" page copy the
Assertion Consumer Service URLfrom the Duo Admin Panel and paste it into theReply URL (Assertion Consumer Service URL)field in Azure. Example:https://sso-abc1def2.sso.duosecurity.com/saml2/idp/RI6WF1LHX9N8GBOEPGZR/acs.Leave all other fields empty.
Click
Saveand close the "Basic SAML Configuration" editor.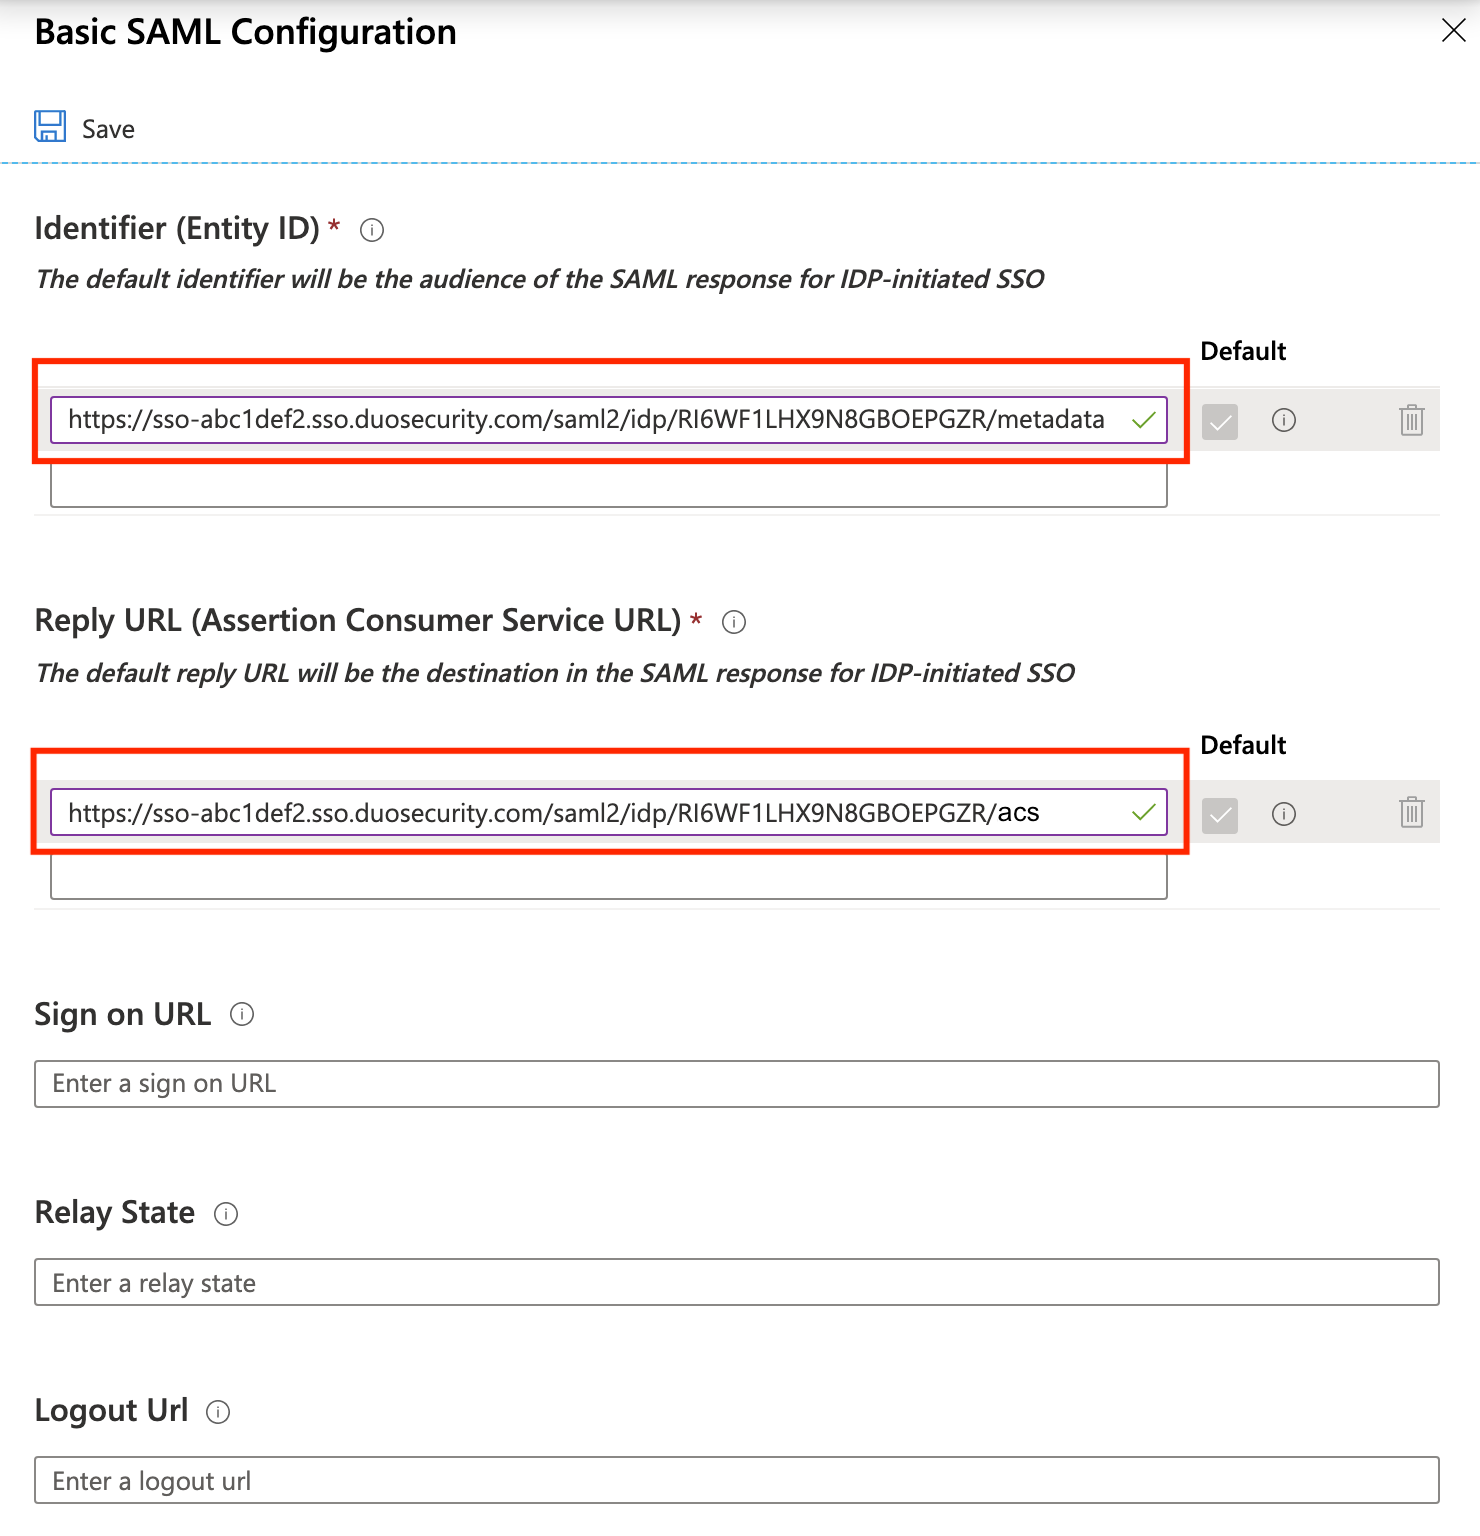
Click the
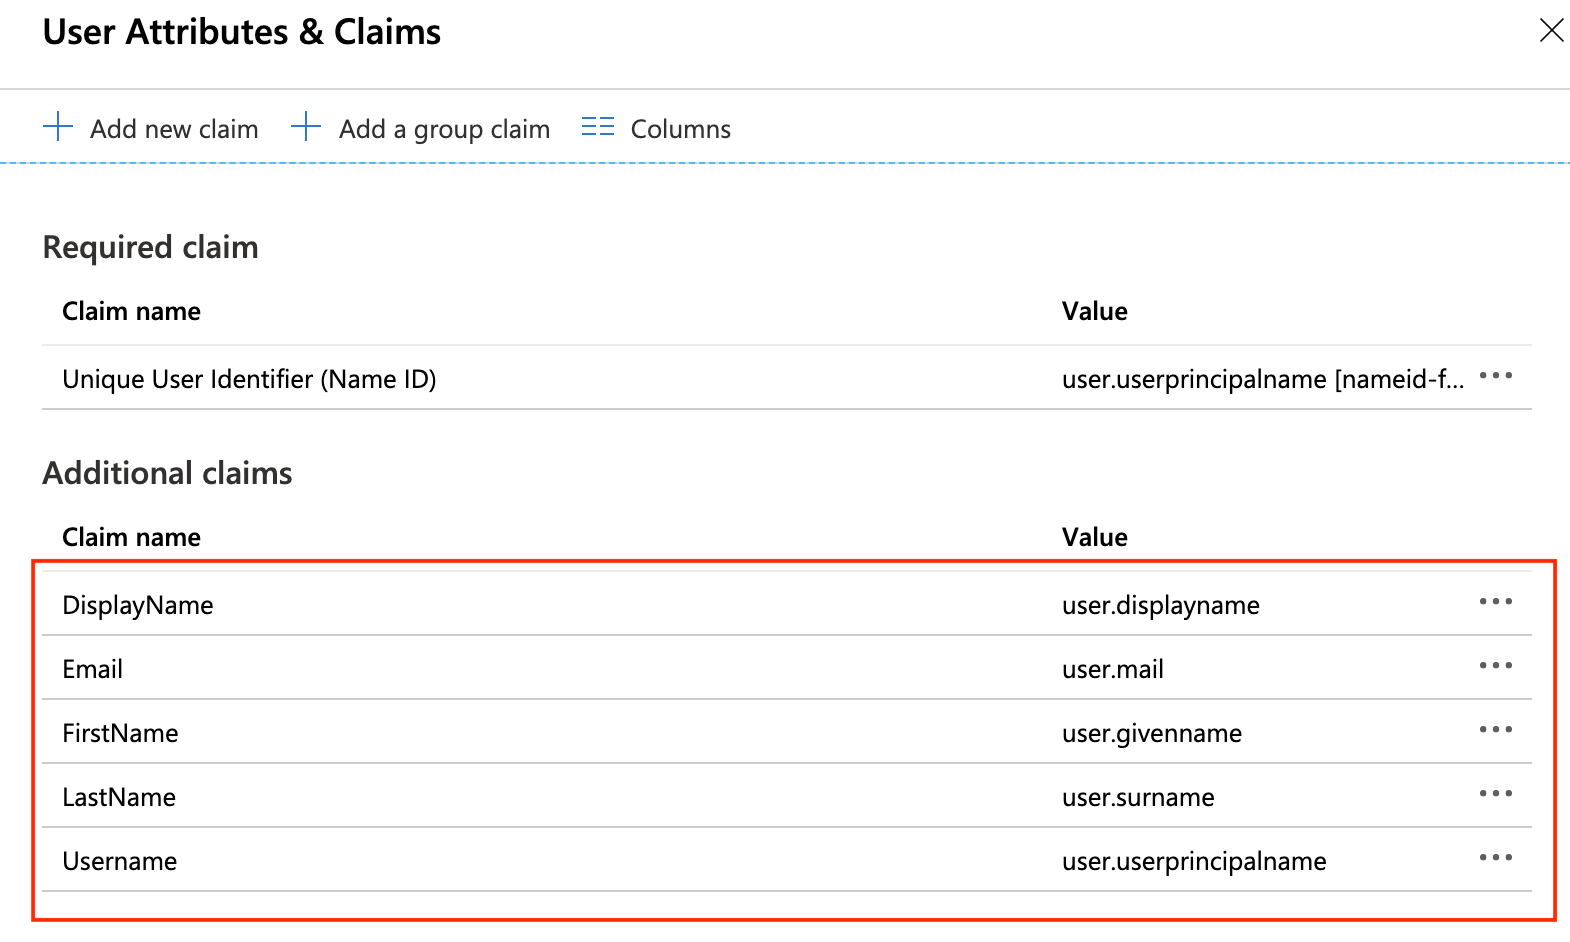
pencil iconnext to "User Attributes & Claims".Under "Additional Claims" click
...thenDeleteand confirm the action next to each row and delete the four default claims.Click
+ Add new claimat the top of the page. Use the information in the table below to add a total of five additional claims.
| Name | Namespace | Source | Source attribute |
|---|---|---|---|
| Leave Empty | Attribute | user.mail | |
| Username | Leave Empty | Attribute | user.userprincipalname |
| FirstName | Leave Empty | Attribute | user.givenname |
| LastName | Leave Empty | Attribute | user.surname |
| DisplayName | Leave Empty | Attribute | user.displayname |
After adding all five claims click the
Xicon at the top right-hand side to close the view.Duo Single Sign-On does not support an identity provider sending it a request. Do not click "Test" under step 5 to test your setup as it will fail.
Configure Duo Single Sign-On to use Azure
In the Azure Portal under "SAML Signing Certificate" click
Downloadnext toCertificate (Base64). You will need this later.Under "Set up Duo SSO" you will find metadata information that needs to be provided to Duo Single Sign-On.
Return to the Duo Admin Panel and scroll down to
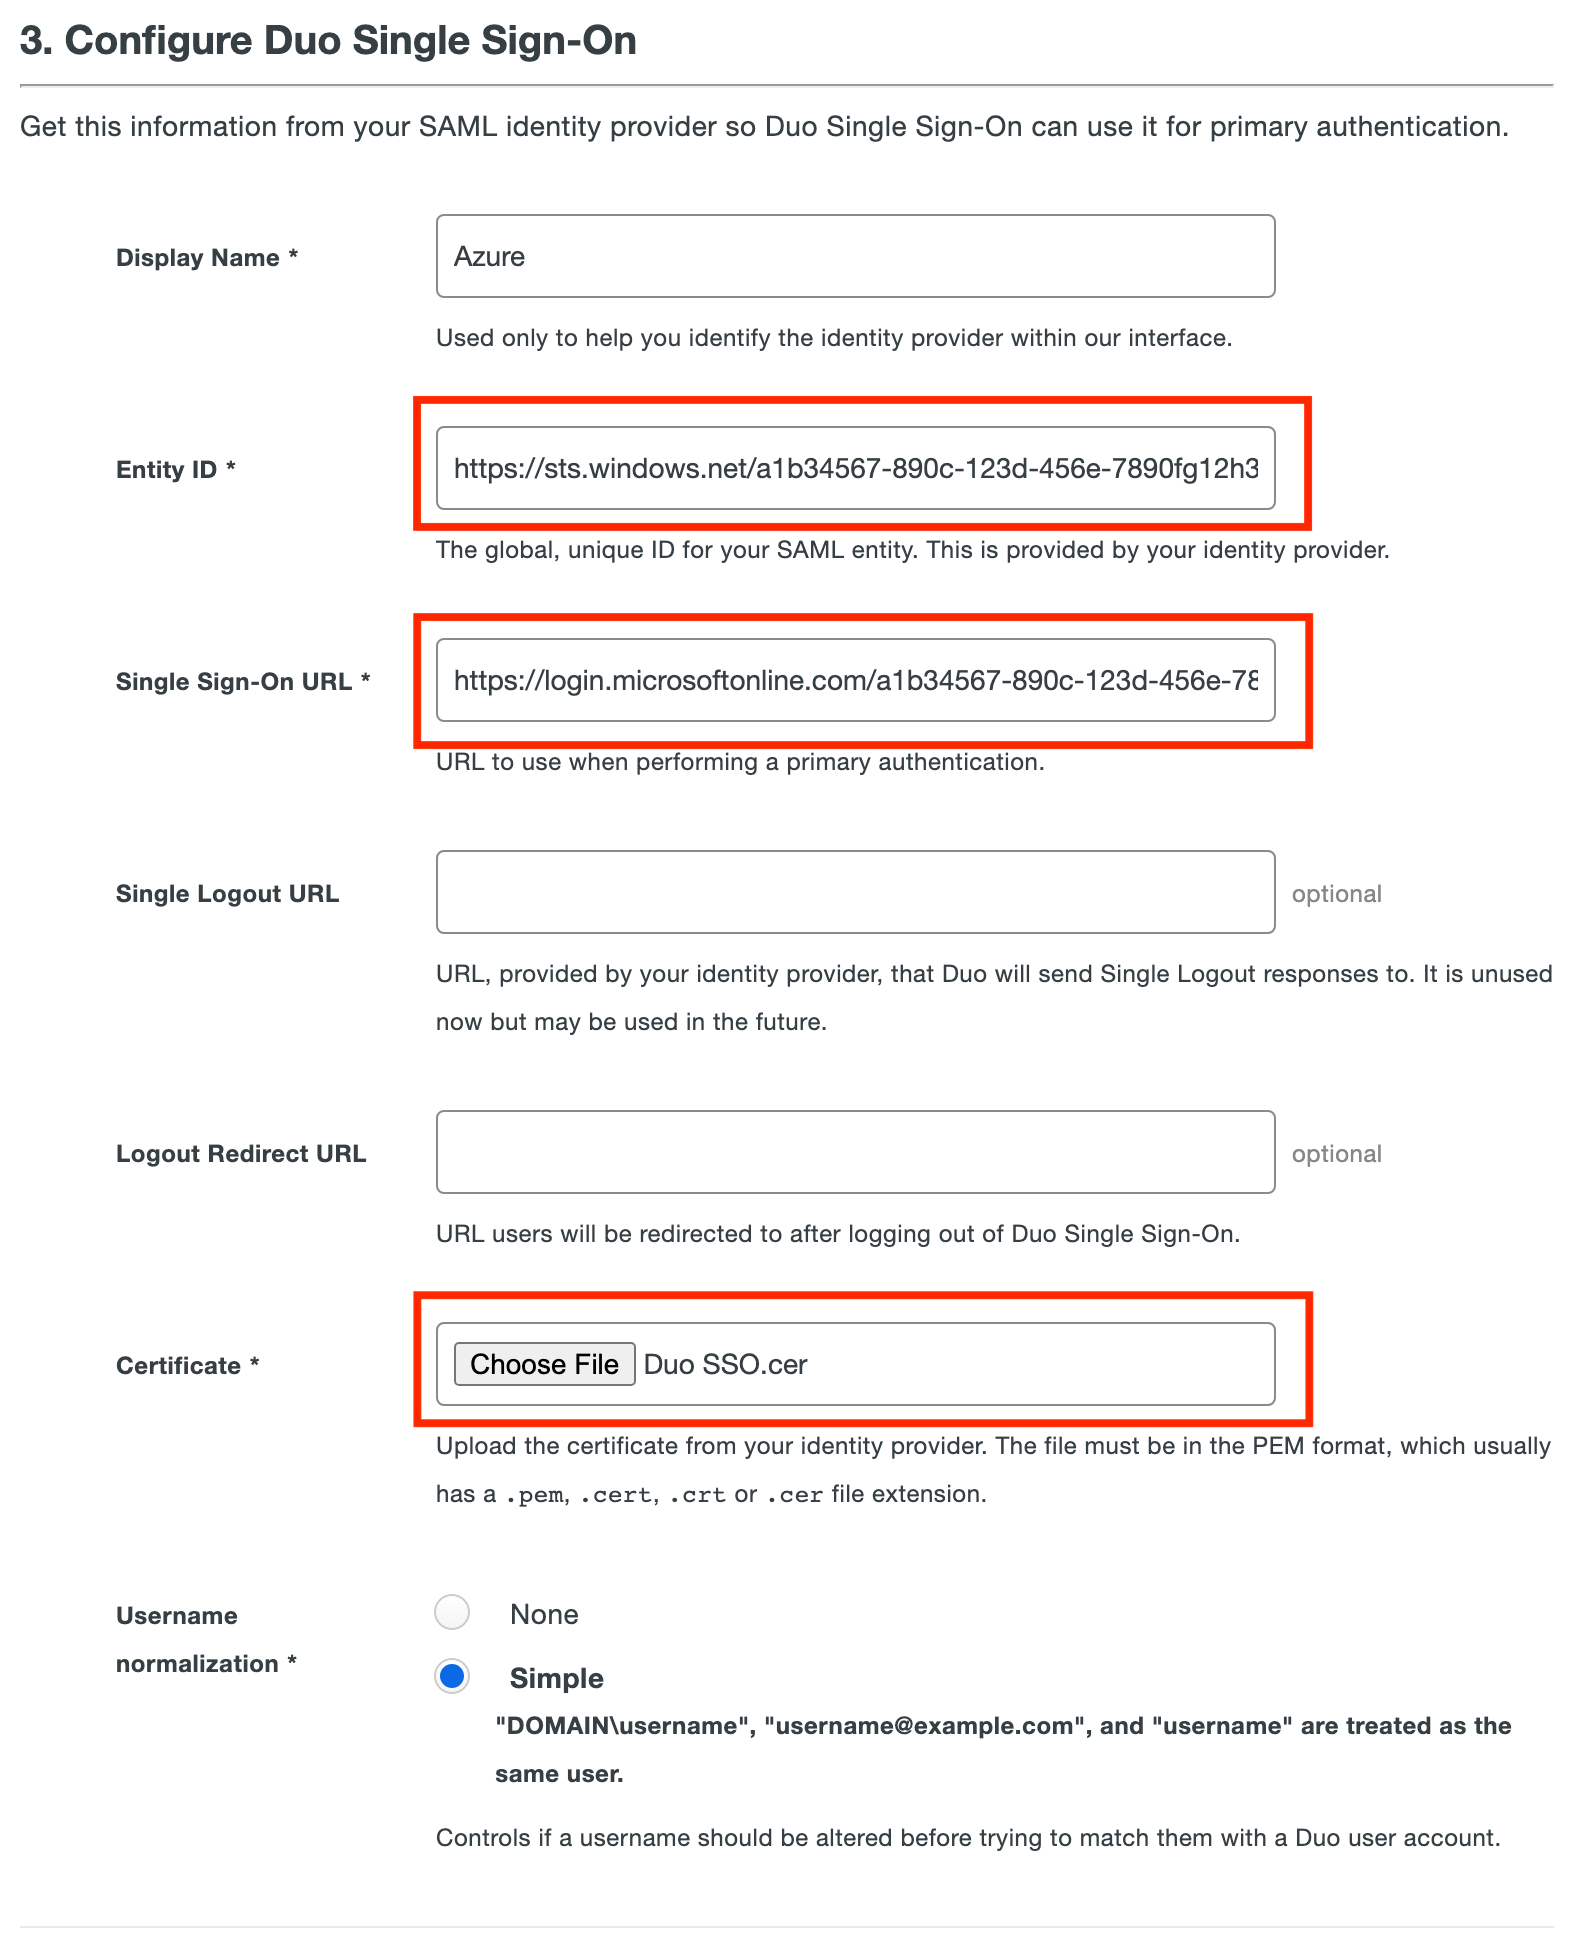
3. Configure Duo Single Sign-On. In theNamefield type a name that will let you easily identify the provider.Copy the
Login URLvalue from Azure and paste it into theSingle Sign-On URLfield in the Duo Admin Panel. Example:https://login.microsoftonline.com/a1b34567-890c-123d-456e-7890fg12h345/saml2Copy the
Azure AD Identifiervalue from Azure and paste it into theEntity IDfield in the Duo Admin Panel. Example:https://sts.windows.net/a1b34567-890c-123d-456e-7890fg12h345/Leave
Single Logout URLandLogout Redirect URLempty in the Duo Admin Panel.Upload the certificate to the
Certificatesection in the Duo Admin Panel.Username Normalizationcontrols whether or not usernames entered for primary authentication should be altered before trying to match them to a Duo user account. Just keep it default.Click Save.
You are now ready to start protecting applications with Duo Single Sign-On.
Create Your Cloud Application in Duo
Log on to the Duo Admin Panel and navigate to Applications.
Click Protect an Application and locate the entry for Generic SAML Service Provider with a protection type of "2FA with SSO hosted by Duo (Single Sign-On)" in the applications list. Click Protect to the far-right to start configuring Generic SAML Service Provider. See Protecting Applications for more information about protecting applications in Duo and additional application options. Note down the Metadata URL, it will be used for DCMC configuration. 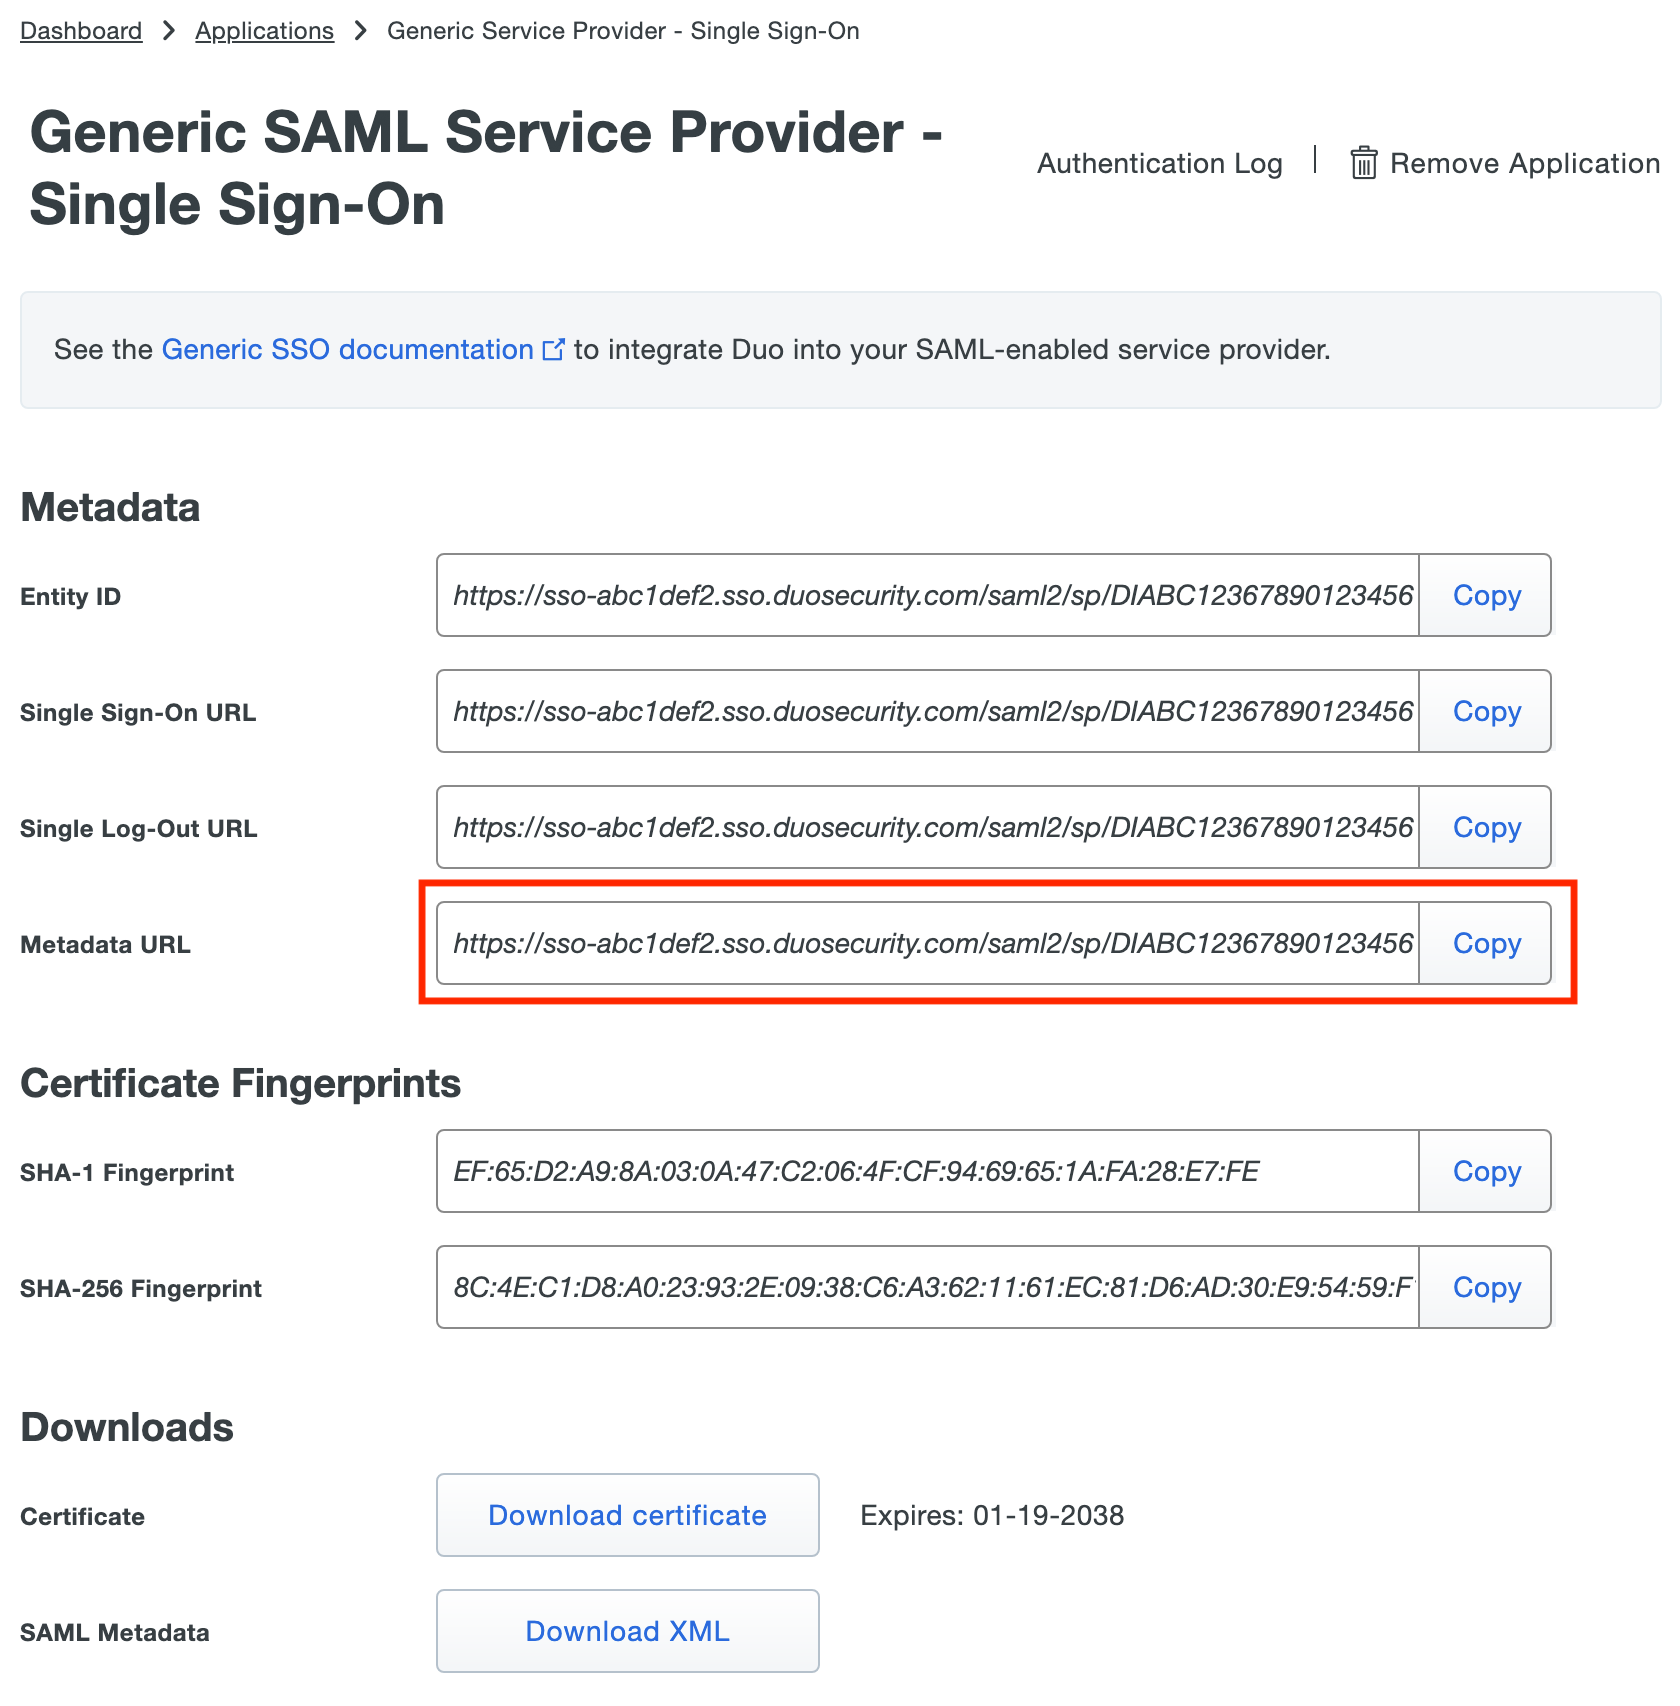
Update Your Cloud Application in Duo
Return to the application page in your Duo Admin Panel.
Enter information into the Service Provider section:
For Entity ID, input http://localhost:9772/saml/metadata
For Assertion Consumer Service (ACS) URL, input http://localhost:9772/saml/acs
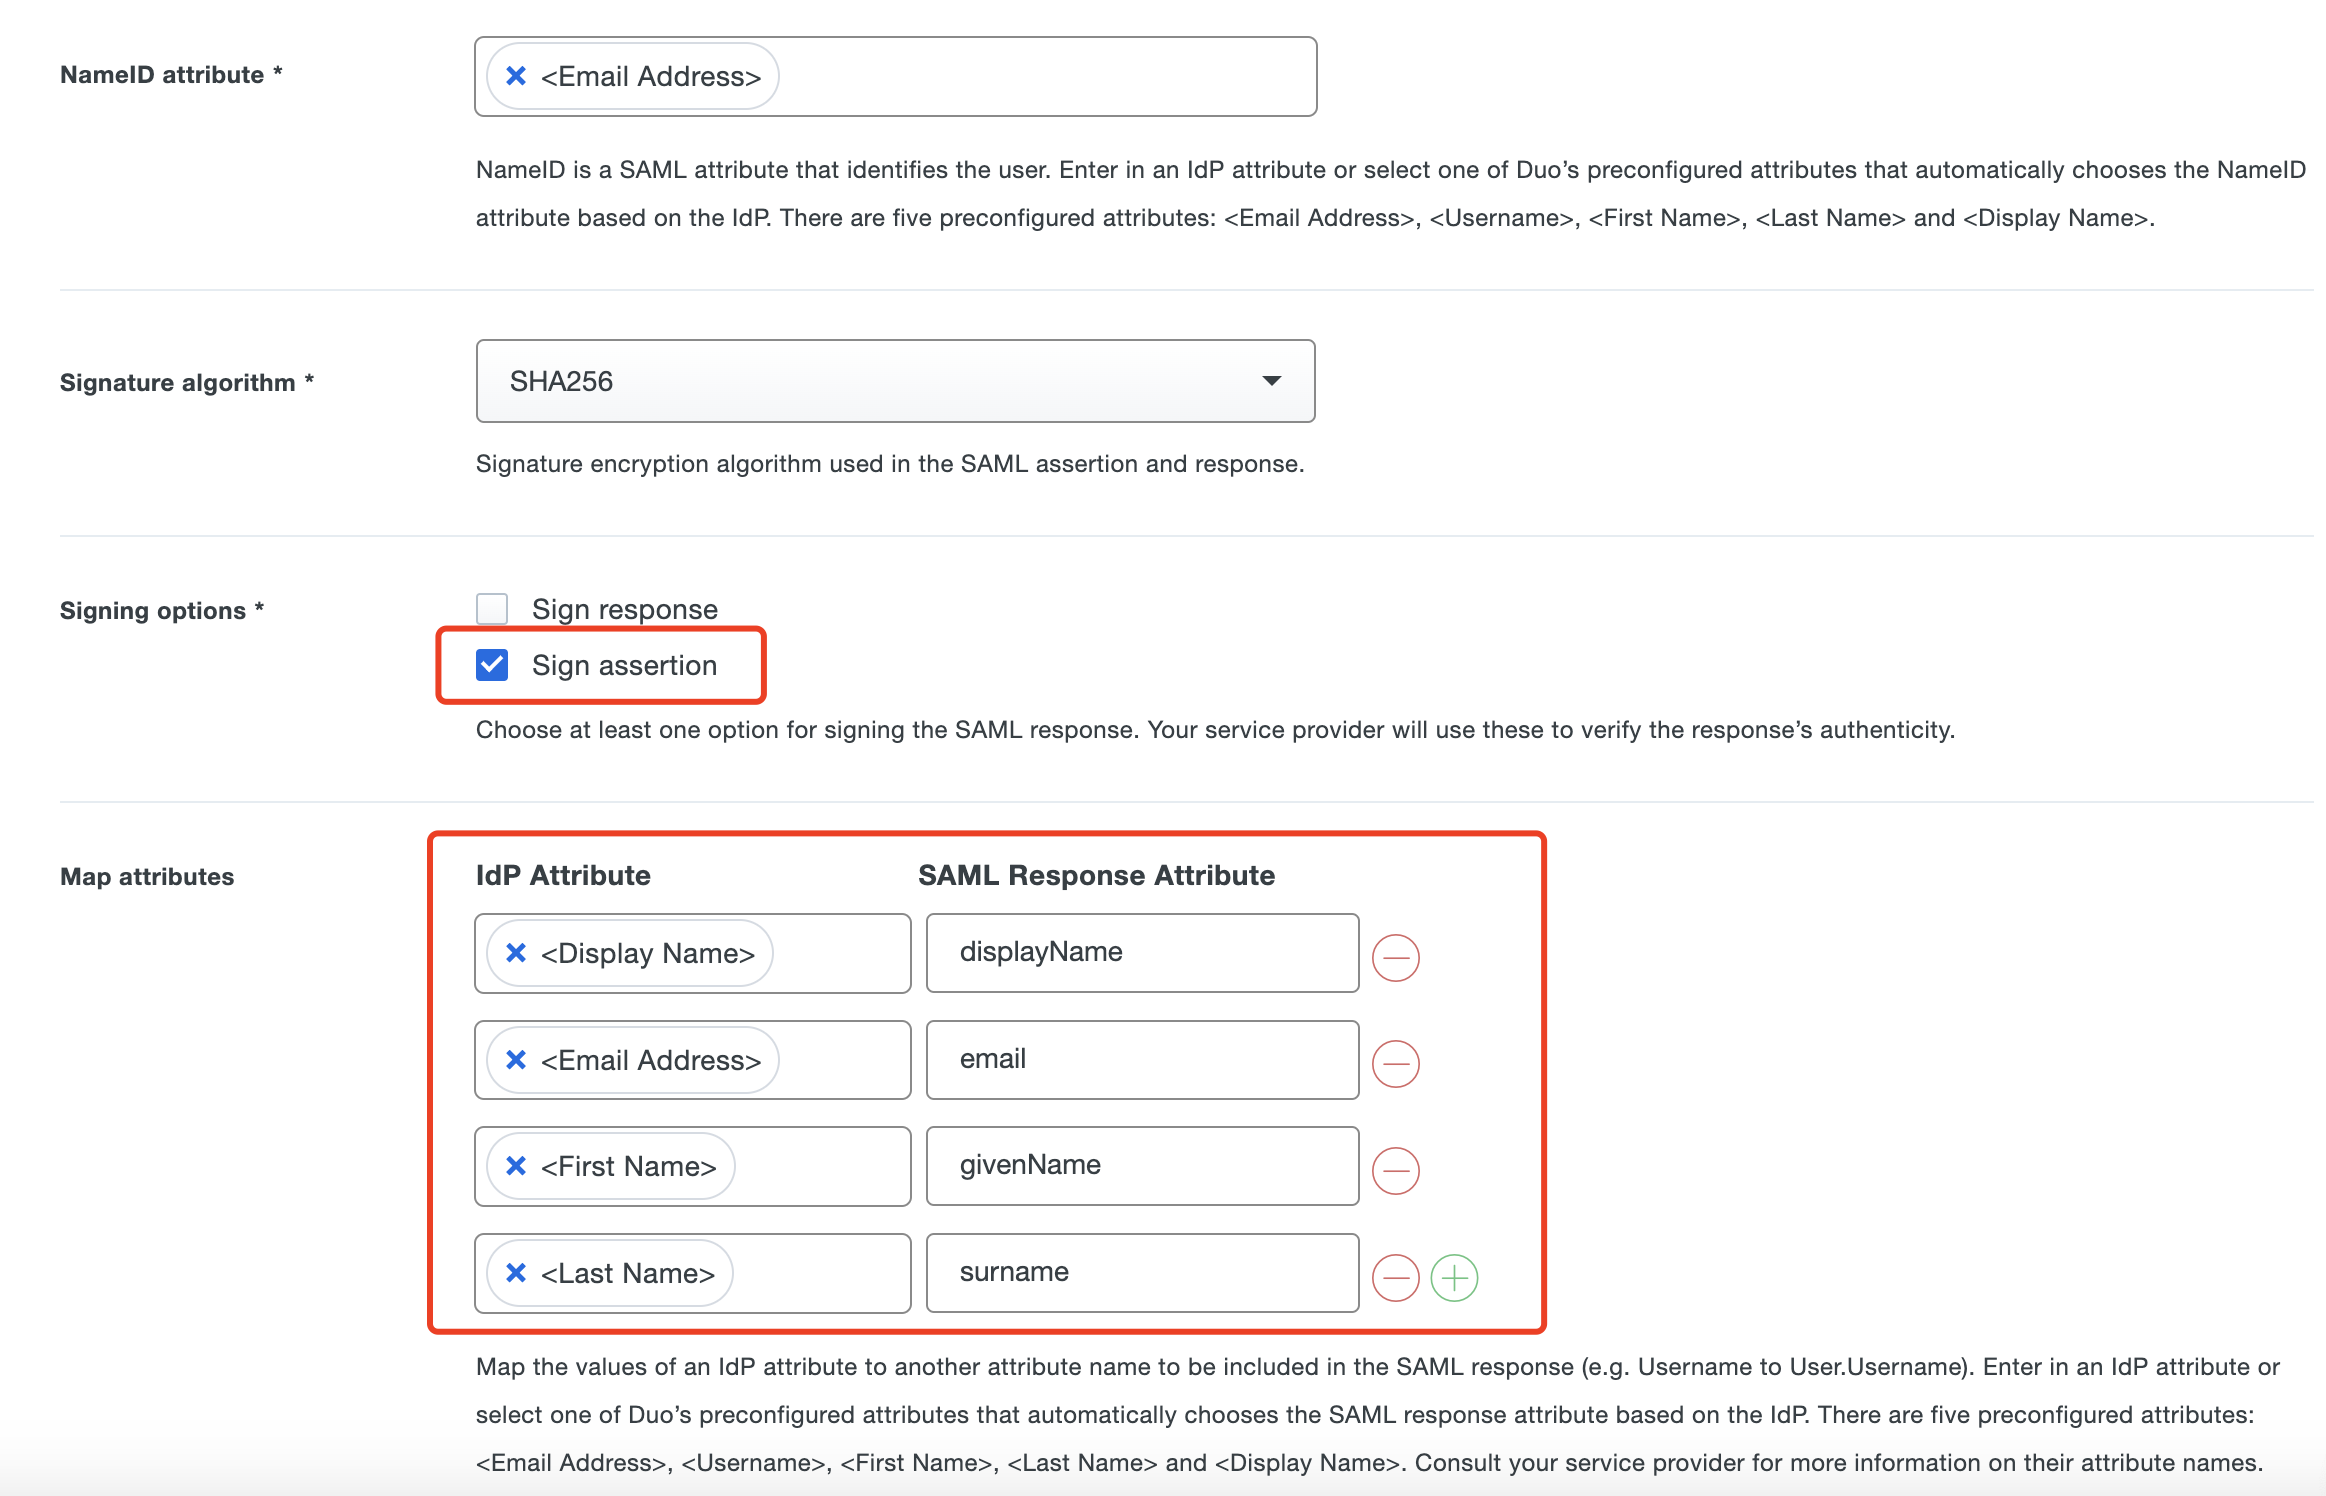
Use your application's SSO instructions to complete the SAML Response section:
For Signing options, select Sign assertion
For Map attributes:
| IdP Attribute | SAML Response Attribute |
|---|---|
| <Display Name> | displayName |
| <Email Address> | |
| <First Name> | givenName |
| <Last Name> | surname |
Scroll down to the bottom of the page and click Save.
Part II: Datawiza Cloud Management Console (DCMC) Configuration
In this section, we will show you how to create an application on the Datawiza Cloud Management Console (DCMC) and generate a pair of PROVISIONING_KEY and PROVISIONING_SECRET for this app. This key pair is used by the Datawiza Access Proxy to get the latest configurations and policies from the DCMC.
Sign Into DCMC
- Log into the DCMC.
Create New Deployment In DCMC
Welcome to the DCMC homepage! Let's get started:
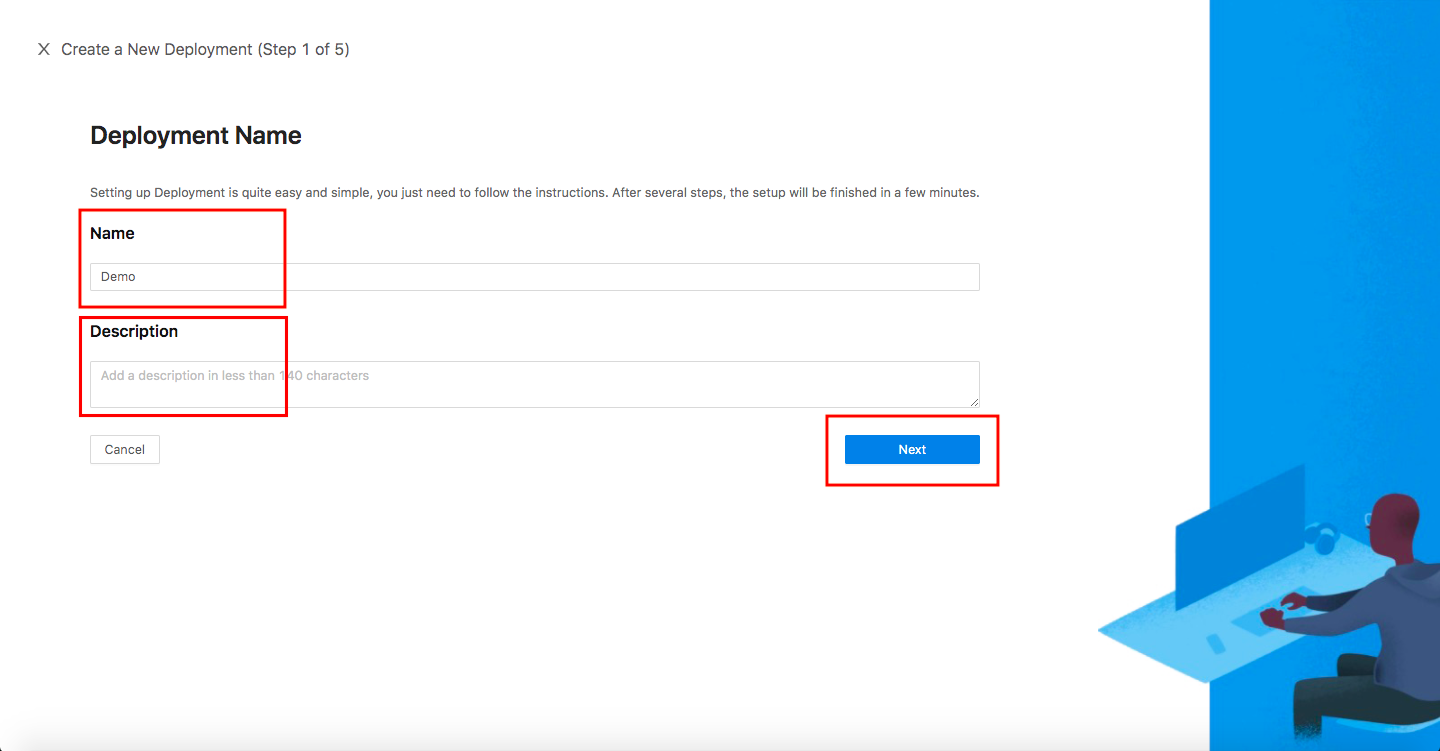
- Click the orange button
Getting started. Specify aNameand aDescription, and clickNext.
Add Application
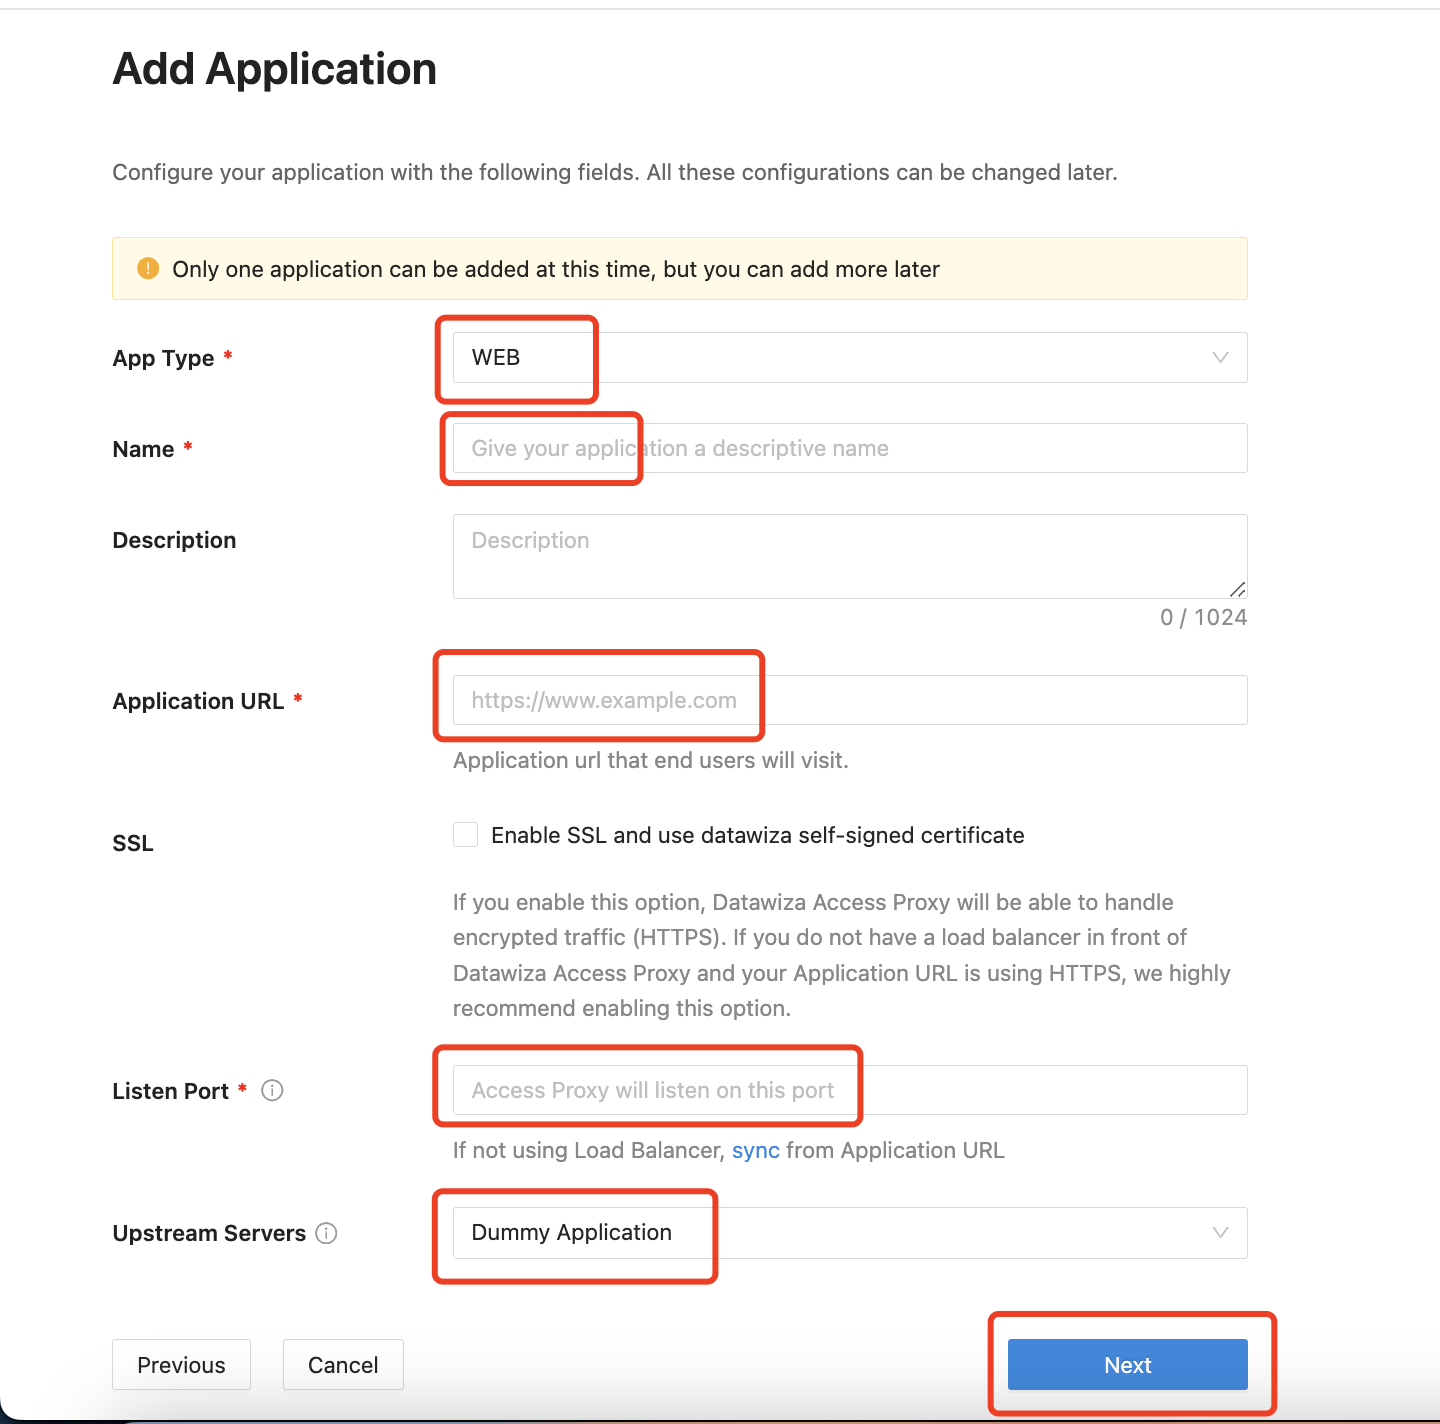
Configure your application with the following values:
App Type:WEBName:Demo AppApplication URL:http://localhost:9772Listen Port:9772Upstream Servers:Dummy Applicatiom- Select
Next.
Note that Upstream Servers is the address of the application that you want to enable SSO.
- If you use the DAP in sidecar mode and your application is running on
localhost:3001on Mac or Windows, then set the upstream server tohost.docker.internal:3001(Docker 18.03+). - If your application is running on Linux, use
ip addr show docker0to get docker host IP (e.g.,172.17.0.1) and then set upstream server to172.17.0.1:3001(see this for more details). - If you do not have any prepared application, you can use our pre-built-in application and set
Upstream ServerstoDummy Application.
IdP Configuration
Select SAML as the
ProtocolandMicrosoft Entra IDas theIdentity Providerfrom the drop-down menu. Input theMetadata Urlgotten from the Duo Cloud Application above.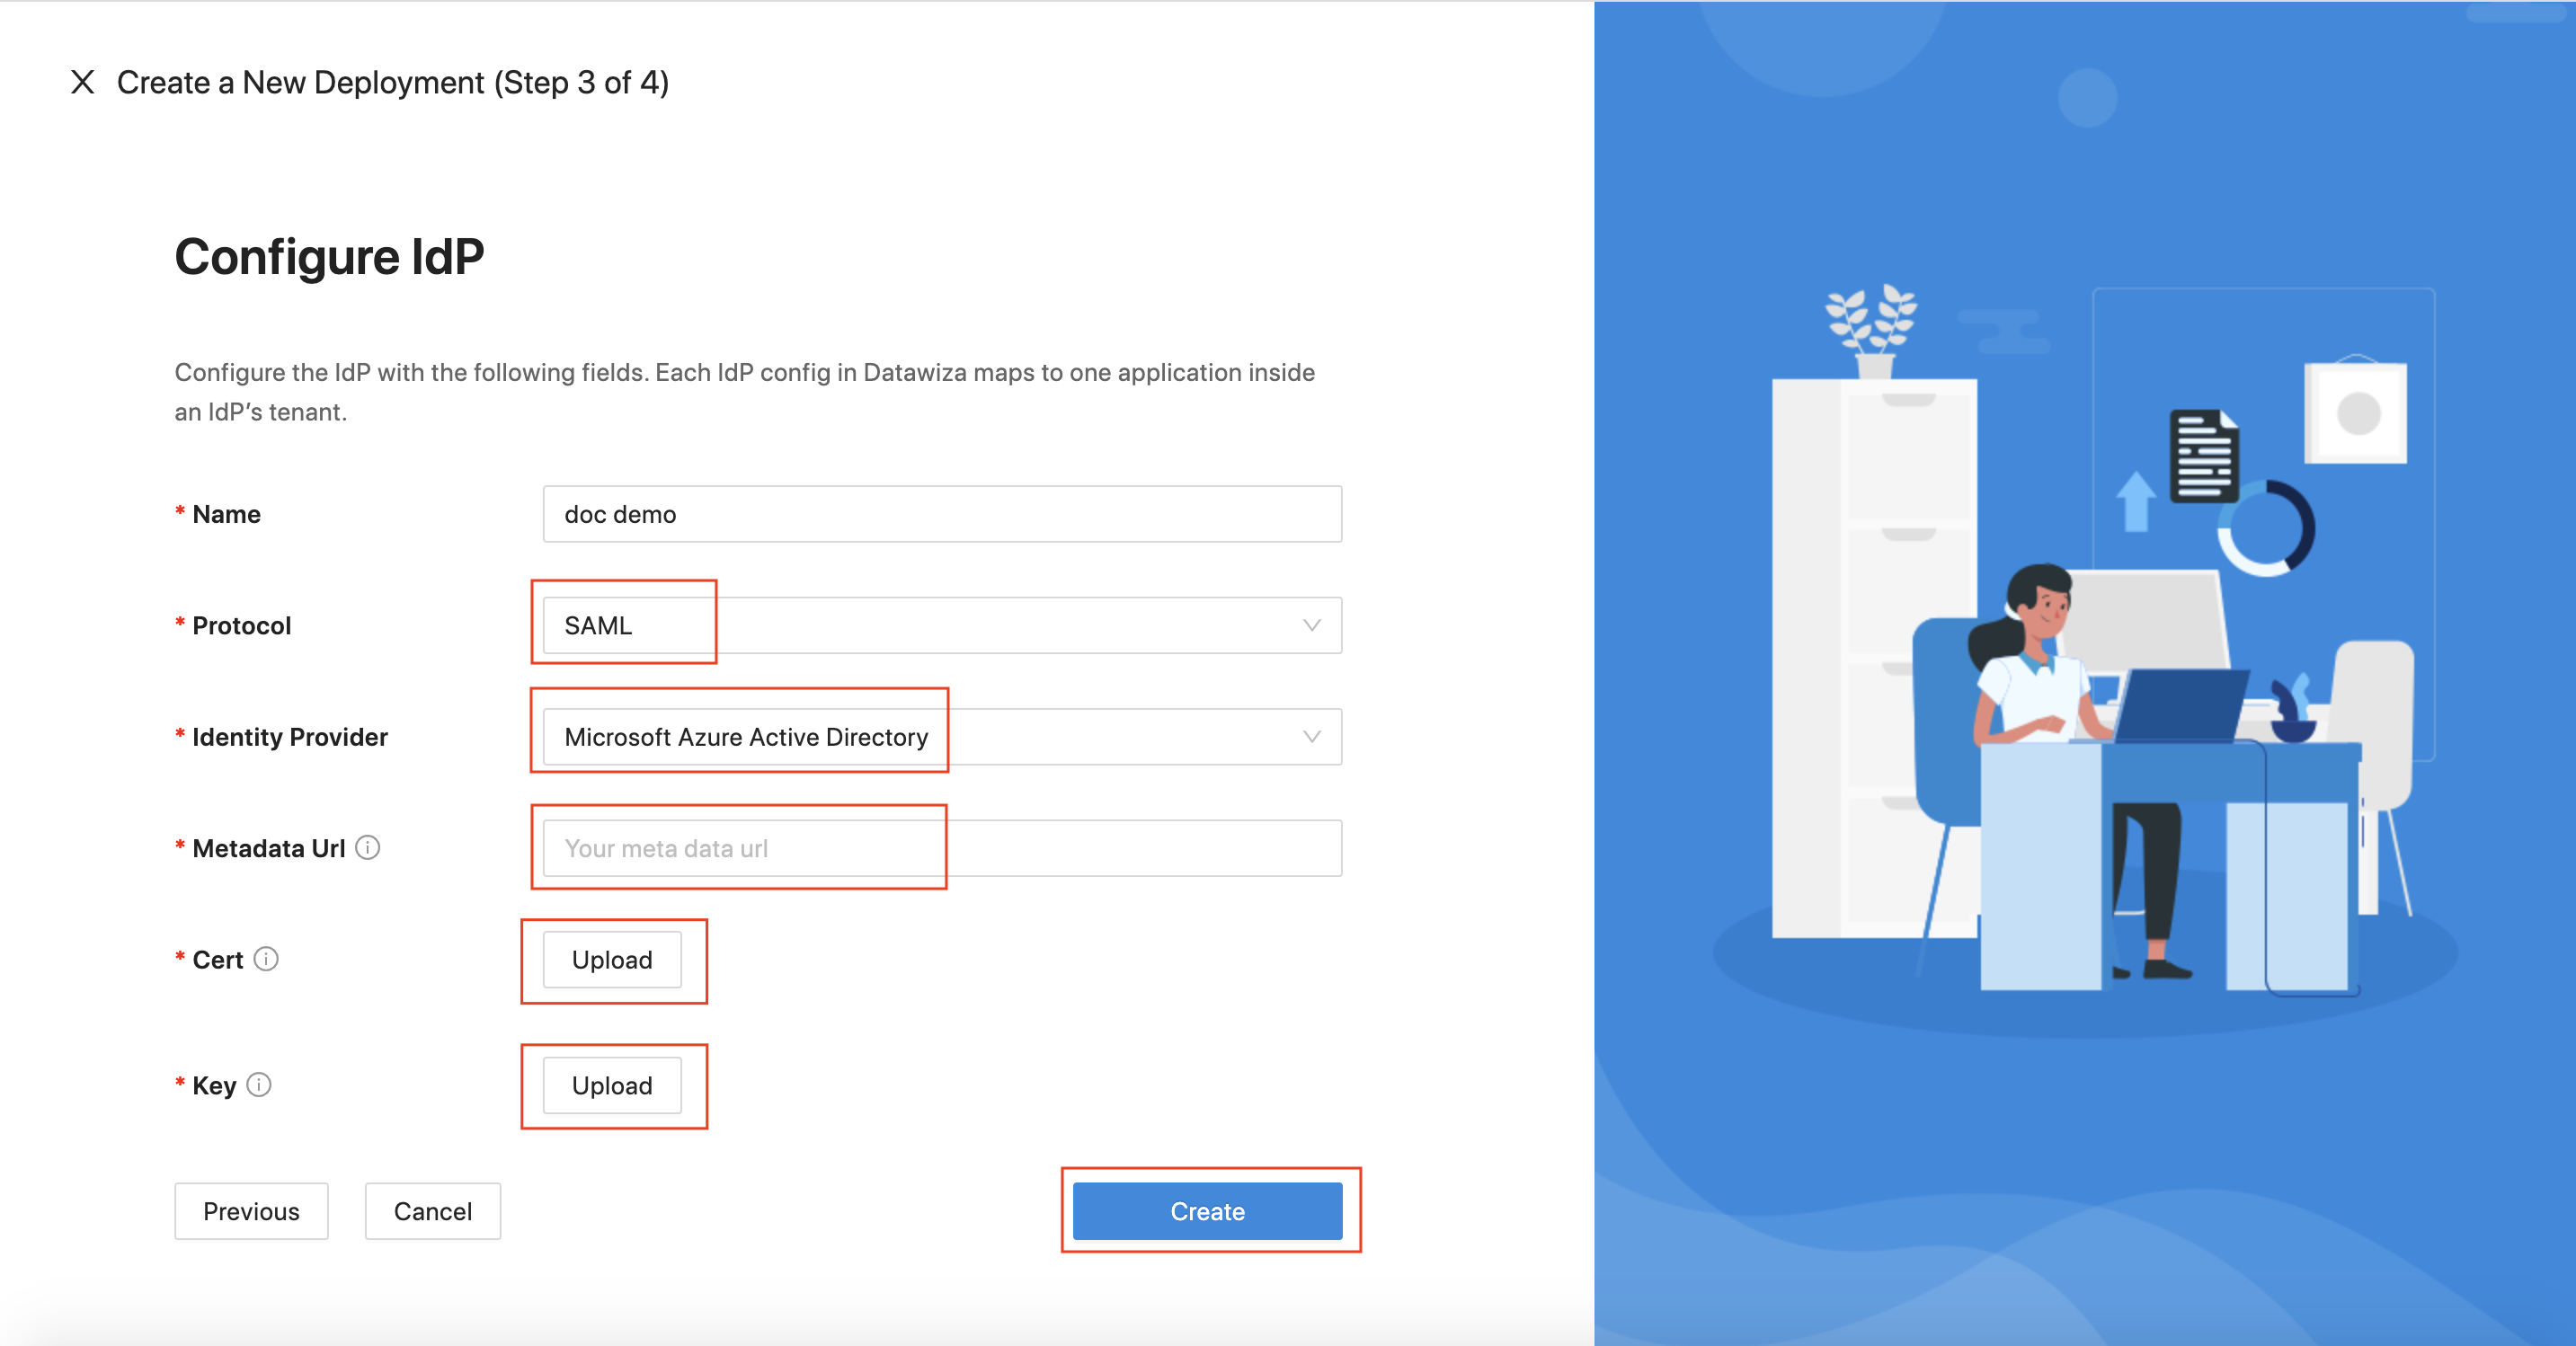
We need a self-signed X.509 key pair when configuring the IdP. You can generate your own with something like this:
openssl req -x509 -newkey rsa:2048 -keyout myservice.key -out myservice.cert -days 365 -nodes -subj "/CN=localhost"
Note Down Provisioning Keys
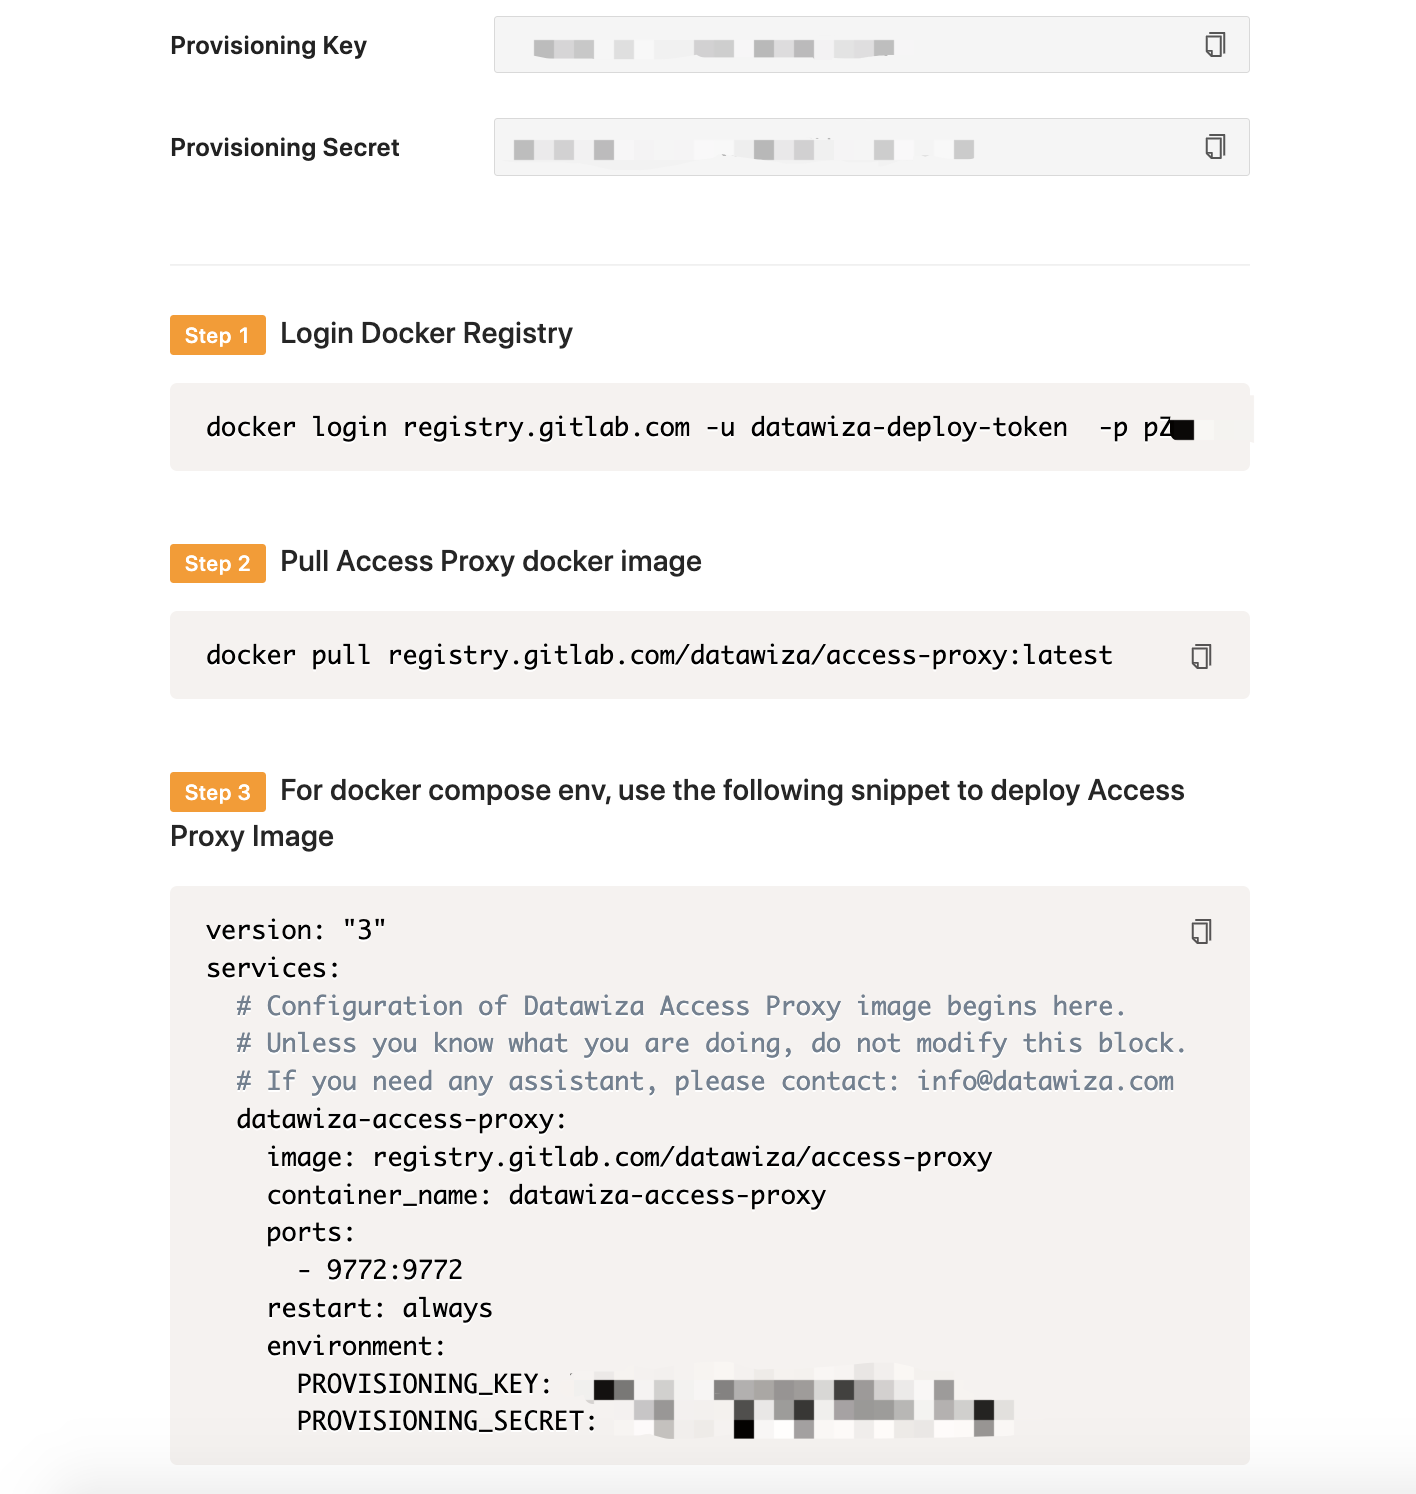
Note down your PROVISIONING_KEY and PROVISIONING_SECRET. We will need these values later when deploying the DAP. Below, you will also find a sample docker-compose file provided for you. Feel free to use this, or if you are looking for Kubernetes-specific instructions, visit Deploy DAP with Kubernetes.
Part III: Run DAP
You can use either Docker or Kubernetes to run DAP. The following is an example docker-compose.yml file. You may need to login to our container registry to download the images of DAP and the header-based app. See Step3 : Configure DAP and SSO Integration for more details or Deploy DAP with Kubernetes for Kubernetes-specific instructions.
version: '3'

services:
  datawiza-access-proxy:
    image: registry.gitlab.com/datawiza/access-proxy
    container_name: datawiza-access-proxy
    restart: always
    ports:
      - "9772:9772"
    environment:
      PROVISIONING_KEY: #############################
      PROVISIONING_SECRET: #############################
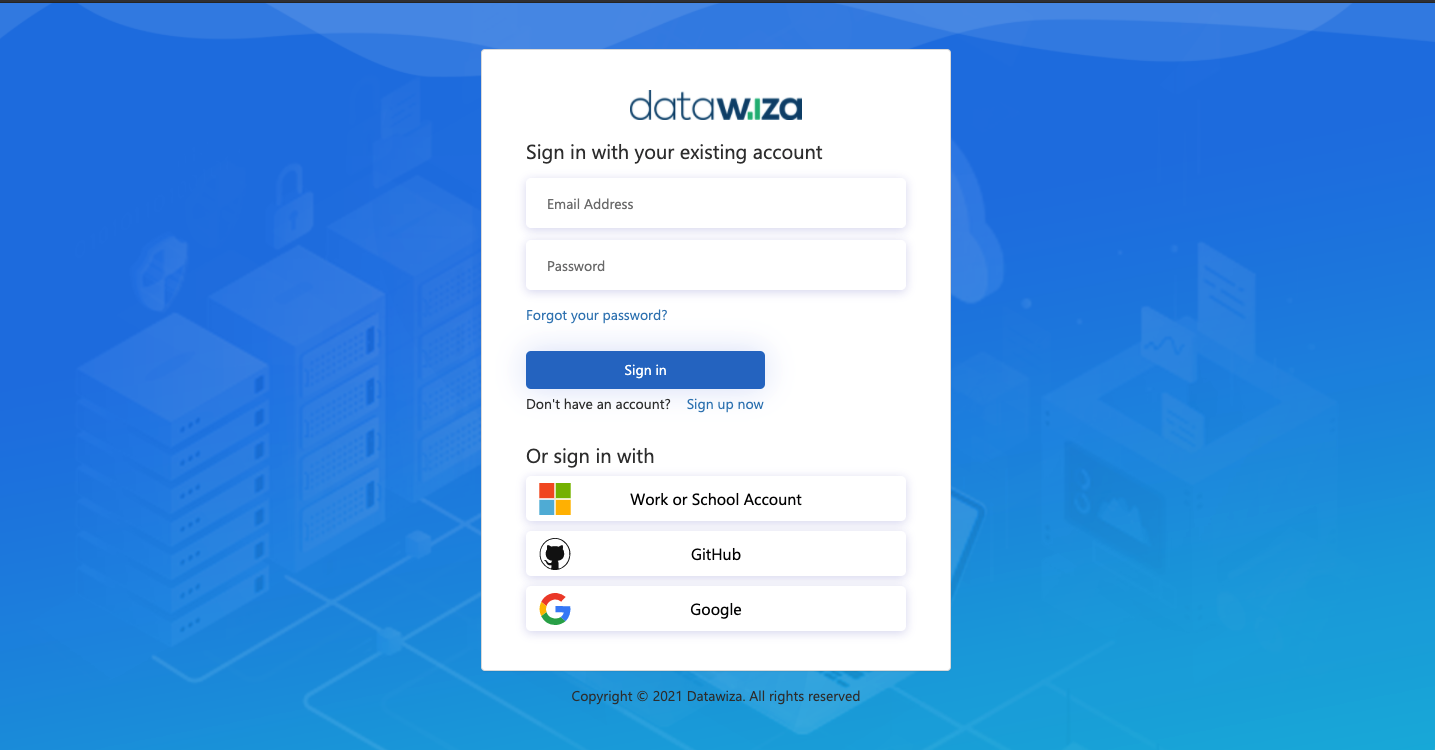
After executing docker-compose -f docker-compose.yml up, the header-based app should have SSO enabled with Microsoft Entra ID. Open a browser and type in http://localhost:9772/. You should see the Microsoft Entra ID login page as follows. If you are seeing the Microsoft Entra ID login page but are unable to login (Microsoft keeps asking for your username and password repeatedly), ensure that you have created a user for your AD domain. Logging in with the root account will not work. Your username should be in the form of user@your_domain.onmicrosoft.com. Note that if you are already logged into Microsoft Entra ID in your browser, you may need to logout to see the login page. 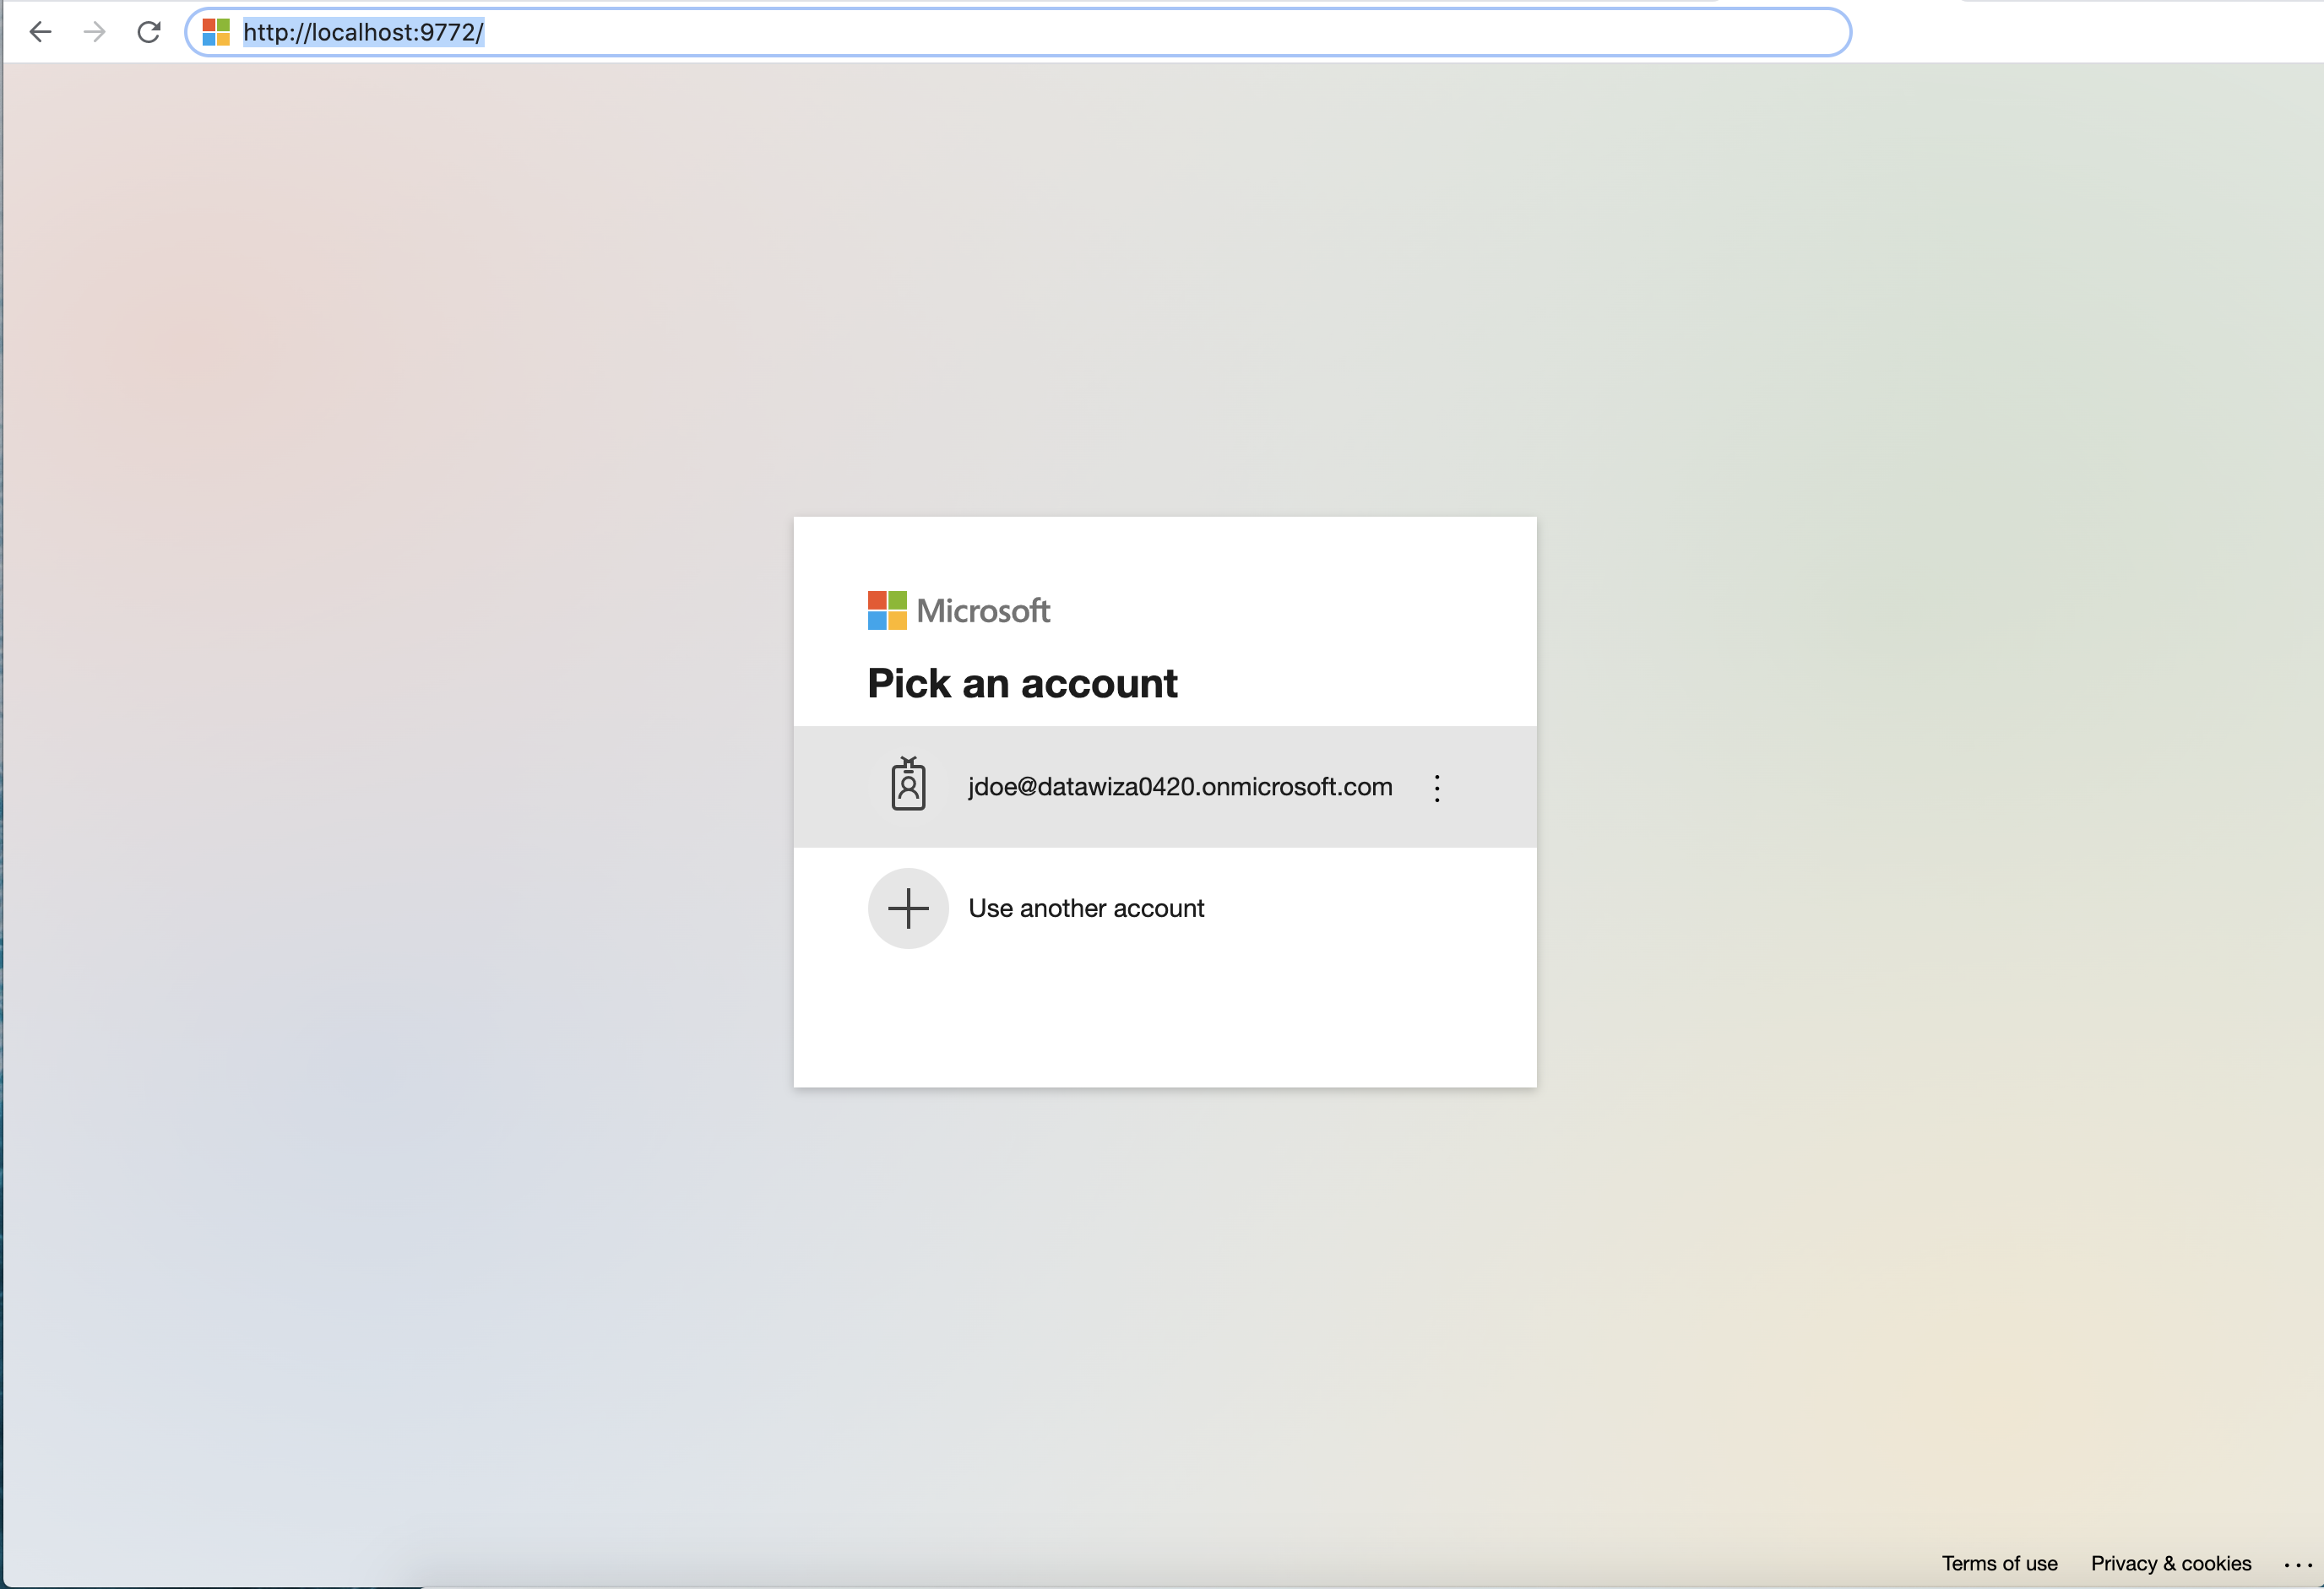
After logging in successfully, you will be redirected to Duo two-factor authentication. Complete Duo two-factor authentication when prompted and then get redirected back to the header-based app. 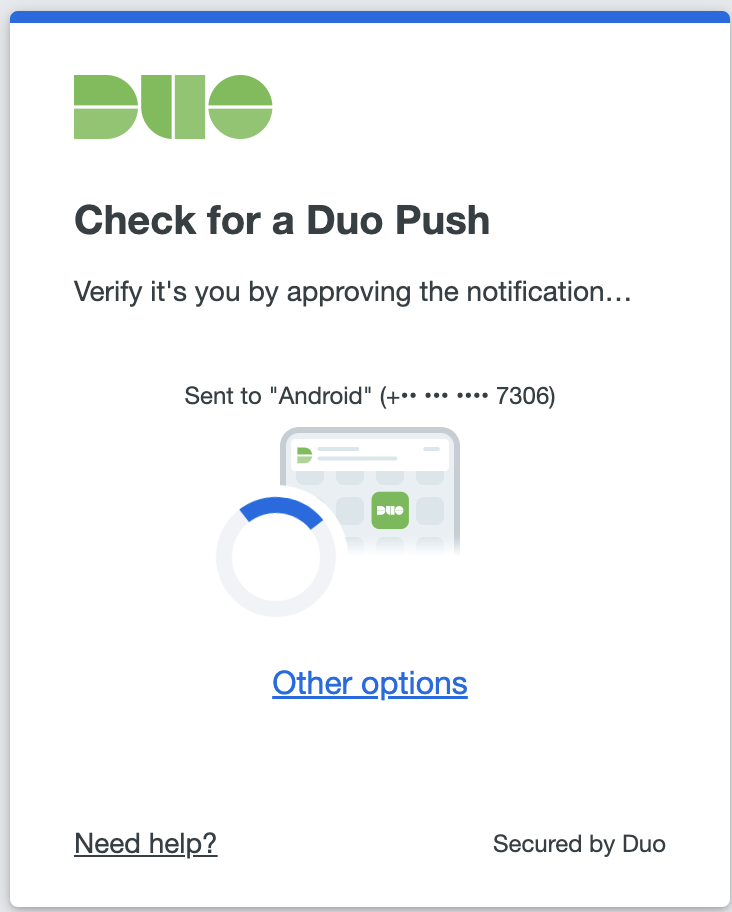
Reference
Duo Single Sign-OnDuo Single Sign-On for Generic SAML Service Providers