PingOne
PingOne Configuration
This session shows how to register an OIDC Web application on the PingOne admin console. When registering the application, we are getting the following values that are needed for later configuration in Datawiza Cloud Management Console (DCMC):
- Client ID
- Client Secret
- Issuer
Add new application
First of all, make sure to login to your account on PingOne. Visit the link here to create a developer account.
Select the environment. We use the default
Administratorsenvironment as the example: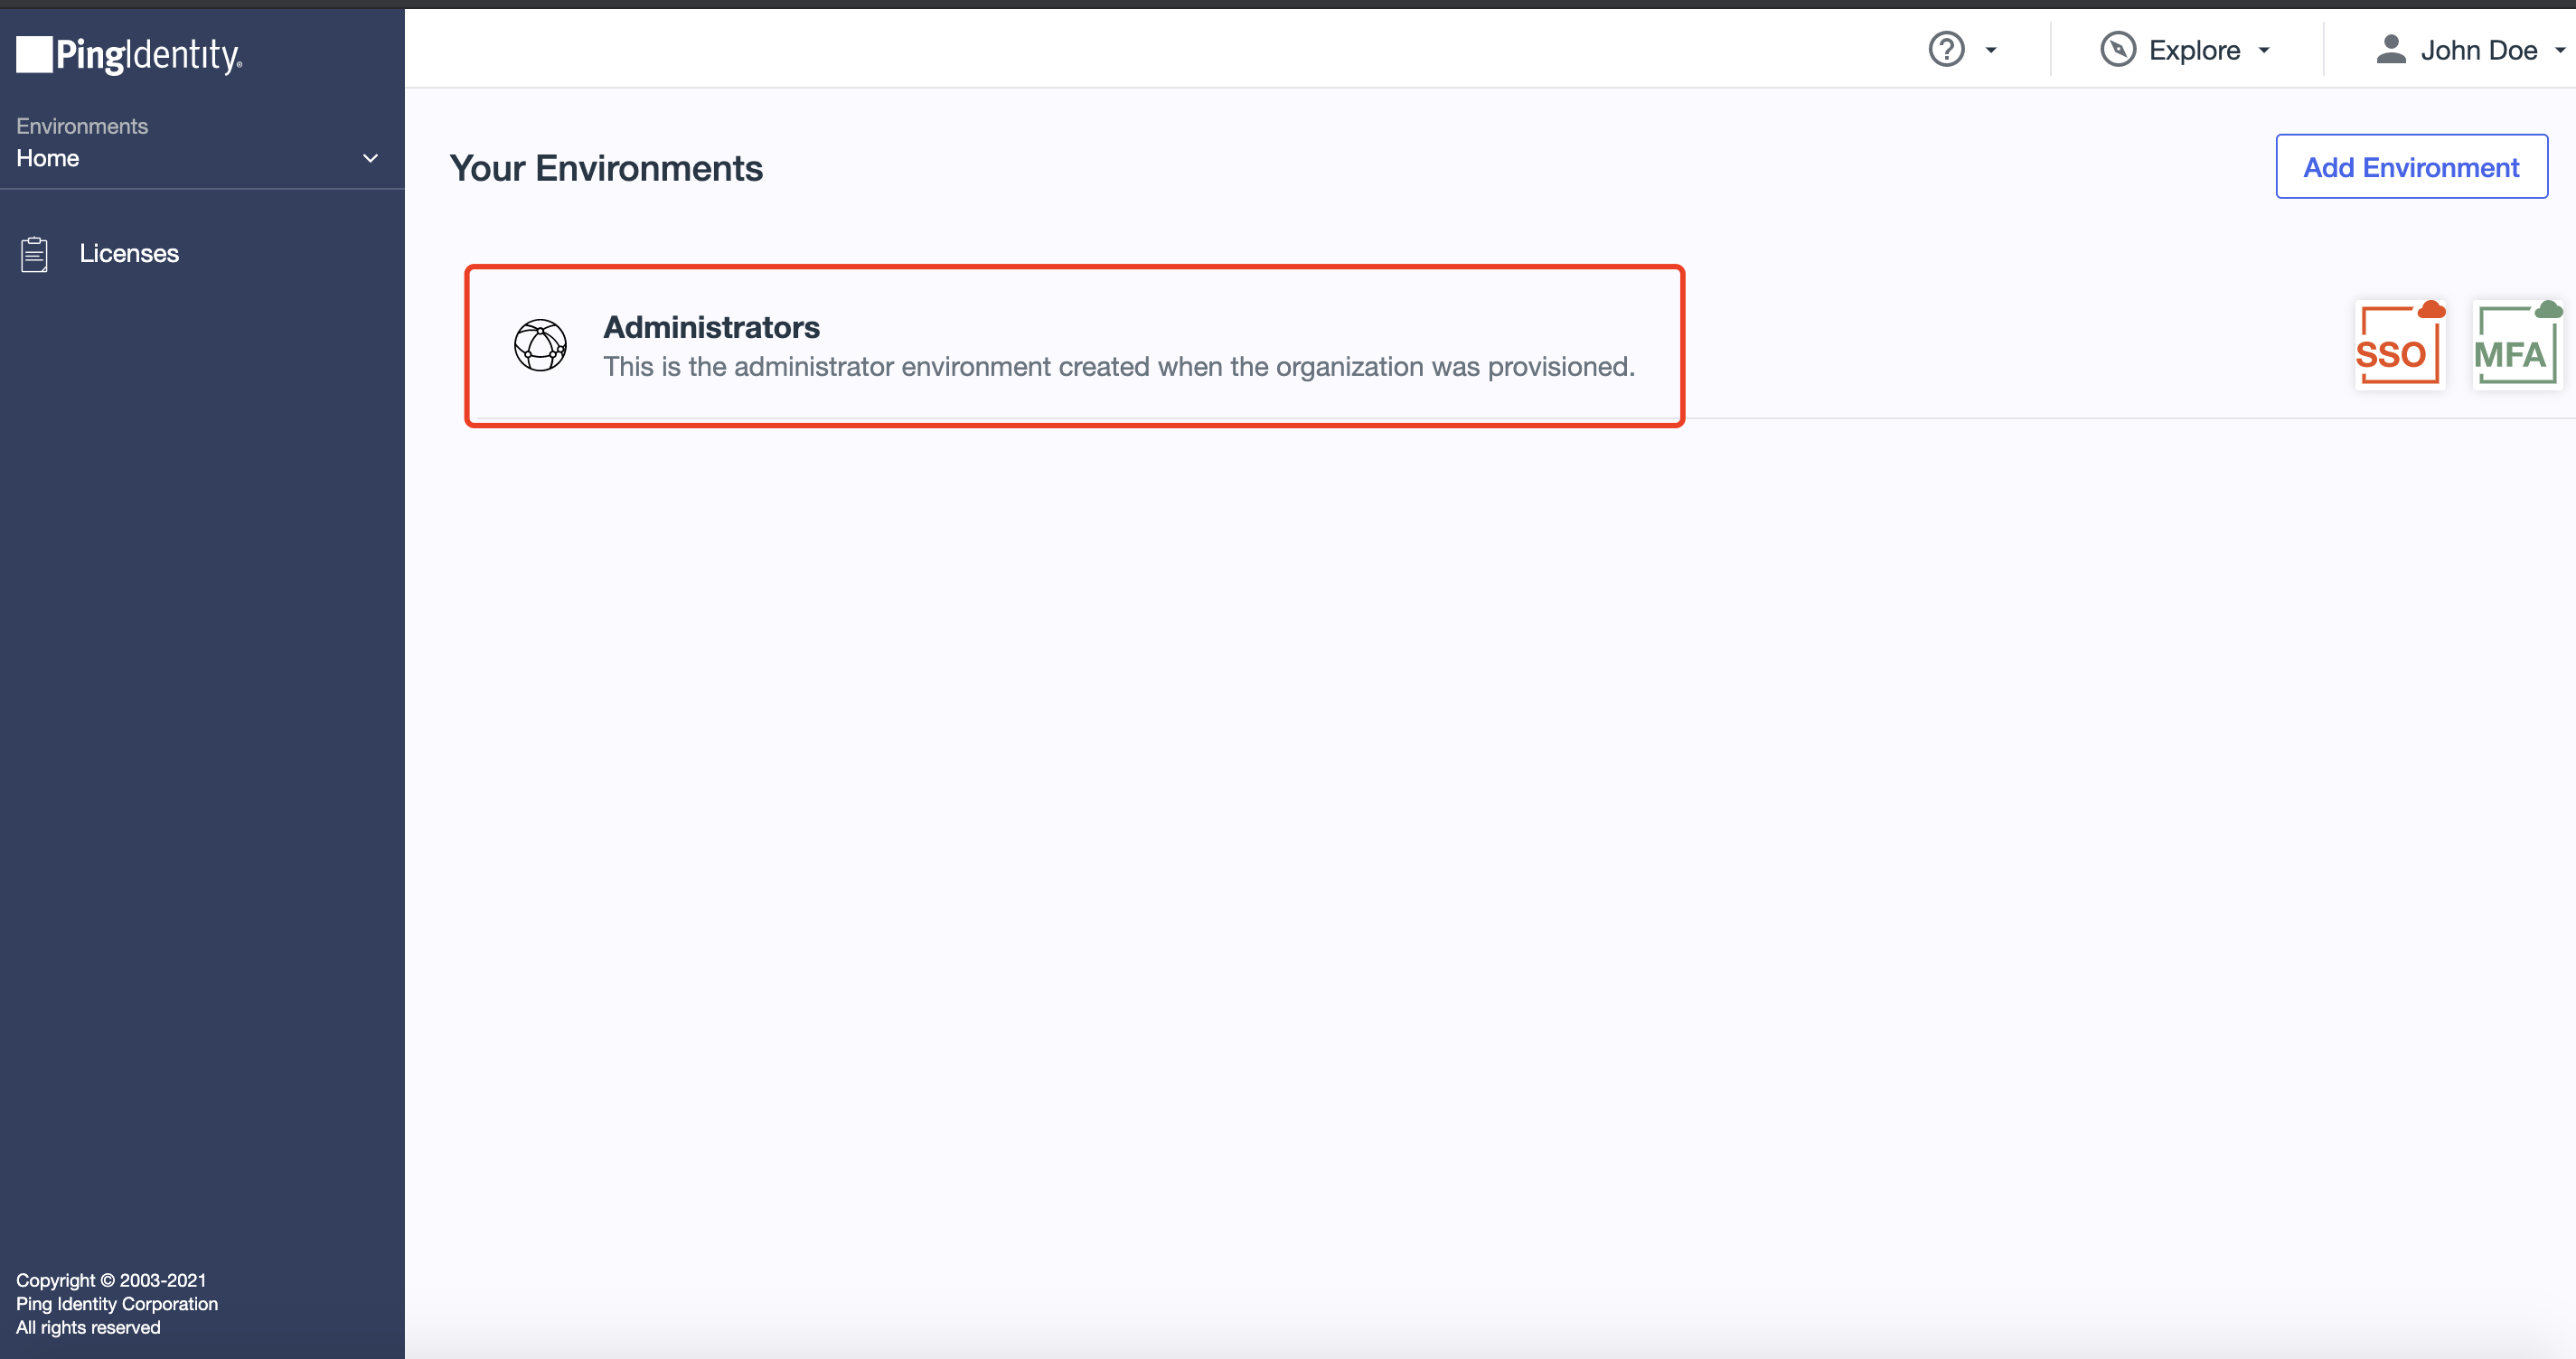
Create a new application. Select
ApplicationsinConnections. Click the+button to add the application. SelectOIDC Web Appas application type then clickSave: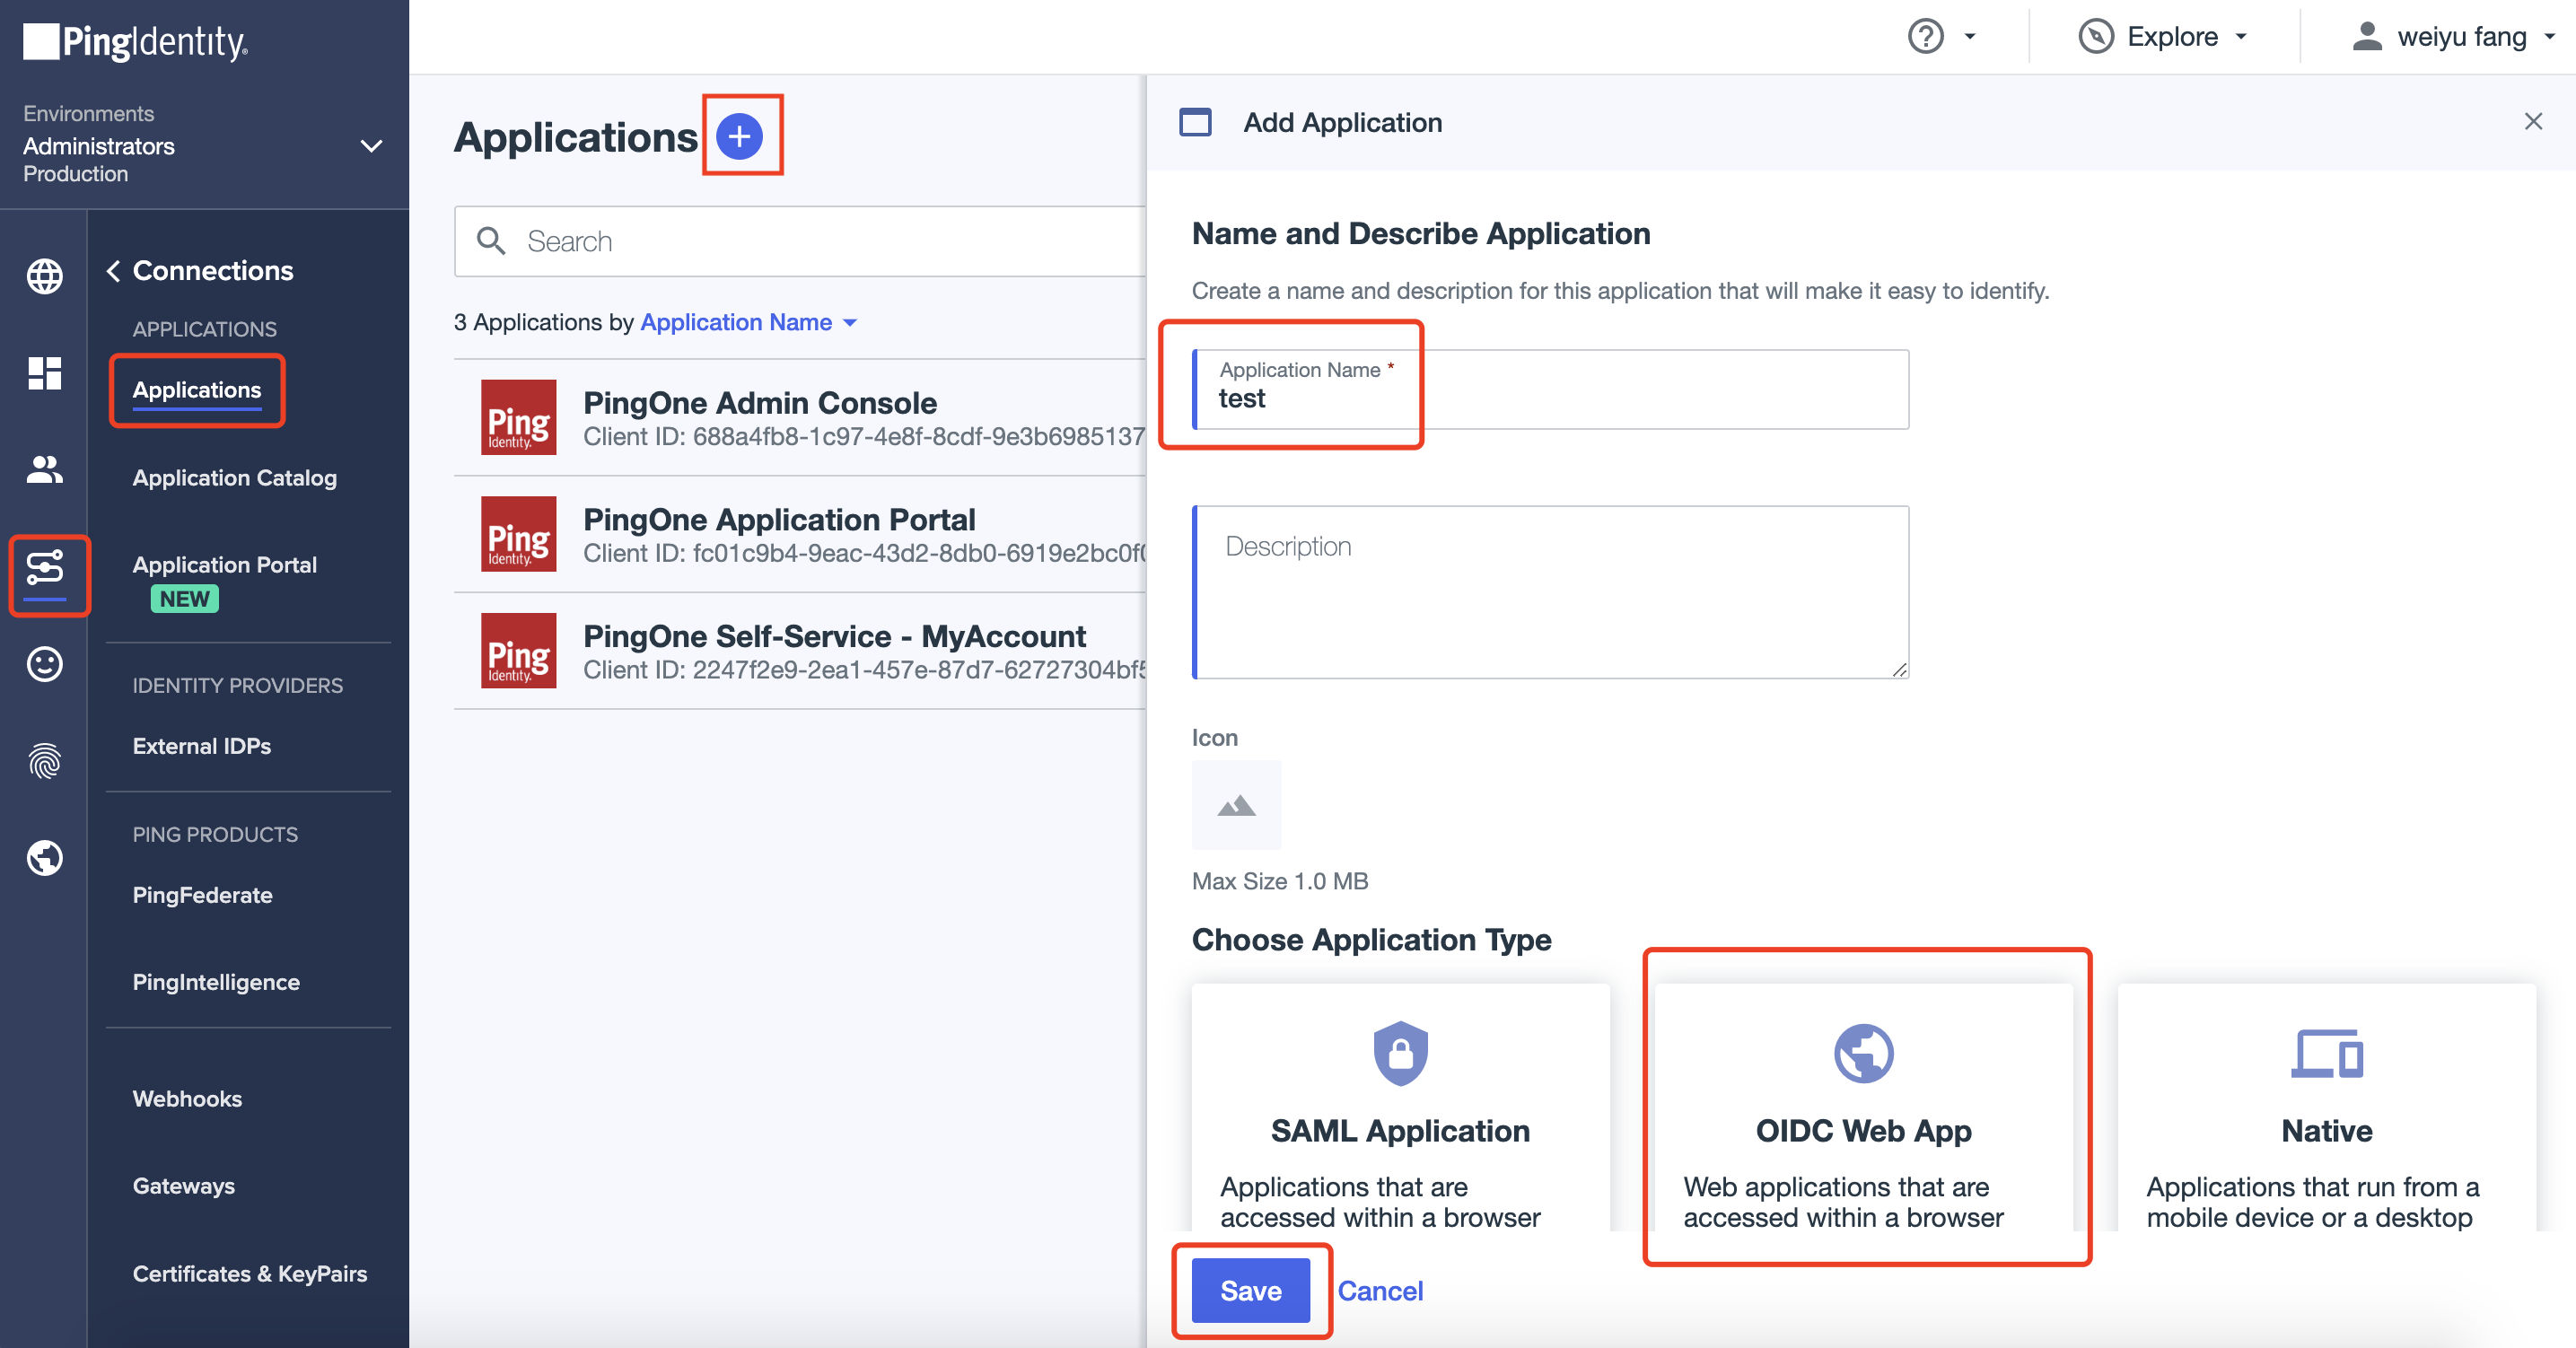
After creating the application successfully, select the
Configurationtab, click edit: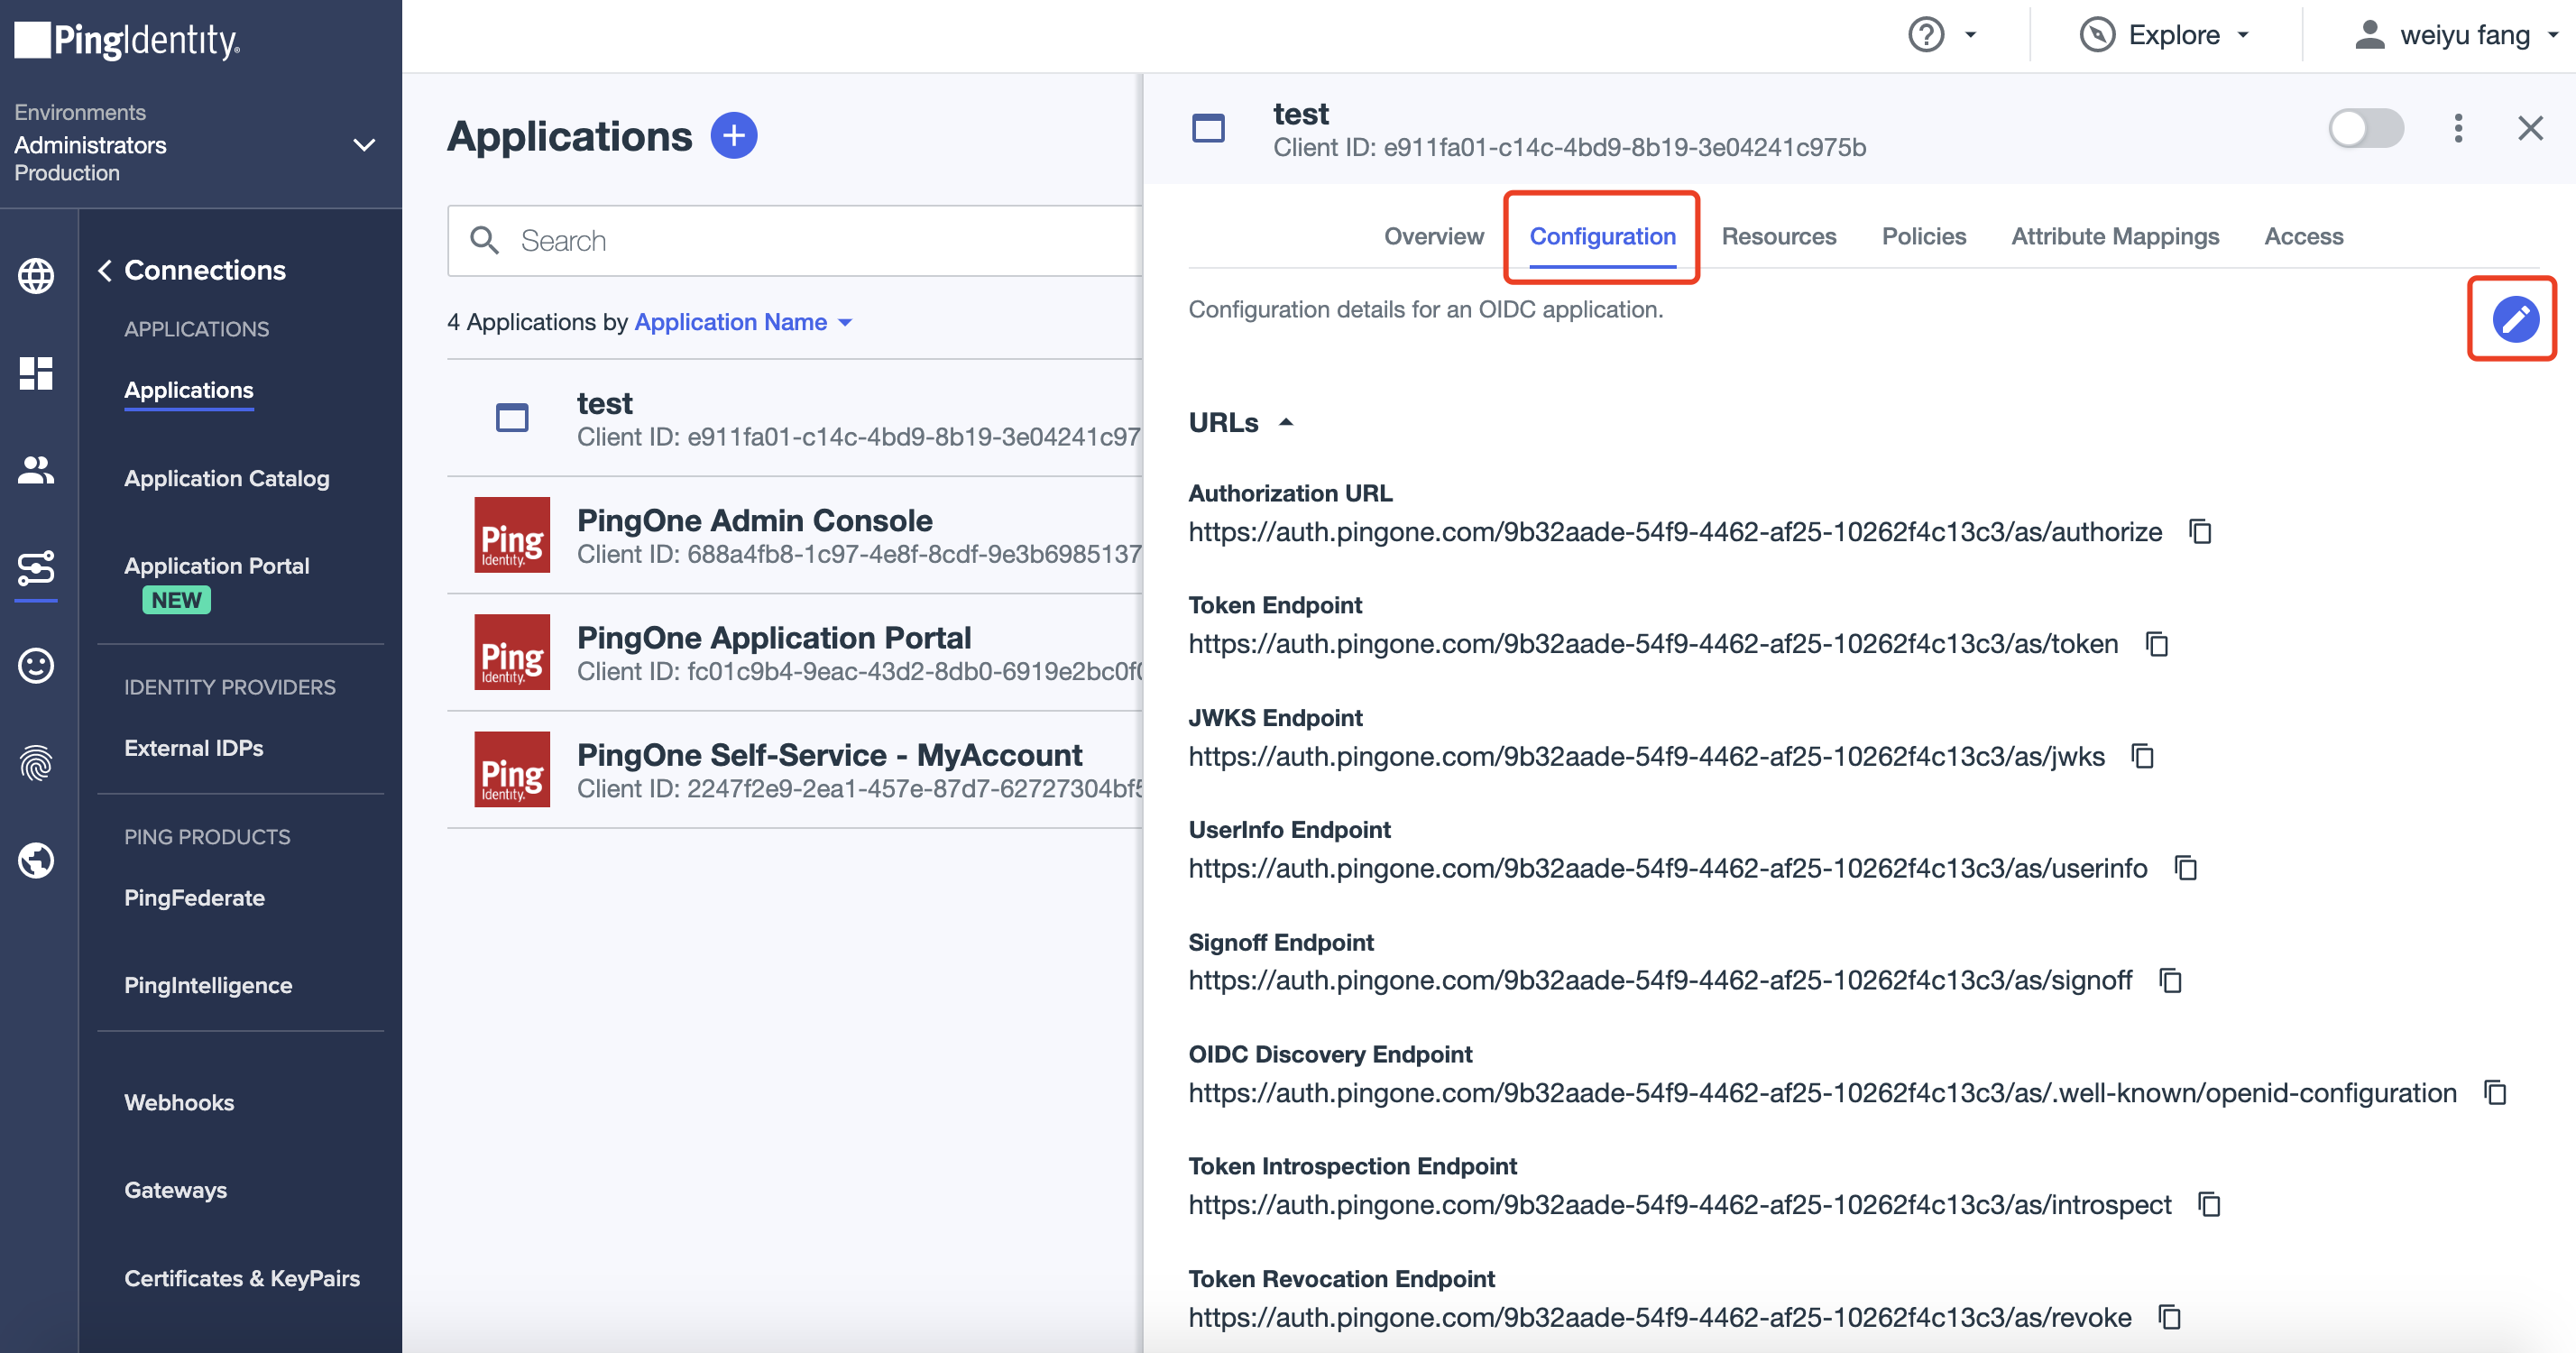
Input the
Redirect URLs. It should behttp://localhost:9772/datawiza/authorization-code/callback. And input theSignoff URLs, it should behttp://localhost:9772for our testing purposes. ClickSave: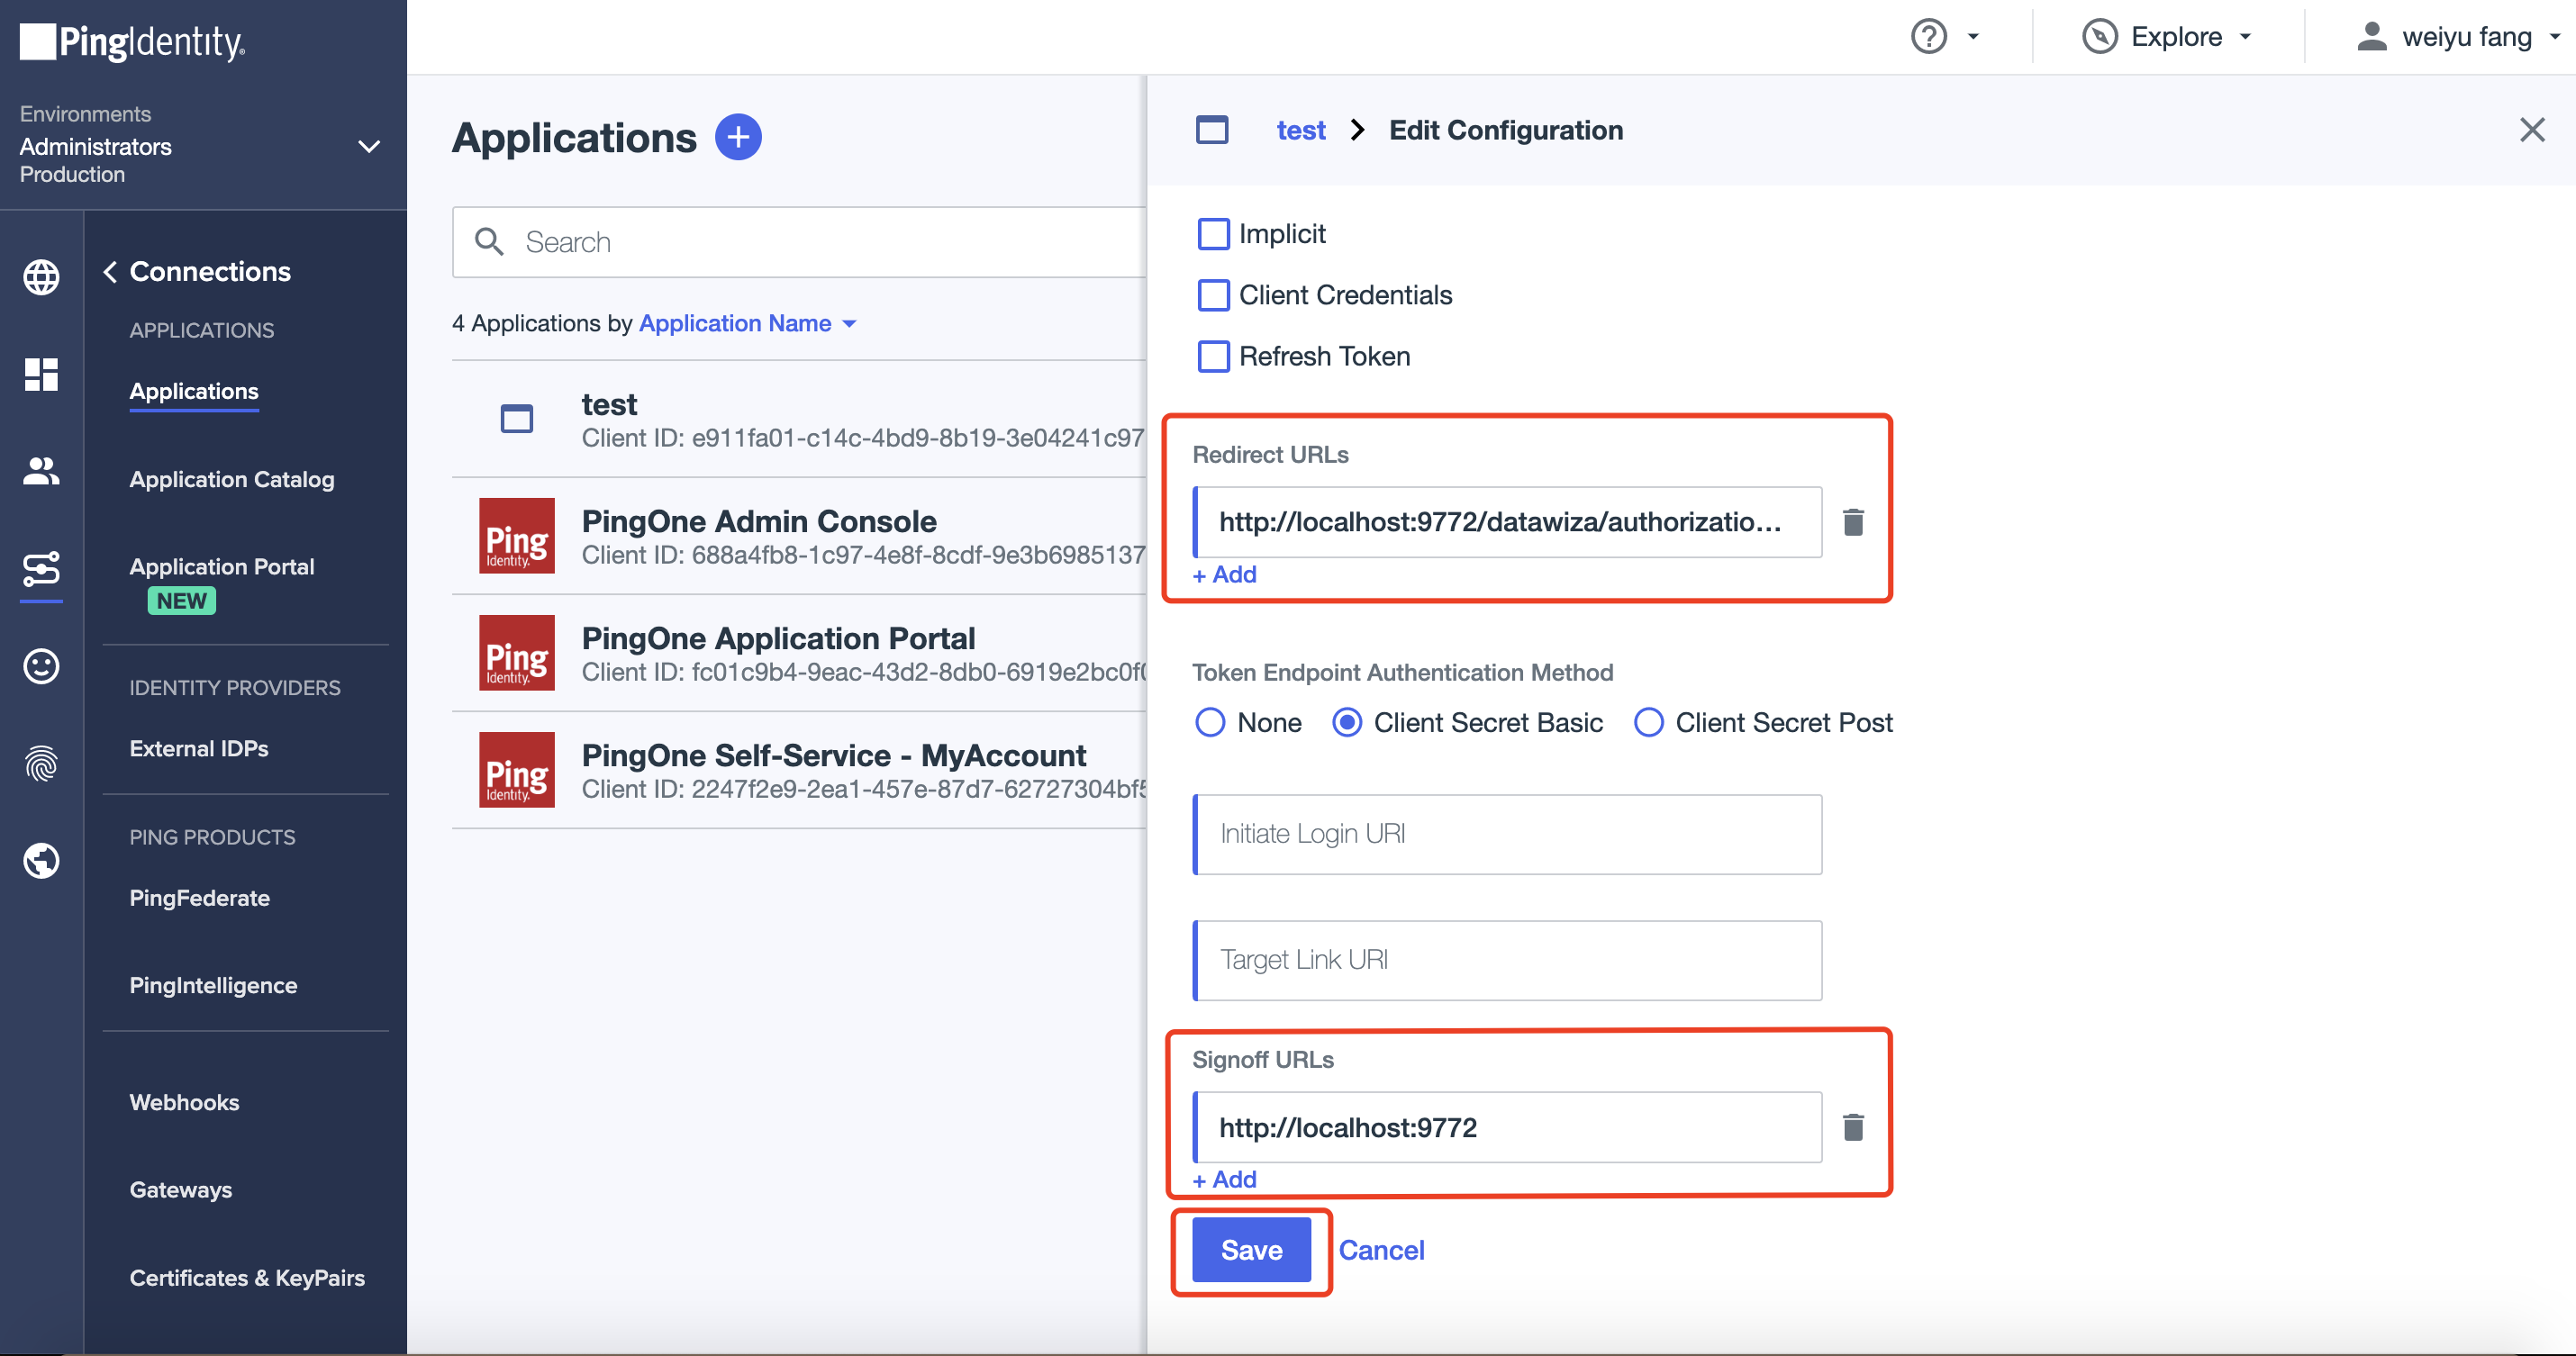
Note down the
Issuer,Client IDandClient Secret: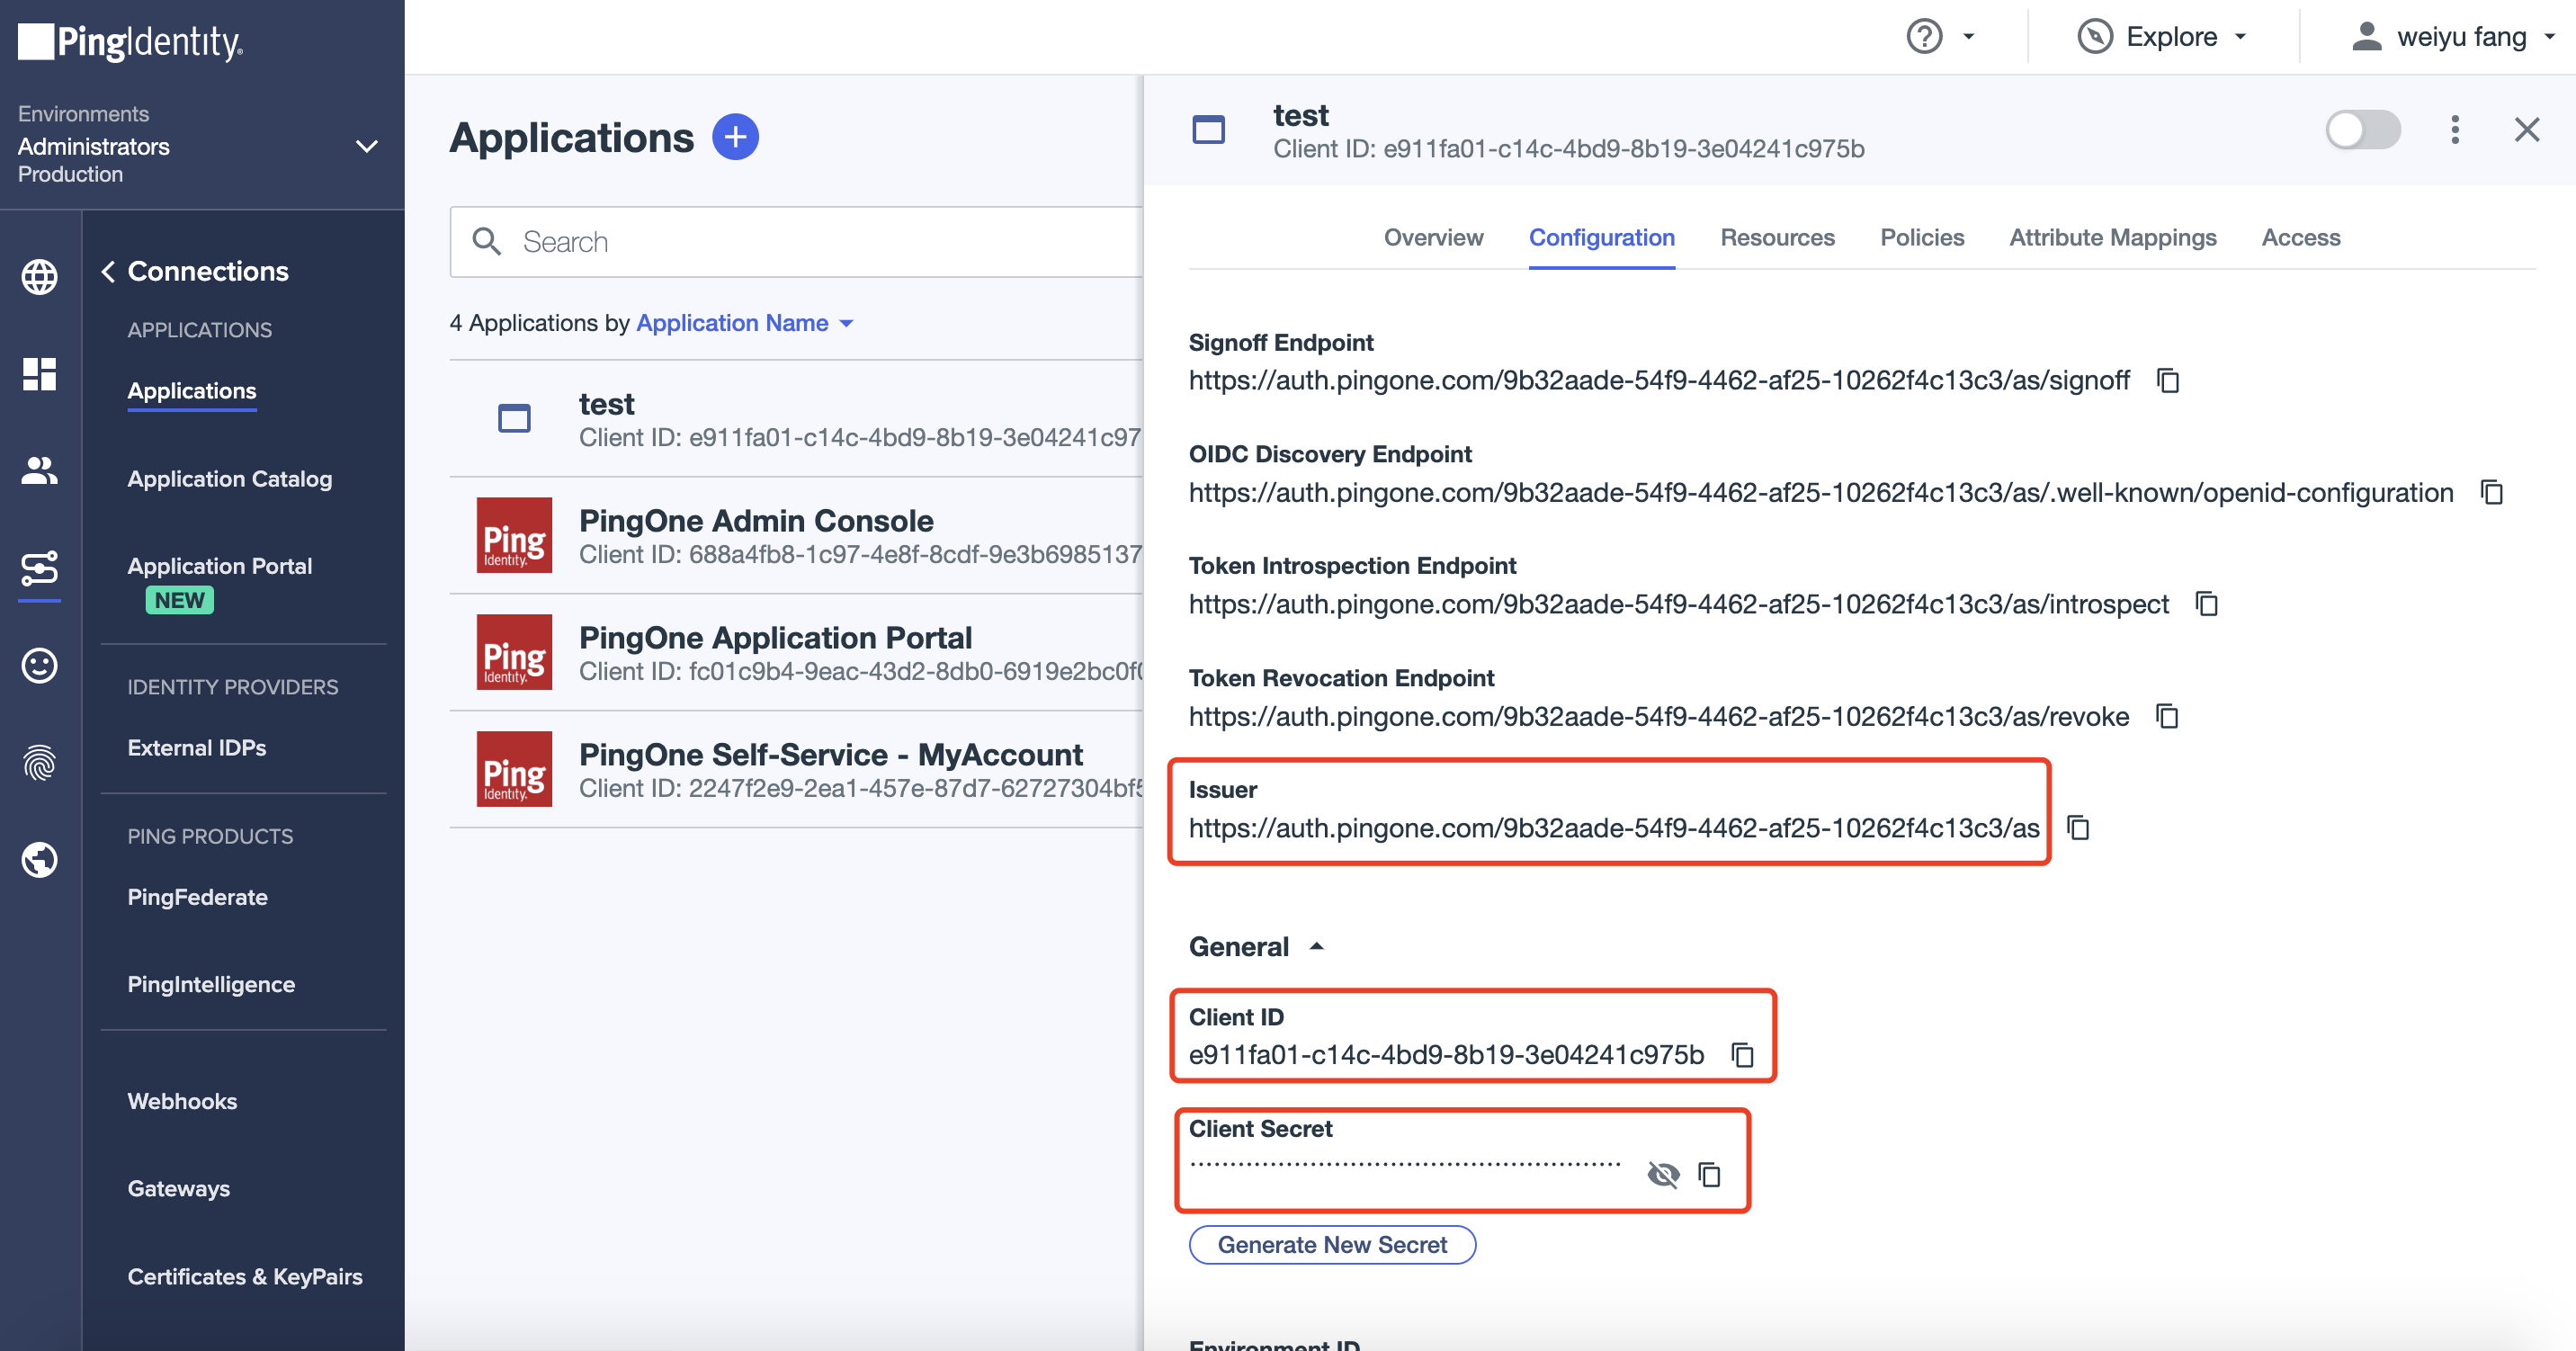
Select
Resourcestab, click edit:
Add required scopes. Click
Save: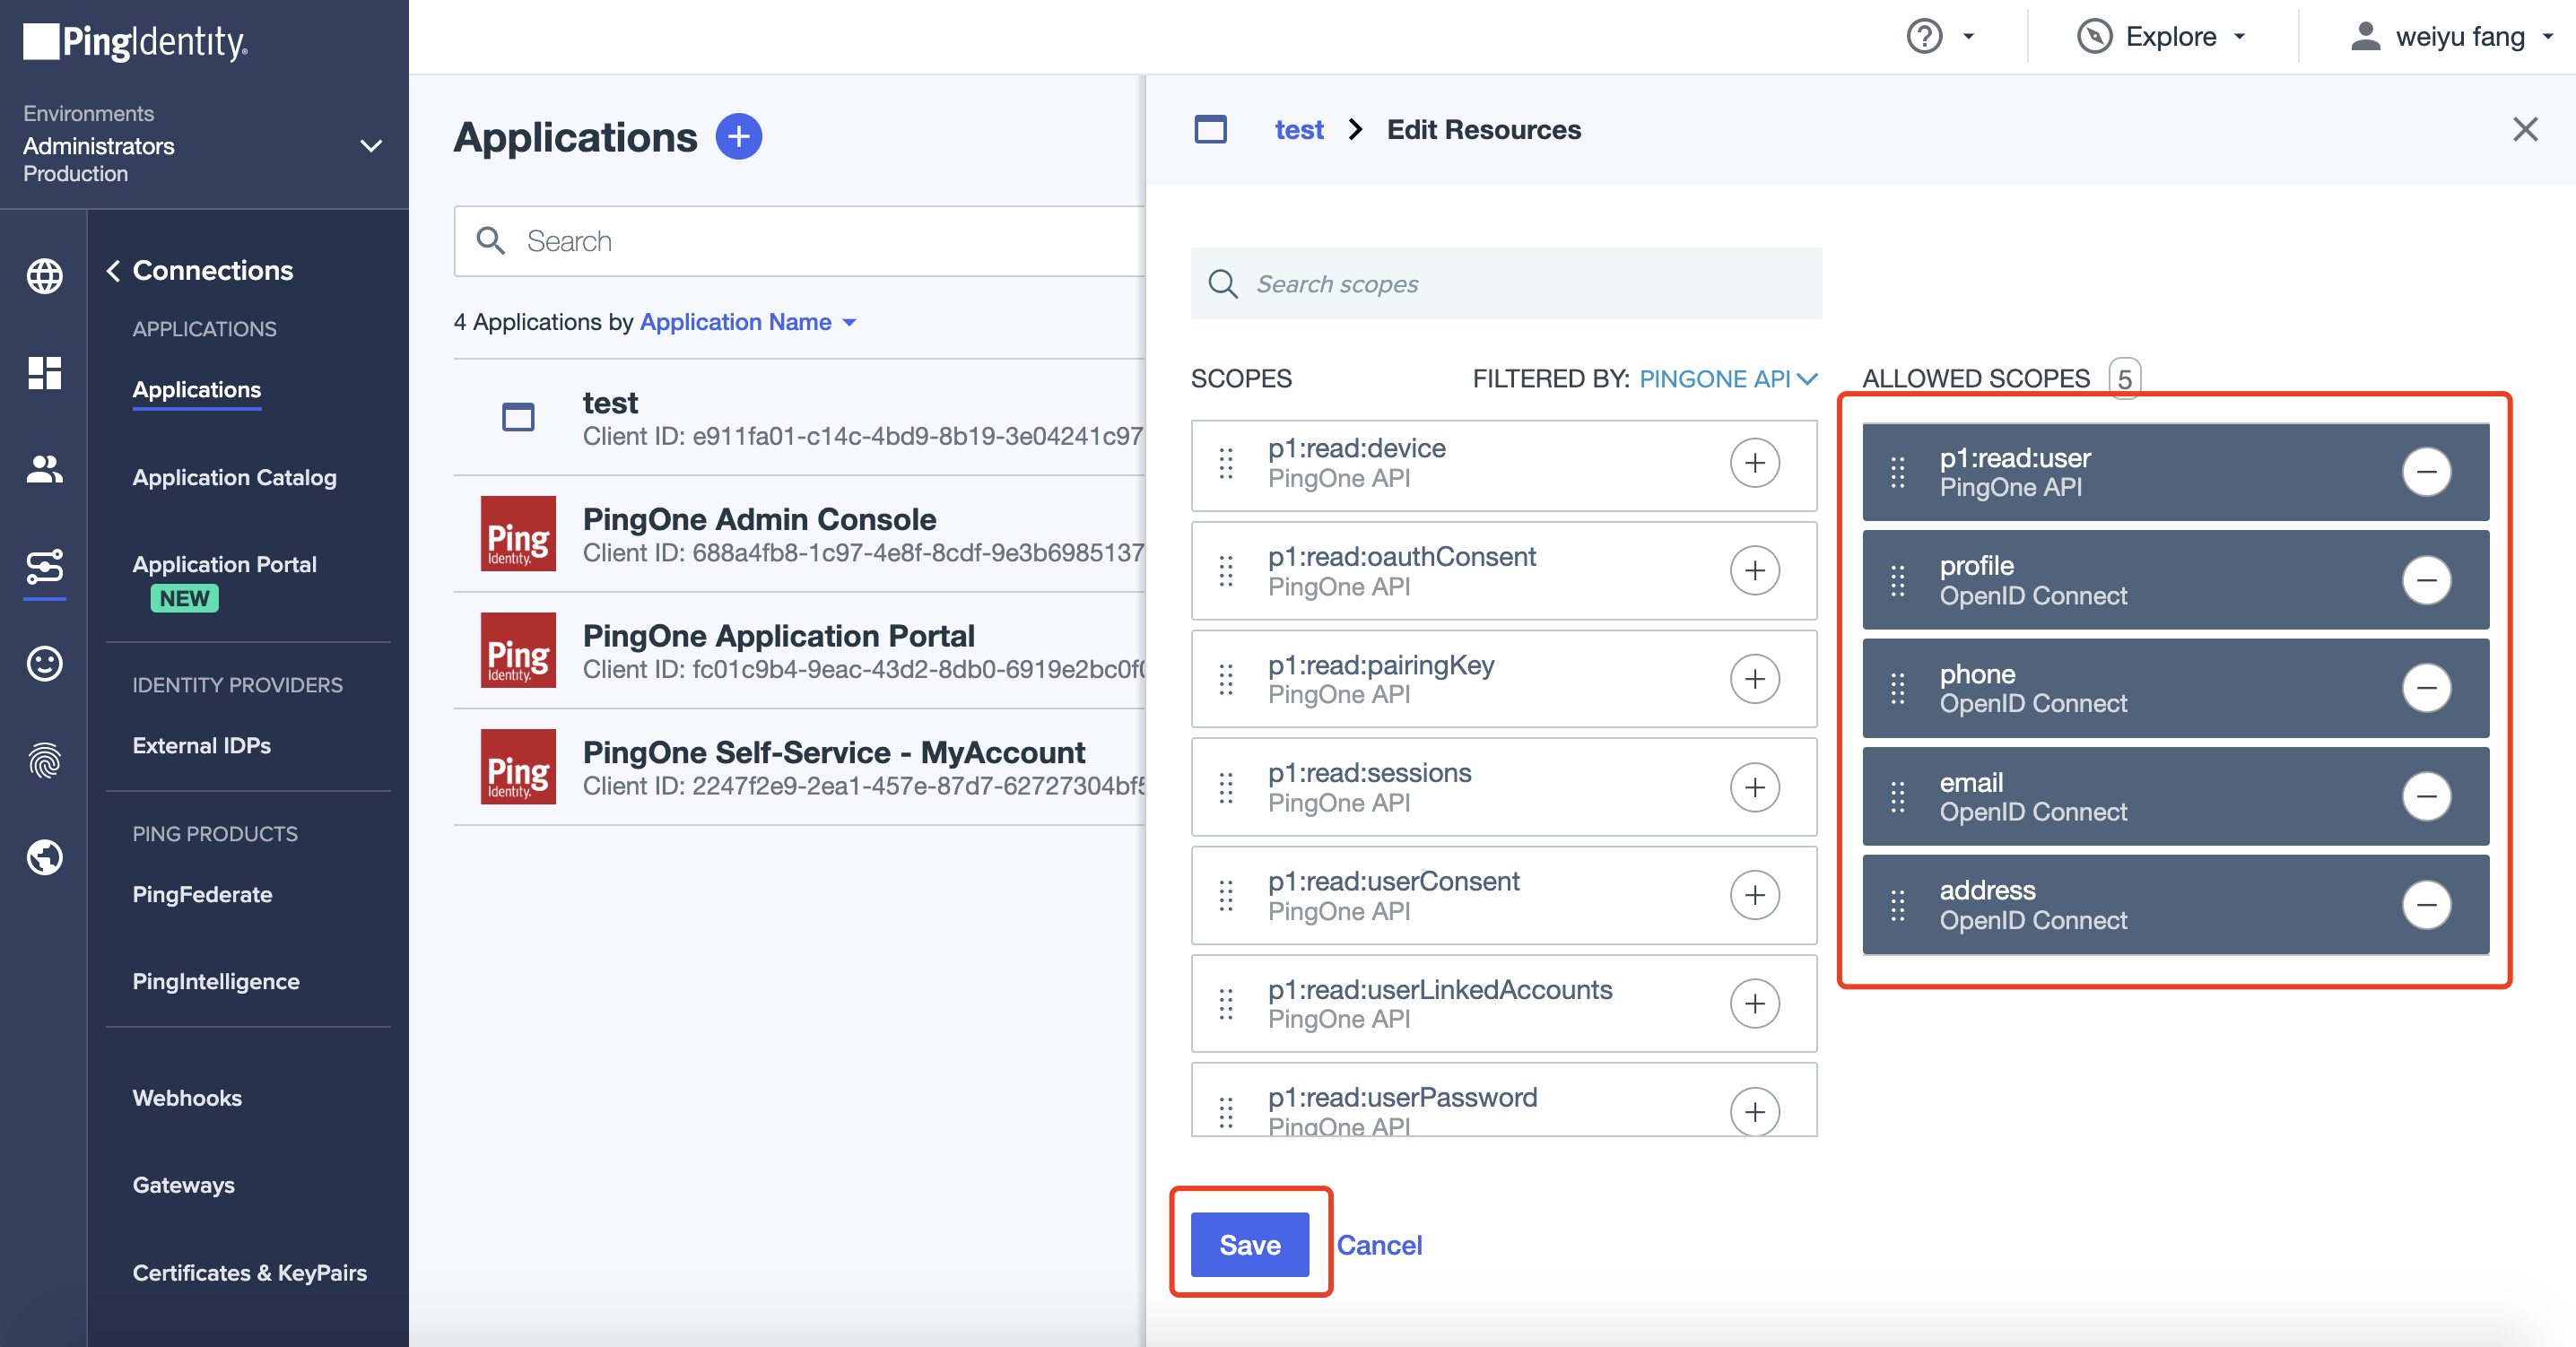
Now, we have successfully created an OIDC web application. By default, user access to this application is disabled. Click to enable. 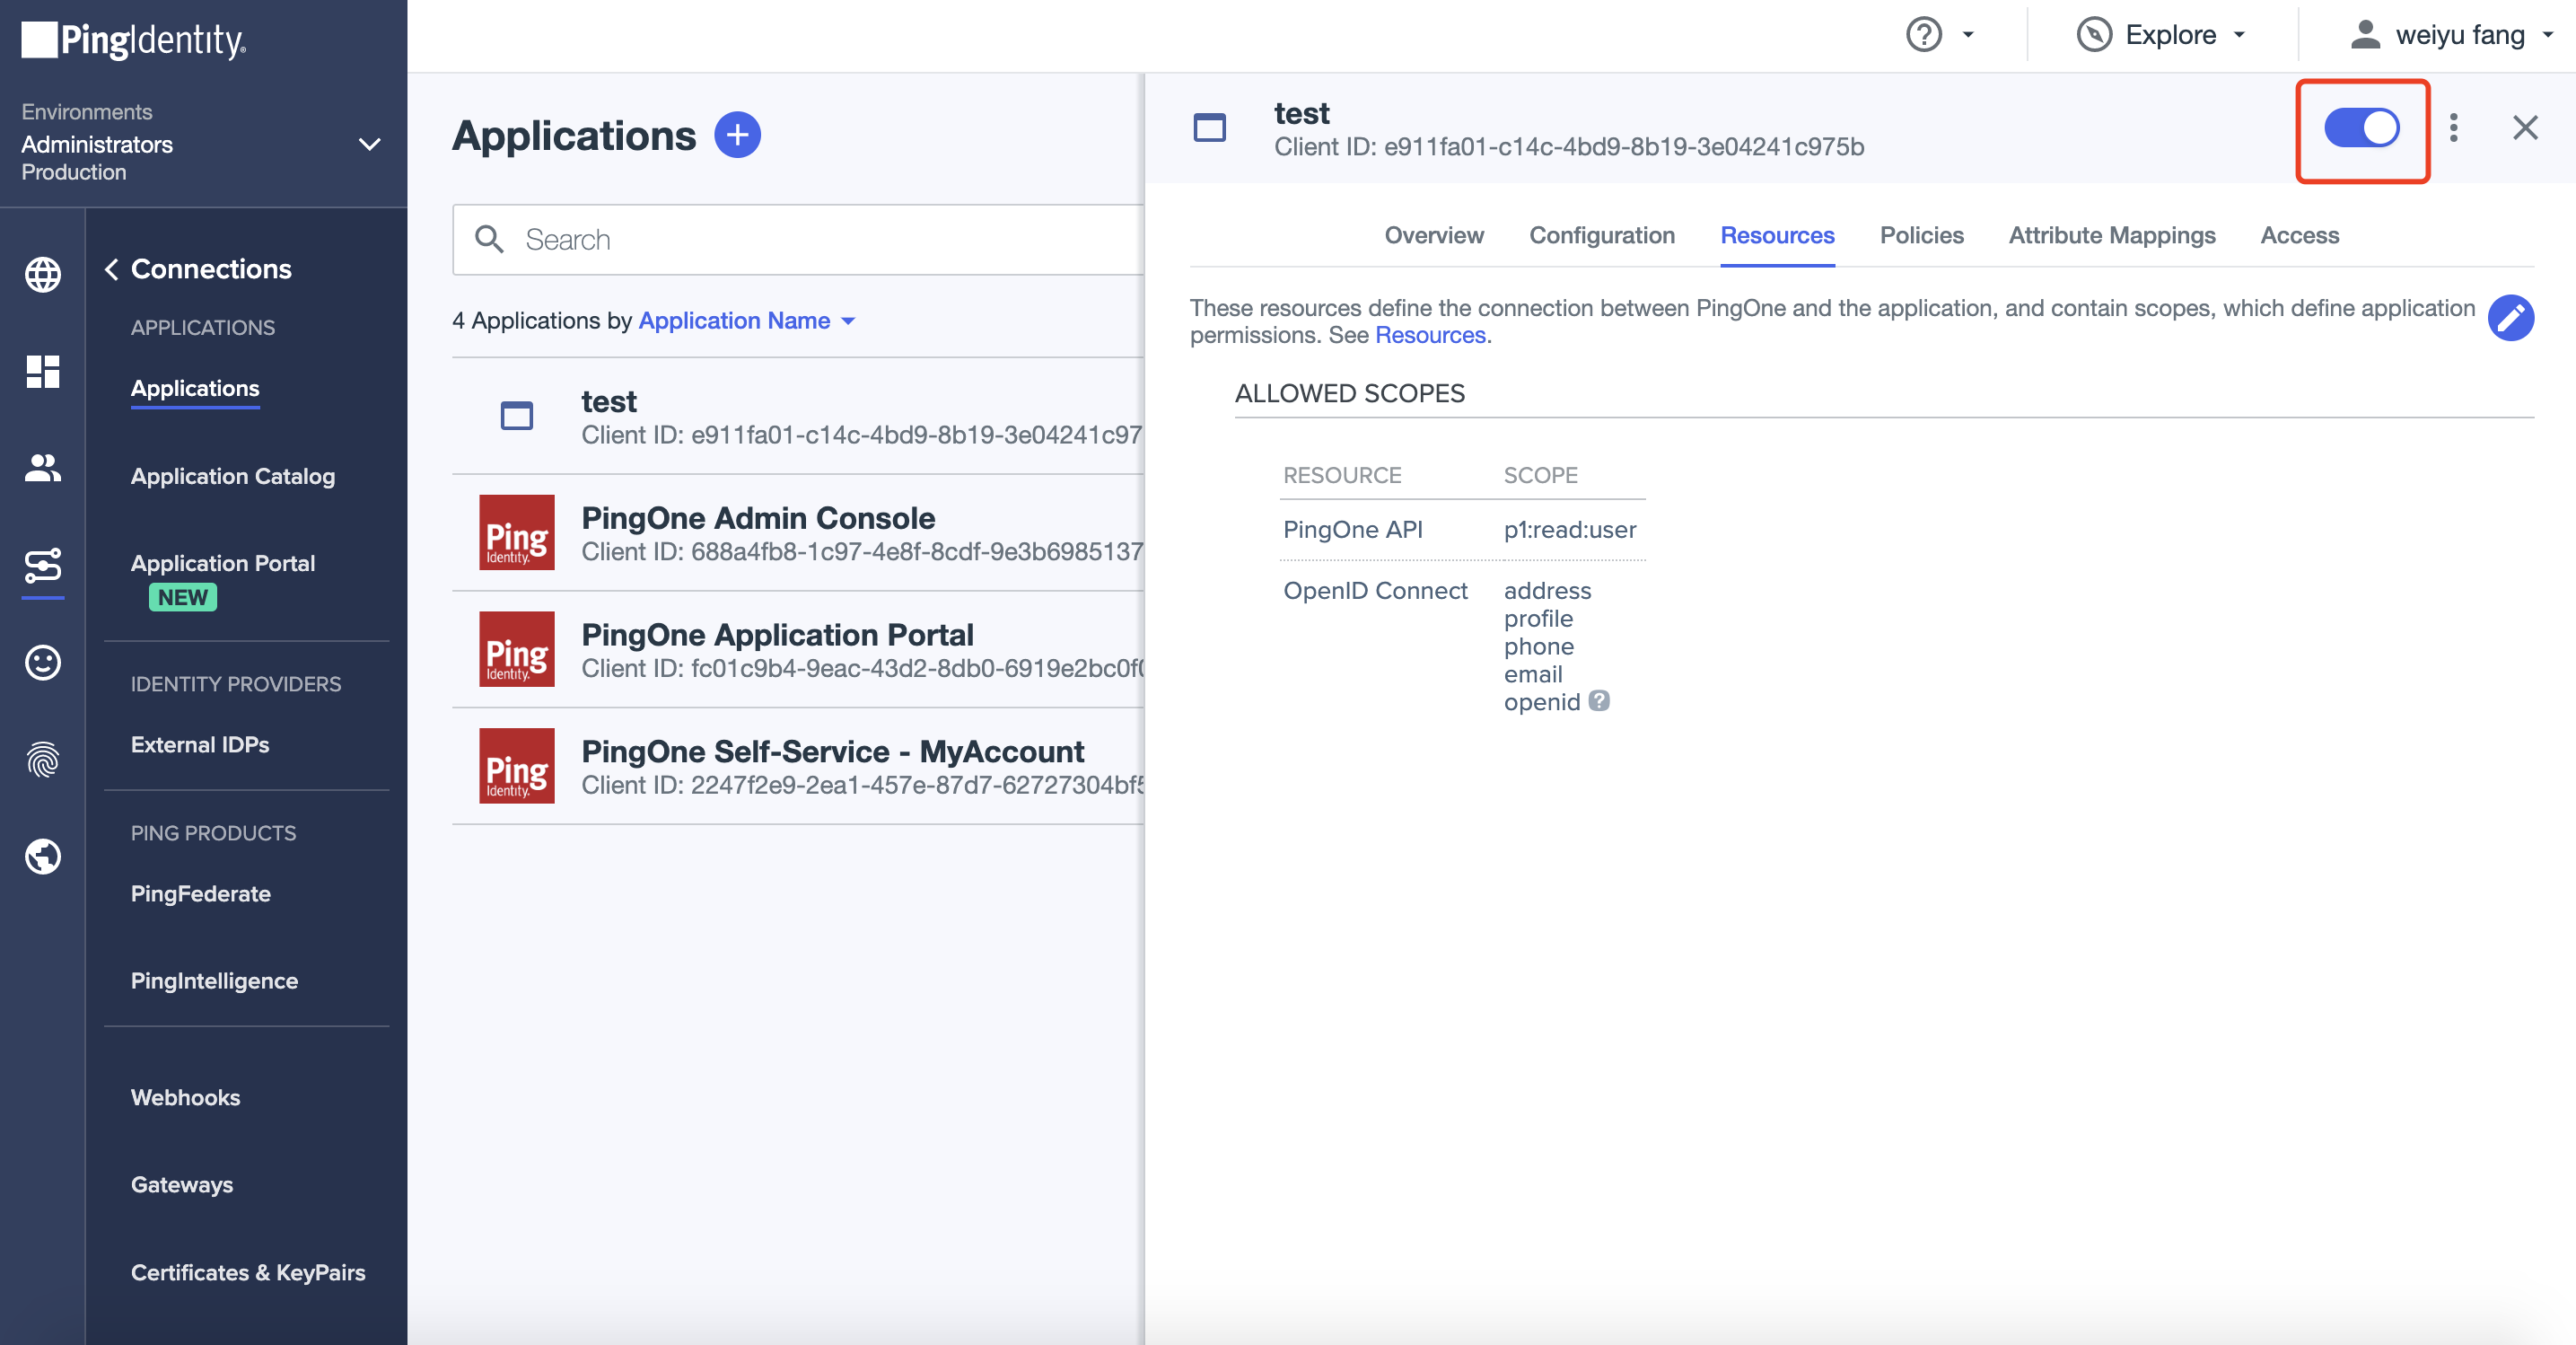
Users and Groups
After creating the application successfully, we need to add some users and groups for testing purposes.
Users
Select
UsersinIdentities, clickAdd User: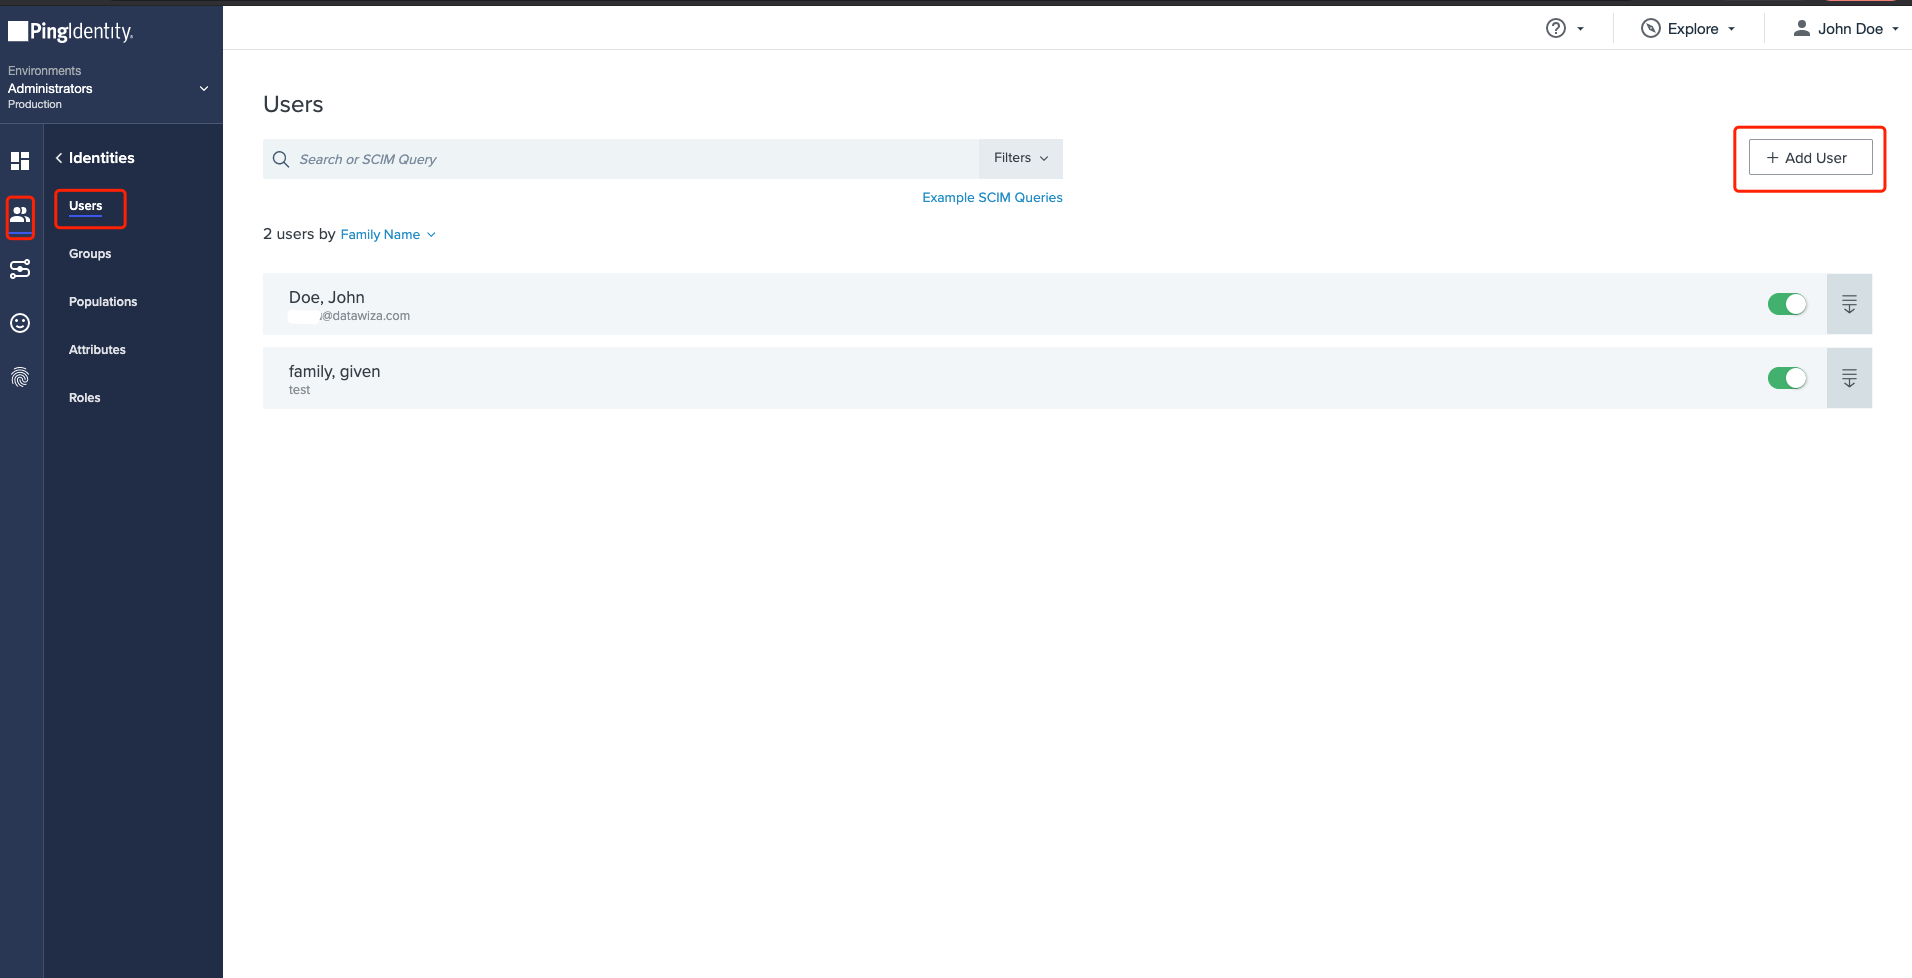
Input some basic information about the user and click
Save.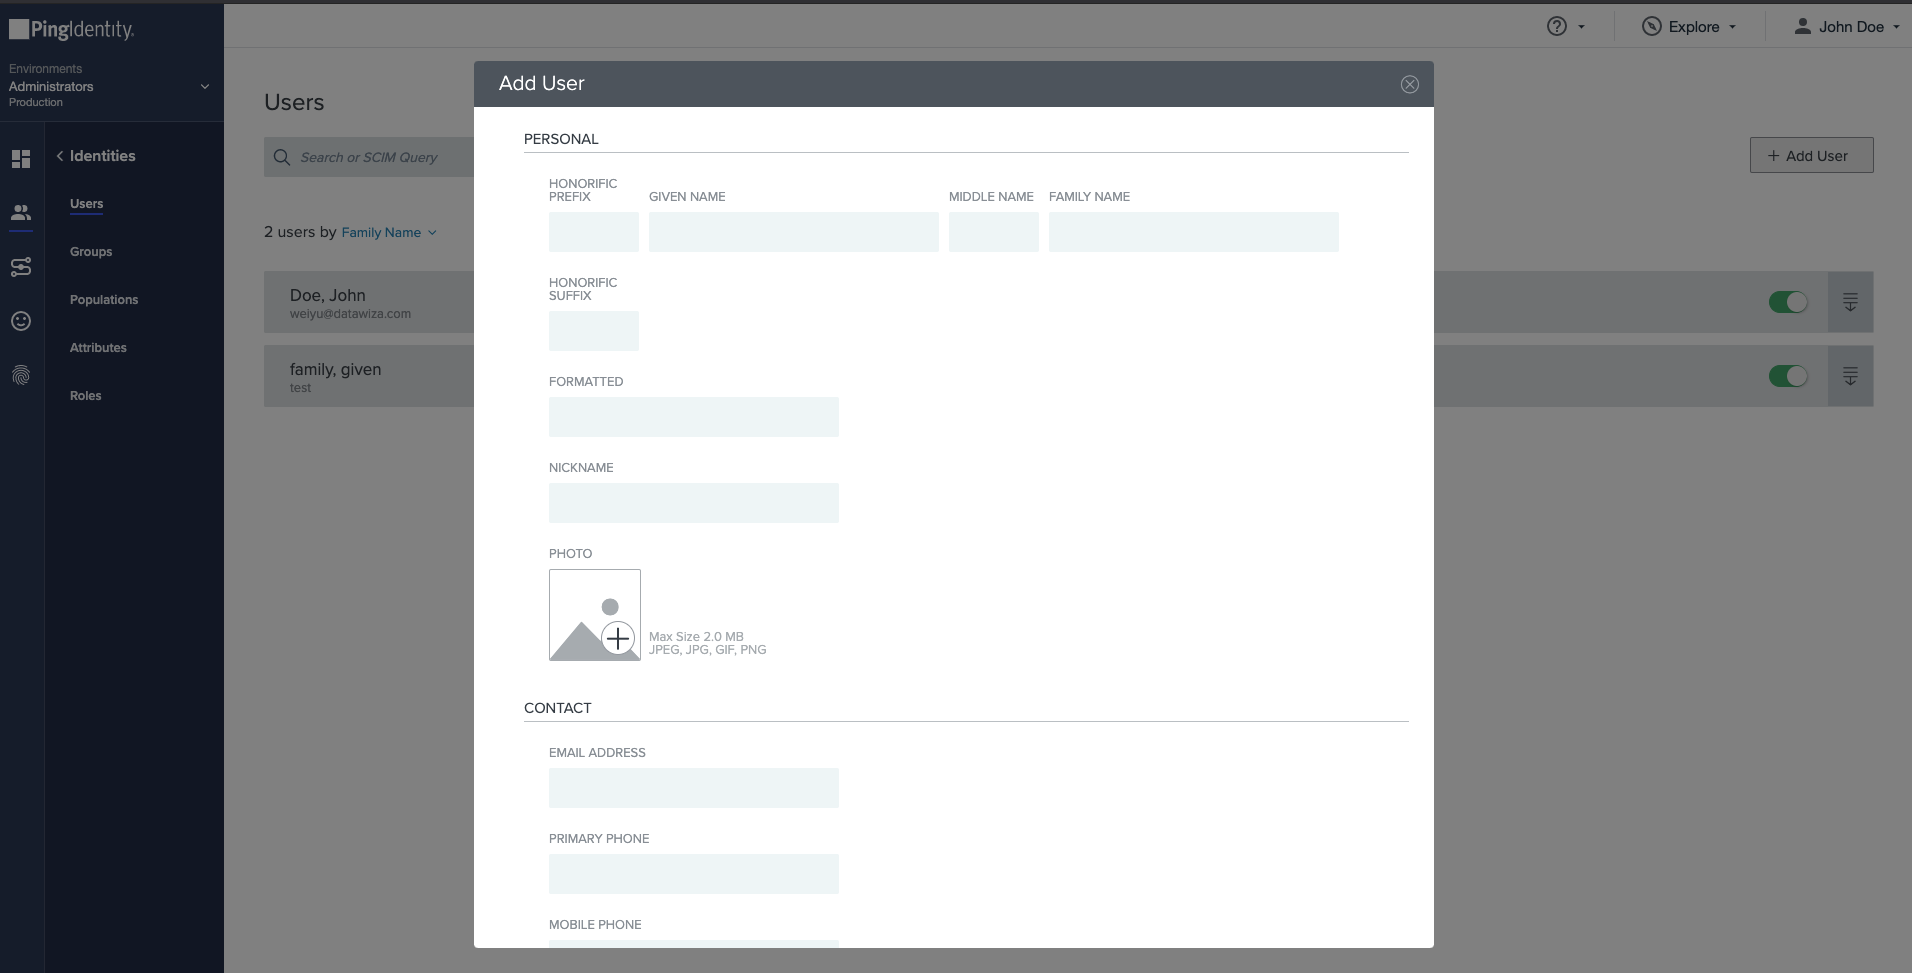
Click
Reset Passwordand create a one time password: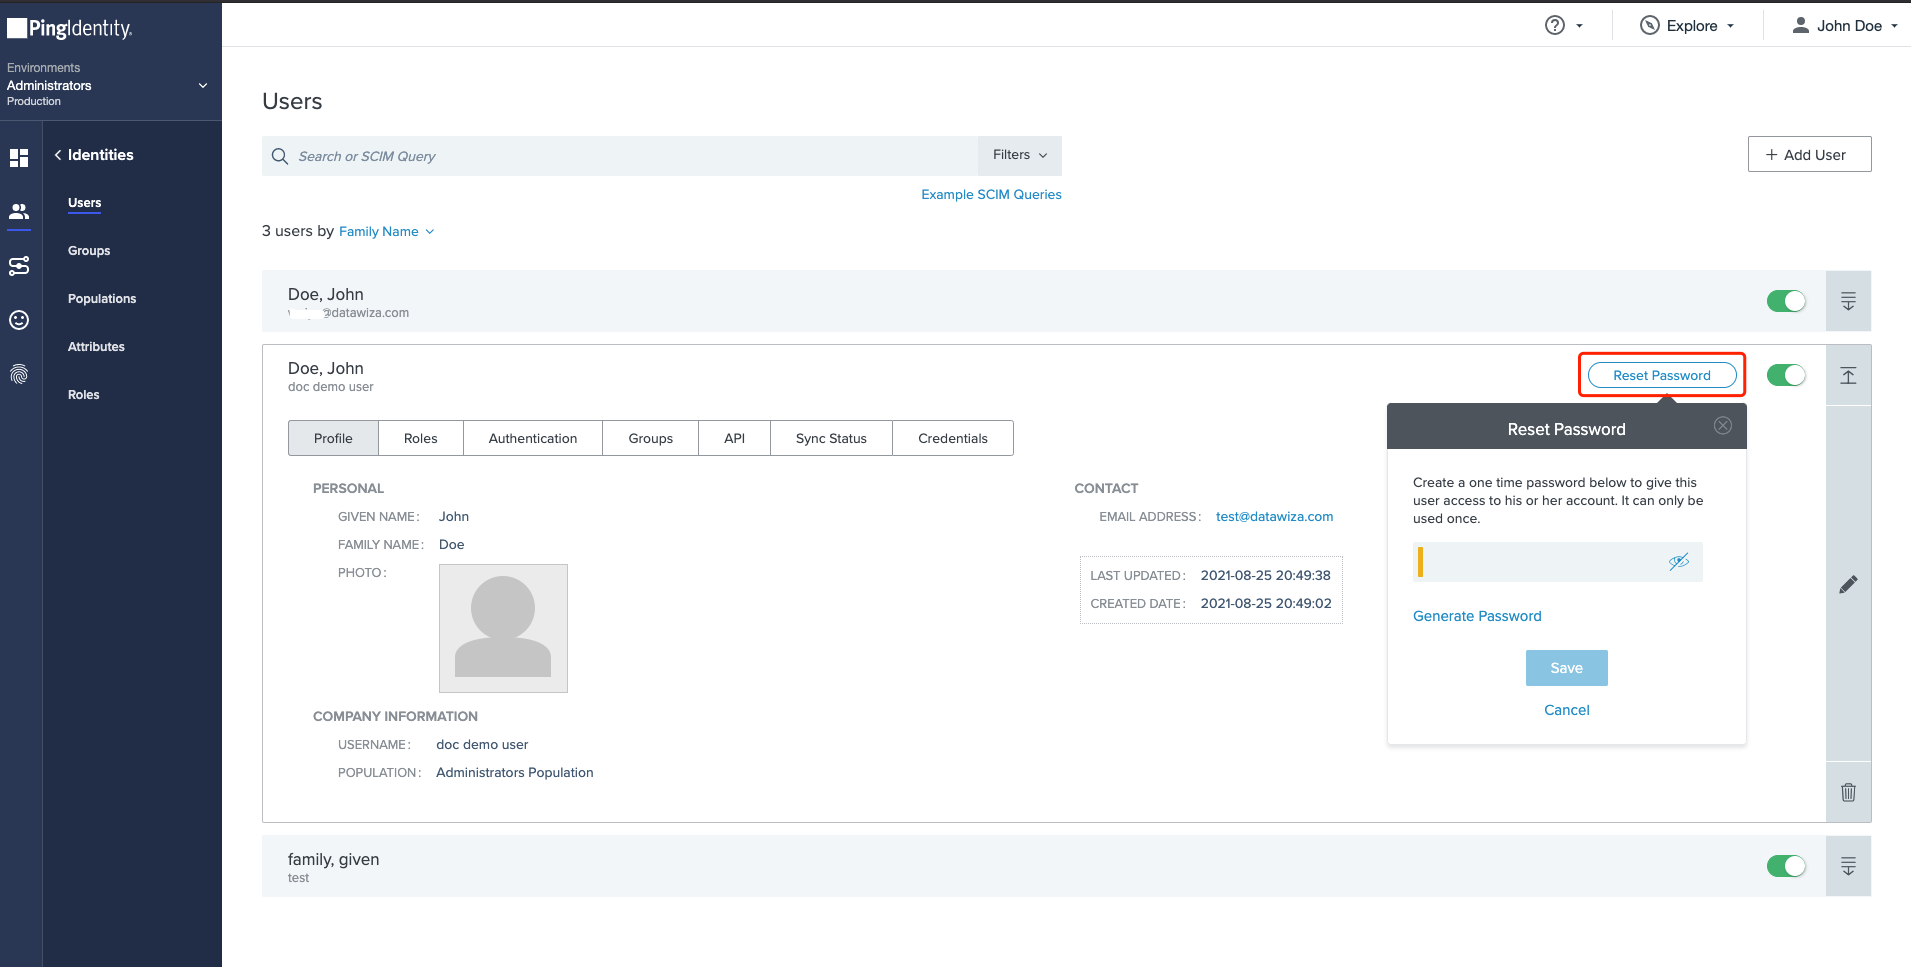
Groups (Optional)
Select
Groupsand click the+button to add a test group. Input theGroup Nameand clickSave: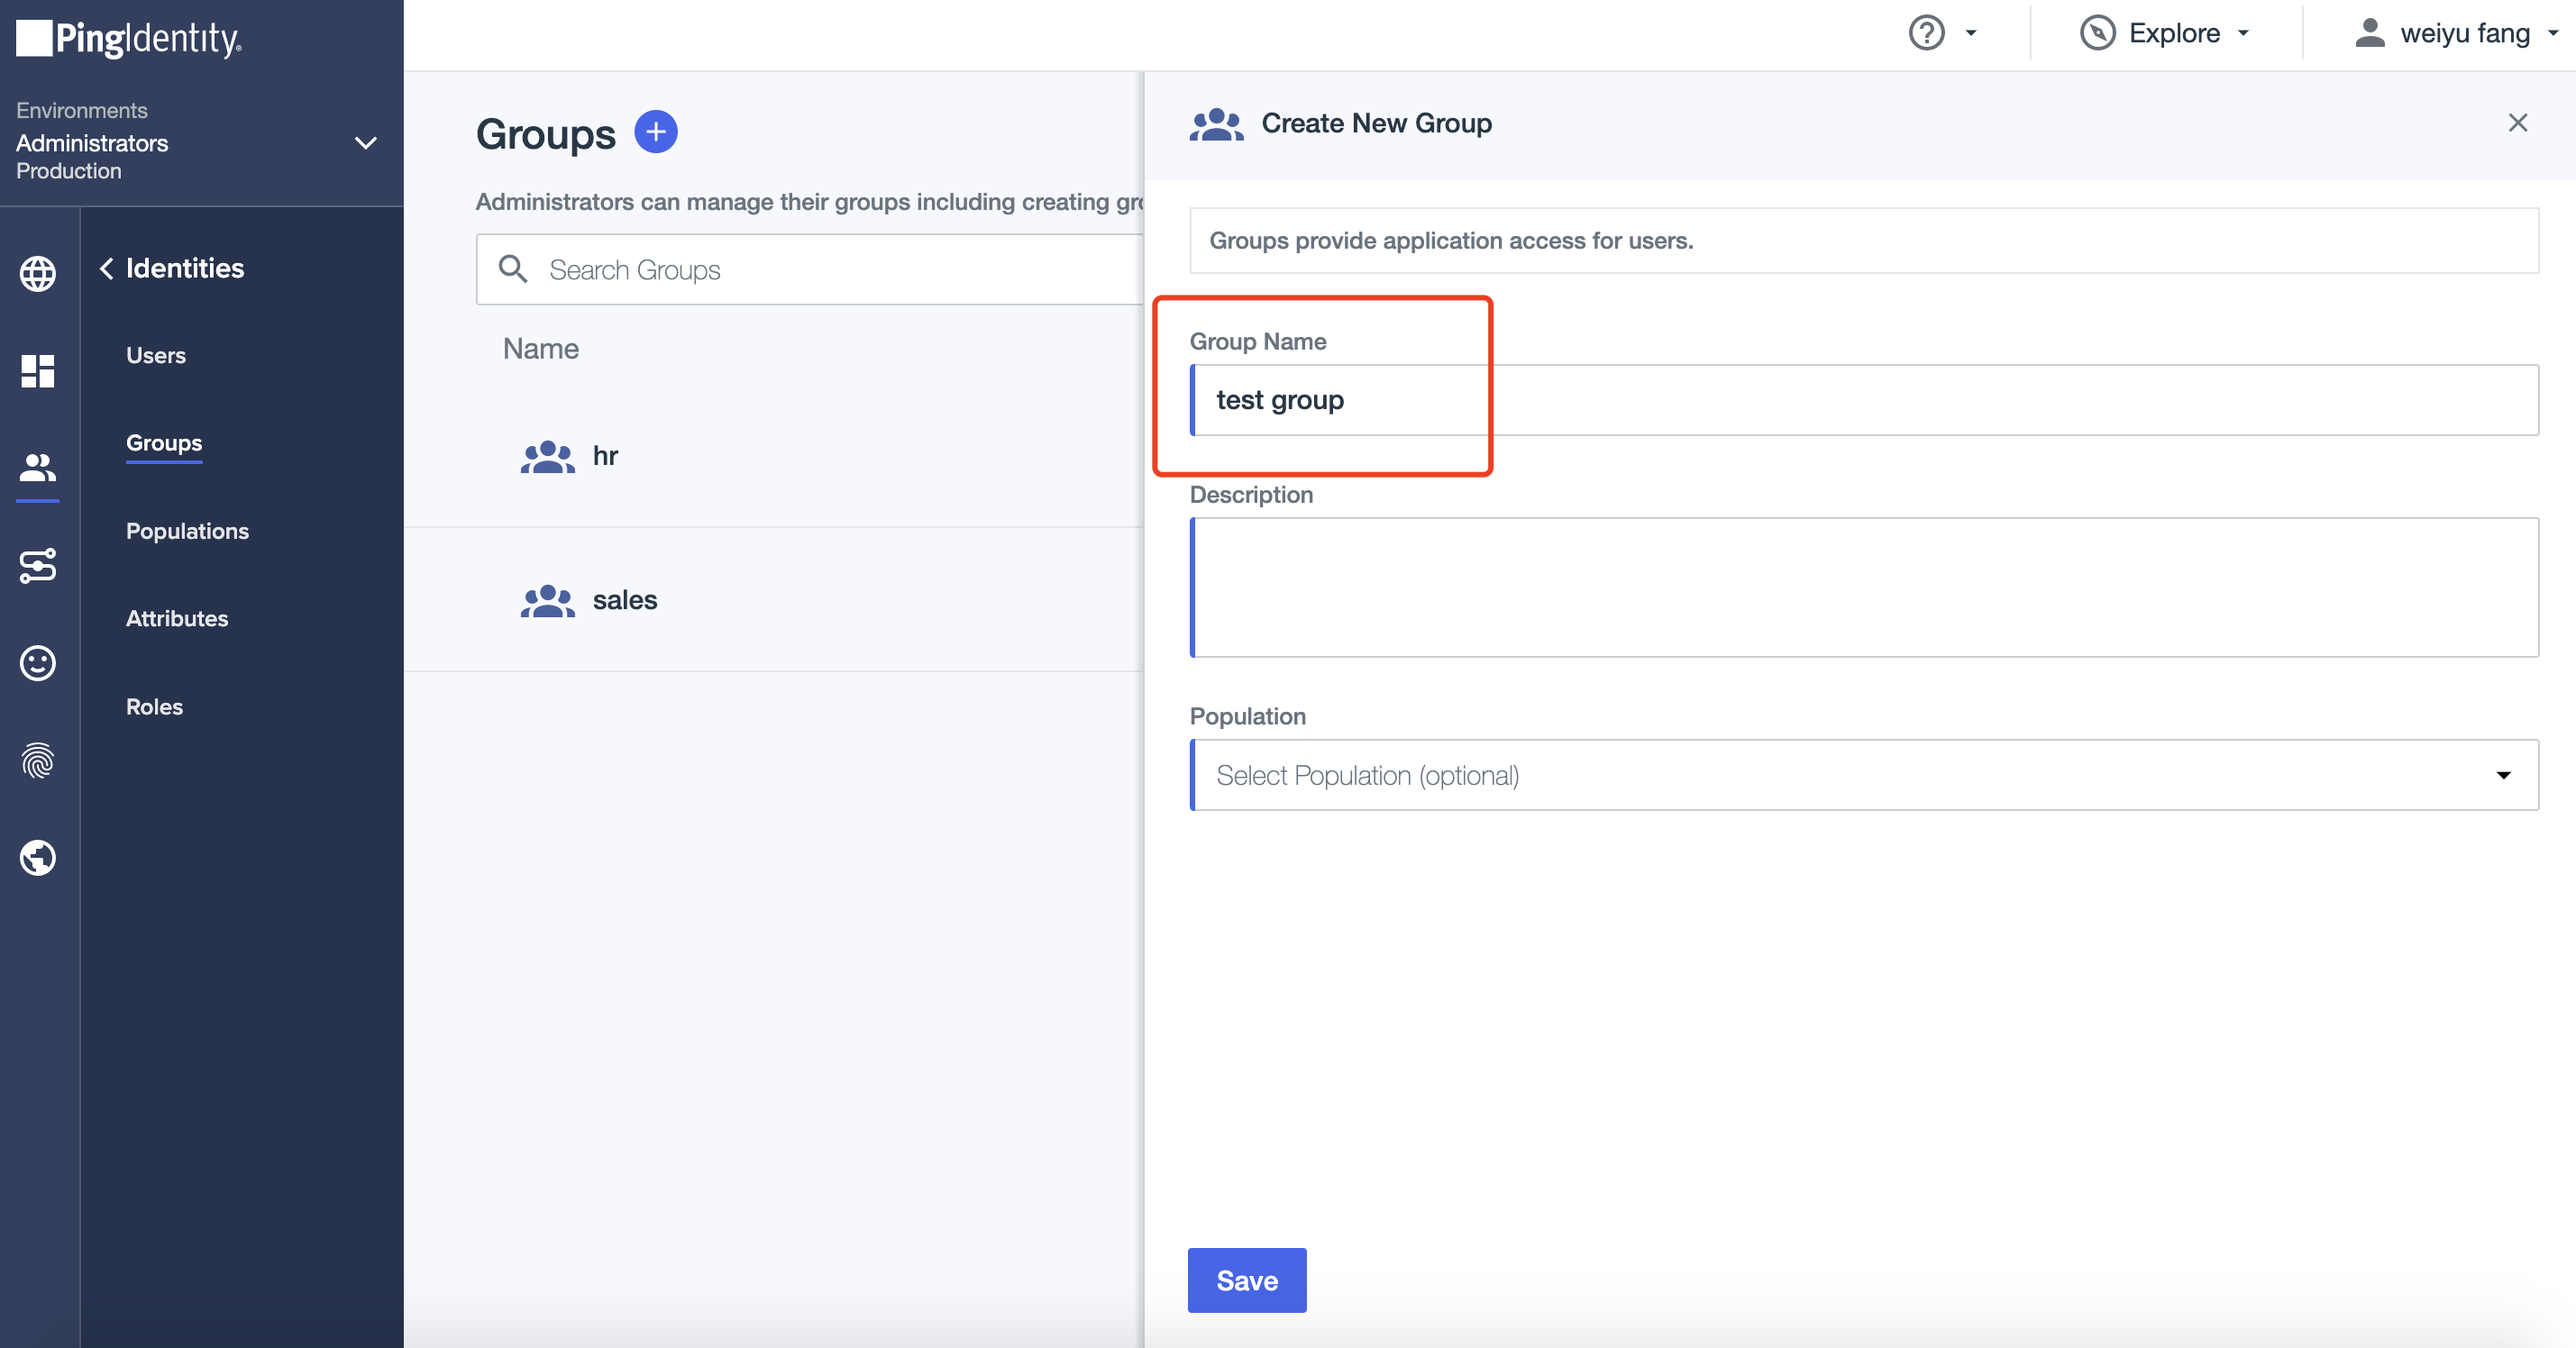
Select
Users, clickAdd Users Individually: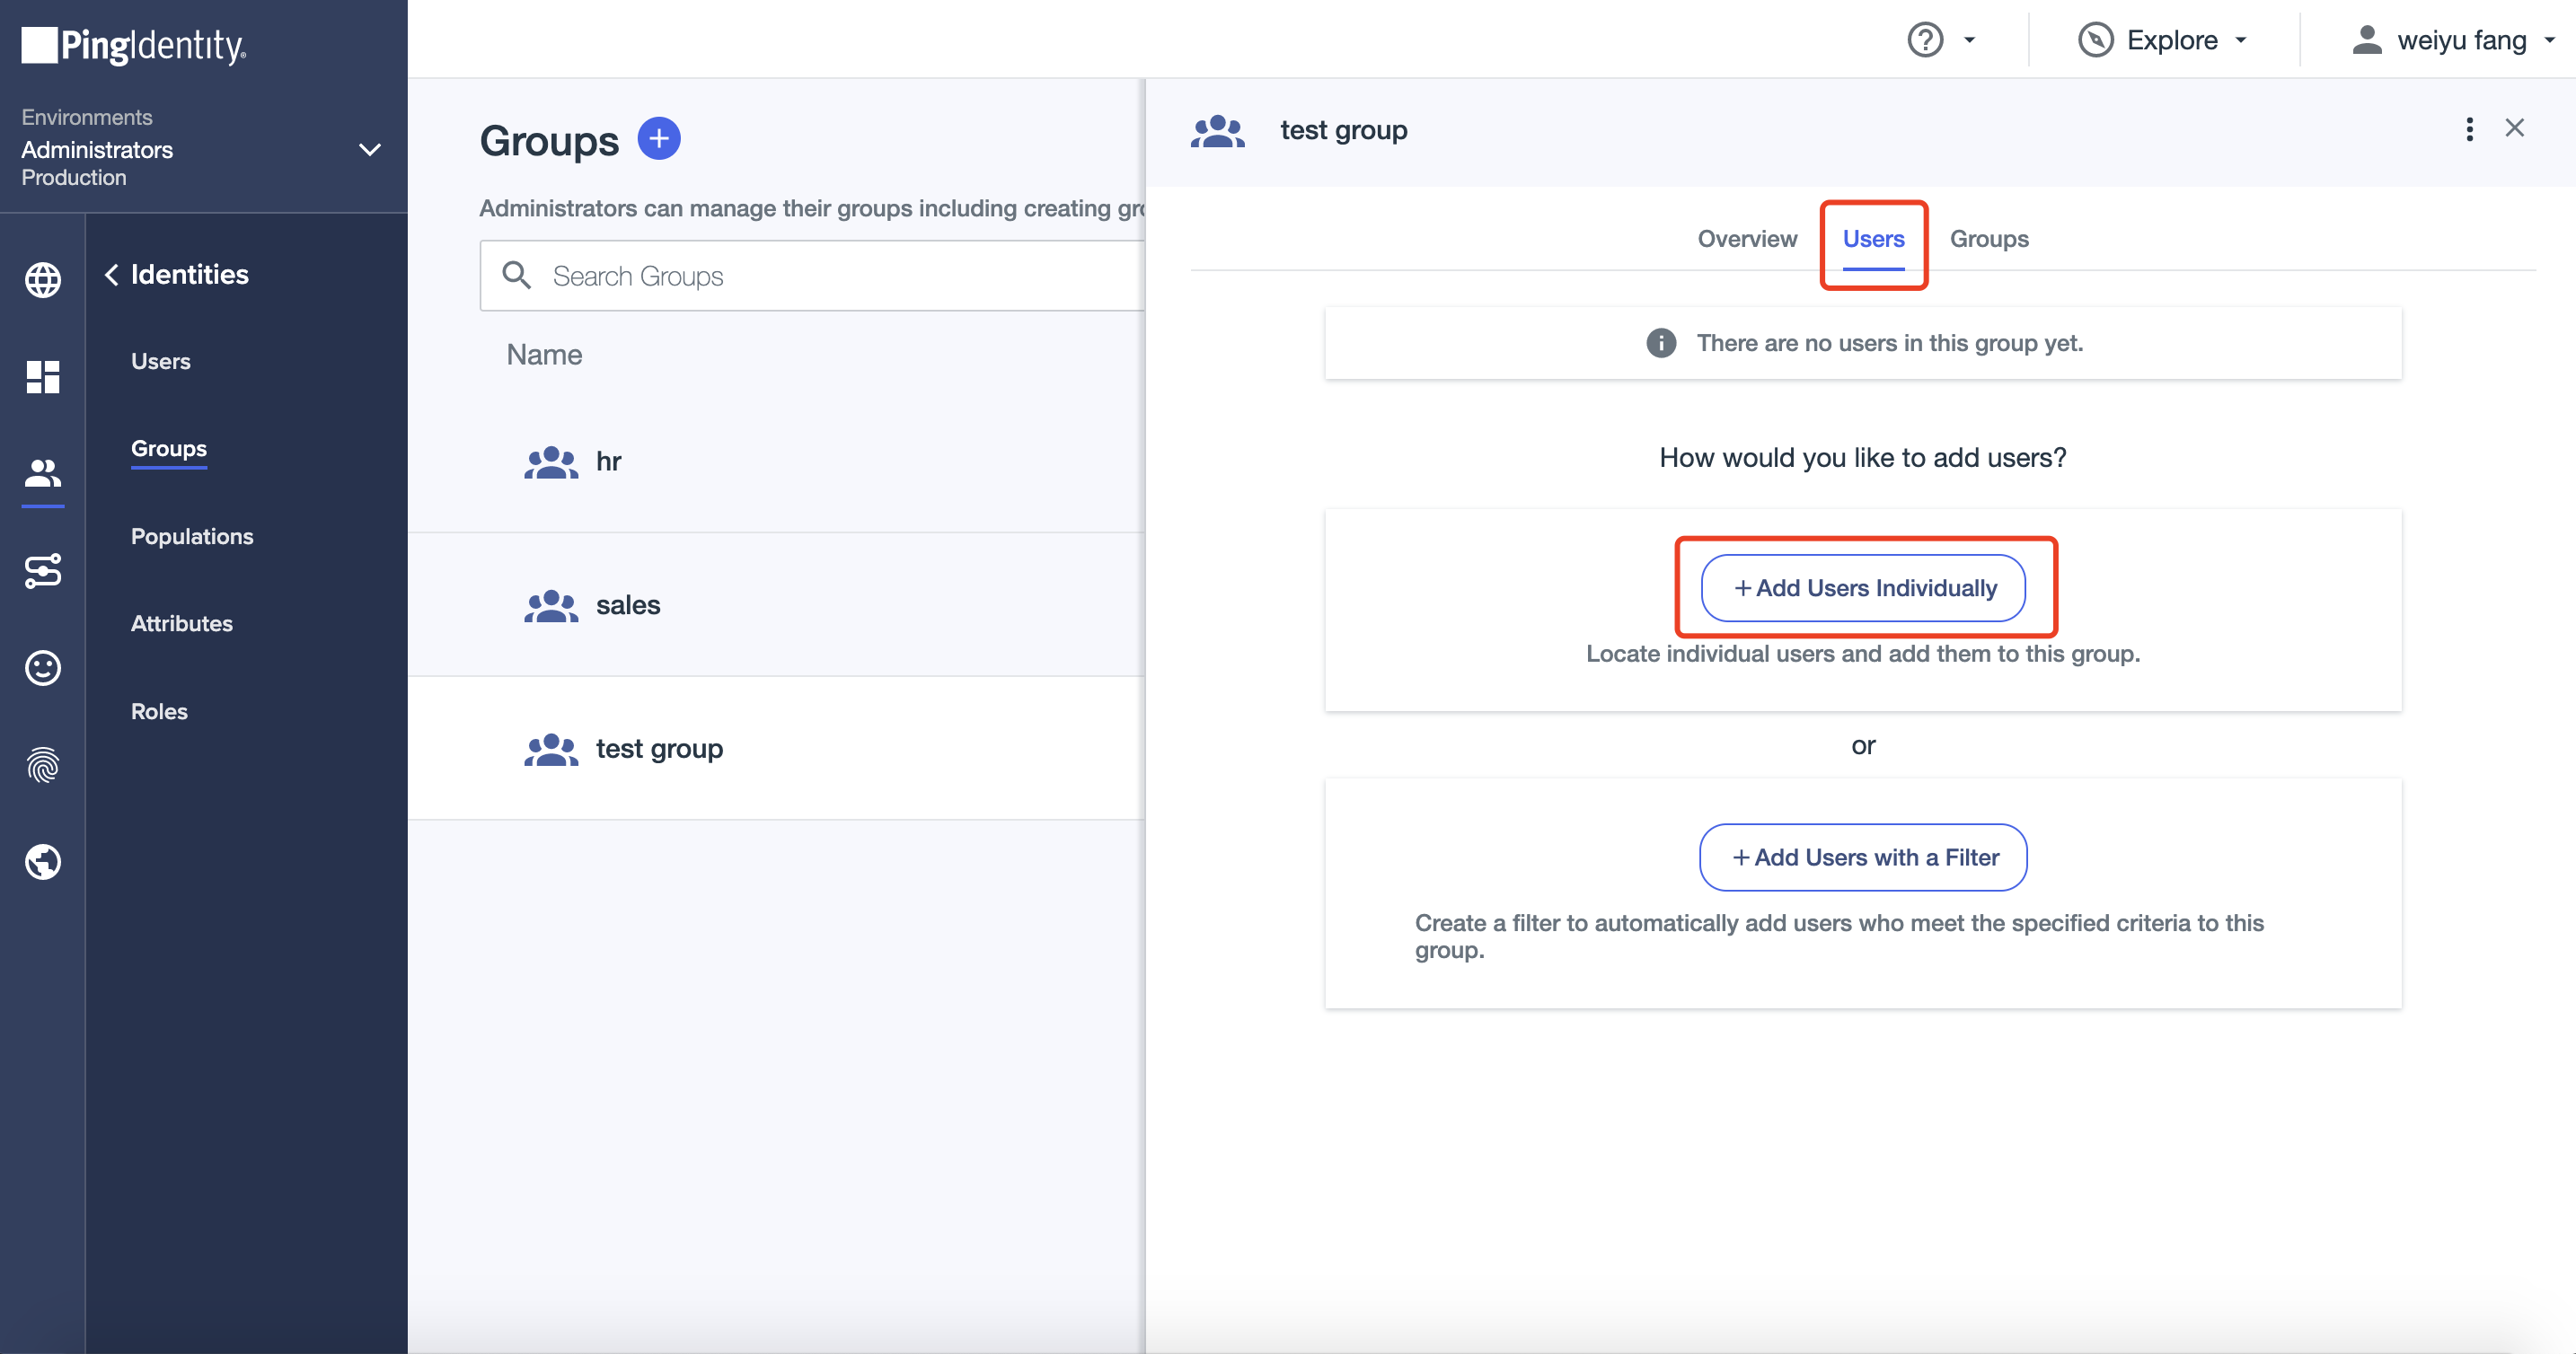
Select the test user we created and click
Save: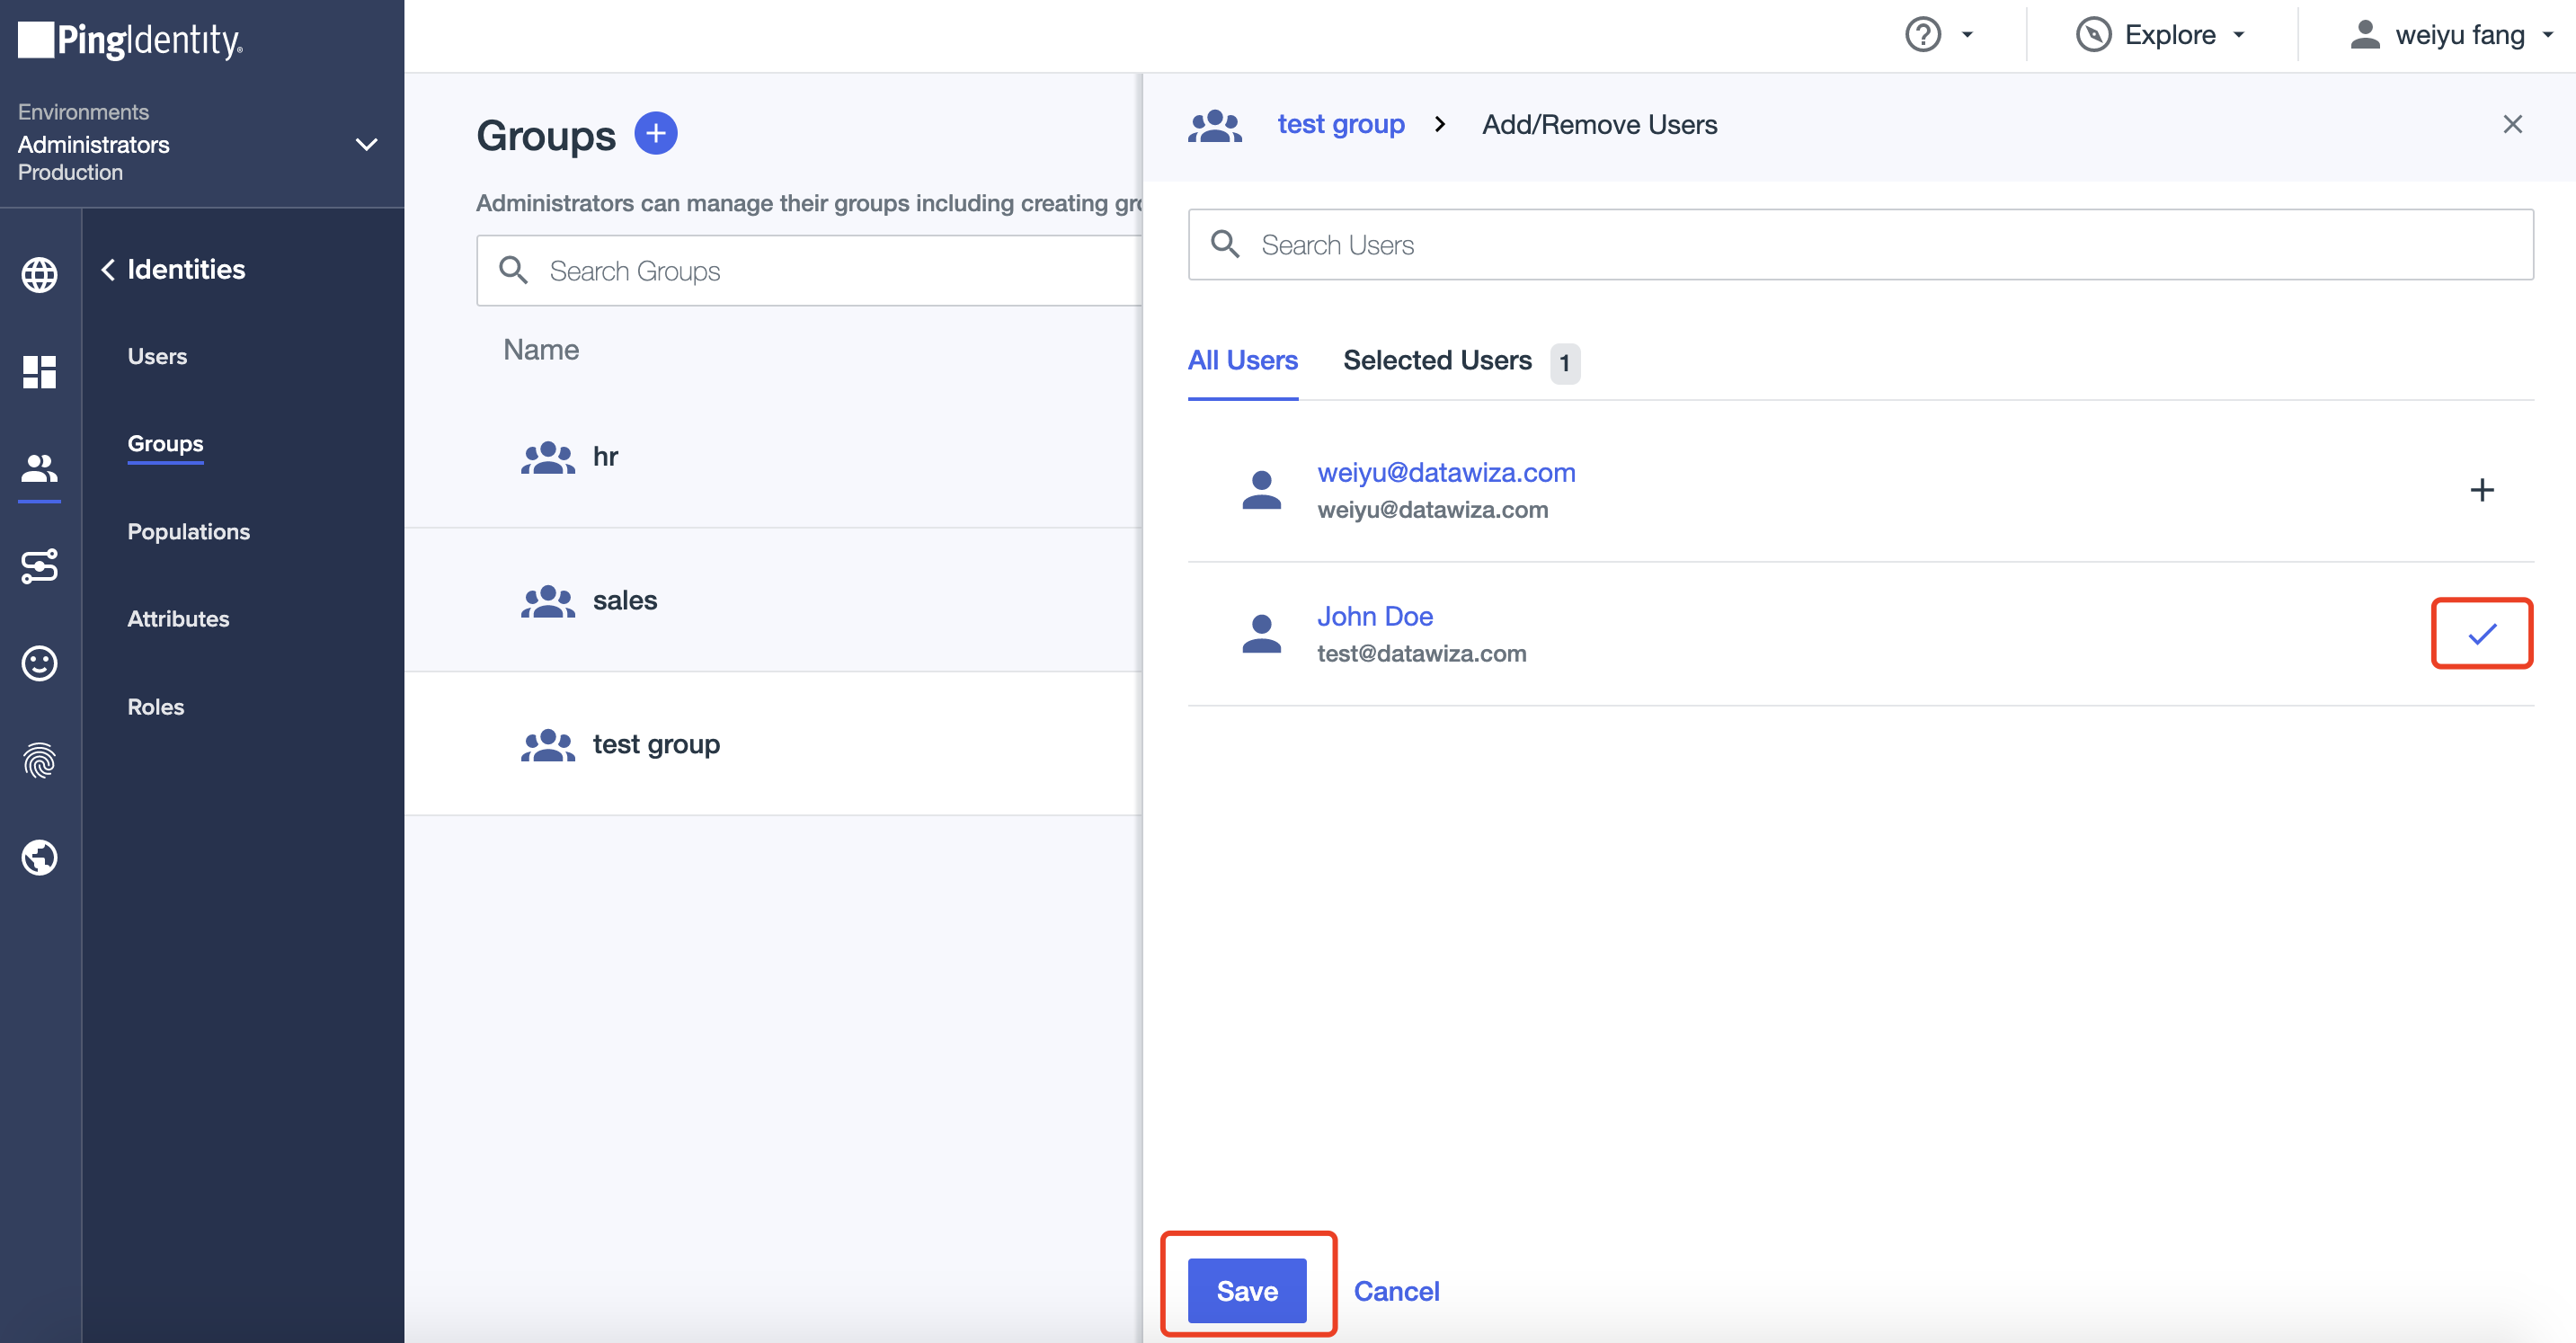
Summary
We have shown how to register a web application on PingOne. Please make sure to save the following values for later setting in Datawiza Cloud Management Console.
- Client ID
- Client Secret
- Issuer