Google Workspace (previously G Suite)
Google Workspace Configuration
This session shows how to create an OAuth 2.0 Client ID, service account and set permissions in Google Workspace (previously G Suite).
Add New OAuth consent screen
1. Create a new OAuth consent screen:
Select OAuth consent screen and select Internal, then Click CREATE: 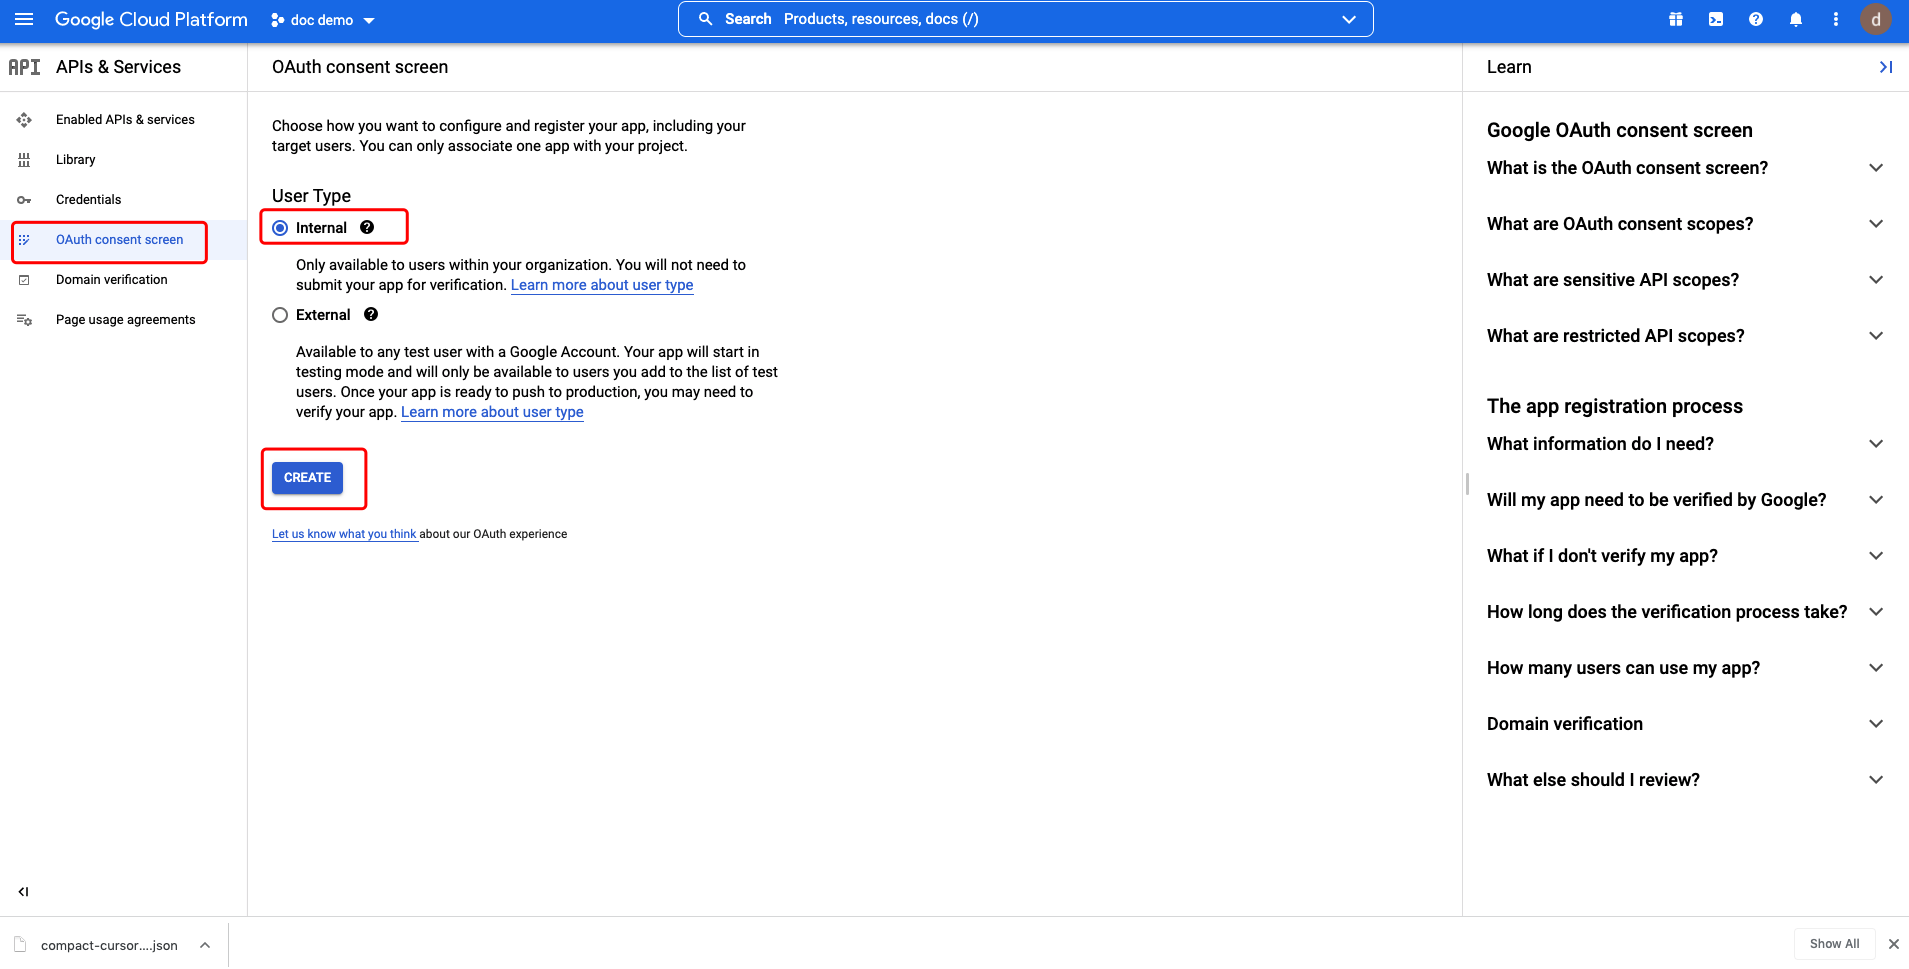 Supply the
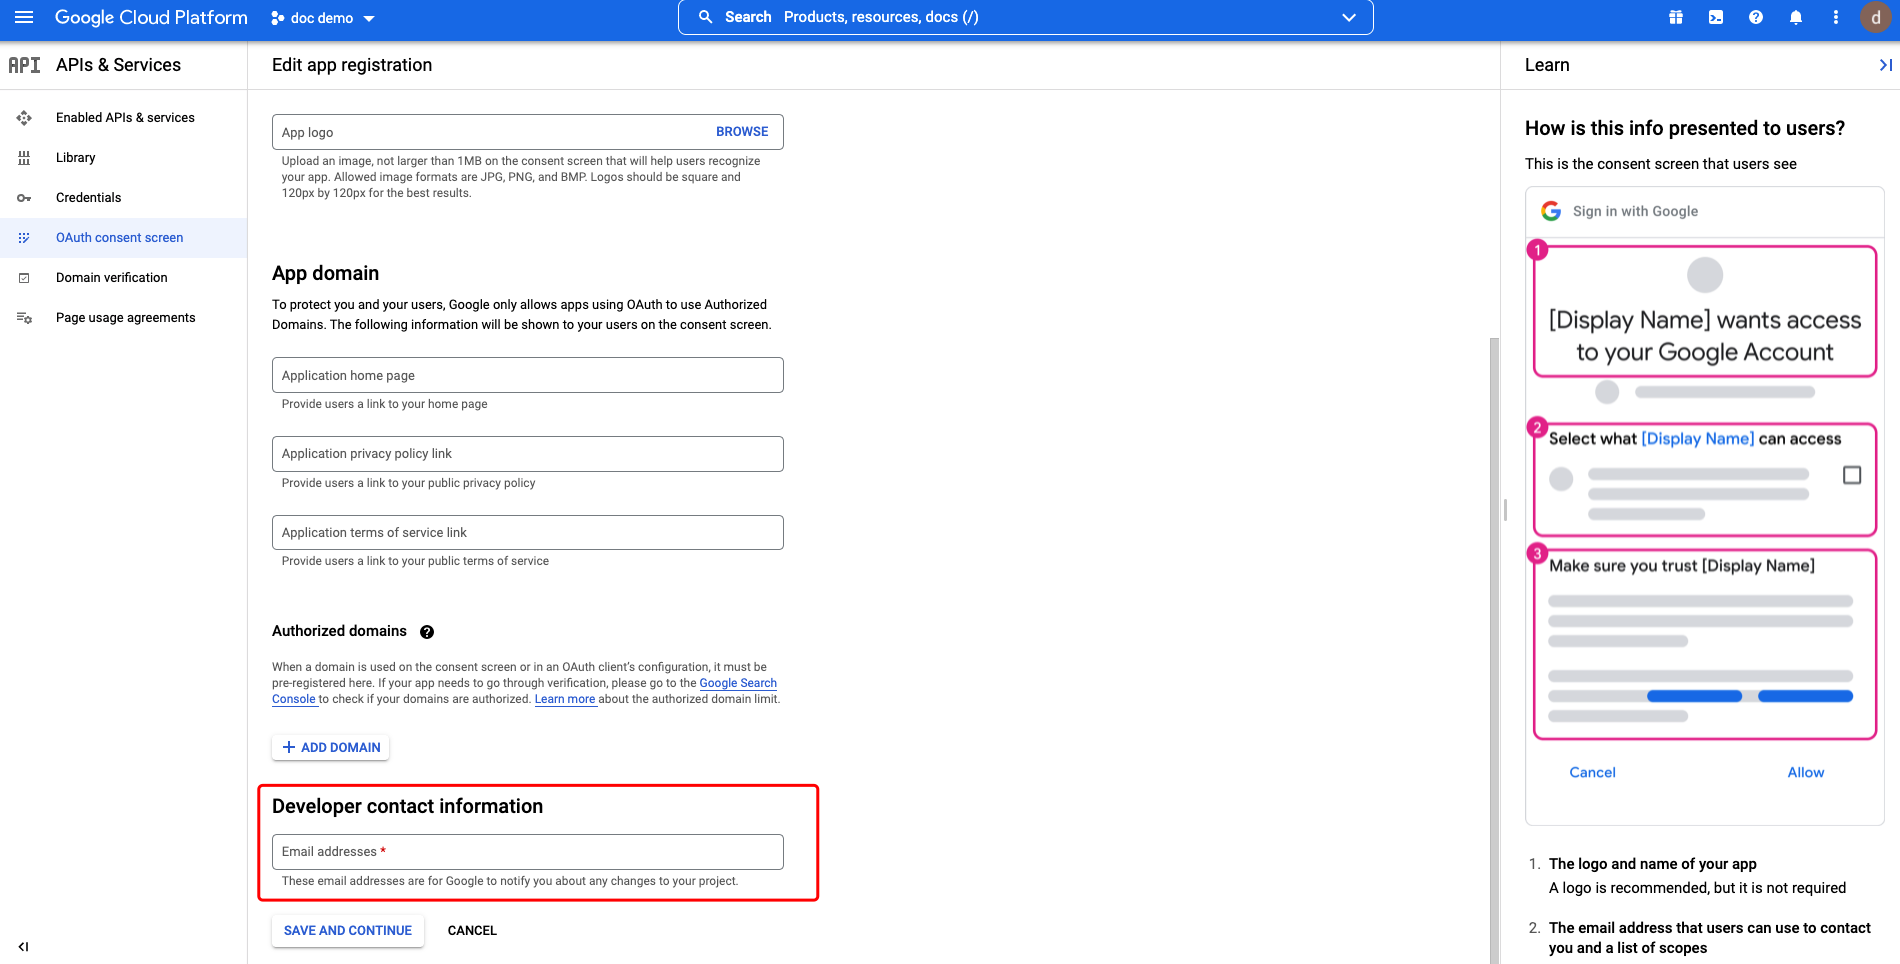
 App name, User support email and Developer contact information and click SAVE AND CONTINUE. 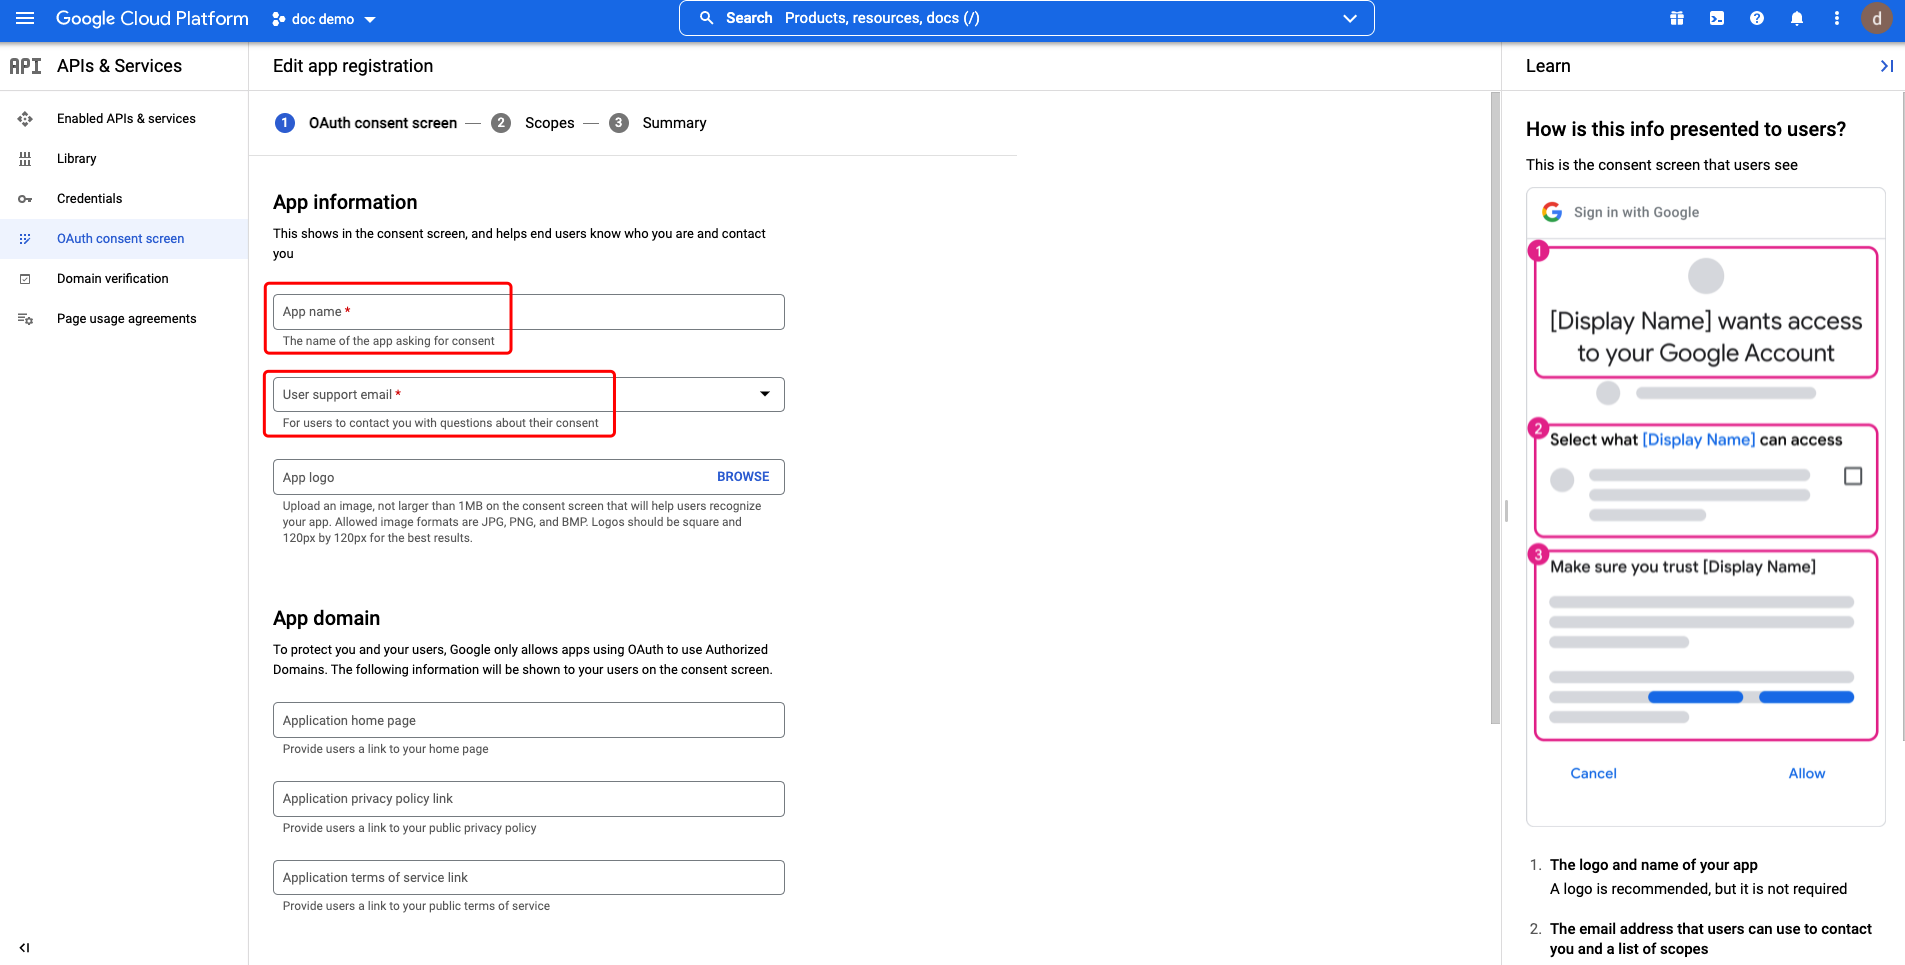
Keep default settings and click SAVE AND CONTINUE: 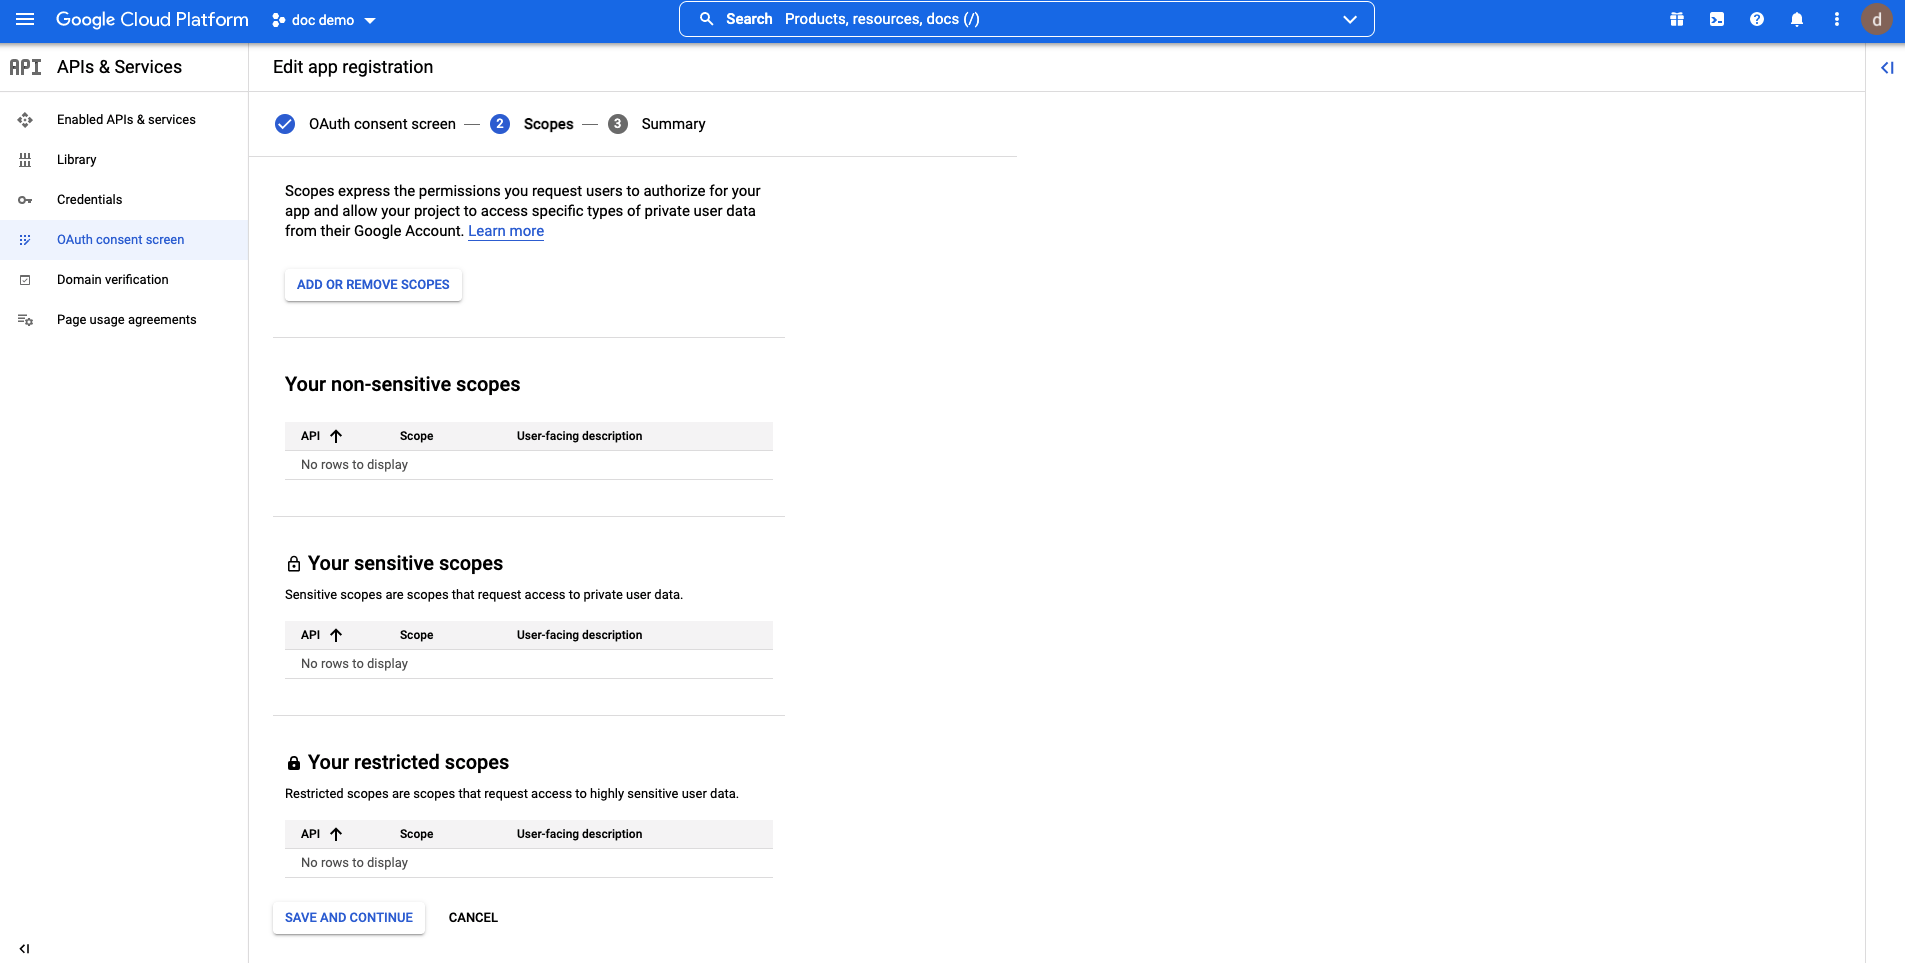 Check the
 Summary and click BACK TO DASHBOARD -- an OAuth consent screens should be displayed: 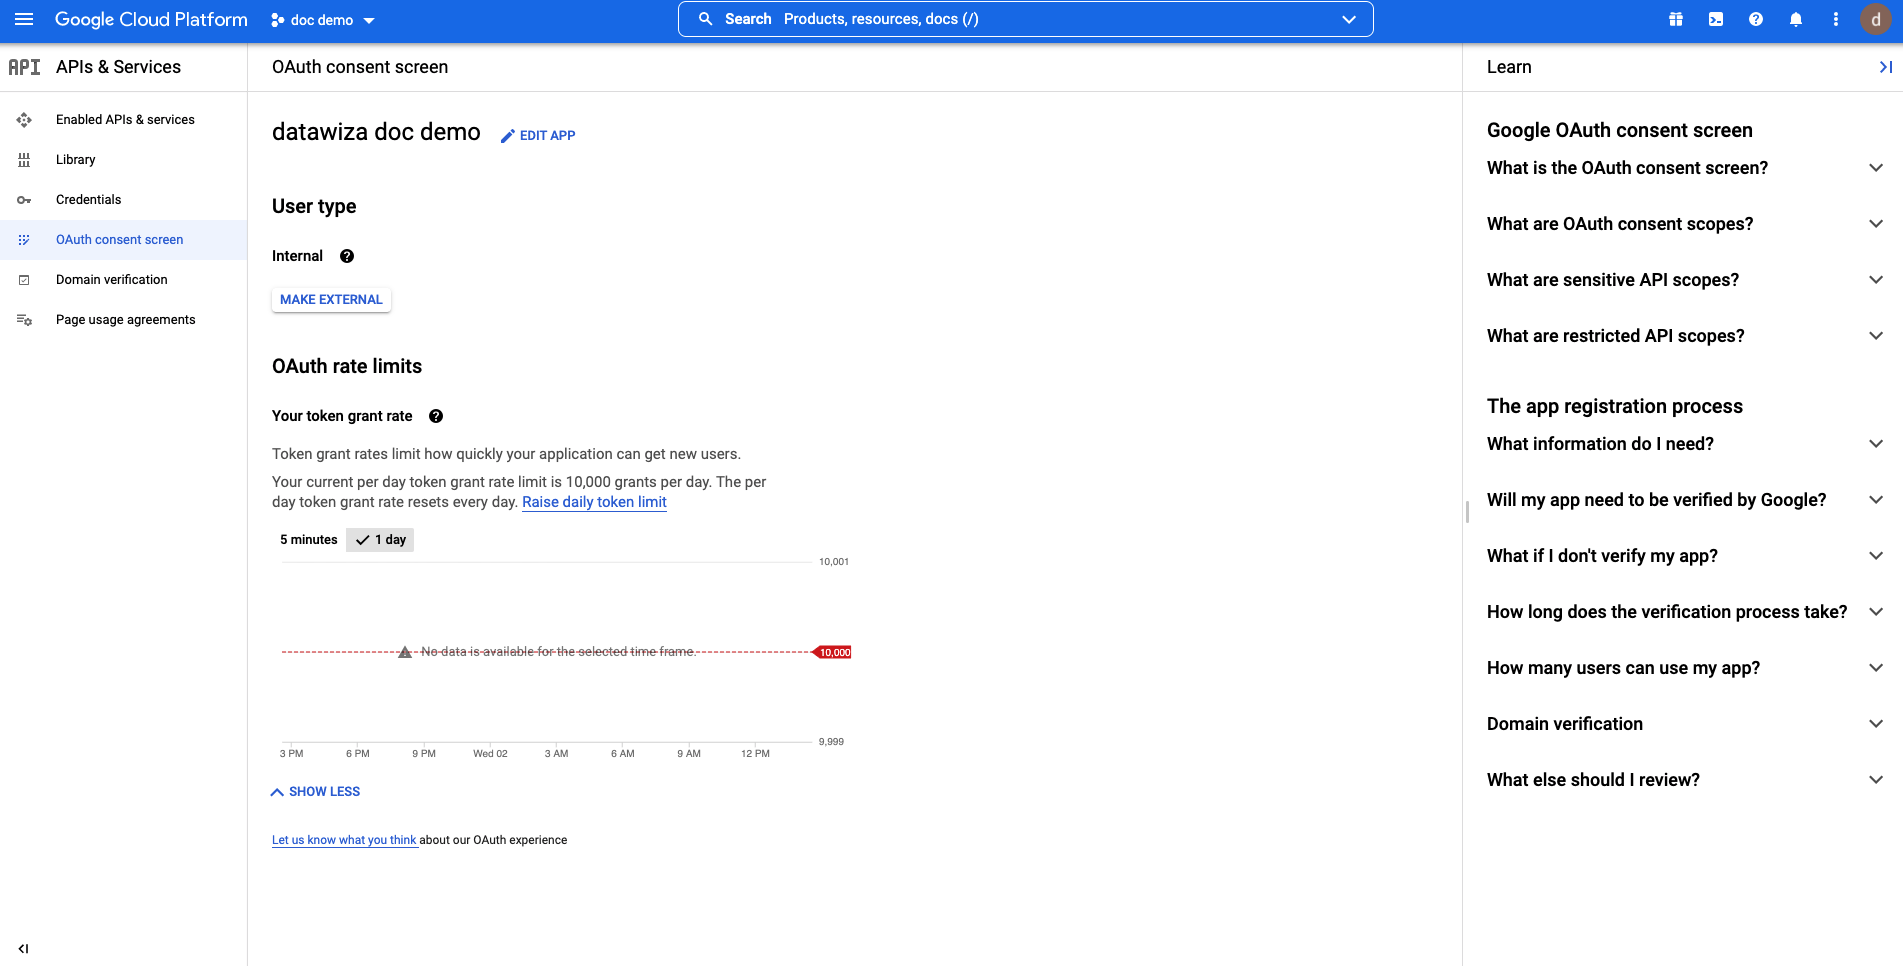
Create and Configure your OAuth 2.0 Client ID
2. Create a Credential:
Select Credentials tab and click CREATE CREDENTIALS, then select OAuth client ID: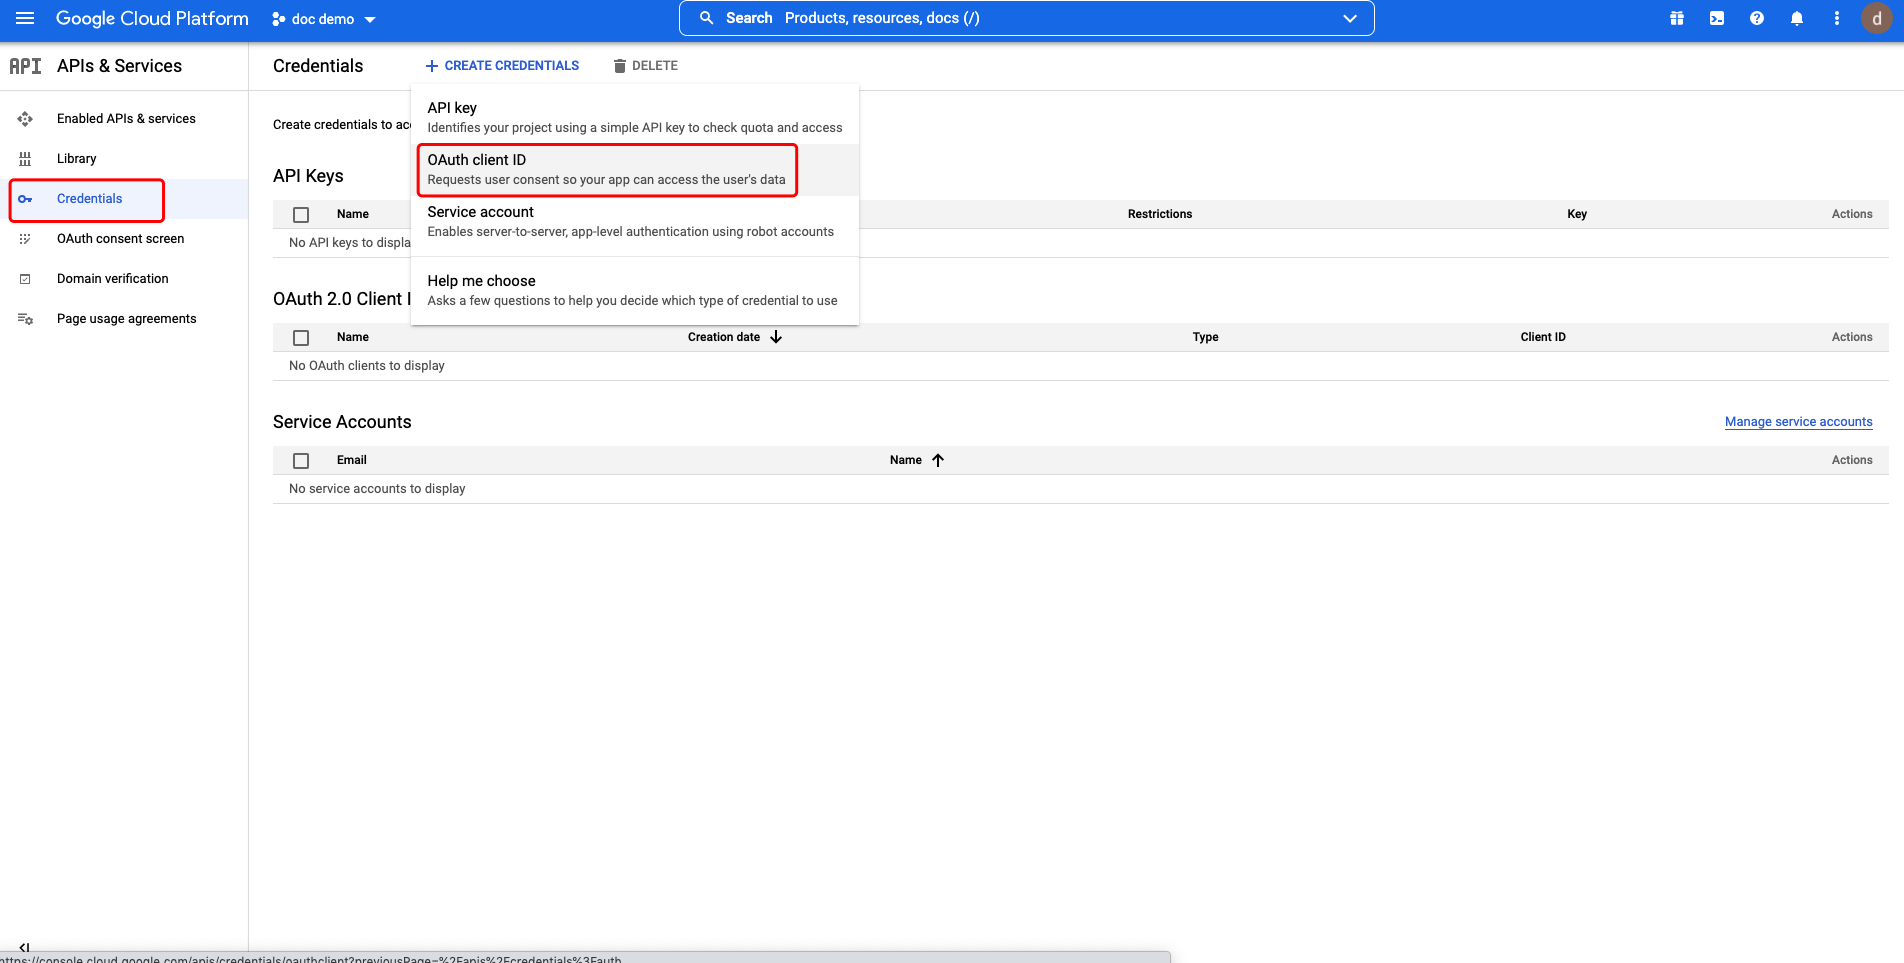
Select Web application as Application type. Add Authorized redirect URIs, e.g., http://localhost:9772/datawiza/authorization-code/callback and click Create: 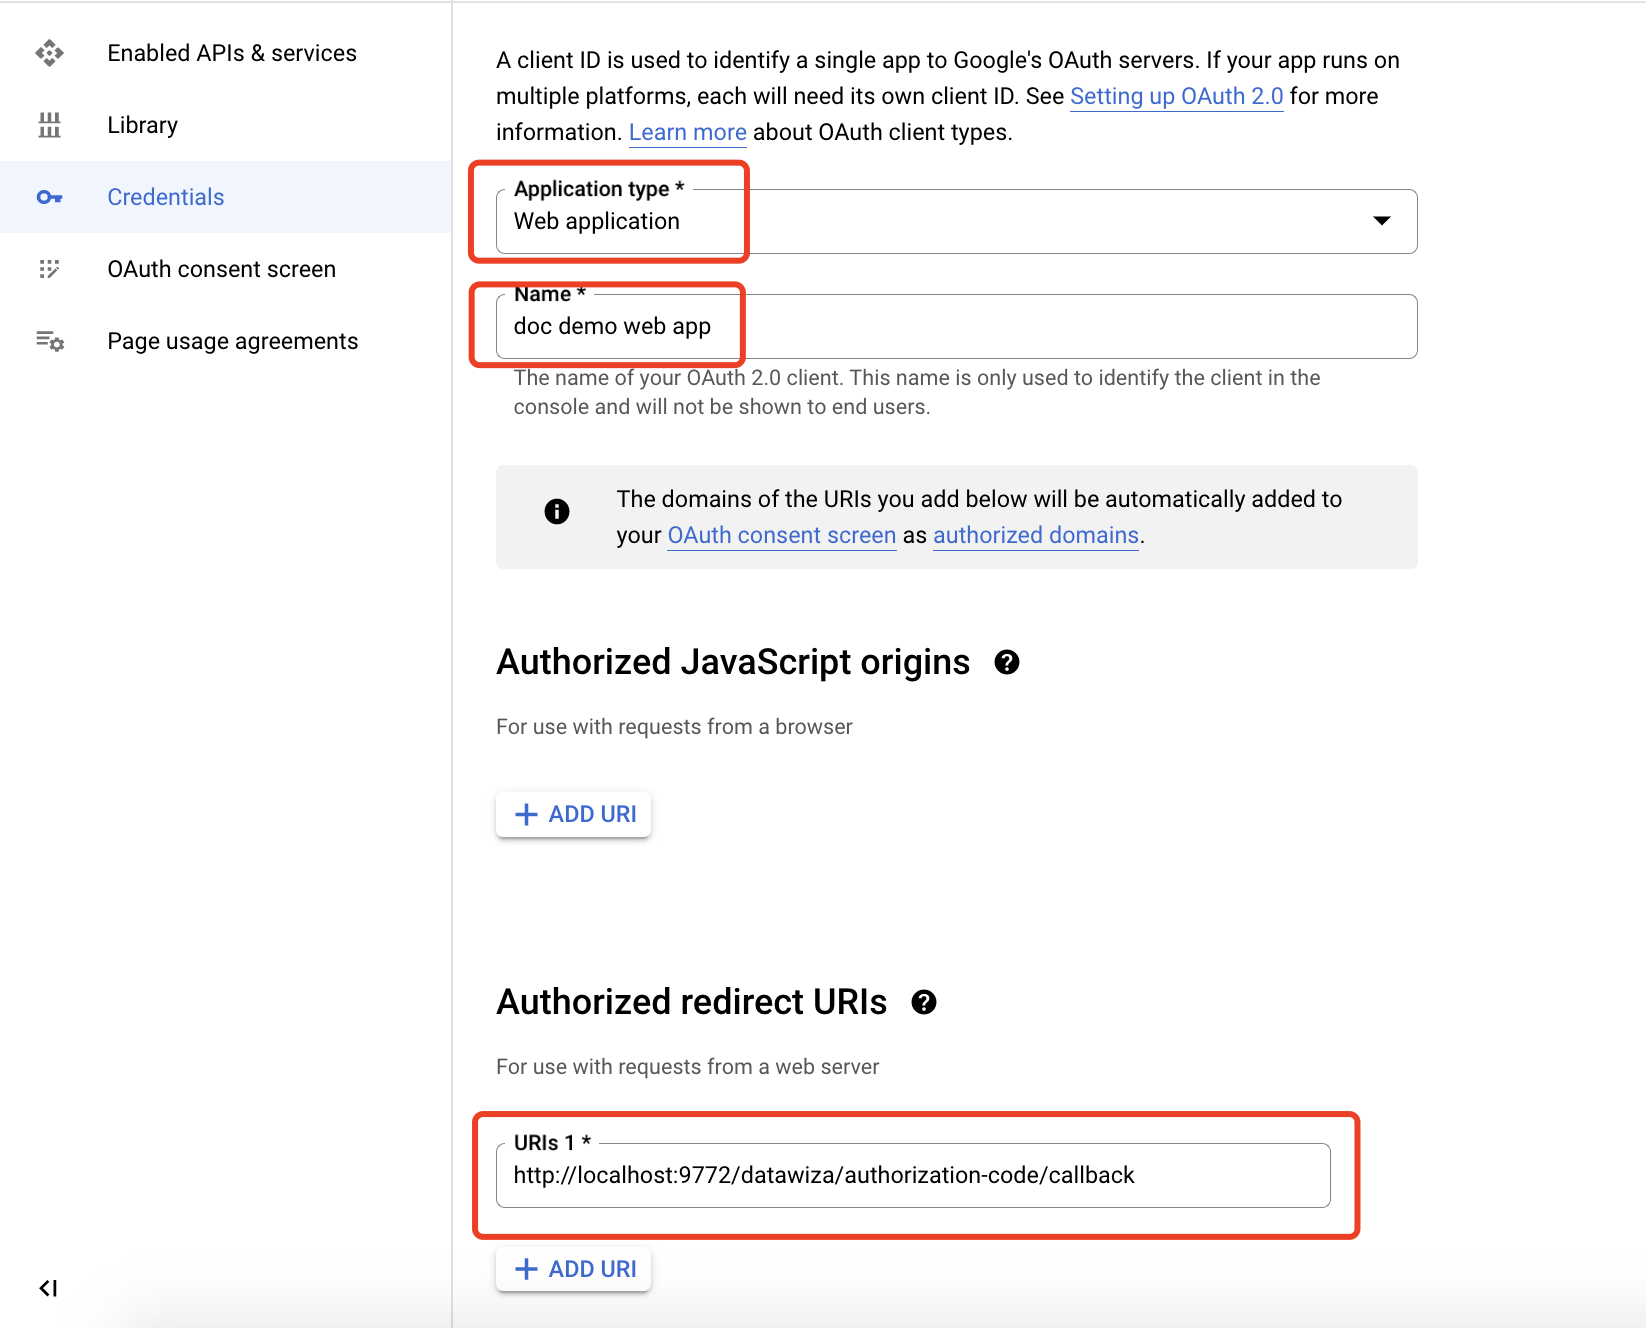 Make sure you save the
 Client ID and Client Secret. You'll need to enter these values when configuring our IdP in Datawiza Cloud Management Console at latter steps. 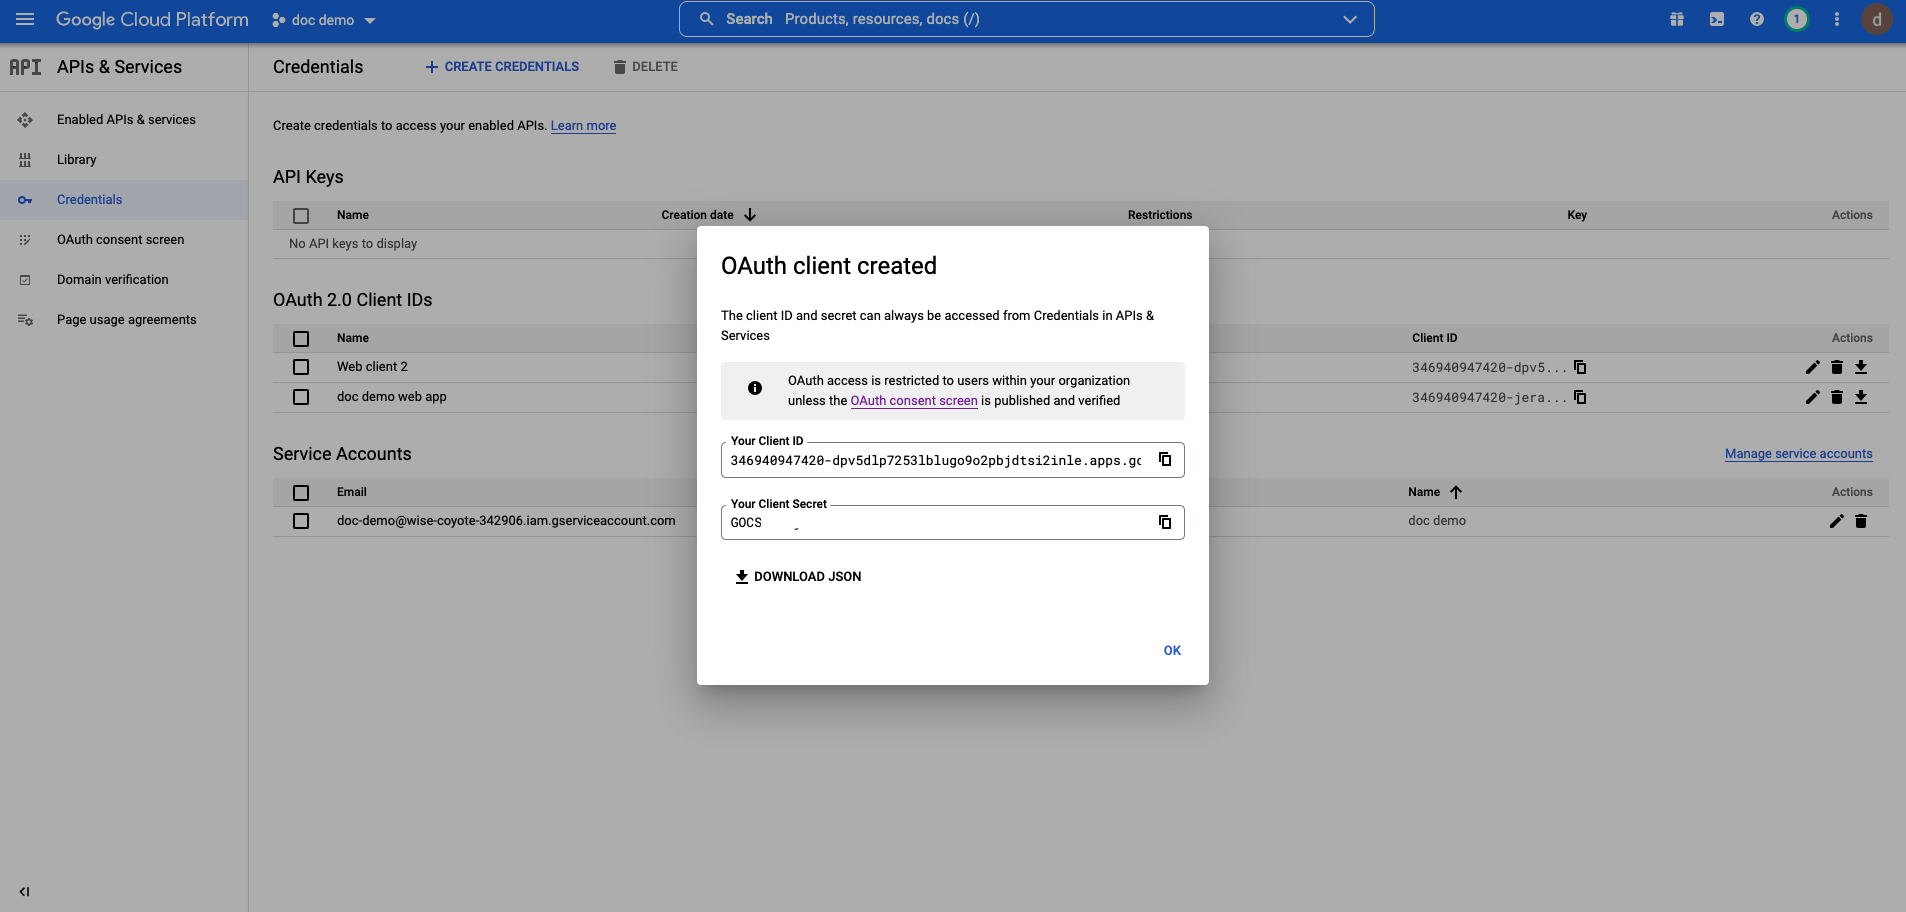
Create a Service Account
In order to have DAP validate group membership, we'll also need to configure a service account with Google Workspace domain-wide delegation enabled.
Go to Google Cloud Platform API & Services, select Credentials tab. Then click CREATE CREDENTIALS, select Service account: 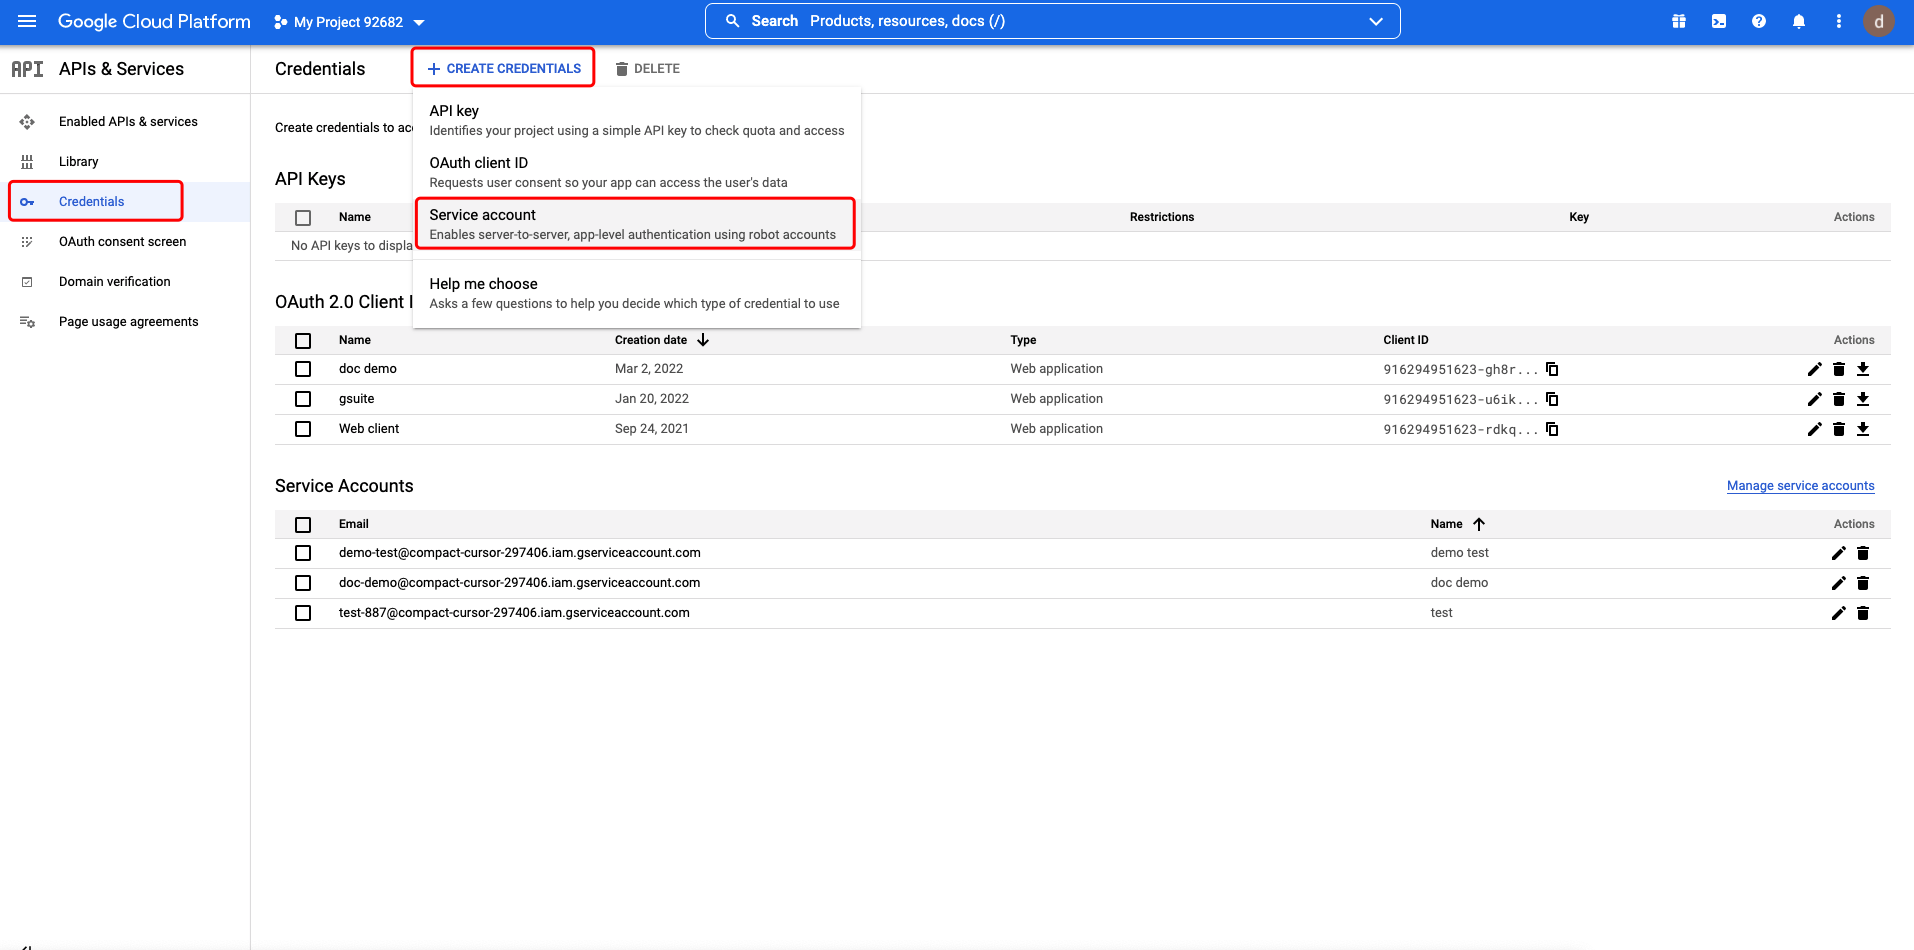 Input the service account name then click
 DONE: 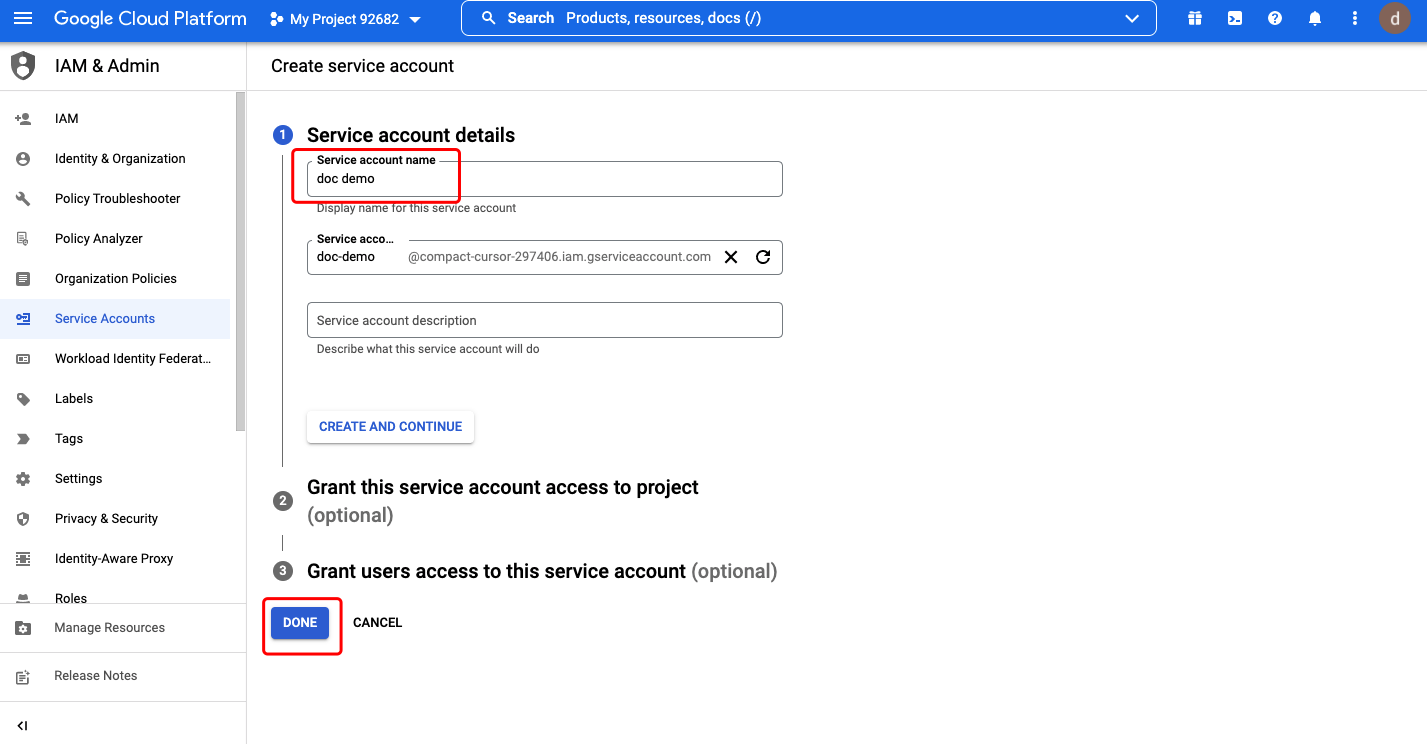 Click the service account we created, select
 KEYS tab. Click ADD KEY->Create new key:  Select
 JSON as Key type, click CREATE: 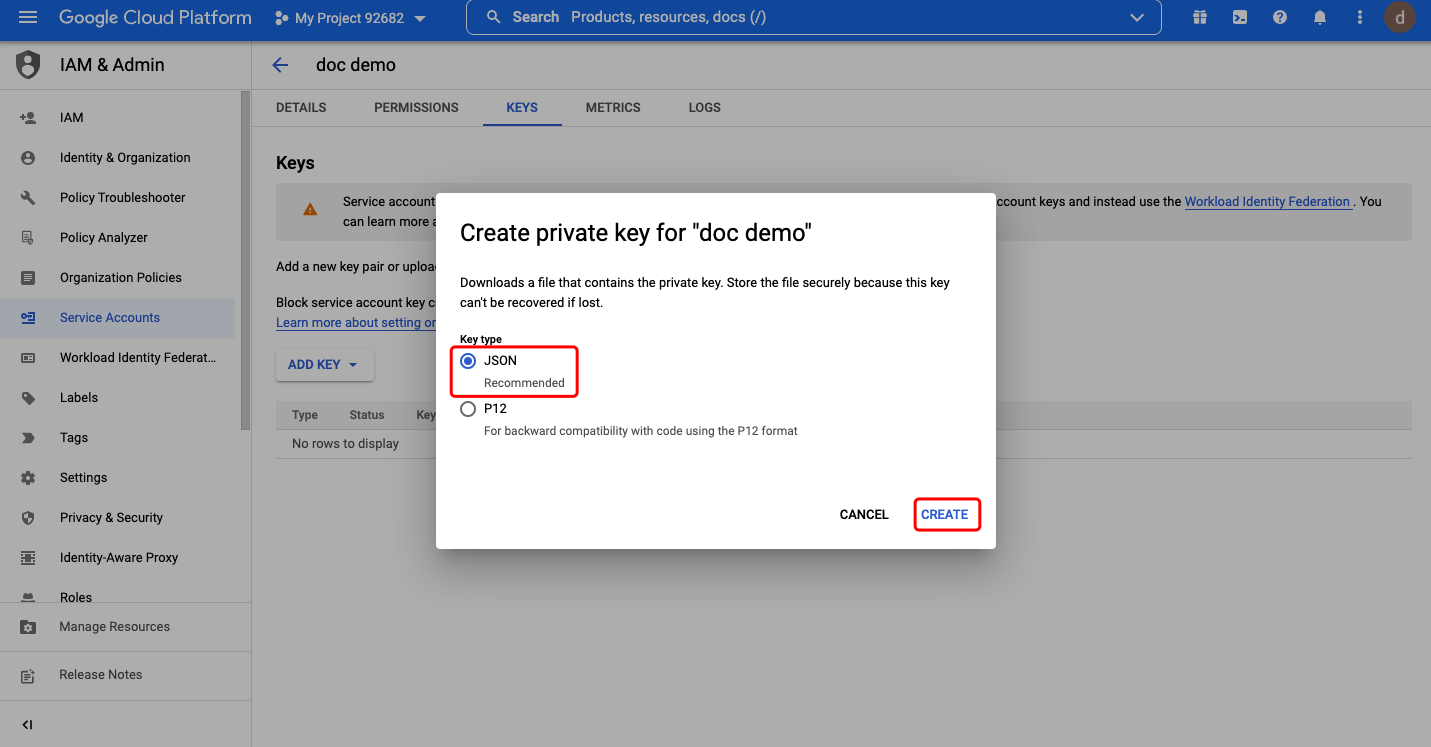 Then the private key will saved to your computer. Close the dialog and go back to the
 DETAILS tab. Click the Advanced settings, note down the Client ID, then click VIEW GOOGLE WORKSPACE ADMIN CONSOLE. 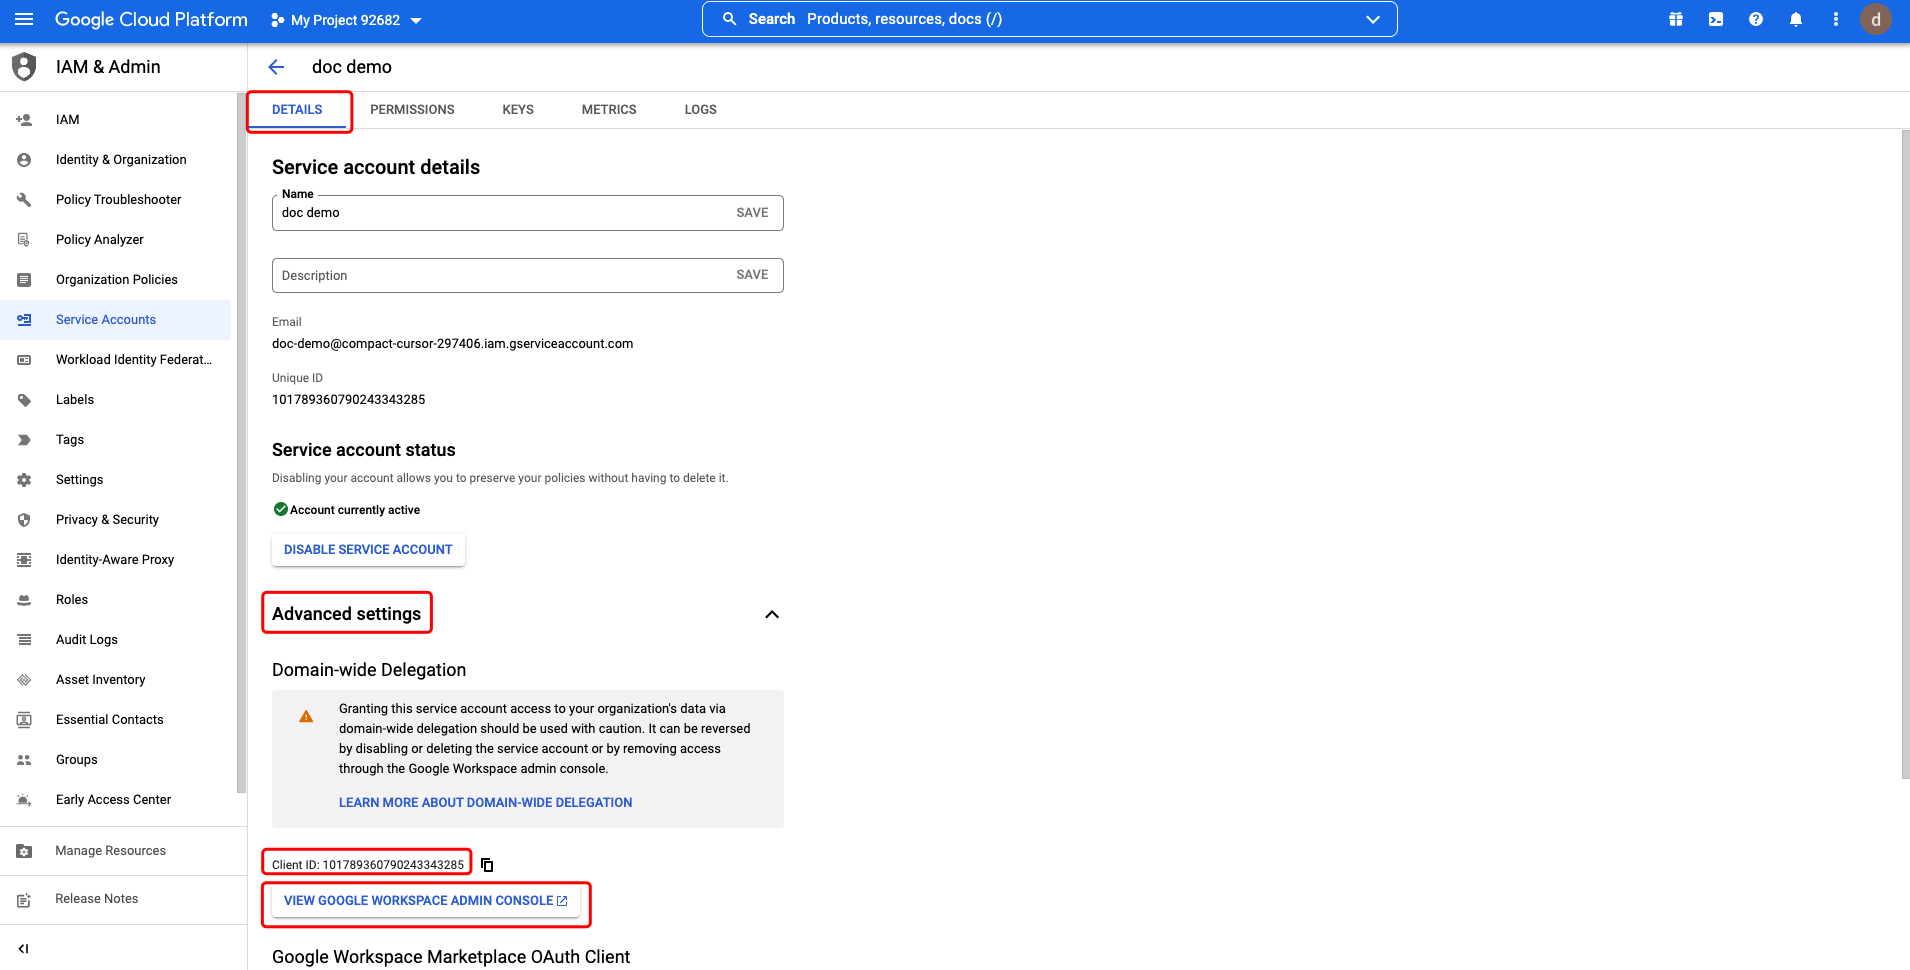
Set Directory Permissions
In the Google Workspace admin console, select Security->Access and data control->API controls: 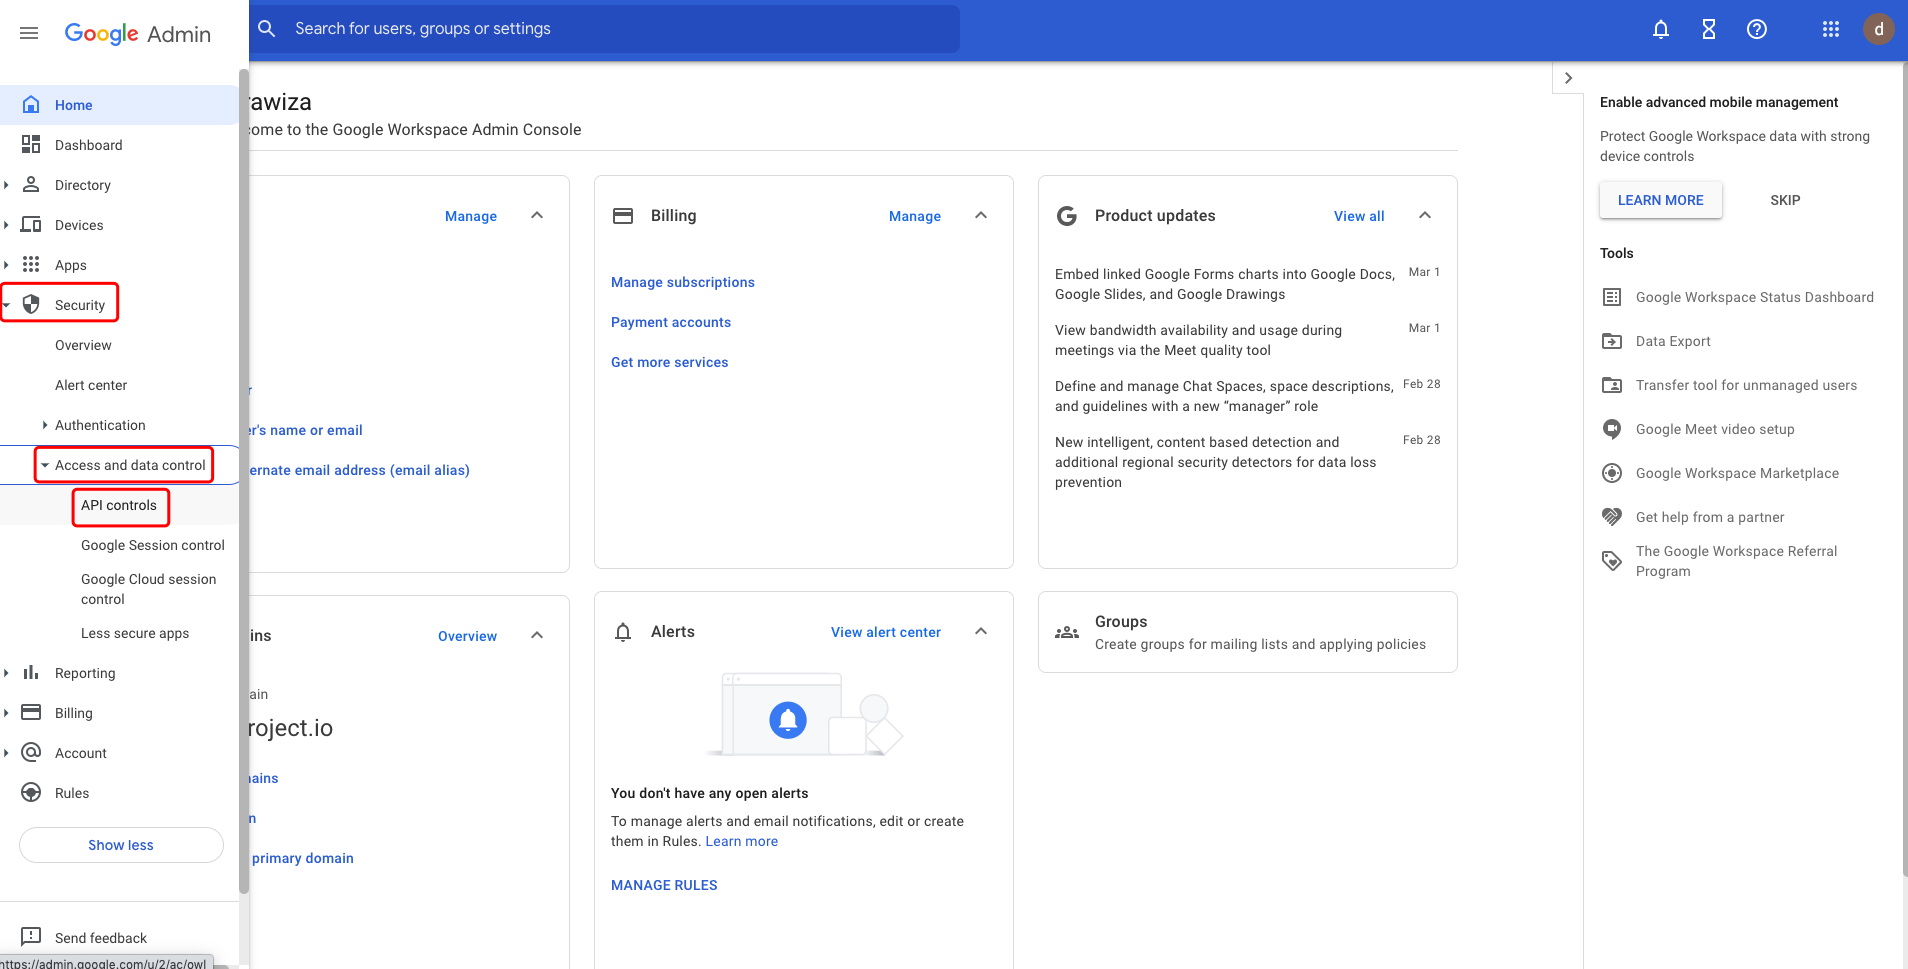
Click MANAGE DOMAIN WIDE DELEGATION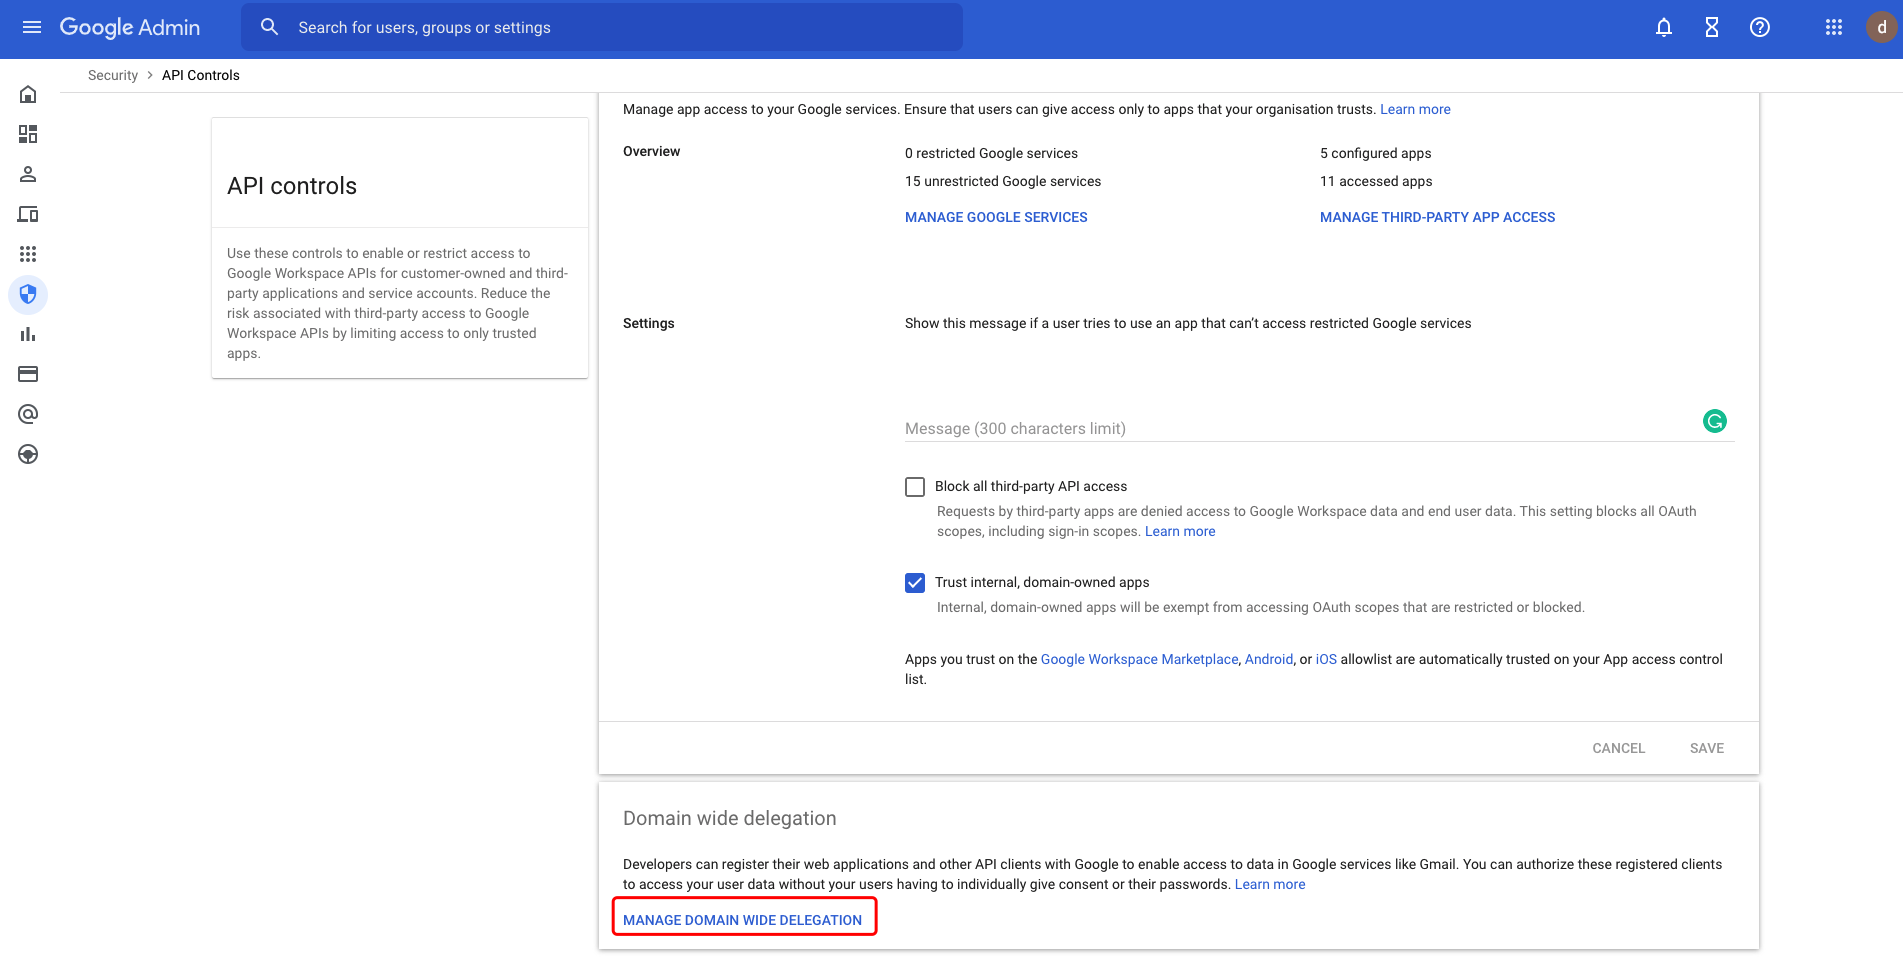
Click Add new.
For the Client ID field, input the Client ID we noted down from the service account creation step above. For the OAuth Scopes field, input the following scopes: https://www.googleapis.com/auth/admin.directory.group.readonlyhttps://www.googleapis.com/auth/admin.directory.user.readonly
Click AUTHORIZE: 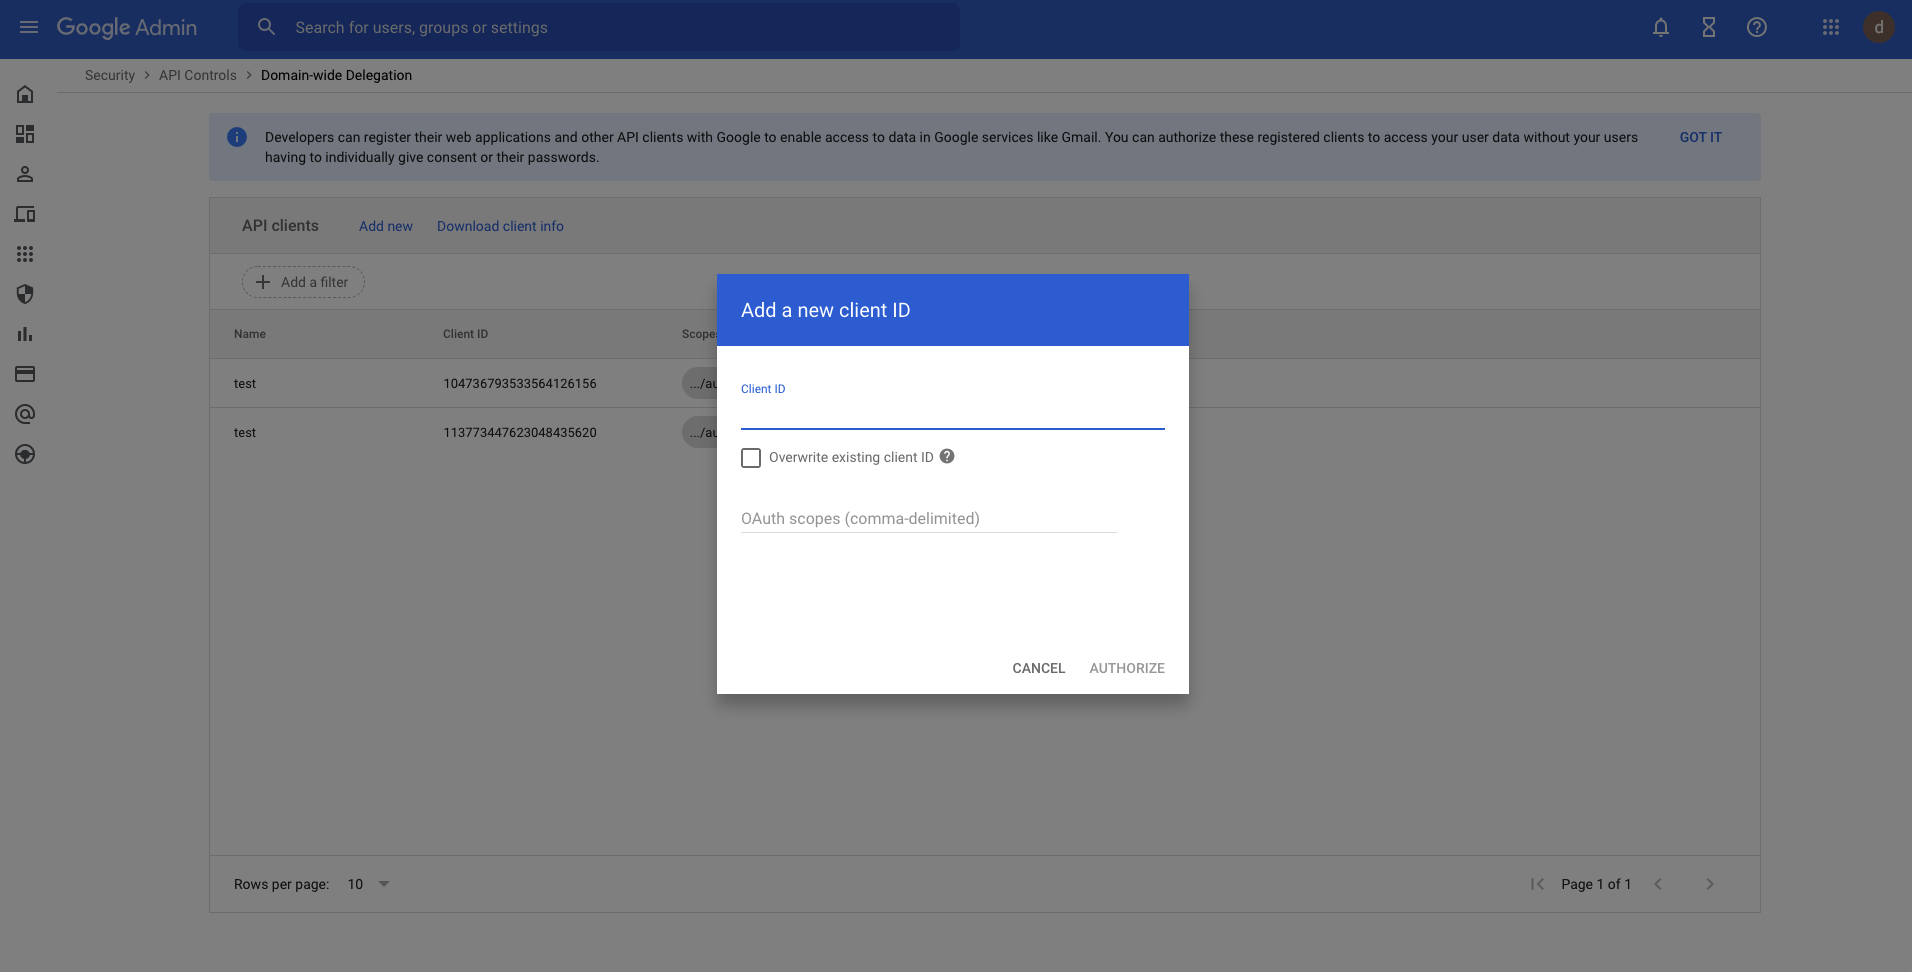
Set the Impersonate User
Create or choose an existing administrative email address as the impersonating user. This email will be impersonated by this client to make calls to the Admin SDK. You can see here for more information.
Or basically, create a specific user with user and group read privileges: Go to Directory -> Users, click Add new user: 
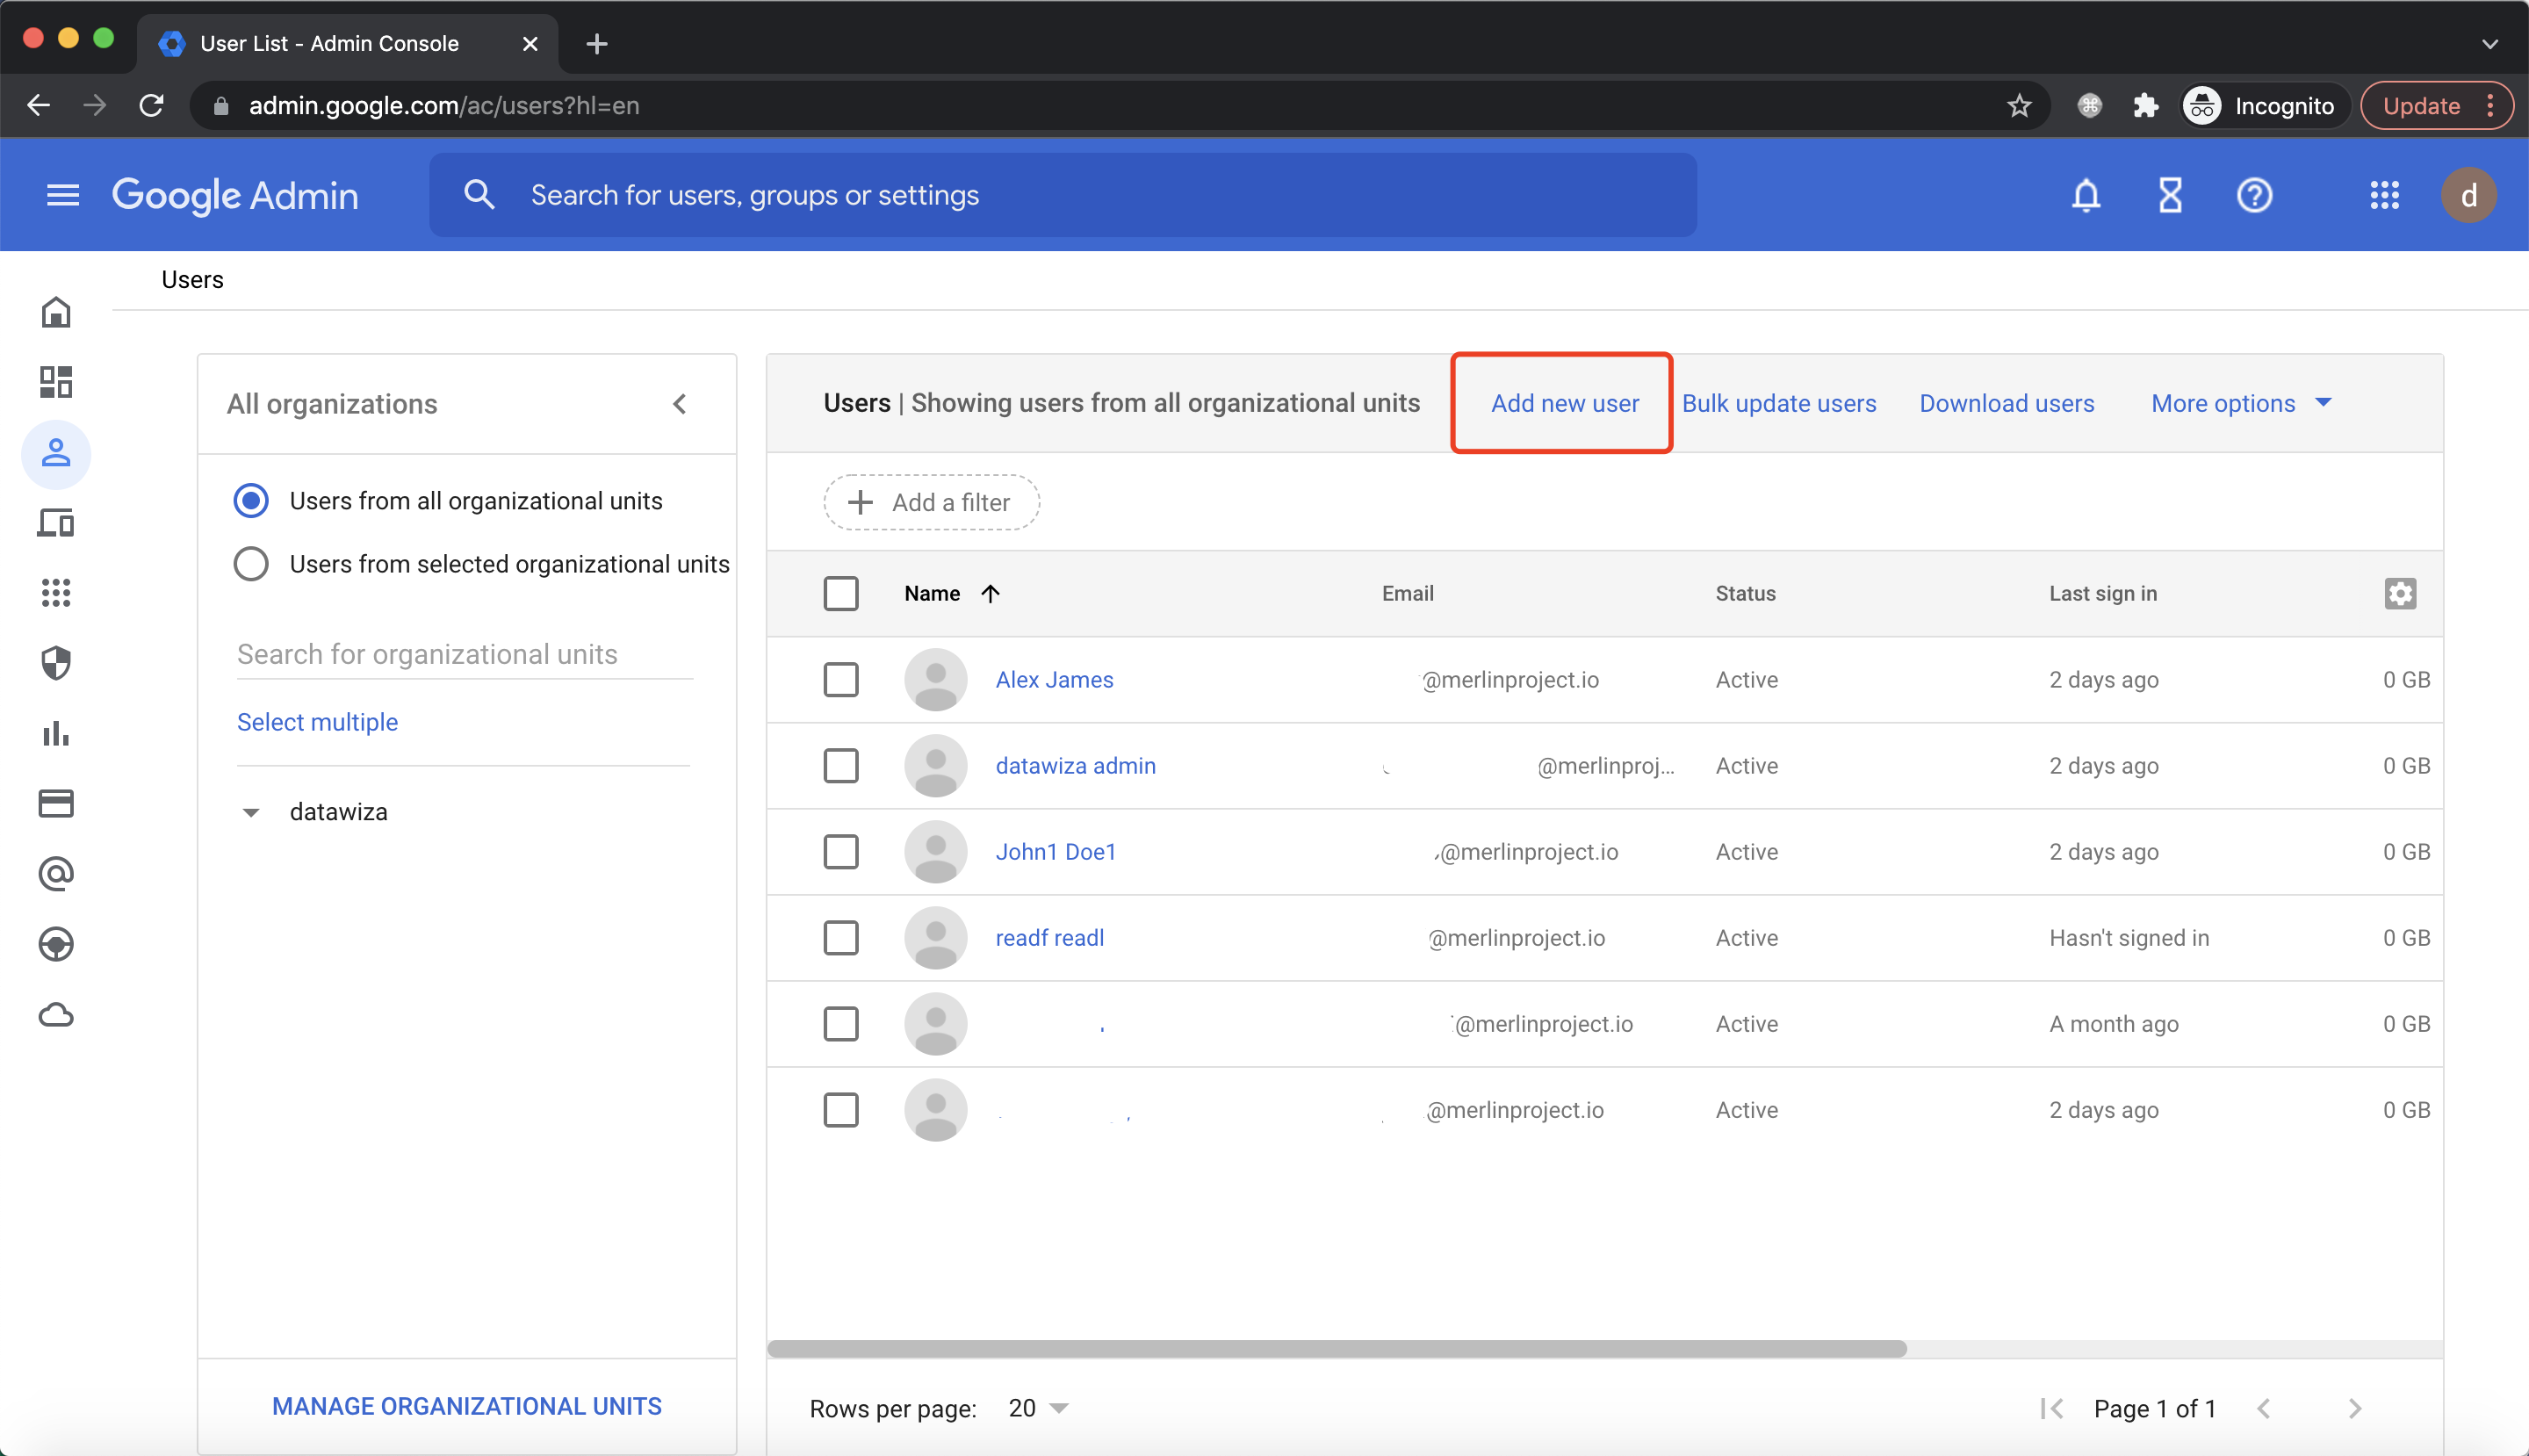 Input basic info and click
 ADD NEW USER: 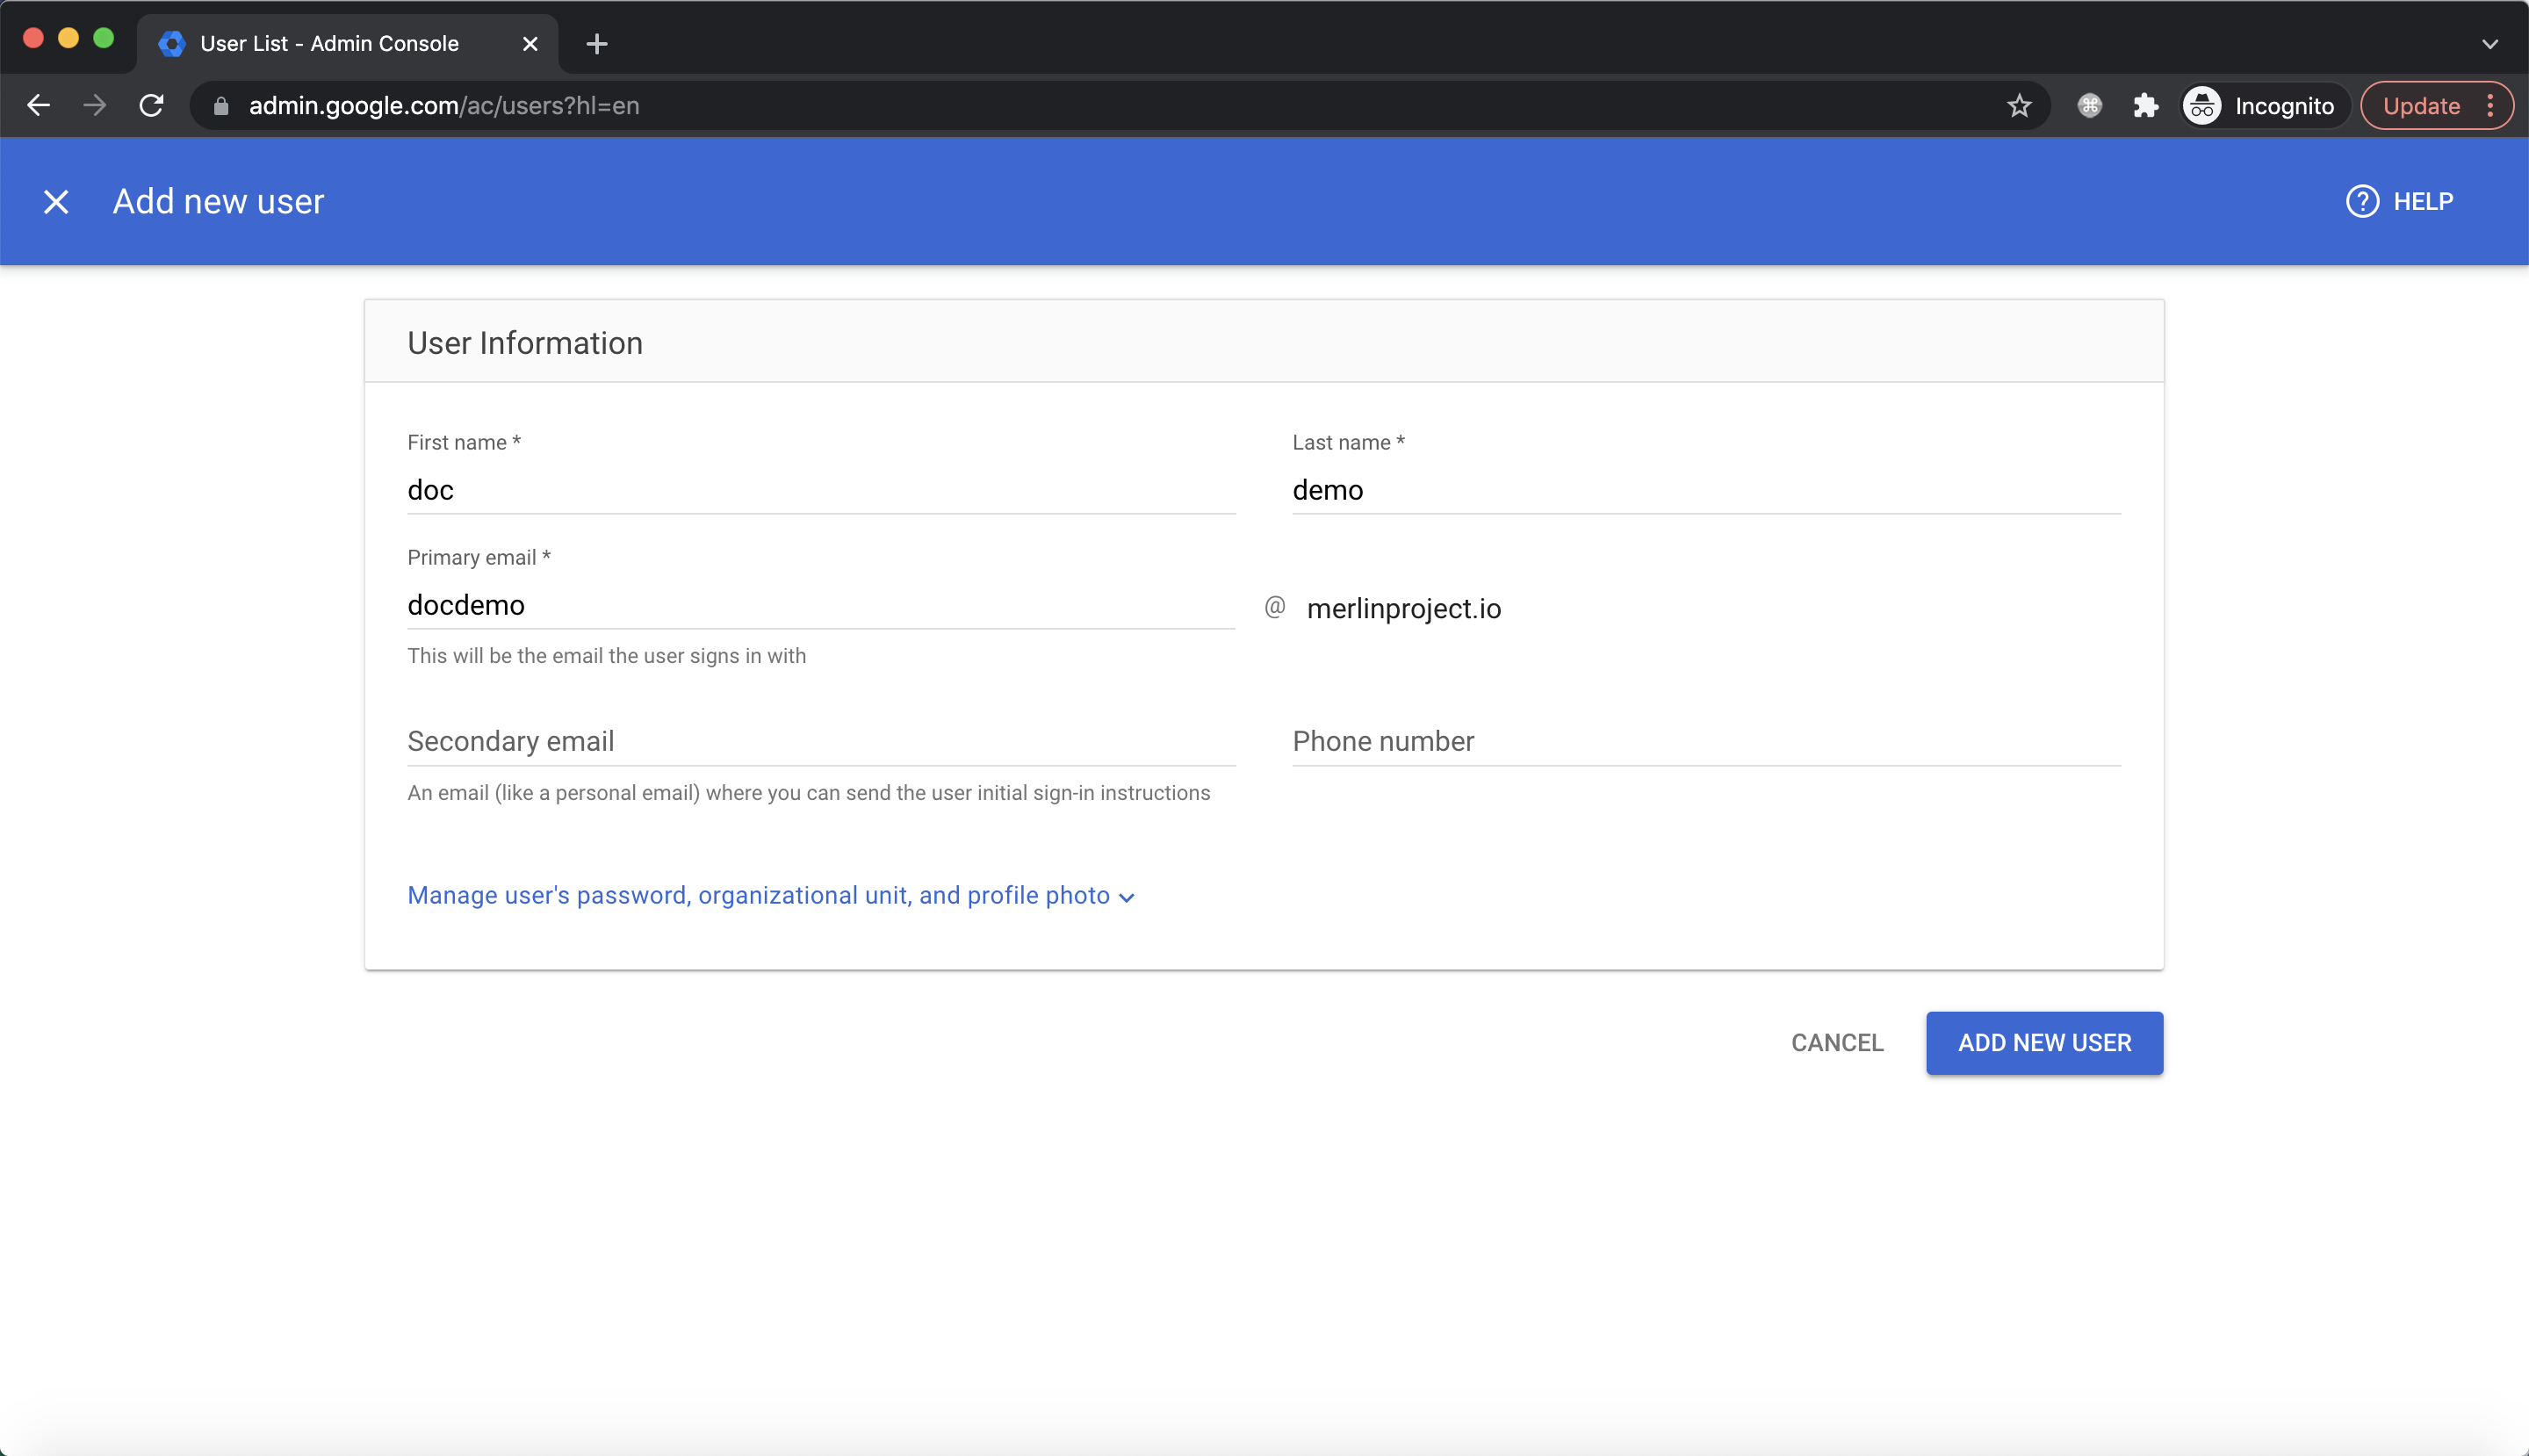
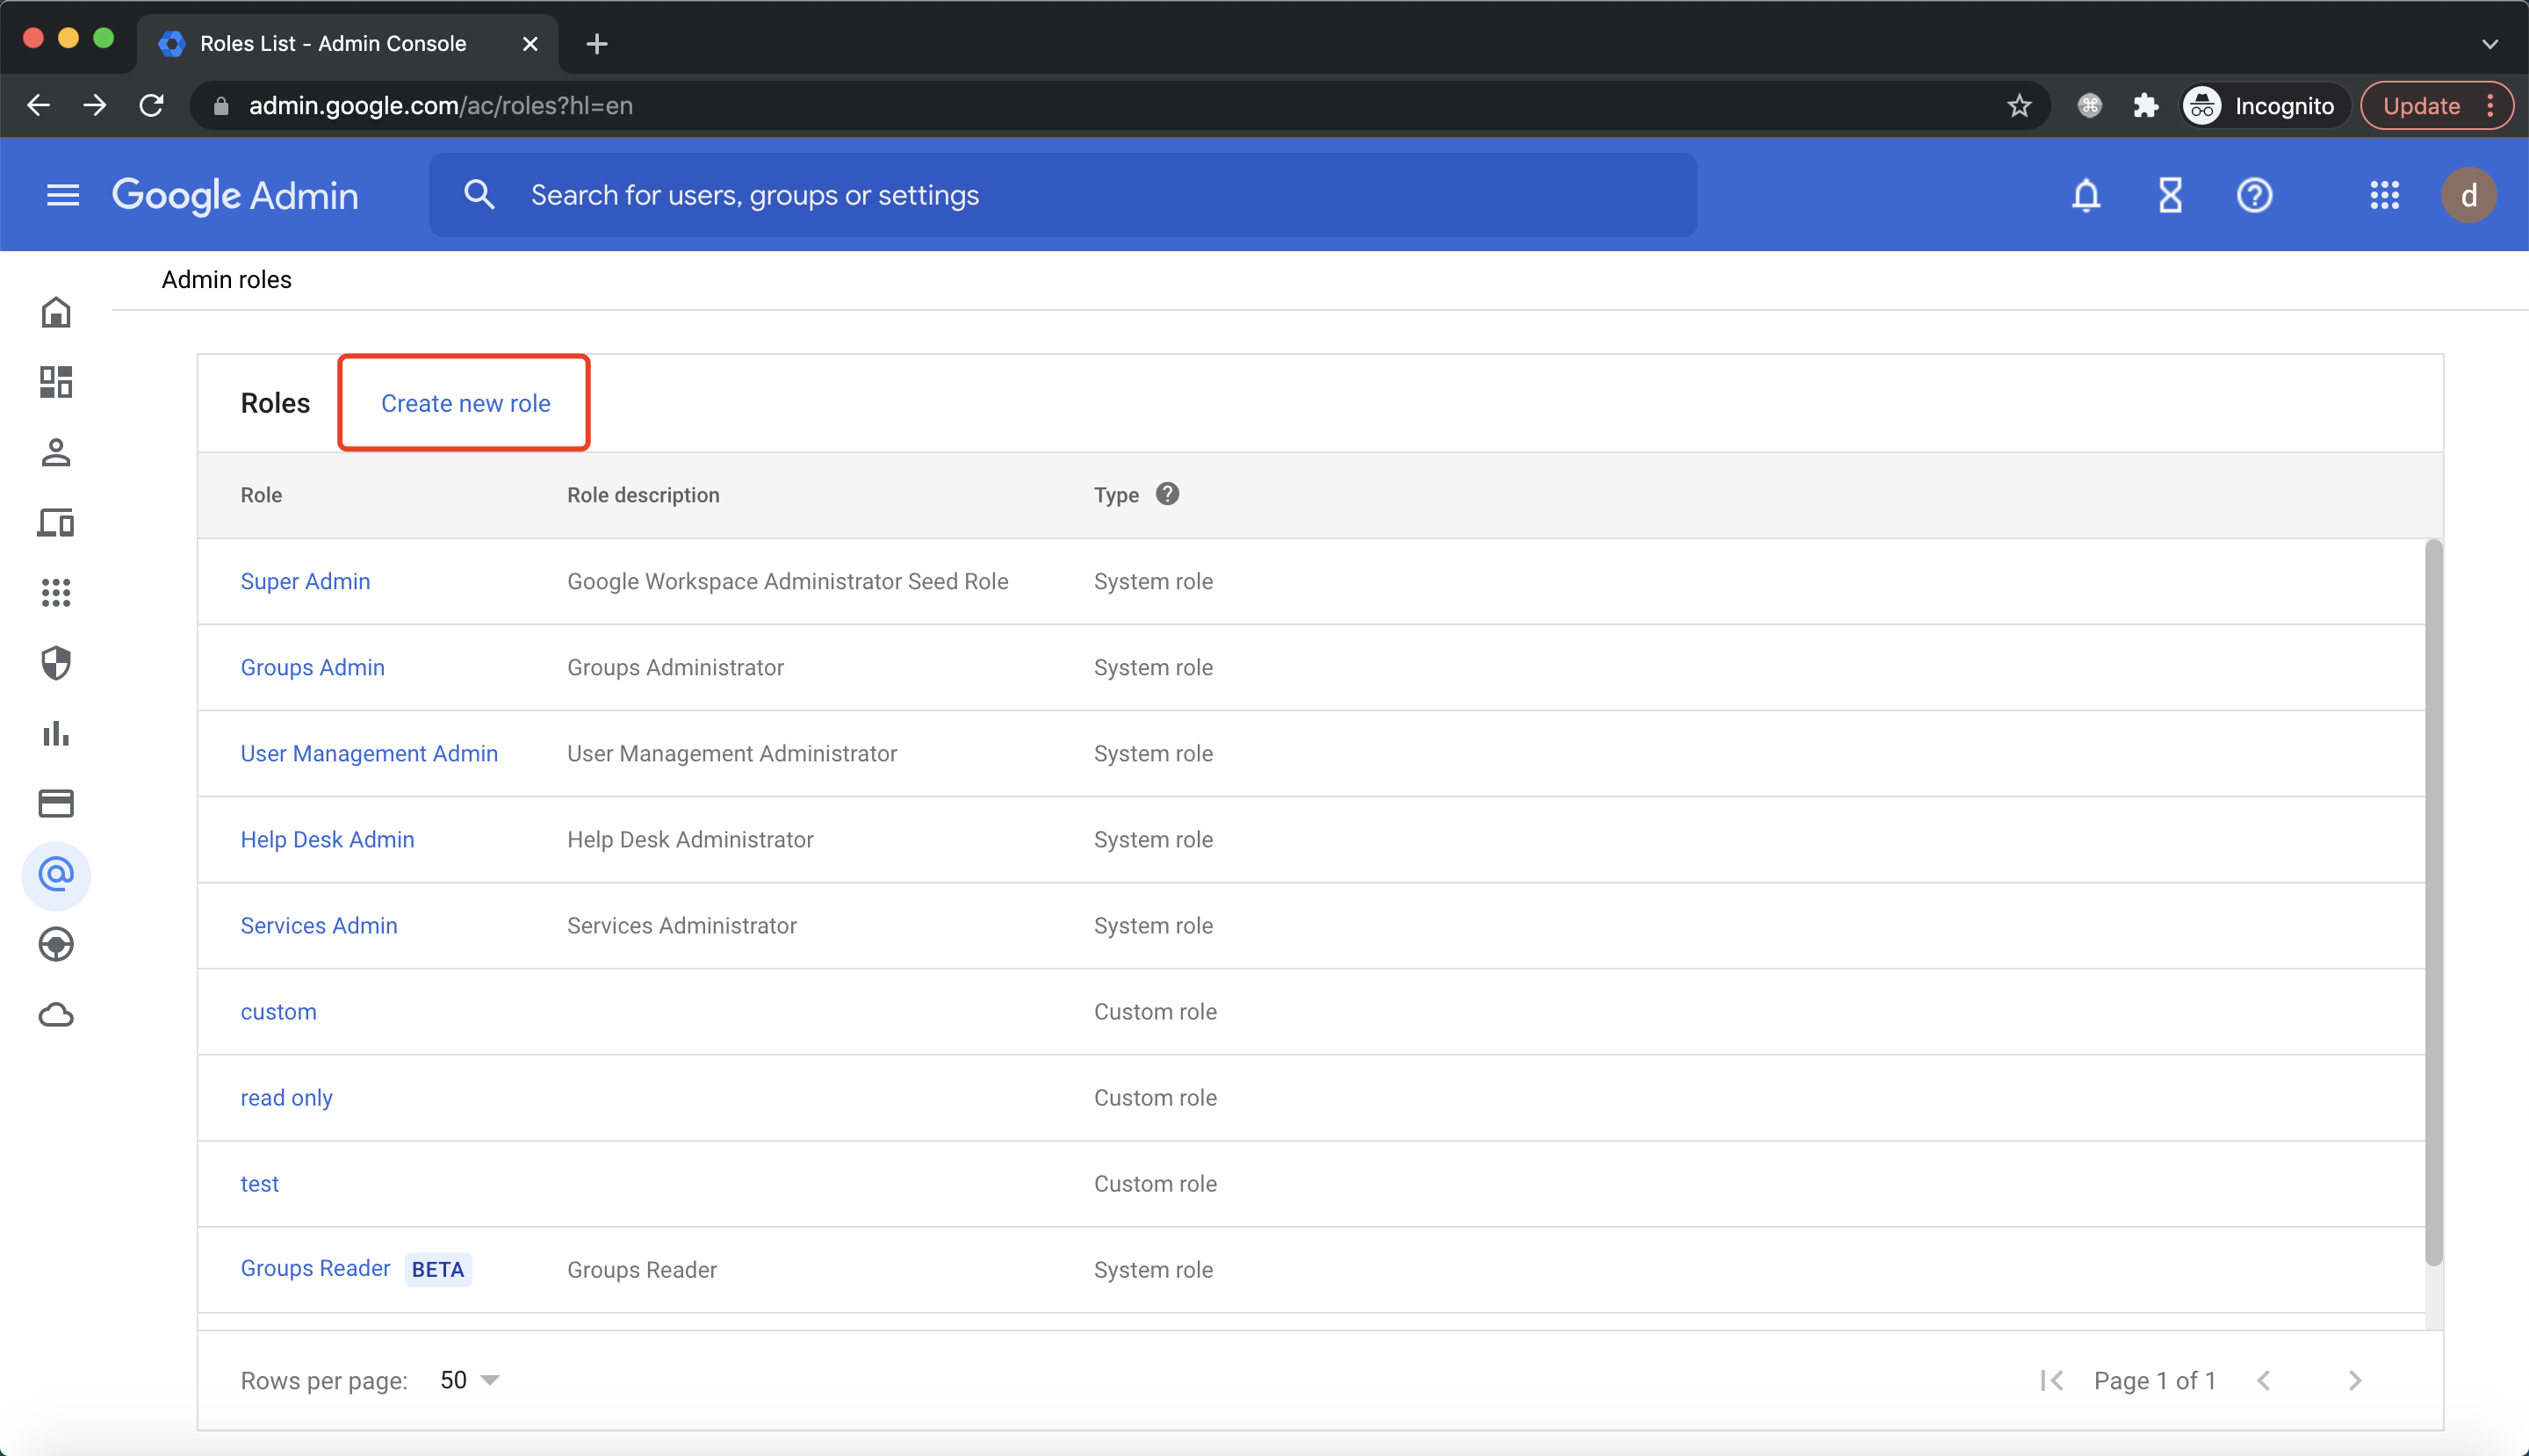
Go To Account -> Admin roles, click Create new role: 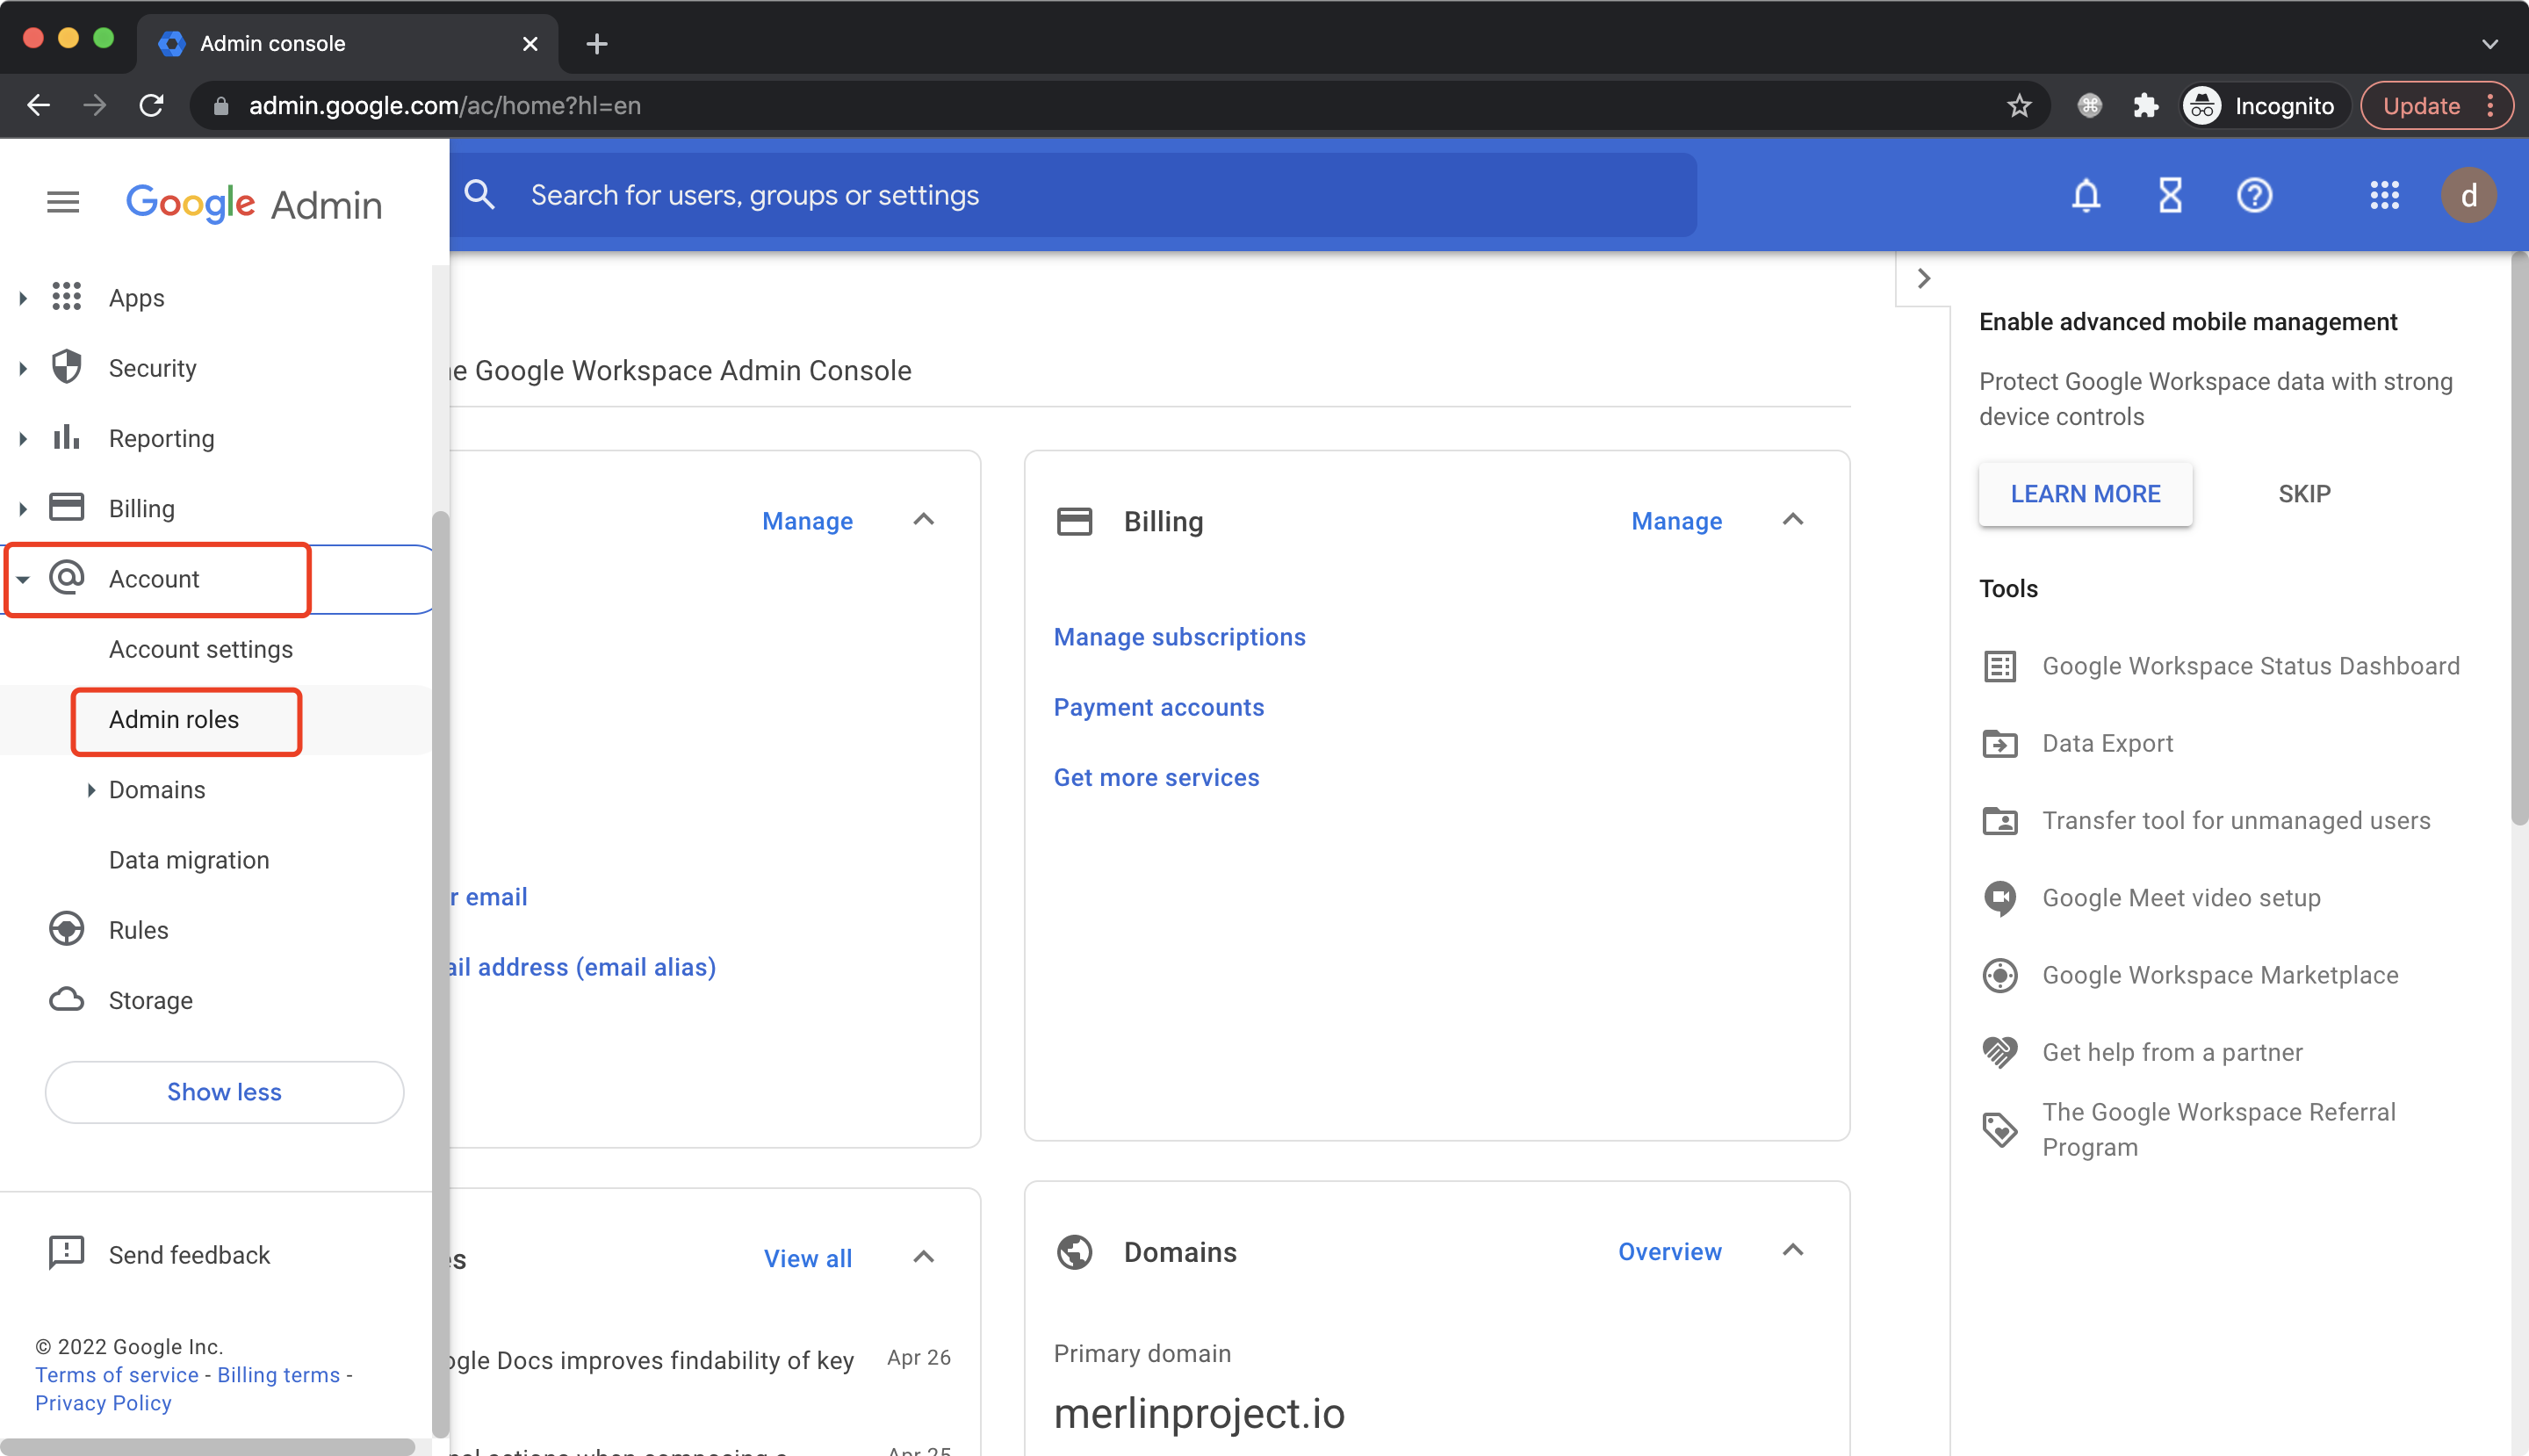
 Input name and click
 CONTINUE: 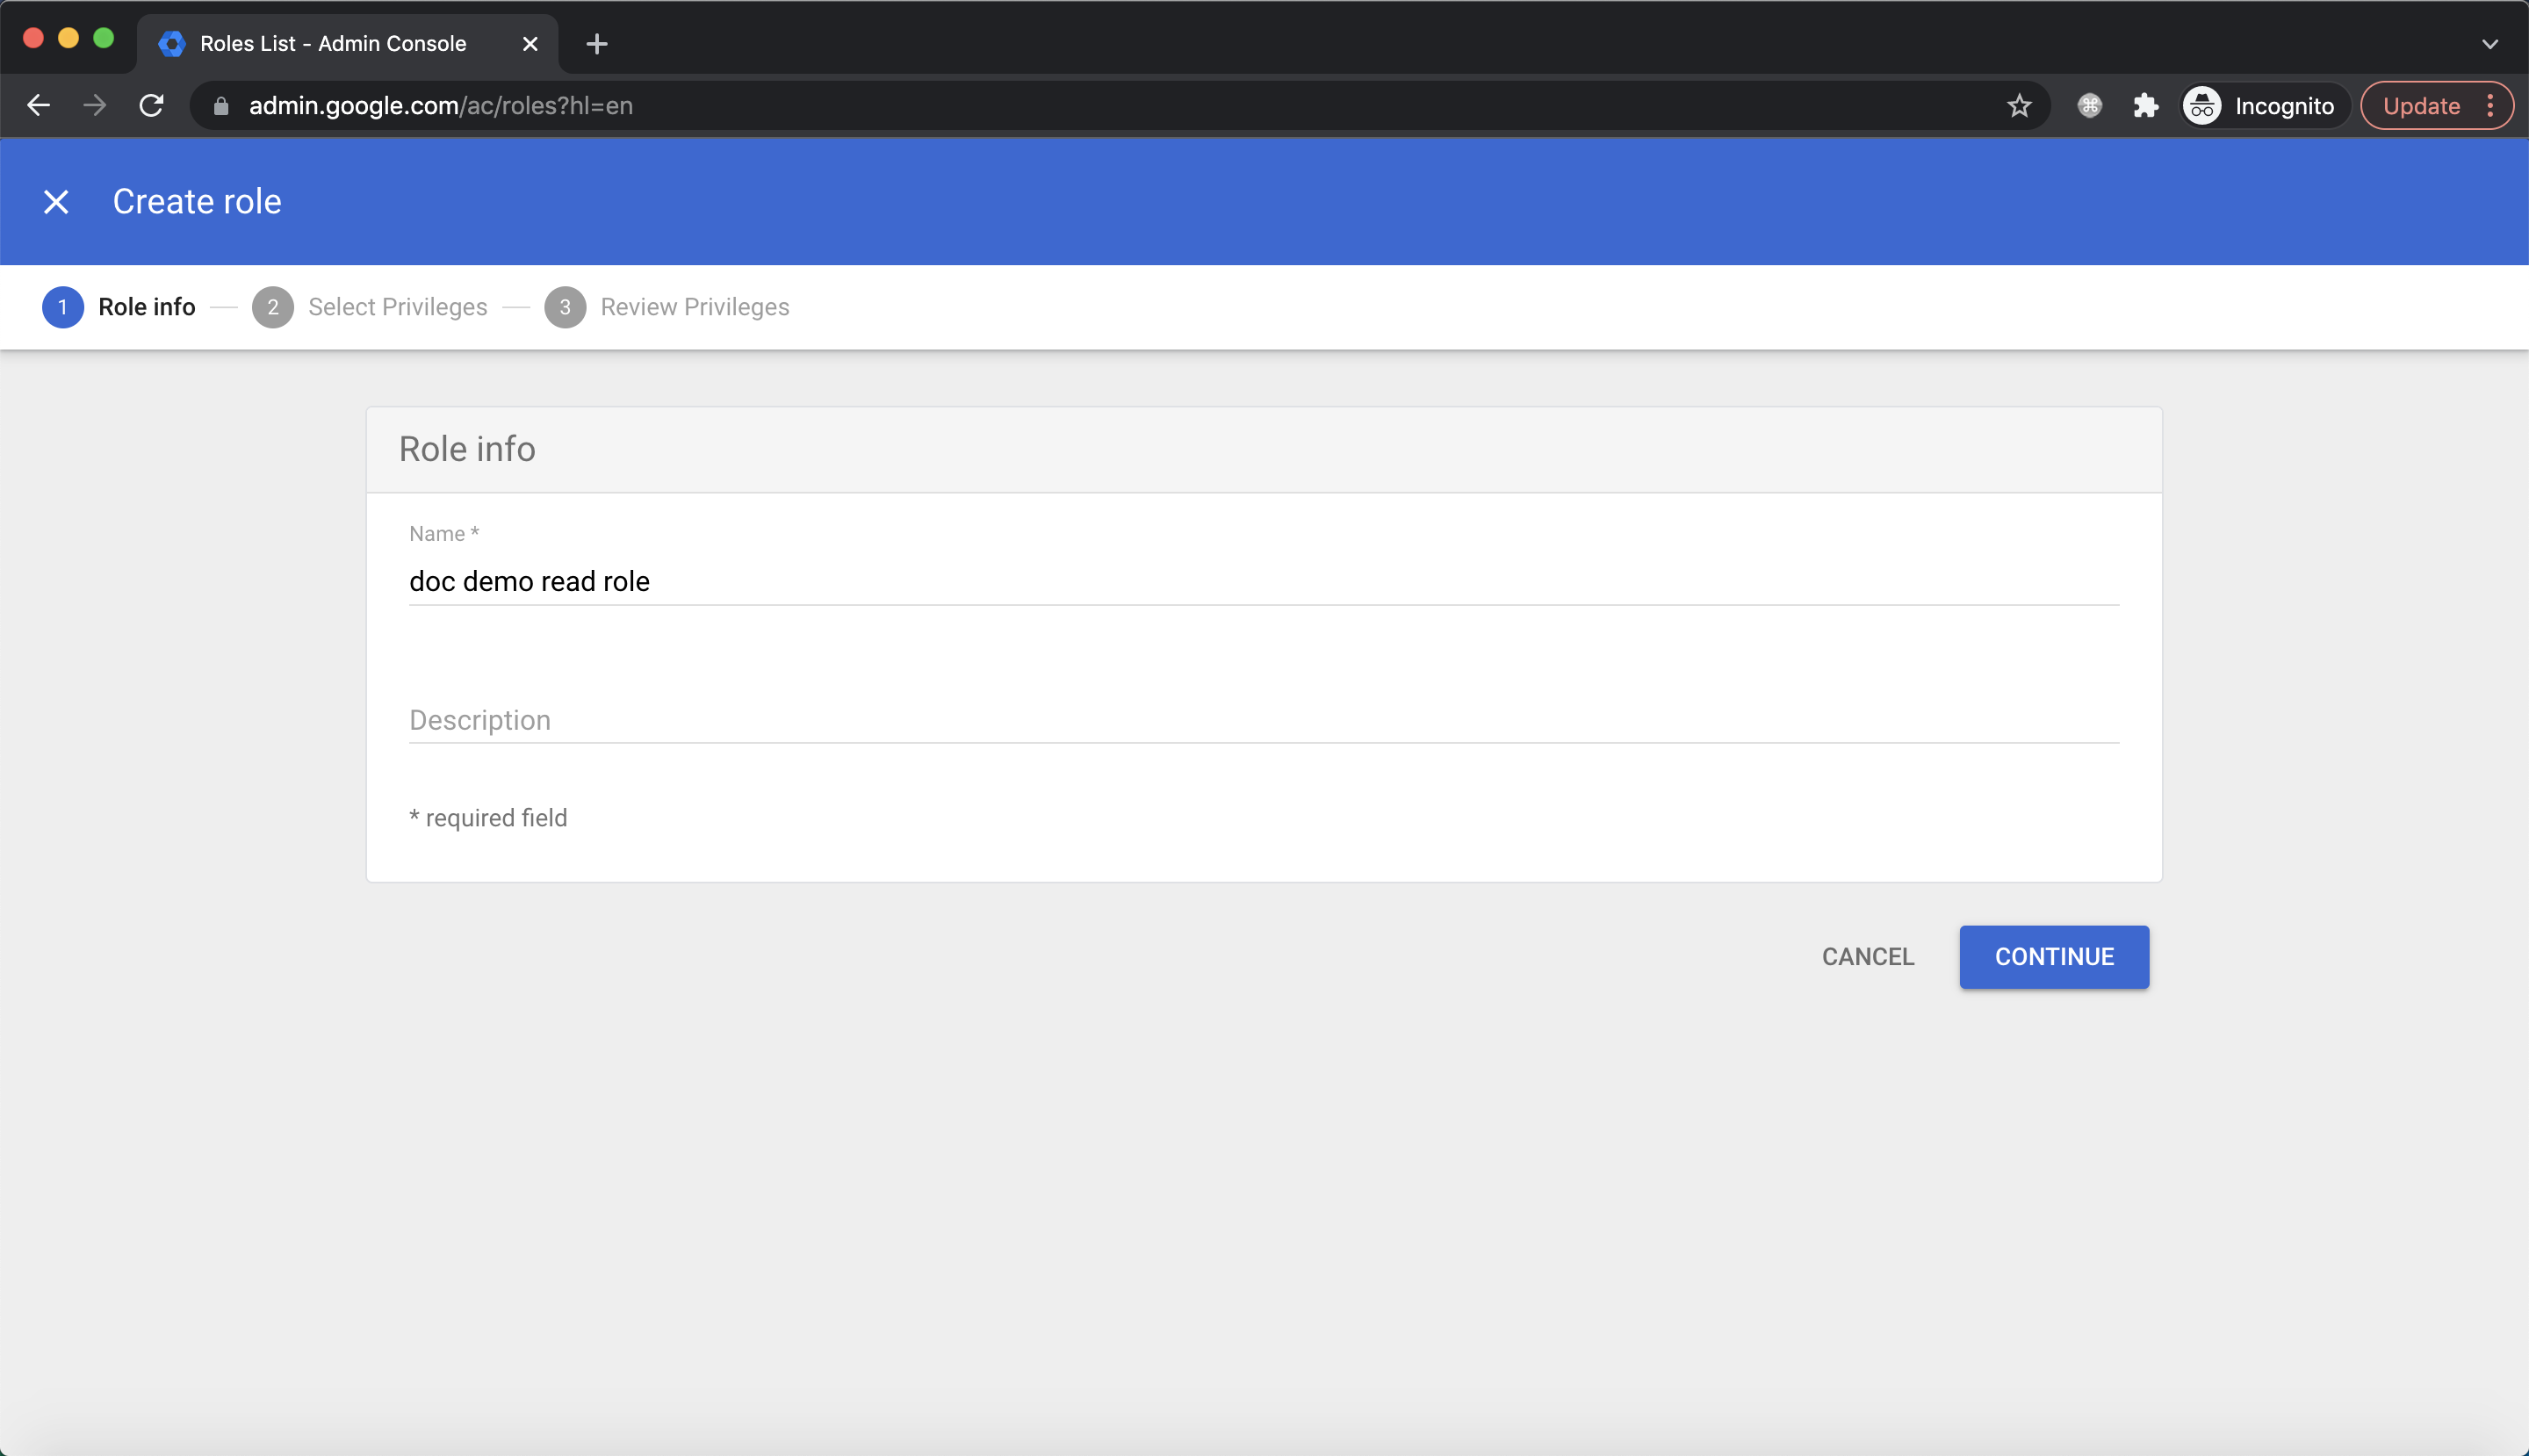 For
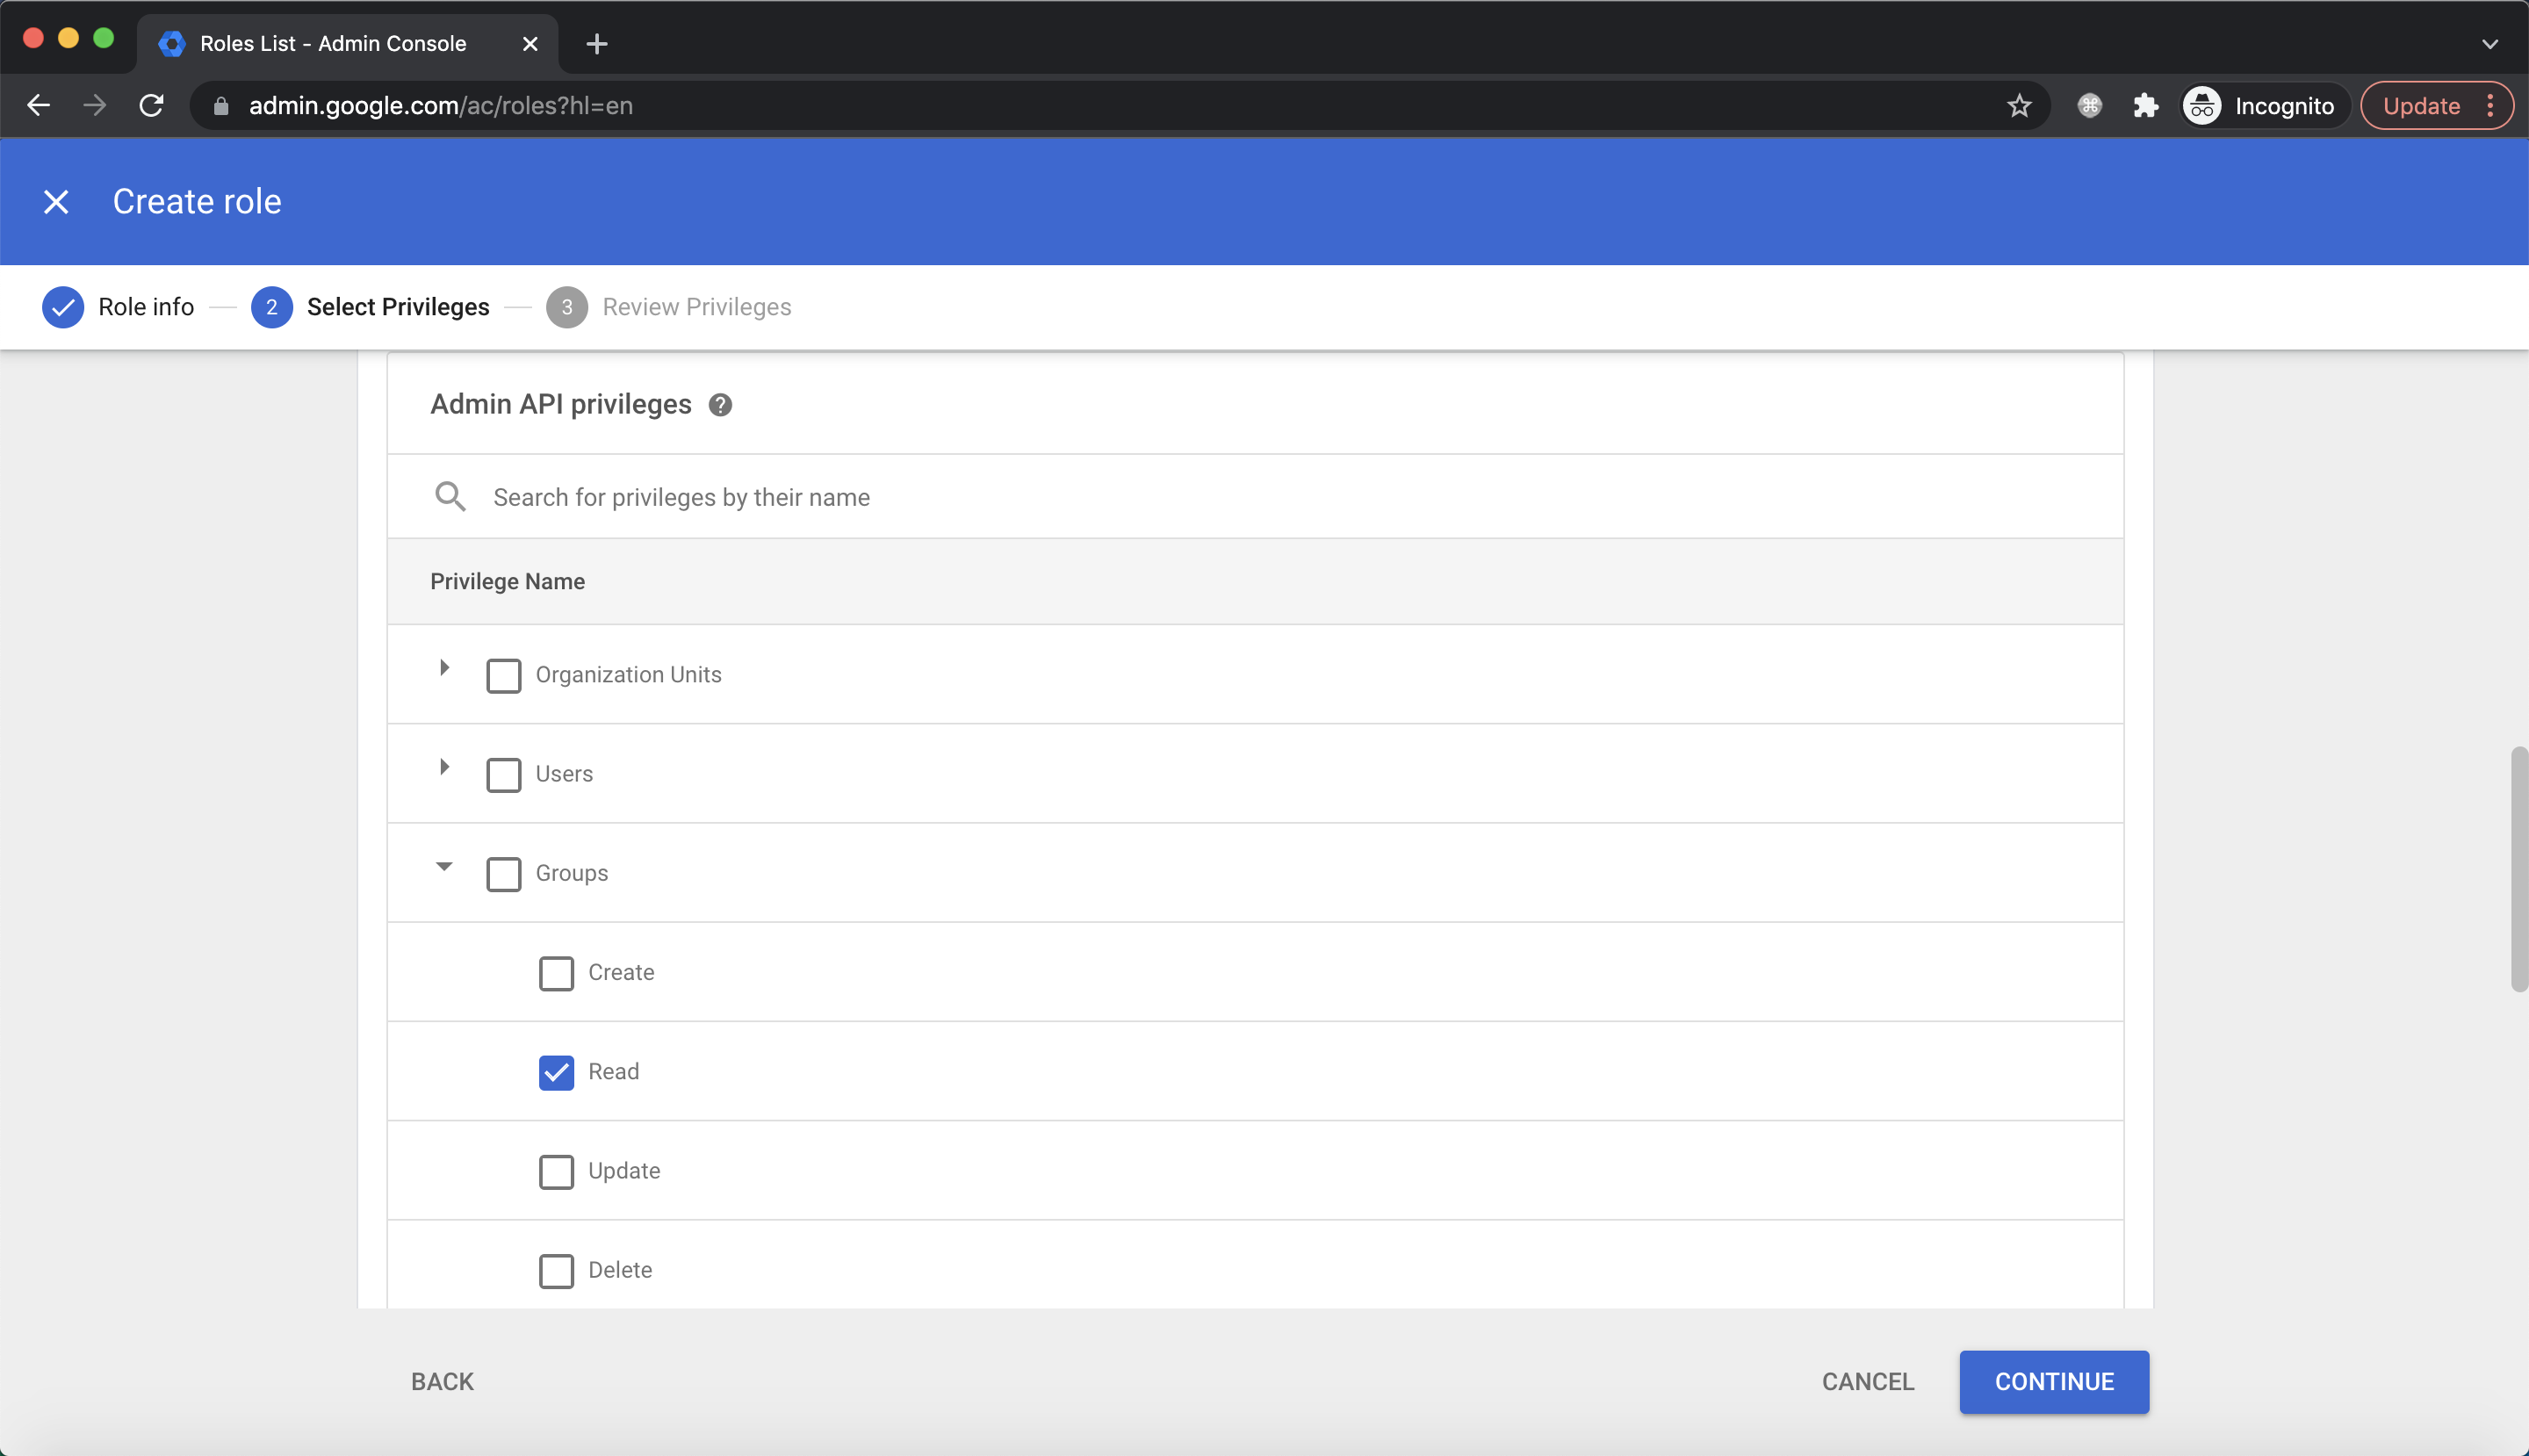
For Admin API Privileges, select Read under Users and Groups, click CONTINUE: 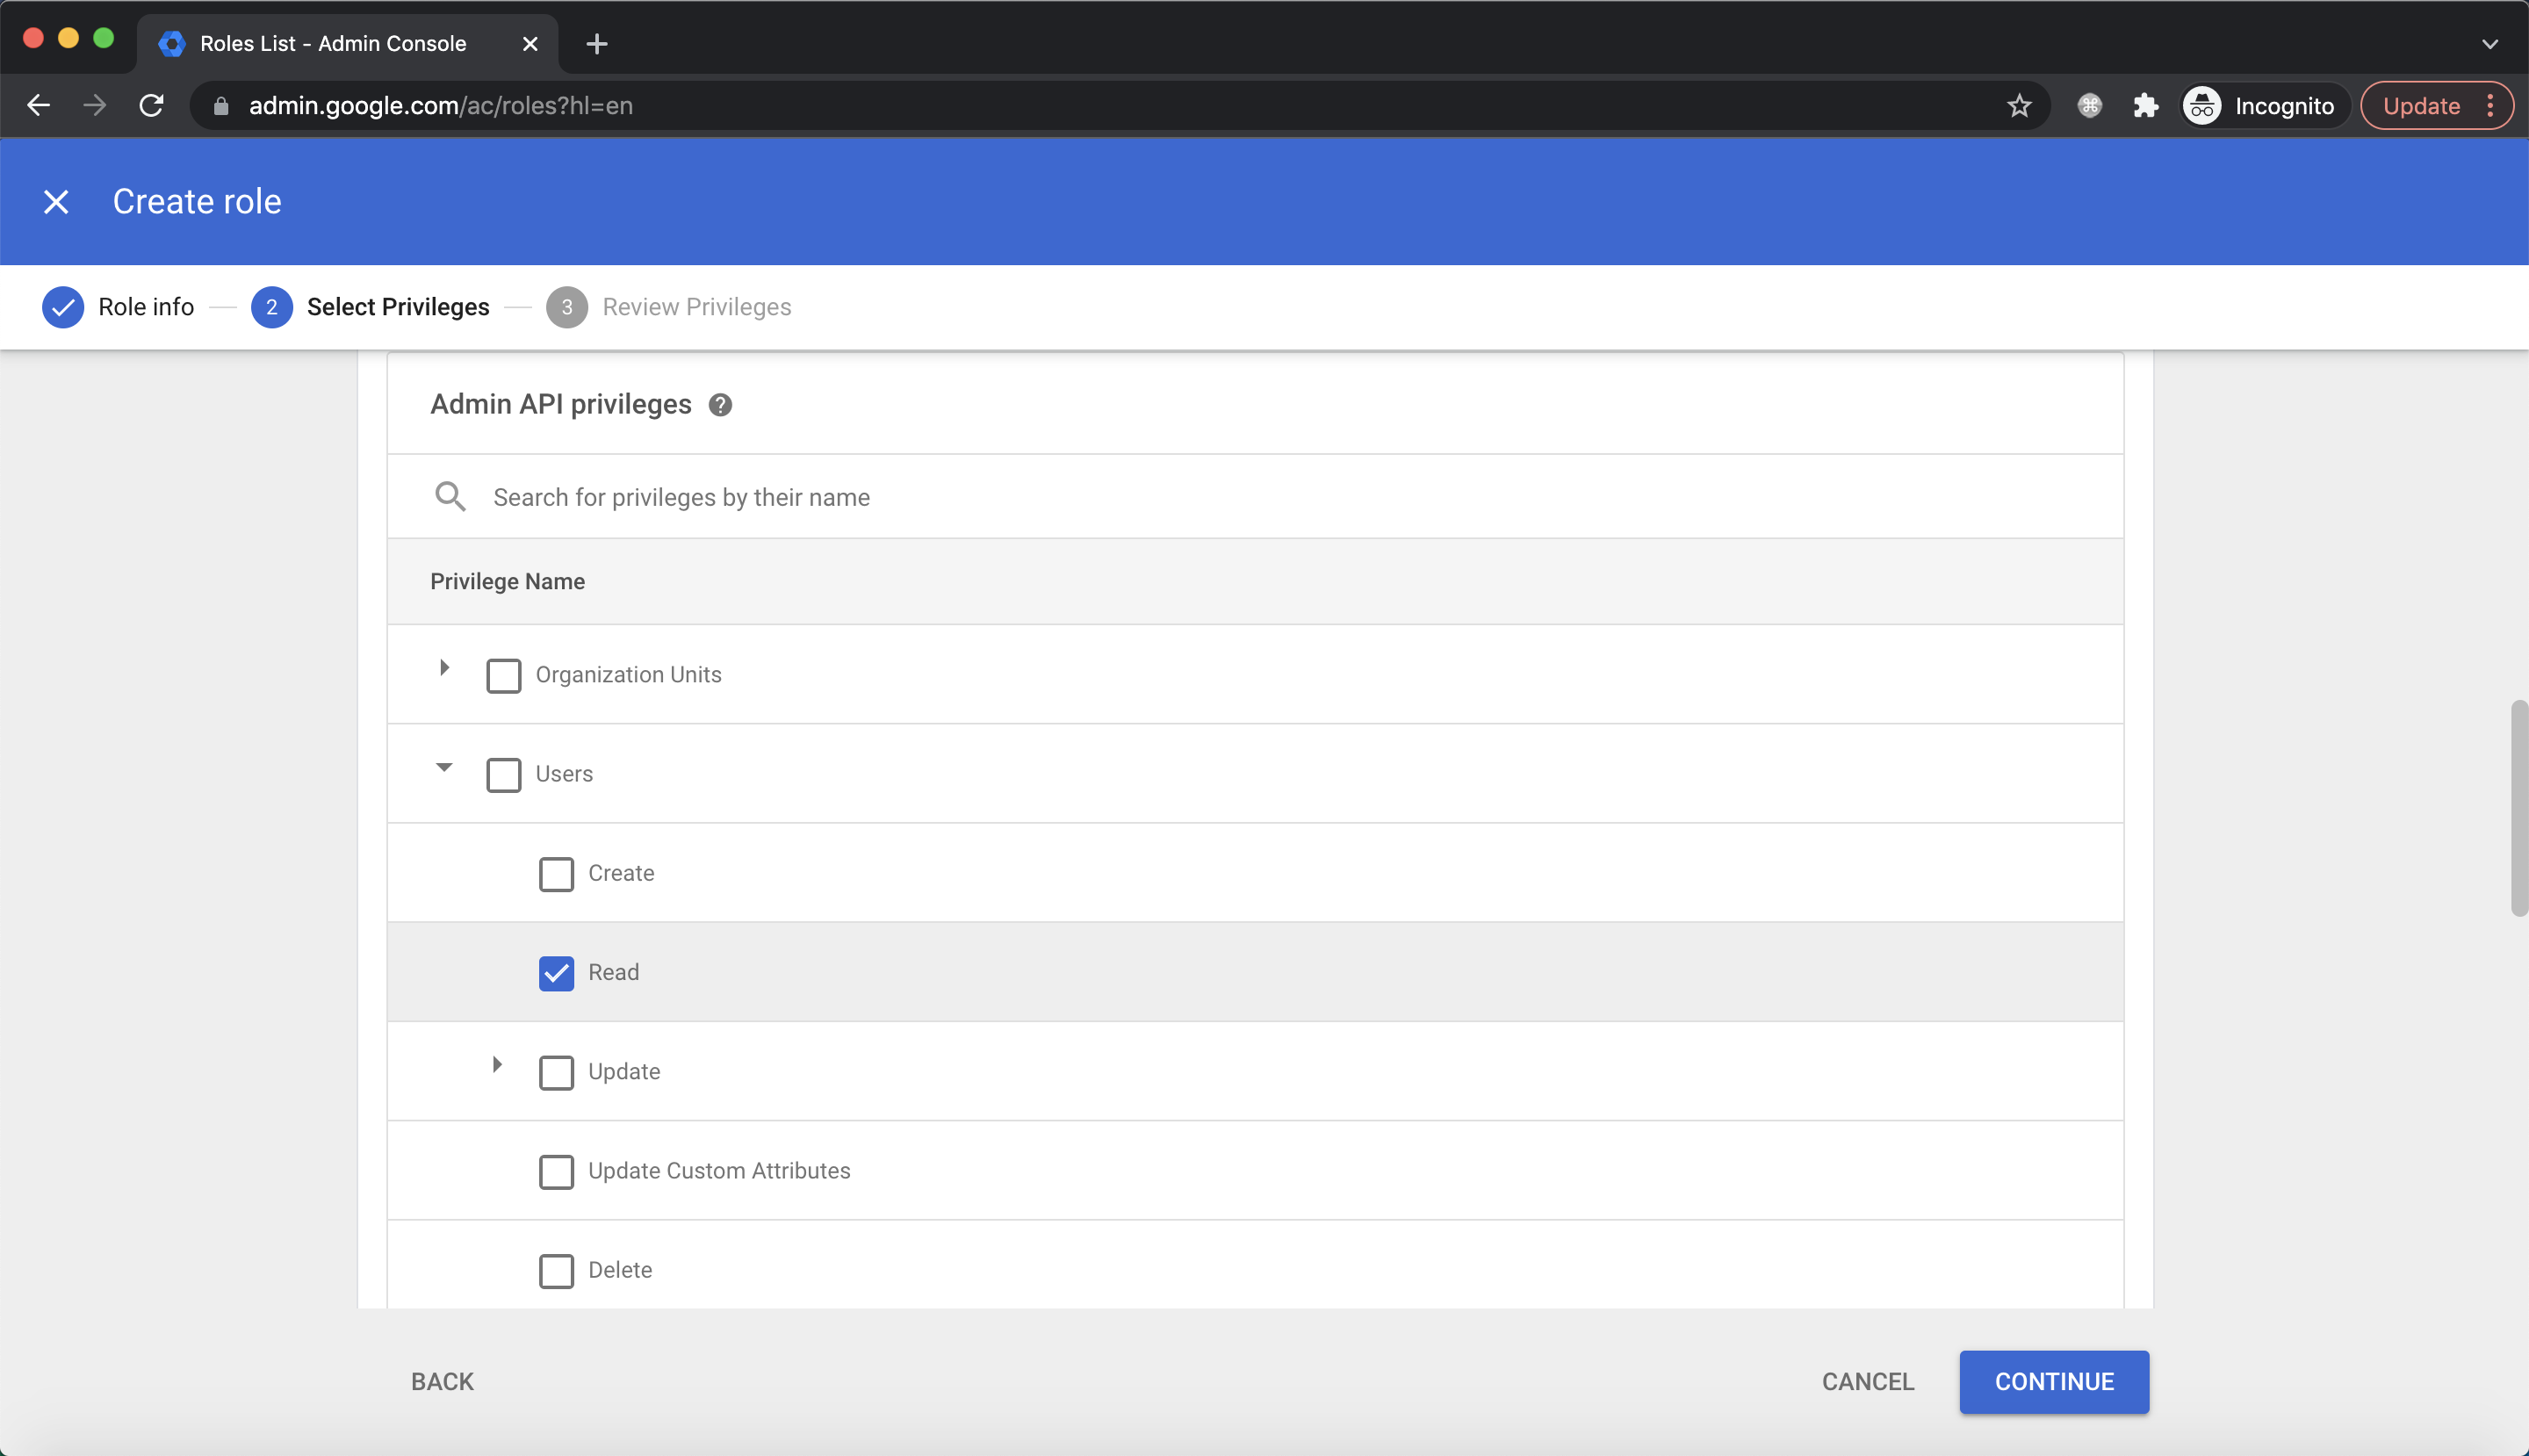
 Review privileges and click
 CREATE ROLE: 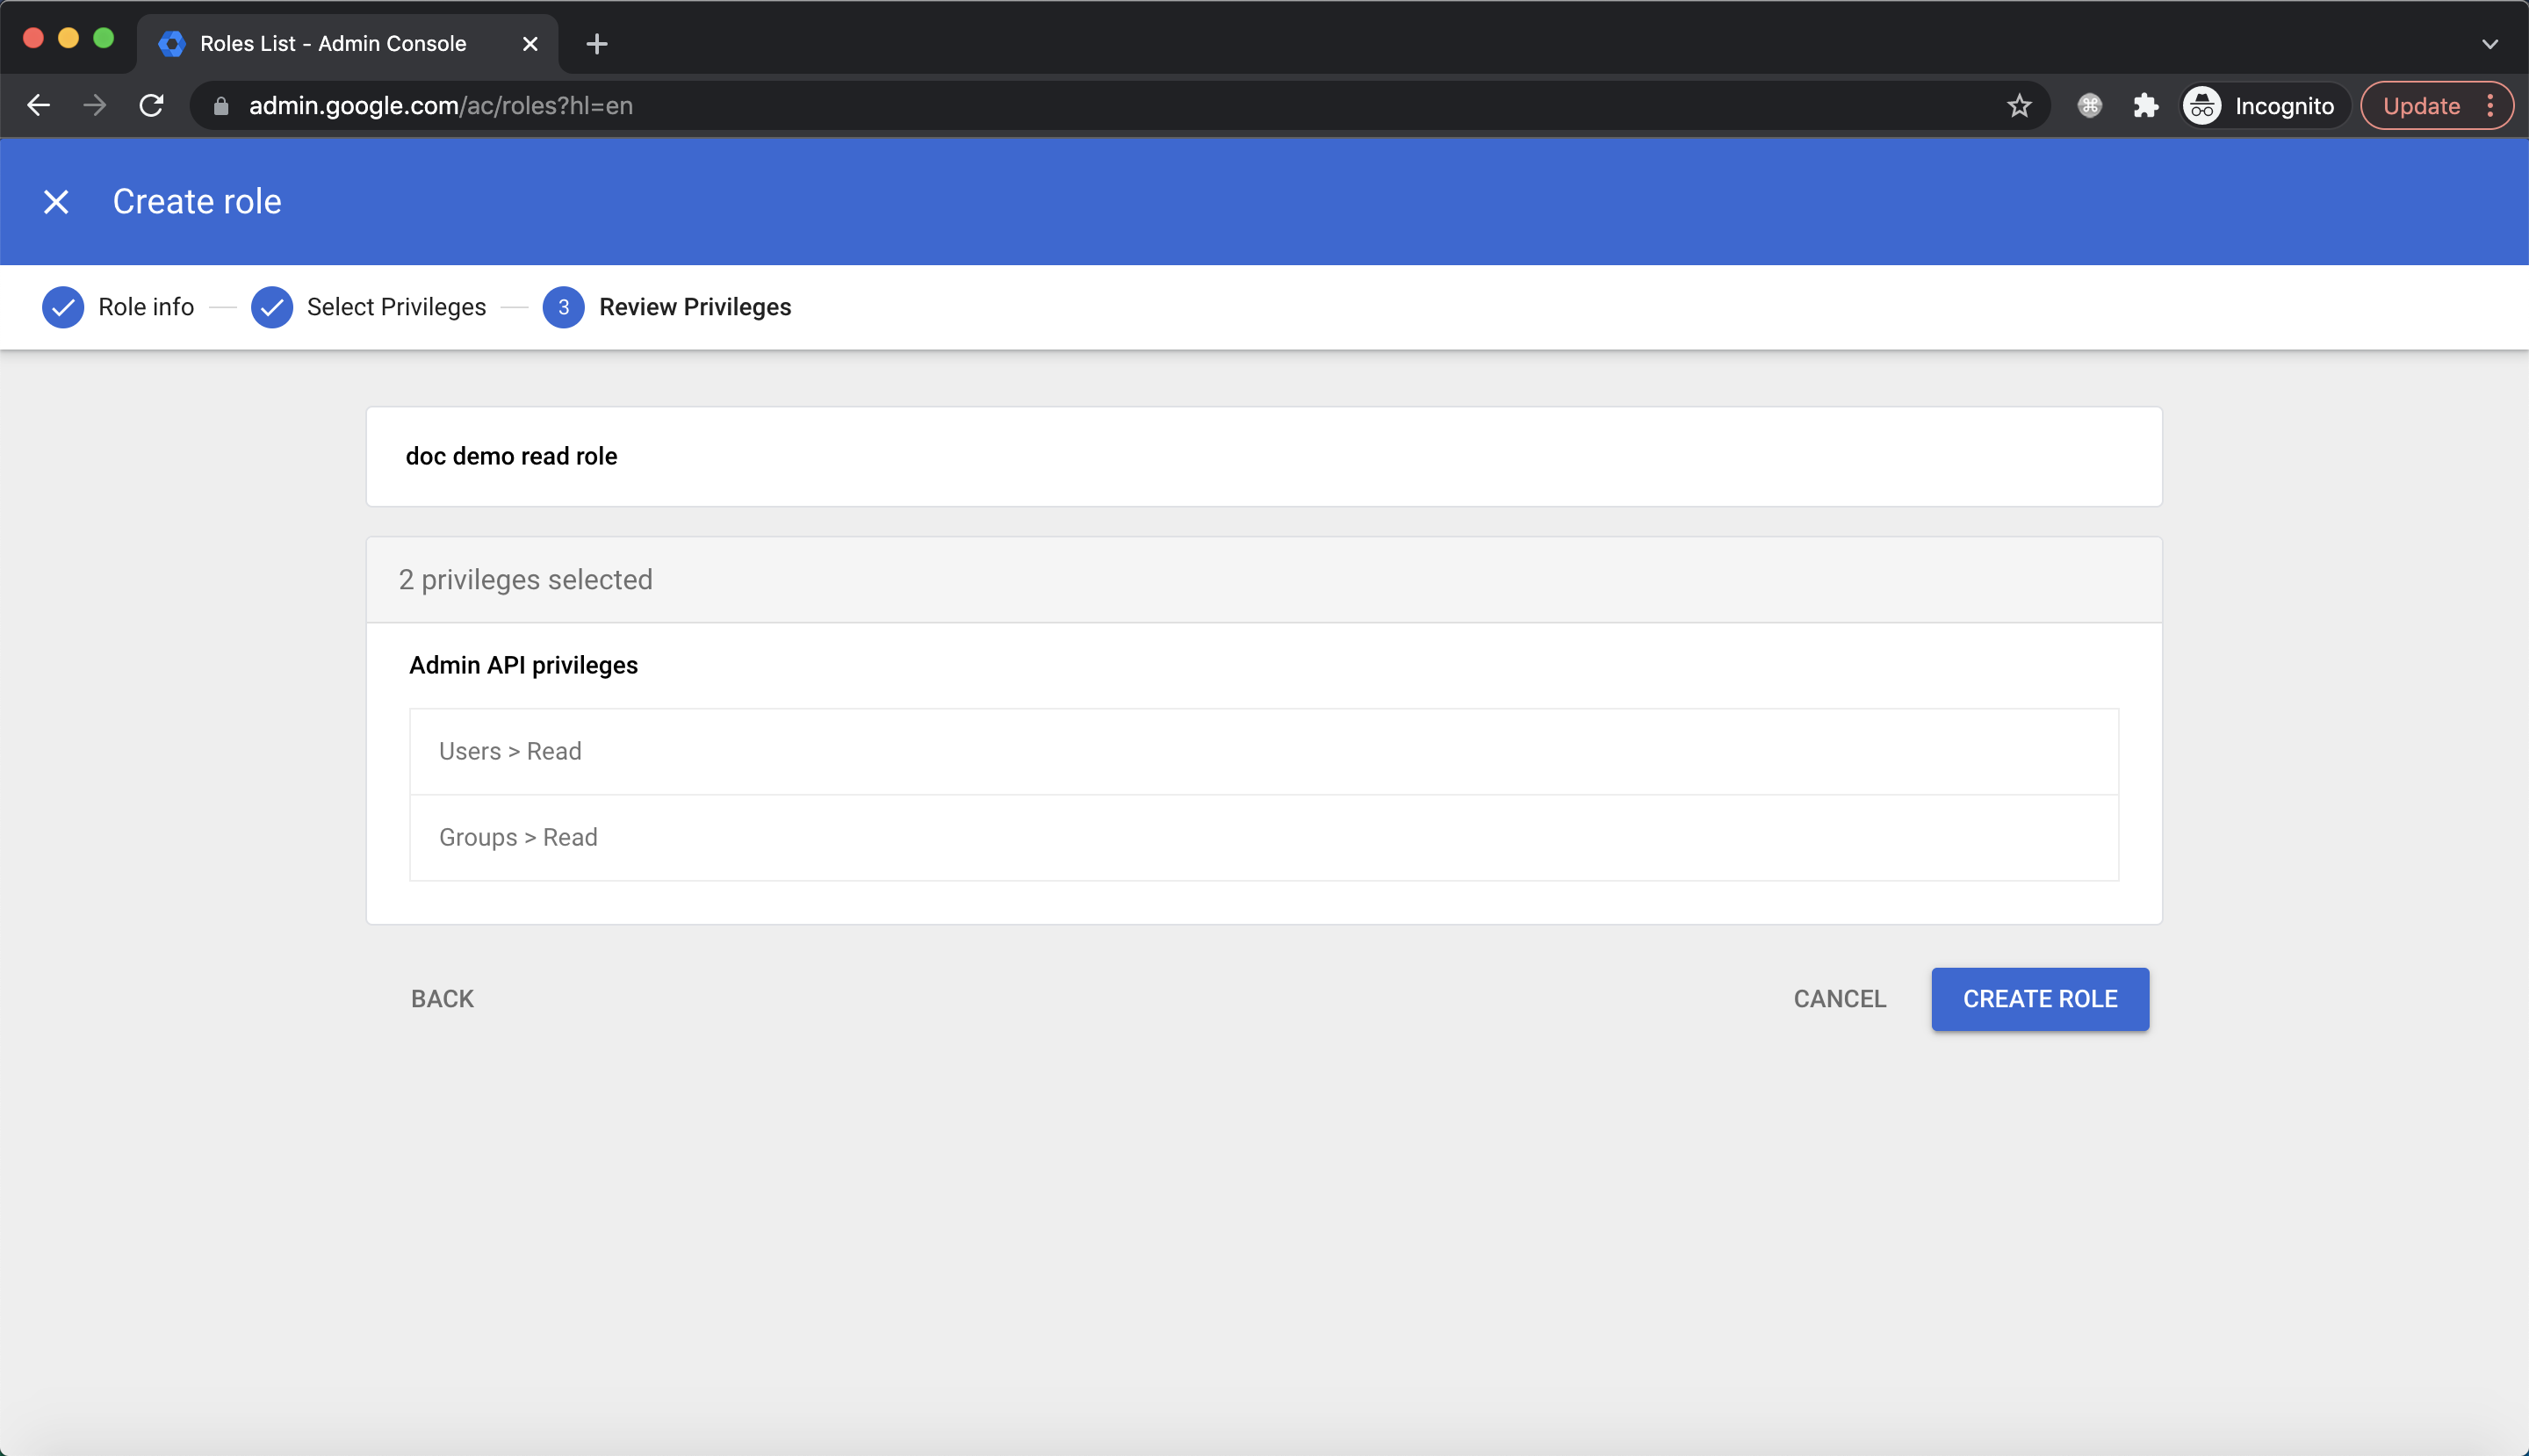 Click
Click Assign users: 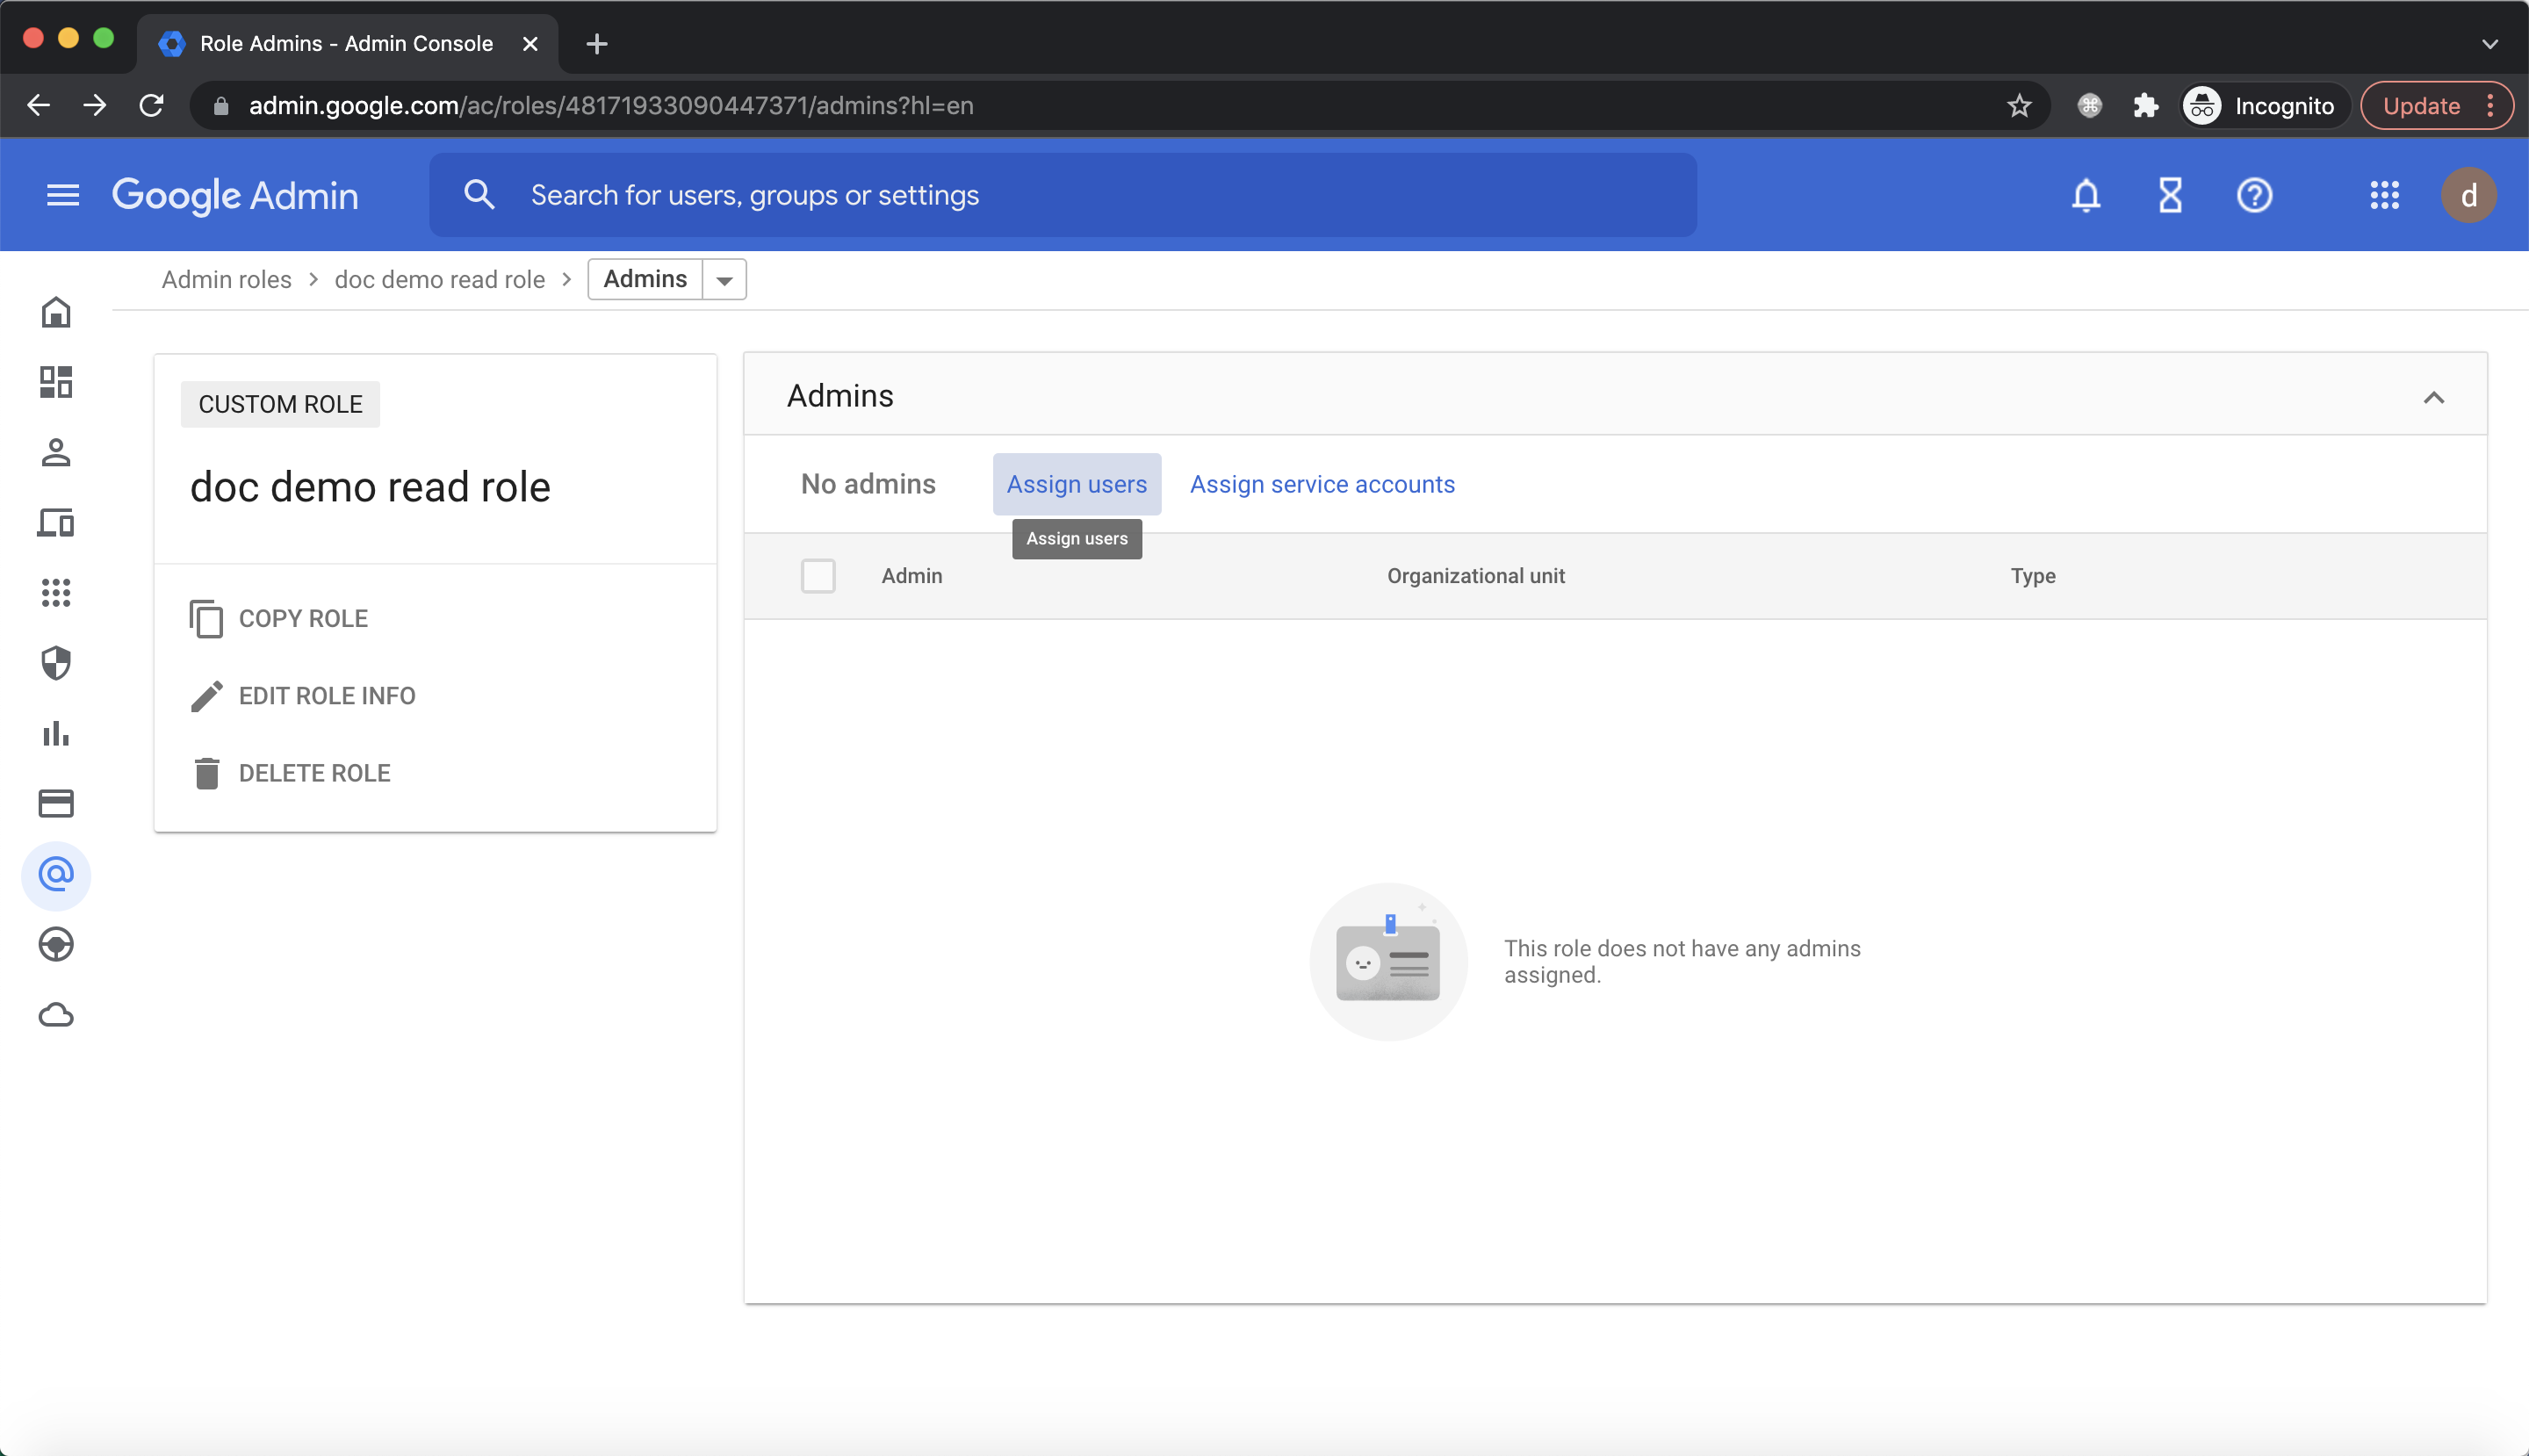 Select the user we just created and click
 ASSIGN ROLE: 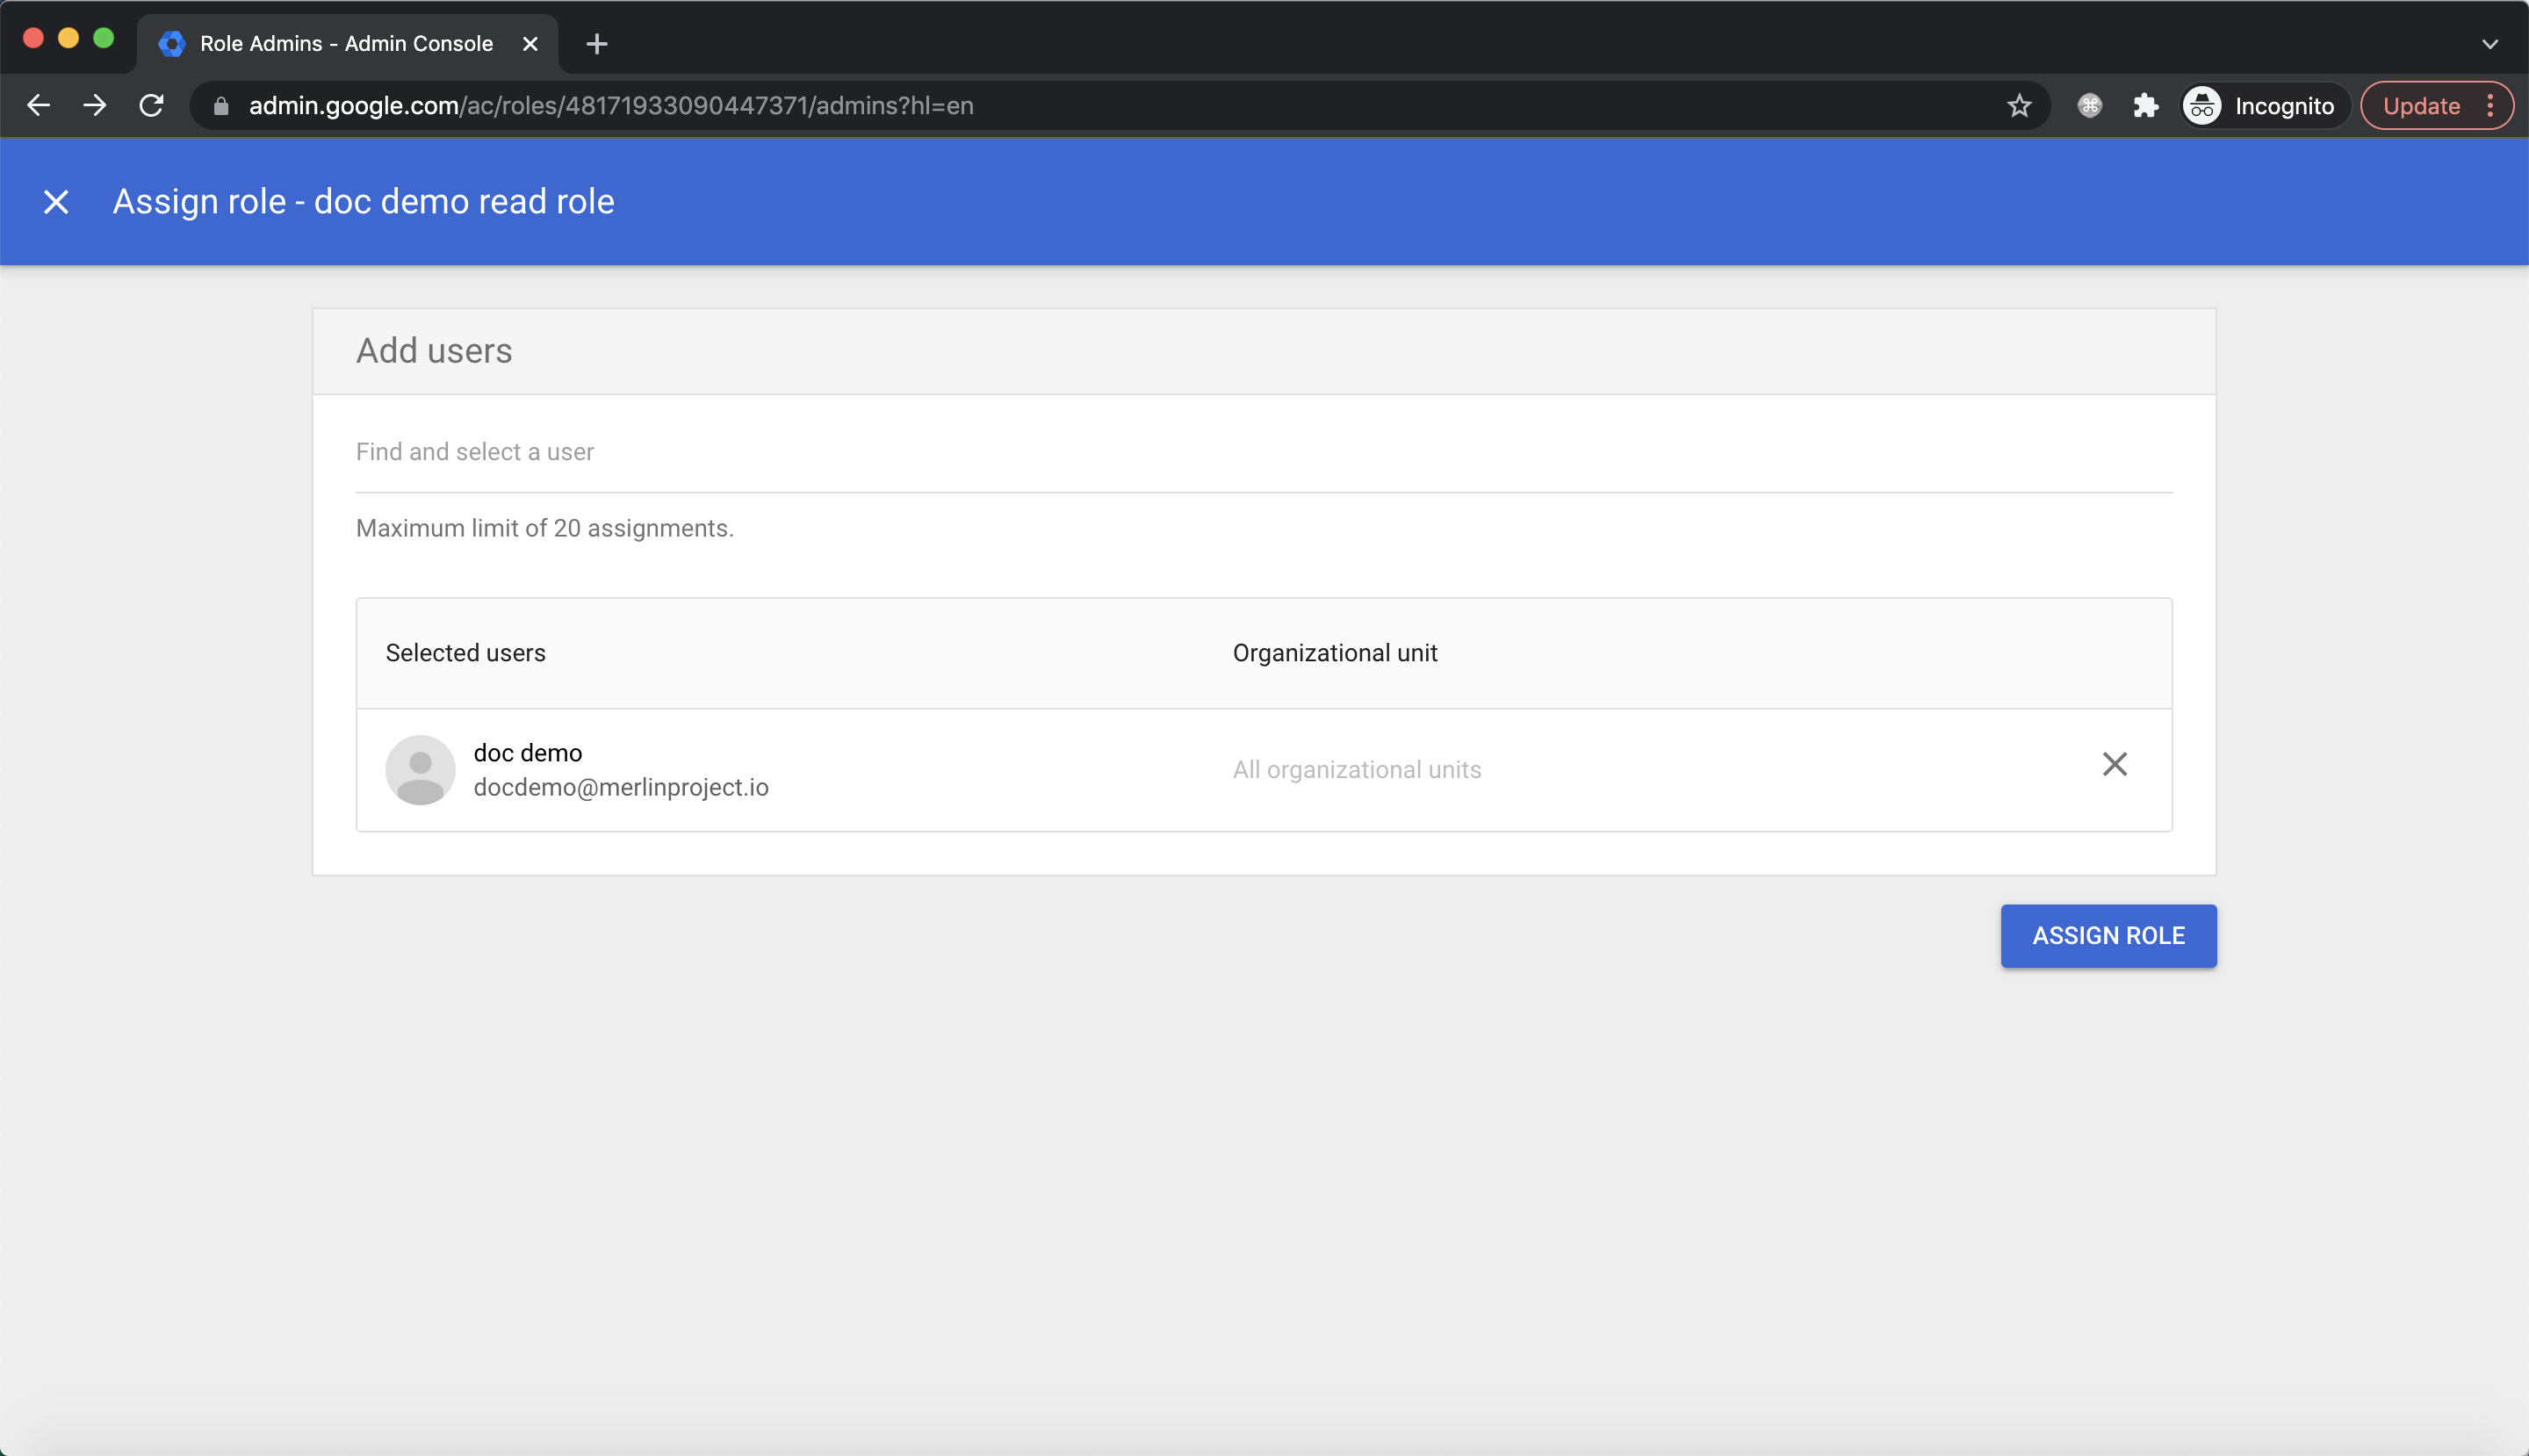
Enable Admin SDK API
Select Enabled APIs & services then click ENABLE APIS AND SERVICES: 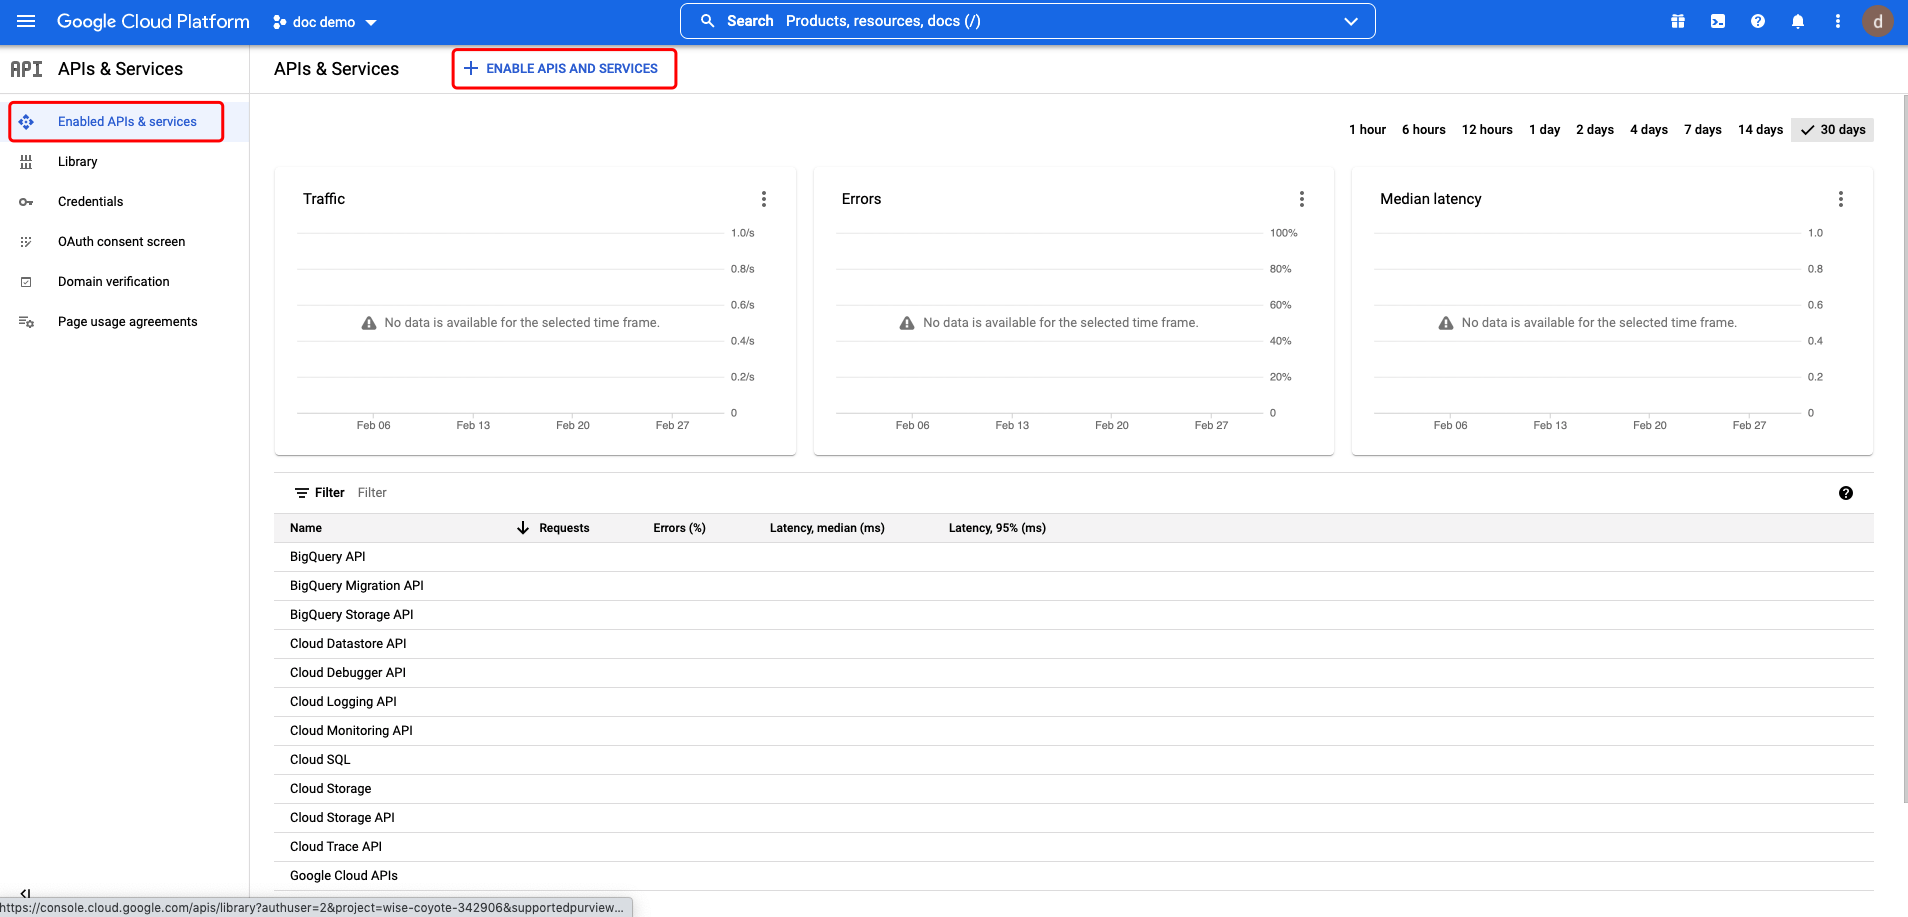 Search for Admin SDK API and click:
 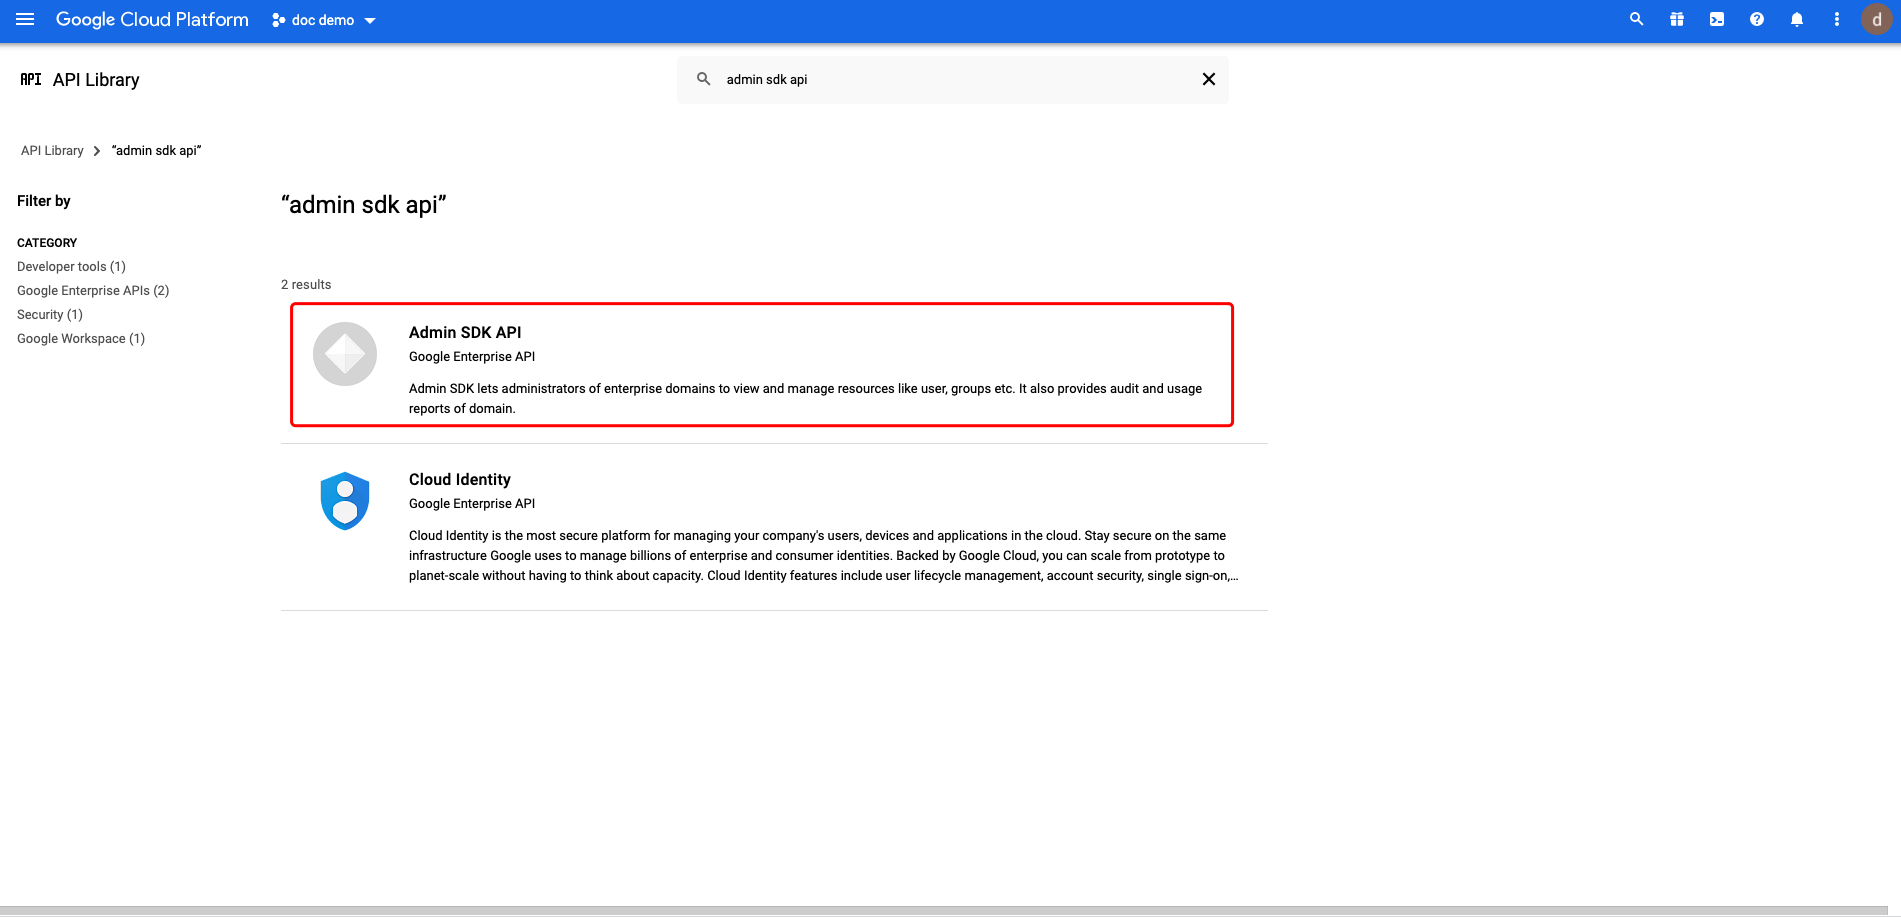 Enable the API:
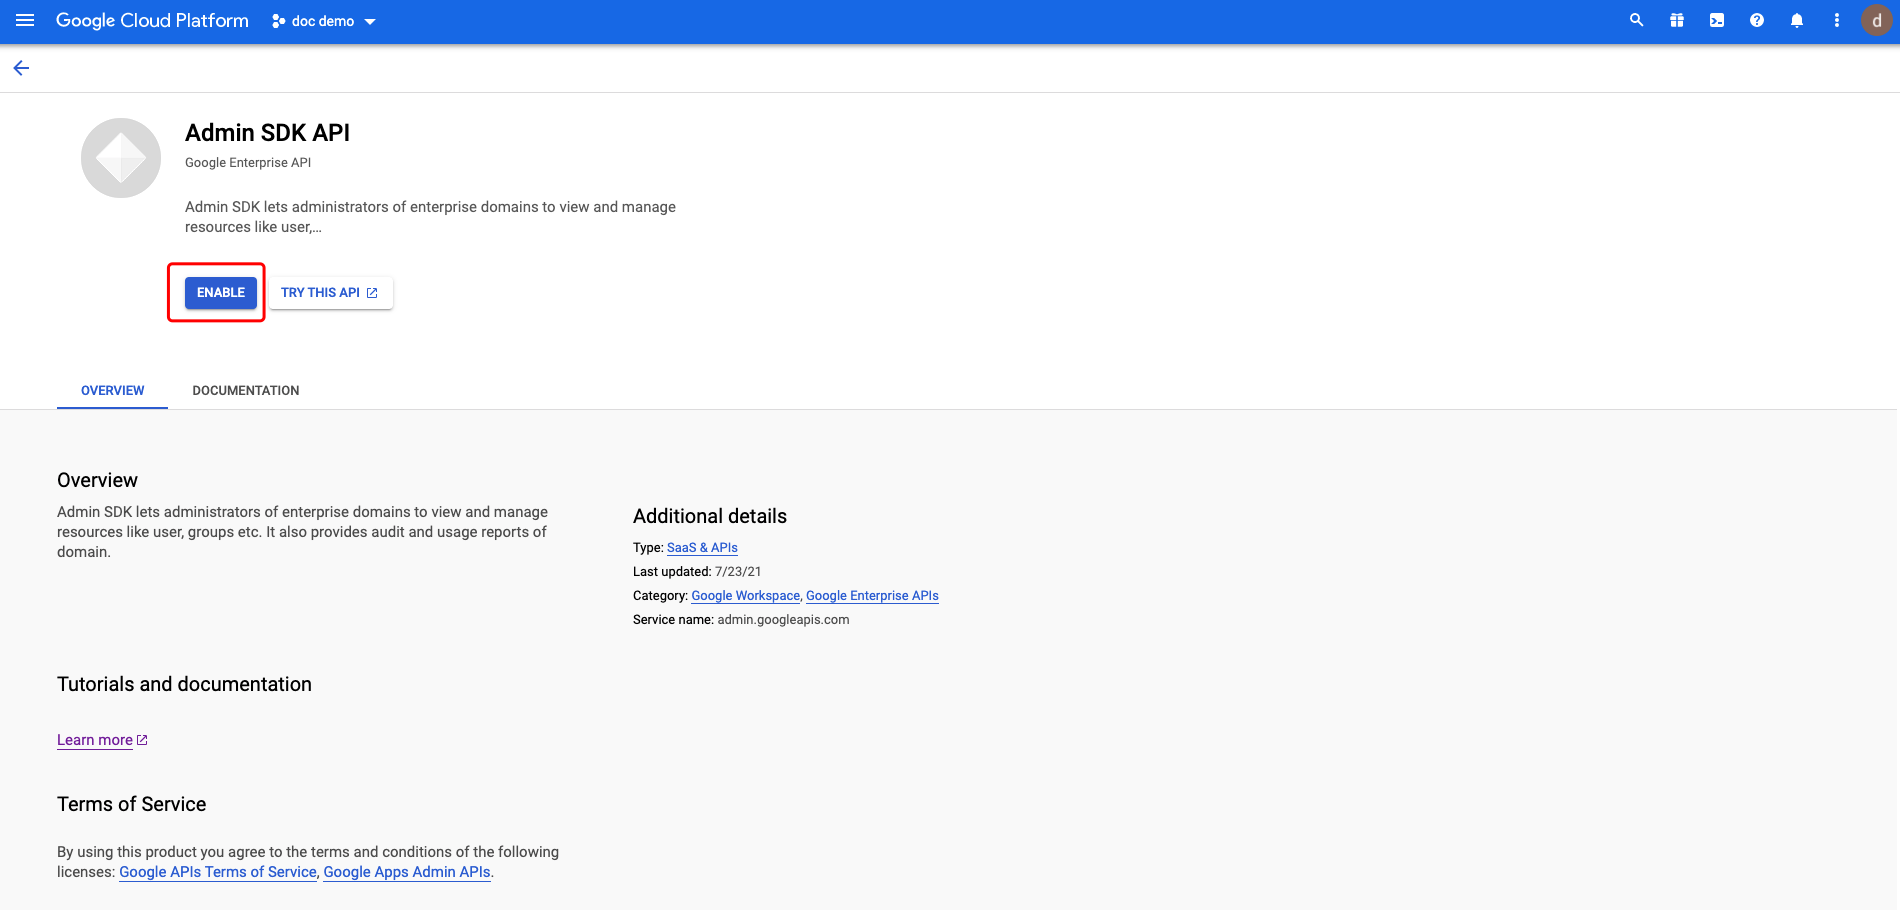
Summary
We have shown how to create a service account and set permissions for Google Workspace. Please make sure to save the following values for later setting in Datawiza Cloud Management Console.
- Service Account Credentials (including both
Client IDandClient Secret) - Impersonate User
Reference
Perform Google Workspace Domain-Wide Delegation of Authority
Use your Admin console