Okta SAML
Okta SAML Configuration
This session shows how to register a SAML application on the Okta developer console. When registering the application, we are getting the following value that is needed for later configuration in Datawiza Cloud Management Console (DCMC):
- Metadata Url
App registration in Okta
Create a new application. When performing this step, make sure to login to your developer account on Okta. Visit the link here to create a developer account.

Choose
SAML 2.0asSign-in method, then clickNext.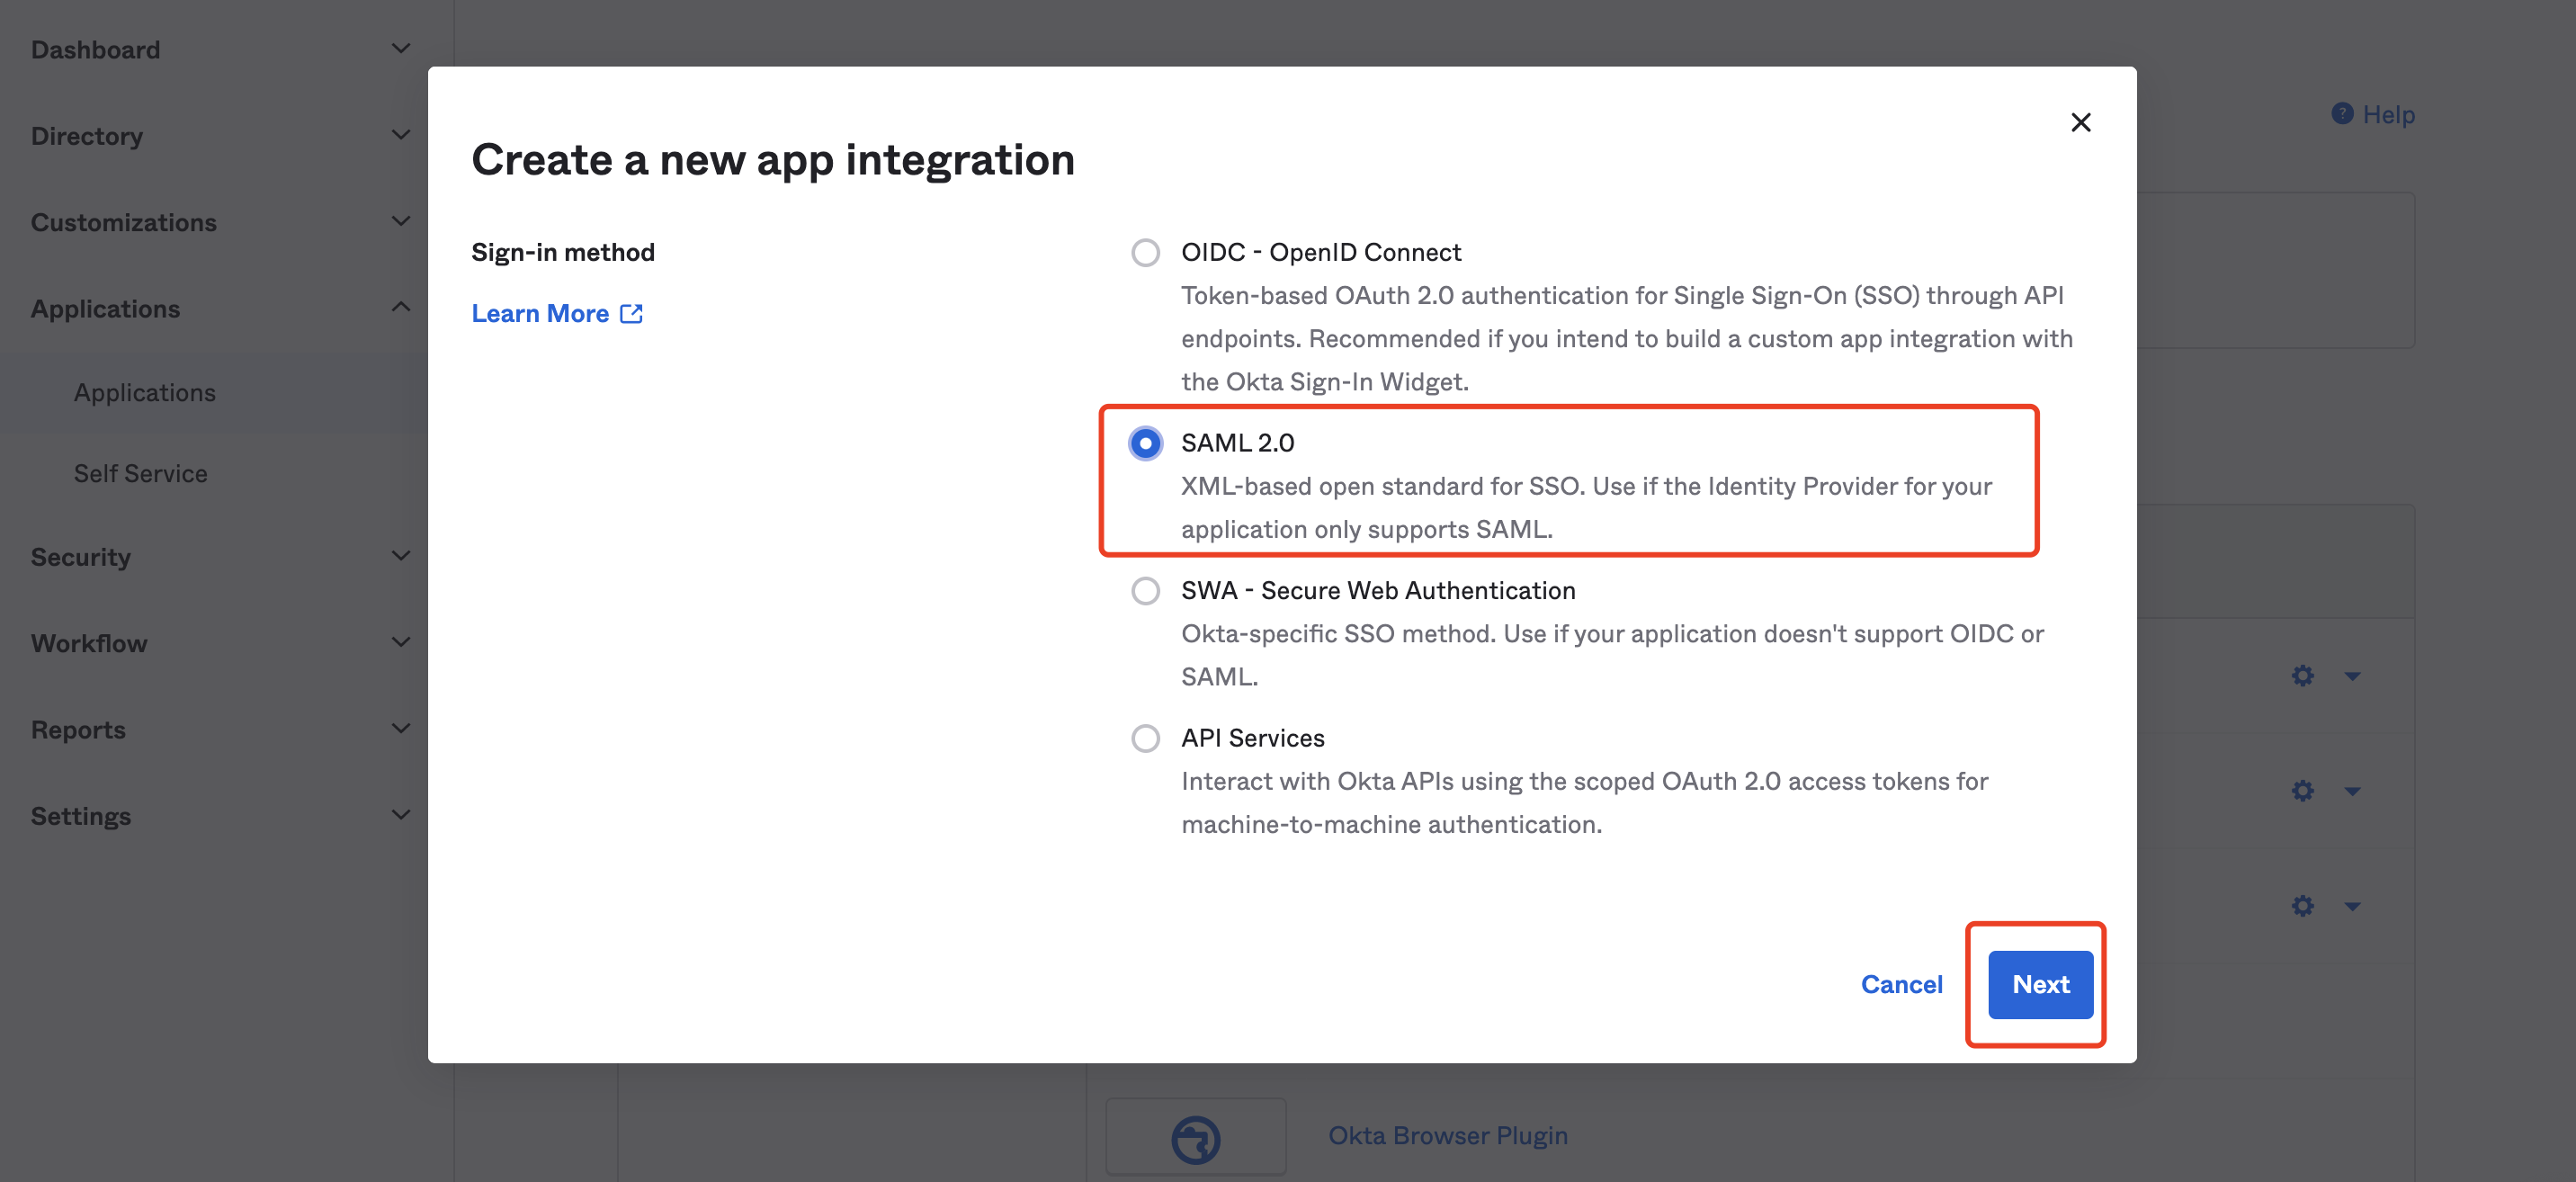
Input App name, then click
Next.
Set
http://localhost:9772/saml/acsasSingle sign on URL, andhttp://localhost:9772/saml/metadataasAudience URI (SP Entity ID).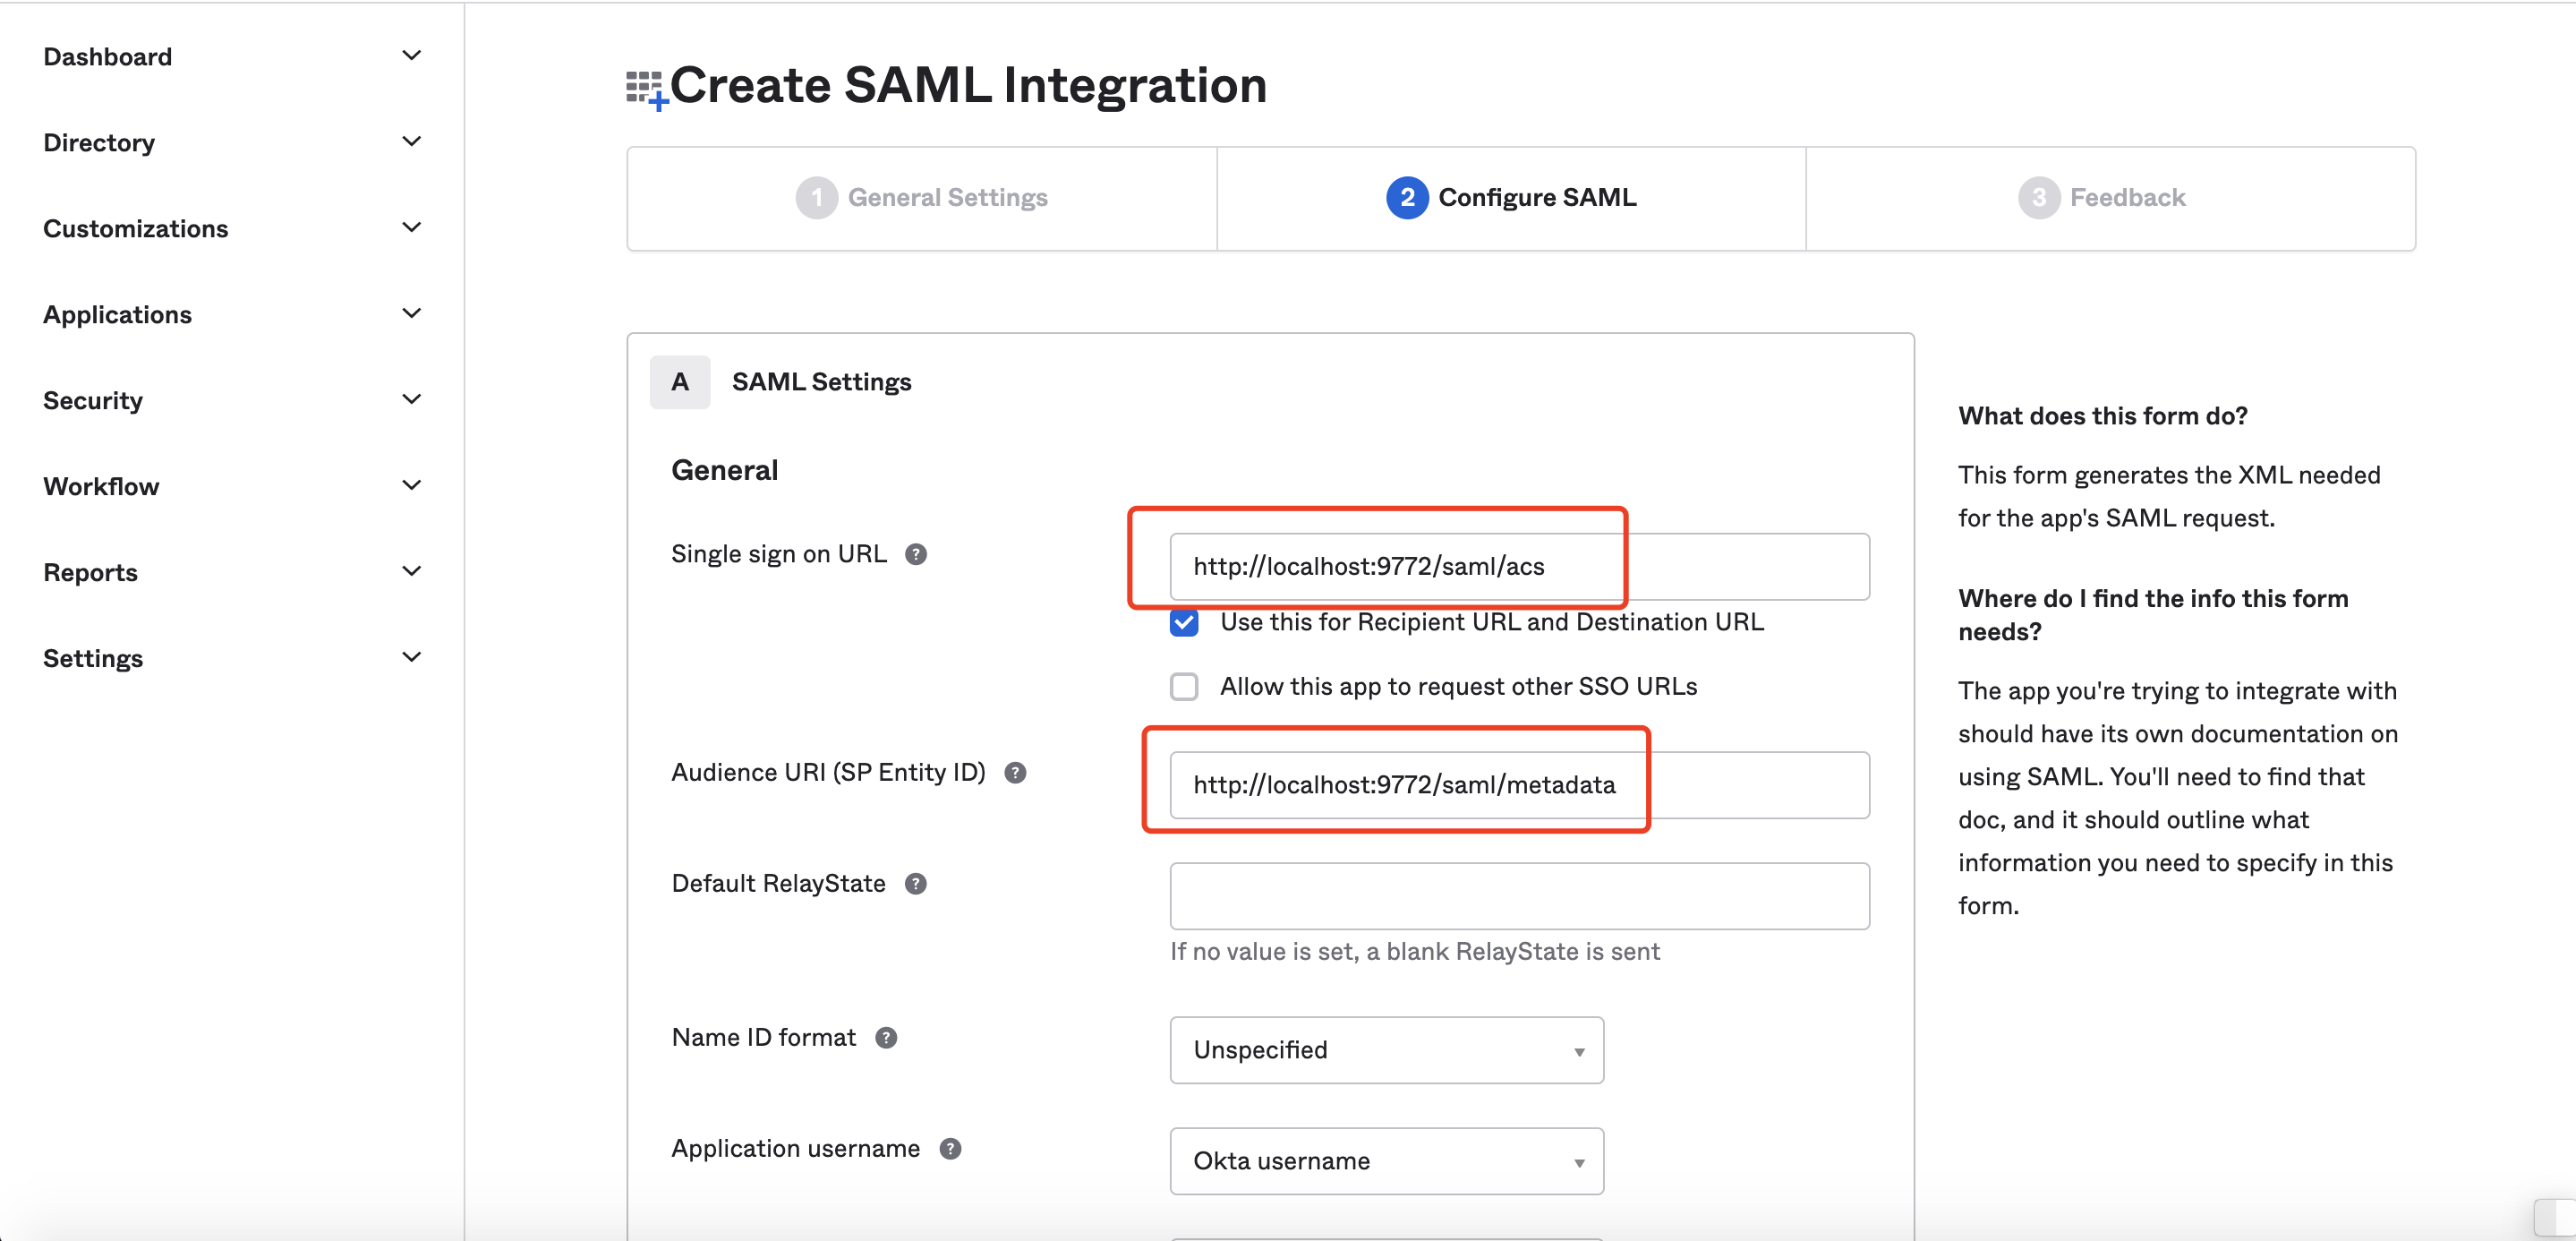
Scroll down to set Attribute Statements and Groups Attribute Statements, then click
Next.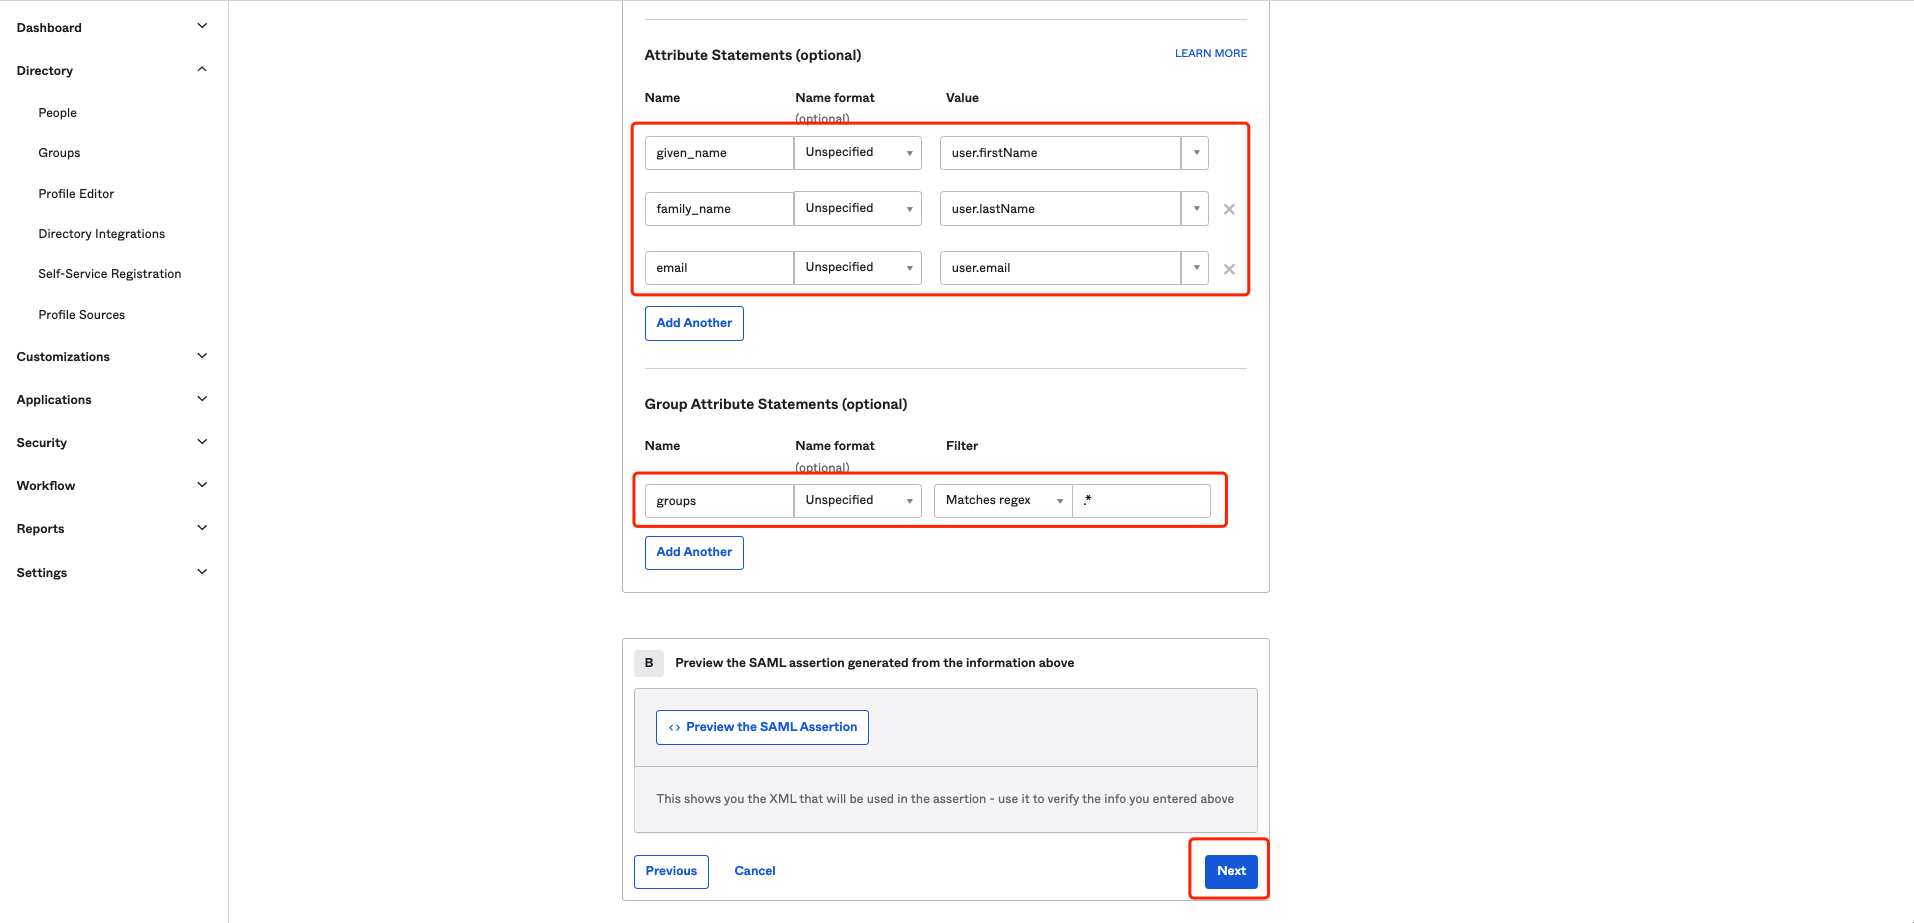
| Name | Name format | Value |
|---|---|---|
given_name | Unspecified | user.firstName |
family_name | Unspecified | user.LastName |
email | Unspecified | user.email |
groups | Unspecified | Matches regex .* |
Select
I'm a software vendor. I'd like to integrate my app with Okta, then clickFinish.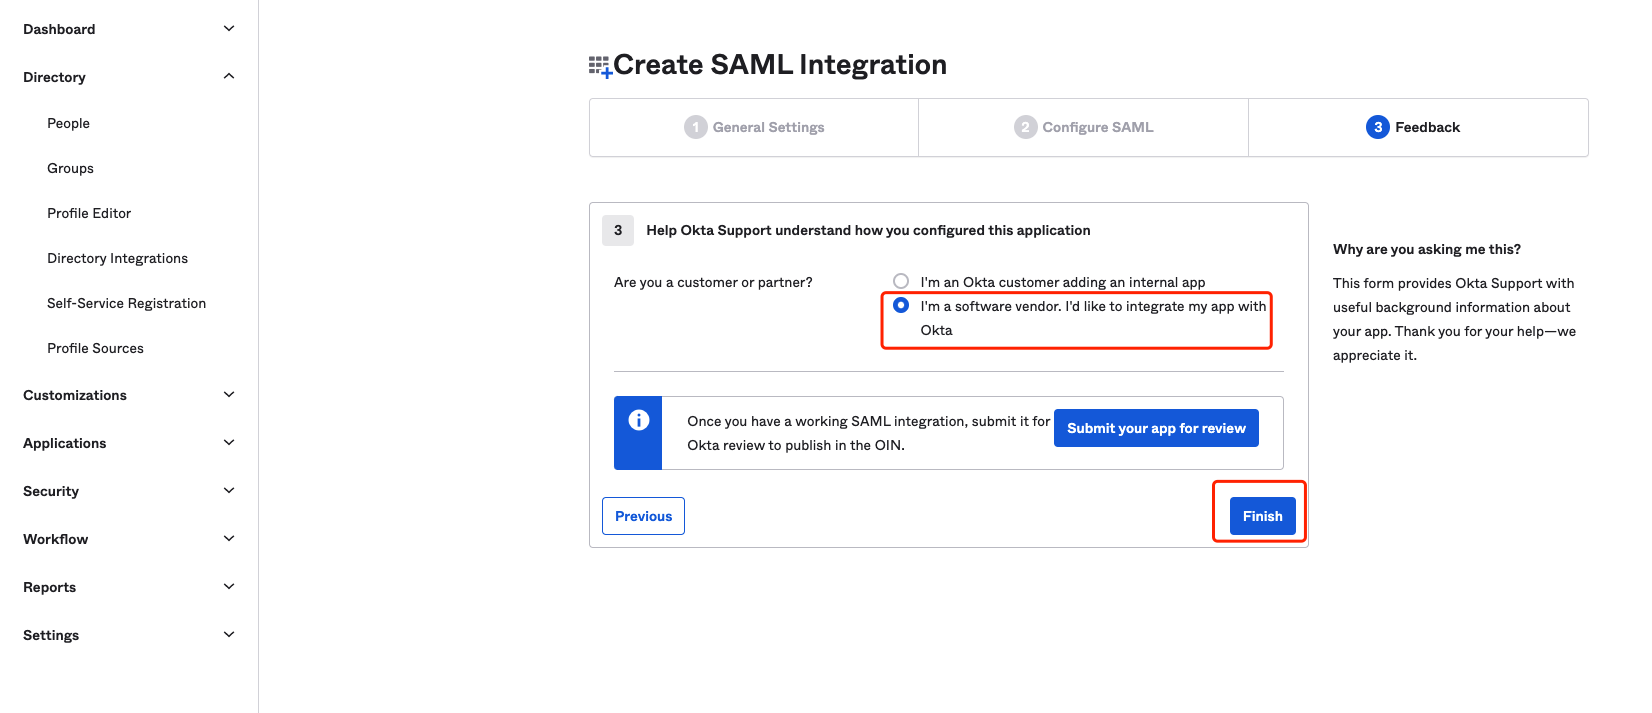
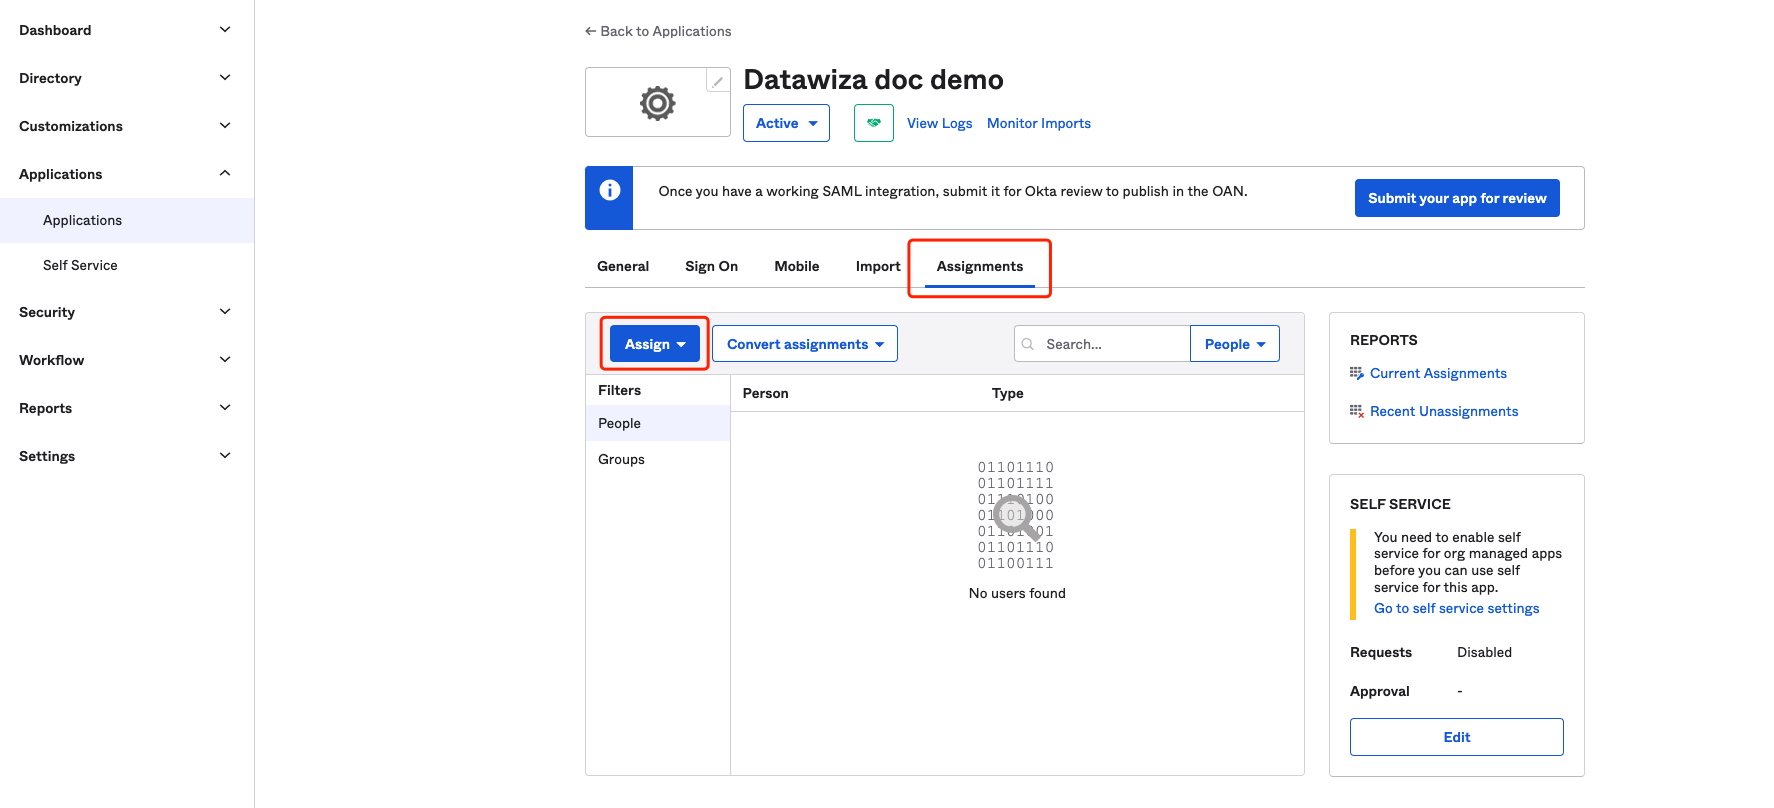
Select Assignments tab and assign the App to the people/groups to which you want to allow access.
Select
Sign Ontab and clickView SAML setup instructions: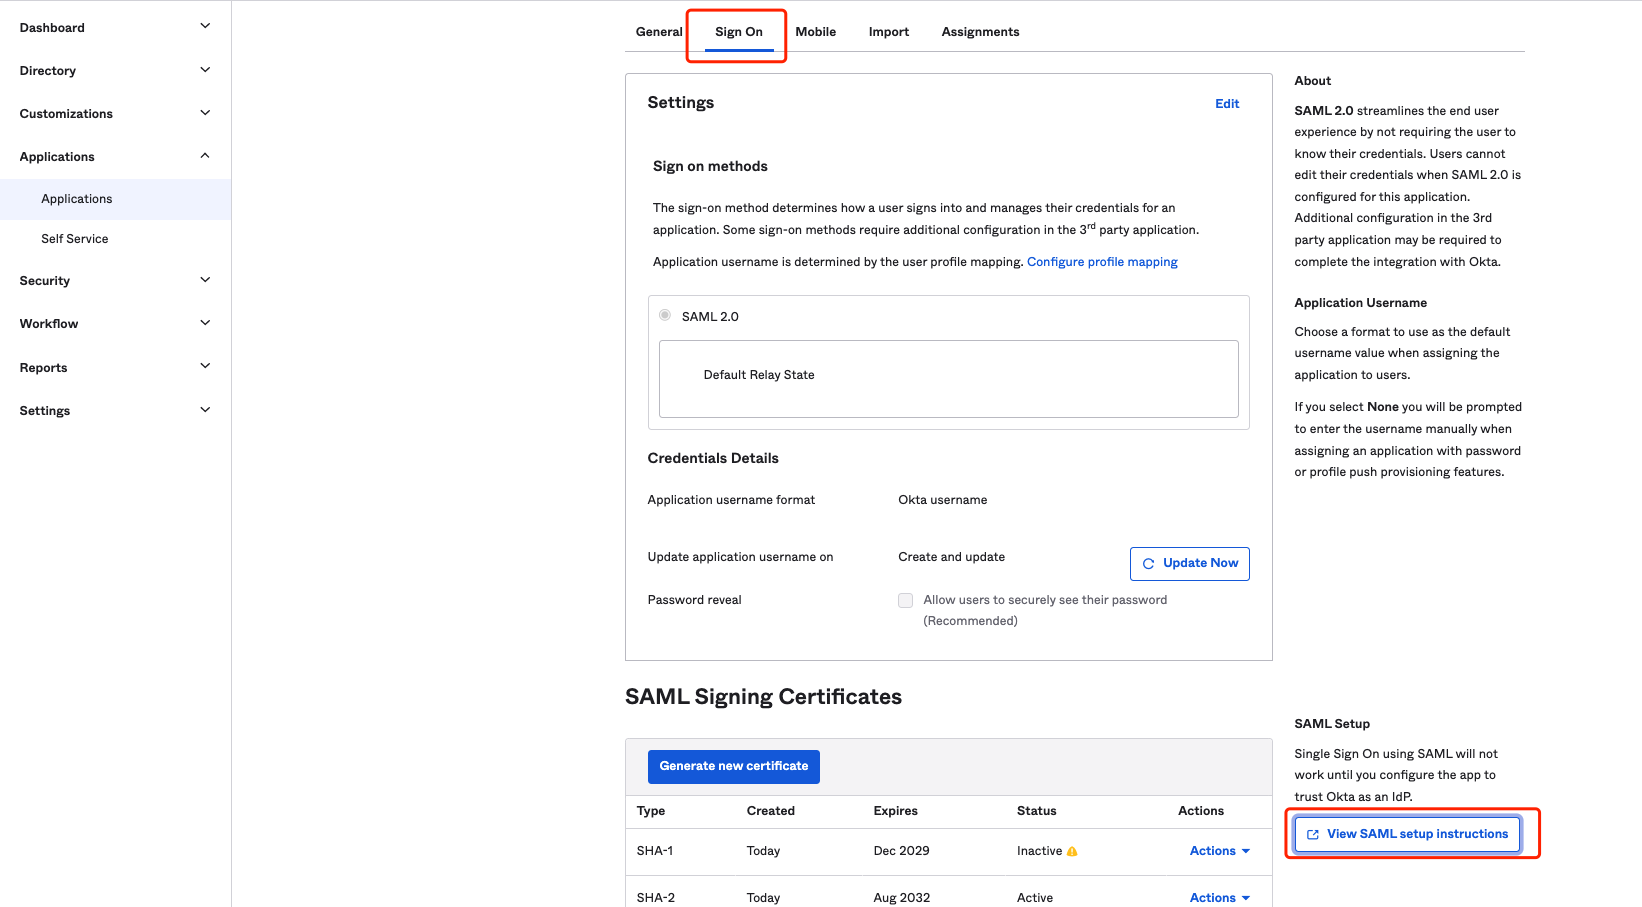 Note down the
 App ID: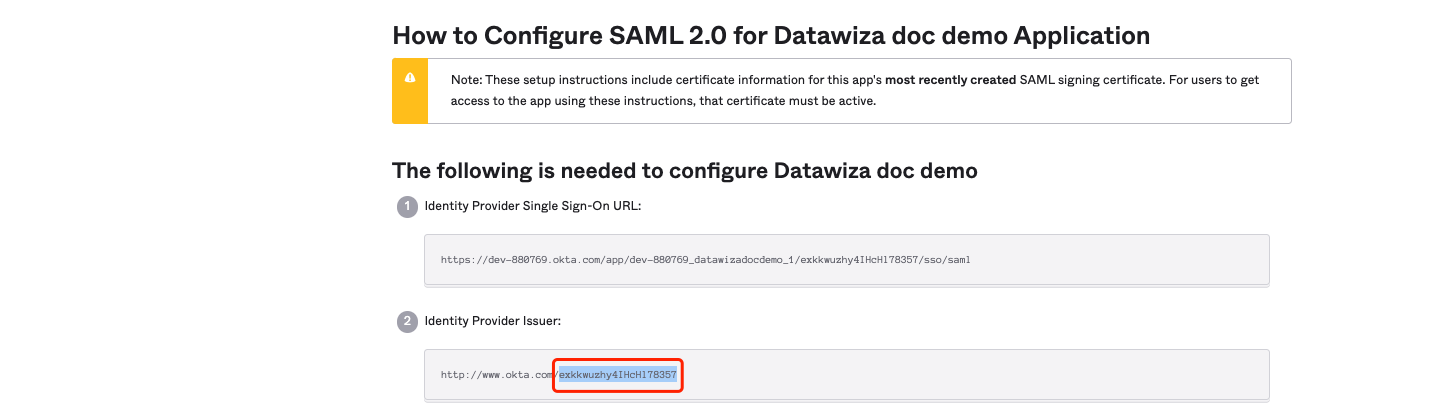 And splice the
 Metadata Urlaccording to this App ID:https://dev-xxxxx-admin.okta.com/app/{appid}/sso/saml/metadata
Summary
We have shown how to register a SAML application on Okta. Please make sure to save the following value for later setting in DCMC.
- Metadata Url