Okta Configuration Guide for OIN (Okta Integration Network)
Contents
Datawiza users have the ability to configure a Identity Provider to power Single Sign On (SSO). This article details how to configure Okta as the primary Identity Provider to facilitate SSO with the Datawiza Access Proxy.
- Supported features
- Requirements
- Configuration steps
- Notes
Supported features
- Single Sign-On (OpenID Connect) initiated by Service Provider
Requirements
- Install Datawiza Access Proxy on your server.
- Follow the steps outlined below for a complete and successful setup.
Configuration Steps
After installing the application from OIN, you need to obtain some information when you contacting us to configure Single Sign On:
- Client Id
- Client Secret
- Okta Org
Gather information from Okta
- On the general information setting page, please make a copy of Client ID and Client secret under the
Client Credentialssection. You will need these two codes later to build up the connection.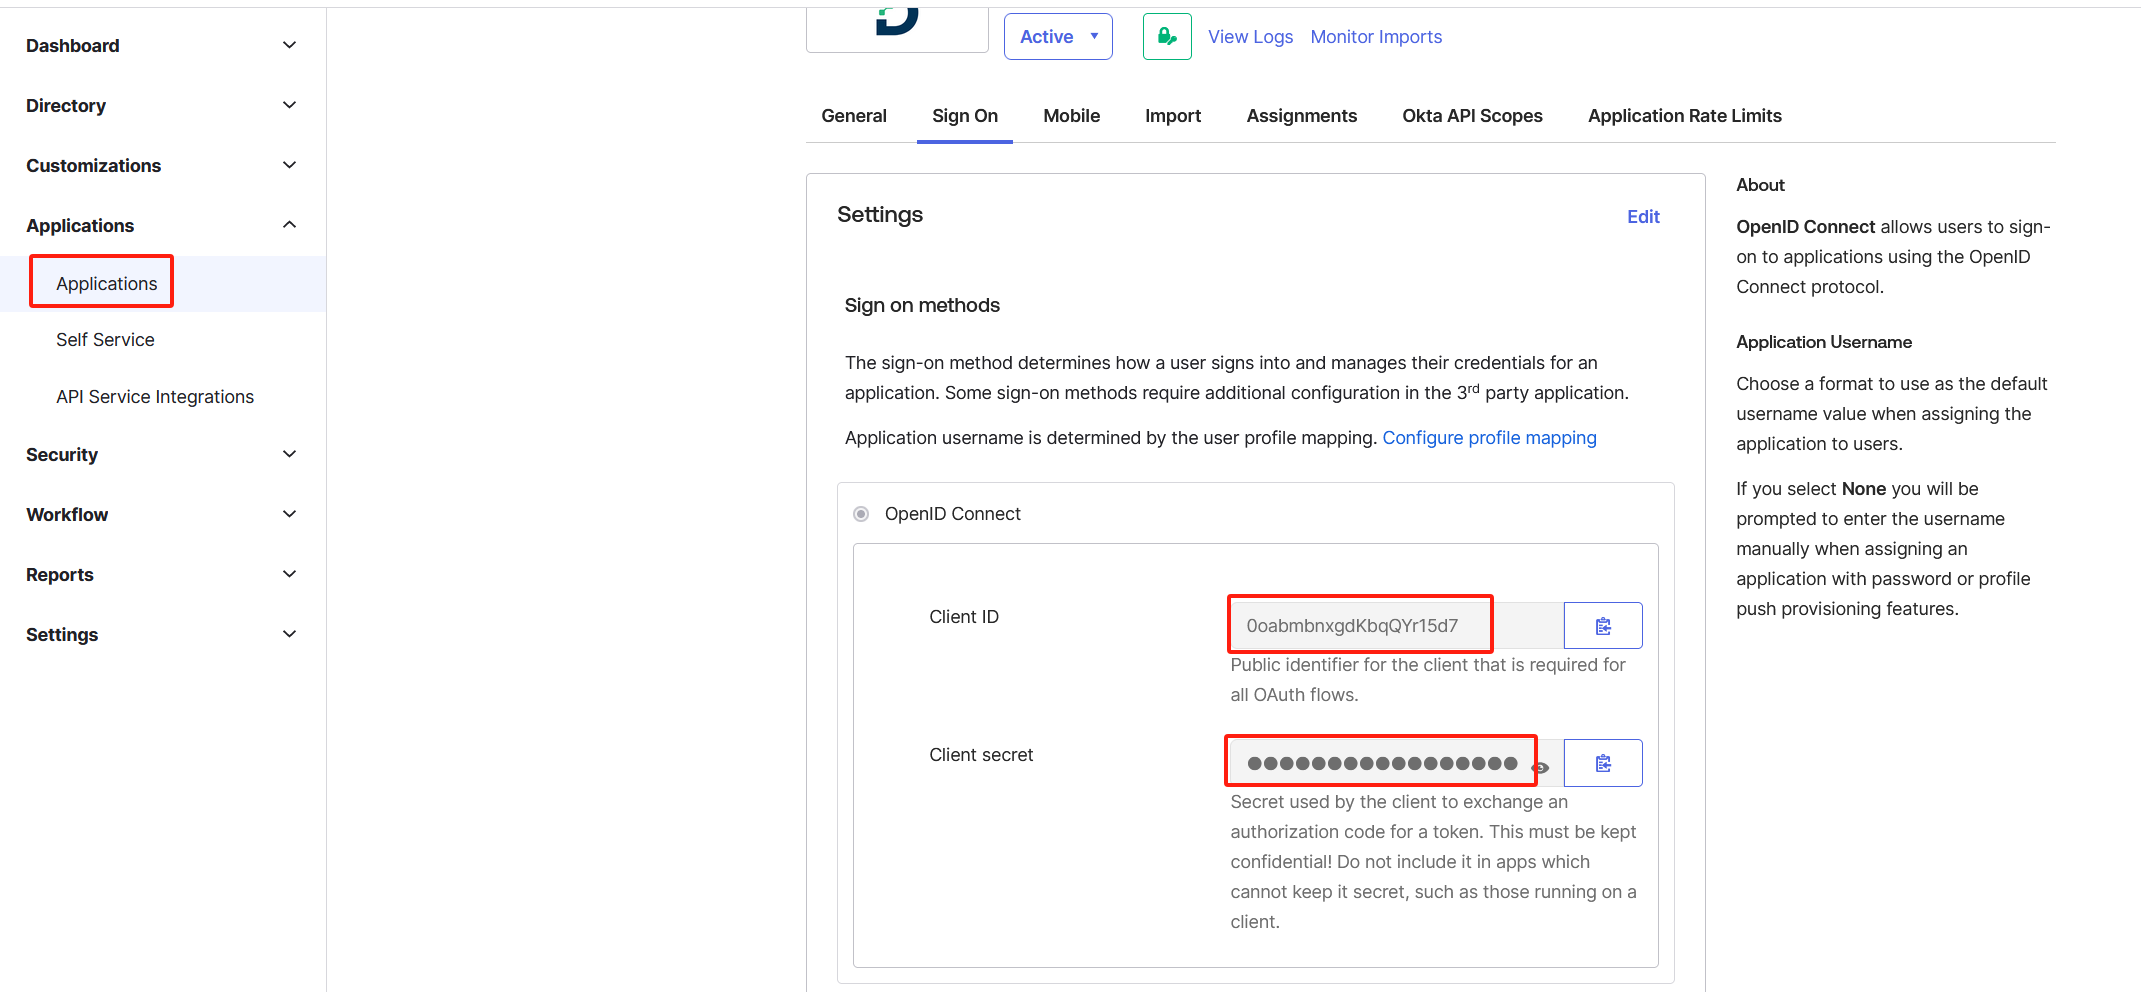
- Locate the organization URL in the upper-right corner which takes the form of
https://your_domain.okta.com. Save this URL asOkta Org.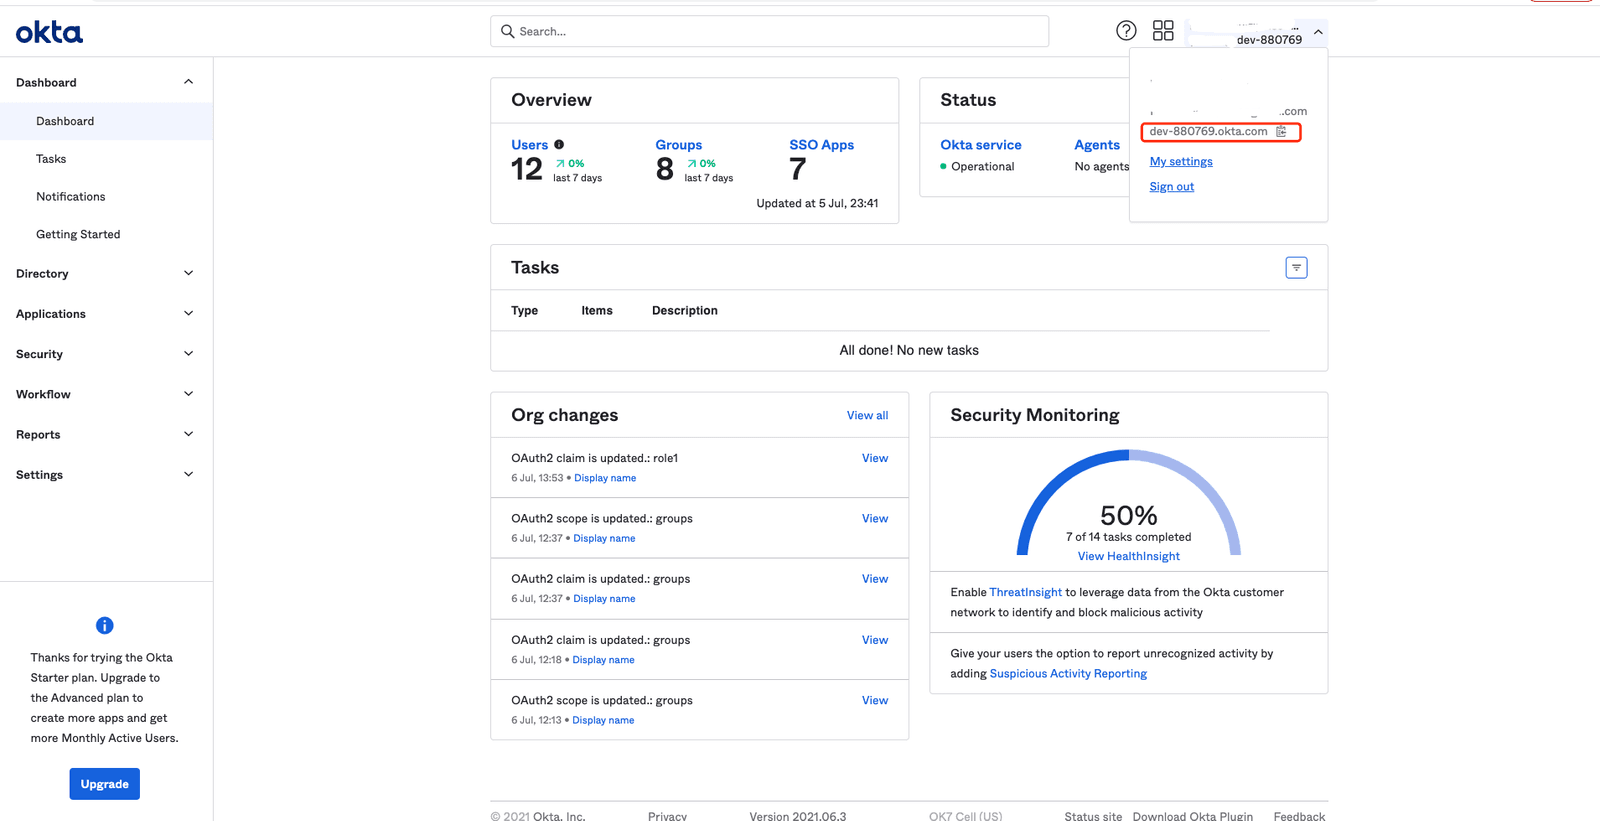
Contact Us
Upon collecting all the necessary information, please get in touch with us at support@datawiza.com. Our team will assist you in advancing to the next steps.
SP-initiated SSO
After receiving confirmation that your configuration has been successfully updated, you can proceed to test it via your web browser. The sign-in process is initiated from Datawiza Access Proxy.
- From your browser, navigate to the {applicationUrl} to access the sign-in page.
- If you have multiple Identity Providers (IdPs) configured, select the desired IdP. If you have only one IdP, you will be automatically redirected to your Okta organization.
- Enter your Okta credentials, including your email and password, and then click the 'Sign in with Okta' button."
Notes
If you encounter any issues or have any questions, please do not hesitate to reach out to support@datawiza.com.