Login a Header Based APP with Social Account
Login a Header Based APP with Social Account
Feature
In this tutorial, we will use the Datawiza Access Proxy (DAP) to enable SSO for a header-based Web App. We will use DAP's sidecar deployment mode, which means DAP and this app are running on the same server.
- We will use a built-in web application as the header-based web App.
- The DAP will run on
localhost:9772, which means the traffic to the app will reach DAP (running on port 9772) first and then be proxied to the web application. - We will provide the docker images for the DAP.
Demo APP
See our live demo app which provides two ways to login: Google social account and Microsoft Entra ID (Azure AD) Accounts in any organizational directory (Any AD directory - Multitenant) and personal Microsoft account.
Quick Set Up
We use the Google social account as the set-up example.
Part I: Google Configuration
This session shows how to register a Credential on Google. When registering the Credential, we are getting the Client Id and the Client Secret that are needed for later configuration in Datawiza Cloud Management Console (DCMC):
Add New OAuth consent screen
1. Create a new OAuth consent screen:
Select OAuth consent screen and select External, then Click CREATE: 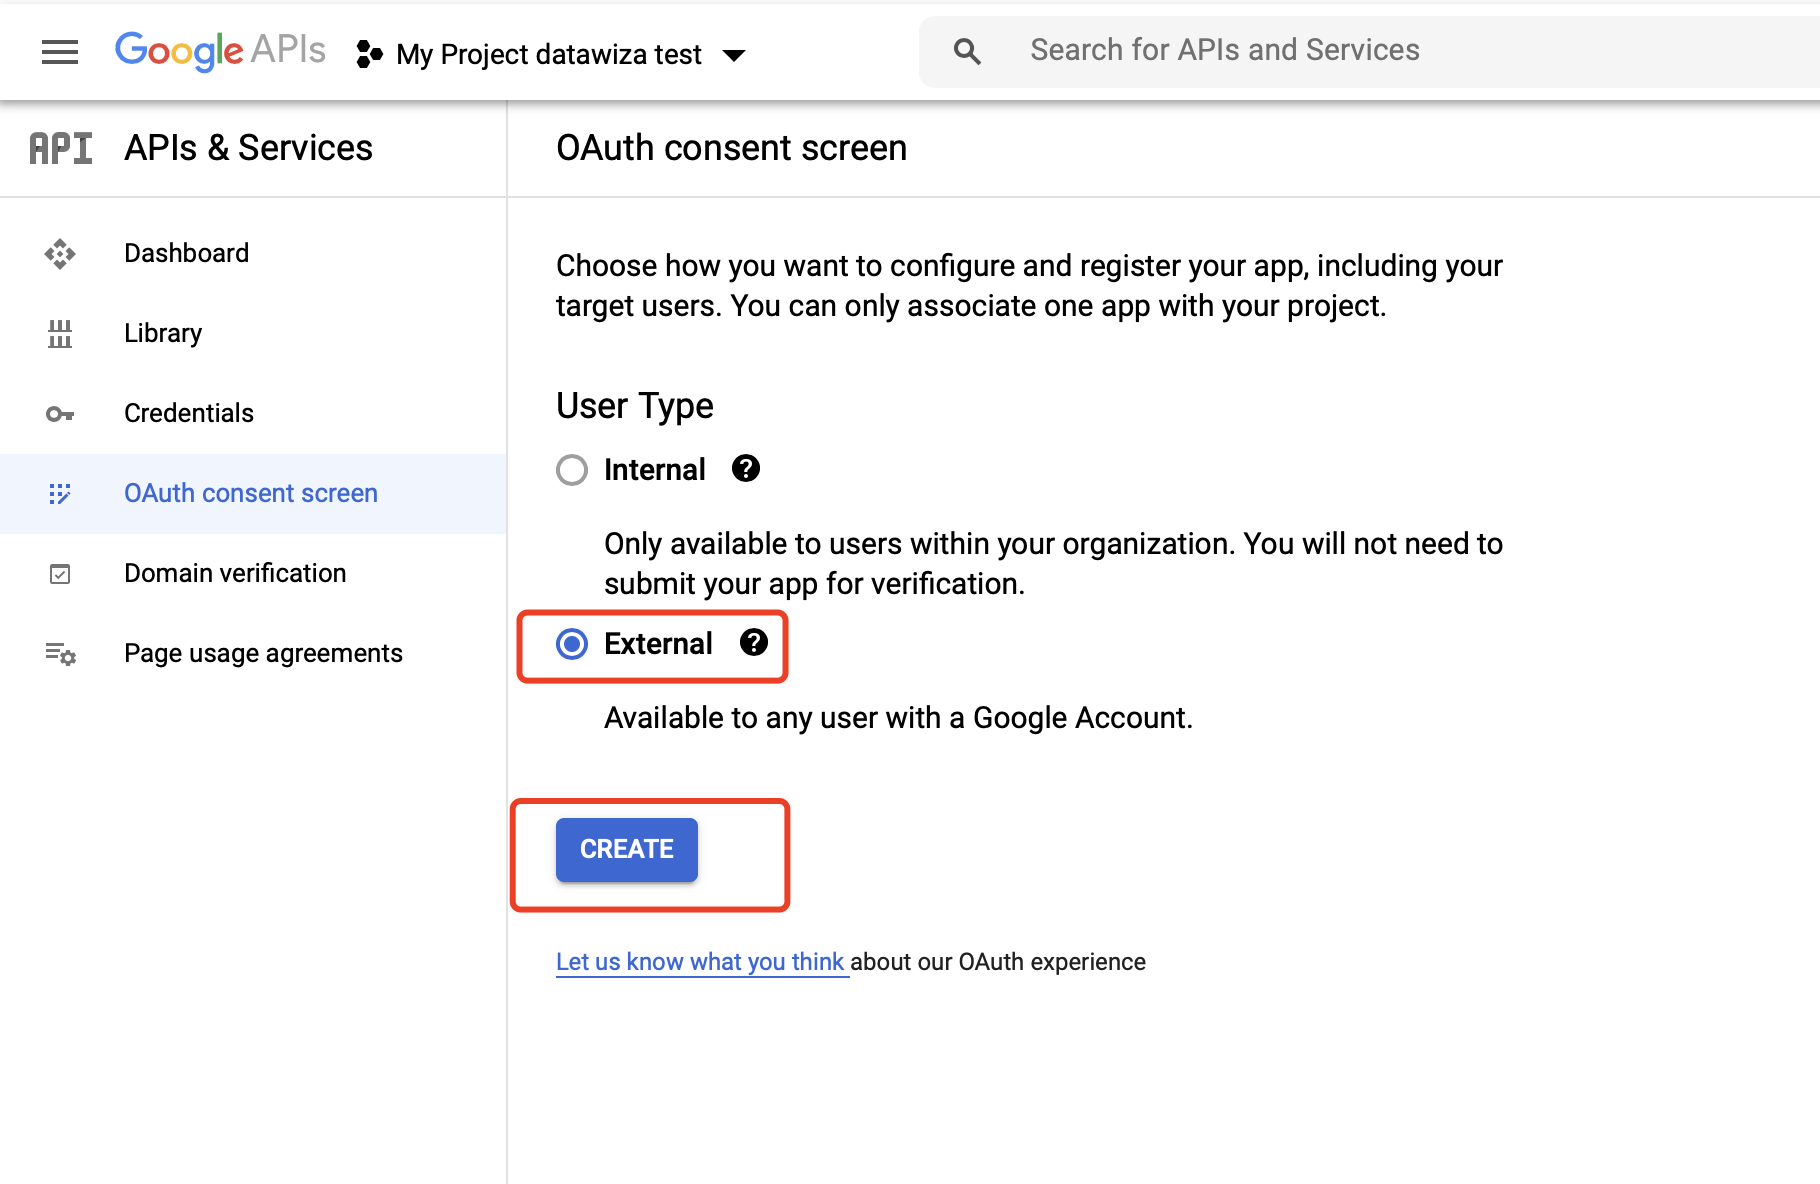 Supply the
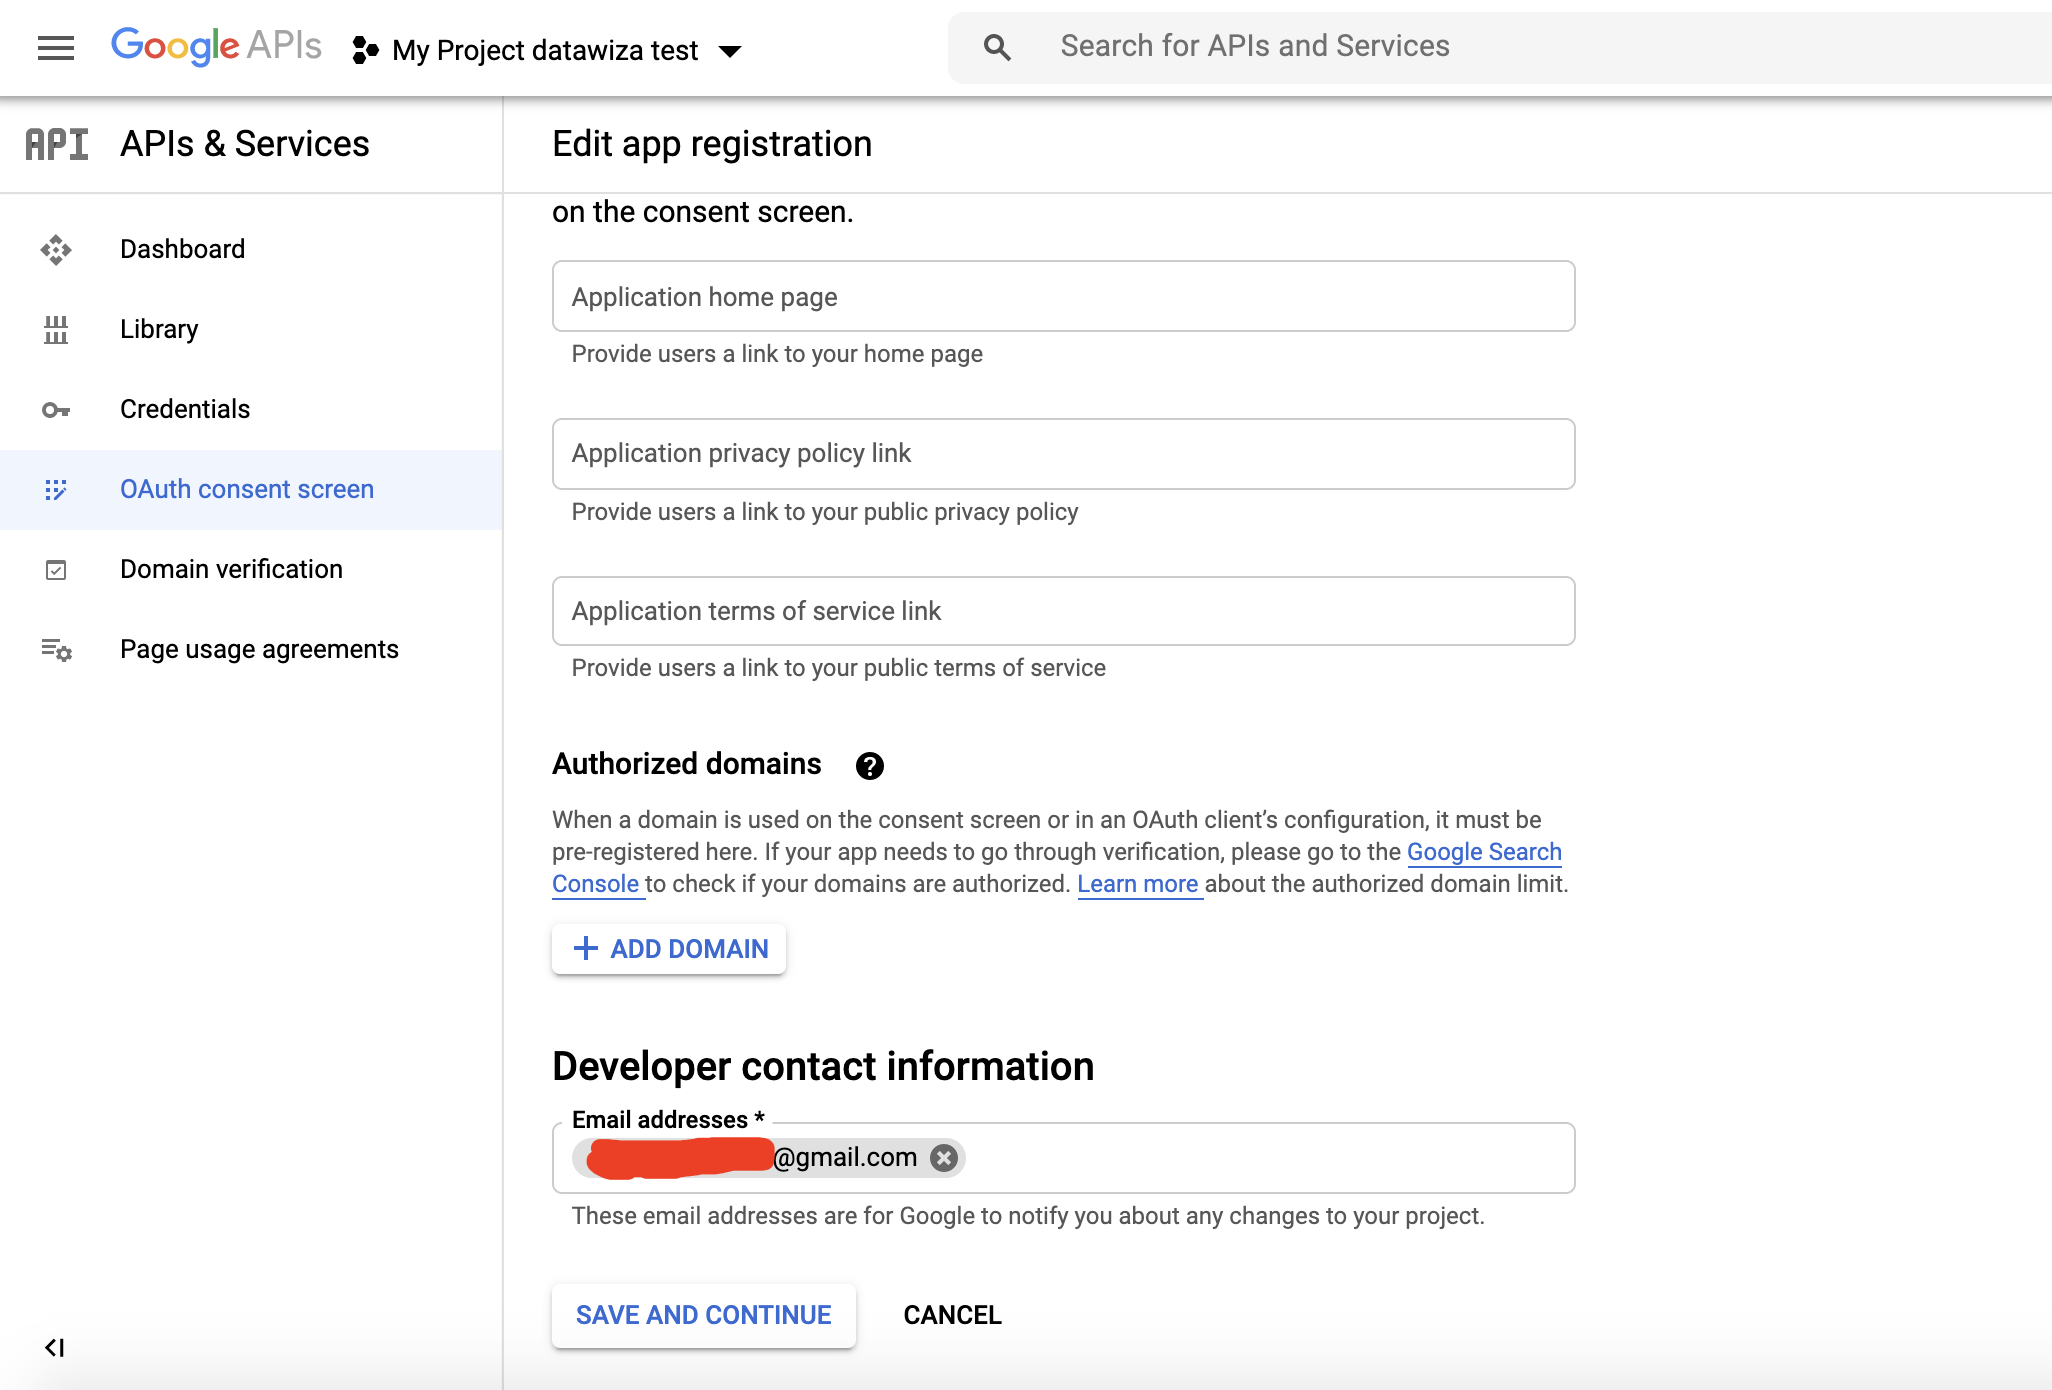
 App name, User support email and Developer contact information and click SAVE AND CONTINUE. 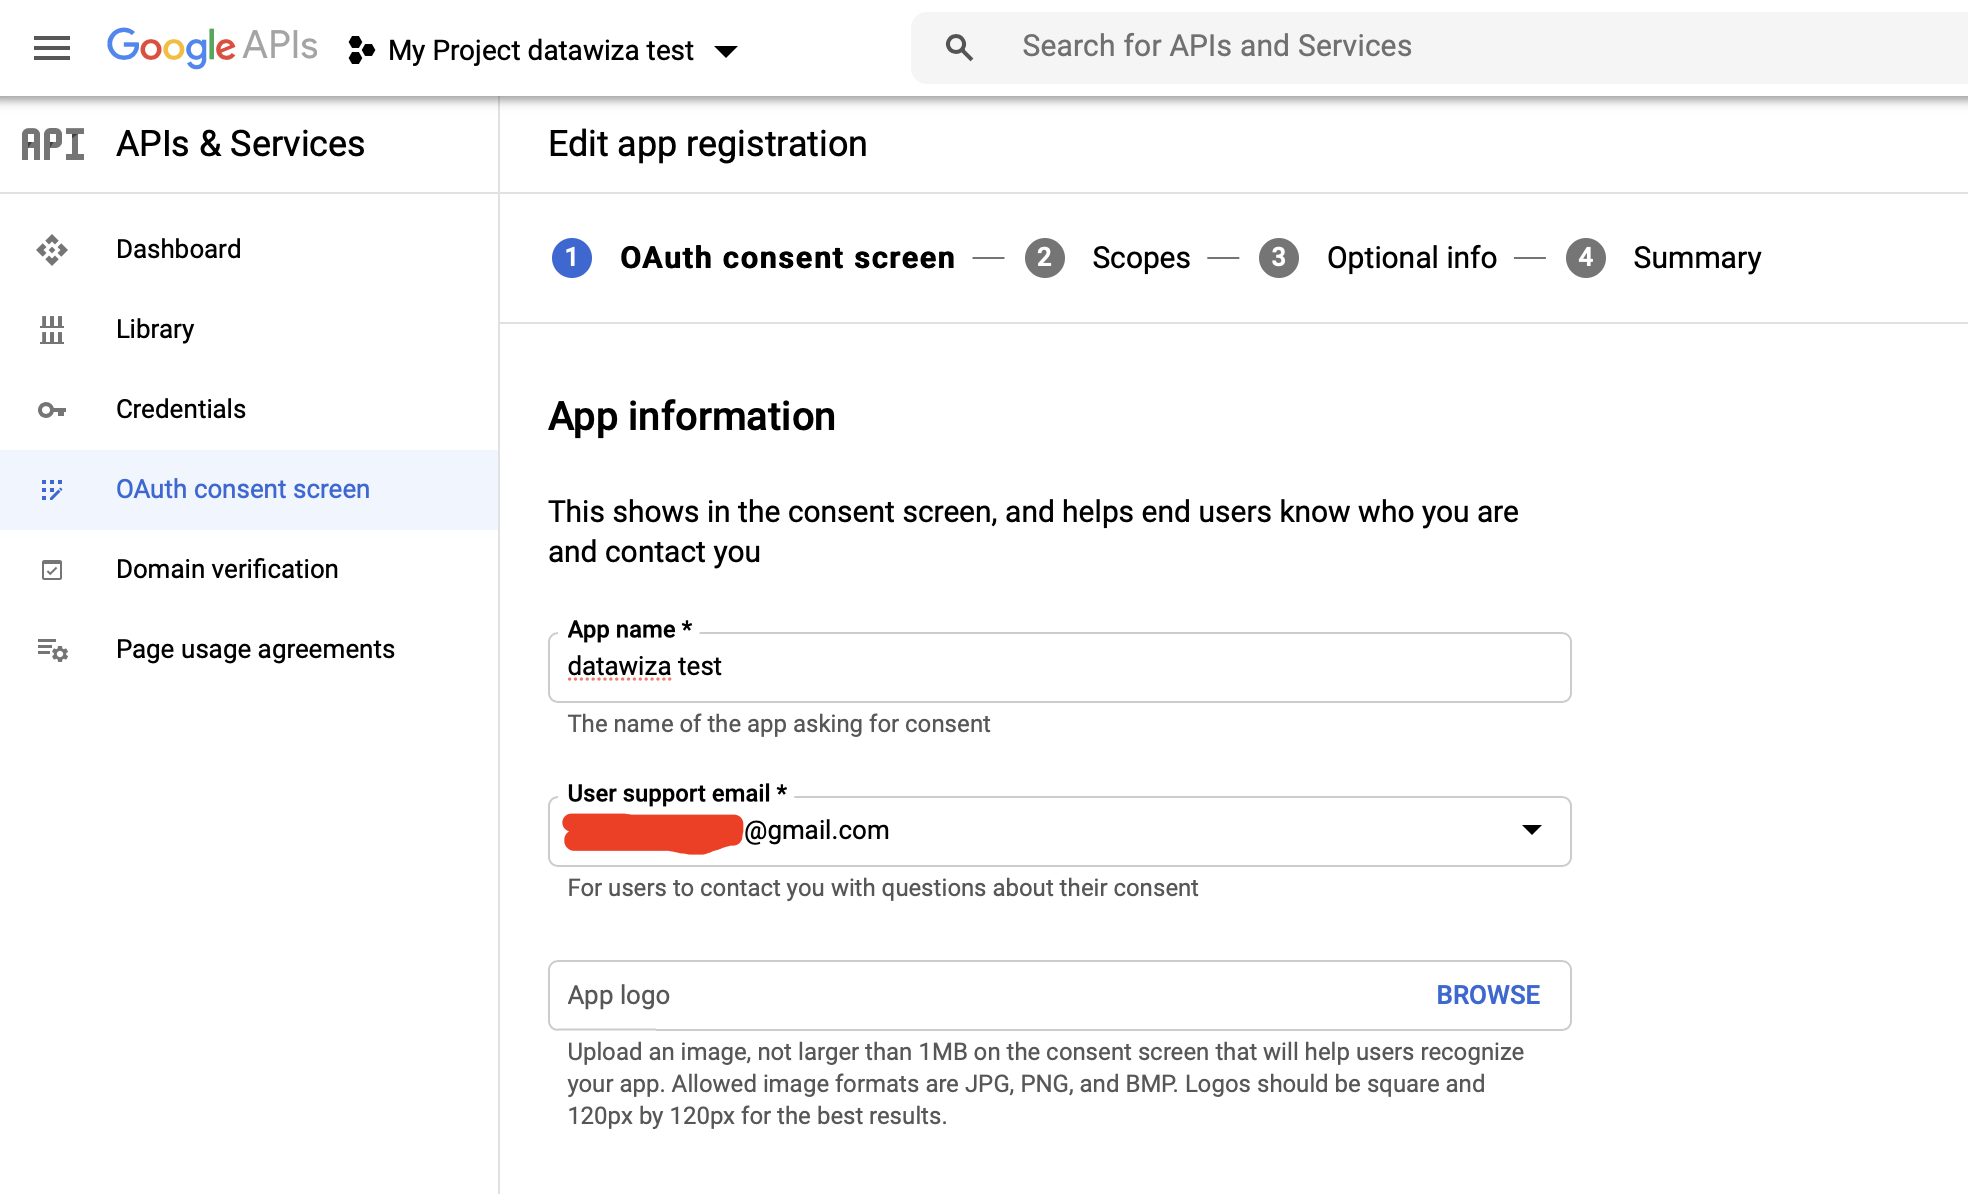
Add basic Scopes and click SAVE AND CONTINUE: 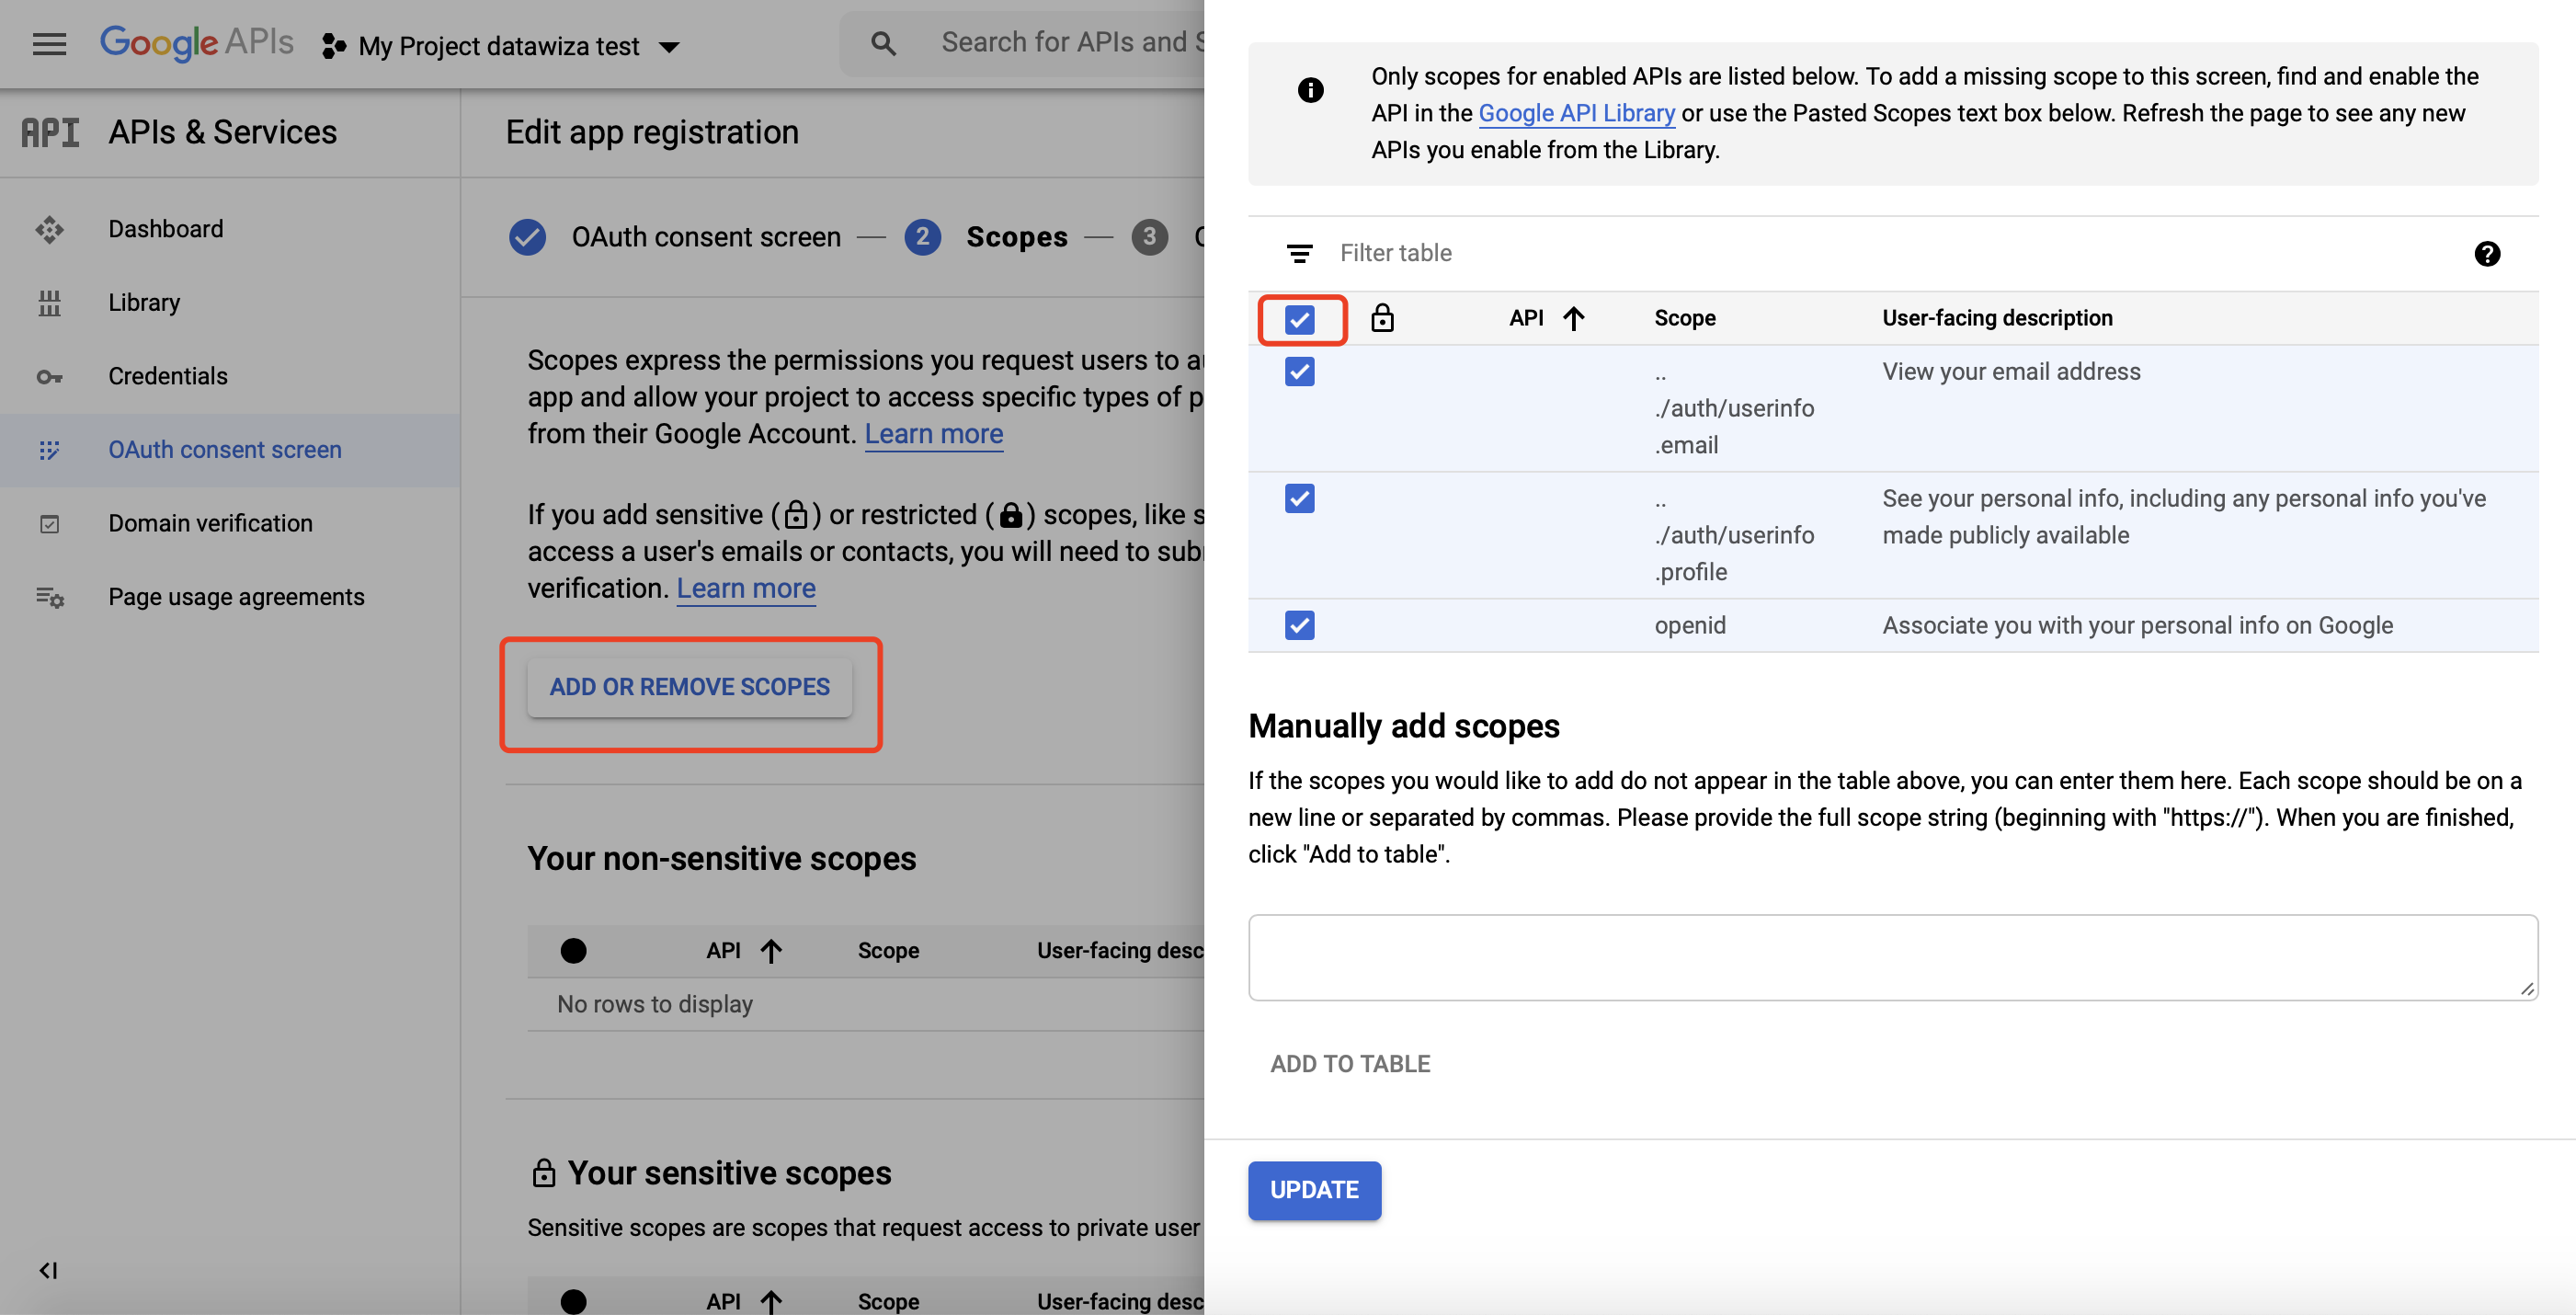 Add
Add Optional info if needed and click SAVE AND CONTINUE.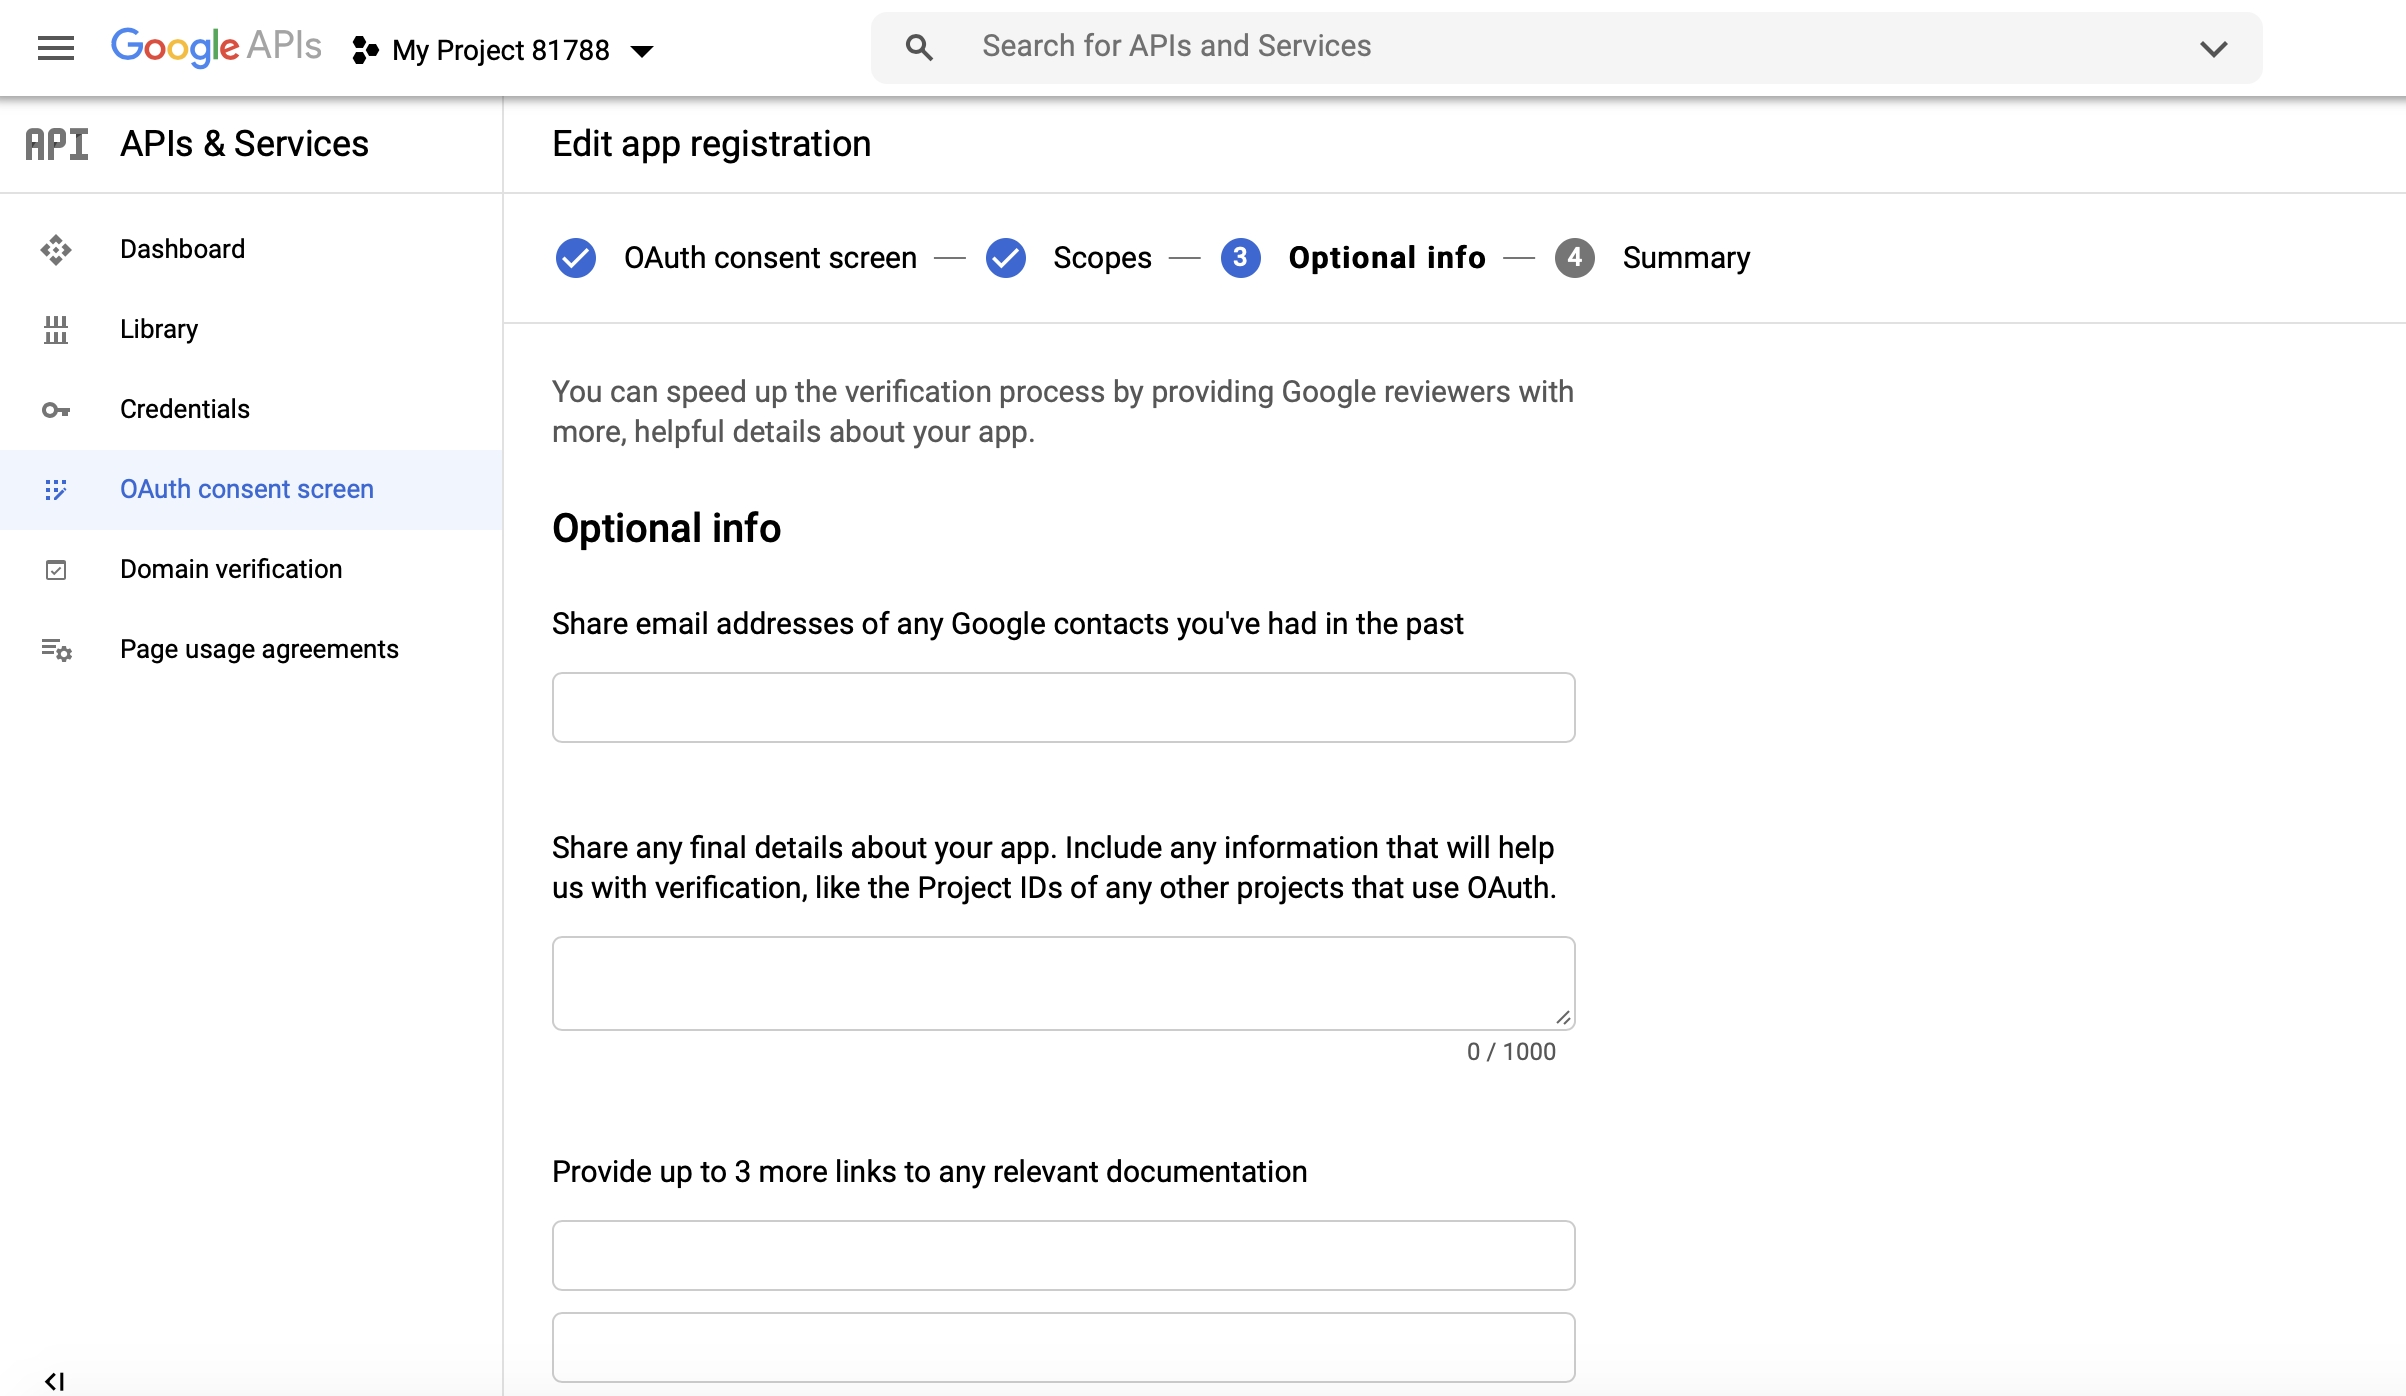 Check the
 Summary and click BACK TO DASHBOARD--an OAuth consent screens should be displayed: 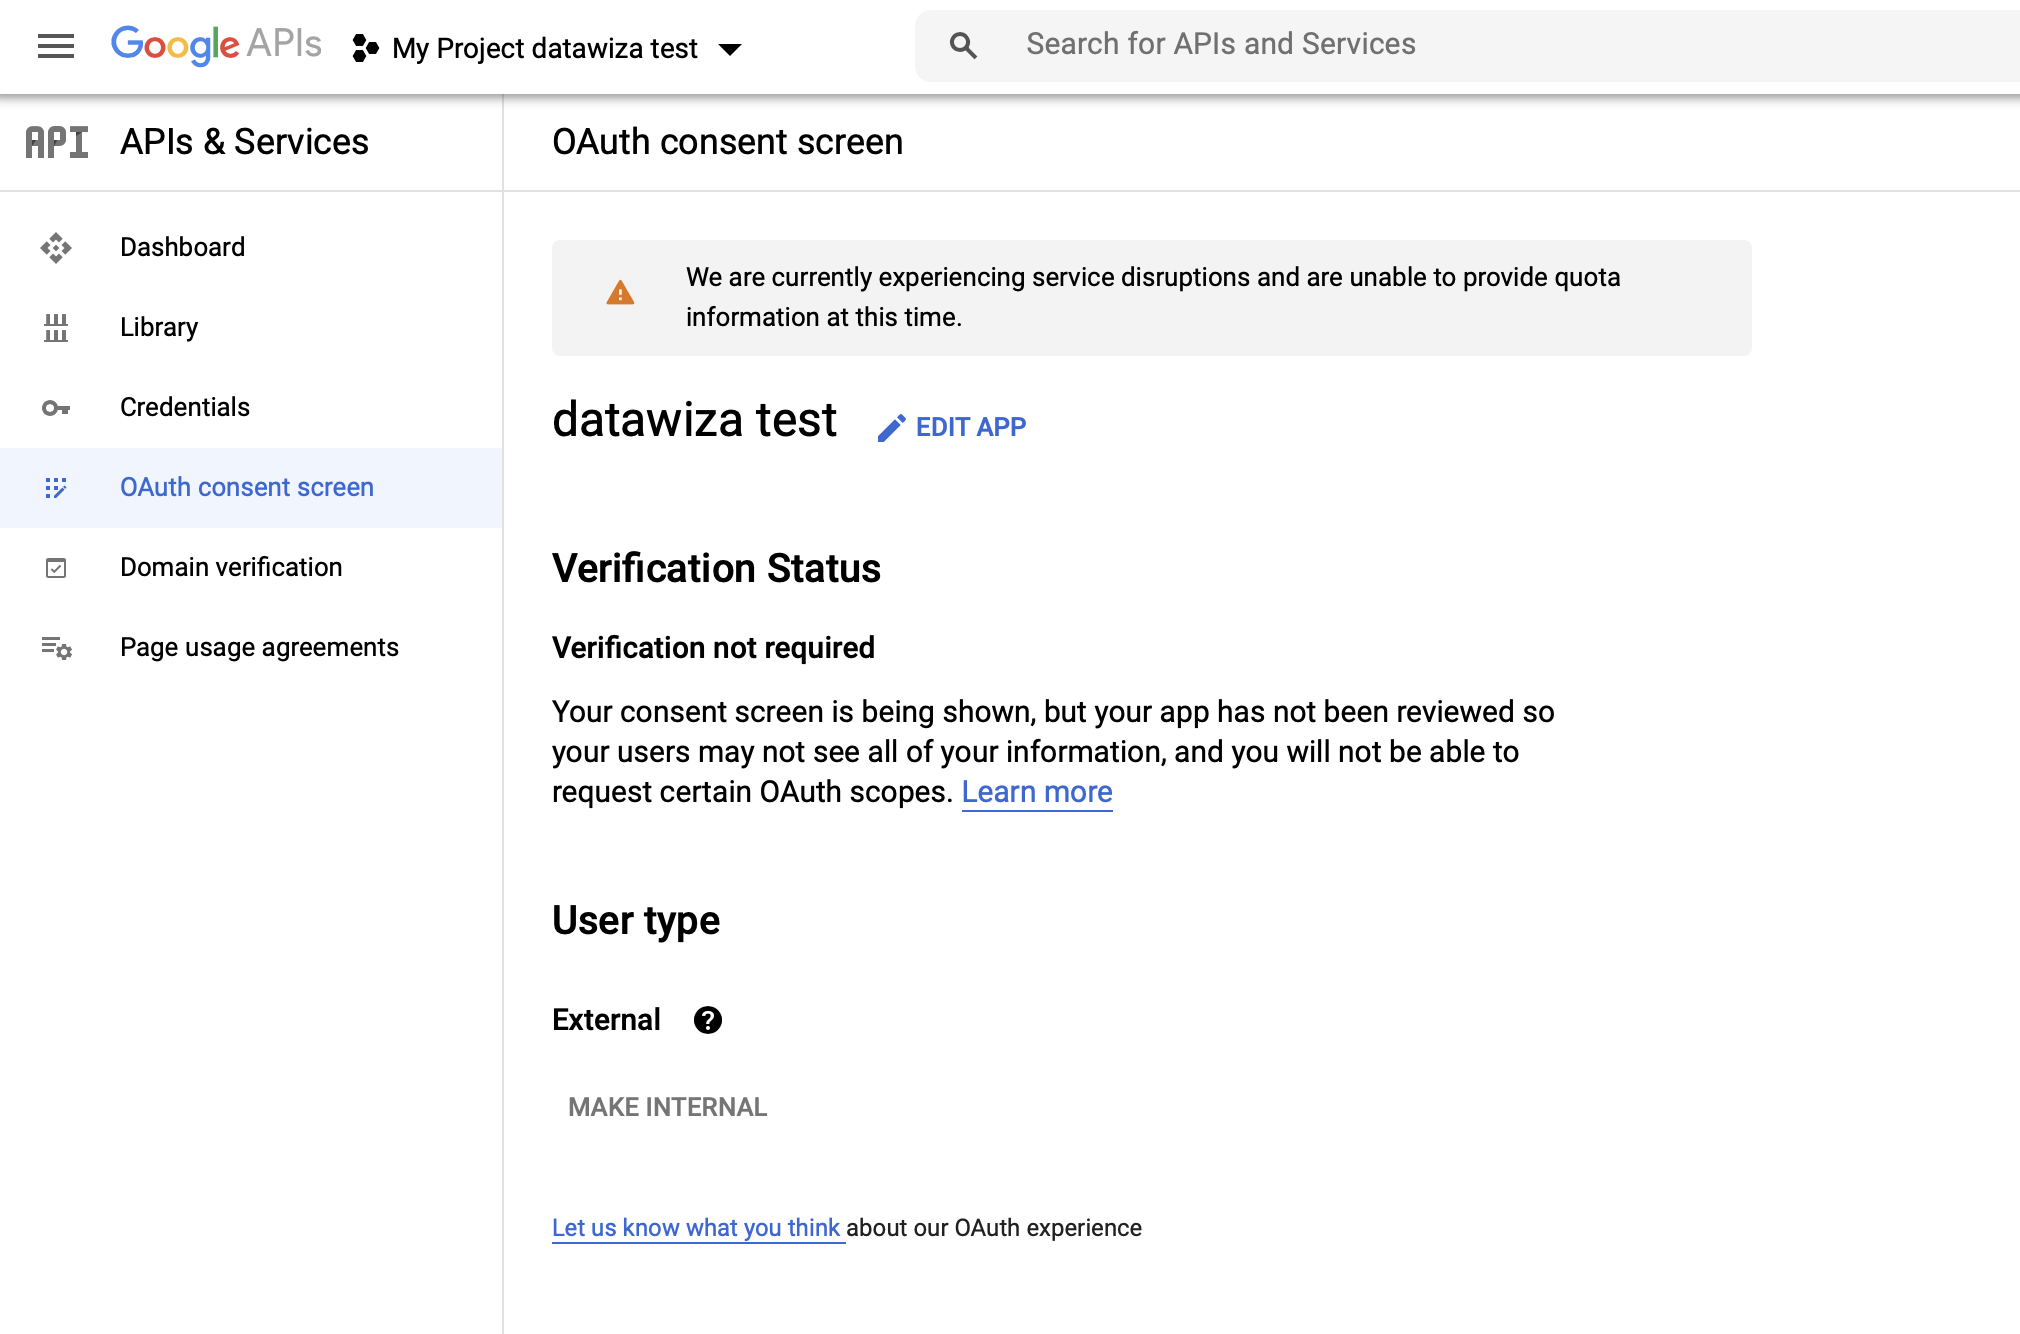
Create and Configure your Google Credentials
2. Create a Credential:
Select Credentials tab and click CREATE CREDENTIALS, then select OAuth client ID:
Select Web application as Application type: 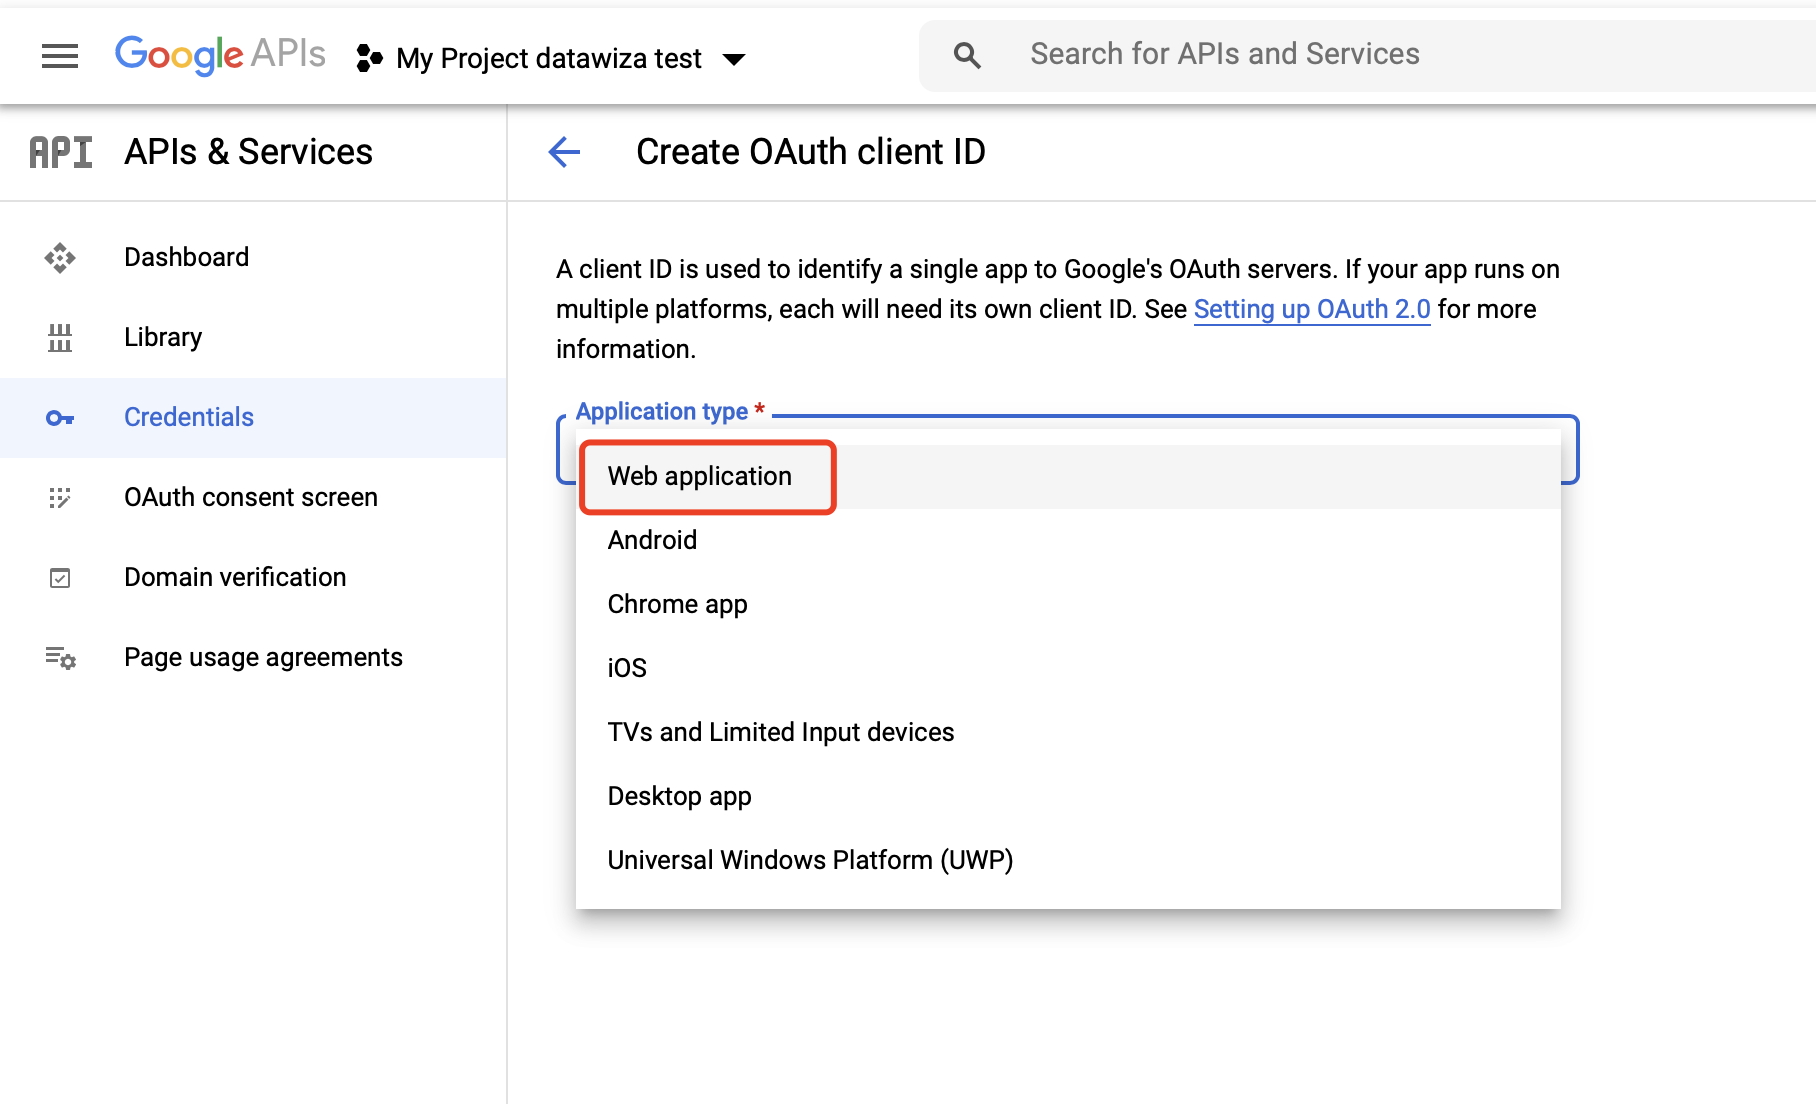
3. Configure the Credential:
Add Authorized redirect URIs, e.g., http://localhost:9772/datawiza/authorization-code/callback, and click Create: 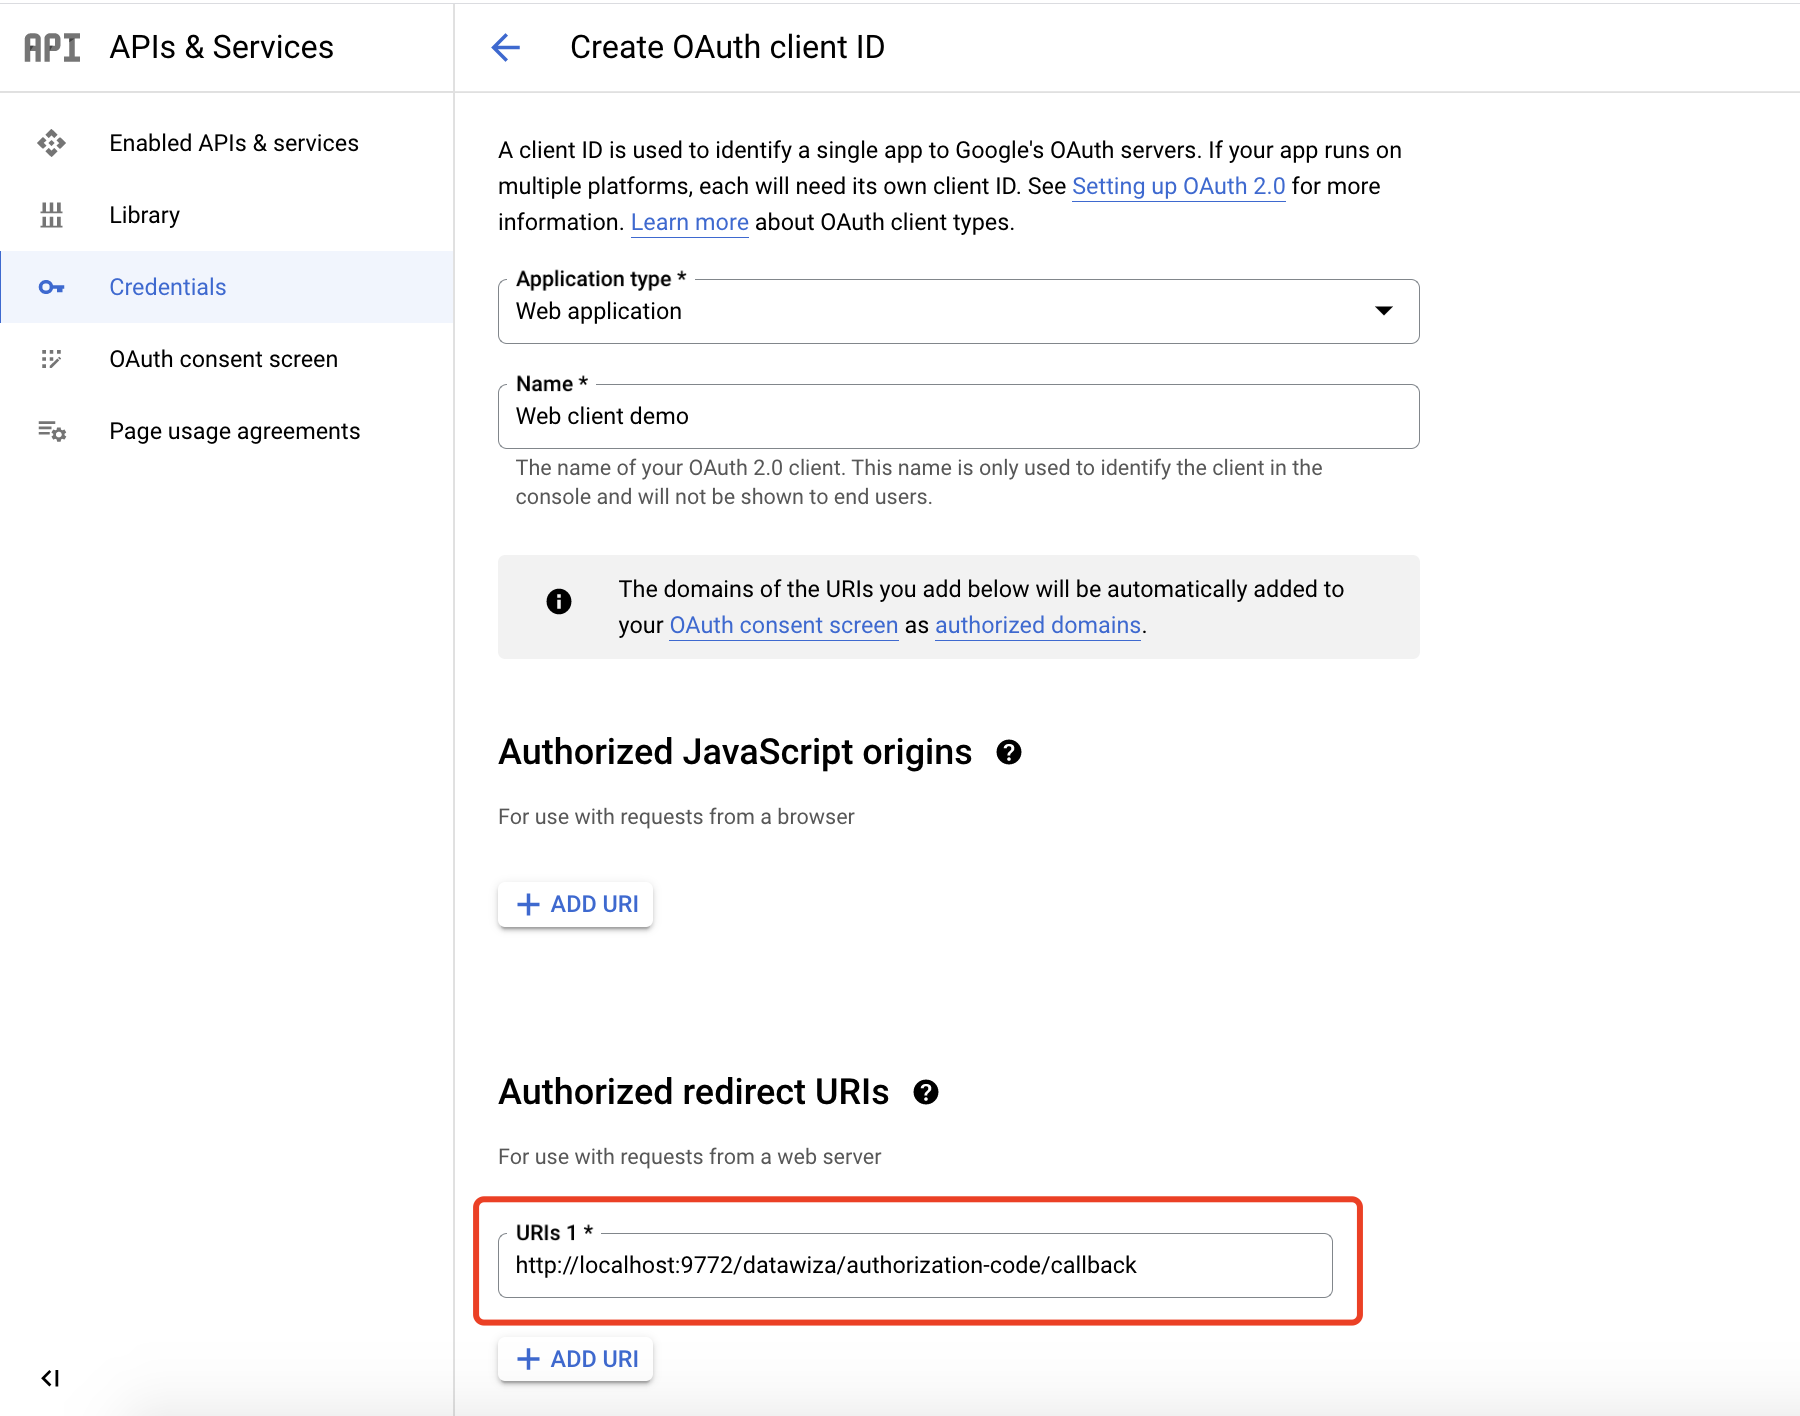
Make sure you save the Client ID and Client Secret. We’ll need to enter these values in the DCMC when configuring our IdP. 
We have shown how to register a Credential on Google. Please make sure to save the Client Id and the Client Secret for later setting in Datawiza Cloud Management Console.
Part II: Datawiza Cloud Management Console (DCMC) Configuration
In this section, we will show you how to create an application on the Datawiza Cloud Management Console (DCMC) and generate a pair of PROVISIONING_KEY and PROVISIONING_SECRET for this app. This key pair is used by the Datawiza Access Proxy to get the latest configurations and policies from the DCMC.
Sign Into DCMC
- Log into the DCMC.
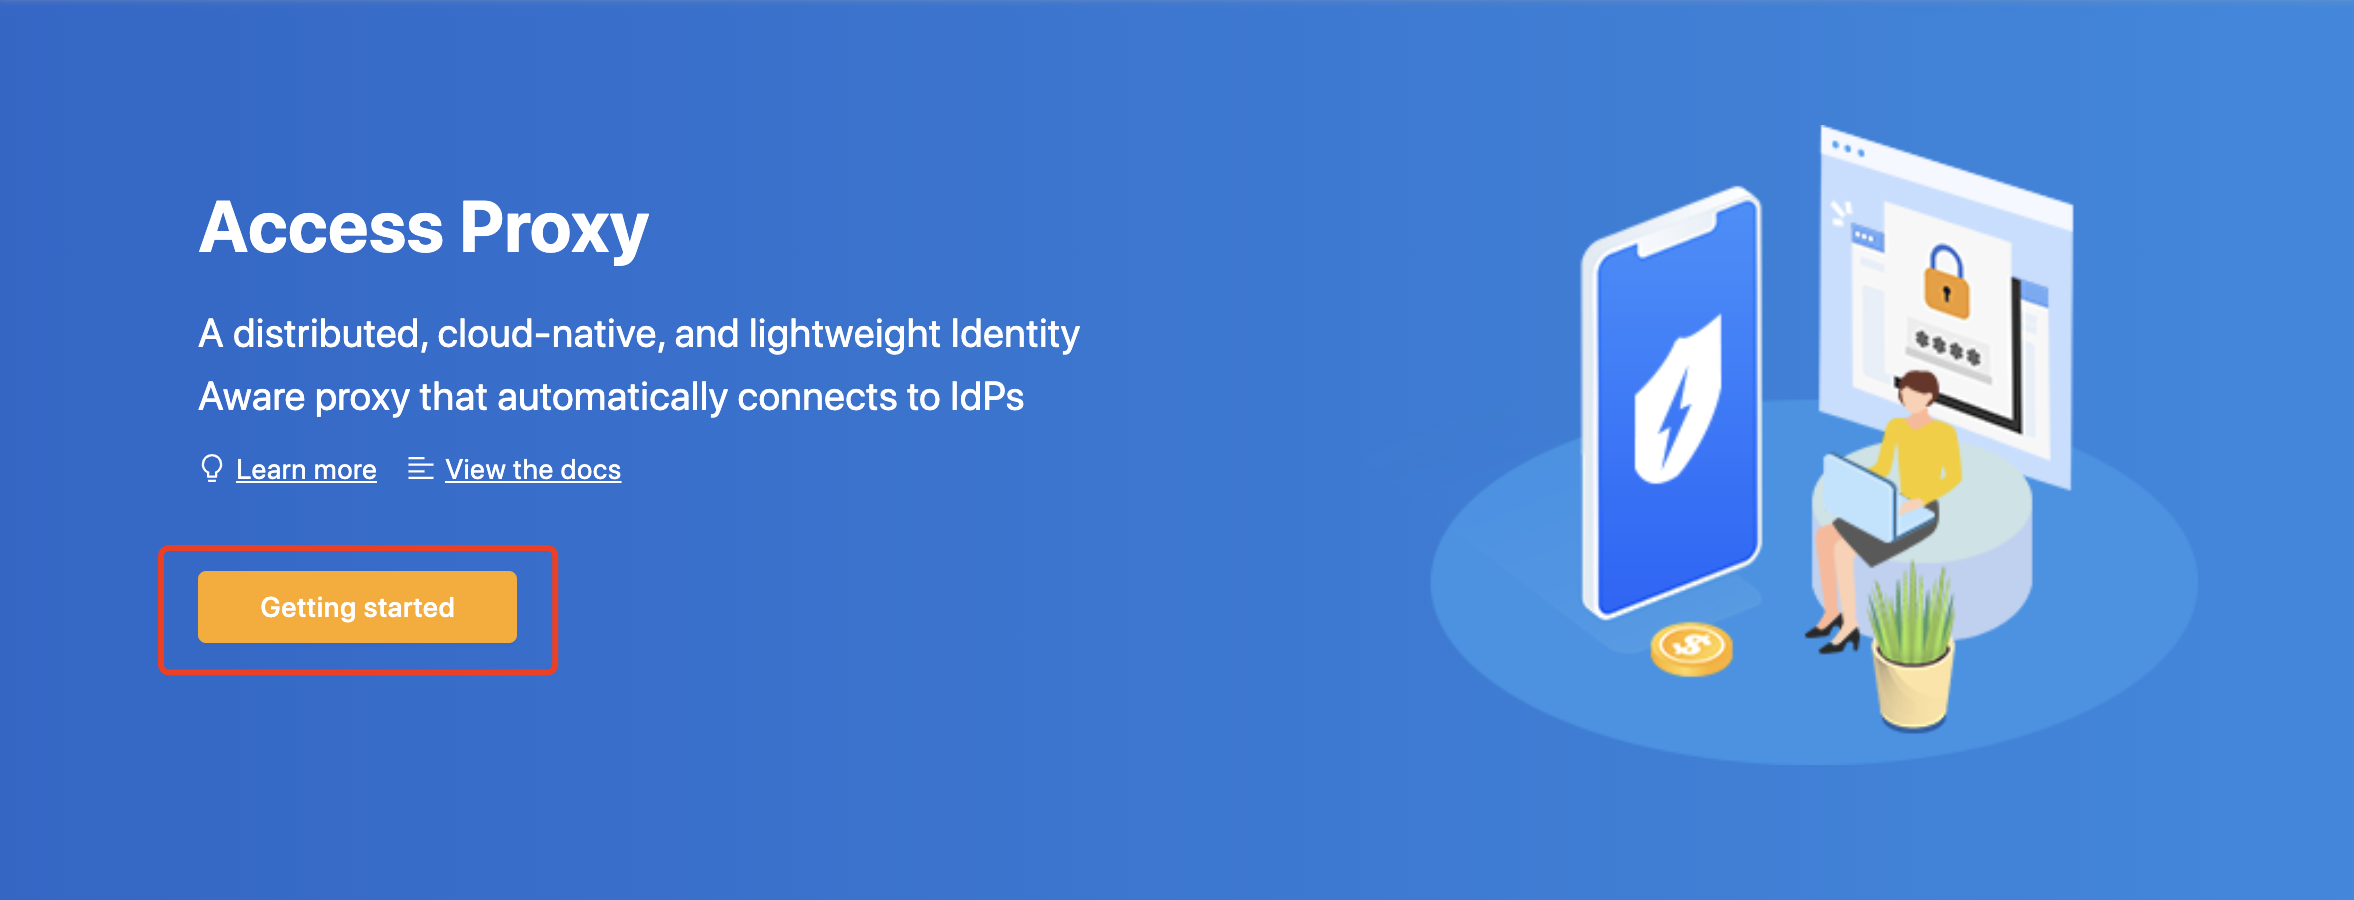
Create New Deployment In DCMC
Welcome to the DCMC homepage! Let's get started:
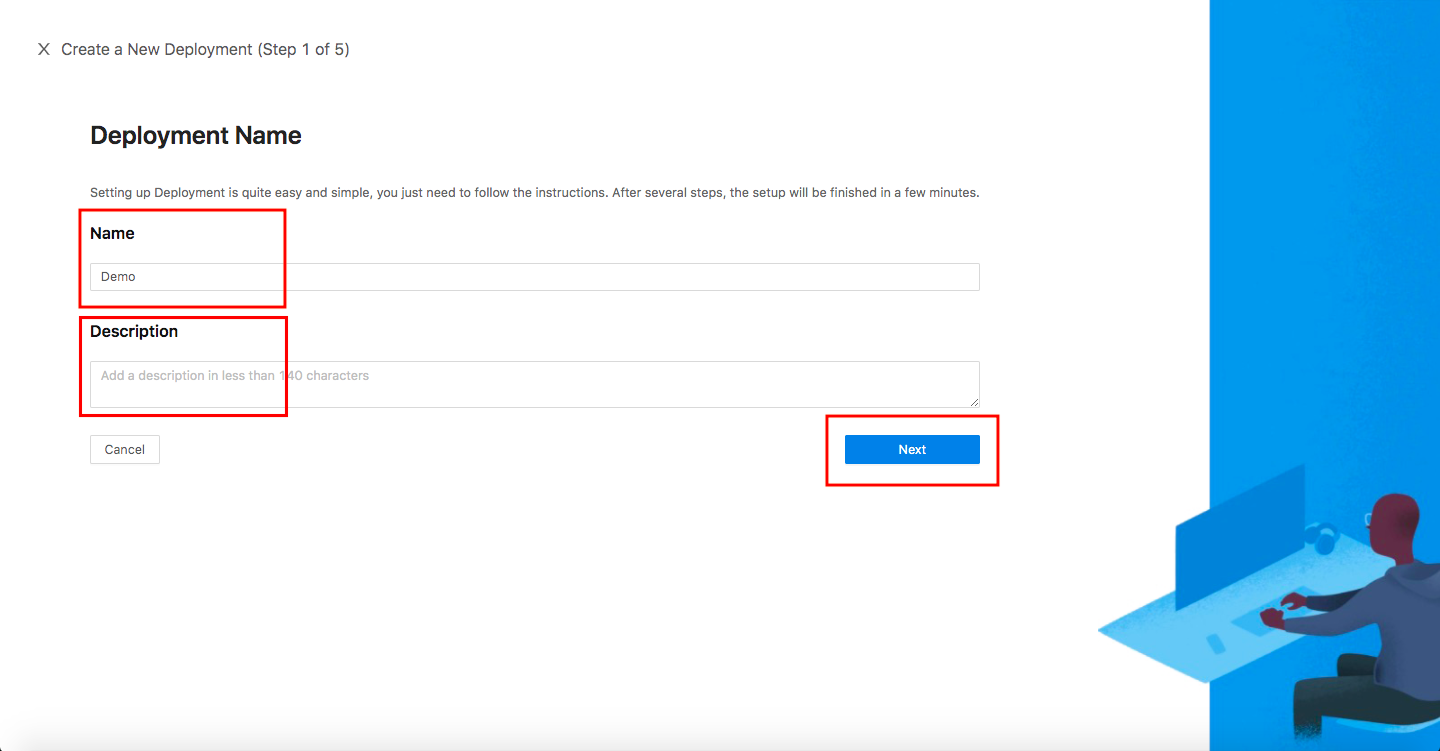
- Click the orange button
Getting started. Specify aNameand aDescription, and clickNext.
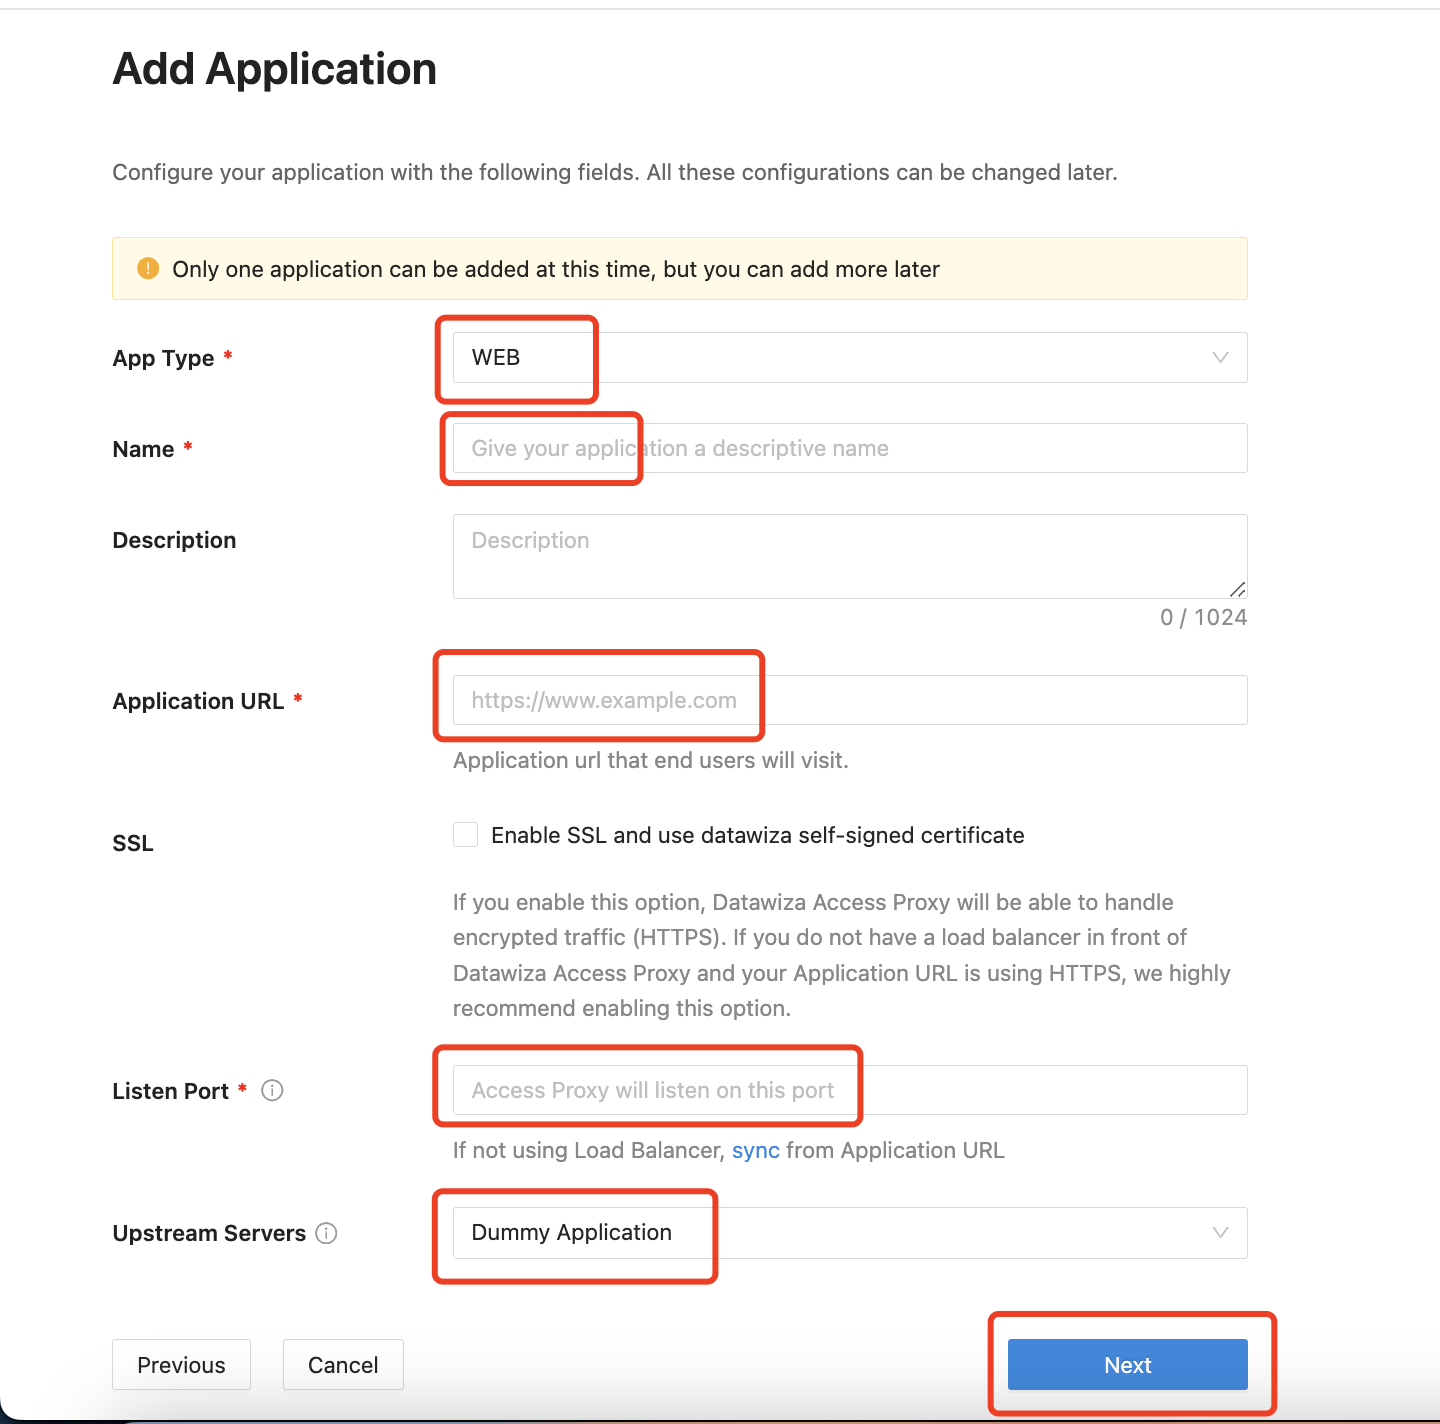
Add Application
Configure your application with the following values:
App Type:WEBName:Demo AppApplication URL:http://localhost:9772Listen Port:9772Upstream Servers:Dummy Application- Select
Next.
Note that Upstream Servers is the address of the application that you want to enable SSO.
- If you use the DAP in sidecar mode and your application is running on
localhost:3001on Mac or Windows, then set the upstream server tohost.docker.internal:3001(Docker 18.03+). - If your application is running on Linux, use
ip addr show docker0to get docker host IP (e.g.,172.17.0.1) and then set upstream server to172.17.0.1:3001(see this for more details). - If you do not have any prepared application, you can use our pre-built-in application and set
Upstream ServerstoDummy Application.
IdP Configuration
- Select Google as the
Identity Providerfrom the drop-down menu. Input theClient IDand theClient Secretgotten from the Google Cloud Platform.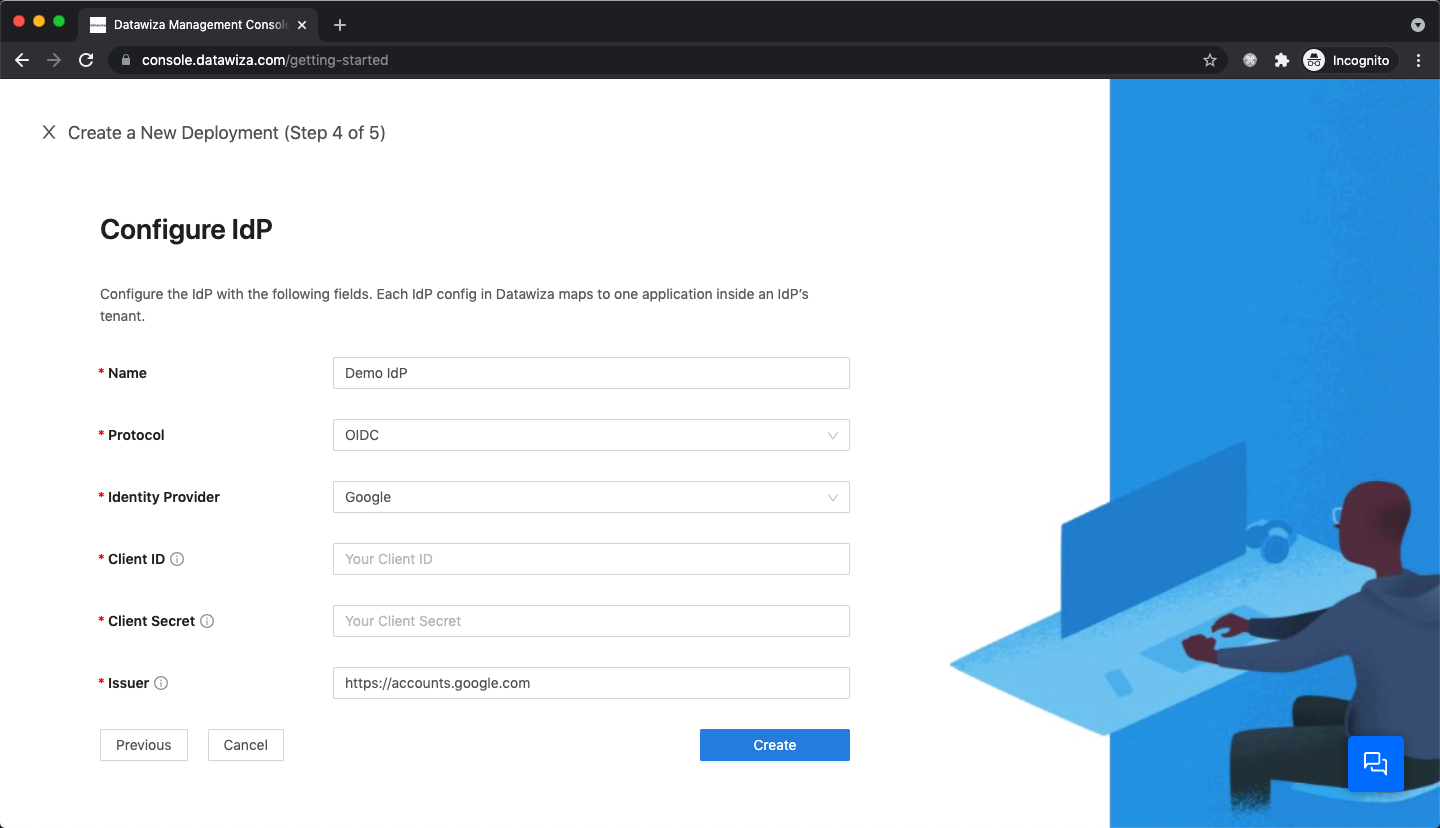
Part III: Run DAP
You can use either Docker or Kubernetes to run DAP. The following is an example docker-compose.yml file. You may need to login to our container registry to download the images of DAP and the header-based app. See Step3 : Configure DAP and SSO Integration for more details or Deploy DAP with Kubernetes for Kubernetes-specific instructions.
version: '3'

services:
  datawiza-access-proxy:
    image: registry.gitlab.com/datawiza/access-proxy
    container_name: datawiza-access-proxy
    restart: always
    ports:
      - "9772:9772"
    environment:
      PROVISIONING_KEY: #############################
      PROVISIONING_SECRET: #############################
After executing docker-compose -f docker-compose.yml up, the header-based app should have SSO enabled with Google. Open a browser and type in http://localhost:9772/. You should see the Google login page as follows. 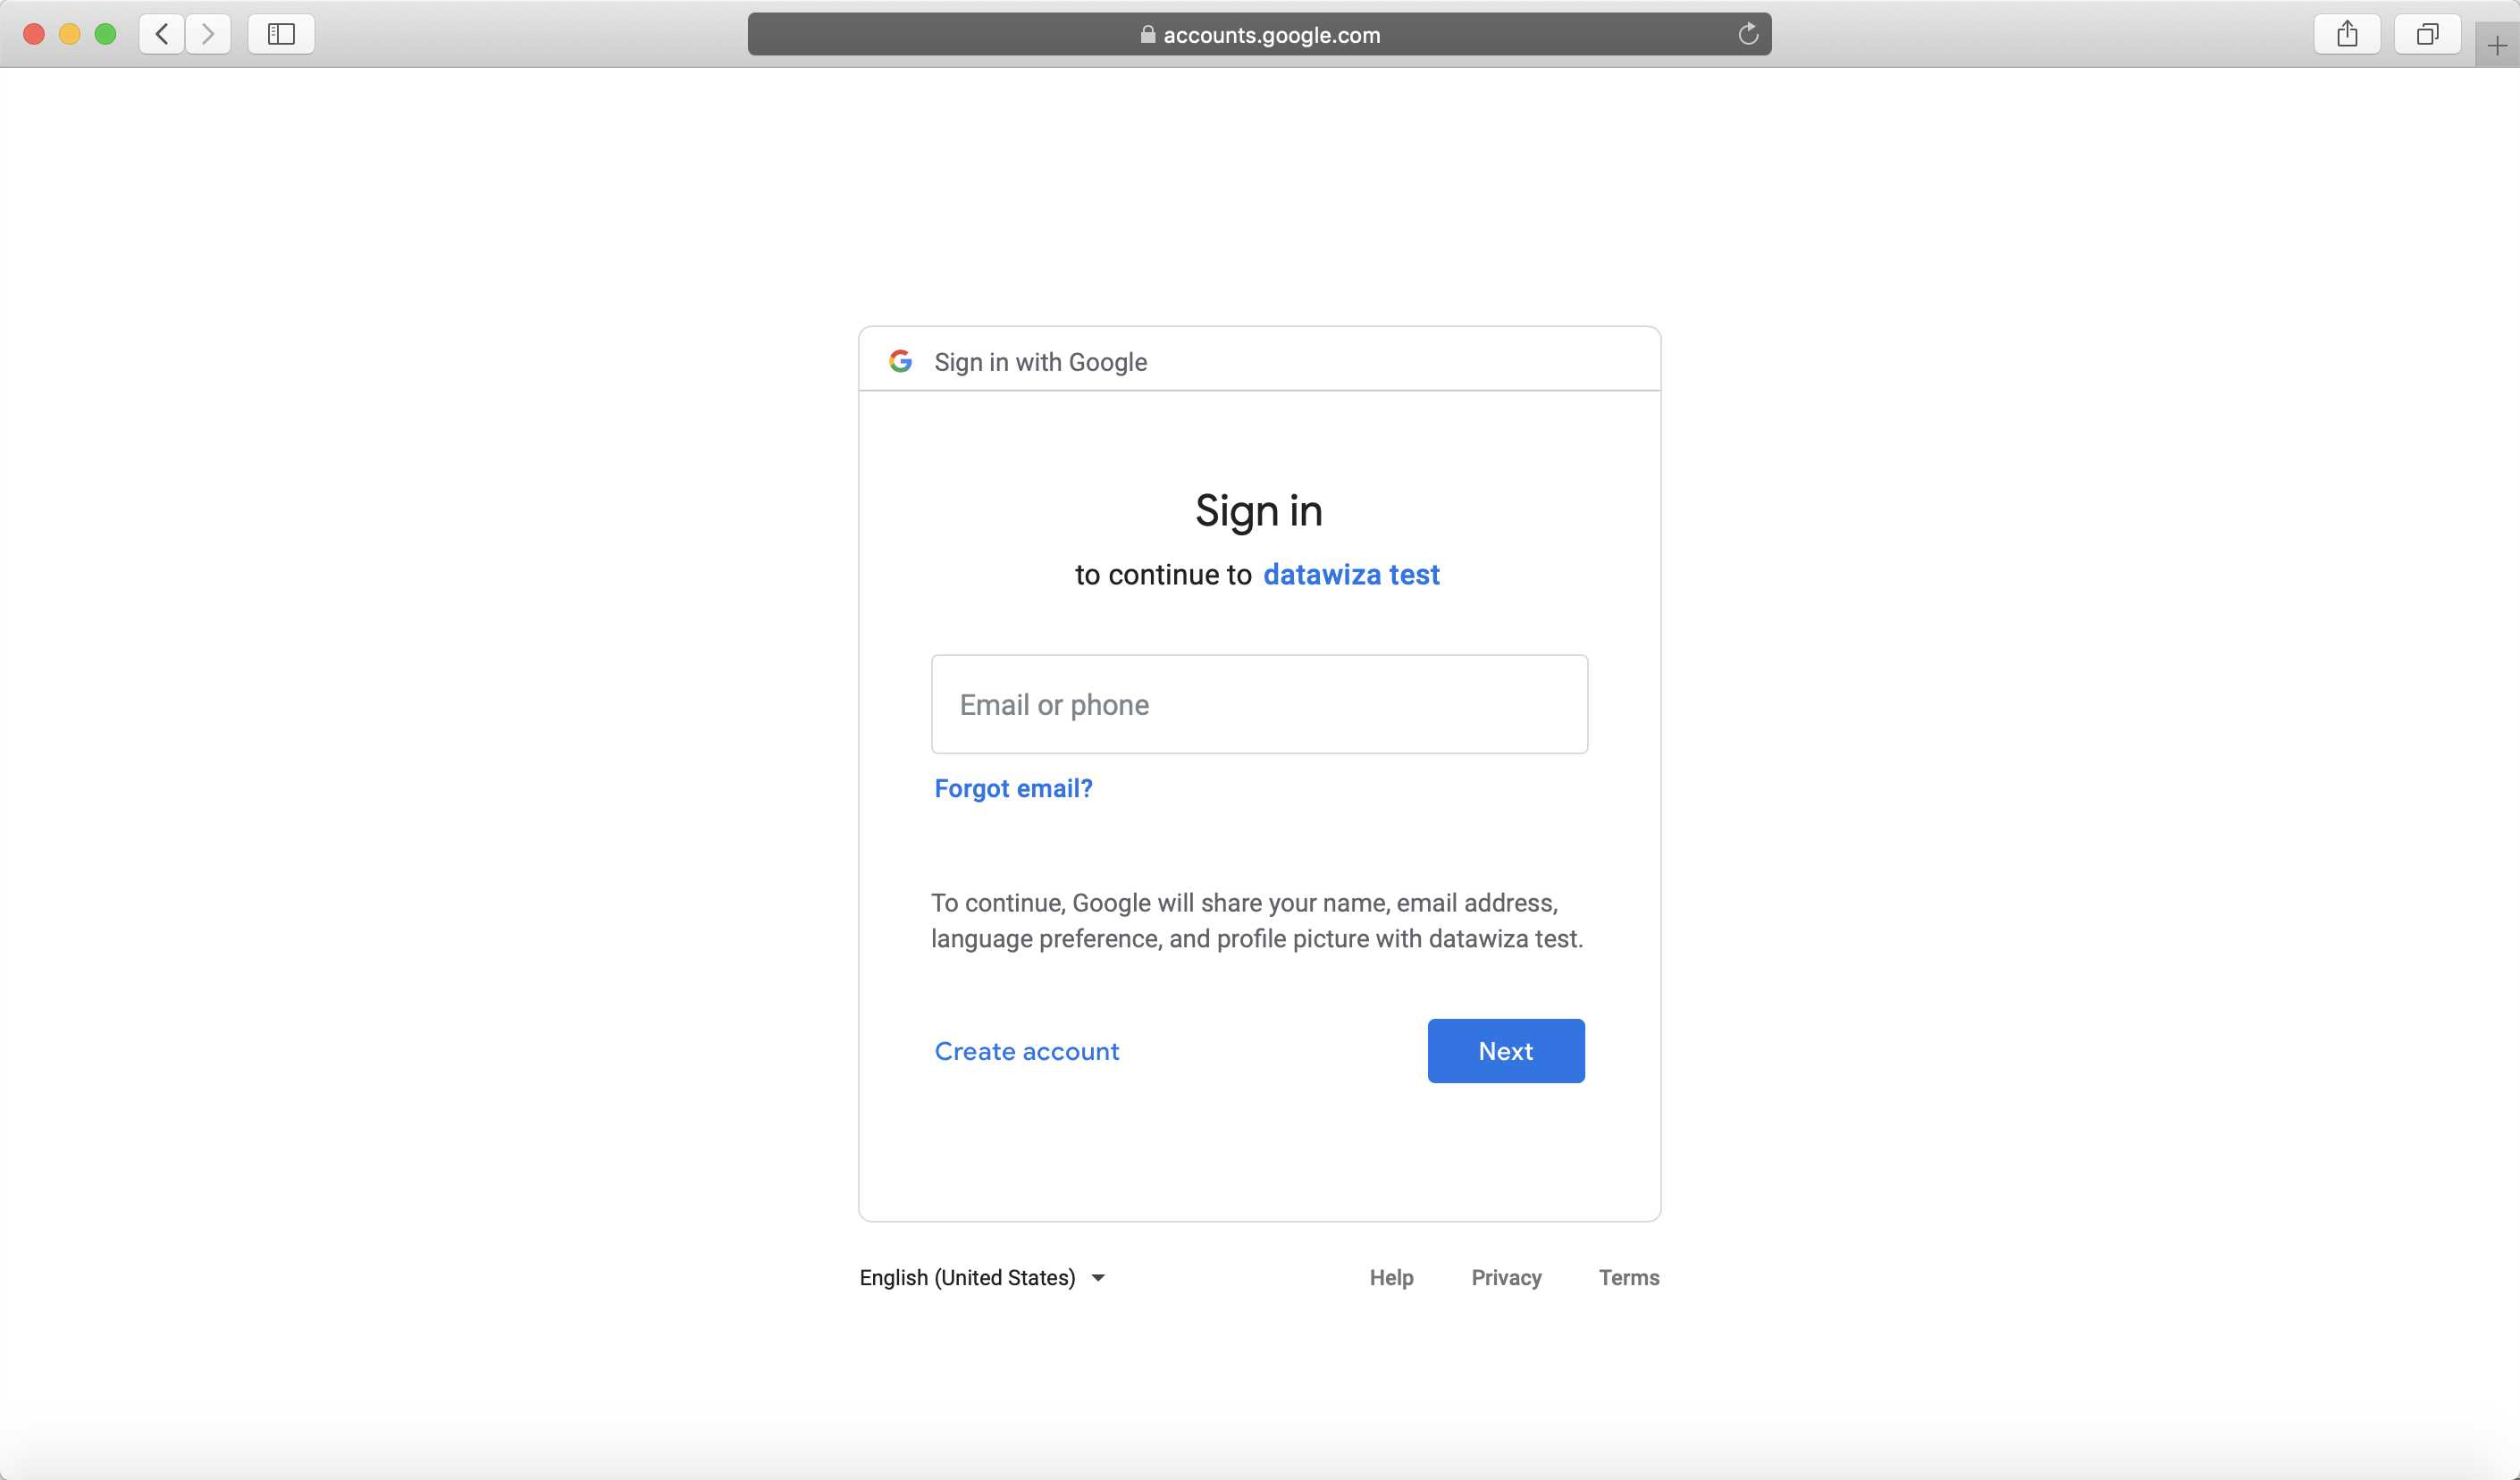
Part IV: Pass User Attributes to the Header-Based App
The DAP gets user attributes from the IdP and can pass the user attributes to the application via header or cookie.
Please follow the instructions of Step4 : Pass User Attributes to pass the user attributes to the header-based app.
After successfully configuring the user attributes, you should see the green check sign for the first three user attributes as follows. 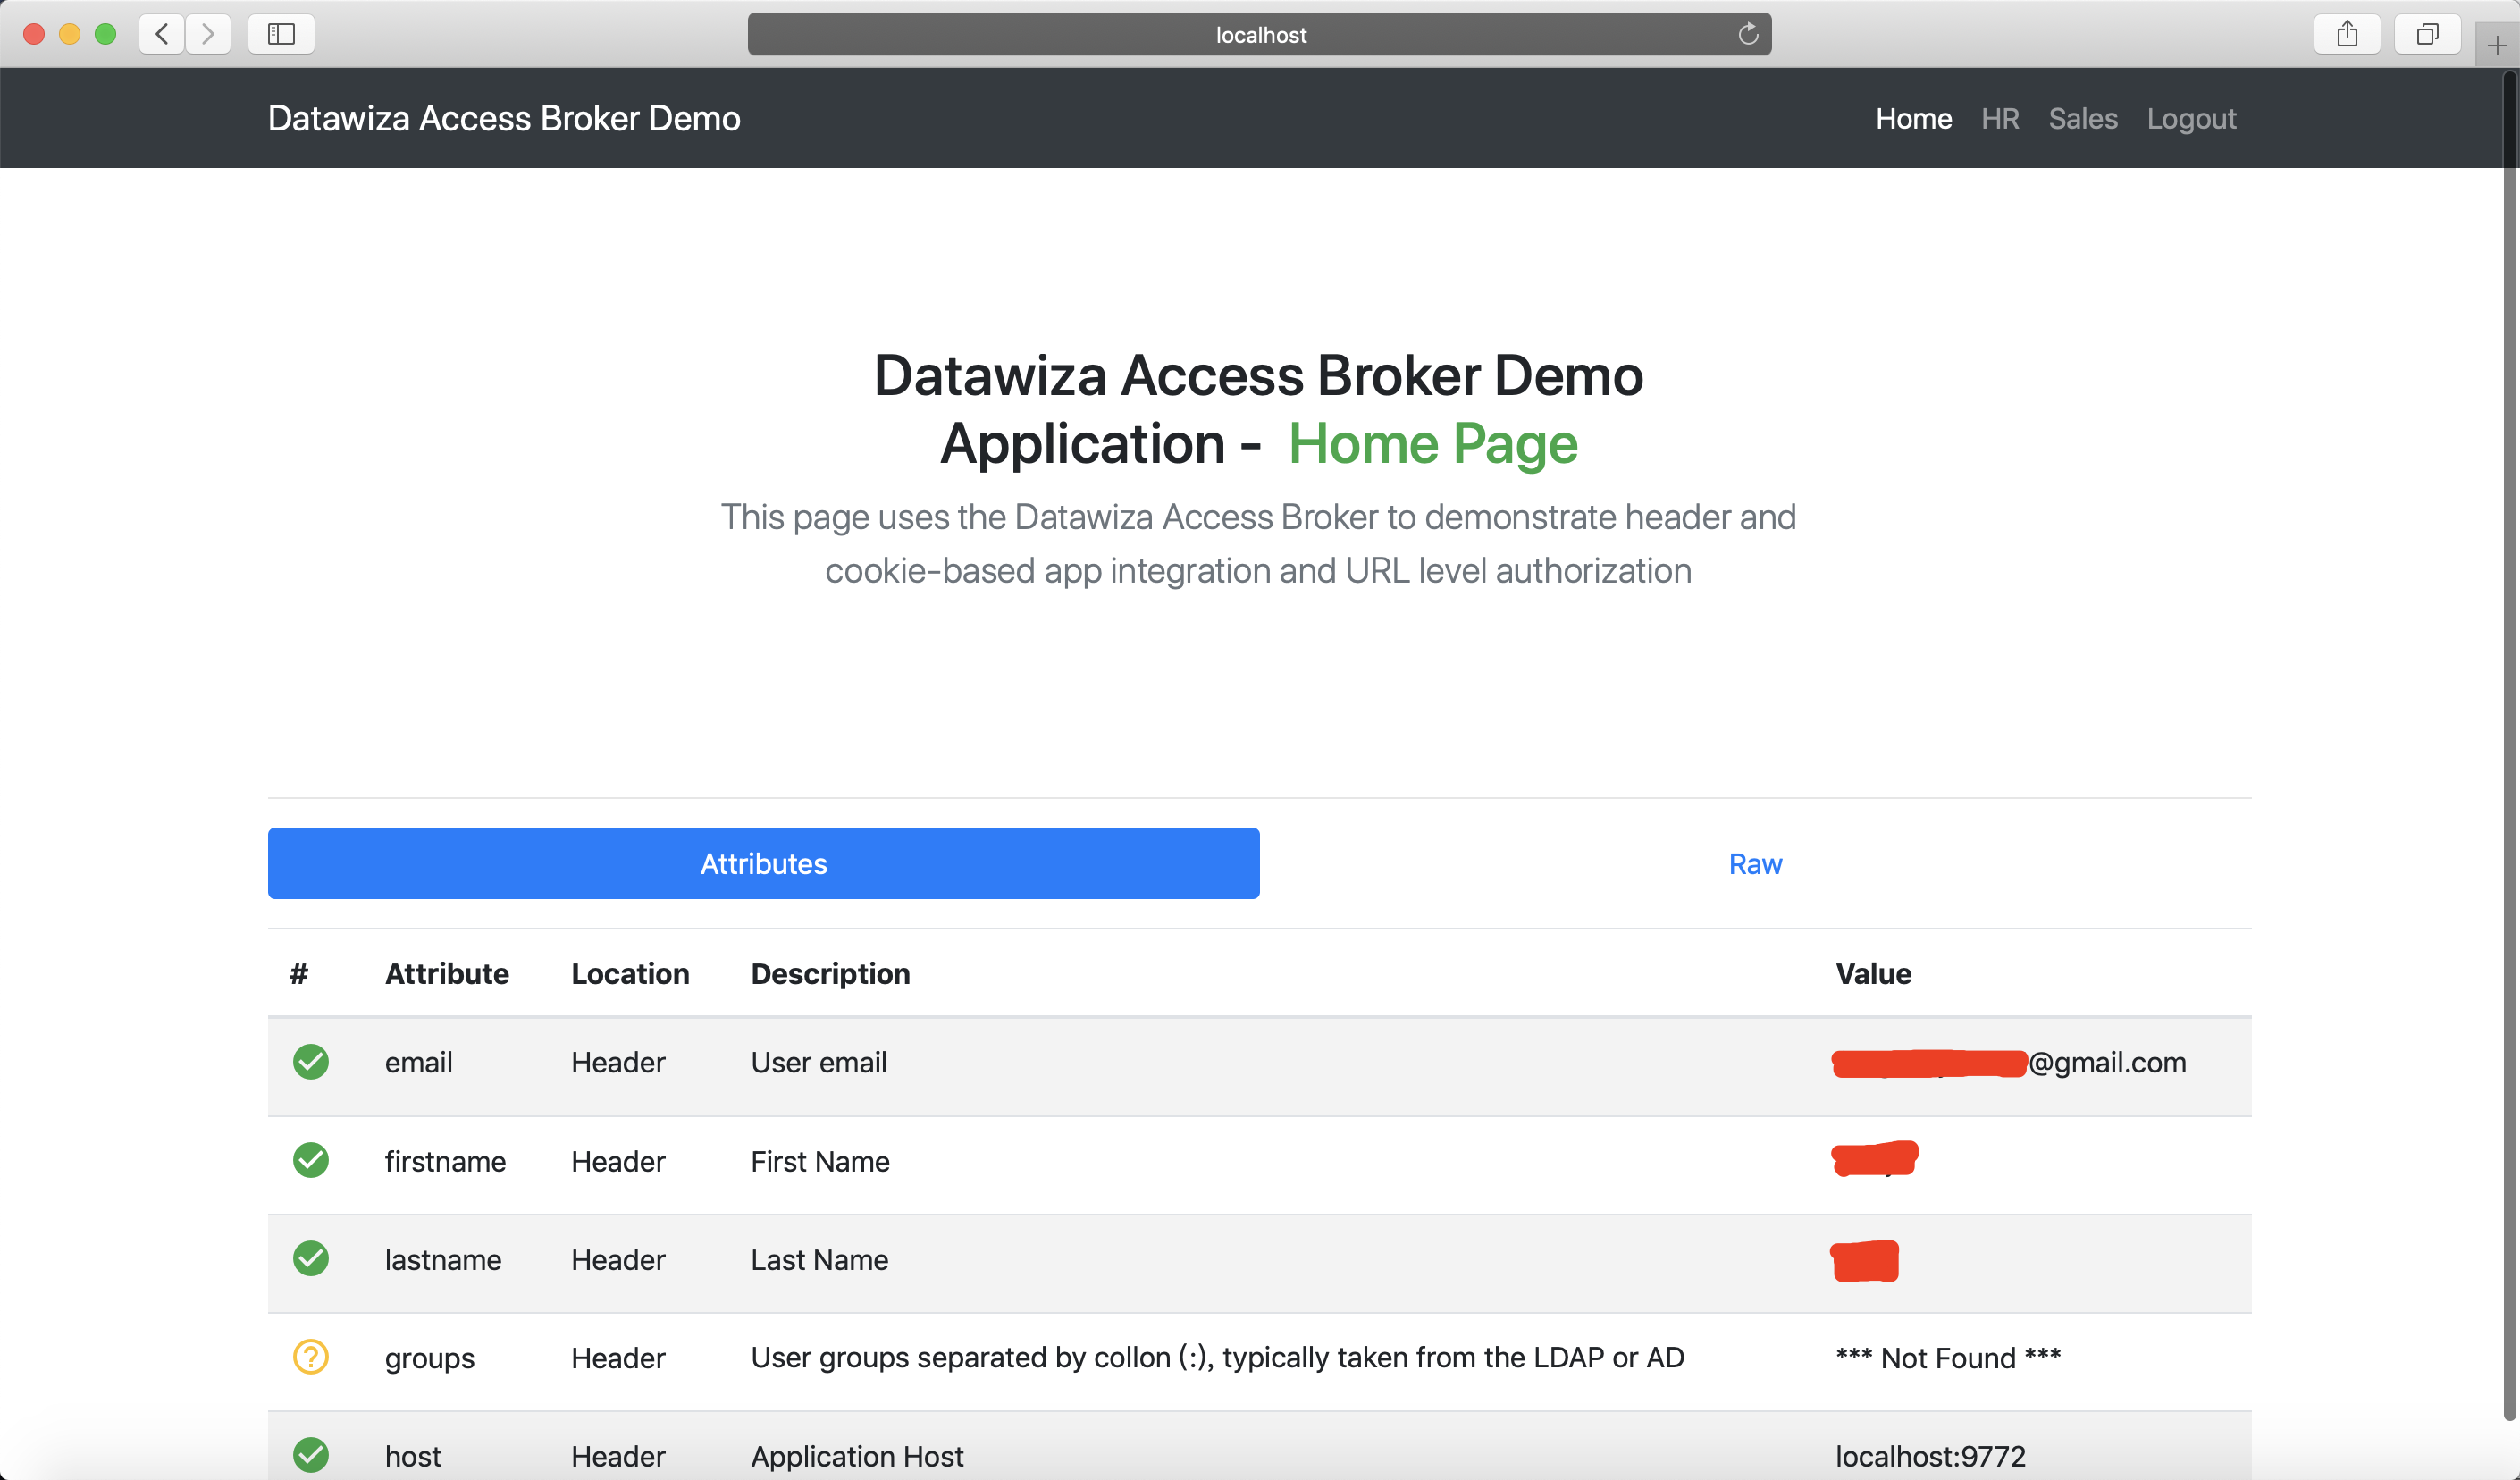
Part V: Achieve Granular Access Control
You can configure access control to an application based on the user's attributes (e.g., given name, family name) and other metadata of a request (e.g., URL, IP, HTTP method, access time).
Please reference Step5 : Achieve Granular Access Control for detailed instructions on how to set up access rules.
A Rule Example
- Create the following two rules: Because Google social account doesn't have group or role, we use the first name here as example:
hr pathcan only be accessed by the user whose first name isWest.sales pathcan only be accessed by the user whose first name isJohn.
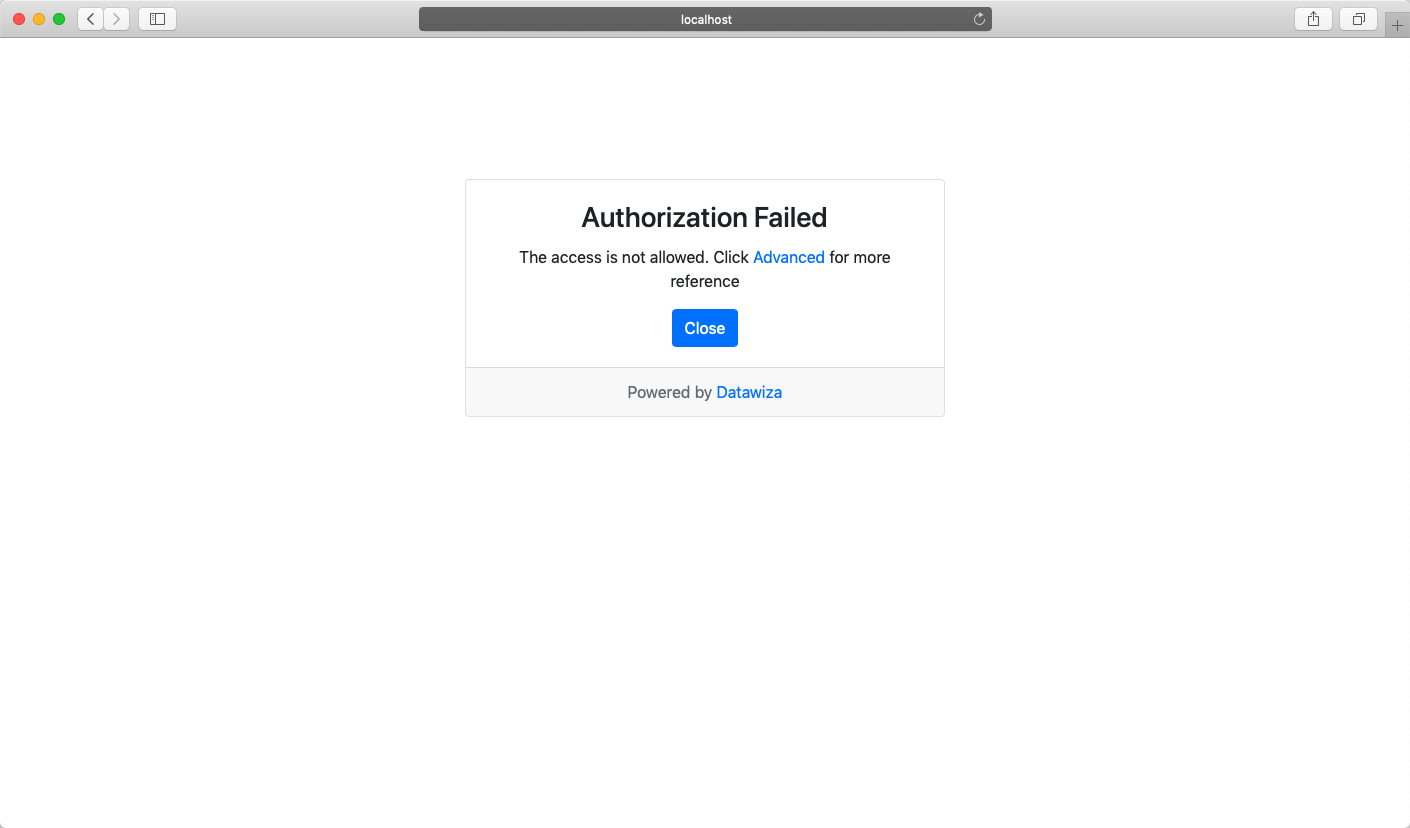
- Verify that the user can only access
hrpage in the header-based app, but cannot accesssalespage. Trying to access the header-based application onlocalhost:9772in your browser, you should get something similar to the following screenshots.http://localhost:9772/hr: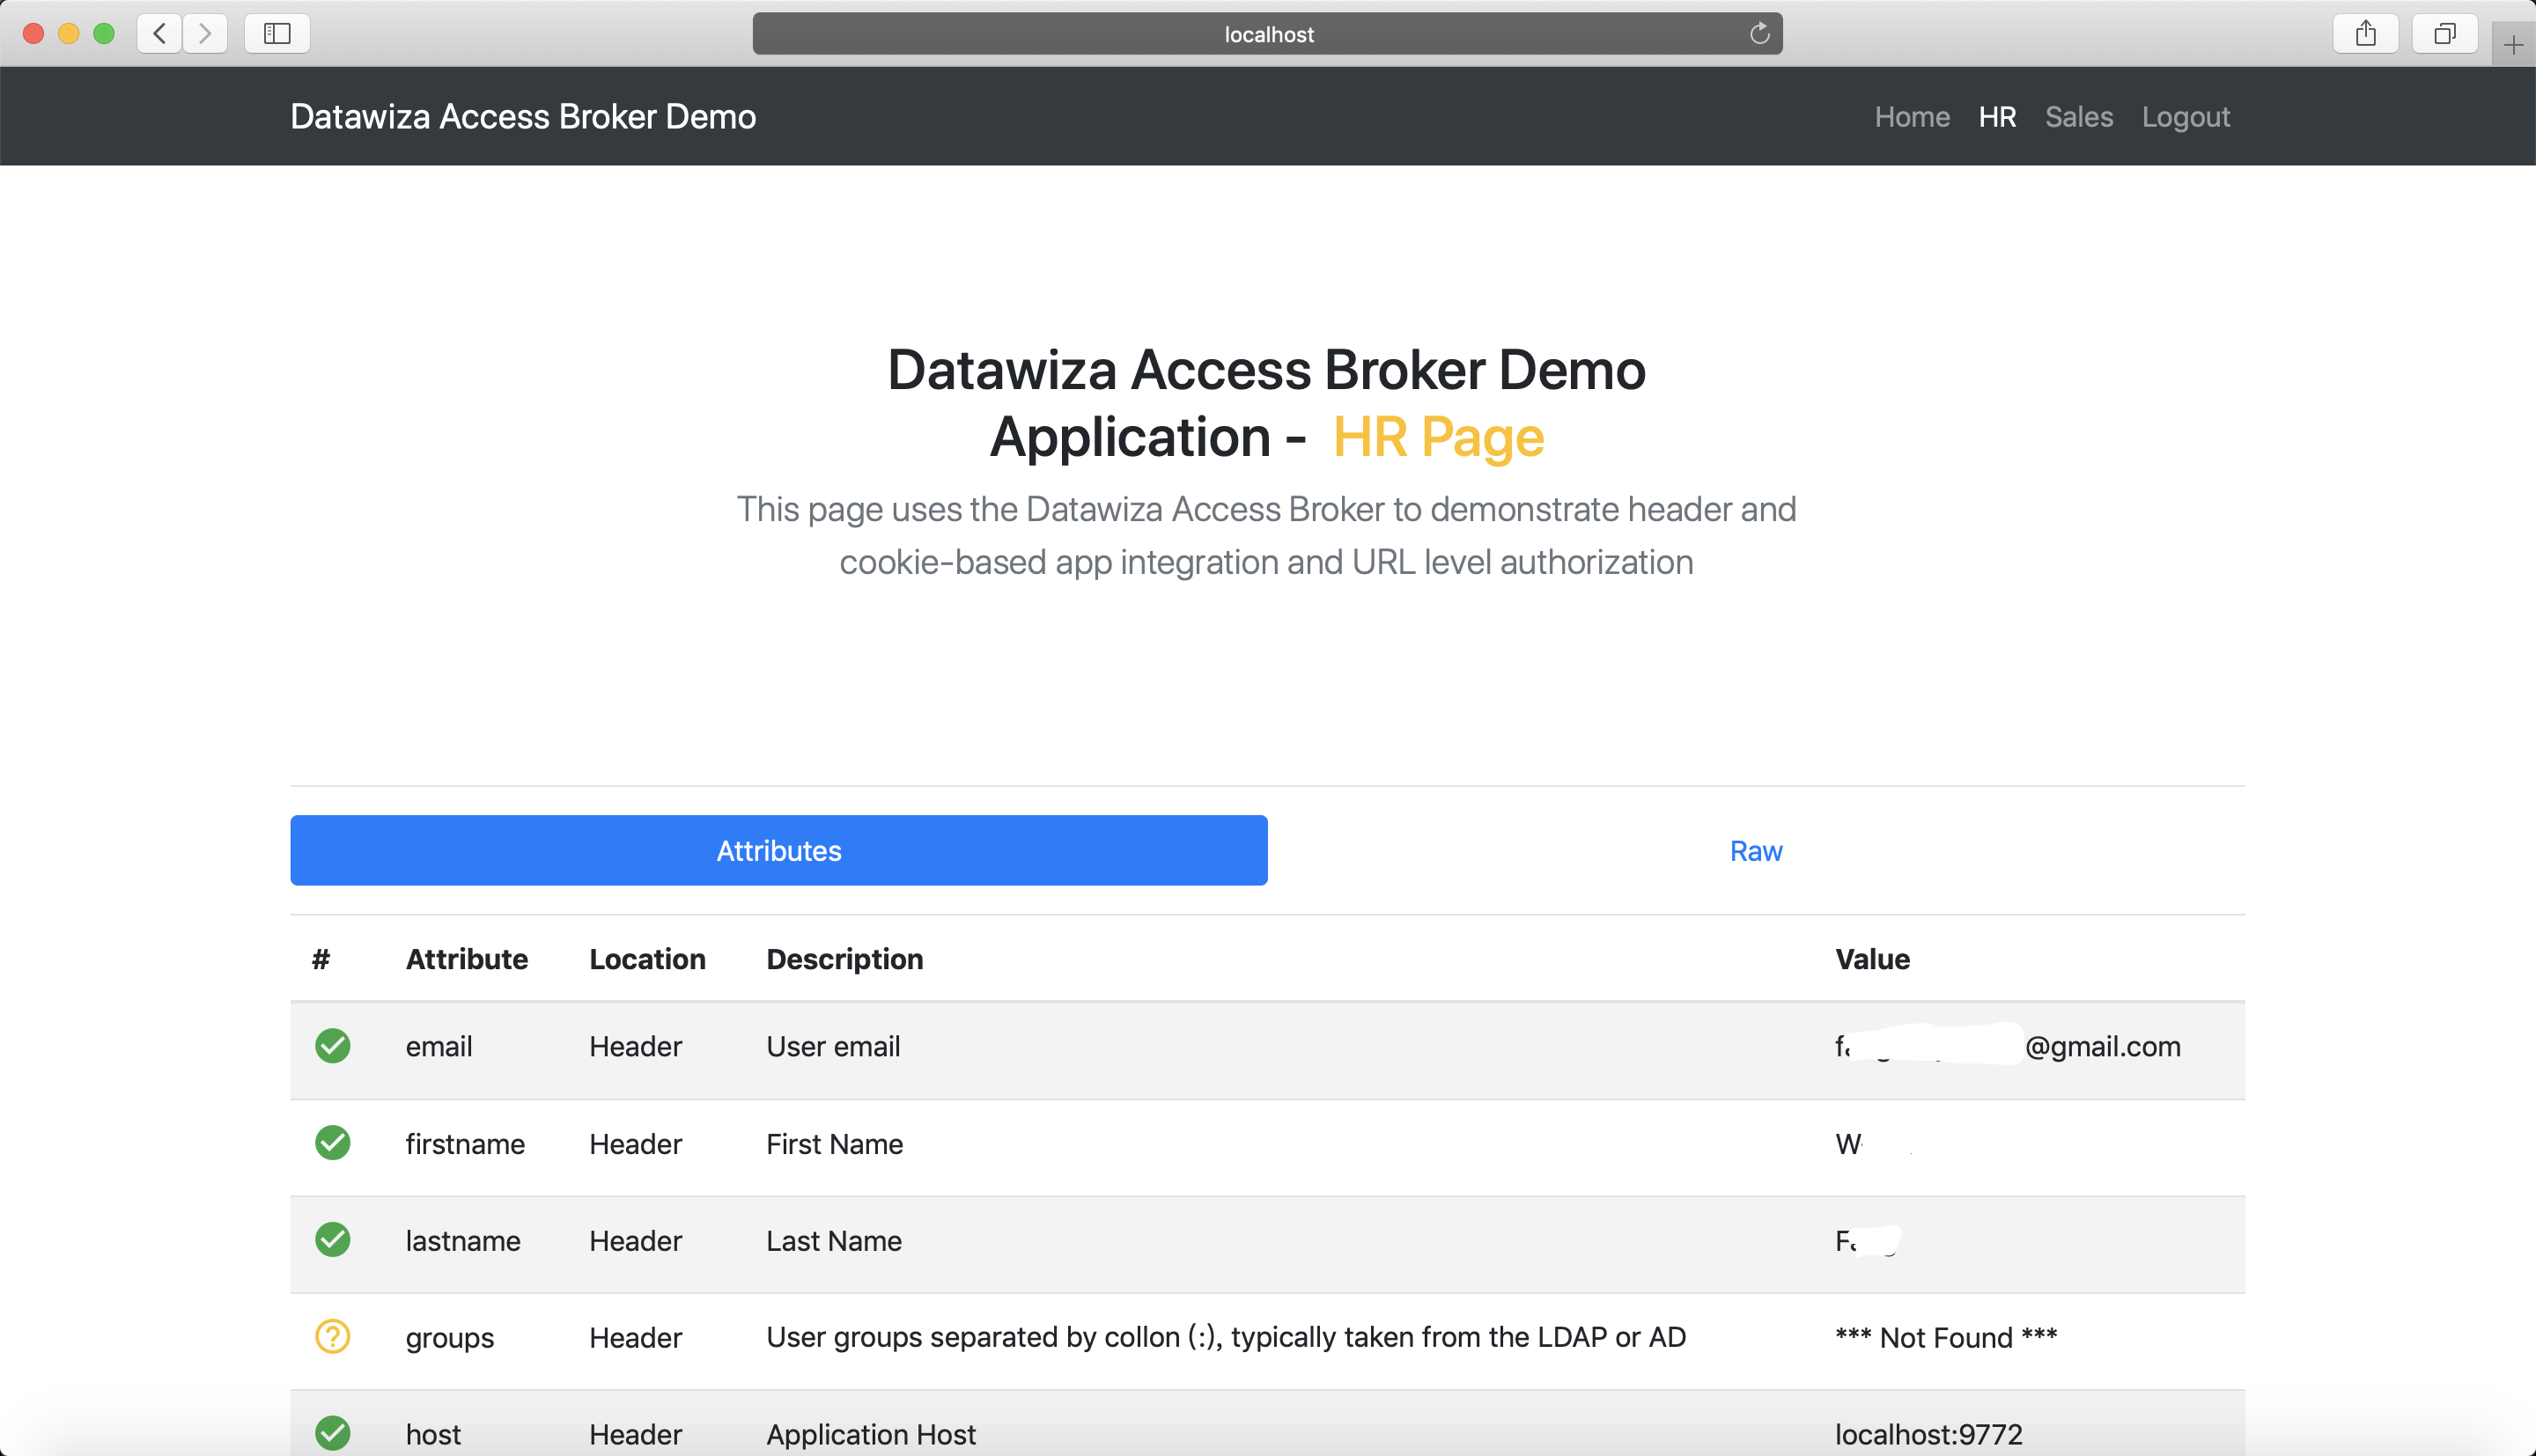
http://localhost:9772/sales: