Use Datawiza Access-Proxy to enable Single Sign-On for CVAT
Use Datawiza Access-Proxy to enable Single Sign-On for CVAT
Datawiza Access Proxy (DAP) is a very powerful platform that lets you enable modern authentication and authorization with no code or very few code. Teams have great success with it to enable SSO, MFA and advanced Identity & Access Management (IAM) for in-house applications, legacy applications, as well as popular 3rd party applications, e.g., Jenkins, WordPress, SuperSet, AirFlow, AWS Elastic MapReduce, and many more.
This document will show you how to enable Single Sign-On (SSO) for CVAT, a very popular ML/AI tool, by using DAP.
You can also try our SSO-enabled instance to get a sense how it looks like when SSO is enabled. For this instance, I chose the Google platform as the Identity Provider (IdP), therefore you can SSO with your Google account.
Prerequisite
Make sure you have the CVAT repo with changes in this branch feature/datawiza-sso.
We are working on merging this branch into the develop branch of the official repo. Once it's in, you can also check out from the official repo.
Build the image with the following command. If you encounter any issue with building it, try to look for a solution in official CVAT issues.
docker compose -f docker-compose.header-auth.yml -f docker-compose.dev.yml buildAlternatively, you can use our pre-built images datawiza/cvat-server-sso:2.0.0 and datawiza/cvat-ui-sso:2.0.0
Have docker and docker-compose installed in your environment.
Configurations
There will be two places you need to configure.
The first place is the IdP of your choice.
The second place is the Datawiza Cloud Management Console (DCMC).
Let's work on each of them as below.
Configure the IdP
Depending on the IdP of your choice, the configuration UI will be vary by a lot.
For your convenience, we compile the tutorial for configuring each IdP. Please select the correct tutorial on the left-hand-side to follow.
For this tutorial, I'll use Google as my IdP as an example.
Configure the DCMC
Register an account in Datawiza Cloud Management Console. It's self-registration. You can easily get started with your Google account, Microsoft account, or GitHub account.
Upon logged into the DCMC, click the orange button
Getting started. This will give a step-by-step guide to configure your application.
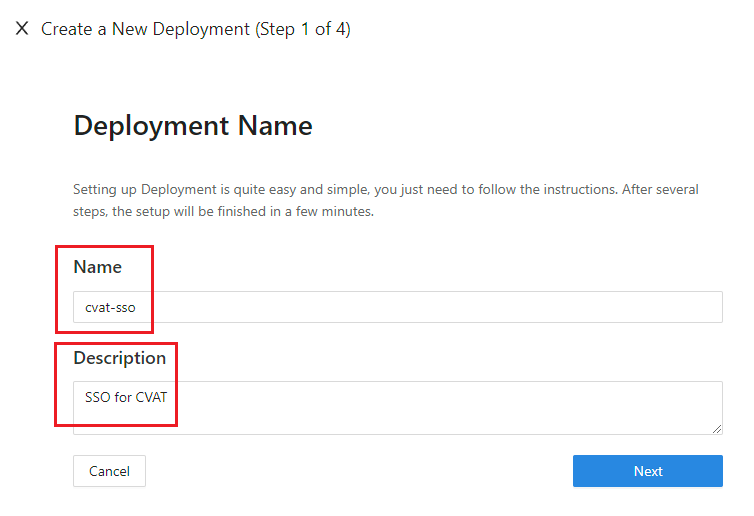
Add new Deployment
The first step of a series of configuration is to create a deployment. A deployment is a concept of organizing applications and IdPs that are associated with the same cluster of DAPs. Don't worry if it's a bit complicated to understand in the beginning. You will get used to it when you play with it more. For now, just give your deployment a meaningful name and description.
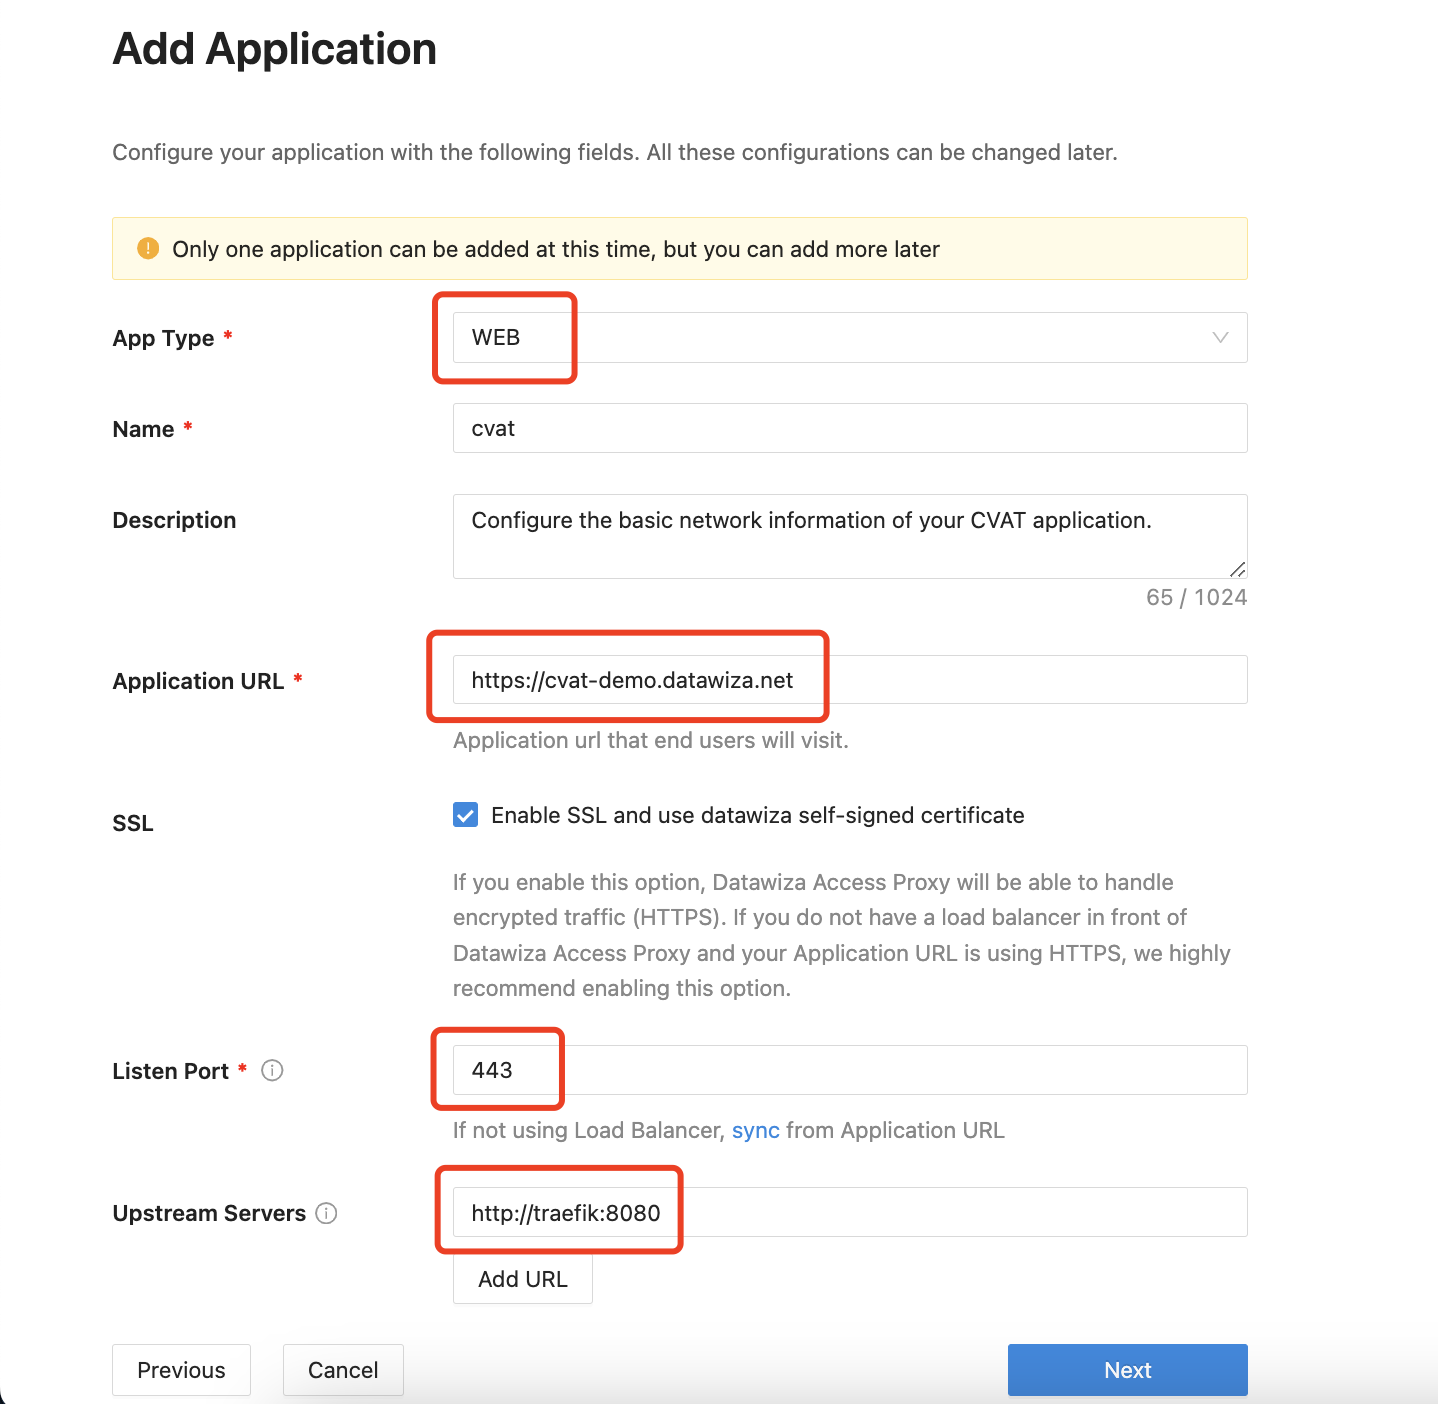
Add new Application
The second step is to create an application, basically it collects the network information of your application.
Here is the explanation of each field.
- App Type: Since CVAT is a web application, select
WEBhere. - Name: The name of your application. Put a meaningful name here. I use
cvat. - Description: A meaningful description for you to understand this application.
- Application URL: This is how your user will access your application. Normally it's the URL in the address bar. You can use
http://localhostif you are running locally, be sure to add the port if you have a non-standard one. - Listen Port: This is the port that the DAP listens on. For simplicity, you can use the same port as the one in Application URL above if you are not deploying the DAP behind a Load Balancer.
- Upstream Servers: This configuration tells DAP how to access the actual application. For CVAT, put
http://traefik:8080.
- App Type: Since CVAT is a web application, select
Add new IdP
The third step is to fill in the IdP information, given that you have followed steps to configure an application in your IdP.
I'm using Google as my IdP following this tutorial.
Here is the explanation of each field.
- Name: A reasonable name for your IdP.
- Protocol: Modern IdPs support
OIDC. So does Google and that's how I created my application in Google in above steps. Therefore I useOIDChere. - Identity Provider: Select the one that you are using.
- Client ID: In the last few steps when configuring the IdP, it will provide you the client id and client secret. Fill in the client id here.
- Client Secret: Fill in the client secret provided by the IdP.
- Issuer: The issuer of your IdP. Different IdP has this information in different places. For Google, just leave it with the default one.
- Scopes: Again different IdP requires different scopes. For Google, just leave it with the default values.
Click on
Createto proceed.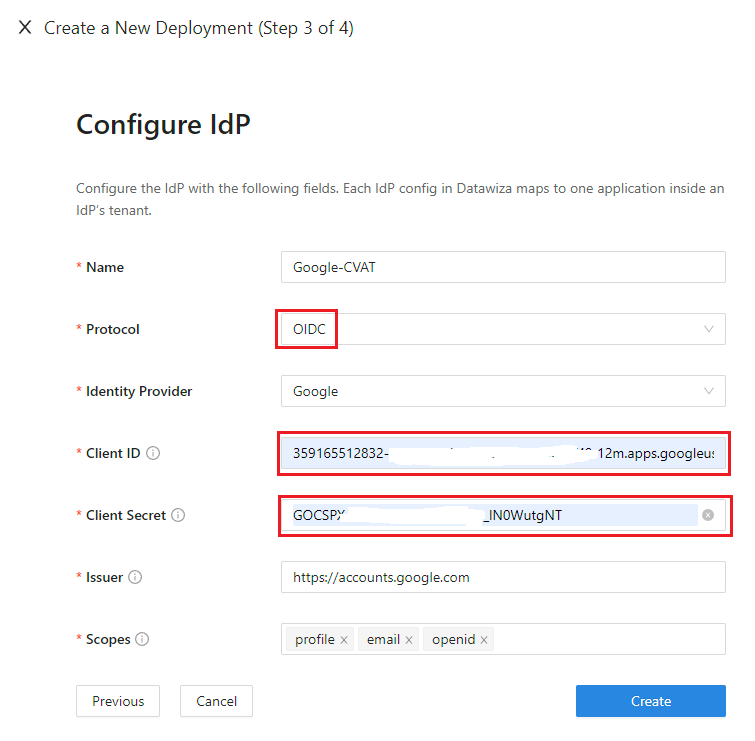
Start DAP
The last step of the guide will provide you the environment configurations. Here you will see the
Provision KeyandProvision Secret.Now edit
docker-compose.header-auth.ymlin the root dir of your CVAT repo, and replace${YOUR_PROVISIONING_KEY}and${YOUR_PROVISIONING_SECRET}with those values.Follow the steps (1 and 2) on the page to log in our docker registry and pull the DAP image. You can ignore step 3 on the page since it's already supplied in the
docker-compose.header-auth.ymlfile.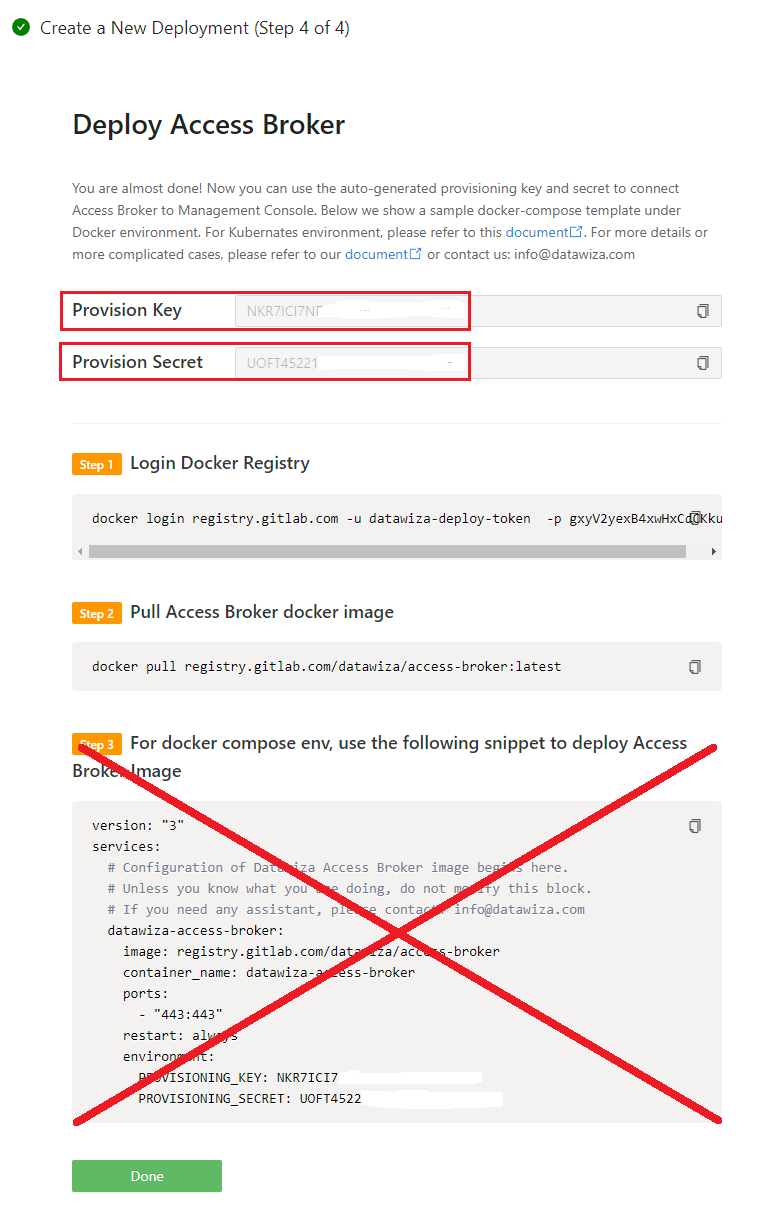
Now run
docker-compose -f docker-compose.header-auth.yml up -dto start enjoy CVAT with SSO. In your browser, hit the
Application URLas you set previously, you should be able to see the IdP login page at this point.Pass Attributes/Claims from IdP to application
In order to let the application recognize the user correctly, there is one more step to configure, which instructs the DAP to pass what value from the IdP to the application under what name.
Such configuration will be done in the
Applicationstab on the left panel.
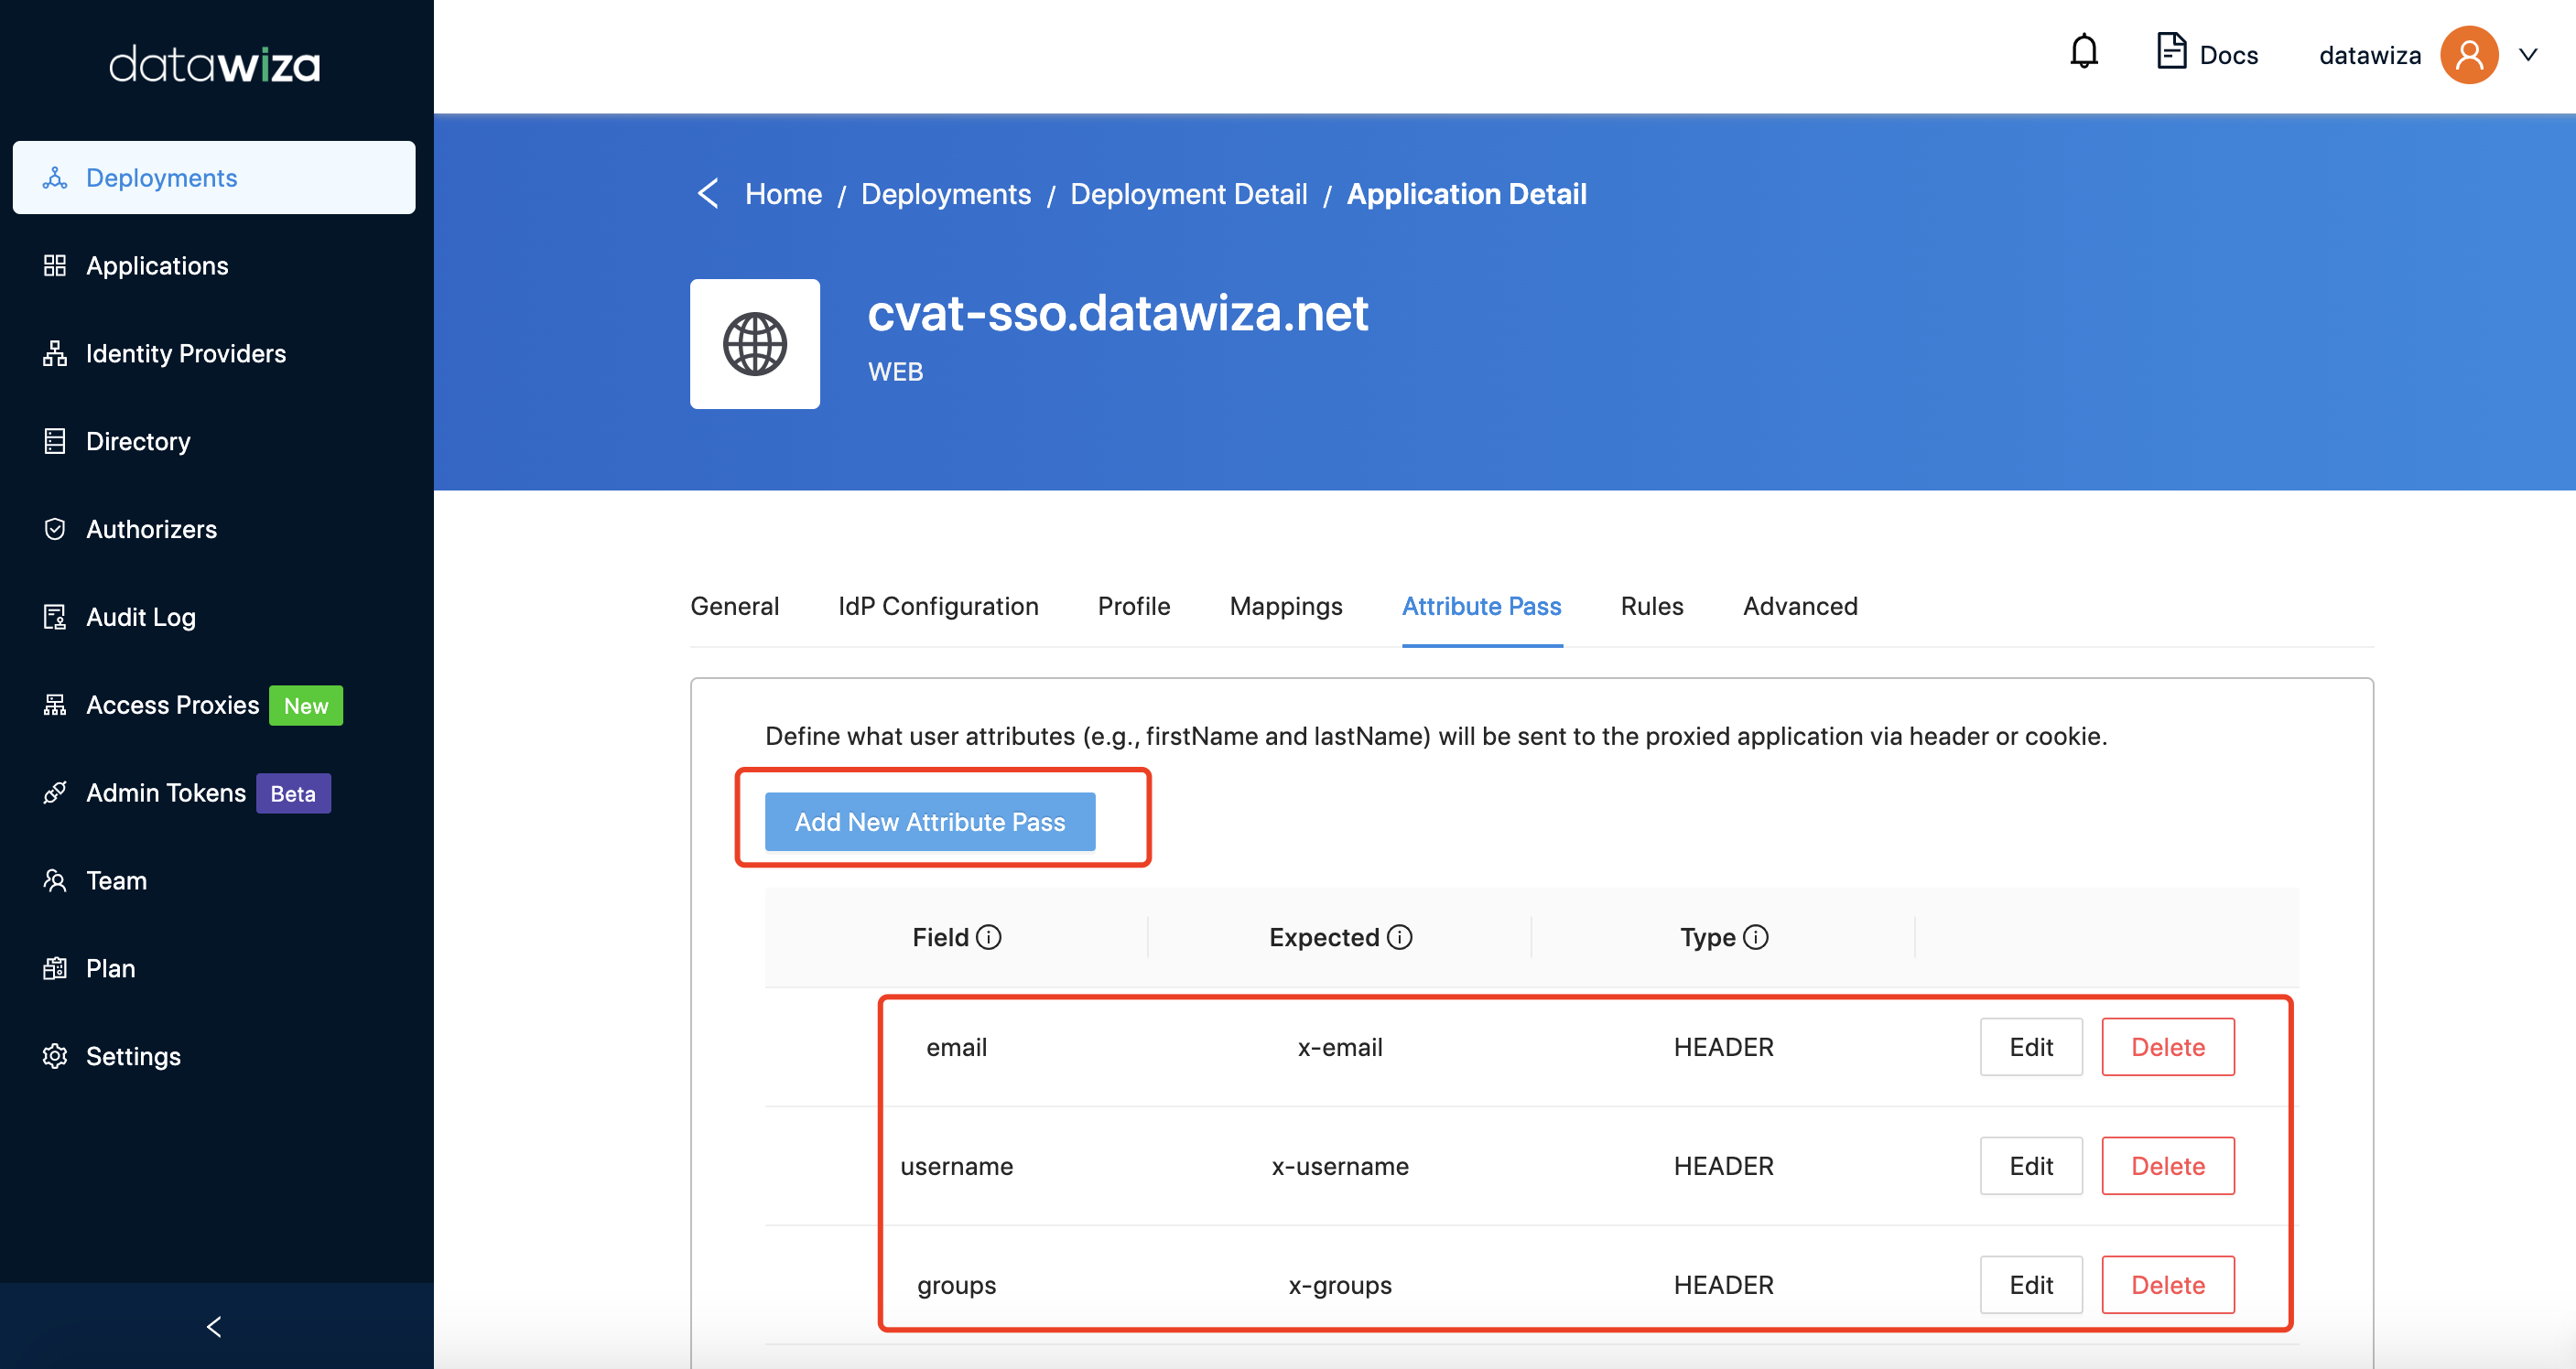
Select the corresponding application, and go to
Attribute Passsub-tab.For CVAT, please refer to the screenshot below to configure the attribute pass.
Tips
Before you can start using the application, one more thing you should know is how to decide who the administrator is.
Do you remember you added an attribute pass at the previous step? Therefore you can set relative group at the IDP side, which will be mapped to CVAT automatically. CVAT accepts four different roles: admin, business, user, and worker respectively, if you set the admin on the IdP's group, you will be login as an administrator.
In addition, you can also use the Role Mapping feature in Datawiza Cloud Management Console -> Application -> Profile -> Edit -> Mapping Type -> Expression to map the roles from IdP to the one in CVAT.
Now visit the
Application URLagain, you should see your email recognized correctly on the top right corner.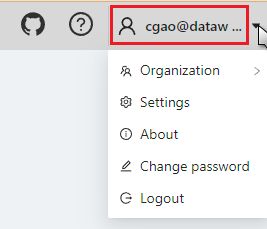
(Optional) Add a custom rule for CVAT API
You can skip this step if you don’t need to call the API endpoints directly and only operate CVAT via web UI.
CVAT provides operations via API endpoints directly when authenticated with Basic Auth or Token.
In order to make this work when DAP is in place, you will need to add an additional rule in the DCMC as follows.
Again, select
Applicationstab on the left panel.Now select the corresponding application, and go to
Rulessub-tab. Click theCreate Rule.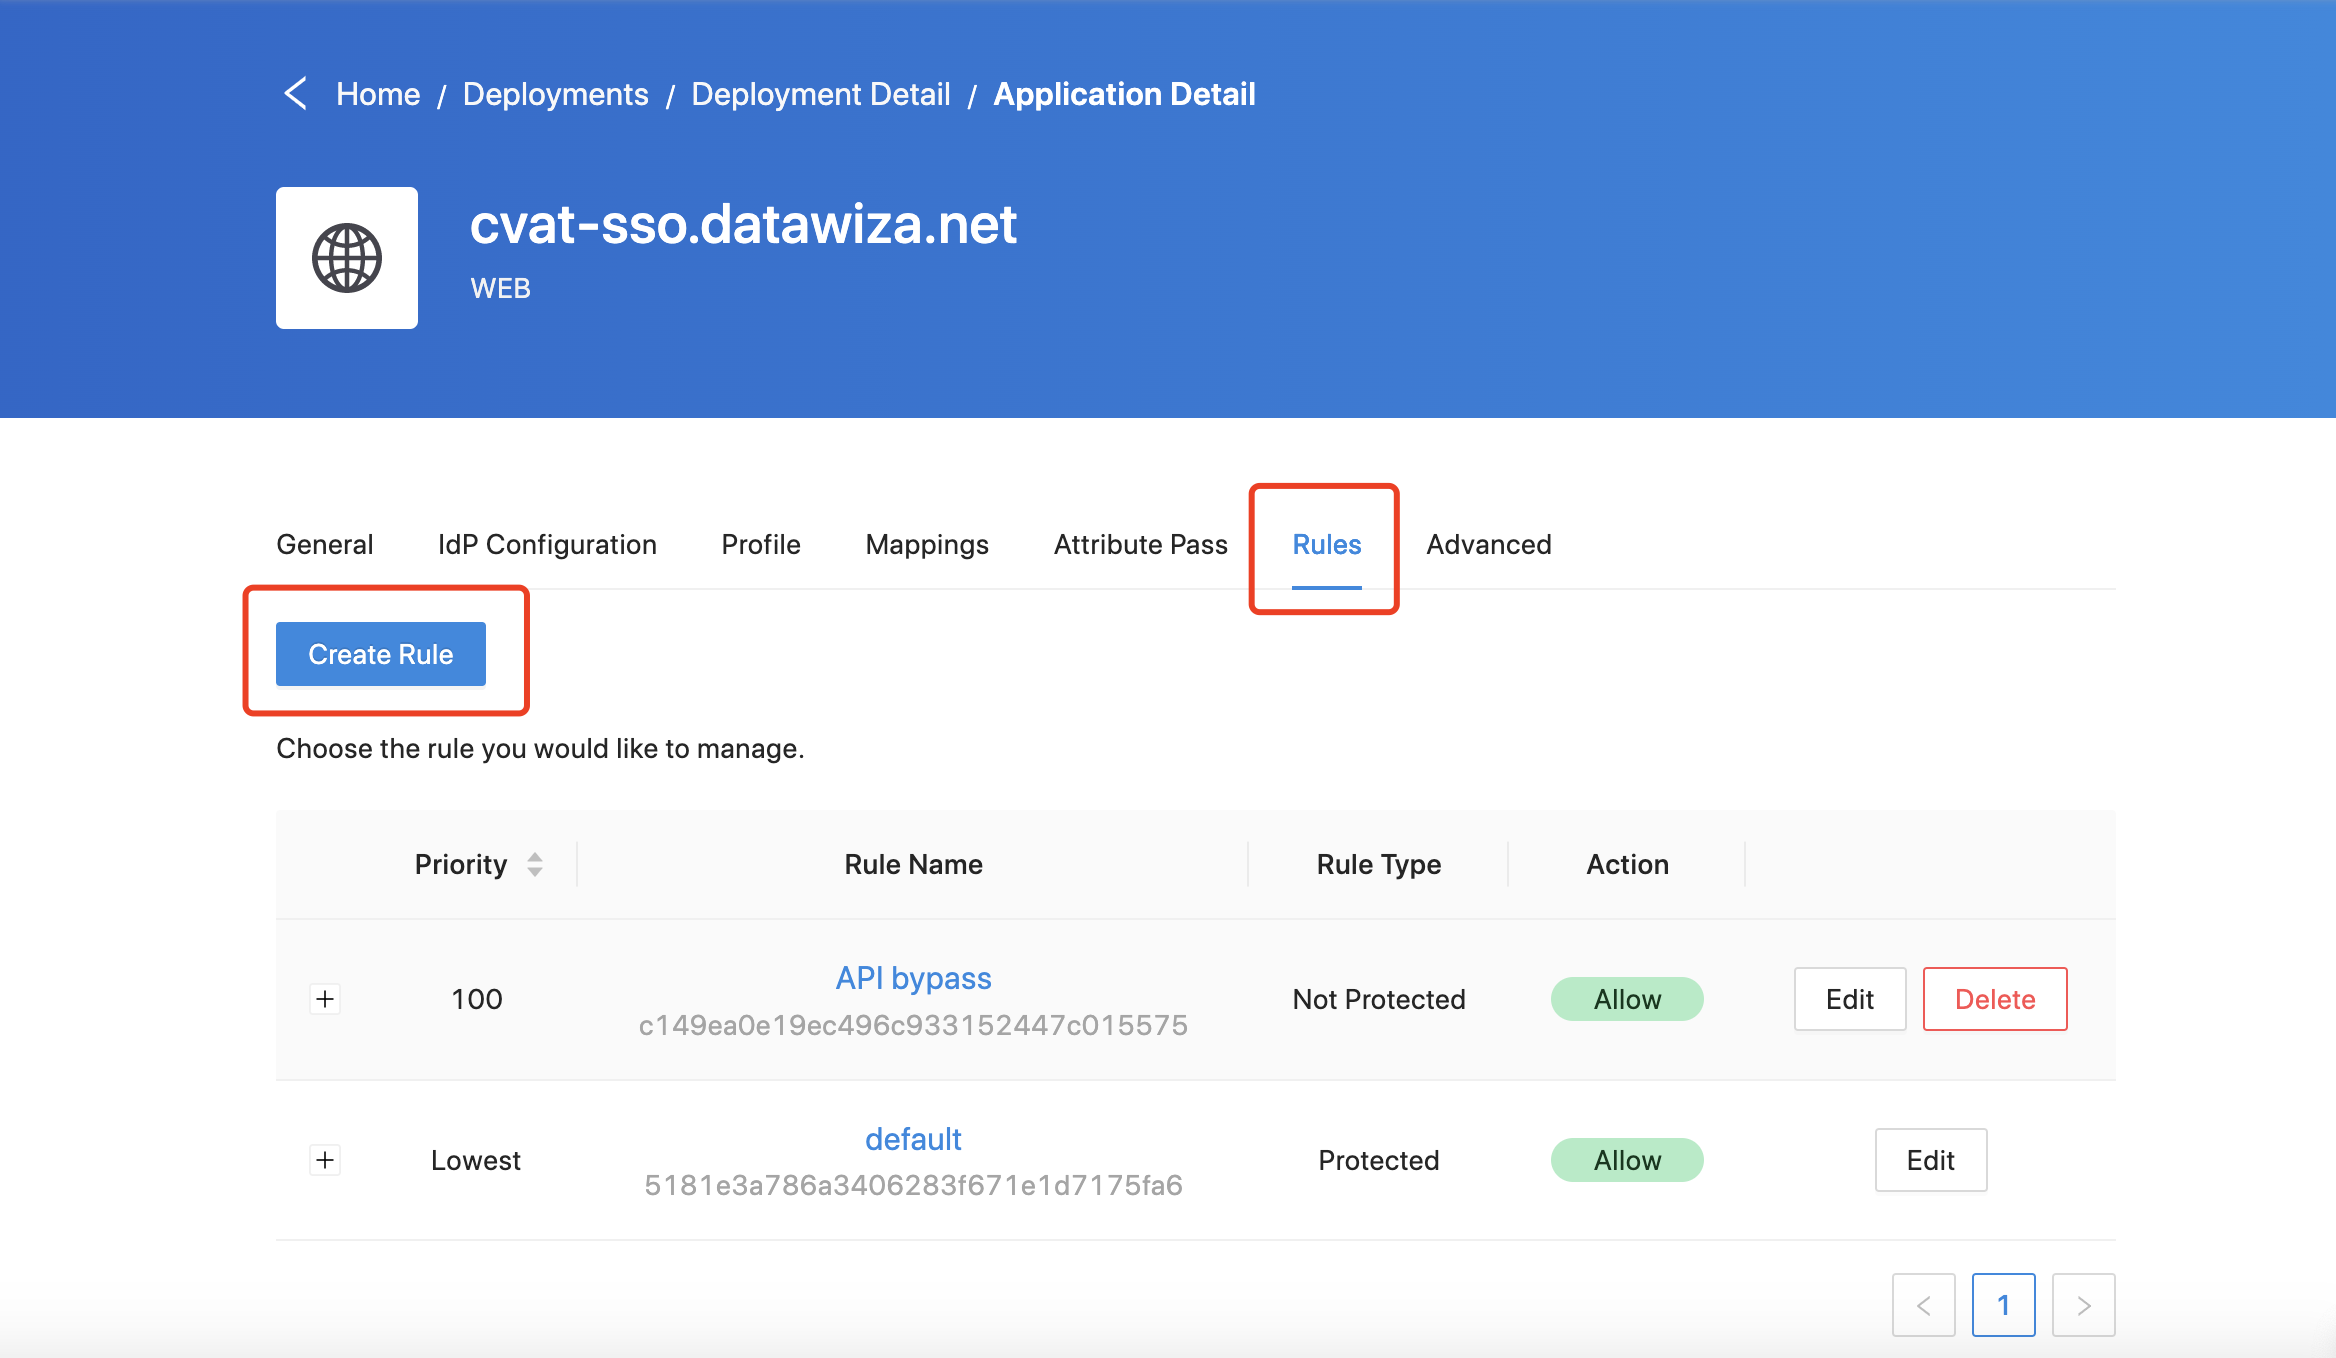
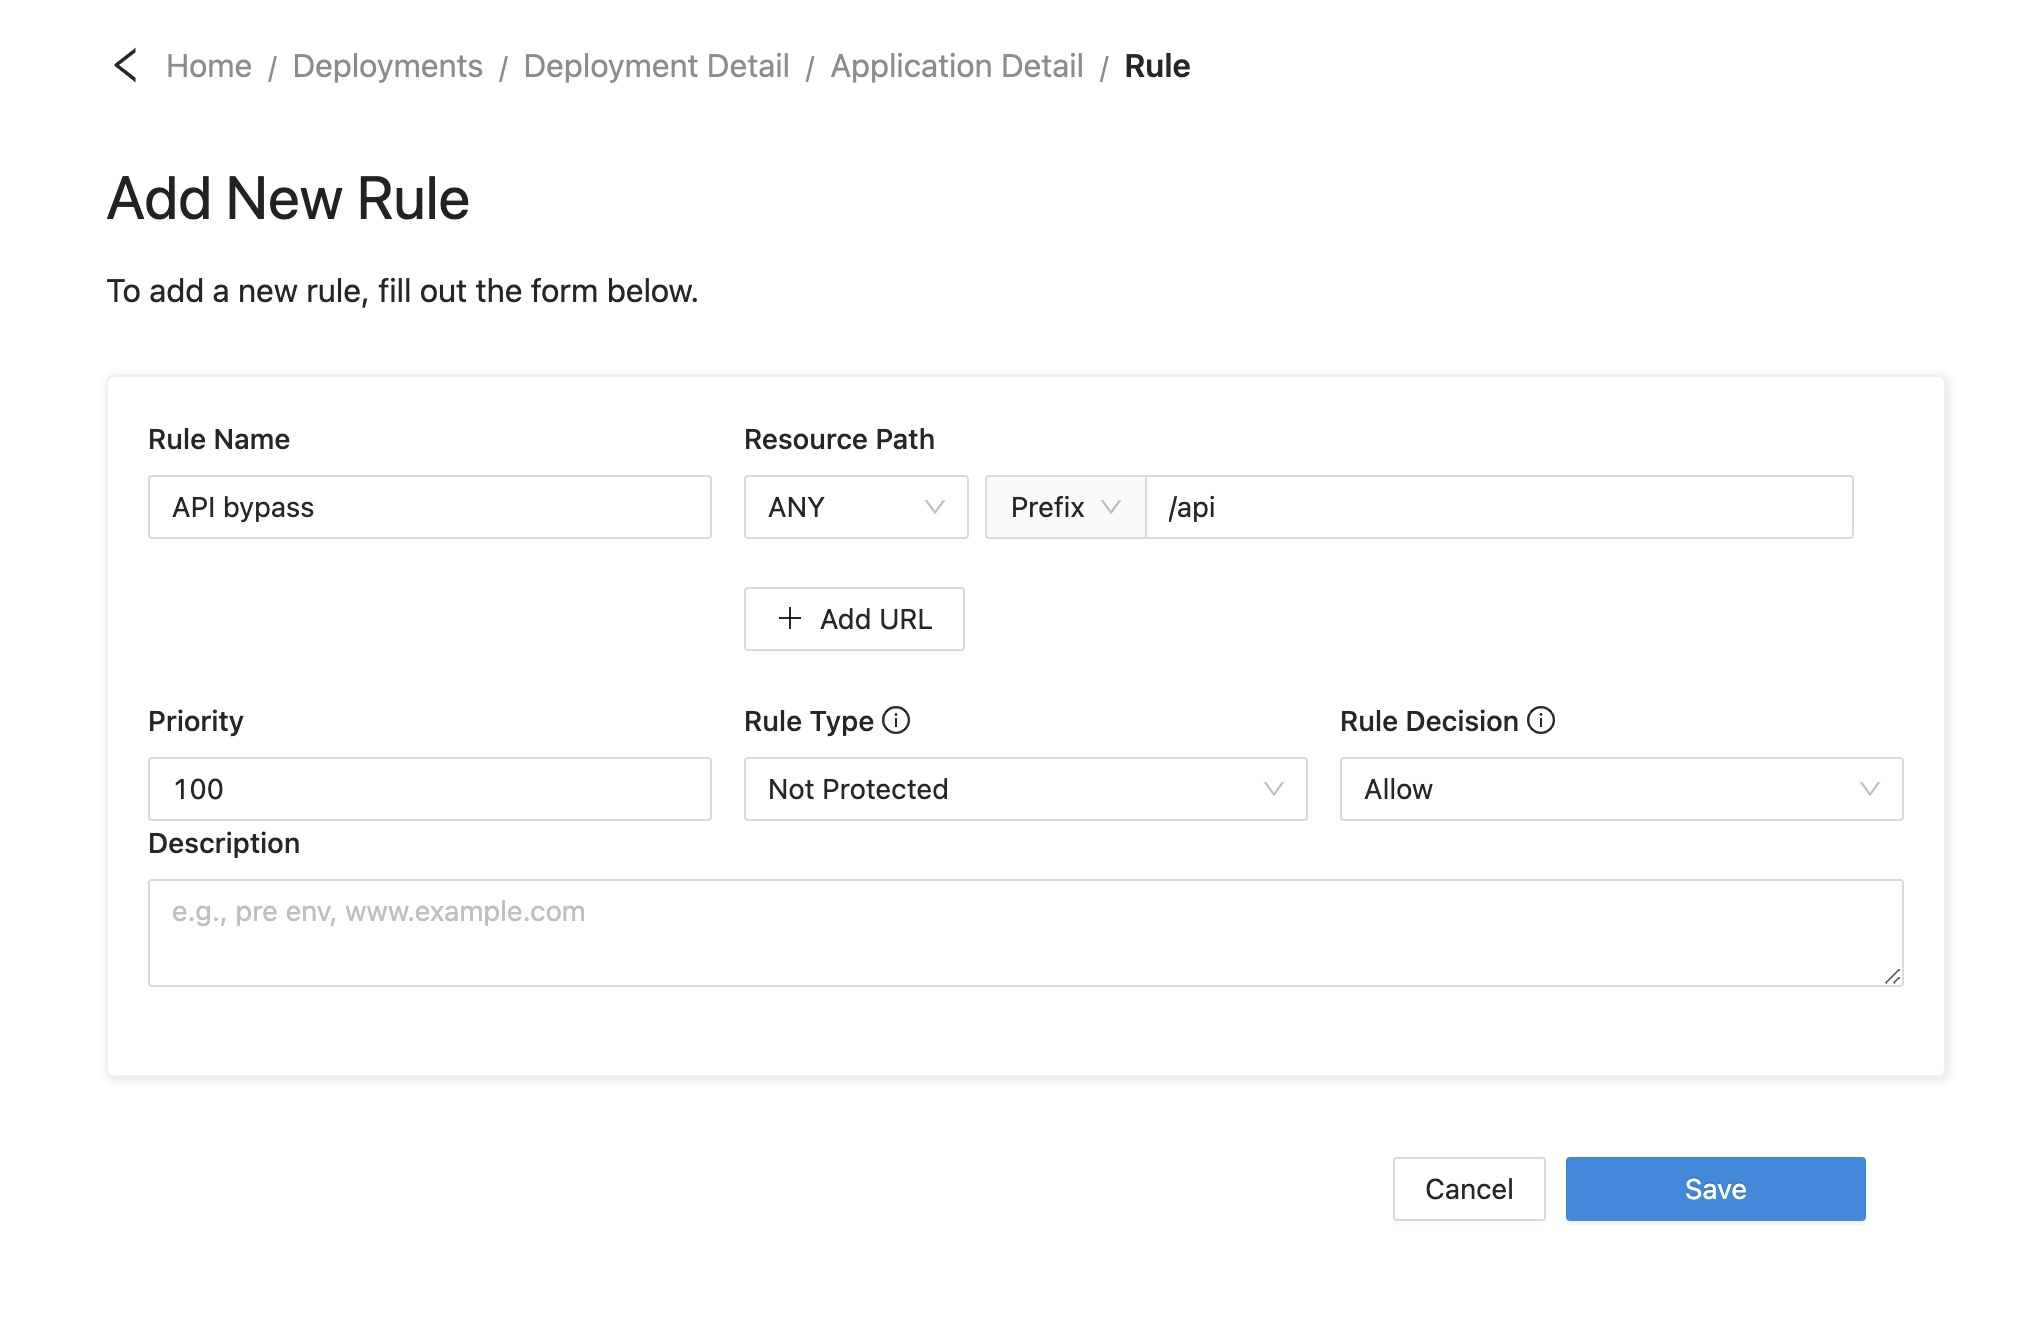
Then refer to the screenshot below to configure the new rule.
Deploy in Kubernetes
CVAT provides the official doc for deployment on Kubernetes with Helm. And we offer the Datawiza Access Proxy Helm as well. So we can use these to deploy DAP with CVAT in Kubernetes easily.
Changes in CVAT
By default, the type of Traefik service used in CVAT Helm is LoadBalancer, we need to change it to ClusterIP since we will deploy the DAP in front of the CVAT. Add the type under the service of the traefik:
traefik:
  logs:
    general:
      level: INFO
  service:
    type: ClusterIP # Set the type of traefik service to ClusterIP here.
As we introduced above, you need to change the image of the frontend and backend to the built image. We use our pre-built image here as an example:
  backend:
    ...
    image: datawiza/cvat-server-sso
    tag: 2.0.0
  frontend:
    ...
    image: datawiza/cvat-ui-sso
    tag: 2.0.0
We use the environment variable HEADER_AUTH_ENABLE to control the header auth functionality, so you need to add it in backend block:
  backend:
    server:
      ...
      additionalEnv:
        - name: HEADER_AUTH_ENABLE
          value: "true"
And don't forget to update your host:
ingress:
  ...
  hosts:
    - host: your_host
We provide a example CVAT helm chart value.yaml file here
DAP
Basically, you need to set the iamgePullSecrets, PROVISIONING_KEY, and PROVISIONING_SECRET in the DAP value.yaml, and change the ports according to your configuration in DCMC. We provide a simple example here that uses LoadBalancer as the service to expose the DAP. Also, you can customize your DAP in other ways like using ingress. See here for more details:
replicaCount: 1

image:
  repository: registry.gitlab.com/datawiza/access-proxy
  pullPolicy: Always
  tag: ""


imagePullSecrets: "cred"
containerPort: 9772
service:
  type: LoadBalancer
  targetPort: 9772
  port: 9772

ingress:
  enabled: false

PROVISIONING_KEY: "your-provisioning-key"
PROVISIONING_SECRET: "your-provisioning-secret"
Use kubectl get svc -n namespace to check the LoadBalancer service EXTERNAL-IP and create the domain resolution for it:

Go back to the DCMC, the upstream should be http://cvat-traefik, which is the service name of CVAT traefik:
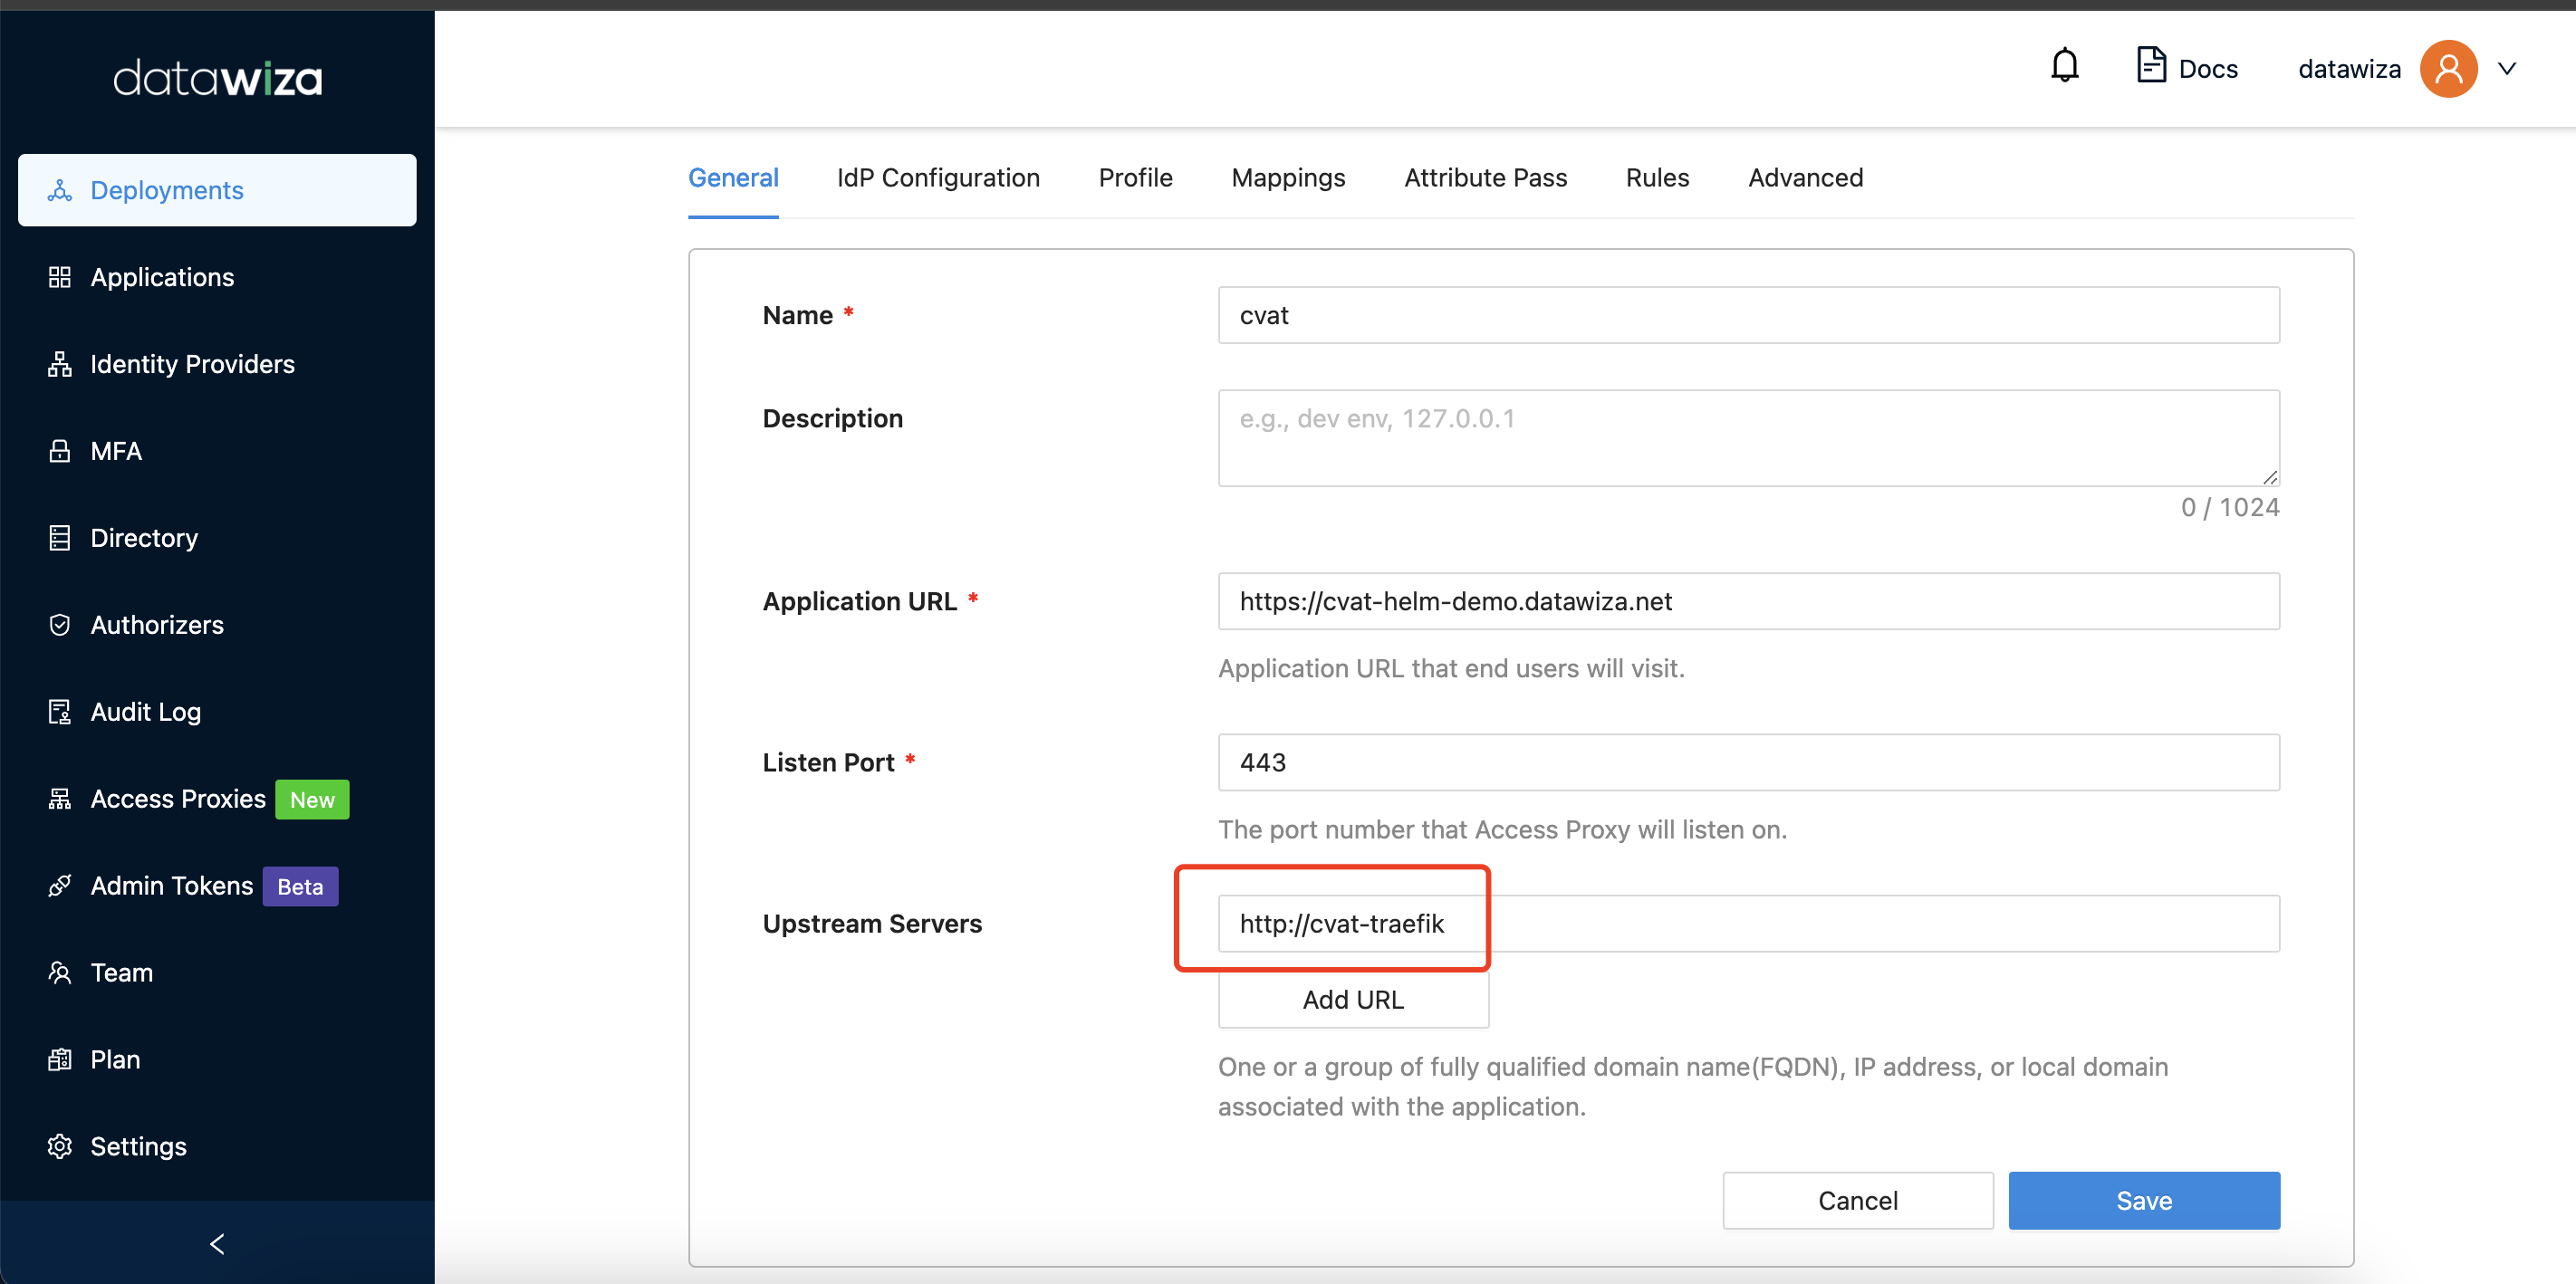
NOTE: For production environments, please make sure that the traefik can only be directly accessed by the DAP for security reasons.
Support
If you run into any issues or would like to get help from Datawiza team, you can
- Schedule a 30-minutes meeting
- Send an email to: support@datawiza.com