SSL Configuration
Add SSL Certificates to Your Domain
Certificates, TLS, HTTPS play a vital role in zero-trust networks. And how about your website? You can have a security check. Since we aim to provide a scalable way to enable a Zero Trust architecture, the Datawiza Access Proxy (DAP) supports SSL. All you need to do is configuring the Datawiza Cloud Management Console (DCMC):
DCMC SSL Configuration
Switch from Datawiza Self-sign certificate to your own certificate
When you first create an application from scratch, it defaults to using Datawiza's self-signed certificate. However, you can use your own certificate instead. Before switching, it is important to properly prepare your certificate. Currently, DCMC supports only certificates in PEM format. If your certificate is in PFX or another format, you will need to convert it to PEM format first. Follow these steps to convert your certificate:
Extract the Private Key
First, you need to extract the private key from the PFX file. Open your command line tool and run:
openssl pkcs12 -in yourcert.pfx -nocerts -out privatekey.pem -nodes
- Replace
yourcert.pfxwith the path to your PFX file. - The
-nocertsoption tells OpenSSL to only output the private key. -nodes(no DES) means the private key will not be encrypted.privatekey.pemis the output file containing the private key.
Once the conversion is done, you can open the output file using a text editor. The private key format should resemble:
-----BEGIN PRIVATE KEY-----
..........
-----END PRIVATE KEY-----
Extract the Public Key
Next, you can extract the public certificate (which contains the public key) from the PFX file:
openssl pkcs12 -in yourcert.pfx -clcerts -nokeys -out publiccert.pem
- Replace
yourcert.pfxwith the path to your PFX file. -clcertsfilters out anything but client certificates, which typically means the actual certificate you're interested in.-nokeysmeans do not output the private key.publiccert.pemis the file that will contain your public certificate.
Upon converting, open the file with a text editor, and ensure the public certificate's format appears as follows:
-----BEGIN CERTIFICATE-----
...........
-----END CERTIFICATE-----
Upload your own certificate
Now you can start to upload it. Select Advanced tab in your application page, choose SSL tab, and then click Edit button. 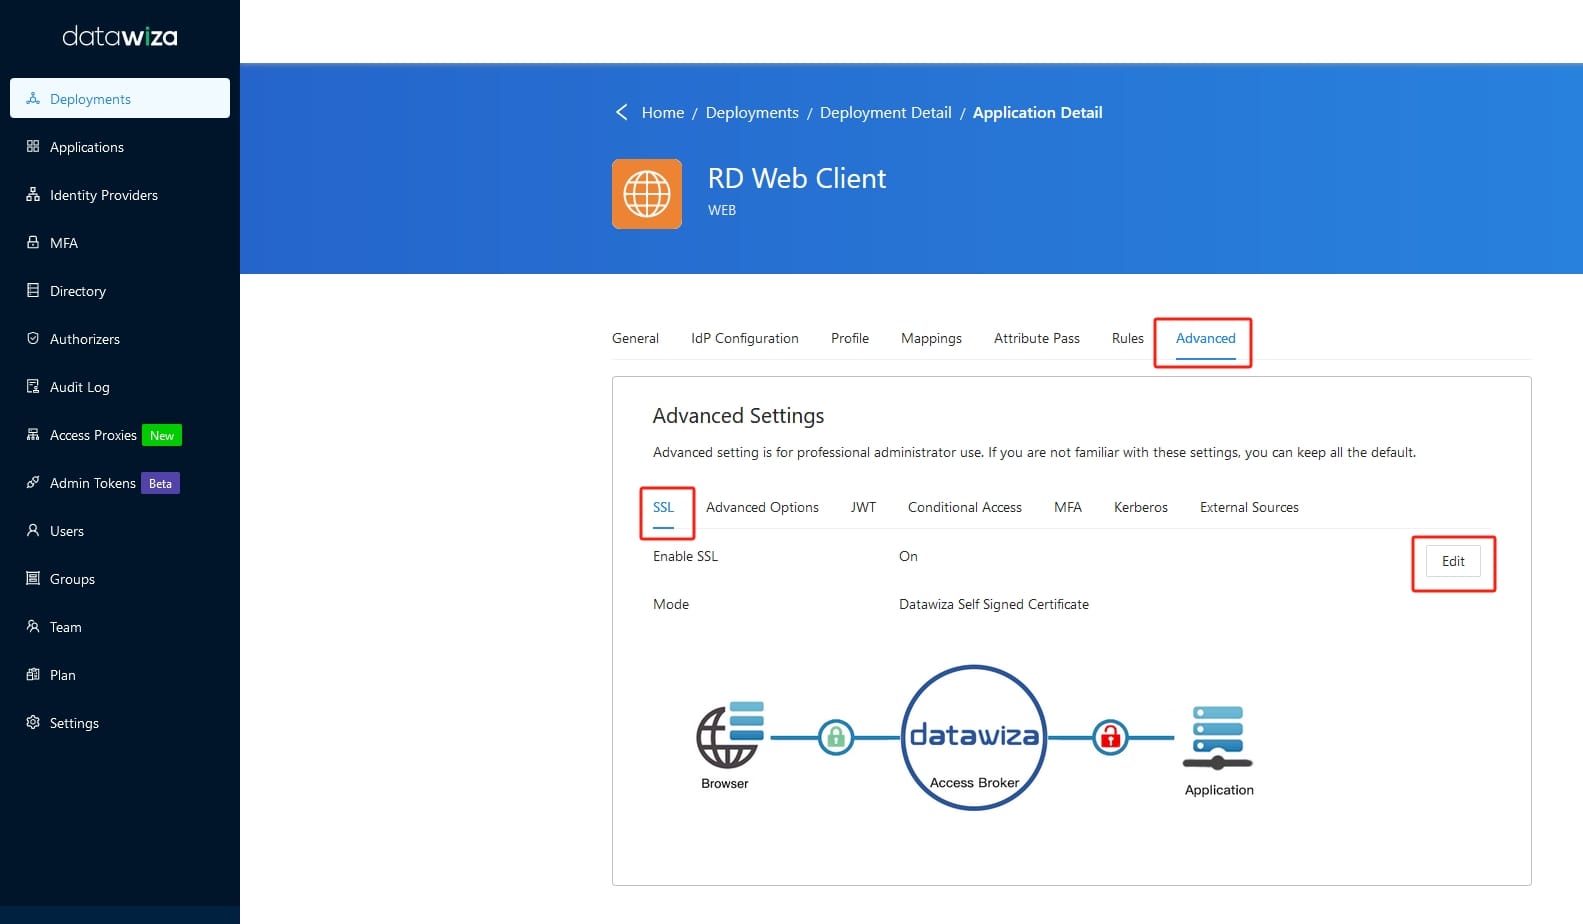
Then click the Update Certificate button and choose your preferred way to switch to using your own certificate. 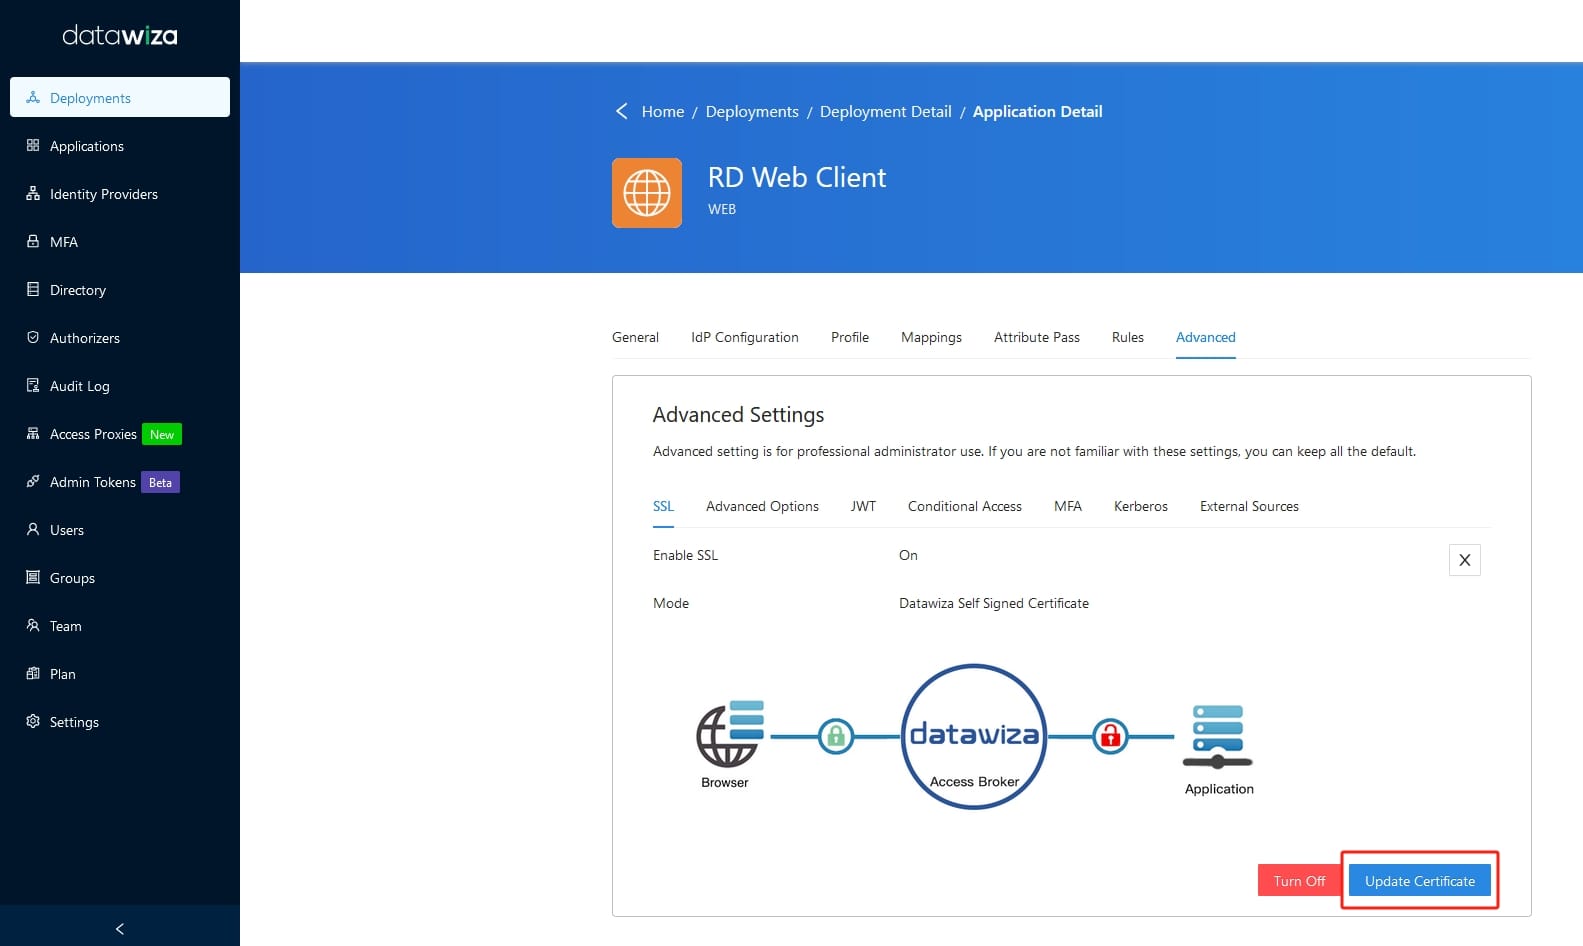
Enable SSL
Select Advanced tab in your application page, choose SSL tab, and then click Edit button. 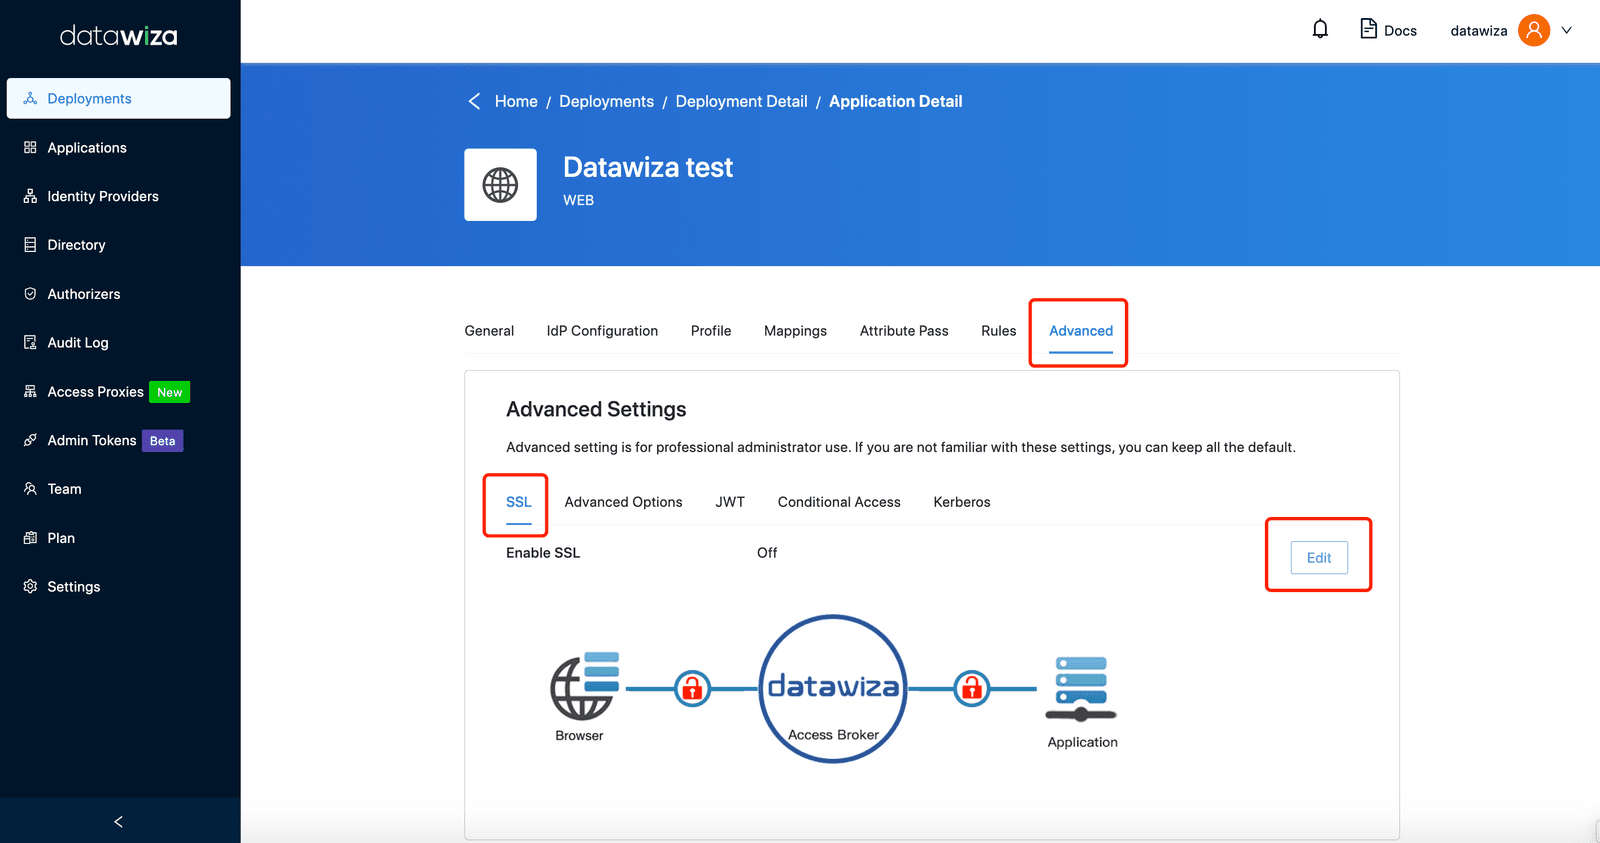 Open SSL and select Cert Type. We provide two options: one is using datawiza self-signed certificate, which can be used for testing purposes, or the other one is uploading your own certificate.
 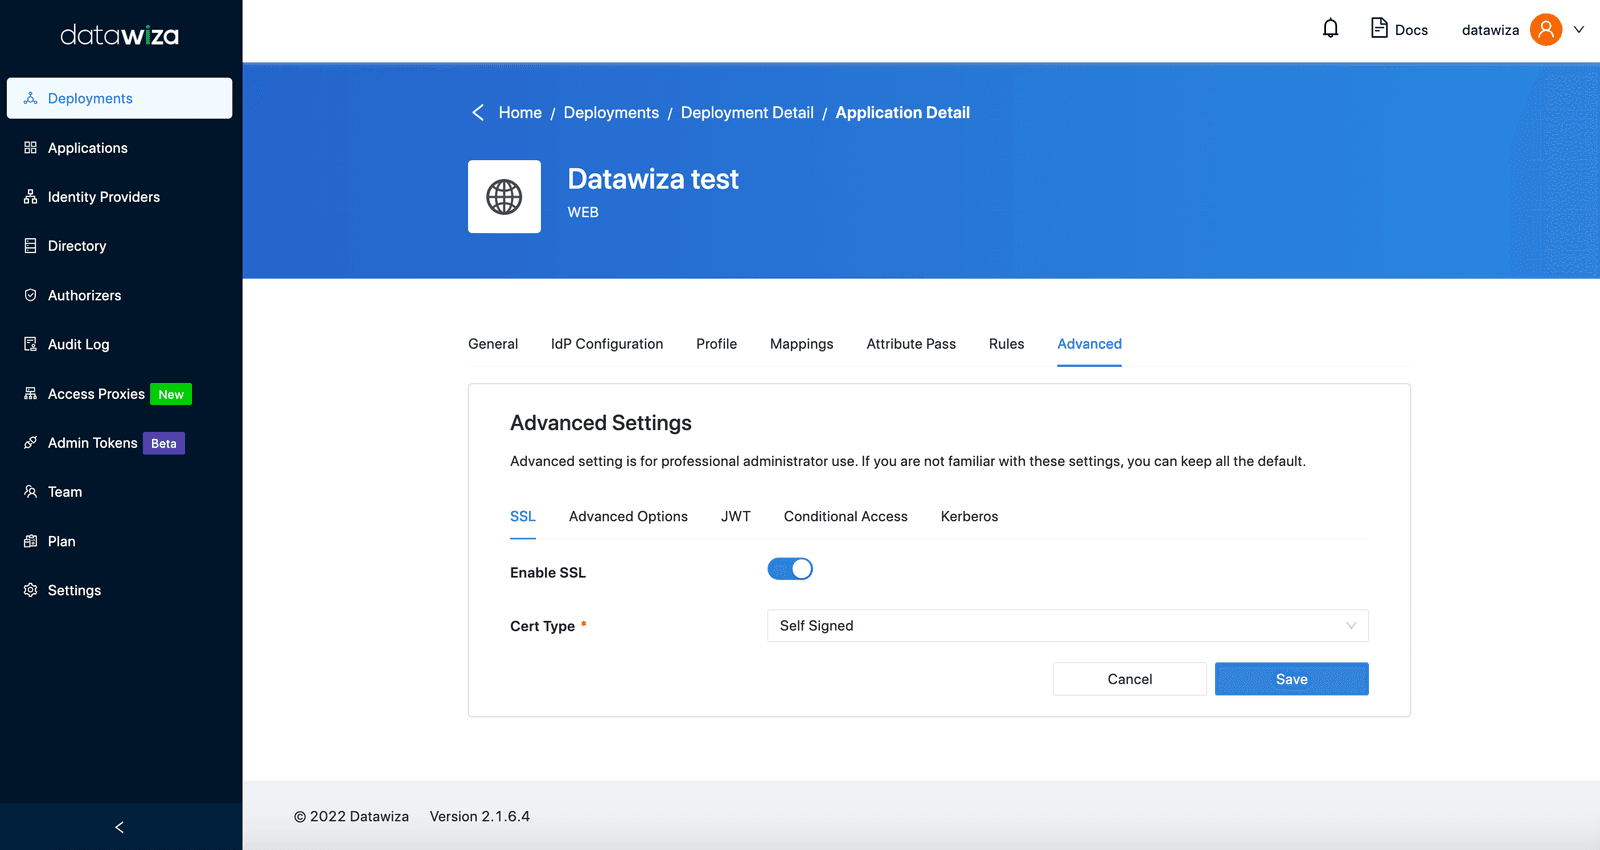 There are two ways to upload your own certificate. You can choose to upload your own certificate from a file or paste from the content:
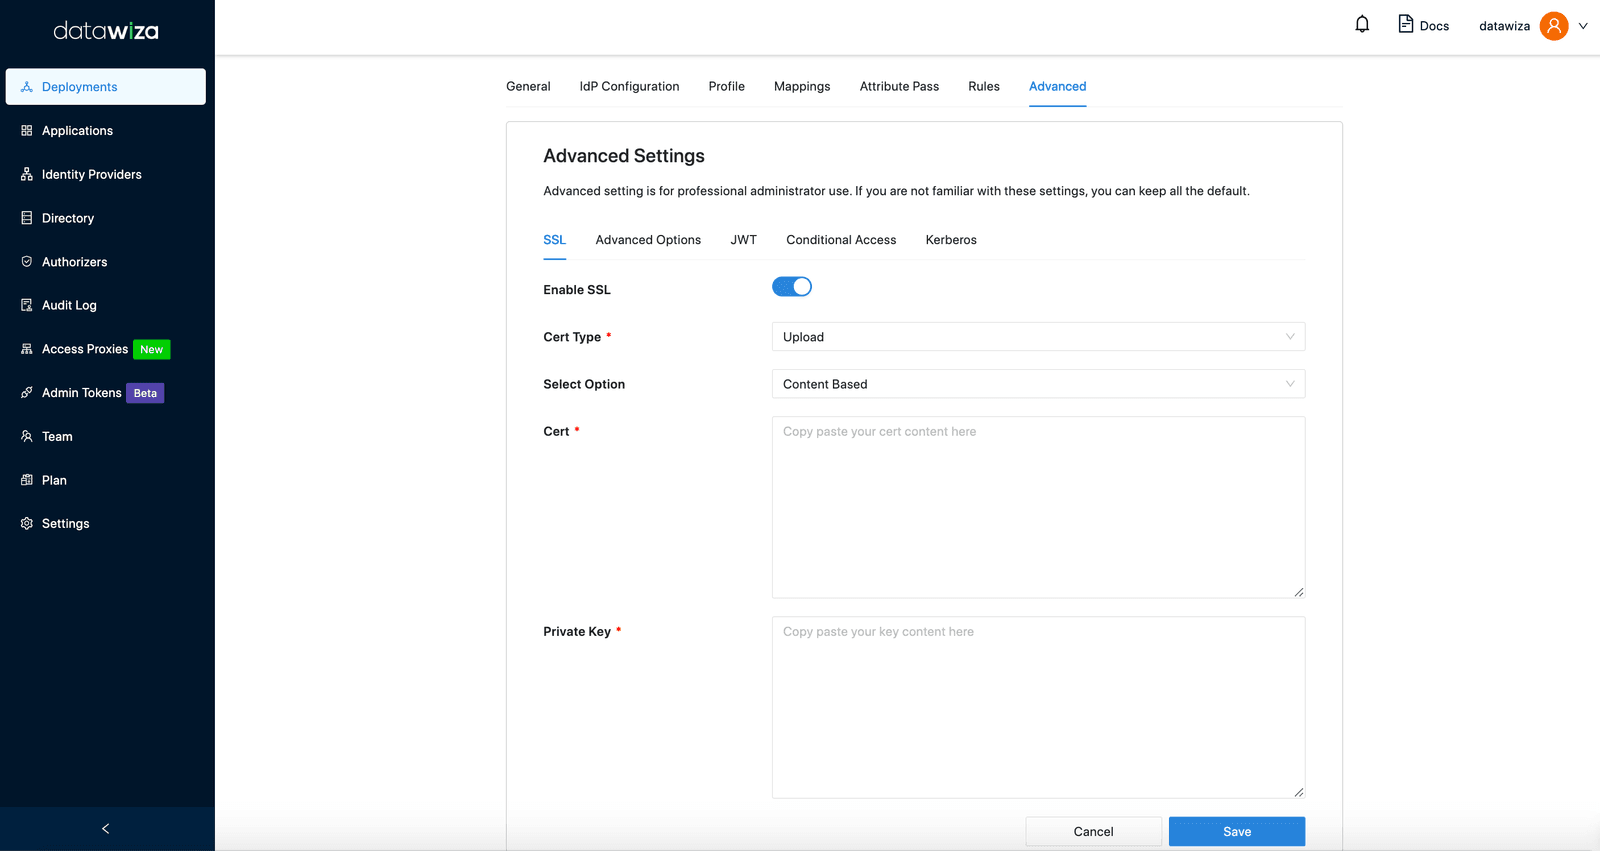 Click Save.
Note
When you enable to use SSL usually you should update your application url accordingly. Go to General tab of your application detail, change protocol from http to https in Application URL. When you updated the application url, please remember to update the Redirect URI of the IdP as well.
Update your certificate
Sometimes your certificate got expired and you need to update it: you can select Advanced tab in your application page, choose SSL tab, and then click Edit button. 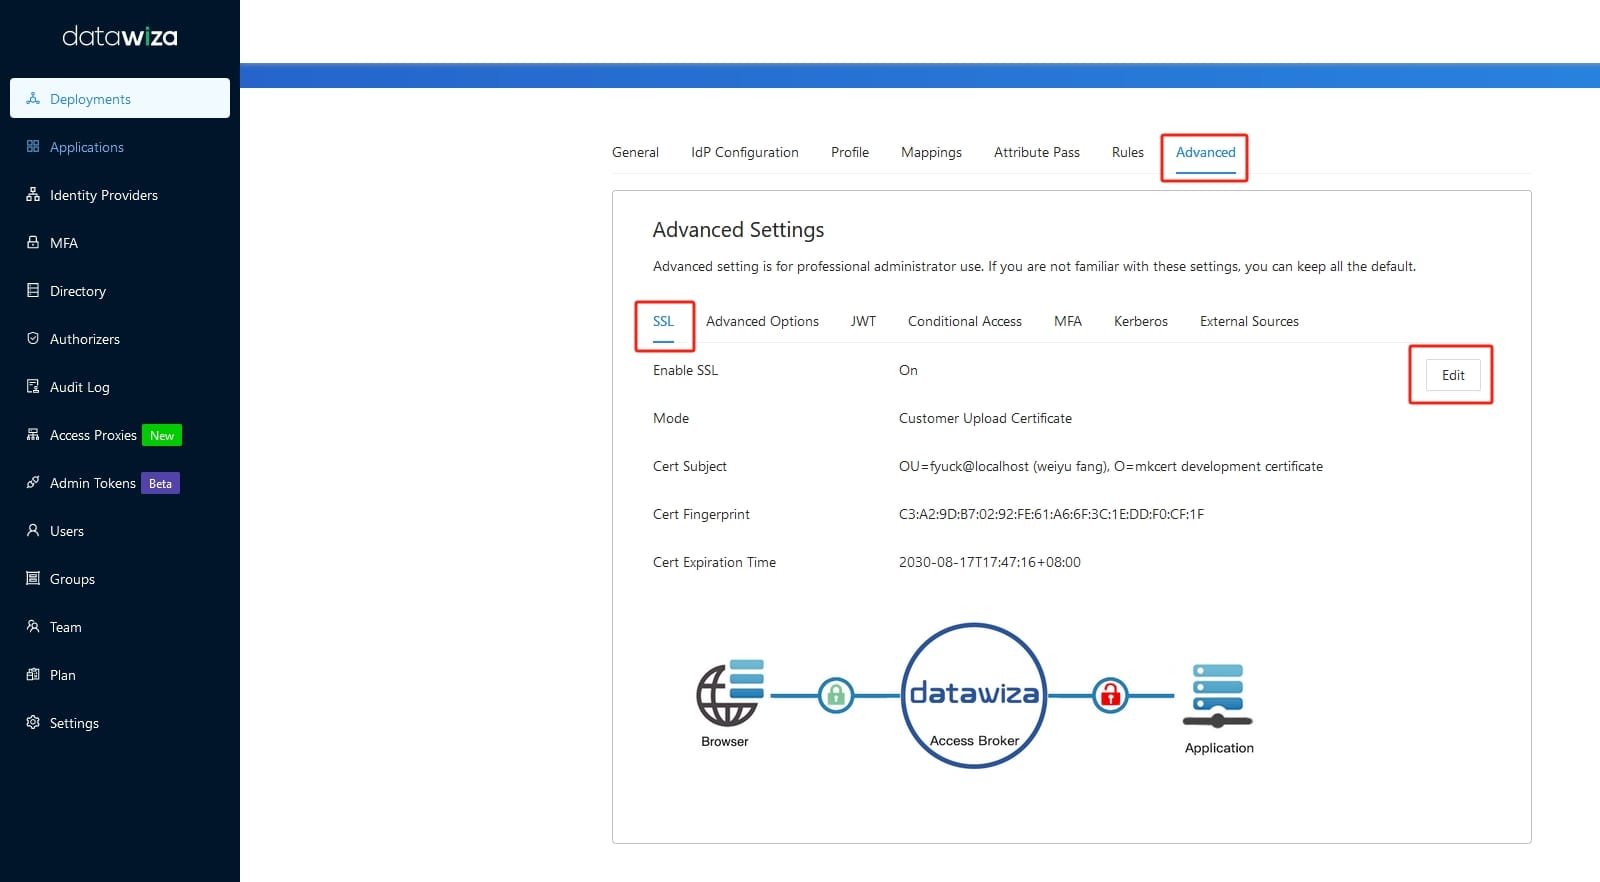
Then click the Update Certificate button and choose your preferred way to update your certificate. 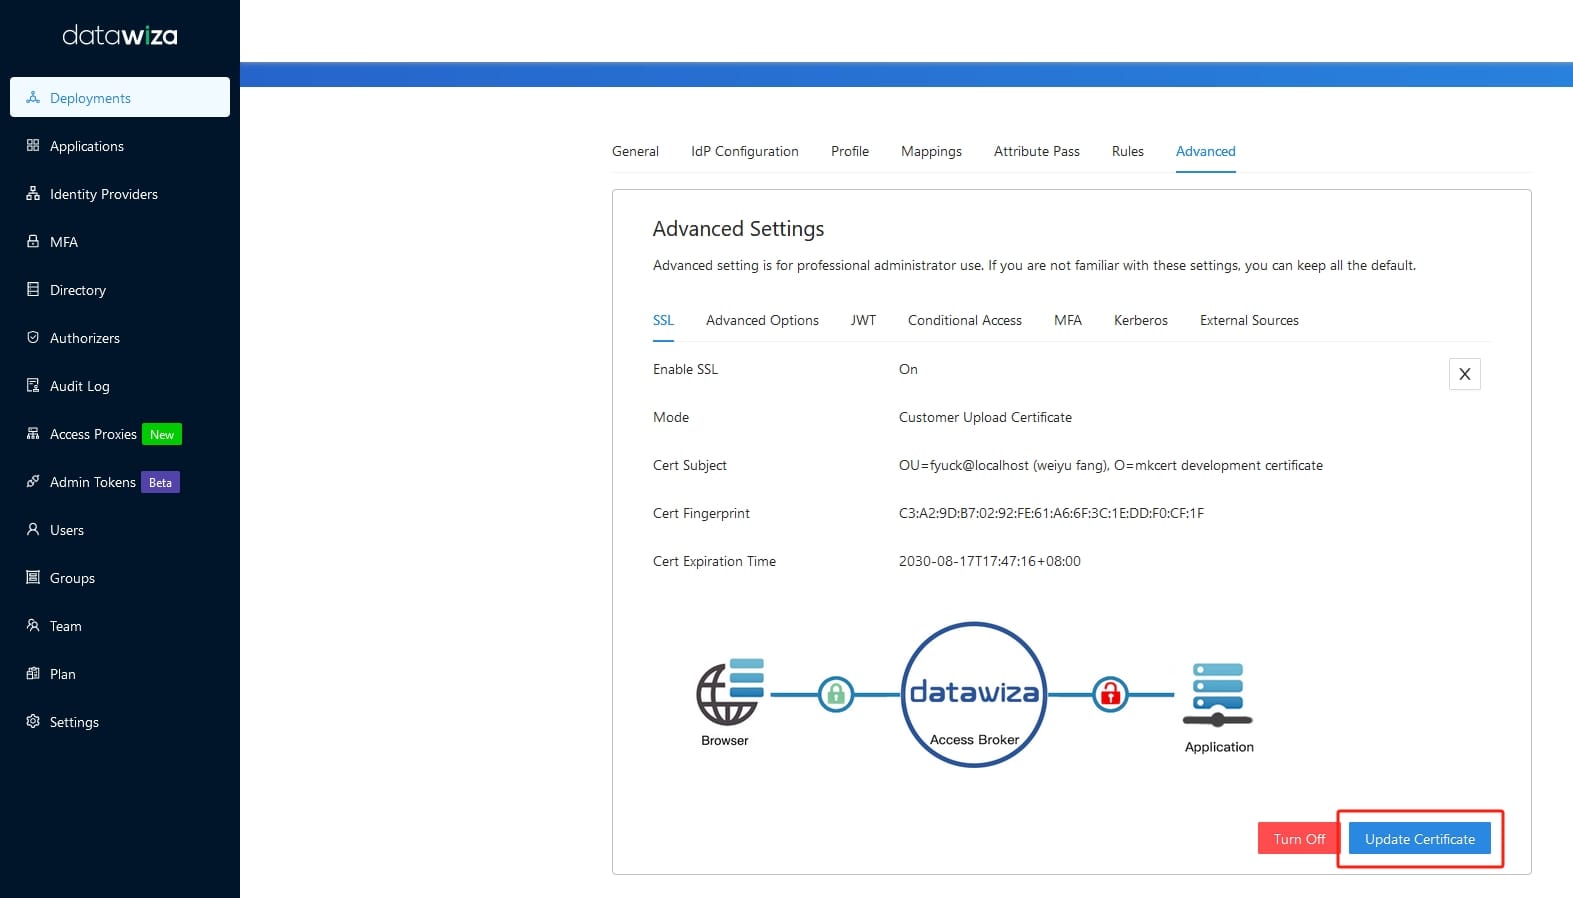
Try it Out
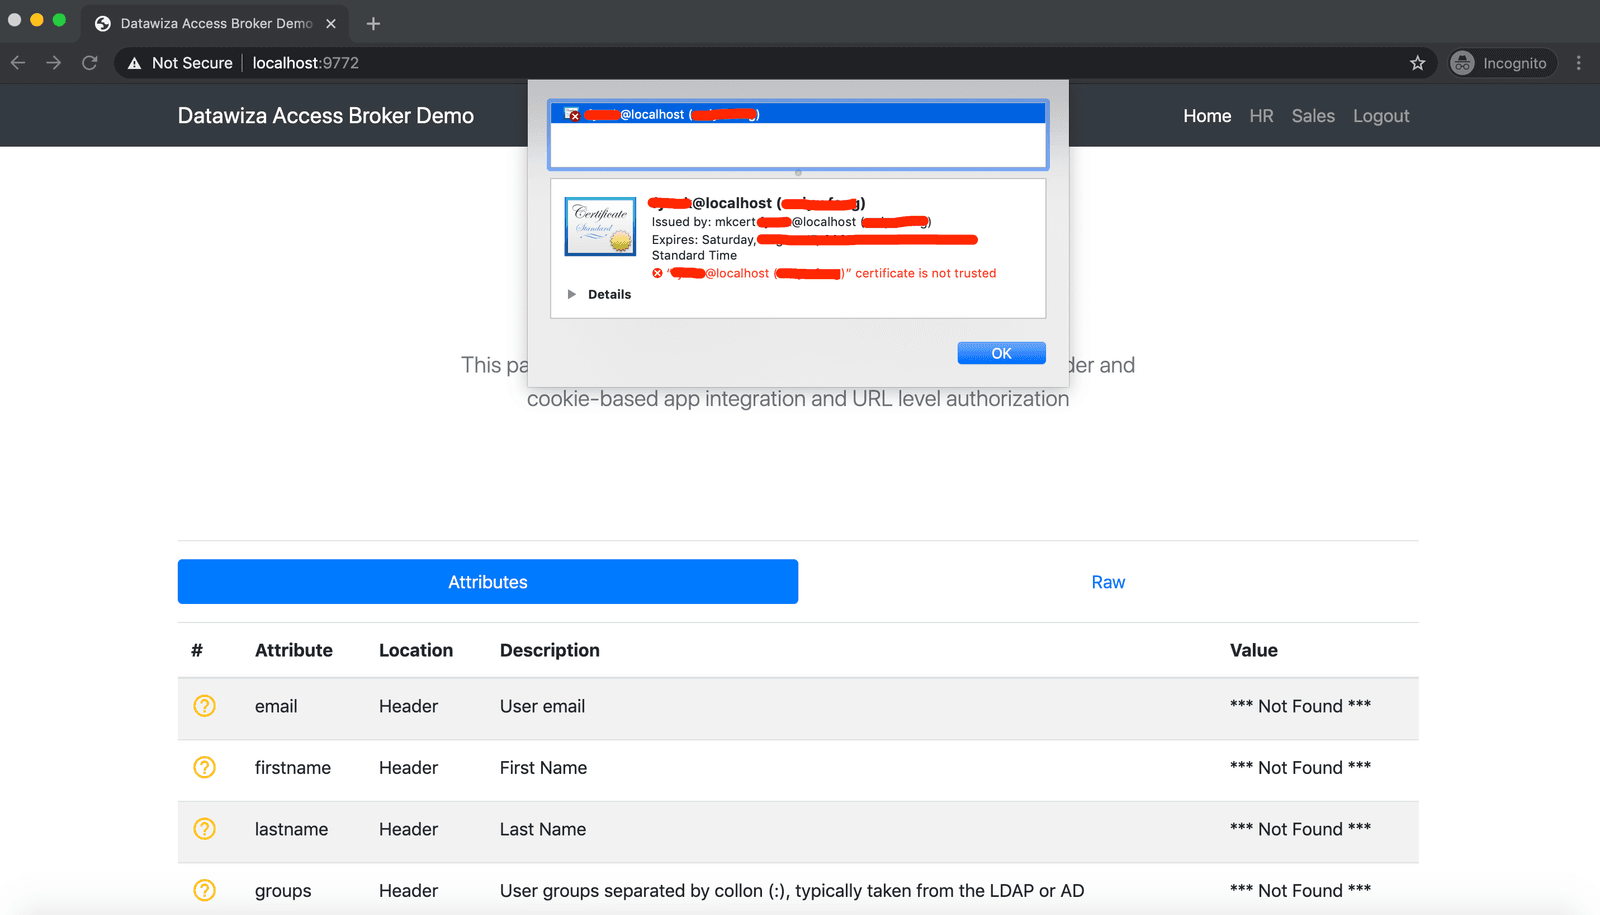
Let's visit https://localhost:9772 and login. There will be a page to show Your connection is not private. It is because we are using a self-signed cert created by mkcert for testing purposes: 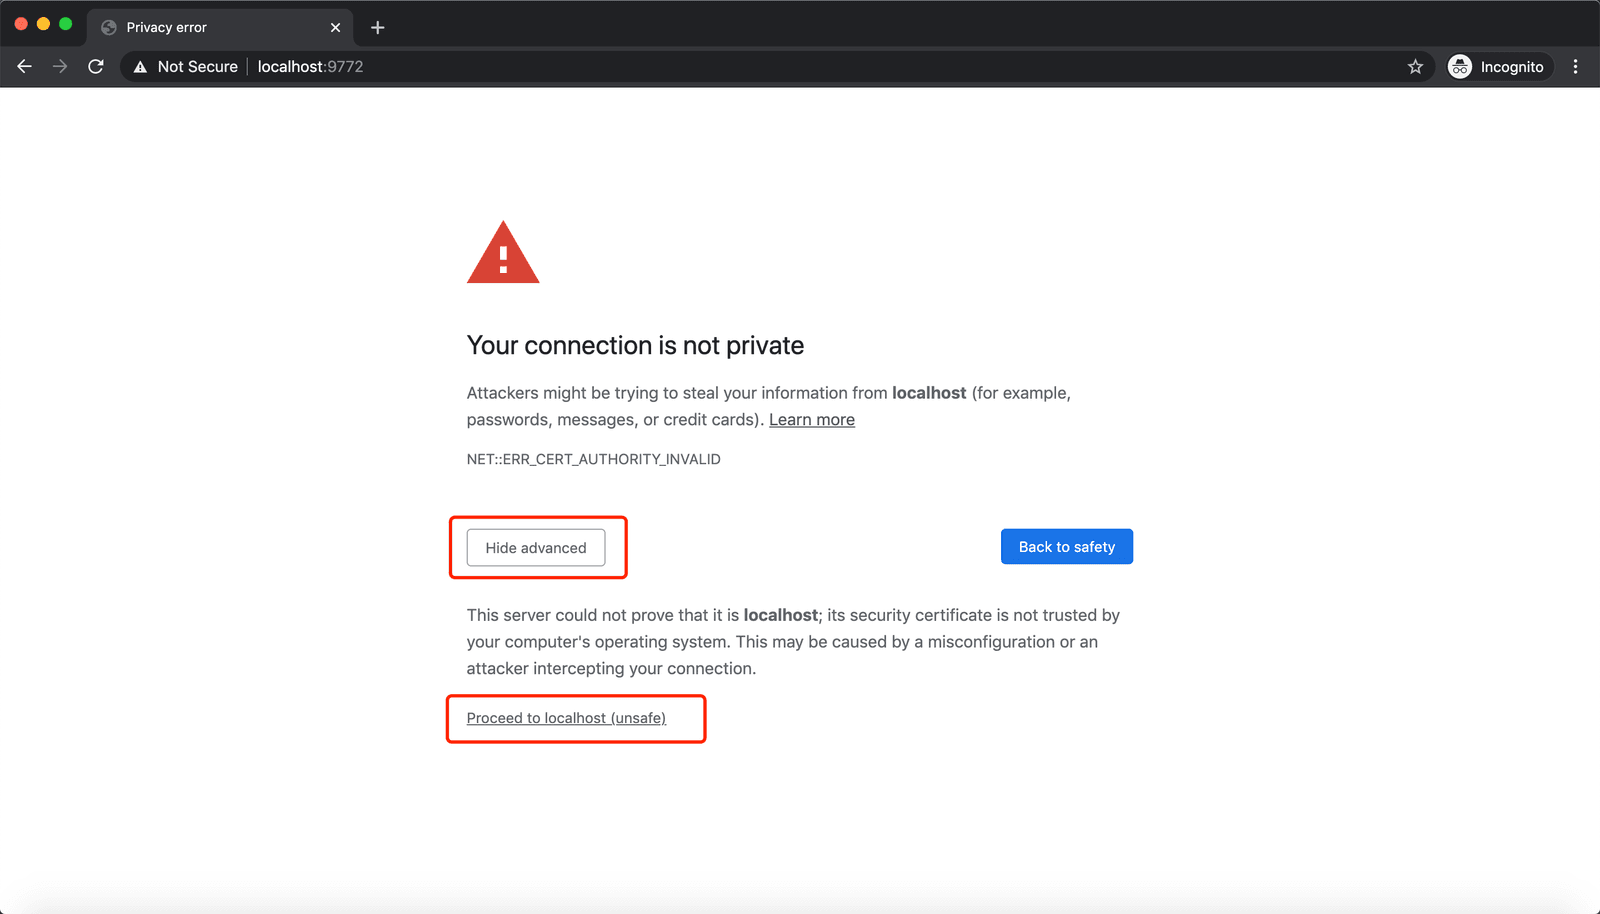 We can now see our certificate working in action.: