
SSL Certificates in Datawiza Agent Gateway
This page shows how to prepare a certificate and upload it to an existing service, whether you're replacing the self-signed certificate with a trusted CA certificate or rotating one that's expiring.
Prepare Your Certificate
DAGC accepts certificates and private keys in PEM format. If your certificate is in PFX (or another format), convert it first.
Private Key Format
The private key must be:
- PEM-encoded — base64 text framed by
-----BEGIN ... KEY-----/-----END ... KEY-----, not a binary.der,.pfx, or.p12file. - Unencrypted — not password-protected. DAGC has no prompt to unlock a passphrase-protected key, so an encrypted key will fail to load.
- In either PKCS#1 (
-----BEGIN RSA PRIVATE KEY-----) or PKCS#8 (-----BEGIN PRIVATE KEY-----) form — both are accepted.
If you're starting from a PFX file:
openssl pkcs12 -in yourcert.pfx -nocerts -out privatekey.pem -nodes
- Replace
yourcert.pfxwith the path to your PFX file. -nocertsoutputs only the private key.-nodes(no DES) leaves the private key unencrypted, which DAGC requires.
The resulting file should look like:
-----BEGIN PRIVATE KEY-----
..........
-----END PRIVATE KEY-----
Public Certificate Format and the Intermediate Chain
Most CA-issued certificates aren't trusted directly — they're signed by an intermediate CA, which is in turn signed by the root CA that's actually in browsers' and clients' trust stores. If you upload only your leaf (end-entity) certificate, clients that don't already have the intermediate cached will fail to build a trust path and reject the connection, even though the certificate itself is valid.
To avoid this, concatenate your leaf certificate and any intermediate certificates into a single PEM file, leaf first, and leave the root CA certificate out (clients already have it):
-----BEGIN CERTIFICATE-----
(your leaf/server certificate)
-----END CERTIFICATE-----
-----BEGIN CERTIFICATE-----
(intermediate certificate)
-----END CERTIFICATE-----
Most CAs provide this chain file directly (sometimes named fullchain.pem or similar) — check your CA's issuance email or dashboard before rebuilding it by hand.
If you're starting from a PFX file that already embeds the chain, extract the leaf and intermediate certificates separately, then concatenate them leaf-first:
openssl pkcs12 -in yourcert.pfx -clcerts -nokeys -out leaf.pem
openssl pkcs12 -in yourcert.pfx -cacerts -nokeys -out intermediates.pem
cat leaf.pem intermediates.pem > publiccert.pem
-clcertskeeps only the client (leaf) certificate.-cacertskeeps only the CA certificates bundled in the PFX (intermediates, and the root if the PFX includes one).-nokeysexcludes the private key from these files.
Note
If intermediates.pem includes the root CA certificate, remove it before concatenating — clients already trust roots from their own trust store, and including one has no benefit.
Switch a Service from Self-Signed to Your Own Certificate
In DAGC, go to Services in the left sidebar, click the service you want to update, then open the Advanced tab.
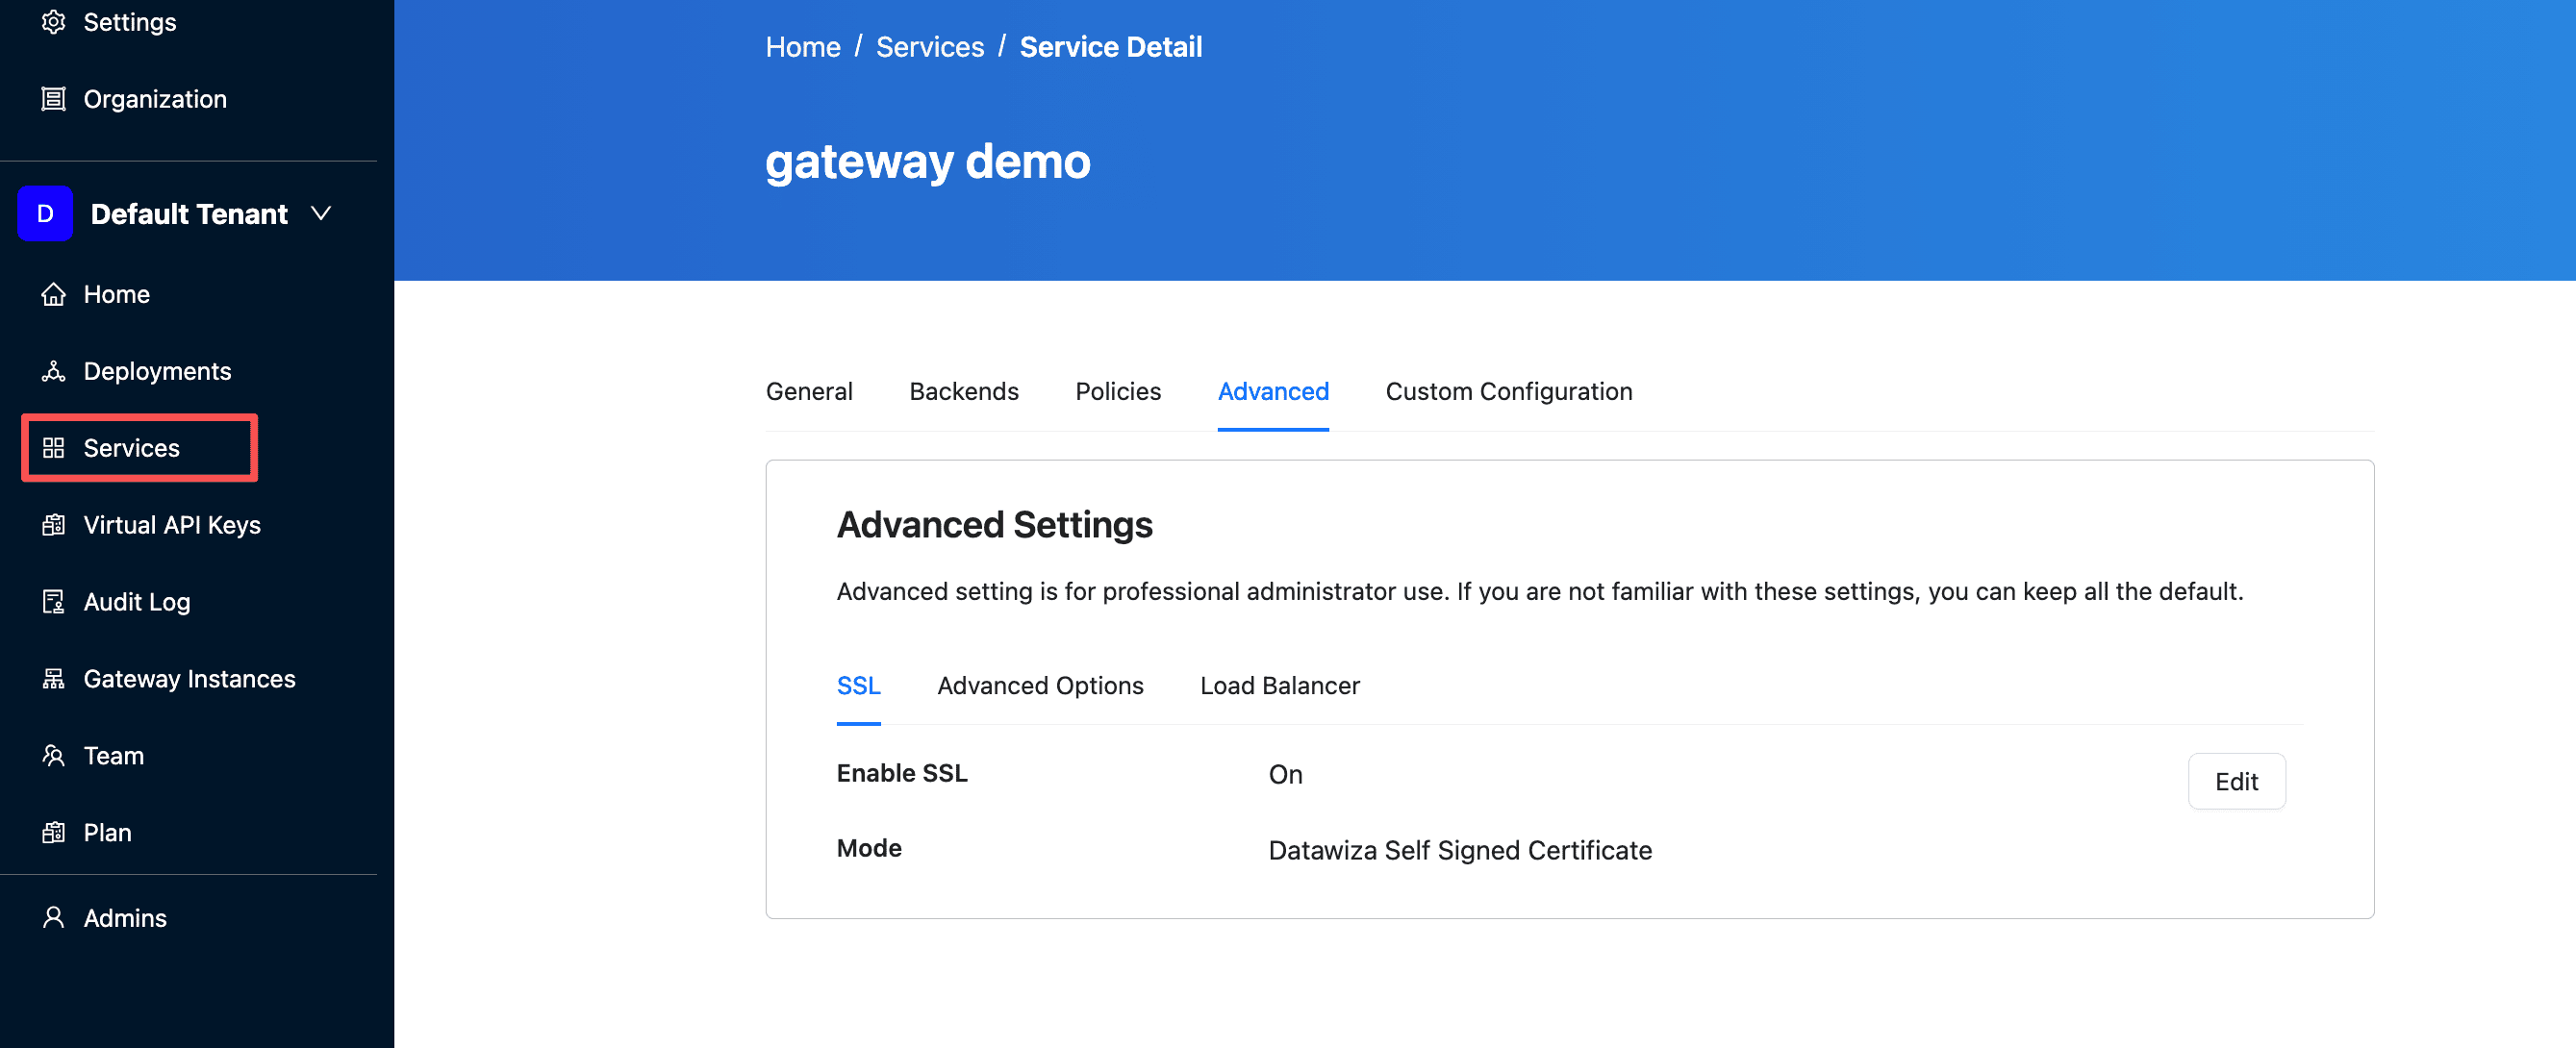
Click Edit, then click Update Certificate.
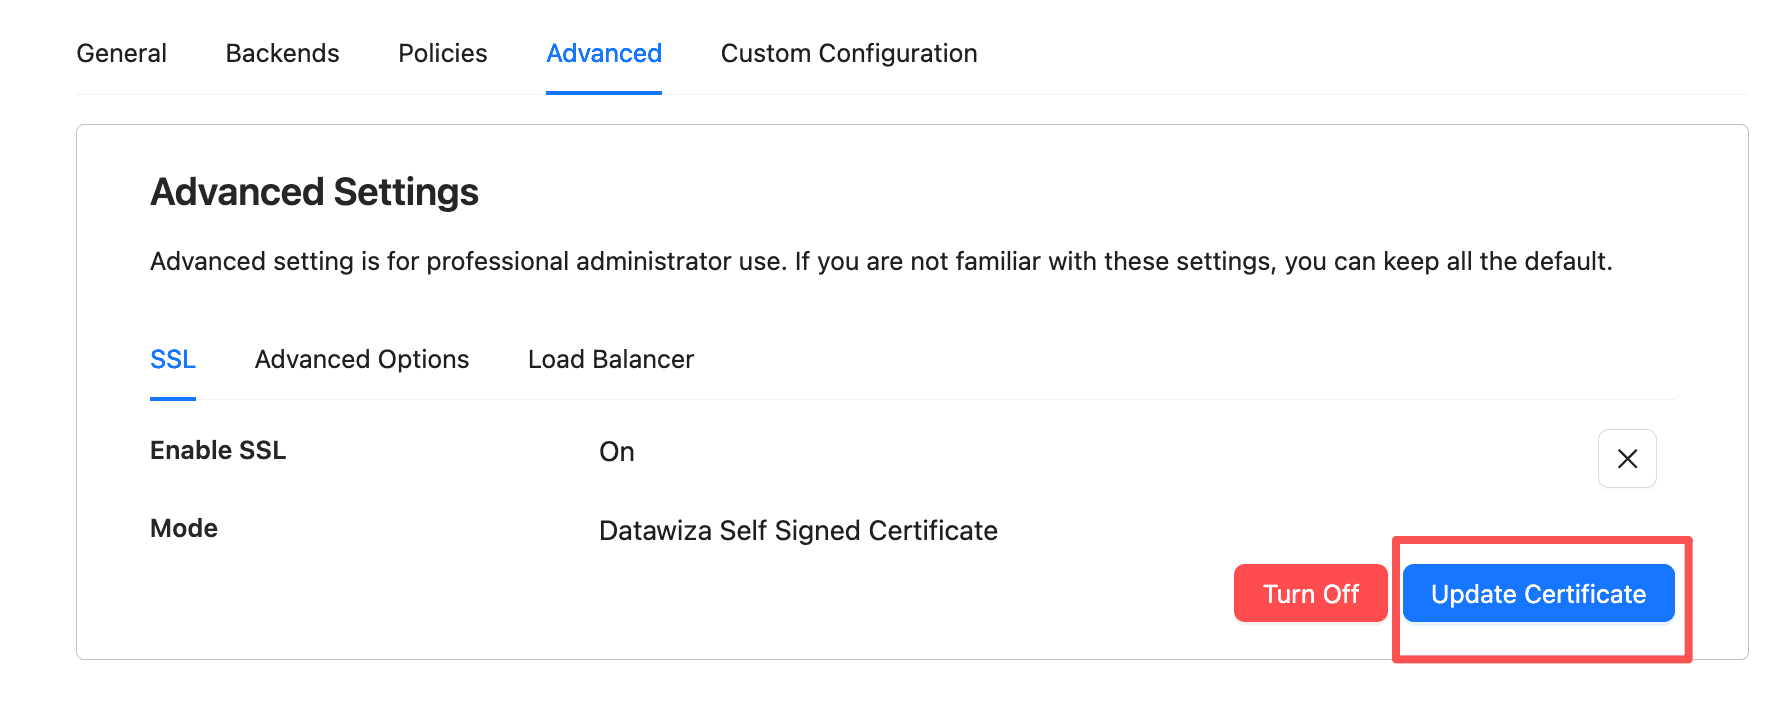
Set Select Option to File Based, then upload your PEM-format certificate and private key.
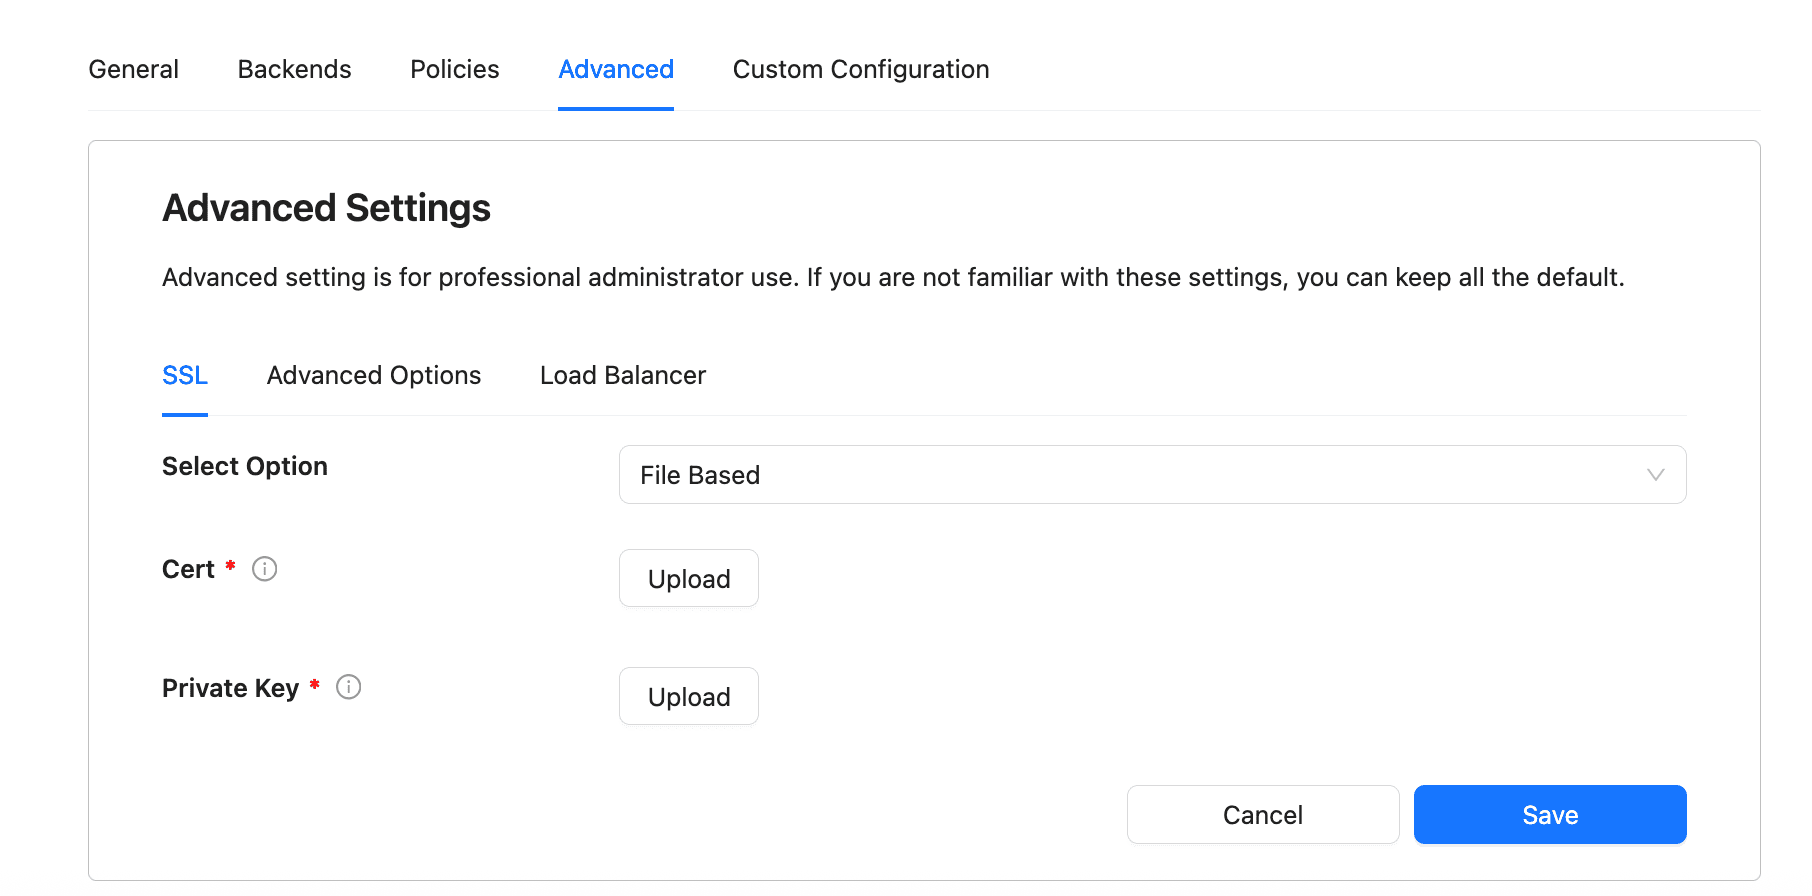
Save your changes.
The gateway picks up the new certificate without requiring a redeploy.
Update a Certificate Before It Expires
Follow the same steps to rotate a certificate that's approaching expiry: Services > select the service > Advanced tab > Edit > Update Certificate, then upload the new PEM files.