OneLogin
OneLogin Configuration
This section shows how to register an OIDC Web application on the OneLogin Admin Portal. When registering the application, you will obtain the following values needed to configure the IdP in Datawiza Cloud Management Console (DCMC):
- Client ID
- Client Secret
- Issuer
Before you begin
Make sure you have a OneLogin account. If you don't have one, sign up for a free trial.
Add New Application
Log in to your OneLogin Admin Portal. Navigate to Applications > Applications, then click Add App.
Search for
OIDCand selectOIDC-OpenID Connectfrom the results.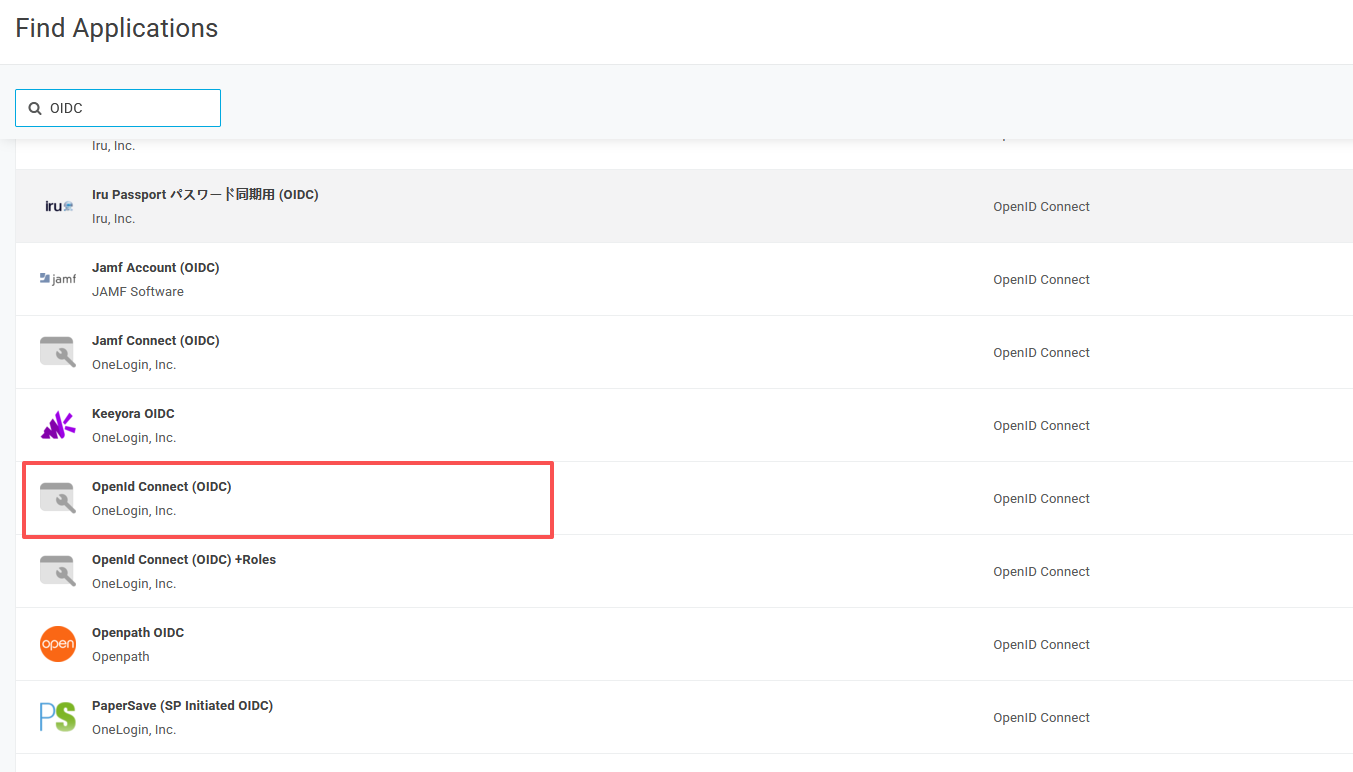
Give your application a descriptive name (e.g.,
Datawiza App), then click Save.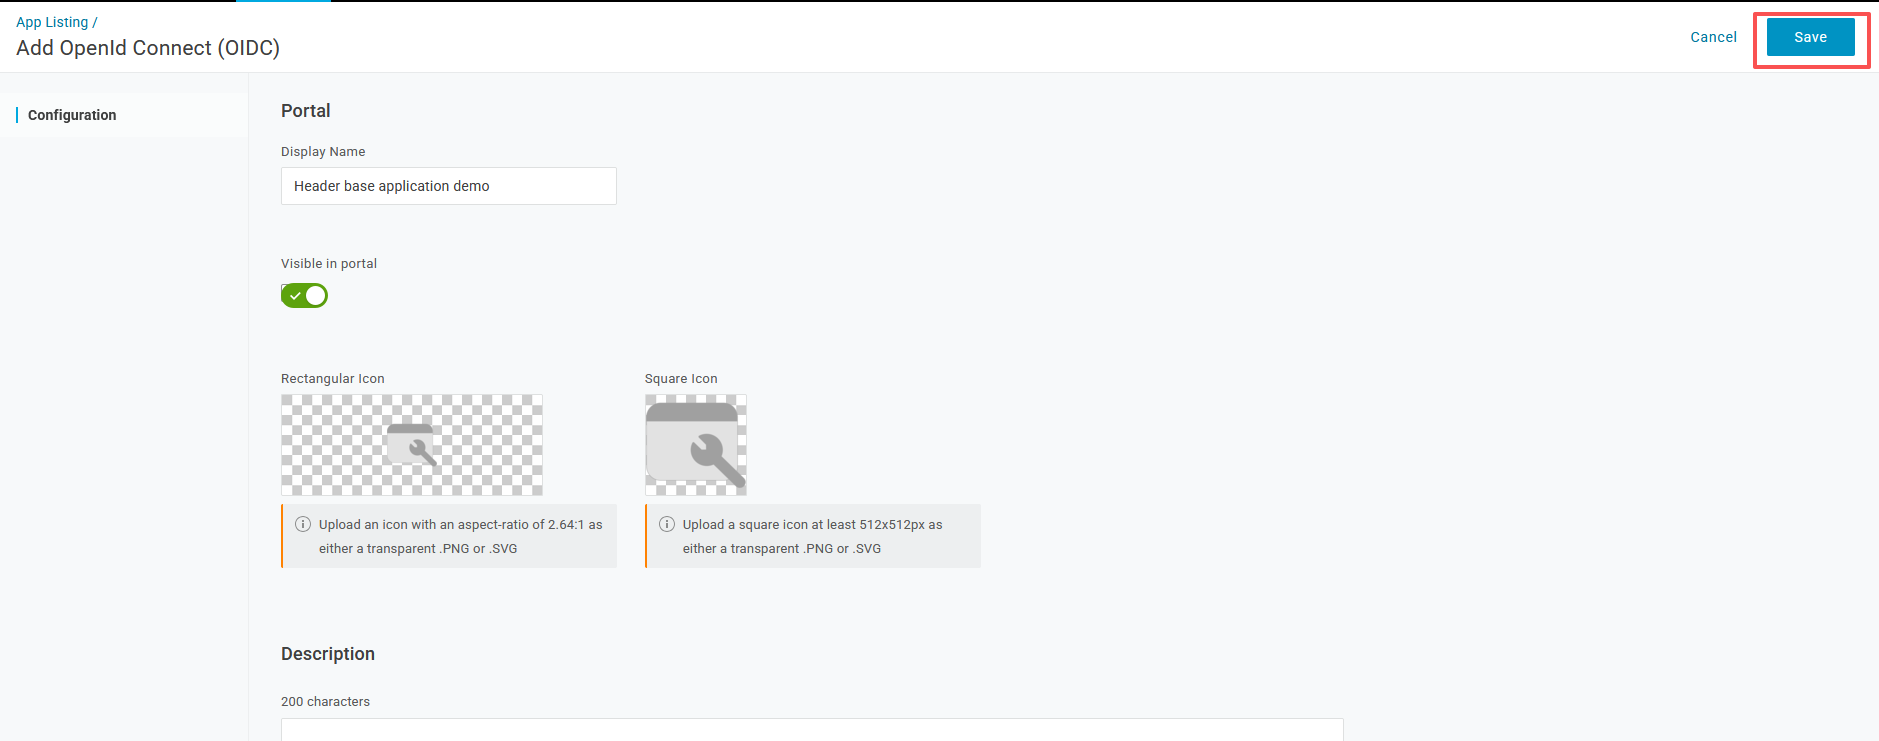
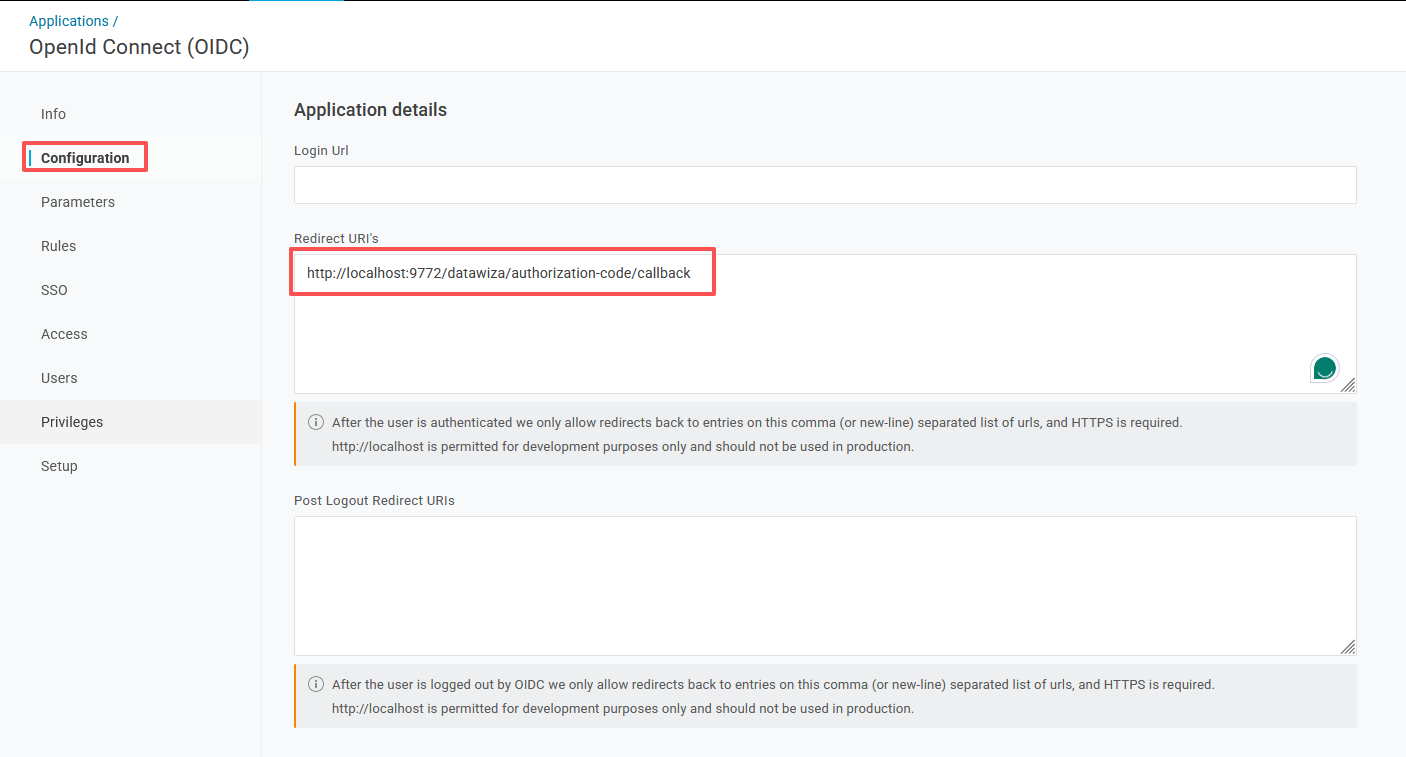
Configure Redirect URI
Navigate to the Configuration tab and set the following field:
- Redirect URIs: e.g.,
http://localhost:9772/datawiza/authorization-code/callback
Info
Replace
http://localhost:9772with the actual base URL of your application.- Redirect URIs: e.g.,
Click Save.
Get Client Credentials and Issuer
Navigate to the SSO tab. Copy the following values:
- Client ID — the unique identifier for your application
- Client Secret — keep this value private and secure
On the same SSO tab, locate the Issuer URL. It takes the form:
https://<your-subdomain>.onelogin.com/oidc/2Replace
<your-subdomain>with your OneLogin account subdomain. Save this as the Issuer.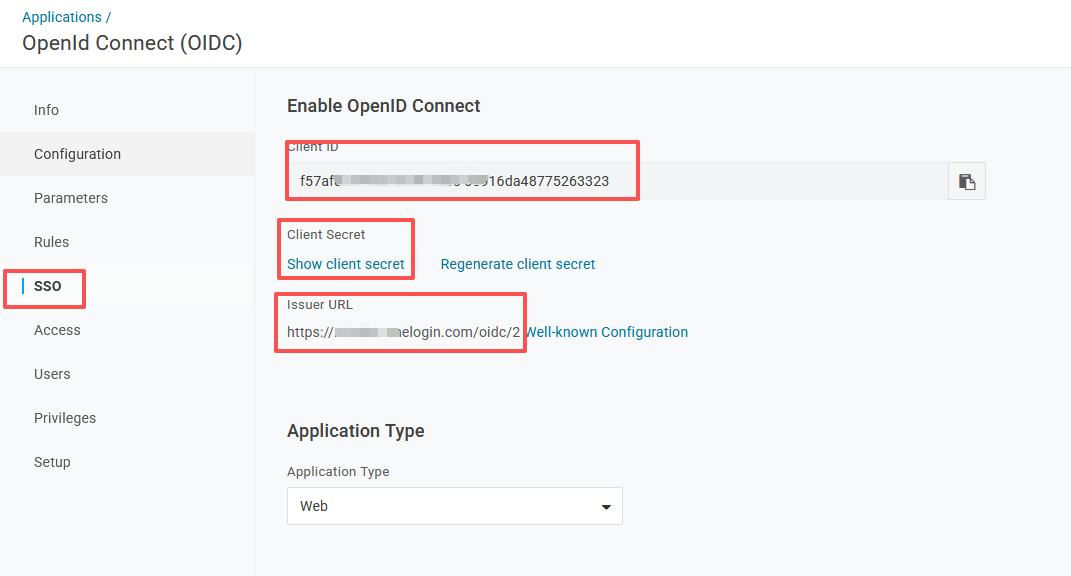
Assign Users to the Application
Users must be assigned to the application before they can authenticate.
- Navigate to the Users tab within your application and click Assign Users to grant access to existing users or groups.
Summary
You have successfully registered a Web application on OneLogin. Save the following values — you will need them when configuring the IdP in Datawiza Cloud Management Console:
| Field | Where to find it |
|---|---|
| Client ID | SSO tab → Client ID |
| Client Secret | SSO tab → Client Secret |
| Issuer | SSO tab → Issuer URL |
Reference
OneLogin Developer Documentation
OneLogin OpenID Connect Overview
OneLogin OpenID Connect Apps